EN
10
10
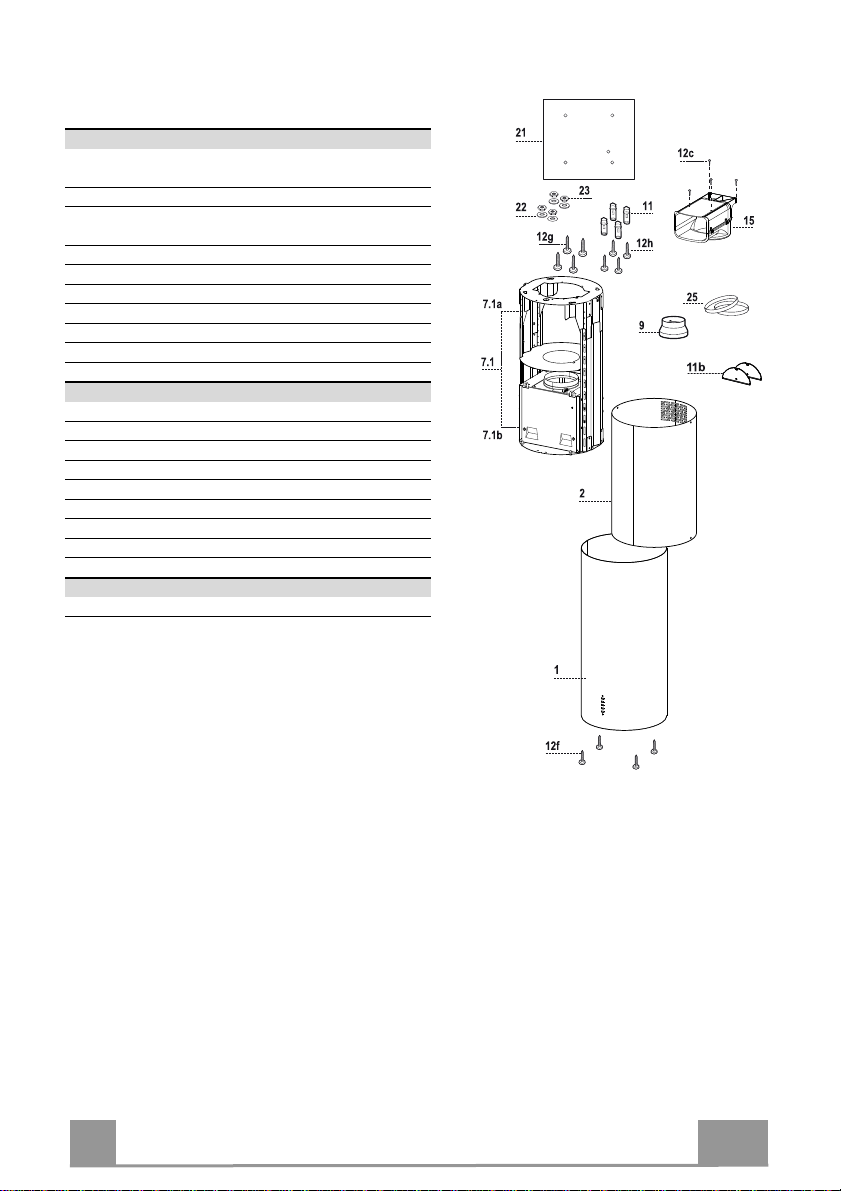
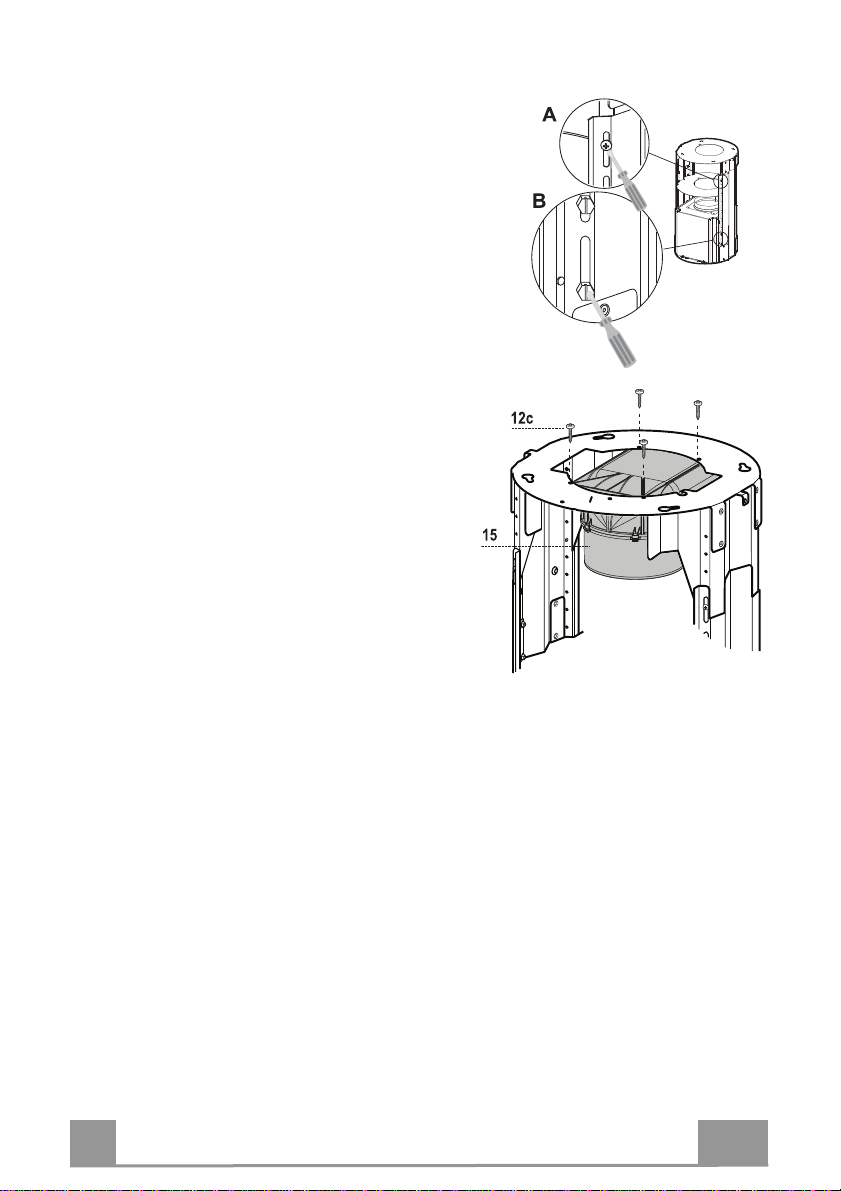
FIXING HE FRAME
• Lift the frame up, making sure that the index over the frame
plate is turned forwards.
• Fit the frame slots onto the two screws inserted in the ceiling as
above, and turn until reaching the centre of the adjustment slot.
• Tighten the two screws and fasten the other two screws provid-
ed; before locking the screws completely, it is possible to ad-
just the frame by turning it, making sure that the screws do not
come out of their housing in the adjustment slot.
• The Frame must be securely fastened so as to support both the
weight of the Hood and the stress caused by occasional axial
pressure against the fitted Appliance. After fixing, make sure
that the base is stable even when the Frame is subjected to lat-
eral stress.
• If the Ceiling is not strong enough in the area where the hood
is to be fixed, the Installer must strengthen the area using suit-
able plates and counterplates anchored to resistant structures.
2
112
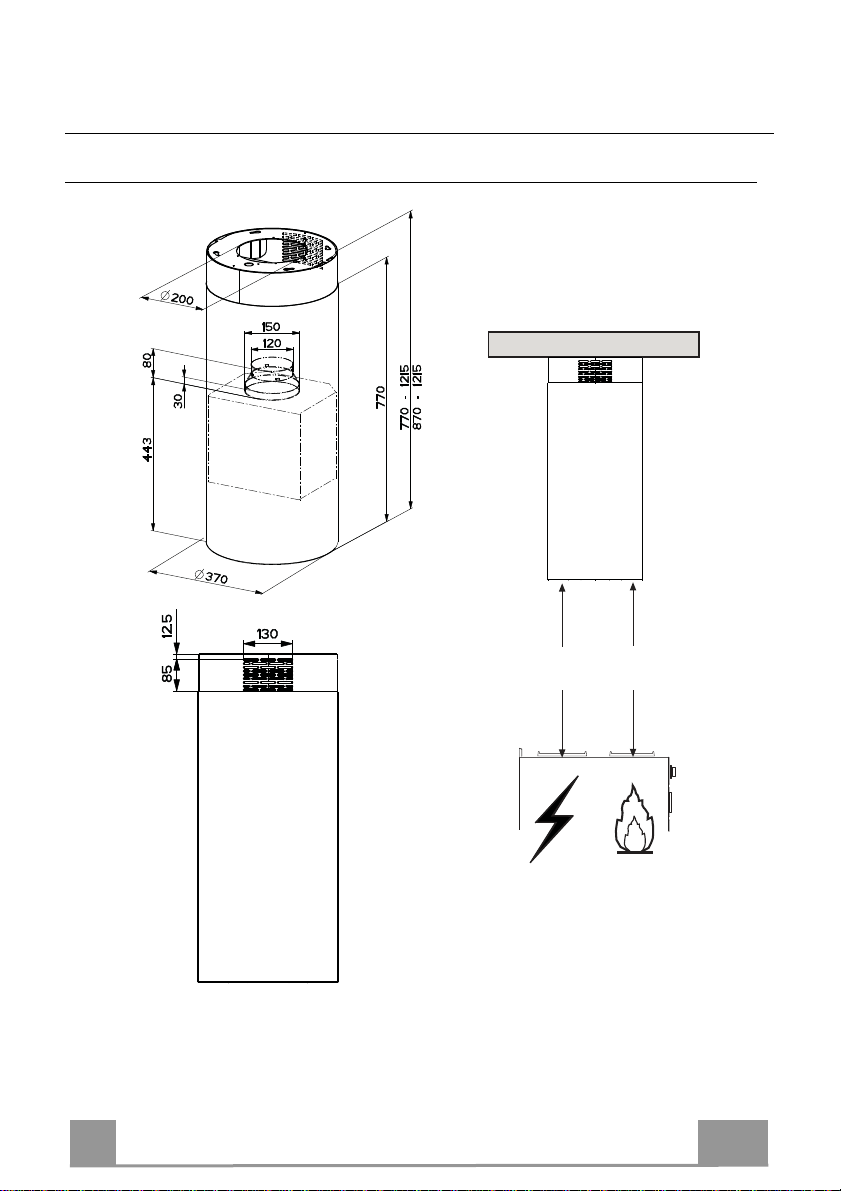
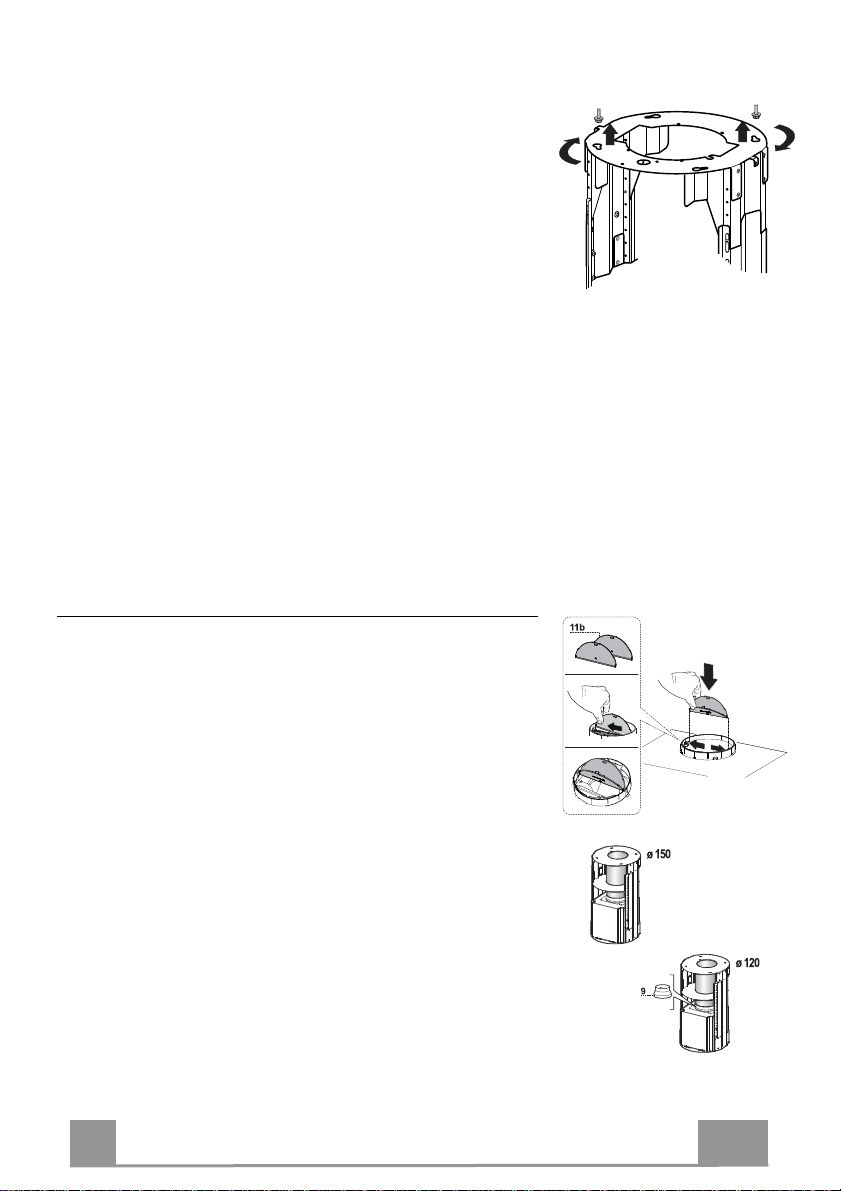
Connections
AIR OU LE DUC ING VERSION
When installing the Ducting version, join the Hood to the outlet
duct using a rigid or flexible pipe ø150 or 120 mm, selection of
which is at the discretion of the installation technician.
• Insert flaps 11b on the Hood Canopy Outlet.
Connecting the ø 150 pipe
• Fasten the pipe using suitable pipe clamps. The materials re-
quired to do so are not provided.
Connecting the ø 120 pipe
• To connect using a ø120 mm pipe, insert the reduction Flange
9onto the Hood Canopy Outlet.
• Fasten the pipe using suitable pipe clamps. The materials re-
quired to do so are not provided.
• In both cases, any Activated Charcoal Filters must be removed.