Section 1: MECHANICAL INSTALLATION
1.5Bolt-In Installation
1.5.1 Check and Preparation of Hull Structure
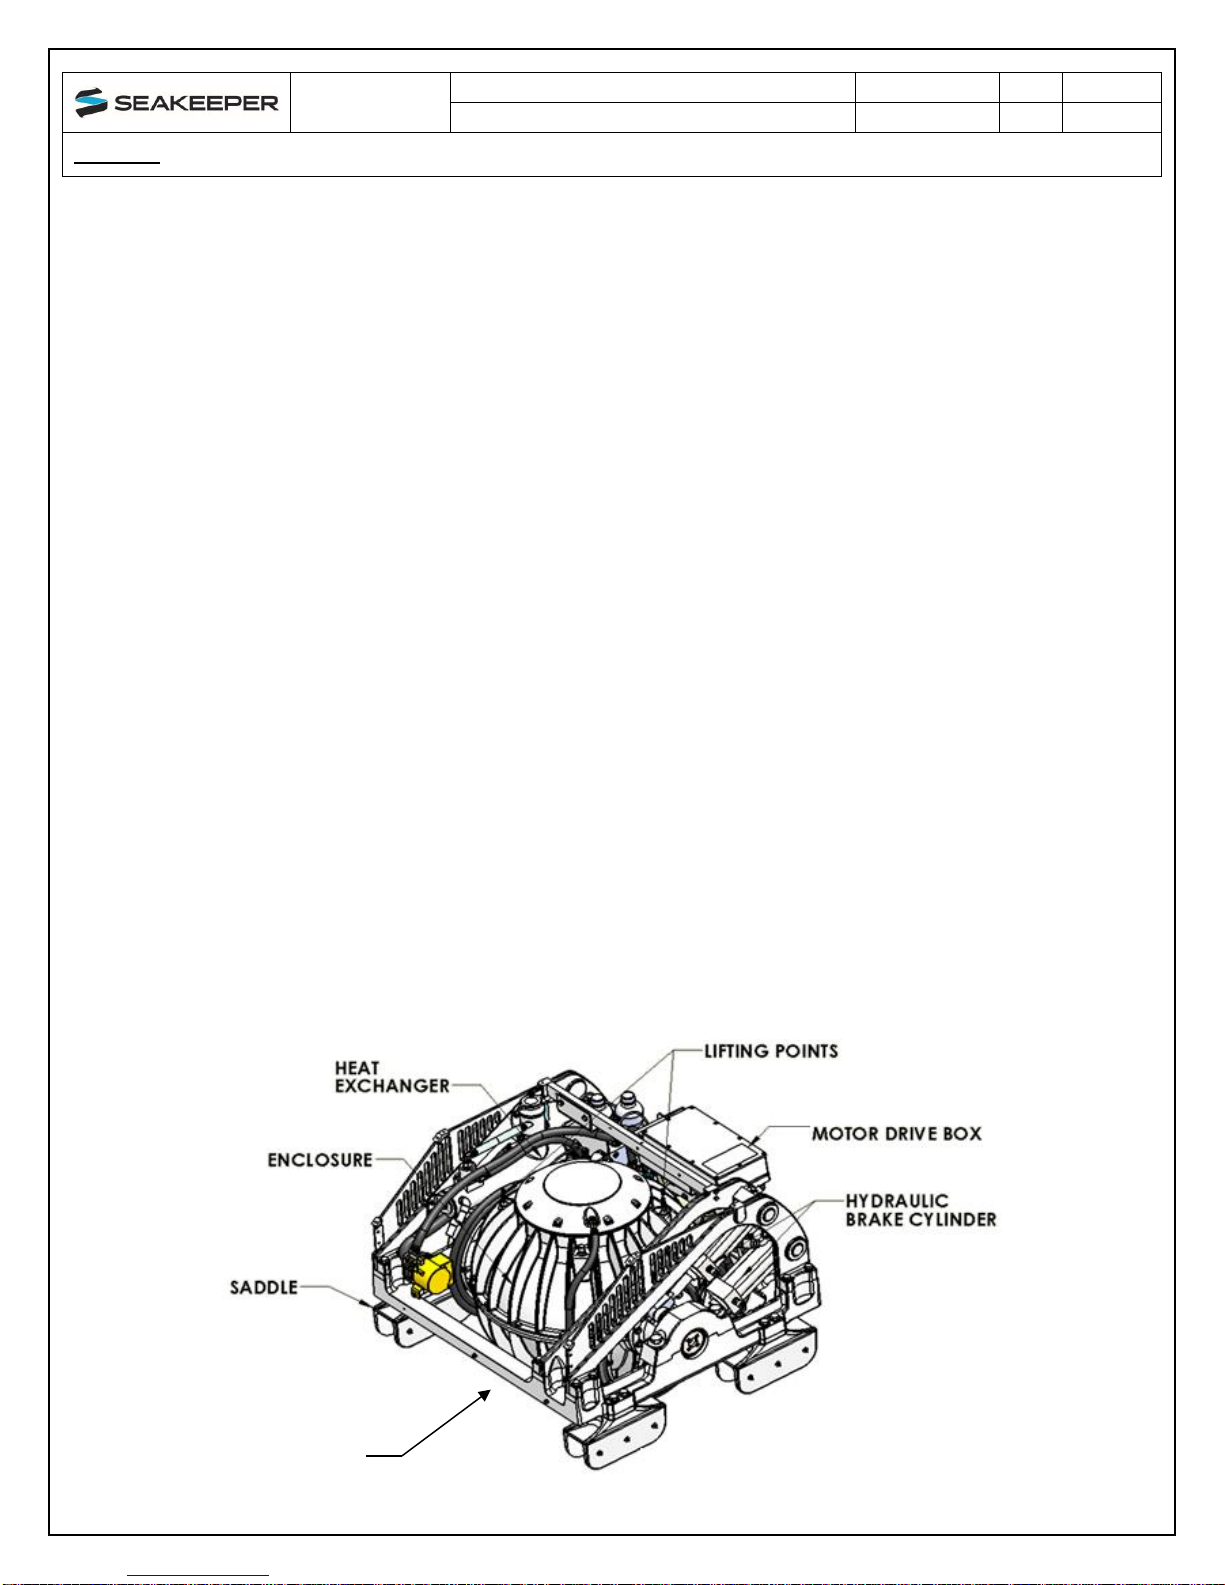
Refer to Seakeeper Drawing No. 90225, Seakeeper 9/7HD Installation Details –Bolt in
Method. Important dimensional and load information is given in this drawing that will impact the
design details of the structure that will receive the Seakeeper. It is assumed that a proper
structural analysis has been performed for the hull structure to which the Seakeeper will be
fastened to insure proper strength margins for the loads the Seakeeper will create during
operation.
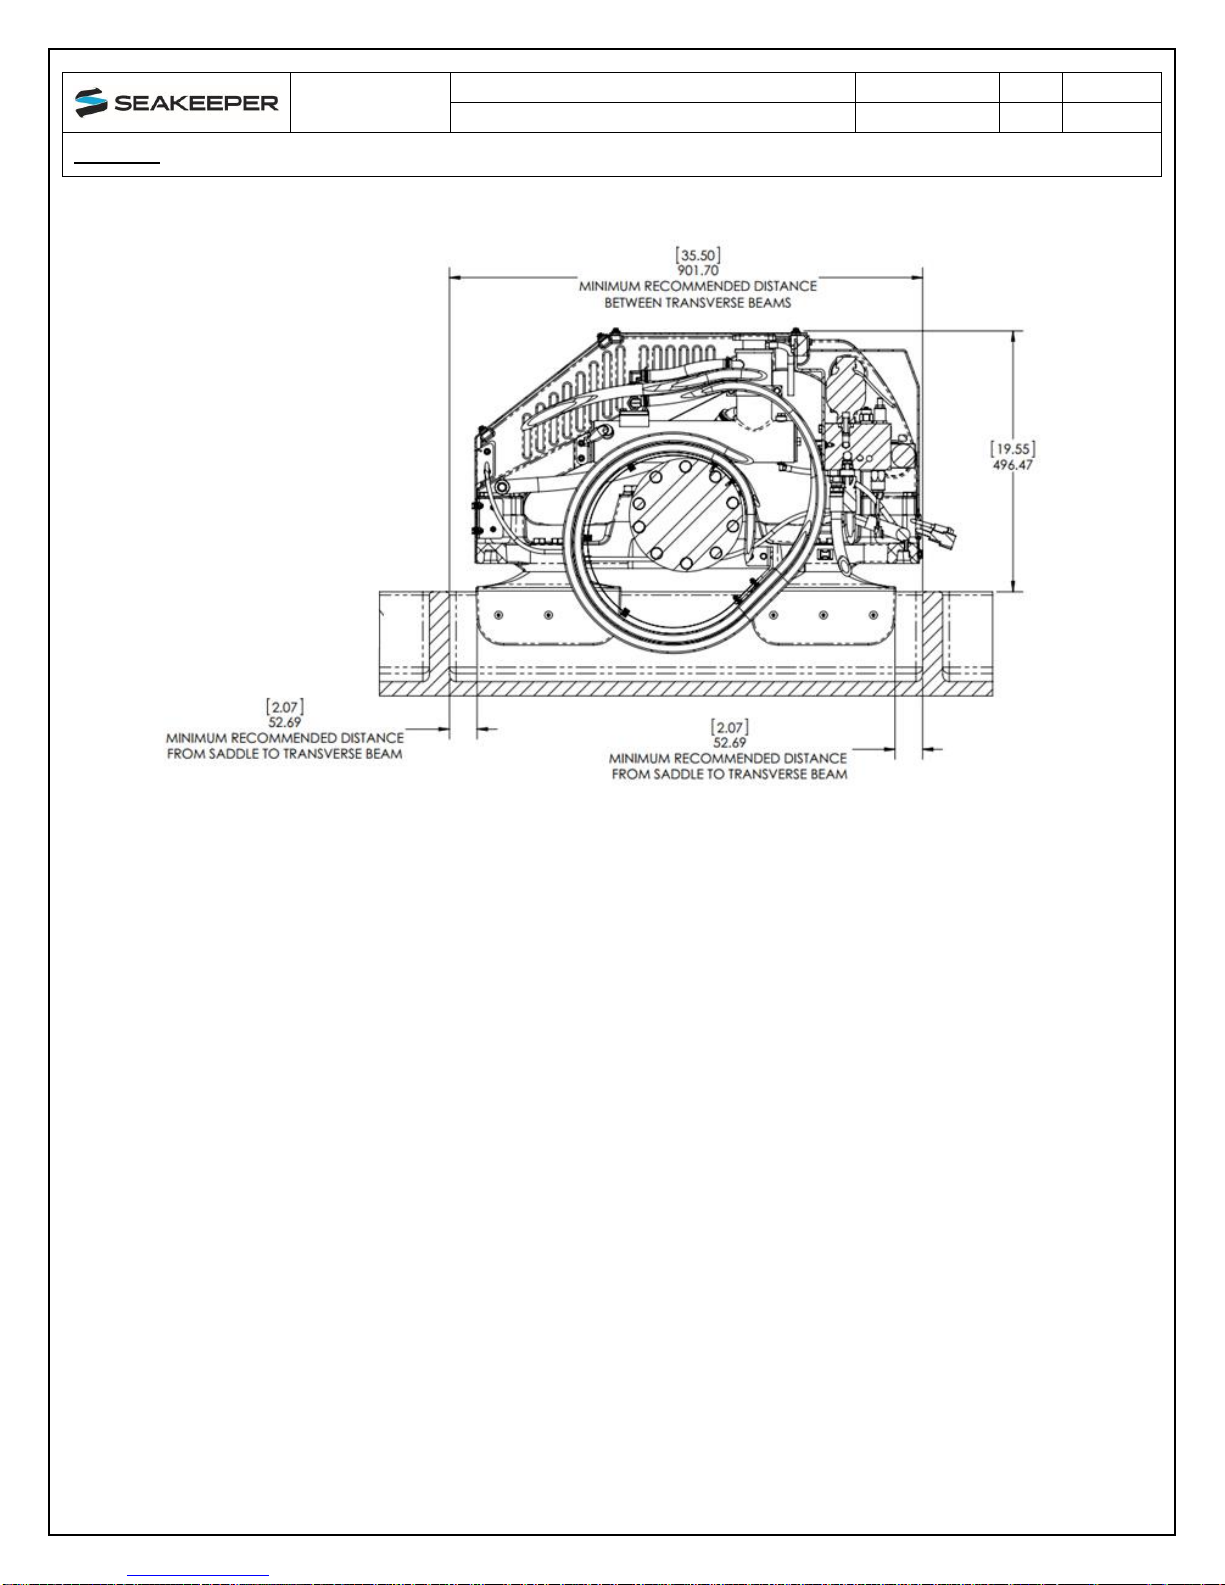
The hull structure supporting the Seakeeper should be installed so the Seakeeper is parallel to
the waterline. In addition, the four areas on top of the beams on which the feet of the
Seakeeper foundation and isolation gaskets will rest, need to be co-planar within .06”
(1.5 mm) to minimize potential distortion of Seakeeper support frame when installed. The
isolation gaskets are only used on dissimilar metal to metal contacts
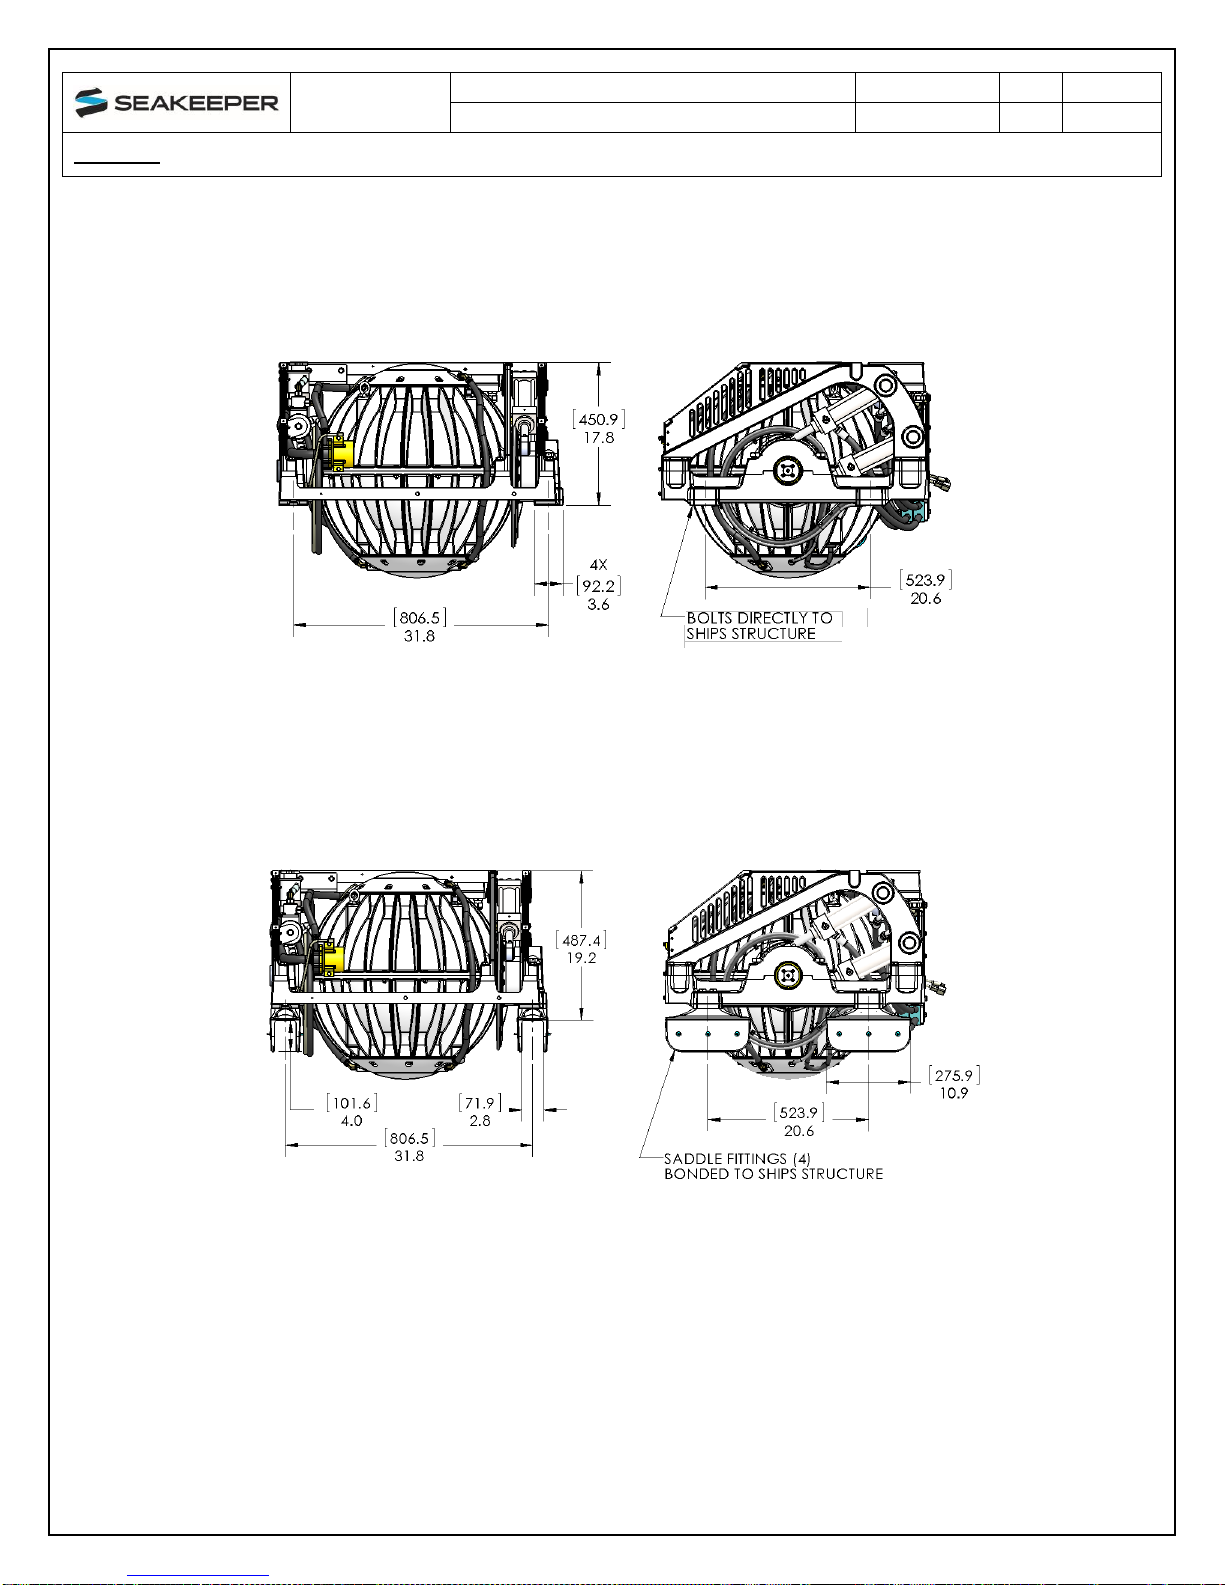
Seakeeper provides an installation template kit, P/N 90253, which contains four plates that
mimic the mating surfaces of the four feet located on the Seakeeper’s foundation. These plates
have 4 holes located at the same centers as the mounting holes on the Seakeeper. The fixture
locates the hole patterns at the proper spacing both in the fore-aft direction and the port-
starboard direction. See Figures 5 below. Once assembled, the fixture can be used to check
clearances and alignment of the hull structure.
Note: Do NOT use the installation fixture to establish the Seakeeper envelope
dimensions. Refer to Drawing No. 90225 for envelope dimensions. A 3-D model of the
Seakeeper is available on the Seakeeper website (www.seakeeper.com) to aid in
designing the Seakeeper foundation and the space around the Seakeeper.
NOTE: MAKE SURE NO OBSTRUCTIONS FROM THE HULL STRUCTURE CAN BE SEEN WITHIN THE INSIDE
OF THE INSTALLATION TEMPLATE KIT (INSIDE THE MARKED RED LINES). REFERENCE SEAKEEPER
DRAWING NO. 90225.
FIGURE 5 –EXPLODED VIEW OF INSTALLATION FIXTURE