manuals.online logo
Brands
  1. Home
  2. •
  3. Brands
  4. •
  5. Sealey
  6. •
  7. Motorcycle Accessories
  8. •
  9. Sealey SWH199 User manual

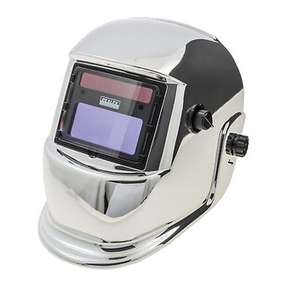
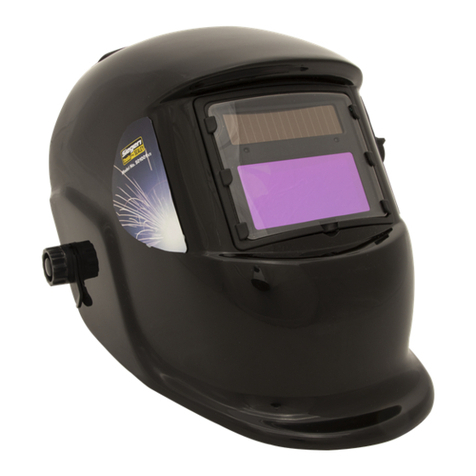
Sealey SWH199 User manual

Type Model . . . . . . . . .SWH199 = Automatic 4/10
. . . . . . . . . . . . . . . . . .SWH299 = Automatic 4/10 4/11 with Manually adjust slide switch
. . . . . . . . . . . . . . . . . .SWH399 = Automatic 4/10-11 or 4/11-12
Light transmittance . . . .SWH199 = Visible range not activated: Shade level 4. Visible range activated: Shade level 10
. . . . . . . . . . . . . . . . . .SWH299 = Visible range not activated: Shade level 4. Visible range activated: Shade levels 10 or 11
. . . . . . . . . . . . . . . . . .SWH399 = Visible range not activated: Shade level 4. Visible range activated: Shade levels 10-11 or 11-12
Specifications common to All Models
Operating temperature (all models) . . . . . . .-100C (+140F) and + 700C (+1580F).
Water-resistant (all models) . . . . . . . . . . . . .Waterproof in accordance with IP67 (test duration 30min. depth 1 m / 3,28
Helmet material (all models) . . . . . . . . . . . . . . . . . . . . . . . . . . . . . .High-impact plastic, stability of shape up to 2200C / 4280F
UV/|IR protection (all cartridge states) (all models) = . . . . . . . . . . . .Maximum
Response (light to dark @ room temp) (all models) = . . . . . . . . . . .0.4ms
Response (light to dark +550C/1310F) (all models) = . . . . . . . . . . . . .0.1ms
Response (dark to light) (all models) = . . . . . . . . . . . . . . . . . . . . . . .0.2 to 0.3 s
Viewing area (all models) . . . . . . . . . . . . . . . . . . . . . . . . . . . . . . . . .98 x 38mm (3.86 x 1.5)
Cartridge size (all models) = . . . . . . . . . . . . . . . . . . . . . . . . . . . . . .90x110x7mm (3.54x4.33x0.28)
Weight Helmet (all models) = . . . . . . . . . . . . . . . . . . . . . . . . . . . . . .460g
Energy source (all models) = . . . . . . . . . . . . . . . . . . . . . . . . . . . . . .Solar cells
Tig Welding (SWH399) = . . . . . . . . . . . . . . . . . . . . . . . . . . . . . . . . .From 50amps
SWH199-299-399 - 3 - 16/07/03
01284 757500
E-mail:
sales@sealey.co.uk
01284 703534
Sole UK Distributor
Sealey Group, Bury St. Edmunds, Suffolk.
NOTE: It is our policy to continually improve products and as such we reserve the right to alter data, specifications and component
parts without prior notice.
IMPORTANT: No liability is accepted for incorrect use of this equipment. WARRANTY: Guarantee is 12 months from purchase date.
proof of which will be required for any claim. INFORMATION: Call us for a copy of our latest catalogue on 01284 757525 and leave
your full name and address including your postcode.
Thank you for purchasing a Sealey Power Product. Manufactured to a high
standard this product will, if used according to these instructions and properly maintained,
give you years of trouble free performance.
IMPORTANT:PLEASE READ THESE INSTRUCTIONS CAREFULLY. NOTE THE SAFE OPERATIONAL REQUIREMENTS,
WARNINGS AND CAUTIONS. USE THIS PRODUCT CORRECTLY AND WITH CARE FOR THE PURPOSE FOR
WHICH IT IS INTENDED. FAILURE TO DO SO MAY CAUSE DAMAGE OR PERSONAL INJURY, AND WILL
INVALIDATE THE WARRANTY. PLEASE KEEP INSTRUCTIONS SAFE FOR FUTURE USE.
Declaration of Conformity We, the sole importer into the UK, declare that the products listed here are
in conformity with the following EEC standards and directives. The construction files for these products are held
by the Manufacturer and may be inspected on request by contacting Jack Sealey Ltd
For Jack Sealey Ltd. Sole importer into the UK of Sealey Power Products
Signed by Mark Sweetman 16th July 2003
INSTRUCTIONS FOR:
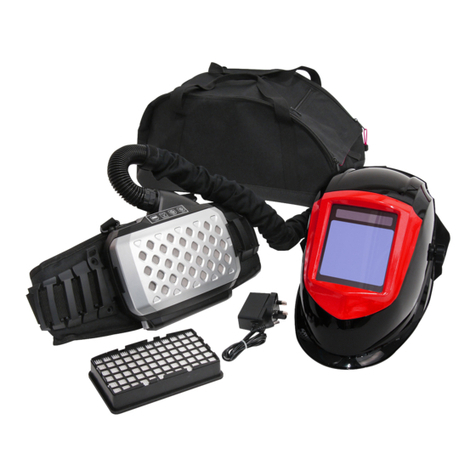
AUTOMATIC WELDING HELMET
Models: SWH199, SWH299, &SWH399
The SWH range of Automatic Welding Helmets come ready for use. Batteries are not necessary as operation is
by means of Solar cells which automatically darken the eye shade cartridge when the arc is struck.
1. SAFETY INSTRUCTIONS
2. SPECIFICATIONS & TECHNICAL DATA
Automatic Welding Helmet
Models SWH199, SWH299, SWH399
BS EN 175:1997 BS EN 379:1994
BS EN 169:2002
Ensure all workshop safety rules, regulations, and conditions are complied with when using welding equipment.
The helmet will not offer protection against mis-use of workshop tools, equipment, or accessories.
Maintain the helmet in good condition, and protect cartridge from liquid and dirt contact.
Regularly replace the protective lenses and replace any damaged or worn parts. Use genuine parts only.
Non authorised parts may be dangerous and will invalidate the warranty.
NEVER open or tamper with the shade cartridge.
p
p
WARNING! This helmet is not suitable for use with laser and gas-welding.
Ensure the front cover lens and front lens frame are securely in place before use.
Fit the helmet and adjust the head band so the helmet will sit as low and near to your face as possible,
Use helmet only in temperatures ranging from -100C (+140F) and + 700C (+1580F).
The eye protective plate in helmet is NOT unbreakable. Helmet will not protect you against severe impact
hazards (such as, but not limited to) fragmenting abrasive discs/grinding wheels, stones and other grinding
tools, explosive devices or corrosive fluids. The helmet will only protect the eyes and face from radiation and sparks.
Remove ill fitting clothing, remove ties, watches, rings, and other loose jewellery.
Maintain correct balance and footing. Ensure the floor is not slippery and wear non slip shoes.
Keep children and unauthorised persons away from the working area.
p
p
WARNING! DO NOT use the helmet if damaged or you suspect it may be faulty. (Contact Service Agent).
DO NOT use helmet unless you have been instructed in its use by a qualified person.
DO NOT get the helmet wet or use in damp or wet locations.
DO NOT leave work area with helmet in lowered position, as bright light source may darken cartridge unexpectedly.
DO NOT place the helmet on a hot surface.
Clean helmet (see chapter 5) and store the helmet in a safe, dry, childproof location.
s
s
DANGER! If, at any time, the face plate in the cartridge FAILS to darken when exposed to a welding spark,
DO NOT USE. Remove cartridge and return to your dealer for service/inspection. Continued use of the
product knowing that the auto darkening feature is not functioning may damage your eyes and cause
blindness. Continued use of the helmet which is not functioning will invalidate the warranty and could
prohibit a successful claim on any insurance policy.
3.3. The time it will take for the shade to turn from light to dark and dark to light is set at 0.2 to 0.3 seconds.
For full details see specifications.
3.4. Adjust the headband so the helmet is seated on the head as low as possible,
and near your face (fig 2). Depress the headband ratchet knob at the rear (fig 3)
until the headband and sweat band (fig 4) sit firmly in place, but not too tight.
3.5. When in lowest position, adjust angle of helmet by turning the angle knob (fig 5).
3.6. If necessary adjust the eye distance by loosening the locking knobs and adjusting
so the shade is the same distance from both eyes. re-tighten the knobs. (fig 6).
3.7. You are now ready to use the helmet.
Replacing front cover lens.
Hold front lens frame at the bottom edge and pull up. Remove old lens and insert a new one. Snap the front lens
frame into place at the top first then at the bottom. Press firmly into place (fig A).
Replacing inside cover lens.
Lift lens with finger nail and then slide it out of the guideways. Replace with new lens (fig B).
Sweat Band
Regularly remove the sweat band wash and replace.
Sensor Bar
Pitch the bar downward and pull it out. Reverse the action to replace. (fig C).
Changing the shade cartridge
Position the potentiometer control knob to number 9 and pull the knob out. Turn locking
knobs and tilt shade cartridge out of place. Reverse procedure to insert new cartridge.
Cleaning
Clean the helmet by wiping with a soft clean cloth. Clean the cartridge surfaces regularly but do not
use strong
cleaning solutions.
Clean the sensors and solar cells with methylated spirit and a clean cloth and wipe dry with a lint-free cloth.
IMPORTANT: The quick response time of the helmet eye shade will protect your eyes from ultraviolet and infrared
rays, regardless of the level the shade is set to.
p
p
WARNING! Before use, ensure that you have read and
understood chapter 1. safety instructions.
3.1. Check that the front lens cover and frame are securely in place.
3.2. On models SWH299 and SWH399, use the switch (fig 1) to select the correct
level of protection for your welding process according to following protection level lists.
IRREGULAR DARKENING The headband may have been unevenly set on the
OR DIMMING. two sides of the helmet (unequal distances from
the eyes to the shade cartridge). Readjust the distance of the shade.
SHADE CARTRIDGE DOES The sensors are soiled or obstructed. Clean
NOT DARKEN OR FLICKERS. The sensor bar is tilted Correct
Front cover lens soiled or damaged. Clean or Replace
Welding current too low. Adjust welding current
POOR VISION Operative lenses and/or shade cartridge soiled. Check clean or replace
Insufficient ambient light. Illuminate work place
Models SWH299/SWH399 Protection level incorrectly set. Correct
SLOW RESPONSE Operating temperature too low do not use at temperatures
below -100C (+140F)
WELDING HELMET SLIPS Headband not adjusted correctly.Lower helmet and refer to chapter 3.
3. INSTRUCTIONS FOR USE
4. PROBLEM SOLVING
5. MAINTENANCE
fig 3 fig 4 fig 5 fig 6
fig 2
fig 1
fig A fig B
fig C
SWH199-299-399 - 3 - 160703
SWH399
Protection level Position
10-11 Automatic . . . . . . . . . .10-11
11-12 Automatic . . . . . . . . . .11-12
10-11 Perceived as too light .11-12
11-12 perceived as too dark .10-11
If the switch is defective . . . . 11
SWH299
Protection level Position
10 Automatic . . . . . . . . . . . .10
11 Automatic . . . . . . . . . . . . .11
10 Perceived as too light . . . .11
11 perceived as too dark . . . .10
If the switch is defective . . . .10
SWH199
No position
setting required.
Your mask is set
to shade 10
protection.
6. PARTS LIST & ASSEMBLY
PARTS LIST
1. Welding mask
2. Shade cartridge
3. Front lens frame
4Front cover lens
5Inside cover lens for shade cartridge
6Eccentric knob
7Headband with fasteners
8Sweat band
9Slide switch for
SWH299 & SWH399
10 Sensor bar
Assembly diagram
Assembly
diagram
SWH599
PARTS
DIAGRAM
s
s
DANGER! If, at any time, the face plate in the cartridge FAILS to darken when exposed to a welding spark, DO NOT USE.
Remove cartridge and return to your dealer for checking. Continued use of the product with auto darkening feature NOT
FUNCTIONING may DAMAGE YOUR EYES and CAUSE BLINDNESS. Knowingly continuing to use a product you are aware
is malfunctioning will invalidate the warranty and any right of claim on any insurance policy.
This manual suits for next models

2

Other Sealey Motorcycle Accessories manuals

Sealey MS052.V2 User manual

Sealey

Sealey MS052.V2 User manual

Sealey MS162 User manual

Sealey

Sealey MS162 User manual

Sealey PWH617 User manual

Sealey

Sealey PWH617 User manual

Sealey Siegen Tools S01001.V3 User manual

Sealey

Sealey Siegen Tools S01001.V3 User manual

Sealey mc454 User manual

Sealey

Sealey mc454 User manual

Sealey FPS6 User manual

Sealey

Sealey FPS6 User manual

Sealey TDMCHB User manual

Sealey

Sealey TDMCHB User manual

Sealey MC401 User manual

Sealey

Sealey MC401 User manual

Sealey MS0630 User manual

Sealey

Sealey MS0630 User manual

Sealey RPS2KD User manual

Sealey

Sealey RPS2KD User manual

Sealey MS065.V2 User manual

Sealey

Sealey MS065.V2 User manual

Sealey SMC3 User manual

Sealey

Sealey SMC3 User manual

Sealey PWH615 User manual

Sealey

Sealey PWH615 User manual

Sealey MS065 User manual

Sealey

Sealey MS065 User manual

Sealey FPS6.V3 User manual

Sealey

Sealey FPS6.V3 User manual

Sealey VS779.V3 User manual

Sealey

Sealey VS779.V3 User manual

Sealey PWH598  Series User manual

Sealey

Sealey PWH598 Series User manual

Sealey FPS7.V2 User manual

Sealey

Sealey FPS7.V2 User manual

Sealey LINK MONKEY User manual

Sealey

Sealey LINK MONKEY User manual

Sealey WORKSAFE SSP78.V2 User manual

Sealey

Sealey WORKSAFE SSP78.V2 User manual

Sealey MS080.V2 User manual

Sealey

Sealey MS080.V2 User manual

Sealey TDMCRW User manual

Sealey

Sealey TDMCRW User manual

Sealey MS018.V2 User manual

Sealey

Sealey MS018.V2 User manual

Sealey MCRS1 User manual

Sealey

Sealey MCRS1 User manual

Popular Motorcycle Accessories manuals by other brands

ClearWater Lights Glenda installation manual

ClearWater Lights

ClearWater Lights Glenda installation manual

DUCATI Performance 96780551A manual

DUCATI Performance

DUCATI Performance 96780551A manual

MadStad Engineering Quick-Release Adjustable Windshield System manual

MadStad Engineering

MadStad Engineering Quick-Release Adjustable Windshield System manual

PACIFIC CYCLE none owner's manual

PACIFIC CYCLE

PACIFIC CYCLE none owner's manual

Shad HONT72SF quick start guide

Shad

Shad HONT72SF quick start guide

hepco & becker 6317557 00 01L manual

hepco & becker

hepco & becker 6317557 00 01L manual

Dynojet Power commander V installation instructions

Dynojet

Dynojet Power commander V installation instructions

Denali KLR650 instruction manual

Denali

Denali KLR650 instruction manual

Denali DNL.WHS.24200 instruction manual

Denali

Denali DNL.WHS.24200 instruction manual

DimSport YOUTUNE Installation and use

DimSport

DimSport YOUTUNE Installation and use

Crivit 93725 owner's manual

Crivit

Crivit 93725 owner's manual

Cobra POWRPRO Fi2000 instruction manual

Cobra

Cobra POWRPRO Fi2000 instruction manual

Touratech 01-051-1200-0 instructions

Touratech

Touratech 01-051-1200-0 instructions

SW-Motech HPS.11.258.900-01 Mounting instructions

SW-Motech

SW-Motech HPS.11.258.900-01 Mounting instructions

Evotech Performance 13347 installation instructions

Evotech Performance

Evotech Performance 13347 installation instructions

hepco & becker 5017514 00 01 quick start guide

hepco & becker

hepco & becker 5017514 00 01 quick start guide

Ohlins BM 205 owner's manual

Ohlins

Ohlins BM 205 owner's manual

hepco & becker 5017519 00 01 quick start guide

hepco & becker

hepco & becker 5017519 00 01 quick start guide

manuals.online logo
manuals.online logoBrands
  • About & Mission
  • Contact us
  • Privacy Policy
  • Terms and Conditions

Copyright 2025 Manuals.Online. All Rights Reserved.