Sealey CP20VRW User manual

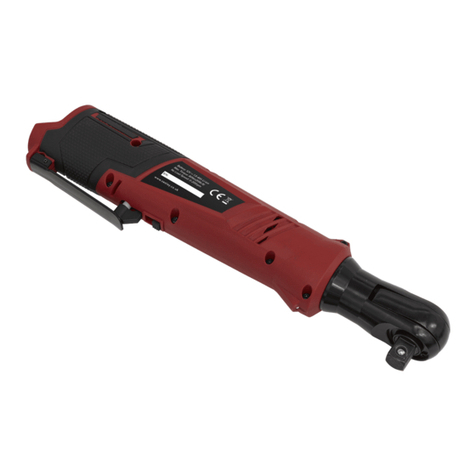
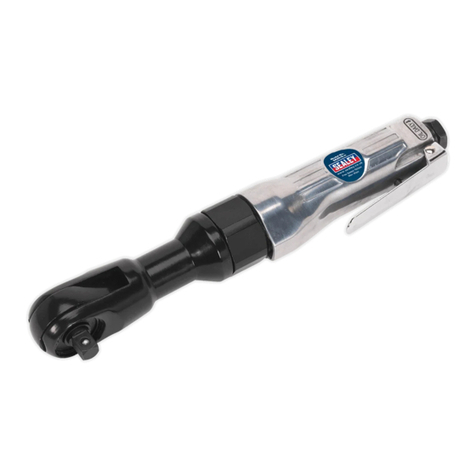
20V 3/8”SQ DRIVE RATCHET WRENCH 60Nm-
BODY ONLY
MODEL NO: CP20VRW
Thank you for purchasing a Sealey product. Manufactured to a high standard, this product will, if used according to these
instructions, and properly maintained, give you years of trouble free performance.
IMPORTANT: PLEASE READ THESE INSTRUCTIONS CAREFULLY. NOTE THE SAFE OPERATIONAL REQUIREMENTS, WARNINGS & CAUTIONS. USE
THE PRODUCT CORRECTLY AND WITH CARE FOR THE PURPOSE FOR WHICH IT IS INTENDED. FAILURE TO DO SO MAY CAUSE DAMAGE AND/OR
PERSONAL INJURY AND WILL INVALIDATE THE WARRANTY. KEEP THESE INSTRUCTIONS SAFE FOR FUTURE USE.
1. SAFETY
1.1. GENERAL POWER TOOL SAFETY WARNINGS
WARNING! Read all safety warnings and all instructions. Failure to follow the warnings and instructions may result in electric shock,
reand/orseriousinjury.
9Save all warnings and instructions for future reference.
1.1.1. WORK AREA SAFETY
9Keep work area clean and well lit. Cluttered or dark areas invite accidents.
9Evaluate your working area before using the tool.
8DO NOT operate power tools in explosive atmospheres, such as in the presence of ammableliquids,gasesordust.Powertools
create sparks which may ignite the dust or fumes.
9Keep children and bystanders away while operating a power tool. Distractions can cause you to lose control.
1.1.2. PERSONAL SAFETY
9Stay alert, watch what you are doing and use common sense when operating a power tool. DO NOT use a power tool while you are
tiredorundertheinuenceofdrugs,alcoholormedication.Amomentofinattentionwhileoperatingpowertoolsmayresultinserious
personalinjury.
9 Usepersonalprotectiveequipment.Alwaysweareyeprotection.Protectiveequipmentsuchasdustmask,non-skidsafetyshoes,
hardhat,orhearingprotectionusedforappropriateconditionswillreducepersonalinjuries.
9 Preventunintentionalstarting.Ensuretheswitchisintheo-positionbeforeconnectingtopowersourceand/orbatterypack,
picking up or carrying the tool.
9 Carryingpowertoolswithyourngerontheswitchorenergisingpowertoolsthathavetheswitchoninvitesaccidents.
9 Removeanyadjustingkeyorwrenchbeforeturningthepowertoolon.
8DO NOT overreach. Keep proper footing and balance at all times. This enables better control of the power tool in unexpected
situations.
9Dress properly. DO NOT wearlooseclothingorjewellery.Keepyourhair,clothingand gloves away from moving parts. Loose
clothes,jewelleryorlonghaircanbecaughtinmovingparts.
1.2. POWER TOOL USE AND CARE
8DO NOT forcethepowertool.Usethecorrectpowertoolforyourapplication.Thecorrectpowertoolwilldothejobbetterand
safer at the rate for which it was designed.
8DO NOTusethepowertooliftheswitchdoesnotturnitonando.Anypowertoolthat cannot be controlled with the switch is
dangerous and must be repaired.
WARNING!thebatterypackfromthepowertoolbeforemakinganyadjustments,changingaccessories,orstoringpower tools.
9Store idle power tools out of the reach of children and do not allow persons unfamiliar with the power tool or these instructions to
operatethepowertool.Powertoolsaredangerousinthehandsofuntrainedusers.
9 Maintainpowertools.Checkformisalignmentorbindingofmovingparts,breakageofpartsandanyotherconditionthatmayaect
the power tool’s operation. If damaged, have the power tool repaired before use. Many accidents are caused by poorly maintained
power tools.
9Use the power tool, accessories and tool bits etc. in accordance with these instructions, taking into account the working conditions
andtheworktobeperformed.Useofthepowertoolforoperationsdierentfromthoseintendedcouldresultinahazardous
situation.
1.2.1. SERVICE
9 Haveyourpowertoolservicedbyaqualiedrepairpersonusingonlyidenticalreplacement parts. This will ensure that the safety of
the power tool is maintained.
1.3. SPECIFIC RATCHET WRENCH SAFETY INSTRUCTIONS
8DO NOTholdunsecuredworkpieceinyourhand.Securelooseworkpieceswithaclamp,viceorotheradequateholdingdevice.
9Hold the power tool by insulated gripping surfaces, when performing an operation where the fastener may contact hidden wiring or
its own cord. Fasteners contacting an orange” live” wire may make exposed parts of the power tool “live” and could give the
operator an electric shock.
9Follow all workshop safety rules, regulations and conditions when using the wrench. I
8DO NOT cover vents. This may cause overheating and damage the tool.
CP20VRWIssue128/09/21
Original Language Version
© Jack Sealey Limited
Refer to
instructions Weareye
protection Wearprotective
gloves Wearamask
Wearear
protection

2. INTRODUCTION
Durablecompositehousingandsoftgripforaddedcomfort.Variablespeedtriggerforeasycontrol.Forwardandreverserotationand
trigger-lock.Fittedwithelectronicbrake.Built-inLEDworklightforlowvisibilityareas.Requirescompatible20Vbatteryandmainscharger,
sold separately.
3. SPECIFICATION
Model No: .............................................................CP20VRW
Battery:
Options:20V2AhLi-ion,20V4AhLi-ion,
20V6AhLi-ion(notincluded)
Drive: .......................................................................... 3/8”Sq
Maximumtorque: ..........................................................60Nm
No-Loadspeed .......................................................0-250rpm
Noise power:........................................................100.2dB(A)
Noise pressure.......................................................89.2dB(A)
Vibration:................................................................7.972m/s²
Uncertainty:................................................................1.5m/s²
Replacement parts.........................CP20VMCmainscharger
4. OPERATION
Unpack the product and check contents. Should there be any damaged or missing parts contact your supplier immediately.
4.1. BATTERY INSTALLATION
4.1.1. To insert the battery align the tongues on the battery cartridge with the grooves on the handle of the wrench, and slide into place.
Insert the battery all the way until it locks into place.
4.2. BATTERY REMOVAL
4.2.1. Holdthewrenchrmlyandpushthebatterylatchbutton,thenslideandremovethebattery.
4.3. STARTING THE WRENCH
4.3.1. Priortostartingthewrenchensurethatthetriggerlockisintheunlockedposition(fullytowardsbatterycartridge).
4.3.2. Applypressureonthetriggertostartthewrench.Thetoolspeediscontrolledbyvaryingthepressureonthetrigger.Releasethe
trigger to stop.
NOTE:Whennotinuseputthetriggerlockintothelockedposition(fullytowardsthedrivesocket).
4.4. WORK LIGHT
4.4.1. Theworklightwillswitchonwhenthetriggerislightlypressed,andwillgooutautomaticallyafterapproximately10secondsafter
the trigger is released.
NOTE:Whenthewrenchisoverheatedtheworklightwillbegintoblink.Allowthewrenchtofullycoolbeforeoperatingthe
wrench again.
4.5. USING THE WRENCH
4.5.1. Fitthecorrectsizesocketrequiredtothewrenchbypushingitontothesquaresocketadaptoruntilitlocksintoplace.Toremove
thesocket,simplypullito.
NOTE:Alwaysusethecorrectsizesocketfortheboltornut.Anincorrectsizesocketcouldresultininconsistentfasteningtorque
and/ordamagetothesocket,fixingorwrench.
4.5.2. Selecttherequireddirectionofrotation.Tochangerotationaldirectionturnthereversingleverclockwiseorcounter-clockwise
until an audible click is heard.
9 Alwayscheckthedirectionofrotationpriortouse.
DO NOT attempt to change the direction of rotation whilst the trigger is depressed. Change direction only when the wrench comes
to a complete stop.
4.5.3. Holdthewrenchrmlyandplacethesocketovertheboltornut.Turnthewrenchonandfasten.Whentheboltornutreachesthe
seating position, the wrench will stop automatically.
4.5.4. Whentighteningtakecarenottoover-torquesmallxings.
WARNING!Holdthewrenchrmlyespeciallywhenthexingreachestheseatingpositionandthesocketstopsit’srotationthe
motor will generate an instant backlash to rotate the wrench.
NOTE:Oncriticalfixingsalwayscheckthetorquewithatorquewrenchaccordingtotheproductorvehiclemanufacturer’s
guidelines.
4.6. USING AS A HAND TOOL
4.6.1. Thewrenchcanbeusedasahandratchetwrenchtooltoassistinthelooseningofstiboltsornuts,byhand.
4.6.2. Whentheboltornuthasbeenadequatelyloosened,unlockthewrenchandturnontocompletethetask.
WARNING! – Risk of Hand Arm Vibration Injury.
ThistoolmaycauseHandArmVibrationSyndromeifitsuseisnotmanagedadequately.
ThistoolissubjecttothevibrationtestingsectionoftheMachineryDirective2006/42/EC.
This tool is to be operated in accordance with these instructions.
Measuredvibrationemissionvalue(a)...........................7.972m/s²
Uncertaintyvalue(k):.........................................................1.5m/s²
Pleasenotethattheapplicationofthetooltoasolespecialisttaskmayproduceadierentaveragevibrationemission.We
recommendthataspecicevaluationofthevibrationemissionisconductedpriortocommencingwithaspecialisttask.
Ahealthandsafetyassessmentbytheuser(oremployer)willneedtobecarriedouttodeterminethesuitabledurationofusefor
each tool.
NB:StatedVibrationEmissionvaluesaretype-testvaluesandareintendedtobetypical.
Whilstinuse,theactualvaluewillvaryconsiderablyfromanddependonmanyfactors.
Such factors include; the operator, the task and the inserted tool or consumable.
NB:ensurethatthelengthofleaderhosesissucienttoallowunrestricteduse,asthisalsohelpstoreducevibration.
CP20VRWIssue128/09/21
Original Language Version
© Jack Sealey Limited
The state of maintenance of the tool itself is also an important factor, a poorly maintained tool will also increase the risk of Hand
ArmVibrationSyndrome.
Health surveillance.
Werecommendaprogrammeofhealthsurveillancetodetectearlysymptomsofvibrationinjurysothatmanagementprocedures
canbemodiedaccordingly.
Personalprotectiveequipment.
Wearenotawareofanypersonalprotectiveequipment(PPE)thatprovidesprotectionagainstvibrationinjurythatmayresultfrom
theuncontrolleduseofthistool.Werecommendasucientsupplyofclothing(includinggloves)toenabletheoperatortoremain
warmanddryandmaintaingoodbloodcirculationinngersetc.Pleasenotethatthemosteectiveprotectionisprevention,please
refer to the Correct Use and Maintenance section in these instructions. Guidance relating to the management of hand arm vibration
canbefoundontheHSCwebsitewww.hse.gov.uk-Hand-ArmVibrationatWork.
5. MAINTENANCE
5.1. Clean with a clean cloth.
8DO NOT use solvents to clean the work light.
WARNING!Beforeperforminganyrepairsormaintenanceensurethatthewrenchisswitchedoandthatthebatterycartridgeis
removed.
CP20VRWIssue128/09/21
Original Language Version
© Jack Sealey Limited
Sealey Group, Kempson Way, Suffolk Business Park, Bury St Edmunds, Suffolk. IP32 7AR
01284 757500 01284 703534 sales@sealey.co.uk www.sealey.co.uk
ENVIRONMENT PROTECTION
Recycleunwantedmaterialsinsteadofdisposingofthemaswaste.Alltools,accessoriesandpackagingshouldbesorted,takento
arecyclingcentreanddisposedofinamannerwhichiscompatiblewiththeenvironment.Whentheproductbecomescompletely
unserviceableandrequiresdisposal,drainanyfluids(ifapplicable)intoapprovedcontainersanddisposeoftheproductandfluids
according to local regulations.
WEEE REGULATIONS
DisposeofthisproductattheendofitsworkinglifeincompliancewiththeEUDirectiveonWasteElectricalandElectronicEquipment
(WEEE).Whentheproductisnolongerrequired,itmustbedisposedofinanenvironmentallyprotectiveway.Contactyourlocalsolid
waste authority for recycling information.
Note: It is our policy to continually improve products and as such we reserve the right to alter data, specifications and component parts without prior
notice.
Important: No Liability is accepted for incorrect use of this product.
Warranty:Guaranteeis12monthsfrompurchasedate,proofofwhichisrequiredforanyclaim.
Table of contents
Other Sealey Power Tools manuals

Sealey
Sealey YK30FFP.V2 User manual

Sealey
Sealey SB974.V5 User manual

Sealey
Sealey YK30XF User manual

Sealey
Sealey CP2144MH User manual

Sealey
Sealey STW101 User manual

Sealey
Sealey STW803.V2 User manual

Sealey
Sealey VS7023a Firmware update

Sealey
Sealey SA31.V2 User manual

Sealey
Sealey STW306.V2 User manual

Sealey
Sealey POWER TOOLS SA92.V2 User manual

Sealey
Sealey STW804 User manual

Sealey
Sealey YK20F.V4 User manual

Sealey
Sealey STW300 User manual

Sealey
Sealey SDL7 User manual

Sealey
Sealey SMART ERASER SA695 User manual

Sealey
Sealey Power Tools SA651.V3 User manual

Sealey
Sealey STW101 User manual

Sealey
Sealey SA204 User manual

Sealey
Sealey STW101 Firmware update

Sealey
Sealey POWER TOOLS HS100CE User manual