1.3. BATTERY SAFETY PRECAUTIONS
WARNING!BatterycontainsLithium-ionwhichisdangerous.Handlewithcaretoavoiddamage,re,corrosionorpersonalinjury.
9 Chargebatterypriortoitsrstuse.Thebatterywillhavebeenshippedinalowchargestatetoreducetheriskofburnsorre.
8DO NOT Attempt to open, disassemble, modify or service the battery pack.
8DO NOTCrush,puncture,shortexternalcontactsordisposeofinreorwater.
8DO NOTExposetotemperaturesabove40°C(104°F).
9Replace only with the battery pack designated for this product.
9 Useonlythesuppliedchargingbaseprovidedtochargethebattery.
8DO NOT attempt recharging the battery by means of an engine generator or a DC power source.
WARNING!DisposeofspentbatteriescorrectlyastheycontainLithium-ion.DANGER! DO NOT attempt to disassemble the
battery.ForsafetyandenvironmentalreasonsDO NOT discard in domestic waste or by burning. ONLY discard or recycle
according to local authority regulations.
WARNING! DO NOT allow a leaking battery to contact your person.
1.4. GENERAL SAFETY
9MaintainthePowerRatchetWrenchandbatteryingoodcondition.Checkmovingpartsalignmentonaregularbasis.
9Replaceorrepairdamagedparts.Useanauthorisedserviceagentandrecommendedpartsonly.Unauthorisedpartsmaybe
dangerous and will invalidate the warranty.
9EnsuretheRatchetWrenchisswitchedobeforeinstallingthebatterypack.
9KeeptheRatchetWrenchandchargercleanforbestandsafestperformance.
9Removeillttingclothing.Removeties,watches,ringsandotherloosejewelleryandcontainlonghair.
9EvaluateyourworkingareabeforeusingtheRatchetWrench;e.g.ceilings,oorsandenclosuresmaycontainelectricalitemsor
water piping.
9 EnsurebatterypackiscorrectlyinsertedintotheRatchetWrenchhandleandlatchedinplacebeforeattemptingtoswitchon
RatchetWrench.
9Secure loose work pieces with a clamp, vice or other adequate holding device.
9Avoid unintentional starting.
9 Wearapprovedsafetyeyeprotection(standardspectaclesarenotadequate).
9 Maintaincorrectbalanceandfooting.Ensurethefloorisnotslipperyandwearnon-skidshoes.
9Keep children and unauthorised persons away from the working area.
8DO NOTusetheRatchetWrenchwherethereareammableliquids,solidsorgases,suchaspaintsolvents,etc.
8DO NOT allow children to operate the RatchetWrench.
8DO NOT operate the RatchetWrenchifanypartsaremissingasthismaycausefailureand/orpersonalinjury.
8DO NOT hold unsecured work piece in your hand.
8DO NOT leave the RatchetWrench operating unattended.
8DO NOT carry the RatchetWrench with your finger on the power switch. Keep switch lock in the locked position.
8DO NOT use the RatchetWrench for a task it is not designed to perform.
8DO NOT operate the RatchetWrench when you are tired or under the influence of alcohol, drugs or intoxicating medication.
8DO NOT get the RatchetWrench or battery charger wet or use in damp or wet locations.
2. INTRODUCTION
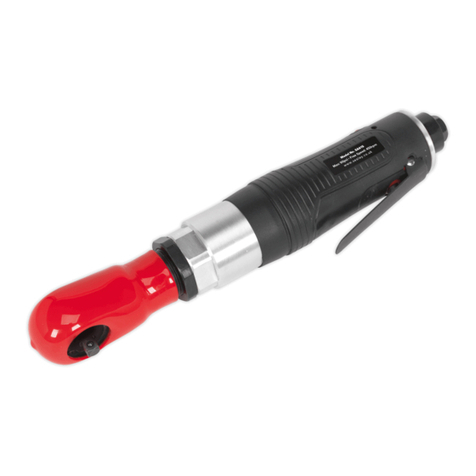
TheSealeyPowerSpeedRatchetcombinesthehightorqueofatraditionalhandratchetwiththefastereciencyofanelectricpowertool,
providingworkingspeeds10-20timesquickerwhentightening/looseningfasteners.Noloadspeed200rpmsavingthetimeandfatigueof
atraditionalhandratchetwrench.Theclutchmechanismisdesignedsothatwhenthemaximumtorqueisreached(1Nm/0.74ft/lb)atactile
vibrationindicatestochangeovertomanualmodeforcontinuedtighteningorlooseningoffasteners.Includesarechargeablelithium-ion
battery,fullrechargeinjust45minutesandisfullyprotectedfromover-charge,over-dischargeorover-heating.Ultrasmooth60-toothratchet
action,twist-reverseandquickreleasewithspring-ballsocketretention,powerbuttonwithLEDindicatorandlockingswitch.Fittedwitha
contoured, soft grip handle. Supplied with AC adaptor, charging base and storage case.
3. SPECIFICATION
Model No: ............................SPR001........................SPR002
Drive: ...................................... 3/8”Sq..........................1/2”Sq
Overall Length:...................... 295mm.........................315mm
Battery(SPR001B):....3.6V2000mAhLi-ion.........3.6V2000mAhLi-ion
Charging base:....................SPR001C......................SPR001C
4. OPERATION
WARNING: Remove battery before maintenance is carried out.
NOTE: Whennew,thebatteriesmayhavebeenshippedinalowchargestate.Fullychargethebatteriesbeforeusingyourtool.
4.1. Ensurethatyouhaveread,understoodandcomplywithallthesafetyinstructionsinSection1.
4.2. BATTERY CHARGER
4.2.1. To remove the battery from the equipment, depress the spring loaded tabs on the sides of the battery. Remove the battery by
sliding it out. DO NOT touch the battery terminals.
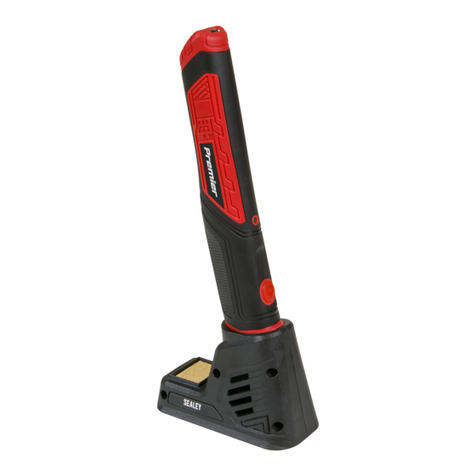
4.2.2. Thebatteryisdesignedtotintothechargeronewayonly.Insertthebatteryfullyandrmlytoseatthebatteryintothecharging
base.
4.2.3. Take the base charger and plug it into the mains, switch on the power and the red LED on the charger will illuminate.
4.2.4. Thebatteryhas3LEDchargelevelindicatorsthatshowfullorpartialchargeslevels.
4.2.5. WhenthebatteryisonchargetheredLEDonthechargerwillashintermittently.
4.2.6. WhenthegreenLEDonthechargerilluminatespermanentlythebatteryisfullycharged.
4.2.7. WhenbothgreenandredLEDsflashthebatteryisnotcharging.Replacebattery.
4.2.8. Remove the battery from the charger. Switch off and remove the plug from the mains.
4.2.9. Relocate battery into tool ensuring correct alignment. DO NOT force the battery in.
Original Language Version
© Jack Sealey Limited SPR001,SPR002Issue2(2,3)04/03/20

