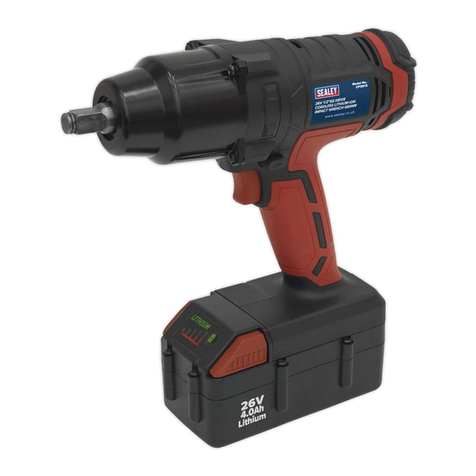
Sealey CP3001.V2 User manual

INSTRUCTIONS FOR: CORDLESS IMPACT WRENCH
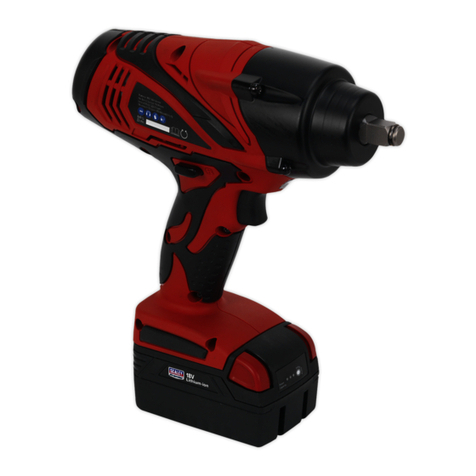
19.2V 1/2 SQUARE DRIVE
Model: CP3001.V2
Thank you for purchasing a Sealey product. Manufactured to a high standard this article will, if used according to these instructions and
properly maintained, give you years of trouble free performance.
1. SAFETY INSTRUCTIONS
IMPORTANT: PLEASE READ THESE INSTRUCTIONS CAREFULLY. NOTE THE SAFE OPERATIONAL REQUIREMENTS, WARNINGS AND
CAUTIONS. USE THIS PRODUCT CORRECTLY AND WITH CARE FOR THE PURPOSE FOR WHICH IT IS INTENDED. FAILURE TO DO SO MAY
CAUSE DAMAGE AND/OR PERSONAL INJURY AND WILL INVALIDATE THE WARRANTY. PLEASE KEEP INSTRUCTIONS SAFE FOR FUTURE USE.
1.1. GENERAL SAFETY
3Follow all workshop safety rules, regulations and conditions when using the wrench.
3Remove the battery pack from the wrench before servicing or performing any maintenance.
3Maintain the wrench and battery pack in good condition. Check moving parts for alignment on a regular basis.
3Replace or repair damaged parts. Use an authorised service agent and recommended parts only. Unauthorised parts may be dangerous
and will invalidate the warranty.
3Ensure the wrench is in neutral before installing the battery pack.
3Keep the wrench, battery pack and charger clean for optimum performance.
3Keep the work area clean and tidy and free from unrelated materials. Ensure that there is adequate lighting.
3Ensure that battery pack is correctly inserted into the wrench handle and latched in place before operating wrench.
pWARNING! When working around vehicle brake systems we recommend that you wear suitable respiratory protection due to the possible
presence of asbestos dust from brake linings.
3Use only impact sockets which are specifically designed for use with an impact wrench.
3Avoid unintentional starting.
3Wear approved safety eye/face shield, ear defenders and hand protection.
3Remove ill-fitting clothing. Remove ties, watches, rings and other loose jewellery and contain long hair.
3Maintain correct balance and footing. Ensure the floor is not slippery and wear non-slip shoes.
3Keep children and unauthorised persons away from the work area.
7DO NOT operate the wrench if any parts are missing as this may cause failure and/or personal injury.
7DO NOT use the wrench unless you have been instructed in its use by a qualified person.
7DO NOT operate the wrench where there are solvent fumes or flammable gases, liquids or solids.
7DO NOT leave the wrench operating unattended.
7DO NOT carry wrench with your finger on the trigger. Keep direction switch in locked position when not in use.
7DO NOT use the wrench for a task it is not designed to perform.
7DO NOT operate the wrench when you are tired or under the influence of alcohol, drugs or intoxicating medication.
7DO NOT get the wrench or battery charger wet or use in damp or wet locations.
3Keep wrench and charger in the case and store in a safe, dry, childproof area where the temperature will not exceed 104OF (40OC).
1.2. BATTERY SAFETY INSTRUCTIONS
pWARNING! The battery pack contains nickel-cadmium which is dangerous. It must therefore be handled with care.
3Charge the battery pack prior to first use. The battery pack will have been shipped in a low charge state.
3Use only the charger provided to charge the battery pack.
7DO NOT charge the battery pack when room temperature is below 50OF (10OC) or above 95OF (35OC).
7DO NOT attempt recharging the pack by means of an engine generator or a DC power source.
7DO NOT short-circuit the battery pack by touching both terminals at the same time with a metal object, or your fingers etc.
7DO NOT store battery pack (or wrench) in locations where the temperature may exceed 104OF(40OC ) e.g. in outside sheds, above heaters etc.
pWARNING! Dispose of spent battery pack correctly as it contains nickel-cadmium.
s
DANGER! DO NOT attempt to disassemble the battery
pack. For safety and environmental reasons DO NOT discard in domestic waste or by burning. ONLY discard or recycle according to local
authority regulations.
pWARNING! DO NOT allow a leaking battery to contact your person. If you come into contact with battery liquid take the following immediate action:
p a) Skin contact: Wash immediately with soap and water, then wash in either lemon juice or vinegar.
p b) Eye contact: Wash with a strong solution of boric acid and seek immediate medical attention.
1.3. MAINS POWER ELECTRICAL SAFETY (In relation to the battery charger)
pWARNING! It is the responsibility of the owner and the operator to read, understand and comply with the following:
You must check all electrical products, before use, to ensure that they are safe. You must inspect power cables, plugs, sockets and any
other connectors for wear or damage. You must ensure the risk of electric shock is minimised by the installation of appropriate safety
devices. A Residual Current Circuit Breaker (RCCB) should be incorporated in the main distribution board. We also recommend that a
Residual Current Device (RCD) is used. It is particularly important to use an RCD with portable products that are plugged into a supply which
is not protected by an RCCB. If in any doubt consult a qualified electrician. You may obtain a Residual Current Device by contacting your
Sealey dealer. You must also read and understand the following instructions concerning electrical safety.
1.3.1. The Electricity At Work Act 1989 requires all portable electrical appliances, if used on business premises, to be tested by a qualified
electrician, using a Portable Appliance Tester (PAT), at least once a year.
1.3.2. The Health & Safety at Work Act 1974 makes owners of electrical appliances responsible for the safe condition of those appliances and
the safety of the appliance operator. If in any doubt about electrical safety, contact a qualified electrician.
1.3.3. Ensure that the insulation on all cables and on the appliance is safe before connecting it to the power supply. See 1.3.1. and 1.3.2.
and use a Portable Appliance Tester.
1.3.4. Ensure that cables are always protected against short circuit and overload.
CP3001.V2 - 2 - 160902
1.3.5. Regularly inspect power supply cables and plugs for wear or damage and check all connections to
ensure none is loose.
1.3.6. Important: Ensure that the voltage marked on the appliance matches the power supply to be used
and that the plug is fitted with the correct fuse - see fuse rating at right.
1.3.7. DO NOT pull or carry the appliance by the power cable.
1.3.8. DO NOT pull the plug from the socket by the cable.
1.3.9. DO NOT use worn or damage cables, plugs or connectors. Immediately have any faulty item
repaired or replaced by a qualified electrician. When an ASTA/BS approved UK 3 pin plug is
damaged, cut the cable just above the plug and dispose of the plug safely.
Ensure that the double insulated charger is correctly connected via a three-pin plug, as follows:
a) Connect the Brown live wire to live terminal L.
b) Connect the Blue neutral wire to the neutral terminal N.
c) After wiring, check that there are no bare wires, that all wires have been correctly connected, that the cable outer insulation extends
past the cable clamp and that the clamp is tight. Note that the earth pin E remains unconnected.
1.3.10. If an extension reel is used it should be fully unwound before connection. A reel with an RCD fitted is preferred since any appliance
plugged into it will be protected. The cable core section is important and should be at least 1.5mm2, but to be absolutely sure that the
capacity of the reel is suitable for this product and for others which may be used in the other output sockets, we recommend the use of
2.5mm2section cable. If extension reel is to be used outdoors, ensure it is marked for outdoor use.
1.4. BATTERY CHARGER SAFETY INSTRUCTIONS
p
p
WARNING! DO NOT attempt to charge any battery other than that supplied for the wrench. Other types of batteries may explode!
3All mains electrical supply safety features must be followed as described in 1.3. above.
3Disconnect the charger from the mains supply when not in use.
7DO NOT charge battery if room temperature is below 41OF (5OC) or above 104OF (40OC)
7DO NOT expose the charger to damp or wet conditions.
7DO NOT pull or carry the charger by the power lead.
7DO NOT operate the charger if it has been dropped, or has received a sharp knock, or is damaged. Take the charger to an authorised
agent for repair or obtain a replacement.
7DO NOT dismantle the charger as this may cause damage and/or personal injury and will invalidate the warranty.
7DO NOT insert foreign objects or material into the hole reserved for the battery pack.
7DO NOT recharge a second battery pack immediately after charging the first. Consecutive charging will overheat the charger. Allow the
unit to cool for 15 minutes before charging the next pack.
7DO NOT attempt to connect two chargers together.
3Store the charger in the same manner as the battery pack in 1.2.
2. INTRODUCTION & SPECIFICATION
Blue -
Neutral
Wire
Brown -
Live Wire
3. OPERATING INSTRUCTIONS
Cable Clamp
FUSE RATING
5 AMP
Powerful and compact cordless impact
wrench fitted with forward and reverse
controls which are integrated into the
housing for ease of use. Powerful but
balanced tool for workshop applications.
Includes 19.2 volt Ni-Cad battery pack
and 1 hour mains charger.
fig. 1
fig. 2
Note: When new, the battery pack will have been shipped in a low charge state. It will take longer to charge initially, and several subsequent charges
may also take a little longer than when the battery pack reaches its optimum performance. Remove battery pack from case and charge as below:
3.1. CHARGING THE BATTERY PACK
3.1.1.
To remove the battery pack (fig. 1.5) from wrench, depress the two side release clips (4). p
p
WARNING! Do not touch metal terminals.
3.1.2. Place wrench in carry case and remove the battery charger.
3.1.3. The battery pack and charger have the positive (+) and negative (-) terminals marked.
Align the correct terminals and insert the battery into slot (fig. 2).
Note: The battery pack is designed so that it will only enter the charger unit the correct way.
When placed in the charger, a very slight downward pressure will seat the pack firmly into the
power terminals.
The red LED (fig. 2) will light to indicate fast charging.
3.1.4. When the fast charge is complete the red LED will go out and the green LED will
light to indicate trickle charging. The battery pack is now ready for use.
NOTE: The charge time is approximately 1 hour.
3.1.5. After removing the battery, disconnect the charger from the mains supply and
store in the carry case.
No-Load Speed . . . . . . . . . . . . . . . . . . .2000rpm
Impact Rate . . . . . . . . . . . . . . . . . . . . .2600bmp
Maximum Torque . . . . . . . . .285ft.lb / 3940kg.cm
Weight . . . . . . . . . . . . . . . . . . . . . . . . . . . .2.9kg
Battery Pack . . . . . . . . . . . . . . . . . . . .19.2V 2Ah
CP3001.V2 - 2 - 160902

4. MAINTENANCE
5. DECLARATION OF CONFORMITY
4.1. CLEANING
Keep the outer case of the wrench clean and free from grease. DO NOT wash with water or use solvents or abrasives. Use a damp cloth.
For any other service or maintenance, contact your authorised service agent.
4.2. LUBRICATION
If the wrench has not been used for some time, remove the lubrication screw (fig. 1.2) and inject grease into the impact mechanism.
p
p
WARNING! Ensure you read, understand and apply safety instructions before use.
3.2. USING THE WRENCH
3.2.1. Use only impact sockets which are specifically designed for use with an impact wrench. The use of normal chrome vanadium sockets
is dangerous since these are more brittle and are liable to shatter.
3.2.2. Fit the socket to the wrench by snapping it onto the square drive (fig 1.1).
3.2.3. Fit the battery pack to the wrench.
3.2.4. Select the required direction of rotation. To change direction, push switch (fig. 1.3) to the left or right. Familiarise yourself with this
operation before use. DO NOT attempt to change the direction of rotation whilst trigger (fig. 1.6) is depressed.
When the wrench is not in use, use the same switch to lock off the trigger by placing the switch in the middle position.
3.2.5. When tightening, release the trigger as soon as the impact sound is heard. Take care not to over-torque small fixings.
Note: On critical fixings always check the torque with a torque wrench according to the vehicle manufacturers, or product, guidelines.
01284 757500 E-mail: sales@sealey.co.uk
Web: www.sealey.co.uk
01284 703534
NOTE: It is our policy to continually improve products and as such we reserve the right to alter data, specifications and component parts without prior notice.
IMPORTANT: No liability is accepted for the incorrect use of this product.
WARRANTY: Guarantee is 12 months from purchase date, proof of which will be required for any claim.
INFORMATION: For a copy of our latest catalogue and promotions call us on 01284 757525 and leave your full name, address and postcode.
Sole UK Distributor,
Sealey Group, Bury St. Edmunds, Suffolk.
Declaration of Conformity We, the sole importer into the UK, declare that the products listed below are in conformity with the following
standards and directives.
For Jack Sealey Ltd. Sole importer into the UK of Sealey Power Tools.
1st October 2001Signed by Mark Sweetman
The construction files for these products are held by the Manufacturer and
may be inspected, by a national authority, upon request to Jack Sealey Ltd.
Cordless Impact Wrench
Model CP3001.V2
Battery Charger
Model CP3001.V2-24
73/23/EEC LV Directive
89/336/EEC EMC Directive
CP3001.V2 - 2 - 160902
Table of contents
Other Sealey Power Tools manuals

Sealey
Sealey SG14.V3 User manual

Sealey
Sealey YK509F.V2 User manual

Sealey
Sealey GSA28 User manual

Sealey
Sealey SA203 User manual

Sealey
Sealey SG14 User manual

Sealey
Sealey Quality Machinery YK20ECF User manual

Sealey
Sealey STW101 User manual

Sealey
Sealey SA55.V2 User manual

Sealey
Sealey SX208 User manual

Sealey
Sealey VS709 User manual

Sealey
Sealey YK6ECB.V2 User manual

Sealey
Sealey SA92.V3 User manual

Sealey
Sealey POWER TOOLS SA92.V2 User manual

Sealey
Sealey YK509F User manual

Sealey
Sealey HS102.V3 User manual

Sealey
Sealey SA78X User manual

Sealey
Sealey AK5063 User manual

Sealey
Sealey AK624 User manual

Sealey
Sealey SA25.V3 User manual

Sealey
Sealey YK30XF.V3 User manual