manuals.online logo
Brands
  1. Home
  2. •
  3. Brands
  4. •
  5. Sealey
  6. •
  7. Power Tools
  8. •
  9. Sealey STW300 User manual

Sealey STW300 User manual

This manual suits for next models

3

Other Sealey Power Tools manuals

Sealey SG14.V3 User manual

Sealey

Sealey SG14.V3 User manual

Sealey SA79R User manual

Sealey

Sealey SA79R User manual

Sealey SSG8E.V3 User manual

Sealey

Sealey SSG8E.V3 User manual

Sealey Siegen Tools S01047 User manual

Sealey

Sealey Siegen Tools S01047 User manual

Sealey SA393 User manual

Sealey

Sealey SA393 User manual

Sealey Professional TOOLS SA3702 User manual

Sealey

Sealey Professional TOOLS SA3702 User manual

Sealey STW900 Series User manual

Sealey

Sealey STW900 Series User manual

Sealey STW400 User manual

Sealey

Sealey STW400 User manual

Sealey SDL11 User manual

Sealey

Sealey SDL11 User manual

Sealey POWER TOOLS SA92.V2 User manual

Sealey

Sealey POWER TOOLS SA92.V2 User manual

Sealey STW101 Firmware update

Sealey

Sealey STW101 Firmware update

Sealey GSA53 User manual

Sealey

Sealey GSA53 User manual

Sealey SA312 User manual

Sealey

Sealey SA312 User manual

Sealey AK5063 User manual

Sealey

Sealey AK5063 User manual

Sealey CP20VPS User manual

Sealey

Sealey CP20VPS User manual

Sealey VS704.V2 User manual

Sealey

Sealey VS704.V2 User manual

Sealey SMS2004 User manual

Sealey

Sealey SMS2004 User manual

Sealey YK30XF.V3 User manual

Sealey

Sealey YK30XF.V3 User manual

Sealey SA608.V2 User manual

Sealey

Sealey SA608.V2 User manual

Sealey HS102.V3 User manual

Sealey

Sealey HS102.V3 User manual

Sealey HS103K.V2 User manual

Sealey

Sealey HS103K.V2 User manual

Sealey SDL7.V2 User manual

Sealey

Sealey SDL7.V2 User manual

Sealey STW101 User manual

Sealey

Sealey STW101 User manual

Sealey CP313 User manual

Sealey

Sealey CP313 User manual

Popular Power Tools manuals by other brands

ISLAND HOPPER Power Egg HT-309 operating instructions

ISLAND HOPPER

ISLAND HOPPER Power Egg HT-309 operating instructions

Sioux Tools SSR6P25 Instructions-parts list

Sioux Tools

Sioux Tools SSR6P25 Instructions-parts list

Makita HM1317C technical information

Makita

Makita HM1317C technical information

ABB Smart Tool + quick start guide

ABB

ABB Smart Tool + quick start guide

Baumr-AG BMJK-24S user manual

Baumr-AG

Baumr-AG BMJK-24S user manual

Bosch Professional GST 18 V-LI S Original instructions

Bosch

Bosch Professional GST 18 V-LI S Original instructions

Ronix RA-2702 quick start guide

Ronix

Ronix RA-2702 quick start guide

Nordson ProBlue user guide

Nordson

Nordson ProBlue user guide

aoyue int6028 instruction manual

aoyue

aoyue int6028 instruction manual

Hitachi CJ 65VA2 Instruction manual and safety instructions

Hitachi

Hitachi CJ 65VA2 Instruction manual and safety instructions

Makita HM1304 instruction manual

Makita

Makita HM1304 instruction manual

Kurtz Ersa Ersa X-TOOL VARIO operating instructions

Kurtz Ersa

Kurtz Ersa Ersa X-TOOL VARIO operating instructions

SCHUNK KSO 65 Installation and operating instruction

SCHUNK

SCHUNK KSO 65 Installation and operating instruction

Harken LokHead 500 user manual

Harken

Harken LokHead 500 user manual

Senco DuraSpin ExTPro installation instructions

Senco

Senco DuraSpin ExTPro installation instructions

Ferm JSM1020 Original instructions

Ferm

Ferm JSM1020 Original instructions

Milwaukee M12 FUEL 2559-20 Operator's manual

Milwaukee

Milwaukee M12 FUEL 2559-20 Operator's manual

EINHELL BT-CD 12/2 operating instructions

EINHELL

EINHELL BT-CD 12/2 operating instructions

manuals.online logo
manuals.online logoBrands
  • About & Mission
  • Contact us
  • Privacy Policy
  • Terms and Conditions

Copyright 2025 Manuals.Online. All Rights Reserved.

WARNING! DO NOT use the wrench if damaged or thought to be faulty.
 Ensure all workshop safety rules, regulations and conditions are complied with when using torque wrench.
 Maintain correct balance and footing. Ensure the floor is not slippery and wear non-slip shoes.
 Keep children and unauthorised persons away from the working area.
After use clean with a soft dry cloth and store in a safe, dry, childproof location.
Keep the wrench away from magnets.
 DO NOT subject the wrench to excessive force or shocks.
 DO NOT drop or throw the wrench.
 DO NOT use wrench unless you have been instructed in its use by a qualified person.
 DO NOT leave the wrench in any place exposed to excessive heat, humidity or direct sunlight.
 DO NOT use organic solvents such as alcohol or thinners to clean the wrench.
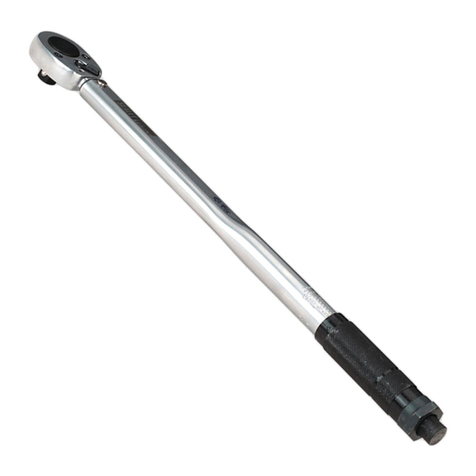
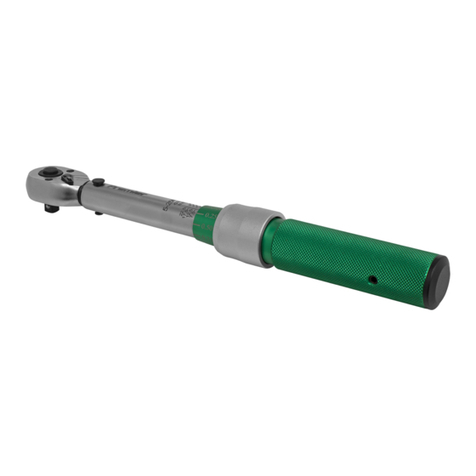
2.1. Introduction Rugged and resilient digital torque wrenchs suitable for workshop and factory use. LCD
readout with LED/audible alarm indicates achieved and target torque levels. Preset desired torque levels or
track peak and working torques using simple push-button menu. Stores up to 50 readings. Selectable
readout in lb.ft, lb.in or Nm. Reversible Chrome Vanadium ratchet allows torque reading in either direction.
Accurate to ±2% between 20% and 100% of wrench’s stated capacity. Tested in accordance with
EN ISO 6789. Supplied with certificate and storage case.
Thank you for purchasing a Sealey Product. Manufactured to a high standard this tool will, if
used according to these instructions and properly maintained, give years of trouble free performance.
IMPORTANT: PLEASE READ THESE INSTRUCTIONS CAREFULLY. NOTE THE SAFE OPERATIONAL REQUIREMENTS, WARNINGS AND CAUTIONS.
USE THIS PRODUCT CORRECTLY AND WITH CARE FOR THE PURPOSE FOR WHICH IT IS INTENDED. FAILURE TO DO SO MAY CAUSE
DAMAGE AND/OR PERSONAL INJURY AND WILL INVALIDATE THE WARRANTY. PLEASE KEEP INSTRUCTIONS SAFE FOR FUTURE USE.
DIGITAL TORQUE WRENCHES
INSTRUCTIONS FOR MODEL NOS:
STW300, STW301, STW302, STW303
1. SAFETY INSTRUCTIONS
2. INTRODUCTION & SPECIFICATION
MODEL
NO.
STW300 STW301 STW302 STW303
DRIVE 1/4" 3/8" 1/2" 1/2"
LENGHT 390mm 415mm 530mm 650mm
Range
accurate to
±2%
Stated
capacity
Range
accurate to
±2%
Stated
capacity
Range
accurate to
±2%
Stated
capacity
Range
accurate to
±2%
Stated
capacity
TORQUE
(Nm)
6 - 30 1.5 - 30 27 - 135 6.8 - 135 40 - 200 10 - 200 68 - 340 17 - 340
TORQUE
(lb.ft)
4.42 -
22.12
1.11 -
22.12
19.9 -
99.5
5 -
99.5
29.5 -
147.5
7.4 -
147.5
50.1 -
250.7
12.5 -
250.7
TORQUE
(lb.in)
53.1 -
265.5
13.3 -
265.5
239 -
1195
60 -
1195
354 -
1770
88.0 -
1700
602 -
3009
150 -
3009
5. RE-CALIBRATION
5.1 In order to ensure continued accuracy the
wrench should be re-calibrated annually and
after any impact or other misuse. Contact your
local Sealey dealer.
4. BATTERIES
4.1 Changing / loading batteries. Use a coin to
unlock the battery compartment by turning the
cap anti-clockwise and removing it. Insert two
new AA size batteries (positive end first) into the
compartment. Line up the small arrow on the
battery cap with the arrow above the
compartment aperture. Using a coin push the cap
flush with the end of the wrench and turn it to the
locked position.
4.2 Low voltage protection. If the battery serial
voltage falls below 2.3 volts the wrench will show
a battery symbol in the top left hand corner of the
display for a short while then cut off.
01284 757500
01284 703534
Sole UK Distributor
Sealey Group,
Bury St. Edmunds, Suffolk.
NOTE: It is our policy to continually improve products and as such we reserve the right to alter data, specifications and
component parts without prior notice. IMPORTANT: No liability is accepted for incorrect use of this product.
WARRANTY: Guarantee is 12 months from purchase date, proof of which will be required for any claim. INFORMATION: For
a copy of our catalogue and latest promotions call us on 01284 757525 and leave your full name, address and postcode.
[email protected]
www.sealey.co.uk
Web
email
STW300, STW301, STW302, STW303, ISSUE No:2 19/01/09
3.1. MODES OVERVIEW:
3.2 In Set Up Mode the ‘M’ button is used to cycle
through the available options. As each option
appears the up/down arrow buttons are used to
set a value or select a particular option. When
the adjustment/selection is complete the ‘M’
button is pressed again to save the settings and
automatically move the display into the next
option. The first option displays the current max.
torque setting. The second option is entitled
nodE and allows the selection of either Track or
Peak Hold mode. The third option is entitled
Unit and allows selection of three alternative
units of measurement (see spec.). The fourth
option will show a memory location number and
this number will alternate with the value stored
there. The fifth option is entitled Clr - and
allows the deletion of the previously displayed
record.
3.3 In Track Mode the torque is preset in the set up
menu. As the wrench applies a turning force to a
bolt the readout will show a continually mounting
torque figure. When 95% of the preset value is
reached the internal buzzer sounds intermittently
and the LED flashes intermittently. When the
force applied goes over the preset torque the
buzzer sounds continually, the LED is fully lit. If
the force applied goes over the stated max.
capacity the LCD display will flash.
NOTE: there is no mechanical ‘click’ when the
wrench reaches the preset torque. As the turning
force on the wrench is released the digital
readout rolls back down to zero.
3.4 In Peak Hold Mode the torque is also preset in
the set up menu. The action of the wrench is
the same as track mode except that when the
pressure is released the display will stay at the
maximum torque that has been applied. This
value can then be stored in one of 50 memories.
As the ratchet is reversible the wrench can be
used on reverse thread fixings and can also be
used to show the amount of torque required to
undo a particular bolt. For further detailed
information on each mode see the schematics .
3.5 Power On. To turn the wrench on press the ‘C’
button. If the wrench is not used for five minutes
it will ‘sleep’ in power saving mode. Press the
‘C’ button to reactivate it.
3.6 Reset in use. To reset the wrench to zero before
taking the next reading press the ‘C’ button.
3.7 Full reset. If the wrench appears to malfunction
press the ‘C’ button and the ‘up arrow’ button
together for a complete reset.
3.8 Memory full. If all 50 memories are used ‘full’
will appear on the display. It will then be
necessary to clear the memory in set up mode.
3. OPERATION
STW300, STW301, STW302, STW303, ISSUE No:2 19/01/09 STW300, STW301, STW302, STW303, ISSUE No:2 19/01/09