manuals.online logo
Brands
  1. Home
  2. •
  3. Brands
  4. •
  5. Sealey
  6. •
  7. Tools
  8. •
  9. Sealey RWH15.V3 User manual

Sealey RWH15.V3 User manual

Original Language Version
1. SAFETY INSTRUCTIONS
WARNING! Disconnect the hose reel from the water supply before changing accessories,
servicing or performing any maintenance.
Maintain the hose reel in good condition.
DO NOT operate the hose reel if any parts are damaged or missing as this may cause failure
and/or personal injury.
Have damaged parts replaced or repaired by an authorised service agent. Use recommended
parts only. Unauthorised parts may be dangerous and will invalidate the warranty.
Locate and fix the hose reel in a suitable working area. Do not position the hose in direct
sunlight, or in areas of extreme heat or cold.
WARNING! Ensure maximum pressure is not exceeded.
Keep extended hose away from heat and sharp edges. Check hose for wear before each use,
and ensure all connections are secure.
Keep children and unauthorised persons away from the hose reel especially when the hose is
retracting.
DO NOT use the hose reel for any purpose other than that for which it is designed.
DO NOT operate the hose reel when you
are tired or under the influence of
alcohol, drugs or intoxicating medication.
DO NOT direct water from the water
hose at yourself or others.
When not in use ensure the water supply
is turned off and tools disconnected.
Disconnect from the water supply and
retract the hose into case.
DO NOT allow water to freeze in the hose.
DO NOT let go of the hose whilst it is
retracting.
DO NOT retract the hose if the water
supply is still on.
Thank you for purchasing a Sealey Product. Manufactured to a high
standard this product will, if used according to these instructions and
properly maintained, give you years of trouble free performance.
IMPORTANT: PLEASE READ THESE INSTRUCTIONS CAREFULLY. NOTE THE SAFE OPERATIONAL REQUIREMENTS,
WARNINGS AND CAUTIONS. USE THIS PRODUCT CORRECTLY AND WITH CARE FOR THE PURPOSE FOR WHICH
IT IS INTENDED. FAILURE TO DO SO MAY CAUSE DAMAGE AND/OR PERSONAL INJURY AND WILL INVALIDATE
THE WARRANTY. PLEASE KEEP INSTRUCTIONS SAFE FOR FUTURE USE.
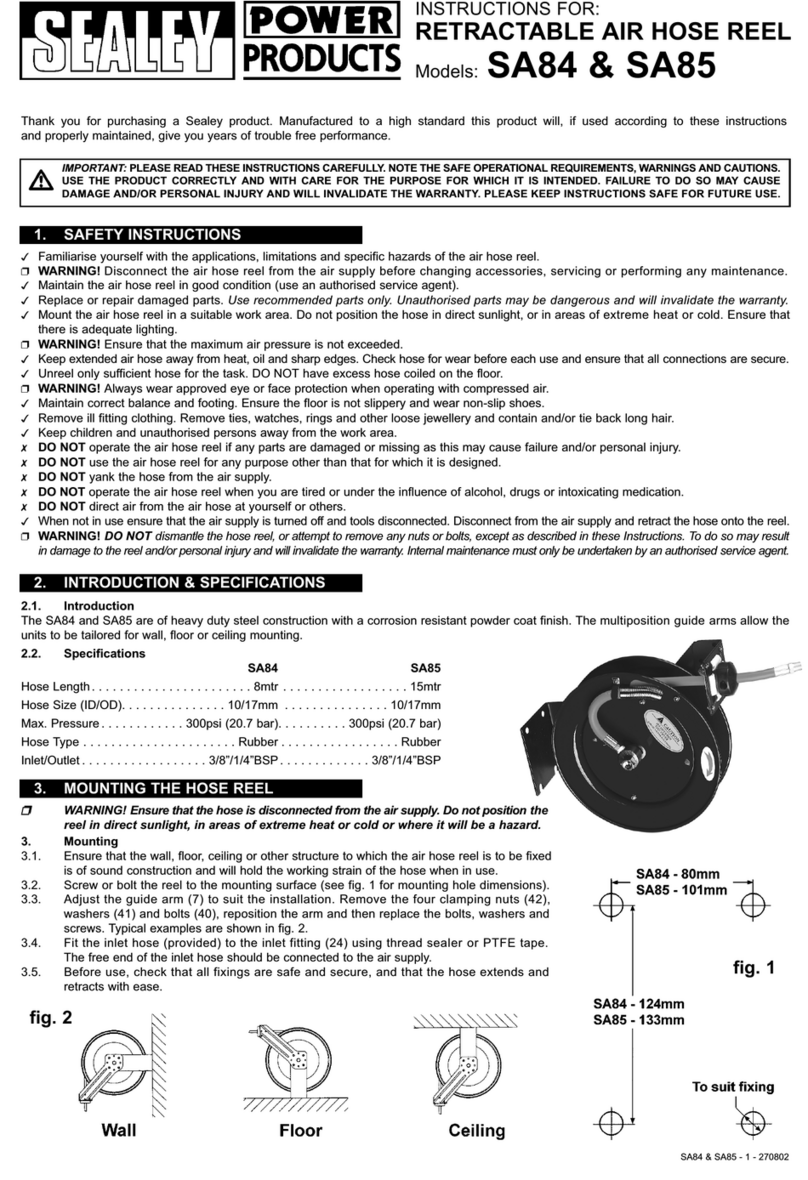
INSTRUCTIONS FOR:
RETRACTABLE GARDEN
HOSE REEL 30MTR
MODEL:
RWH15.V3
Heavy-duty composite housing with wall mounting aluminium alloy swivel bracket. Fitted with
30mtr Ø13mm PVC garden hose with spray/jet nozzle. Innovative design features three key
points. Hose can be extended and stopped at any length. Controlled, slow rewind which, unlike
traditional retractable reels, returns the water hose at a safe speed. Auto layering mechanism
distributes water hose evenly back into reel housing preventing it from jamming. Supplied with
2mtr leader hose with quick coupler and tap connector.
Hose Length ..................................................30mtr Size:............................................................... Ø13mm
RWH15.V3 Issue No.1 17/09/09
2. INTRODUCTION & SPECIFICATION
NOTE: It is our policy to continually improve products and as such we reserve the right to alter data, specifications and component
parts without prior notice. IMPORTANT: No liability is accepted for incorrect use of this product. WARRANTY: Guarantee is 12
months from purchase date, proof of which will be required for any claim. INFORMATION: For a copy of our catalogue and latest
promotions call us on 01284 757525 and leave your full name, address and postcode.
01284 757500
01284 703534
[email protected]
www.sealey.co.uk
Web
email
Sole UK Distributor,
Sealey Group, Kempson Way,
Suffolk Business Park,
Bury St Edmunds, Suffolk, IP32 7AR

Original Language Version
4.1 EXTENDING THE HOSE
Steadily pull the hose out to the desired length. When you stop
pulling, the hose should automatically lock. If not, give it a short
pull to activate the mechanism.
4.2 RETRACTING THE HOSE
Before retracting the hose turn the water off and leave the spray
nozzle open in order to release any pressure in the hose line. To
retract the hose give it a short pull to disengage the automatic lock
after which the hose will retract. To ensure satisfactory retraction
and stowage of the hose it is recommended that at least 25% of the
hose should be extended. Keep hold of the end of the hose,
without exerting undue tension, so that it is drawn back into the reel
in a controlled manner. In the event of the hose retracting
unsatisfactorily pull out the entire hose and start again. When the
warning mark appears (one metre from end), stop pulling.
WARNING! Whilst the hose reel has a controlled retraction
mechanism it is still recommended that the user holds the end of
the hose during this process to avoid injury to others or damage to
property.
4.3 ADJUSTING THE SPRAY
4.3.1 To shut off the spray nozzle keep turning it anticlockwise as
shown in fig.4. To turn it on and adjust the spray turn it clockwise.
As the nozzle first opens up the spray pattern will be fine. As the
nozzle is opened further the spray pattern will be coarse and if
the nozzle is further opened the spray will turn to a jet.
4. OPERATION
5. MAINTENANCE & STORAGE
3. MOUNTING/ASSEMBLY
 WARNING! Do not position the hose reel in direct sunlight or in
areas of extreme heat or cold.
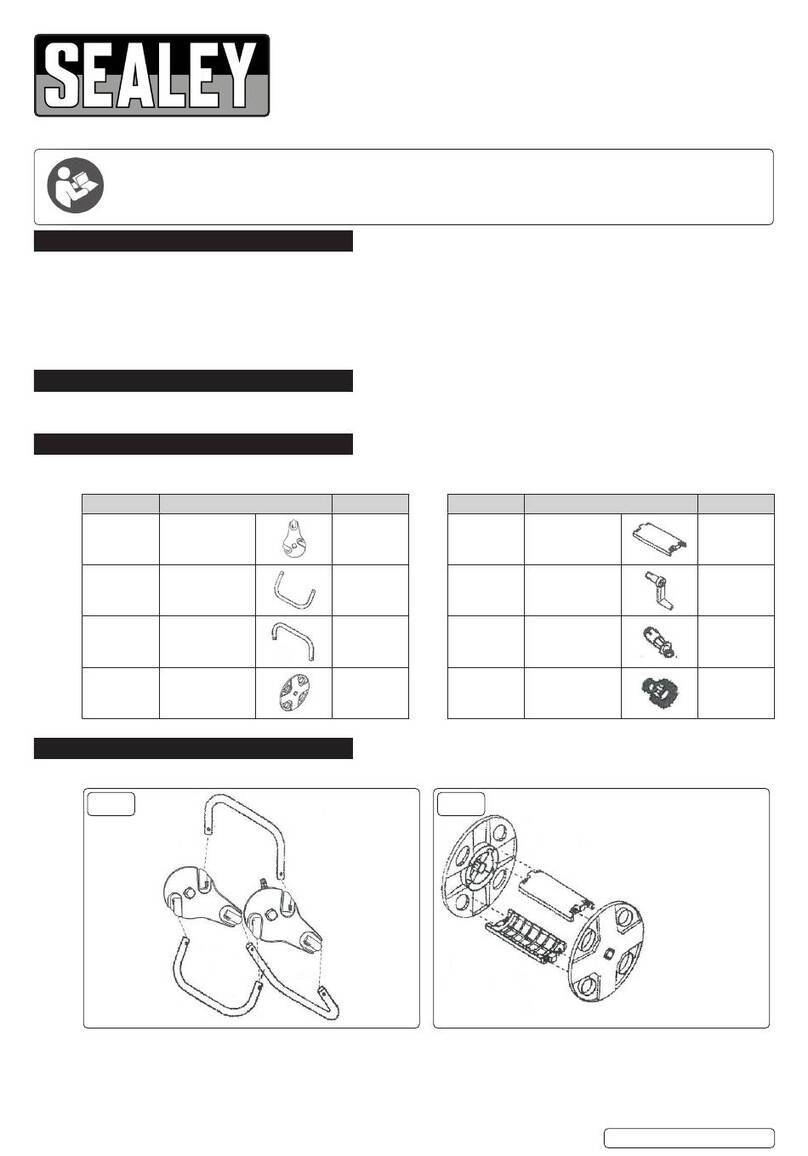
3.1 MOUNTING THE HOSE REEL. The hose reel should be mounted
close enough to an external water tap to prevent the 2mtr lead
hose from being unduly stretched when the reel is moved from
side to side. The mounting bracket can be fixed to a masonary
surface or screwed to a convenient wooden structure capable of
supporting the reel.
3.2 The reel is designed to swivel through 180° and therefore requires
clearance either side of the mounting bracket. Ideally the reel
should be positioned so that the majority of the hose can be
pulled out straight without having to go round a corner. Where this
is unavoidable mount the reel 1.5m from the corner and ensure
that the hose is not abraded by any rough or sharp surfaces.
3.3 Remove the top cover from the bracket (see fig.3-3) and allow the
bracket to slide down and off the hose reel mount. Remove the
two screws from the bottom cover and remove this from the
bracket too (see fig.3-1). If mounting on masonary, drill four 12mm
holes in the wall ready to receive the four anchor bolts provided.
Use the bracket dimensions shown in fig.2 or use the bracket itself
as a template.
3.4 Insert the four anchor bolts into the holes. Mount the bracket onto
the protruding studs and loosely secure it with the flat washers,
spring washers and nuts. See fig.1. Tighten evenly until the
bracket is secure. The bracket must not deviate from the vertical
by more than 5°.
3.5 Refit the bracket bottom cover and secure it with the two screws
as shown as shown in fig.3-1. Slide the hose reel mounting down
into the bracket (see fig.3-2) and refit the bracket top cover (see
fig.3-3). Rotate the reel from side to side to ensure that the
mounting position is satisfactory.
3.6 Release the tap connector from the end of the leader hose by
pulling the green sleeve back (see fig.5C) and pulling out the
connector (see fig.5B). Screw the connector to the tap.
3.7 Push the leader hose onto the tap connector. Extend the hose
before turning on the tap. If there are any leaks tighten the
appropriate fixings.
fig.1
WARNING! In the event of the reel becoming faulty it should be returned to your Sealey dealer for
professional maintenance. The user should not attempt any maintenance due to the high tension spring
mechanism inside. To ensure reliable operation, clean the hose and casing regularly. DO NOT spray or
wet the product, but clean with a cloth and warm water. DO NOT use solvents or detergents, as these may
permanently damage the item.
WINTER STORAGE: Before the onset of cold weather all water should be drained from the hose to
prevent it freezing inside the reel. Also in colder weather the plastic hose will become more rigid and
may not auto-rewind correctly. For these reasons it is best to store the hose reel inside during periods of
extreme cold. To store the hose reel, ensure it is clean and dry. Place the reel in a safe, dry, childproof
location, where the temperature will remain reasonably stable. DO NOT store in a nylon, or plastic, bag as
this will encourage condensation.
RWH15.V3 Issue No.1 17/09/09 RWH15.V3 Issue No.1 17/09/09
fig.5
fig.4
fig.3
fig.2
NOTE: It is our policy to continually improve products and as such we reserve the right to alter data, specifications and component
parts without prior notice. IMPORTANT: No liability is accepted for incorrect use of this product. WARRANTY: Guarantee is 12
months from purchase date, proof of which will be required for any claim. INFORMATION: For a copy of our catalogue and latest
promotions call us on 01284 757525 and leave your full name, address and postcode.
01284 757500
01284 703534
[email protected]
www.sealey.co.uk
Web
email
Sole UK Distributor,
Sealey Group, Kempson Way,
Suffolk Business Park,
Bury St Edmunds, Suffolk, IP32 7AR

Other Sealey Tools manuals

Sealey GSA12 User manual

Sealey

Sealey GSA12 User manual

Sealey AK3988 User manual

Sealey

Sealey AK3988 User manual

Sealey SA85 User manual

Sealey

Sealey SA85 User manual

Sealey WK1.V2 User manual

Sealey

Sealey WK1.V2 User manual

Sealey VS0205 User manual

Sealey

Sealey VS0205 User manual

Sealey GA40 User manual

Sealey

Sealey GA40 User manual

Sealey WHR1512 User manual

Sealey

Sealey WHR1512 User manual

Sealey SMS7P User manual

Sealey

Sealey SMS7P User manual

Sealey SA613 User manual

Sealey

Sealey SA613 User manual

Sealey AK458DX.V5 User manual

Sealey

Sealey AK458DX.V5 User manual

Sealey AUTO SERVICE PS990.V2 User manual

Sealey

Sealey AUTO SERVICE PS990.V2 User manual

Sealey AK4404 User manual

Sealey

Sealey AK4404 User manual

Sealey SA36.V2 User manual

Sealey

Sealey SA36.V2 User manual

Sealey SA95.V3 User manual

Sealey

Sealey SA95.V3 User manual

Sealey AB930 User manual

Sealey

Sealey AB930 User manual

Sealey AK481 User manual

Sealey

Sealey AK481 User manual

Sealey VS701 User manual

Sealey

Sealey VS701 User manual

Sealey GH60A User manual

Sealey

Sealey GH60A User manual

Sealey GA50 User manual

Sealey

Sealey GA50 User manual

Sealey CPG12V.v3 User manual

Sealey

Sealey CPG12V.v3 User manual

Sealey SA660 User manual

Sealey

Sealey SA660 User manual

Sealey TRMK User manual

Sealey

Sealey TRMK User manual

Sealey AB931 User manual

Sealey

Sealey AB931 User manual

Sealey VSE5312.V2 User manual

Sealey

Sealey VSE5312.V2 User manual

Popular Tools manuals by other brands

Rockler JIG IT instructions

Rockler

Rockler JIG IT instructions

Hilti DX 6 Original operating instructions

Hilti

Hilti DX 6 Original operating instructions

Uponor Unipipe UP 75 instruction manual

Uponor

Uponor Unipipe UP 75 instruction manual

Legacy L8601 Owner's instructions

Legacy

Legacy L8601 Owner's instructions

Cembre HTEP-S Operation and maintenance manual

Cembre

Cembre HTEP-S Operation and maintenance manual

Parkside PFE 50 A1 Original instructions

Parkside

Parkside PFE 50 A1 Original instructions

MSW MSW-HT2 user manual

MSW

MSW MSW-HT2 user manual

Clarke SBR610 Operation & maintenance instructions

Clarke

Clarke SBR610 Operation & maintenance instructions

OYPLA DIY 4587 user manual

OYPLA DIY

OYPLA DIY 4587 user manual

Panduit CT-3001/CCP instruction manual

Panduit

Panduit CT-3001/CCP instruction manual

Alexander Schleicher ASK 21 Flight manual

Alexander Schleicher

Alexander Schleicher ASK 21 Flight manual

TOOLCRAFT 1499511 operating instructions

TOOLCRAFT

TOOLCRAFT 1499511 operating instructions

Cheyenne SOL NOVA ULTIMITED 2.5 operating instructions

Cheyenne

Cheyenne SOL NOVA ULTIMITED 2.5 operating instructions

PAC Handlelok 1004 installation instructions

PAC

PAC Handlelok 1004 installation instructions

VEVOR CT-612 user manual

VEVOR

VEVOR CT-612 user manual

Graco SD Composite Series instructions

Graco

Graco SD Composite Series instructions

SIG PLB 291K Service instructions

SIG

SIG PLB 291K Service instructions

BGS technic 9689 instruction manual

BGS technic

BGS technic 9689 instruction manual

manuals.online logo
manuals.online logoBrands
  • About & Mission
  • Contact us
  • Privacy Policy
  • Terms and Conditions

Copyright 2025 Manuals.Online. All Rights Reserved.