manuals.online logo
Brands
  1. Home
  2. •
  3. Brands
  4. •
  5. Sealey
  6. •
  7. Tools
  8. •
  9. Sealey VS7026.V2 User manual

Sealey VS7026.V2 User manual

INSTRUCTIONS FOR:
BEARING & BUSH REMOVAL/
INSTALLATION KIT 27pc
MODEL No: VS7026.V2
1.1. GENERAL SAFETY
 WARNING! Ensure Health & Safety, local authority, and general workshop
practice regulations are adhered to when using this tool.
WARNING! Familiarise yourself with the specific applications and limitations of
the kit, as well as any potential hazards.
This kit should be used in conjunction with inspection maintenance procedures
recommended in the vehicle manufacturer’s manual.
Ensure that the kit is correct for the task.
Wear the appropriate personal protective equipment for the task. A full range is
available from your Sealey dealer.
DO NOT use the kit for any purpose other than that for which it is designed.
Ensure that the vehicle is properly supported with axle stands before working under
the vehicle.
 Ensure there is adequate lighting prior to using the kit. A range of inspection
lamps are available from your Sealey dealer.
Keep children and unauthorised persons away from the working area.
 DO NOT use the kit if any parts are damaged or missing, as this may cause
failure and/or personal injury.
 DO NOT use the kit when you are tired, or under the influence of alcohol, drugs or
intoxicating medication.
After use, store in a safe, dry childproof area. 
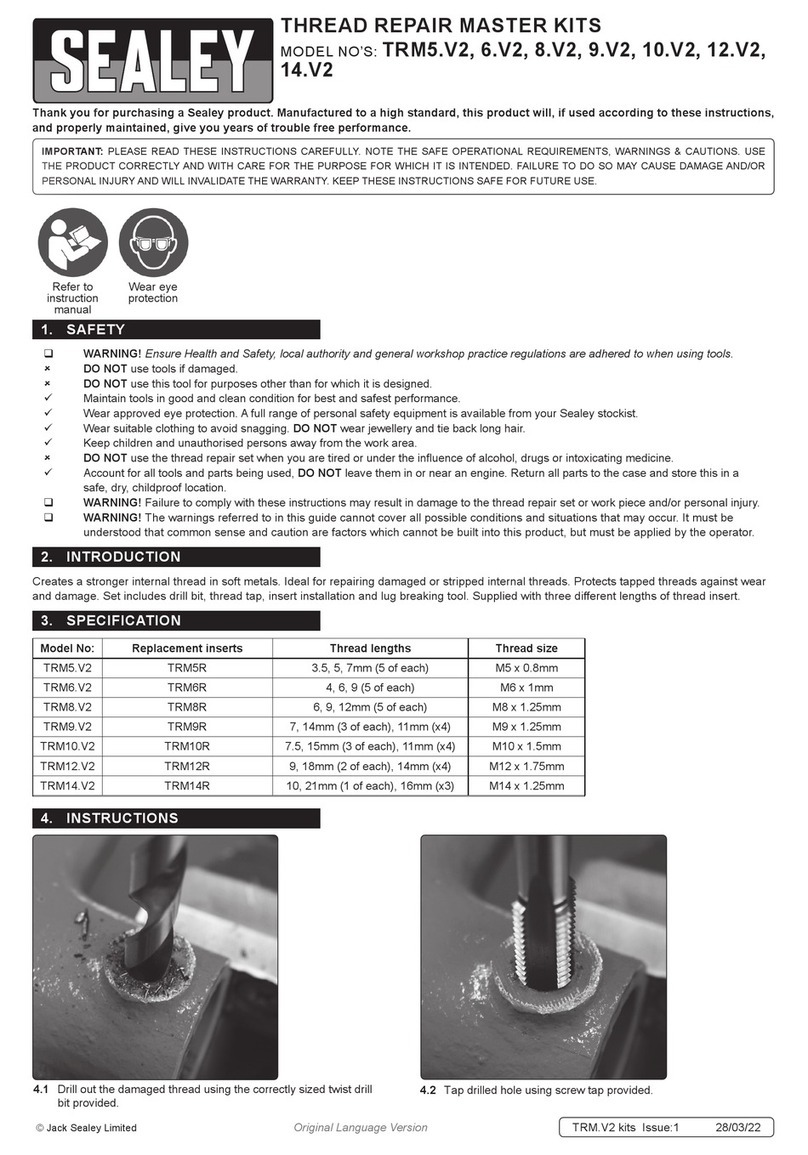
ALWAYS KEEP FORCE SCREW
WELL LUBRICATED. MOLYBDENUM/
COPPER BASED GREASE
RECOMMENDED.
DO NOT USE AIR TOOLS
The force screw maximum recommended torque is 170Nm (M18x1.5), 155Nm (M16X1.5), 99Nm (M14X1.5), 60Nm (M12X1.5), 33Nm (M10X1.5).
Exceeding these torque values may shorten the life of the force screws. The force screws are considered to be consumable items and are
NOT covered under warranty.
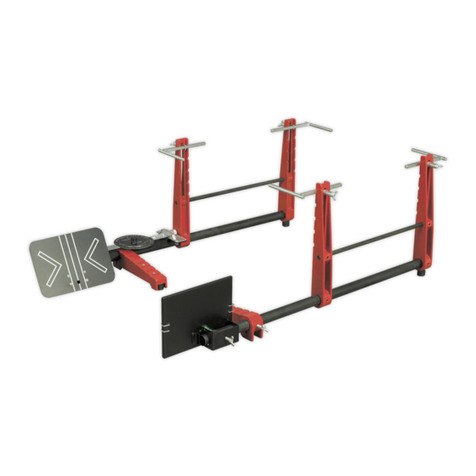
Comprehensive kit for fast and effective in-situ removal/installation of wheel bearings/suspension bushes and seals. Reduces the possibility of
damaging the bearing/suspension housings. Supplied with twenty two adapters from 44 to 90mm and ve force screws in carry case. Adapters can
also be used in a standard workshop press when in situ access isn't possible.
3.1. Adapters
External Ø mm Internal Ø mm Part No.
44 34 VS7026.01
46 36 VS7026.02
48 38 VS7026.03
50 40 VS7026.04
52 42 VS7026.05
54 44 VS7026.06
56 46 VS7026.07
58 48 VS7026.08
60 50 VS7026.09
62 52 VS7026.10
64 54 VS7026.11
66 56 VS7026.12
68 58 VS7026.13
70 60 VS7026.14
External Ø mm Internal Ø mm Part No
72 62 VS7026.15
74 64 VS7026.16
76 66 VS7026.17
78 68 VS7026.18
80 70 VS7026.19
82 72 VS7026.20
85 75 VS7026.21
90 80 VS7026.22
3.2. Force Screws
Size Part No.
M10 VS7026.23
M12 VS7026.24
M14 VS7026.25
M16 VS7026.26
M18 VS7026.27
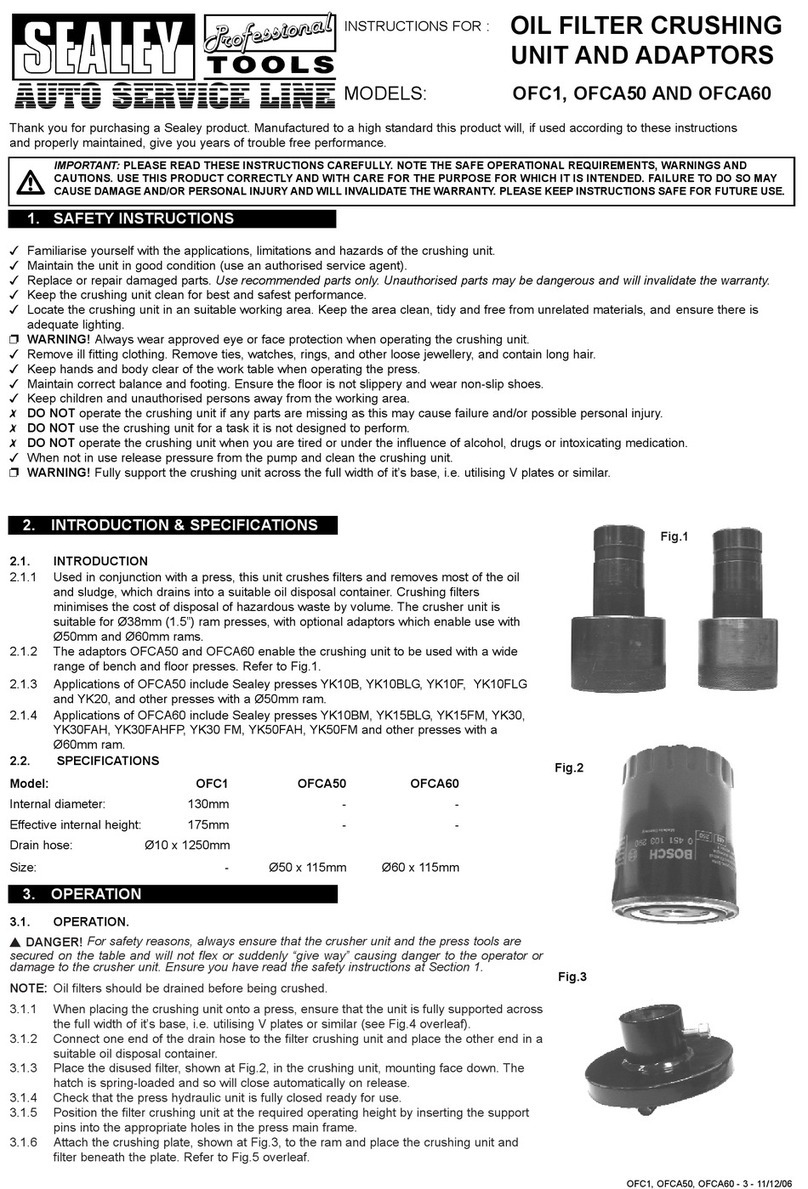
Fig.1
VS7026.V2 Issue No.1 - 02/02/15
Original Language Version
©Jack Sealey Limited
IMPORTANT: PLEASE READ THESE INSTRUCTIONS CAREFULLY. NOTE THE SAFE OPERATIONAL REQUIREMENTS, WARNINGS & CAUTIONS. USE THE PRODUCT
CORRECTLY AND WITH CARE FOR THE PURPOSE FOR WHICH IT IS INTENDED. FAILURE TO DO SO MAY CAUSE DAMAGE AND/OR PERSONAL INJURY AND WILL
INVALIDATE THE WARRANTY. KEEP THESE INSTRUCTIONS SAFE FOR FUTURE USE.
Thank you for purchasing a Sealey product. Manufactured to a high standard, this product will, if used according to these
instructions, and properly maintained, give you years of trouble free performance.
1. SAFETY
2. INTRODUCTION
3. CONTENTS
Refer to
instruction
manual
Fig.2 Fig.3
NOTE: Before installing the new bush/bearing refer to the vehicle manufacturer's service instructions, or a proprietary manual, to
establish the correct horizontal alignment or positioning of the bush. Mark where the old bush sits to ensure correct replacement.
IMPORTANT!
Ensure the area around the bush is thoroughly cleaned.
4.1. Bush/BearingRemoval(Seeg.2)
4.1.1 Choose the thickest threaded bar that will pass through the bearing/bush.
4.1.2 Lubricate the force screw and nuts with a high quality molybdenum disulphide grease.
4.1.3 Choose the correct size of adapter to locate on the external casing of the bearing/bush. This adapter must be able to pass through the
suspension arm.
4.1.4 Choose the correct size of adapter to sit square on the bearing/bush housing on the suspension arm. This must be large enough to accept
the bush as it is pushed out.
4.1.5 Insert the force screw through the bearing/bush and locate the adapters as described in 4.1.3 and 4.1.4. Attach the washers and nuts at
each end of the force screw. Refer to g.2.
4.1.6 Make sure the U shaped viewing slots are aligned so that you can see the bush being removed.
4.1.7 Make sure the adapters and force screws are correctly positioned before tightening the nuts.
4.1.8 Using the correct sized ring spanner, gradually tighten the force screw nuts to drive the bearing/bush from its housing.
DO NOT use air tools.
DO NOT exceed the maximum torque rating of each force screw as listed in g.3.
4.1.9 Unscrew the nuts to separate the adapters and retrieve the bearing/bush.
350mm long
Force Screw
(5-pieces)
Sizes/Torque*
M10X1.5/ 33Nm
M12X1.5/ 60Nm
M14X1.5/ 99Nm
M16X1.5/155Nm
M18X1.5/170Nm
*Max recommended
torque (lubricated).
4.2. Bush/Bearing Installation (Fig.2)
4.2.1 Fitting is the reverse of the removal proceedure.
4.2.2 Before installing the new bearing/bush, clean the inside of the housing with abrasive cloth to ensure it is free of debris and corrosion.
4.2.3 Lightly oil the outer ring of the bearing/bush and using a hammer gently tap the outer ring of the bearing/bush to locate it in the housing.
4.2.4 Use the largest force screw that will t through the centre of the bearing/bush and clean and lubricate its threads.
4.2.5 Select the appropriate sized adapters (see Section 4.1) assemble them and the force screws (see g.2). Once the adapters are square on
the housing and on the bearing/bush outer ring, tighten the nuts to force the bearing/bush into the suspension arm. Make sure that the
bearing/bush is square to the housing during installation.
4.2.6 Once the bearing/bush is installed, remove, clean and lubricate the components and return to their case.
4.3. Using with a workshop press
4.3.1 Where in-situ access isn't possible, the adapters can be used with a standard work shop press for bush/bearing removal and installation.
NOTE: It is our policy to continually improve products and as such we reserve the right to alter data, specifications and component parts without prior notice.
IMPORTANT: No liability is accepted for incorrect use of this product.
WARRANTY: Guarantee is 12 months from purchase date, proof of which will be required for any claim.
01284 757500
01284 703534
sales@sealey.co.uk
Sole UK Distributor, Sealey Group,
Kempson Way, Suffolk Business Park,
Bury St. Edmunds, Suffolk,
IP32 7AR
www.sealey.co.uk
4. OPERATION
Parts support is available for this product. To obtain a parts listing and/or diagram,
please log on to www.sealey.co.uk, email sales@sealey.co.uk or telephone 01284 757500.
Environmental Protection
Recycle unwanted materials instead of disposing of them as waste. All tools, accessories and packaging should be sorted,
taken to a recycling centre and disposed of in a manner which is compatible with the environment.
When the product becomes completely unserviceable and requires disposal, drain off any fluids (if applicable)
into approved containers and dispose of the product and the fluids according to local regulations.
VS7026.V2 Issue No.1 - 02/02/15
Original Language Version
©Jack Sealey Limited

Other Sealey Tools manuals

Sealey AK48 User manual

Sealey

Sealey AK48 User manual

Sealey VS2055.V4 User manual

Sealey

Sealey VS2055.V4 User manual

Sealey PS985.V2 User manual

Sealey

Sealey PS985.V2 User manual

Sealey VS8625 User manual

Sealey

Sealey VS8625 User manual

Sealey Auto Service VS0463 User manual

Sealey

Sealey Auto Service VS0463 User manual

Sealey GH60 User manual

Sealey

Sealey GH60 User manual

Sealey Power Tools SA36.V2 User manual

Sealey

Sealey Power Tools SA36.V2 User manual

Sealey VS0204A User manual

Sealey

Sealey VS0204A User manual

Sealey SA50.V3 Instruction manual

Sealey

Sealey SA50.V3 Instruction manual

Sealey GH60A User manual

Sealey

Sealey GH60A User manual

Sealey VS9111 User manual

Sealey

Sealey VS9111 User manual

Sealey SCR16 User manual

Sealey

Sealey SCR16 User manual

Sealey GSA03 User manual

Sealey

Sealey GSA03 User manual

Sealey WLC01 User manual

Sealey

Sealey WLC01 User manual

Sealey AK467D User manual

Sealey

Sealey AK467D User manual

Sealey SUPERSNAP RE83/10/SK User manual

Sealey

Sealey SUPERSNAP RE83/10/SK User manual

Sealey GA40 User manual

Sealey

Sealey GA40 User manual

Sealey RE105 User manual

Sealey

Sealey RE105 User manual

Sealey VS4980 User manual

Sealey

Sealey VS4980 User manual

Sealey SA314.V2 User manual

Sealey

Sealey SA314.V2 User manual

Sealey VS1815 User manual

Sealey

Sealey VS1815 User manual

Sealey AK45KIT User manual

Sealey

Sealey AK45KIT User manual

Sealey RE91/05.V2 User manual

Sealey

Sealey RE91/05.V2 User manual

Sealey SA811 User manual

Sealey

Sealey SA811 User manual

Popular Tools manuals by other brands

XTline XT105305 user manual

XTline

XTline XT105305 user manual

Berner 407716 operating instructions

Berner

Berner 407716 operating instructions

Con-Treat Grinder Dolly Safety & Operators & Parts Manual

Con-Treat

Con-Treat Grinder Dolly Safety & Operators & Parts Manual

Carbon MCS-352 Service manual

Carbon

Carbon MCS-352 Service manual

Powerfix Profi 282447 Operation and safety notes

Powerfix Profi

Powerfix Profi 282447 Operation and safety notes

Max TA551B/16-11 Operating instructions manual

Max

Max TA551B/16-11 Operating instructions manual

Victaulic VE106 Groove-N-Go Operating and maintenance instruction manual

Victaulic

Victaulic VE106 Groove-N-Go Operating and maintenance instruction manual

Josef Kihlberg JK35-590 operating instructions

Josef Kihlberg

Josef Kihlberg JK35-590 operating instructions

Lamello Zeta P2 instructions

Lamello

Lamello Zeta P2 instructions

DURHAND C20-025 instruction manual

DURHAND

DURHAND C20-025 instruction manual

ELEY 1043 manual

ELEY

ELEY 1043 manual

Carl Stahl Kromer 7251 manual

Carl Stahl Kromer

Carl Stahl Kromer 7251 manual

Matco Tools HG10S quick start guide

Matco Tools

Matco Tools HG10S quick start guide

Alemlube 630A Owner technical manual

Alemlube

Alemlube 630A Owner technical manual

BGS technic 1230 instruction manual

BGS technic

BGS technic 1230 instruction manual

Parkside 89169 Operation and safety notes translation of original operation manual

Parkside

Parkside 89169 Operation and safety notes translation of original operation manual

BGS GENERAL 5261 instruction manual

BGS GENERAL

BGS GENERAL 5261 instruction manual

JAMEC PEM PRO Series operating instructions

JAMEC PEM

JAMEC PEM PRO Series operating instructions

manuals.online logo
manuals.online logoBrands
  • About & Mission
  • Contact us
  • Privacy Policy
  • Terms and Conditions

Copyright 2025 Manuals.Online. All Rights Reserved.