manuals.online logo
Brands
  1. Home
  2. •
  3. Brands
  4. •
  5. Sealey
  6. •
  7. Vacuum Cleaner
  8. •
  9. Sealey PC80 User manual

Sealey PC80 User manual

1.1. ELECTRICAL SAFETY
p WARNING! It is the responsibility of the owner and the operator to read, understand and comply with the following:
You must check all electrical products, before use, to ensure that they are safe. You must inspect power cables, plugs, sockets and any other
connectors for wear or damage. You must ensure that the risk of electric shock is minimised by the installation of appropriate safety devices.
A Residual Current Circuit Breaker (RCCB) should be incorporated in the main distribution board. We also recommend that a Residual Current
Device (RCD) is used. It is particularly important to use an RCD with portable products that are plugged into a supply which is not protected
by an RCCB. If in any doubt consult a qualified electrician. You may obtain a Residual Current Device by contacting your Sealey dealer.
You must also read and understand the following instructions concerning electrical safety.
1.1.1. The Electricity at Work Act 1989 requires all portable electrical appliances, if used on business premises, to be tested by a qualified
electrician, using a Portable Appliance Tester (PAT), at least once a year.
1.1.2. The Health & Safety at Work Act 1974 makes owners of electrical appliances responsible for the safe condition of those appliances
and the safety of the appliance operators. If in any doubt about electrical safety, contact a qualified electrician.
1.1.3. Ensure that the insulation on all cables and on the appliance is safe before connecting it to the power supply. See 1.1.1. and 1.1.2.
and use a Portable Appliance Tester.
1.1.4. Ensure that cables are always protected against short circuit and overload.
1.1.5. Regularly inspect power supply cables and plugs for wear or damage and check all
connections to ensure that none is loose.
1.1.6. Important: Ensure that the voltage marked on the appliance matches the power supply
to be used and that the plug is fitted with the correct fuse - see fuse rating at right.
1.1.7. DO NOT pull or carry the appliance by the power cable.
1.1.8. DO NOT pull the plug from the socket by the cable.
1.1.9. DO NOT use worn or damaged cables, plugs or connectors. Immediately have any faulty
item repaired or replaced by a qualified electrician. When an ASTA/BS approved UK
3 pin plug is damaged, cut the cable just above the plug and dispose of the plug safely.
Fit a new plug according to the following instructions (UK only).
a) Connect the GREEN/YELLOW earth wire to the earth terminal E.
b) Connect the BROWN live wire to the live terminal L.
c) Connect the BLUE neutral wire to the neutral terminal N.
d) After wiring, check that there are no bare wires, that all wires have been correctly connected, that the cable outer insulation
extends beyond the cable restraint and that the restraint is tight.
Double insulated products, which are always marked with this symbol , are fitted with live (brown) and neutral (blue) wires only.
To rewire, connect the wires as indicated above - DO NOT connect either wire to the earth terminal.
1.1.10. Products which require more than 13 amps are supplied without a plug. In this case you must contact a qualified electrician to ensure that a
suitably rated supply is available. We recommend that you discuss the installation of an industrial round pin plug and socket with your electrician.
1.1.11. If an extension reel is used it should be fully unwound before connection. A reel with an RCD fitted is preferred since any appliance
plugged into it will be protected. The cable core section is important and should be at least 1.5mm2, but to be absolutely sure that the
capacity of the reel is suitable for this product and for others which may be used in the other output sockets, we recommend the use of
2.5mm2section cable. If extension reel is to be used outdoors, ensure it is marked for outdoor use.
1.2. GENERAL SAFETY
3Disconnect the cleaner from the power supply before servicing, changing accessories, or performing any maintenance.
3Use only genuine parts and accessories. Unauthorised parts and accessories may be dangerous and will invalidate your warranty.
3Maintain the cleaner in good condition. Use authorised agent for servicing. Keep machine clean, but DO NOT use solvents.
3Ensure that the correct paper filter bag is firmly in place before operating the cleaner. Incorrect bags may cause machine faults and will
invalidate your warranty.
3Wear protective clothing and gloves.
7DO NOT allow children or untrained persons to operate the cleaner.
7DO NOT place attachments close to your face (especially eyes, ears, etc). Do not point the hose end at other persons or animals.
s
s
DANGER! DO NOT vacuum very fine powders, hot or glowing ash, inflammable, explosive, corrosive or otherwise dangerous substances.
7DO NOT operate the unit without the paper filter bag (except when wet vacuuming).
7DO NOT leave machine running unattended. Turn power supply OFF, and DO NOT leave the vicinity until motor has come to a complete stop.
7DO NOT operate the cleaner when you are tired or under the influence of alcohol, drugs or intoxicating medication.
7DO NOT use the cleaner in the rain or in very damp conditions.
7DO NOT use the cleaner for a task it is not designed to perform.
3When not in use, store the cleaner in a safe, dry, childproof location.
INSTRUCTIONS FOR:
WET & DRY VACUUM CLEANERS
Models: PC80 & PC90P
1. SAFETY INSTRUCTIONS
IMPORTANT: PLEASE READ THESE INSTRUCTIONS CAREFULLY. NOTE THE SAFE OPERATIONAL REQUIREMENTS, WARNINGS AND
CAUTIONS. USE THE PRODUCT CORRECTLY AND WITH CARE FOR THE PURPOSE FOR WHICH IT IS INTENDED. FAILURE TO DO SO MAY
CAUSE DAMAGE AND/OR PERSONAL INJURY AND WILL INVALIDATE THE WARRANTY. PLEASE KEEP INSTRUCTIONS SAFE FOR FUTURE USE.
PC80 & PC90P - 2 - 271103
Thank you for purchasing a Sealey product. Manufactured to a high standard this product will, if used according to these instructions and
properly maintained, give you years of trouble free performance.
FUSE RATING 13 AMP
Blue
Neutral
Wire
Yellow & Green
Earth Wire
Cable
Restraint
Brown
Live
Wire
Item Description
1. Flexible hose with swivelling connectors.
2. Ergonomic grip with downflow ring.
3. Upper curved tube.
4. Lower curved tube.
5. Crevice tool.
6. Sponge filter.
7. Triangular solid waste nozzle.
8. Industrial floor brush.
9. Industrial carpet brush.
10. Industrial brush for liquids.
11. BIA basket pre-filter, polyester felt.
12. Basket.
3.2. Assembly
Note: Numbers in brackets refer to Fig. 3.
3.2.1. Attach the handgrip (1) to the container drum (2) by fitting it into the holders (3) and then tighten the locking screws (4).
Fig. 2
Fig. 3
3. CONTENTS & ASSEMBLY
3.1. Carton content
3.1.1. Release the side clips, Fig. 1, and lift the motor head from the container.
Take out the items in the container.
3.1.2. Replace and re-clip motor head.
3.1.3. Check and identify each accessory as shown in Fig. 2 and listed below.
If anything is missing or damaged contact your supplier immediately.
4. DRY VACUUM CLEANING
Using the machine as a DRY cleaner only (no liquids involved).
4.1. Ensure that the machine is unplugged at the mains.
4.2. Remove the motor head by undoing the two side clips, Fig. 1 and lifting off the head.
4.3. Ensure the cartridge filter is correctly fitted and clean, see paras. 7.1 & 7.2.
4.4. If required, fit either the basket pre-filter or a disposable collecting bag, see paras. 7.3 & 7.8.
4.5. Re-fit the motor head and secure using the two side clips, Fig. 1.
4.6. Connect the flexible hose to the drum and extension tubes as required.
4.7. Attach the appropriate end nozzle.
4.8. Ensure that the power switches, Fig. 4. are in the O (Off) position before plugging in.
4.9. Plug into the mains supply and select I on the power switches. You are now ready to use the
machine as a dry vacuum cleaner. When you have completed vacuuming, select O on the
power switches and unplug from the mains.
4.10. Check that accessories are not blocked or damaged and are in good working order. Damaged
parts must be replaced. Blocked hoses or tubes will impair performance and may damage the machine.
UNPLUG AT THE MAINS BEFORE OPENING THE CLEANER.
DO NOT VACUUM SOLVENTS OR EXPLOSIVE, INFLAMMABLE OR OTHER HAZARDOUS SUBSTANCES.
THE USE OF AN INCORRECT FILTER WILL INVALIDATE THE WARRANTY.
Fig. 4
PC80 & PC90P - 2 - 271103
Fig. 1
2. INTRODUCTION & SPECIFICATIONS
2.1. Introduction
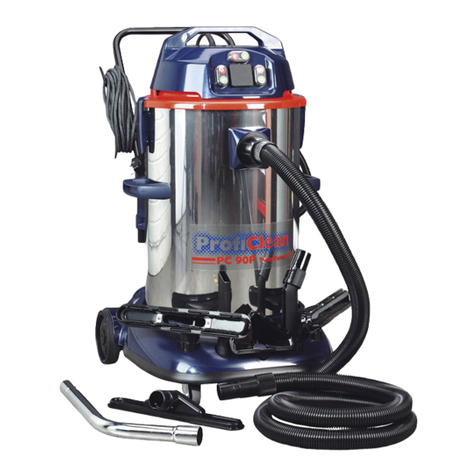
2.1.1. A new generation of advanced industrial vacuum cleaners, the extremely efficient ProfiClean twin motor range offers superior vacuuming
and is suitable for industrial and commercial applications where extra capacity and power are required to clean large areas and/or large
volumes of waste. Both models feature 2 x 1200W high power induction motors, auxiliary 800W power socket, high capacity stainless
steel drum and triple filtration system with an efficiency greater than 99.97%. Each trolley has two Ø155mm fixed wheels and two front
swivel castors for easy manoeuvrability, large bumper, power cable winder and accessories holder. The PC80 and PC90P are also
powerful liquid vacuum cleaners, with the PC90P featuring a trolley mounted electric pump for liquid discharge. Both models supplied
with full Ø45mm accessory kit.
2.2. Specifications
Model Motor Power Supply Air Flow Drum size Weight
PC80 1200W x 2 230V 195m³/h 80ltr 24kg
PC90P 1200W x 2 230V 195m³/h 90ltr 25kg
7. FILTERS
p WARNING! Disconnect the cleaner from the power supply before servicing, changing
accessories, or performing any maintenance.
7.1. Cartridge Filter - Fitting - Fig. 8
Note: Numbers in brackets refer to Fig. 8.
7.1.1. To fit the cartridge filter, remove the motor head by undoing the two side clips, Fig. 1, and
lifting off the head.
7.1.2. Position the filtering element (1) on the motor support (2), fit the adaptor disk (3) on the
filtering element (1) and secure both to the motor support by turning the adaptor
disc (3) in a clockwise direction.
7.1.3. Refit the motor head and secure using the two side clips, Fig. 1.
7.2. Cartridge Filter - Cleaning
7.2.1. To clean the cartridge filter, remove the motor head by undoing the two side
clips, Fig. 1, and lifting off the head.
7.2.2. Turn the adaptor disc, Fig. 8.3, in an anti-clockwise direction to unlock it.
7.2.3. Remove the adaptor disc and cartridge filter, Fig. 8.1.
7.2.4. Clean the cartridge filter frequently using a soft bristle brush as shown in Fig. 9.
7.2.5. To clean the filter more thoroughly, use a shower fitting and direct the jet of water from the
inside towards the outside of the filter, Fig. 9.
Note: Handle with great care as the cartridge filter becomes extremely delicate when wet.
7.2.6. Ensure that the cartridge filter is completely dry before refitting.
7.2.7. The cartridge filter should be replaced if it becomes heavily contaminated or damaged.
7.3. Basket Pre-Filter - Assembly and Fitting - Fig. 10
Note: Use this pre-filter only when the cartridge filter element is fitted.
7.3.1. To assemble the basket pre-filter, fit the filter onto the basket edge and secure in place using
the plastic snap ring provided.
Note: The plastic basket frame has six dovetail hooks underneath the upper rim. After fitting the
filter material, ensure that the plastic snap ring is secured by all six of the hooks.
7.3.2. To fit the assembled filter assembly, remove the motor head by undoing the two side clips,
Fig. 1, and lifting off the head.
7.3.3. Insert the pre-filter into the drum, Fig. 10, refit the motor head and secure using the two side
clips, Fig. 1.
6. AUXILIARY POWER SUPPLY
Note: The maximum rating for an appliance operated from the auxiliary power supply is 800W.
6.1. To use the auxiliary power supply, Fig. 6, lift the cover plate and plug in the appliance. The On/Off switch is above the socket.
Fig. 8
Fig. 9
Fig. 11
PC80 & PC90P - 2- 271103
Fig. 6
5. WET VACUUM CLEANING
p
p
WARNING! Ensure that you read, understand and apply Section 1 Safety Instructions.
DO NOT vacuum solvents, explosives, inflammable and/or hazardous liquids such as petrol,
oil, spirits, paint, thinners, acids etc.
5.1. Wet Vacuum Cleaning - PC80 & PC90P
5.1.1. Ensure that the machine is unplugged from the power supply.
5.1.2. Remove the motor head by undoing the two side clips, Fig. 1, and lifting off the head.
5.1.3. Remove the filters and the disposable collecting bag.
5.1.4. Make sure the container is clean and free from dust and dirt.
5.1.5. Fit the sponge filter (para. 7.5), replace the motor head and secure using the side clips.
5.1.6. Attach the same flexible hose as used for dry cleaning and fit the appropriate nozzle.
5.1.7. Ensure the switches are in the O position, Fig. 4, and then plug the cleaner into the power supply.
5.1.8. To vacuum large quantities of liquid, from a sink or tank, etc., do not immerse tool completely in the liquid, leave a gap at the top of
the tool opening to allow an air inflow, Fig. 5.
5.1.9. The machine is fitted with a float valve which stops the suction action when the container has reached its maximum capacity or if the
cleaner is overturned. There will be an increase in motor speed. When this happens, turn the motors off and disconnect from power supply.
5.2. Emptying the container - PC80
Note: It is advisable to empty the container when it is less than half full.
The container is not designed to store water, please ensure the container is emptied
imediately after use.
5.2.1. Ensure the machine is unplugged from the power supply.
5.2.2. Remove the motor head by undoing the two side clips, Fig. 1, and lifting off the head.
5.2.3. Empty liquid into a suitable receptacle or drain.
5.2.4. To continue vacuuming, refit head and proceed.
5.2.5. On completion of wet vacuuming, empty the container and dry inside and out.
Remember! After wet vacuuming the cartridge filter element must be refitted before dry vacuuming again.
5.3. Emptying the container - PC90P
5.3.1. The PC90P is fitted with a pump which can be used to empty the container of liquids.
5.3.2. To operate the pump, turn the vacuum motors off and plug the pump into the auxiliary power socket
on the motor head, Fig. 6.
5.3.3. Remove the cap, Fig. 7, place the drain hose into a suitable receptacle or drain and start the pump.
5.3.4. As the liquid level drops, tilt the cleaner backwards in order to empty the container completely.
5.3.5. Switch off the pump as soon as liquid stops flowing from the drain hose.
Note: If liquid stops flowing from the drain hose and there is still sufficient liquid in the container to cover
the filter, the filter may be blocked. Switch off the pump immediately and clean the filter, para. 7.10.
5.3.6. Empty the bin and clean and dry the inside and outside before storage.
Remember! After wet vacuuming the cartridge filter element must be refitted before dry vacuuming again.
Fig. 5
Fig. 7
Fig. 10
Fig. 15
7.4. Basket Pre-Filter - Cleaning - Fig. 11
7.4.1. To clean the basket pre-filter, remove the motor head by undoing the two side clips, Fig. 1,
and lifting off the head.
7.4.2. Lift out the basket pre-filter assembly.
7.4.3. Using a shower fitting, direct the jet of water from the inside towards the outside of the filter.
7.4.4. Ensure the filter is completely dry before refitting.
7.4.5. The filter should be replaced if it becomes worn or damaged.
7.5. Sponge Filter - Fitting - Fig. 12
7.5.1. To fit the sponge filter, remove the motor head by undoing the two side clips, Fig. 1, and lifting
off the head.
7.5.2. Ensure the basket pre-filter, cartridge filter and disposable collecting bag have been removed.
7.5.3. Fit the sponge filter to the motor support, ensuring the elastic of the sponge filter overlaps the
edge of the motor support.
7.5.4. Refit the motor head and secure using the two side clips, Fig. 1.
7.6. Sponge Filter - Cleaning - Fig. 13
7.6.1. To clean the sponge filter, remove the motor head by undoing the two side clips, Fig. 1, and
lifting off the head.
7.6.2. Remove the sponge filter from the motor support and rinse under running water.
Note: Do not use detergents when washing the sponge filter.
7.6.3. The filter should be replaced if it becomes worn or damaged.
7.7. US-HEPA Air Outlet Filter - Replacement - Fig. 14
7.7.1. This filter ensures that air blown back into the room is free from impurities and should be
replaced periodically.
7.7.2. Release the container by lifting the release tab as shown in Fig. 14.
7.7.3. Replace the filter ensuring that the seal is facing towards the outside of the container.
7.7.4. Refit the container ensuring it clicks into place.
7.8. Disposable Collection Bag - Fitting - Fig. 15
Note: Use the bag only when both the cartridge filter and the basket are fitted.
7.8.1. To fit the disposable collection bag, remove the motor head by undoing the two side clips,
Fig. 1, and lifting off the head.
7.8.2. Insert the bag into the container and fit the plastic flange to the air inlet union as shown in Fig. 15.
7.8.3. Spread the bag out and lap the top of the bag over the rim of the container.
7.8.4. Fit the basket into the container, refit the motor head and secure using the two side clips, Fig. 1.
p WARNING! Do not use to vacuum sharp materials.
7.8.5. The bag should be replaced when approximately half full. DO NOT re-use.
7.9. Disposable Collection Bag - Replacement - Fig. 16
7.9.1. To replace the disposable collection bag, remove the motor head by undoing the two side
clips, Fig. 1, and lifting off the head.
7.9.2. Carefully lift out the basket ensuring all the vacuumed material remains in the collection bag.
7.9.3. Remove the plastic flange from the air inlet union and close the plastic flange using the cap attached to the bag.
7.9.4. Carefully lift the bag out of the container ensuring that it is not damaged in the process.
7.10. Drain Filter - Cleaning - PC90P only - Fig. 17
7.10.1. Remove the motor head by undoing the two side clips, Fig. 1, and lifting off the head.
7.10.2. Pull the drain filter off the water outlet and clean thoroughly in clean water. The filter should be replaced if
worn or damaged.
7.10.3. Refit the motor head and secure using the two side clips.
8. TROUBLESHOOTING
9. DECLARATION OF CONFORMITY
Cleaner will not operate.
Dust comes from the motor cover.
Reduced efficiency and increased
motor speed/vibration.
No power supply.
Faulty power cable, switch or motor.
Container full of liquid.
Filter cartridge missing or damaged.
Paper filter bag and/or cartridge clogged.
Nozzle, hose or bin inlet blocked.
Check supply.
Check and repair or replace faulty item.
Empty container.
Fit or replace.
Replace paper filter bag and/or clean cartridge.
Check nozzle, hose and bin inlet for blockage.
NOTE: It is our policy to continually improve products and as such we reserve the right to alter data, specifications and component parts without prior notice.
IMPORTANT: No liability is accepted for incorrect use of this equipment.
WARRANTY: Guarantee is 12 months from purchase date, proof of which will be required for any claim.
INFORMATION: For a copy of our latest catalogue and promotions call us on 01284 757525 and leave your full name and address, including postcode.
Declaration of Conformity We, the sole UK importer, declare that the products listed below are in conformity with the following
standards and directives.
The construction files for these products are held by the Manufacturer and
may be inspected, by a national authority, upon request to Jack Sealey Ltd.
For Jack Sealey Ltd. Sole UK importer of Sealey Power Products.
Signed by Mark Sweetman 23rd December 2002
Wet & Dry Vacuum Cleaner
Models: PC80 & PC90P
73/23/EEC Low Voltage Directive
89/336/EEC EMC Directive
93/68/EEC Marking Directive
01284 757500
01284 703534 www.sealey.co.uk
Sole UK Distributor,
Sealey Group,
Bury St. Edmunds, Suffolk. sales@sealey.co.uk
e-mail Web
PC80 & PC90P - 2 - 271103
Fig. 17
Fig. 12
Fig. 13
Fig. 14
Fig. 16
ITEM PART NO. DESCRIPTION ITEM PART NO. DESCRIPTION
1186.50003H00 HANDLE 20 186.70000H0N FLOW SEPARATOR
2 186.25805H0X SCREW, 4.5x40mm 21 186.70005H0N MOTOR ABSORBER
3186.70004H0N CABLE GUIDE 22 186.70002H0N SINGLE STAGE MOTOR W/CUP
4186.80017BON FEEDER 23 186.20100H0X MOTOR GASKET
5 186.50009H00 COVER 24 186.83351H0N MOULDED RING
6 186.80100H0V TTR BIPOLAR SWITCH 25 186.83353H0N SOUND PROOFING, FRONT MOTOR SUPPORT
7 186.80202B8N GASKET/SOCKET COVER 26 186.83352H0N SOUND PROOFING, REAR MOTOR SUPPORT
8 186.80200B8N TRIPOLAR SOCKET 27 186.50000H0N MOTOR SUPPORT
9 186/50315BDV NUT, LOCK 28 186.50002H0N CONVEYOR PLATE
10 186.50007H00 HEPA POST FILTER LID 29 186.50005H0N VALVE BODY
11 186.80150H0V SET OF WIRES 30 186.50001H0N VALVE FLAP
12 186.50006H0G MOTOR COVER 31 186.70003H0N FLOAT GASKET
13 186.70007H0N LID GASKET 32 186.50014H0N FLOAT
14 186/80029BOI TERMINAL 33 186.30100H0X FLOAT PROTECTION GRID
15 186/50333BEN FASTENER, CABLE 34 186.25804H0X SCREW, 4x30mm
16 186.25806H0X SCREW 35 186.50008H0N CARTRIDGE HOLDER BASKET
17 186.30078H0X CONTACT 36 186.50023H0N PRE-FILTER CAGE
18 186.83350H0N EXTERIOR ISOLATOR RING, MOTOR DIAPHRAGM 37 186.50024H0N PRE-FILTER FLANGE
19 186.70001H0N DIAPHRAGM SEAL 38 186.01410H0N ADAPTOR DISC ASSY
Issue: 1
Date Issued: 230303
ITEM PART NO. DESCRIPTION
87 186.01300H0N HOSE WITH SWIVELLING
CONNECTORS
88 186/40020B5N TUBE,UPPER,CURVED CHROME
89 186/40021B5N TUBE,LOWER,CURVED CHROME
90 186.50094B0N GRIP
91 186/50095BON RING, OUTFLOW
92 186.50090B0N TRIANGULAR NOZZLE
93 186.50087B0N CREVICE TOOL
94 186/60005B5N FLOOR NOZZLE WITH BRUSH
95 186/60006B5N FLOOR NOZZLE,CARPET
96 186/60007B5N FLOOR NOZZLE,LIQUID
97 186.83010H0I BASKET FILTER
98 186.83035H0B SPONGE FILTER
99 186.83001H0G CARTRIDGE FILTER ELEMENT
100 186.83150H0I OUTLET AIR POST FILTER
101 186.83139H0B PACK OF 5 COLLECTION BAGS
PARTS LIST FOR:
WET & DRY VACUUM CLEANERS
Models: PC80 & PC90P
01284 757500
01284 703534 www.sealey.co.uk
Sole UK Distributor,
Sealey Group,
Bury St. Edmunds, Suffolk. sales@sealey.co.uk
e-mail Web
ITEM PART NO. DESCRIPTION ITEM PART NO. DESCRIPTION
39 186.10004H0X STAINLESS STEEL CONTAINER (PC80) 54 186.30066G0X SPRING
186.10002H0X STAINLESS STEEL CONTAINER (PC90P) 55 186.50028H0N HOOK
42 186.50017H00 AIR INLET CONNECTION 56 186.25803H0X TC SCREW, 3x16mm
43 186.70006H0N GASKET 57 186.50018H00 TROLLEY
44 186.50016H0N ELBOWED INLET TUBE 58 186.30082H0X CASTOR WHEEL
45 186.01015H00 COMPLETE HINGE 59 186/60057B5N WHEEL,REAR
46 186.50019H0N HINGE SUPPORT 60 186.40200H0X AXLE
47 186.50025H00 HANDLE 61 186.30400H0X WASHER
48 186/25120D0X STAINLESS STEEL WASHER, 26x6.2x1mm 62 186.50011H0N DRUM FASTENING BOLT
49 186.70009H0N GASKET, 26x5x2mm 63 186.30070H0X SPRING
50 186.01900H00 HANDLE SUPPORT ASSY 64 186.25715H0X M8 SQUARE NUT
51 186.50027H0N HUB 65 186.30001H0X HANDWHEEL
52 186.50029H0N WINDING BRIDGE 66 186.60030H0N SHOCK PROOF BAND
53 186.40010H0N HANDLE
PARTS LIST FOR:
WET & DRY VACUUM CLEANERS
Models: PC80 & PC90P
01284 757500
01284 703534 www.sealey.co.uk
Sole UK Distributor,
Sealey Group,
Bury St. Edmunds, Suffolk. sales@sealey.co.uk
e-mail Web
Issue: 1
Date Issued: 230303
ITEM PART NO. DESCRIPTION ITEM PART NO. DESCRIPTION
67 186.80300H0U PUMP 78 186.80151H0V SET OF WIRES
68 186.50012H00 PUMP COVER 79 186.25806H0X SCREW, 3.5x20mm
69 186.70008H0N GASKET 80 186.50032H0N TUBE BLOCKING STAPLE
70 186/80030ZOI BLOCK (SO) 81 186.50033H0N CLAMP
71 186.50078G0V CABLE FASTENER 82 186.50031H0N PLUG
72 186.70095G0N CABLE GUIDE 83 186.50027H0N HUB
74 186.50030H0N WASHER, 13x4x6mm 84 186.50029H0N WINDING BRIDGE
75 186.50020H0N PUMP FILTER WELL 85 186.30066G0X SPRING
76 186.50021H0N FILTERING SECTION 86 186.25803H0X TC SCREW, 3x16mm
77 186.60015H0N DRAIN PIPE
PARTS LIST FOR:
WET & DRY VACUUM CLEANER
Model: PC90P
01284 757500
01284 703534 www.sealey.co.uk
Sole UK Distributor,
Sealey Group,
Bury St. Edmunds, Suffolk. sales@sealey.co.uk
e-mail Web
Issue: 1
Date Issued: 230303

This manual suits for next models

1

Other Sealey Vacuum Cleaner manuals

Sealey PC195SD.V2 User manual

Sealey

Sealey PC195SD.V2 User manual

Sealey PC35230V User manual

Sealey

Sealey PC35230V User manual

Sealey SM47.V3 User manual

Sealey

Sealey SM47.V3 User manual

Sealey SA317.V2 User manual

Sealey

Sealey SA317.V2 User manual

Sealey GV180WM User manual

Sealey

Sealey GV180WM User manual

Sealey CPV144.V2 User manual

Sealey

Sealey CPV144.V2 User manual

Sealey PC300.V2 User manual

Sealey

Sealey PC300.V2 User manual

Sealey PC220 User manual

Sealey

Sealey PC220 User manual

Sealey CPV72 User manual

Sealey

Sealey CPV72 User manual

Sealey PC200.V3 User manual

Sealey

Sealey PC200.V3 User manual

Sealey PC150 User manual

Sealey

Sealey PC150 User manual

Sealey DFS35M User manual

Sealey

Sealey DFS35M User manual

Sealey PC150A User manual

Sealey

Sealey PC150A User manual

Sealey CPV100 User manual

Sealey

Sealey CPV100 User manual

Sealey PC200SDAUTO.V2 User manual

Sealey

Sealey PC200SDAUTO.V2 User manual

Sealey PC460 User manual

Sealey

Sealey PC460 User manual

Sealey PC700 User manual

Sealey

Sealey PC700 User manual

Sealey PC200SD.V3 User manual

Sealey

Sealey PC200SD.V3 User manual

Sealey PC300SD.V3 User manual

Sealey

Sealey PC300SD.V3 User manual

Sealey CP20VAV User manual

Sealey

Sealey CP20VAV User manual

Sealey VMA913 User manual

Sealey

Sealey VMA913 User manual

Sealey POWERCLEAN COMBI PC118 User manual

Sealey

Sealey POWERCLEAN COMBI PC118 User manual

Sealey PC200A User manual

Sealey

Sealey PC200A User manual

Sealey PC150A User manual

Sealey

Sealey PC150A User manual

Popular Vacuum Cleaner manuals by other brands

Philips FC8589 manual

Philips

Philips FC8589 manual

Black & Decker BDH2000SL instruction manual

Black & Decker

Black & Decker BDH2000SL instruction manual

Simplicity S36 Service manual

Simplicity

Simplicity S36 Service manual

Fein Dustex 35 LX AC manual

Fein

Fein Dustex 35 LX AC manual

Makita XBV01B owner's manual

Makita

Makita XBV01B owner's manual

Bosch GL-50 Instructions for use

Bosch

Bosch GL-50 Instructions for use

EFBE-SCHOTT BSS 450 Assembly

EFBE-SCHOTT

EFBE-SCHOTT BSS 450 Assembly

Kärcher NT 611 MWF Original instructions

Kärcher

Kärcher NT 611 MWF Original instructions

Fakir CLYDE instruction manual

Fakir

Fakir CLYDE instruction manual

Festool CT MINI I HEPA Original instructions

Festool

Festool CT MINI I HEPA Original instructions

Bissell 16981 Series user guide

Bissell

Bissell 16981 Series user guide

Panasonic MC-UL915 operating instructions

Panasonic

Panasonic MC-UL915 operating instructions

Daewoo DAVC 90-30L user manual

Daewoo

Daewoo DAVC 90-30L user manual

KONUS tipitop robot S2 instruction manual

KONUS

KONUS tipitop robot S2 instruction manual

Philips FC8269 - FC8250 user manual

Philips

Philips FC8269 - FC8250 user manual

Bestron ABG100STE instruction manual

Bestron

Bestron ABG100STE instruction manual

Hoover S2IN1300C user manual

Hoover

Hoover S2IN1300C user manual

Dolmar AZ-1020 instruction manual

Dolmar

Dolmar AZ-1020 instruction manual

manuals.online logo
manuals.online logoBrands
  • About & Mission
  • Contact us
  • Privacy Policy
  • Terms and Conditions

Copyright 2025 Manuals.Online. All Rights Reserved.