Seiko V111 User manual

V111 / V114 / V115 / V116 / V117 /
V131 / V137 / V138 / V147 /
V157 / V158 / V181 / V187
2208
V111 / V114 / V115 / V116 / V117 /
V131 / V137 / V138 / V147 /
V157 / V158 / V181 / V187
INSTRUCTIONSSOLAR WATCH
https://www.seikowatches.com/
日本語 ..................................................
English ................................................
1
JA
1
EN
Deutsch / Français / Italiano / Español /
Pусский язык / / Português /
䬁Ổᶮ㔈 /䷂橕ᶮ㔈 / 㭛⧄ /
そのほかの言語の取扱説明書は、パソコンや
スマートフォンから当社ホームページ内の
「カスタマーサービス」>「取扱説明書」
にアクセスいただき、ご覧ください。
Please refer to the Instruction Manuals
of other languages by accessing
"Customer Service"→ "Instruction"
on our Website from PC or Smartphone.

Thank you very much for choosing a SEIKO watch.
For proper and safe use of your SEIKO watch,
please read carefully the instructions in this
booklet before using it.
Keep this manual handy for easy reference.
* Length adjustment service for metallic bands is available at the retailer from
whom the watch was purchased. If you cannot have your watch repaired by
the retailer from whom the watch was purchased because you received the
watch as a gift, or you moved to a distant place, please contact SEIKO
CUSTOMER SERVICE CENTER. The service may also be available on a
chargeable basis at other retailers, however, some retailers may not undertake
the service.
* If your watch has a protective film for preventing scratches, make sure to peel
it off before using the watch. If the watch is used with the film on it, dirt, sweat,
dust, or moisture may be attached to the film and may cause rust.
EN 1
CONTENTS
1 HOW TO USE
Handling cautions ............................................ 3
Before use ....................................................... 7
Make sure to keep the watch sufficiently
charged ....................................................... 7
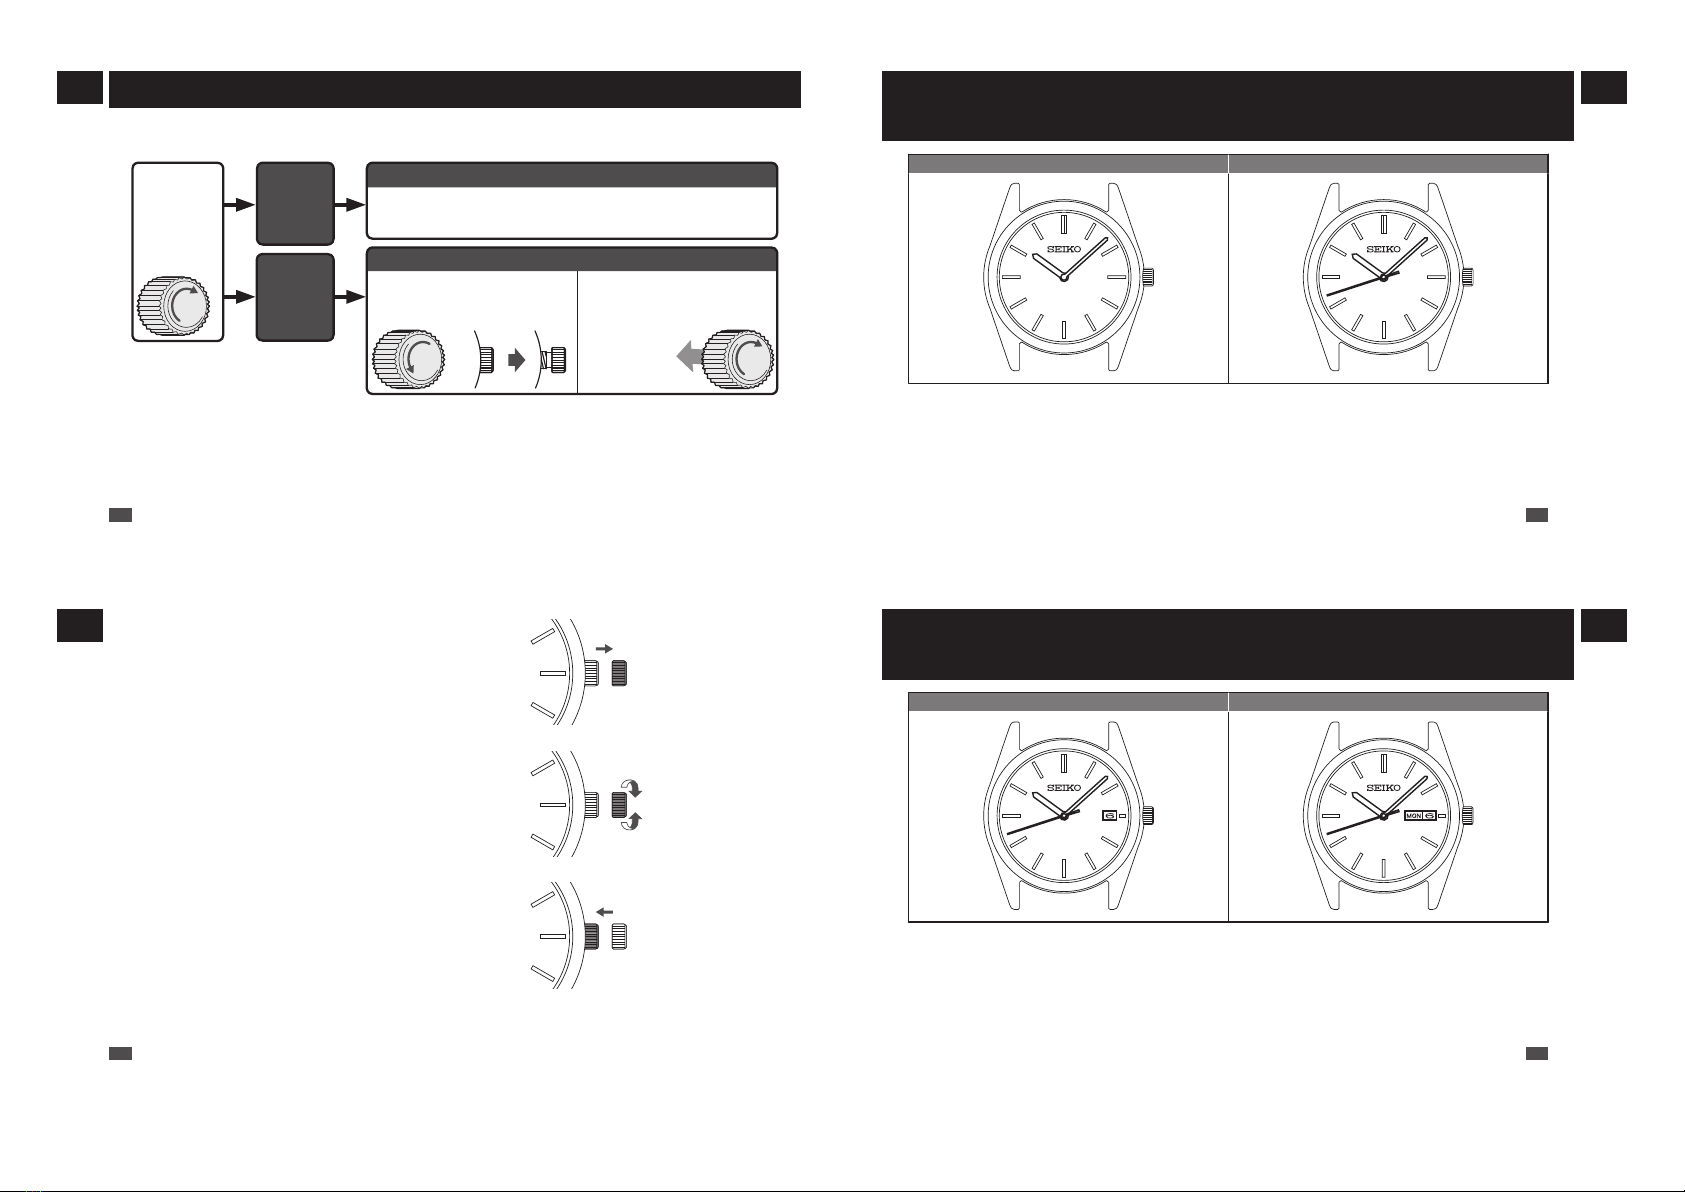
Names of the parts and their functions ............ 8
Crown .............................................................. 9
How to set the time (for models with two or three
hands)
............................................................ 10
How to set the time and date (for models with
date or date and day of the week)
................ 12
Manual date adjustment at the end of the
month
........................................................ 16
2 SOLAR CHARGING FUNCTION
Charging the battery ...................................... 17
How to charge the battery .......................... 17
Guide to charging times ............................. 18
3 TO PRESERVE THE QUALITY OF YOUR
WATCH
Power Source ................................................ 21
Daily care ...................................................... 23
Performance and type ................................... 24
Lumibrite ....................................................... 25
Water resistant performance ......................... 26
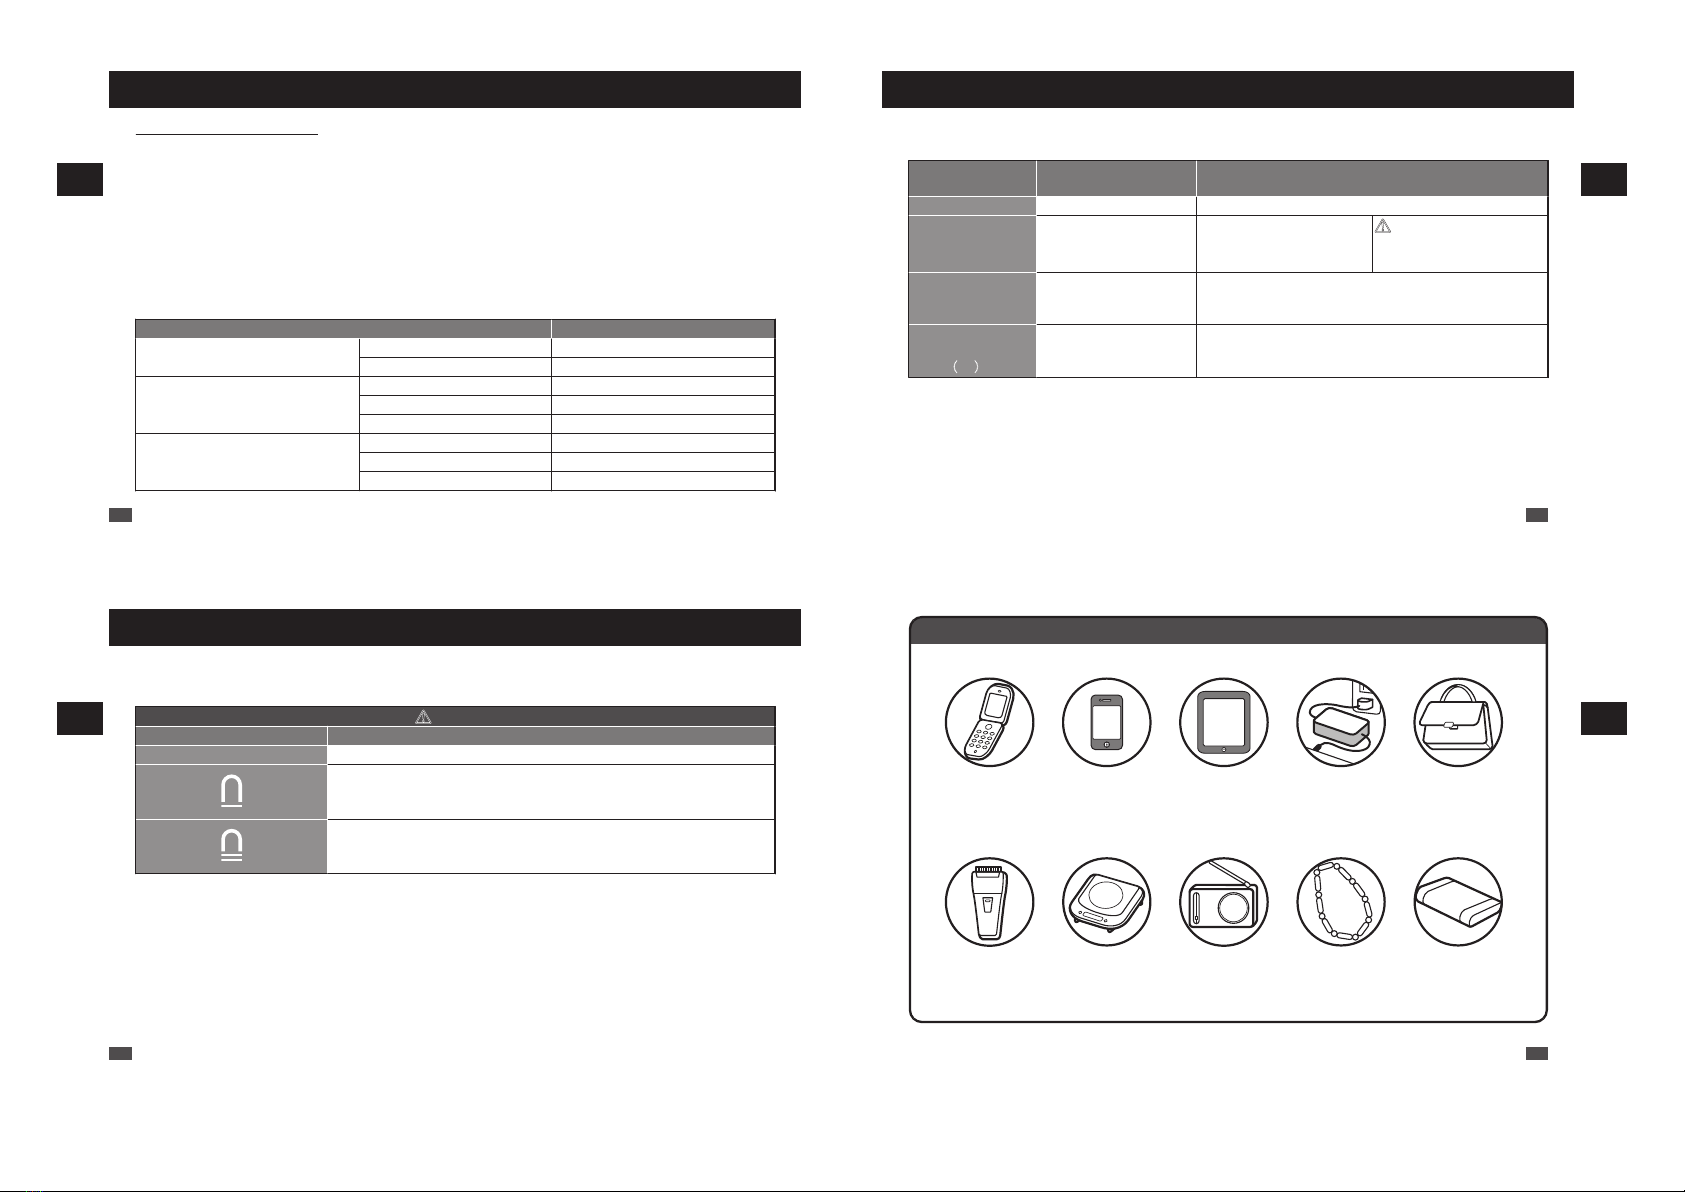
Magnetic resistant performance .................... 27
Band .............................................................. 29
How to use tri-fold type clasp for leather band
(Special clasps) ............................................. 31
After sales service ......................................... 37
4 TROUBLESHOOTING
Troubleshooting ............................................ 39
5 SPECIFICATIONS
Specifications ................................................ 41
EN 2
Handling cautions
bWARNING
Please note that there is a risk of serious consequences such as severe injury if the following
safety regulations are not strictly observed.
Immediately stop wearing the watch in following cases:
○ If the watch body or band becomes edged by corrosion etc.
○ If the pins protrude from the band.
* Immediately consult the retailer from whom the watch was purchased or SEIKO CUSTOMER SERVICE
CENTER.
Keep the watch and accessories out of the reach of babies and children.
Care should be taken to prevent a baby or a child accidentally swallowing the accessories.
If a baby or child swallows the battery or accessories, immediately consult a doctor, as it will be
harmful to the health of the baby or child.
Do not remove the secondary battery from the watch.
* About the secondary battery → Power Source → P.21
Replacement of the secondary battery requires professional knowledge and skill. Please ask the retailer
from whom the watch was purchased for replacement of the secondary battery.
Installation of an ordinary silver oxide battery can generate heat that can cause bursting and ignition.
EN 3
1
HOW TO USE
bCAUTION
Please note that there is a risk of minor injury or material damage if the following safety
regulations are not strictly observed.
Avoid the following places for wearing or keeping the watch:
○Places where volatile agents (cosmetics such as polish remover, bug repellent, thinners etc.) are
vaporizing
○ Places where the temperature drops below
5°C or rises above 35°C for a long time
○ Places affected by strong magnetism or static
electricity
○ Places affected by strong vibrations
○ Places of high humidity
○ Dusty places
If you observe any allergic symptoms or skin irritation
Stop wearing the watch immediately and consult a specialist such as a dermatologist or an allergist.
Other cautions
○ For adjusting the length of the metallic band, specialized knowledge and expertise are necessary.
Therefore, in such a case, contact the retailer from whom the watch was purchased. If you attempt
to adjust the metallic band, injury may occur to your hand or fingers, or parts of the band may be
lost.
○ Do not disassemble or tamper with the watch.
○ Keep the watch out of the reach of babies and children. Extra care should be taken to avoid risks
of any injury or allergic rash or itching that may be caused when you touch the watch.
○ When disposing of used batteries, follow the instructions of your local authorities.
○ If your watch is of the fob or pendant type, the strap or chain attached to the watch may damage
your clothes, or injure the hand, neck, or other parts of your body.
EN 4
1
HOW TO USE

bWARNING
Do not use the watch in scuba diving or saturation diving.
The various tightened inspections under simulated harsh environment, which are
usually required for watches designed for scuba diving or saturation diving, have
not been conducted on the water resistant watch with the BAR (barometric
pressure) display. For diving, use watches specifically designed for diving.
bCAUTION
Do not pour running water directly from faucet.
The water pressure of tap water from a faucet is high enough to degrade the water
resistant performance of a water resistant watch for everyday life.
EN 5
1
HOW TO USE
bCAUTION
Please note that there is a risk of minor injury or material damage if the following safety
regulations are not strictly observed.
Do not turn or pull out the crown when the watch is wet.
Water may get inside of the watch.
* If the inner surface of the glass is clouded with condensation or water droplets appear
inside of the watch for a long time, the water resistant performance of the watch is
deteriorated. Immediately consult the retailer from whom the watch was purchased or
SEIKO CUSTOMER SERVICE CENTER.
Do not leave moisture, sweat and dirt on the watch for a long time.
Be aware of a risk that a water resistant watch may lessen its water resistant
performance because of deterioration of the adhesive on the glass or gasket, or
the development of rust on stainless steel.
Do not wear the watch while taking a bath or a sauna.
Steam, soap or some components of a hot spring may accelerate the
deterioration of water resistant performance of the watch.
EN 6
1
HOW TO USE
Before use
■ Make sure to keep the watch sufficiently charged
The watch operates while charging electricity by converting light received on the dial to electrical energy.
It cannot properly operate unless the remaining energy is sufficient.
Place or store in a location receiving light, etc., to sufficiently charge electricity.
●The amount of energy stored in the watch can be checked by the
movement of the seconds hand.
* Two-second interval movement by the seconds hand is a signal that the energy of the watch is nearly depleted.
(For models with a seconds hand)
●Charging the solar battery
“How to charge the battery” → P.17
“Guide to charging times” → P.18
EN 7
1
HOW TO USE
Names of the parts and their functions
1Minute hand
2Hour hand
3Seconds hand
4Date and day of the week
5Crown
* The position and design of the display may vary depending on the model.
* Some models may not have a seconds hand or display the date or day of the week.
1
4
5
2
3
EN 8
1
HOW TO USE

Crown
There are two types of crowns, a normal crown and a screw down crown.
Please check the type of the crown of your watch.
While
pressing the
crown in, turn it
in the direction
indicated by
the arrow.
The
crown
turns.
The crown
does not
turn.
Normal crown
Pull out the crown and operate it.
Screw down crown
Unlock the crown before
operating it.
After operating the crown,
lock it.
Unscrew
Rotate while
pressing
the crown in.
* By locking the crown by screw, a screw down crown can prevent malfunction and increase water resistance.
* Be careful not to screw the crown in by force as it may damage the slots of the crown.
EN 9
1
HOW TO USE
How to set the time (for models with two or three
hands)
Models with two hands Models with three hands
EN 10
1
HOW TO USE
1Pull out the crown.
If your watch has three hands, pull out the crown when
the seconds hand is at the 12 o’clock position. (The
seconds hand will stop.)
* For models with screw down crown, please unlock the
crown before operating it.
2Turn the crown to set the time.
In order to set the time accurately, turn the minute
hand 4 to 5 minutes ahead and then return it to the
correct time.
3Push the crown back in to the normal
position.
If your watch has three hands, push the crown back
in simultaneously with a time signal.
* The telephone time signal service is helpful for setting
the seconds hand exactly.
* For models with screw down crown, please be sure to
lock the crown after operating it.
EN 11
1
HOW TO USE
How to set the time and date (for models with date
or date and day of the week)
Models with date Models with date and day of the week
EN 12
1
HOW TO USE

●Time setting
U
N
U
N
U
N
1Pull out the crown to the second click.
Pull out the crown to the second click when the
seconds hand is at the 12 o’clock position; the
seconds hand stops on the spot.
* For models with screw down crown, please unlock the
crown before operating it.
2Turn the crown to set the time.
In order to set the time accurately, turn the minute
hand 4 to 5 minutes ahead and then return it to the
correct time.
* When setting the time, make sure that AM/PM is set
correctly.
The date changes once every 24 hours.
3Push the crown back in to the normal
position in accordance with a time signal.
* The telephone time signal service is helpful for setting
the seconds hand exactly.
* For models with screw down crown, please be sure to
lock the crown after operating it.
EN 13
1
HOW TO USE
●Date (Day of the week) setting
The watch is provided with a date (day of the week) function and is so designed that the date
changes once every 24 hours.
The date (day of the week) changes around 12 o’clock midnight. If AM/PM is not properly set, the
date will change at 12 o’clock noon.
bCAUTION
Do not set the date (day of week) within the following time frames. Amending the date
during this time period may cause problems such as the date failing to change the next
day or may cause damage.
Date-displaying models: 9:00 pm to 1:00 am
Date/day of week-displaying models: 9:00 pm to 4:00 am
EN 14
1
HOW TO USE
U
N
U
N
Day of the week*
Date*
U
N
1Pull out the crown to the first click.
* For models with screw down crown, please unlock the
crown before operating it.
2Turn the crown to set the date (day of the
week).
Day of the week can be displayed either in Japanese
or English by your choice.
* Some models display the date and day of the week in
the reverse order.
3Push the crown back in to the normal
position.
* For models with screw down crown, please be sure to
lock the crown after operating it.
EN 15
1
HOW TO USE
■ Manual date adjustment at the end of the month
It is necessary to adjust the date at the end of February and 30-day months.
Ex.) To adjust the date in the A.M. period on the first day of a month following a 30-day month
The watch displays “31” instead of “1.” Pull out the crown to the first click.
Turn the crown to set the date to “1” and then push the crown back in to the normal position.
* For models with screw down crown, please be sure to lock the crown after operating it.
U
N
bCAUTION
Avoid amending the date within the following time frames. Doing so may cause damage.
Date-displaying models: 9:00 pm to 1:00 am
Date/day of week-displaying models: 9:00 pm to 4:00 am
EN 16
1
HOW TO USE

Charging the battery
■ How to charge the battery
Expose the dial to light to charge the watch.
To ensure optimal performance of the watch, make
sure that the watch is kept sufficiently charged at all
times.
Under the following situations, the energy of the watch is
likely to be depleted, resulting in stoppage of the watch:
• The watch is concealed under a sleeve.
•
The watch is used or stored under conditions where
it cannot be exposed to light for a long time.
* Be careful to make sure that the watch does not get hot when it is charging. (The operating temperature range is
-10°C to +60°C.)
* When you first start using the watch or starting it after it stopped due to a lack of charge, charge the watch sufficiently
using the table on P.18 as a guide.
* Two-second interval movement by the seconds hand is a signal that the energy of the watch is nearly depleted.
(For models with a seconds hand)
EN 17
2
SOLAR CHARGING FUNCTION
■ Guide to charging times
Charge the watch using the times below as a guide.
The “Time required for charging the watch to stable hand movement” figure is an estimate of the amount
of time required to expose the stopped watch to light and charge the watch until it reaches stable hand
movement (for models with a seconds hand: until it reaches one-second interval movement). Charge the
watch using these times as a guide.
* The required charging time slightly varies depending on the model of the watch.
●V111 / V114 / V115 / V116 / V117
Illuminance
lx (LUX) Light source Condition (Example)
Time required
for fully
charging the
watch
Time required for
charging the
watch to stable
hand movement
Time required
for charging the
watch to last for
1 day
700 Fluorescent light General offices - 60 hours 3 hours
3,000 Fluorescent light 30 W 20 cm 180 hours 10 hours 35 minutes
10,000 Sunlight Cloudy day 60 hours 4 hours 12 minutes
100,000 Sunlight
Sunny day (Under direct
sunlight on a summer
day)
10 hours 30 minutes 2 minutes
EN 18
2
SOLAR CHARGING FUNCTION
●V131 / V137 / V138
Illuminance
lx (LUX) Light source Condition (Example)
Time required
for fully
charging the
watch
Time required for
charging the
watch to stable
hand movement
Time required
for charging the
watch to last for
1 day
700 Fluorescent light General offices - 16 hours 110 minutes
3,000 Fluorescent light 30 W 20 cm 90 hours 4 hours 30 minutes
10,000 Sunlight Cloudy day 30 hours 72 minutes 8 minutes
100,000 Sunlight
Sunny day (Under direct
sunlight on a summer
day)
10 hours 6 minutes 1 minute
●V147 / V157 / V158
Illuminance
lx (LUX) Light source Condition (Example)
Time required
for fully
charging the
watch
Time required for
charging the
watch to stable
hand movement
Time required
for charging the
watch to last for
1 day
700 Fluorescent light General offices - 25 hours 110 minutes
3,000 Fluorescent light 30 W 20 cm 120 hours 6 hours 30 minutes
10,000 Sunlight Cloudy day 35 hours 2 hours 10 minutes
100,000 Sunlight
Sunny day (Under direct
sunlight on a summer
day)
9 hours 24 minutes 2 minutes
EN 19
2
SOLAR CHARGING FUNCTION
●V181
Illuminance
lx (LUX) Light source Condition (Example)
Time required
for fully
charging the
watch
Time required for
charging the
watch to stable
hand movement
Time required
for charging the
watch to last for
1 day
700 Fluorescent light General offices 82 hours 6 hours 75 minutes
3,000 Fluorescent light 30 W 20 cm 20 hours 78 minutes 18 minutes
10,000 Sunlight Cloudy day 5 hours 18 minutes 5 minutes
100,000 Sunlight
Sunny day (Under direct
sunlight on a summer
day)
126 minutes 6 minutes 2 minutes
●V187
Illuminance
lx (LUX) Light source Condition (Example)
Time required
for fully
charging the
watch
Time required for
charging the
watch to stable
hand movement
Time required
for charging the
watch to last for
1 day
700 Fluorescent light General offices 100 hours 8 hours 95 minutes
3,000 Fluorescent light 30 W 20 cm 25 hours 96 minutes 23 minutes
10,000 Sunlight Cloudy day 7 hours 24 minutes 6 minutes
100,000 Sunlight
Sunny day (Under direct
sunlight on a summer
day)
3 hours 6 minutes 3 minutes
EN 20
2
SOLAR CHARGING FUNCTION

Power Source
The battery used in this watch is a special secondary battery, which is different from ordinary
batteries.
Unlike an ordinary silver oxide battery, the secondary battery does not require periodic
replacement.
The capacity or charging efficiency may gradually lower due to long-term use or operating
environment.
In addition, long-term use may shorten the charge duration due to wear, contamination, lubricant
deterioration of mechanical parts, etc. Request repair when the performance lowers.
bWARNING
■ Notes on replacing the secondary battery
• Do not remove the secondary battery from the watch.
Replacement of the secondary battery requires professional knowledge and skill.
Please ask the retailer from whom the watch was purchased for replacement of the
secondary battery.
• Installation of an ordinary silver oxide battery can generate heat that can cause
bursting and ignition.
EN 21
3
TO PRESERVE THE QUALITY OF YOUR WATCH
* Overcharge prevention function
When the secondary battery is fully charged, the overcharge prevention function is automatically
activated to avoid further charging.
There is no need to worry about damage caused by overcharging no matter how much the
secondary battery is charged in excess of the “time required for fully charging the watch.”
* For the required time to fully charge the battery, see “Guide to charging times” → P.18.
bWARNING
■ Notes on charging the watch
•When charging the watch, do not place the watch in close proximity to an intense light
source such as lighting equipment for photography, spotlights or incandescent lights,
as the watch may be excessively heated resulting in damage to its internal parts.
•When charging the watch by exposure to direct sunlight, avoid places that easily reach
high temperatures, such as a car dashboard.
• Always keep the watch temperature under 50°C.
EN 22
3
TO PRESERVE THE QUALITY OF YOUR WATCH
Daily care
●The watch requires good daily care
• Do not wash the watch when its crown is in the extended position.
• Wipe away moisture, sweat or dirt with a soft cloth.
• After soaking the watch in seawater, be sure to wash the watch in clean pure water and wipe it dry
carefully.
Do not pour running water directly from a faucet onto the watch. Put some water into a bowl first, and
then soak the watch in the water to wash it.
* If your watch is rated as “Non-water resistant” or “water resistant for daily use,” please do not wash the watch.
“Performance and type” → P.24
“Water resistant performance” → P.26
●Turn the crown from time to time
• In order to prevent corrosion of the crown, turn the crown from time to time.
• The same practice should be applied to a screw down crown.
“Crown” → P.9
EN 23
3
TO PRESERVE THE QUALITY OF YOUR WATCH
Performance and type
The case back shows the caliber and performance of your watch
WATER RESISTANT
10
BAR
V131-0000
R2 AG
W
A
T
E
R
R
E
S
I
S
T
A
N
T
1
0
B
A
R
V
1
3
1
-
0
0
0
0
A
G
R2
Water resistant
performance
Case Number
Magnetic resistant
performance
•Water resistant performance
Please refer to P.26.
•Case Number
The number to identify the type of your watch.
•Magnetic resistant performance
Please refer to P.27 and P.28.
* The above illustration is provided as an example, therefore it may not be exactly the same as your watch.
EN 24
3
TO PRESERVE THE QUALITY OF YOUR WATCH

Lumibrite
If your watch has Lumibrite
Lumibrite is a luminous paint that absorbs the light energy of sunlight and lighting apparatuses in a short
time and stores it to emit light in the dark. For example, if exposed to a light of more than 500 lux for
approximately 10 minutes, Lumibrite can emit light for 3 to 5 hours. Please note, however, that, as Lumibrite
emits the light it stores, the luminance level of the light decreases gradually over time. The duration of the
emitted light may also differ slightly depending on such factors as the brightness of the place where the
watch is exposed to light and the distance from the light source to the watch.
* In general, when coming from a place that is bright to a place that is dark, it takes human eyes some time to adapt
to the darkness making it difficult to see objects initially. (Dark adaptation)
* Lumibrite is luminous paint that stores and emits light, which is harmless to human beings and the environment,
containing no toxic materials such as radioactive substances.
<Brightness levels>
Condition Illumination
Sunlight Fine weather 100,000 lux
Cloudy weather 10,000 lux
Indoor (Window-side during
daytime)
Fine weather More than 3,000 lux
Cloudy weather 1,000 to 3,000 lux
Rainy weather Less than 1,000 lux
Lighting apparatus (40-watt daylight
fluorescent light)
Distance to the watch: 1 m 1,000 lux
Distance to the watch: 3 m 500 lux (Average room luminance)
Distance to the watch: 4 m 250 lux
EN 25
3
TO PRESERVE THE QUALITY OF YOUR WATCH
Water resistant performance
Refer the table below for the description of water resistant performance of your watch before using.
(Please look at P.24.)
Indication on the
case back
Water resistant
performance Conditions of Use
No indication Non-water resistance Avoid drops of water or sweat
WATER
RESISTANT
Water resistance for
everyday life
The watch withstands
accidental contact with
water in everyday life.
bWARNING
Please do not use it for
swimming.
WATER
RESISTANT
5 BAR
Water resistance for
everyday life at 5-BAR
water resistant
The watch is suitable for sports such as swimming.
WATER
RESISTANT
10(20)BAR
Water resistance for
everyday life at 10 (20)-BAR
water resistant
The watch is suitable for diving not using an air cylinder.
EN 26
3
TO PRESERVE THE QUALITY OF YOUR WATCH
Magnetic resistant performance
Affected by nearby magnetism,
a watch may temporarily gain or lose time or stop operating.
bDANGER
Indication on the case back Condition of use
No indication Keep the watch more than 10 cm away from magnetic products.
Keep the watch more than 5 cm away from magnetic products.
(JIS level-1 standard)
Keep the watch more than 1 cm away from magnetic products.
(JIS level-2 standard)
If the watch becomes magnetized and its accuracy deteriorates to an extent exceeding the specified rate
under normal use, the watch needs to be demagnetized. In this case, you will be charged for
demagnetization and accuracy readjustment even if it happens within the guarantee period.
The reason why a watch is affected by magnetism
The built-in motor is provided with a magnet, which may be influenced by a strong external magnetic field.
EN 27
3
TO PRESERVE THE QUALITY OF YOUR WATCH
Examples of common magnetic products that may affect watches
Smartphone, cellular phone, tablet terminal
(Speaker, magnet of cover)
AC adapter Bag
(With magnet
buckle)
AC-powered
shaver
Magnetic
cooking device
Portable radio
(Speaker)
Magnetic
necklace
Magnetic health
pillow
EN 28
3
TO PRESERVE THE QUALITY OF YOUR WATCH

Band
The band touches the skin directly and becomes dirty with sweat or dust. Therefore, lack of care
may accelerate deterioration of the band or cause skin irritation or stain on the sleeve edge.
The watch requires a lot of attention for long usage.
●Metallic band
•Moisture, sweat or soil will cause rust even on a stainless steel band if they are left for a long time.
•Lack of care may result in a rash or cause a yellowish or gold stain on the lower sleeve edge of shirts.
• Wipe off moisture, sweat or soil with a soft cloth as soon as possible.
• To clean the soil around the joint gaps of the band, wipe it out in water and then brush it off with a soft
toothbrush.
(Protect the watch body from water splashes by wrapping it up in plastic wrap etc.)
Clean it off with a soft cloth.
• Because some titan bands use pins made of stainless steel, which has outstanding strength, rust may
form in the stainless steel parts.
• If rust advances, pins may poke out or drop out, and the watch case may fall off the band, or the clasp
may not open.
• If a pin is poking out, personal injury may result. In such a case, refrain from using the watch and request
repair.
EN 29
3
TO PRESERVE THE QUALITY OF YOUR WATCH
●Leather band
•A leather band is susceptible to discoloration and deterioration from moisture, sweat and direct sunlight.
• Wipe off moisture and sweat as soon as possible by gently blotting them up with a dry cloth.
• Do not expose the watch to direct sunlight for a long time.
• Please take care when wearing a watch with light-colored band, as dirt is likely to show up.
•
Refrain from wearing a leather band watch other than Aqua Free bands while bathing, swimming, and
when working with water even if the watch itself is water resistant enforced for daily use (10-BAR/20-BAR
water resistant).
●Polyurethane band
• A polyurethane band is susceptible to discoloration from light, and may be deteriorated by solvent or
atmospheric humidity.
• Especially a translucent, white, or pale colored band easily adsorbs other colors, resulting in color smears
or discoloration.
• Wash out dirt in water and clean it off with a dry cloth.
(Protect the watch body from water splashes by wrapping it up in plastic wrap etc.)
• When the band becomes less flexible, have the band replaced with a new one. If you continue to use
the band as it is, the band may develop cracks or become brittle over time.
Notes on skin
irritation and
allergy
Skin irritation caused by a band may result from various factors such as allergy to
metals or leathers, or skin reactions against friction on dust or the band itself.
Notes on the
length of the band
Adjust the band to allow a little clearance with your wrist to ensure proper
airflow.
When wearing the watch, leave enough room to insert a finger between
the band and your wrist.
EN 30
3
TO PRESERVE THE QUALITY OF YOUR WATCH
How to use tri-fold type clasp for leather band (Special clasps)
There are 3 types of special clasps as described below;
If the clasp of the watch you purchased is one of them, please refer to the indications.
AA Type → P.32
BB Type → P.33
CC Type → P.34
EN 31
3
TO PRESERVE THE QUALITY OF YOUR WATCH
AA Type
1Lift up the clasp to release the buckle.
Fixed loop
Movable loop
Buckle
Flap
2Open the flap.
3
Remove the pin from the adjustment hole. Slide the
band left and right, and reinsert the pin into the
adjustment hole at an appropriate length.
Pin
Adjustment hole
4Fasten the flap.
* Do not push the flap in too hard.
* When fastening the clasp, insert the tip of the band
into the movable loop and fixed loop, and then,
securely tighten the clasp.
EN 32
3
TO PRESERVE THE QUALITY OF YOUR WATCH

BB Type
1While pressing the push buttons on both sides
of the flap, lift to open the clasp.
Push button
2Remove the pin from the adjustment hole.
Slide the band left and right, and insert the pin
into the adjustment hole at an appropriate
length. Push the buckle and fasten the clasp.
Buckle
Pin
Adjustment hole
EN 33
3
TO PRESERVE THE QUALITY OF YOUR WATCH
CC Type
●How to wear or take off the watch
1While pressing the push buttons on both sides
of the flap, pull the band out of the movable
loop and fixed loop. Then open the clasp.
Fixed loop
Movable loop
Buckle
Flap
Push button
2Place the tip of the band into the movable loop
and fixed loop, and fasten the clasp by
pressing the frame of the buckle.
EN 34
3
TO PRESERVE THE QUALITY OF YOUR WATCH
●How to adjust the length of the band
1While pressing the push buttons on both sides
of the flap, pull the band out of the movable
loop and fixed loop. Then open the clasp.
Fixed loop
Movable loop
Buckle
Flap
Push button
2Press the push buttons again to unfasten the
flap.
EN 35
3
TO PRESERVE THE QUALITY OF YOUR WATCH
3Pull the pin out of an adjustment hole of the
band. Slide the band to adjust its length and
find an appropriate hole. Place the pin into the
hole.
Pin
Adjustment hole
Pin
Adjustment hole
4Fasten the flap.
EN 36
3
TO PRESERVE THE QUALITY OF YOUR WATCH

After sales service
●Notes on guarantee and repair
• Contact the retailer from whom the watch was purchased or SEIKO CUSTOMER SERVICE CENTER
for repair or overhaul.
• Within the guarantee period, present the certificate of guarantee to receive repair services.
• Guarantee coverage is provided in the certificate of guarantee.
Read carefully and retain it.
• For repair services after the guarantee period has expired, if the functions of the watch can be restored
by repair work, we will undertake repair services upon request and payment.
●Replacement with functional parts
• Please keep in mind that if original parts are not available, they may be replaced with substitutes whose
outward appearance may differ from the originals.
EN 37
3
TO PRESERVE THE QUALITY OF YOUR WATCH
●Inspection and adjustment by disassembly and cleaning (Overhaul)
• Periodic inspection and adjustment by disassembly and cleaning (overhaul) is recommended
approximately once every 3 to 4 years in order to maintain optimal performance of the watch for a long
time. According to use conditions, the oil retaining condition of your watch mechanical parts may
deteriorate, abrasion of the parts may occur due to contamination of oil, which may ultimately lead the
watch itself to stop.
As the parts such as gasket may deteriorate, water-resistant performance may be impaired due to
intrusion of perspiration and moisture.
Please contact the retailer from whom the watch was purchased for inspection and adjustment by
disassembly and cleaning (overhaul). For replacement of parts, please specify “SEIKO GENUINE
PARTS.” When asking for inspection and adjustment by disassembly and cleaning (overhaul), make
sure that the gasket and push pin are also replaced with new ones.
• When your watch is inspected and adjusted by disassembly and cleaning (overhauled), the movement
of your watch may be replaced.
EN 38
3
TO PRESERVE THE QUALITY OF YOUR WATCH
Troubleshooting
Troubles Possible causes Solutions
Reference
The watch stops
operating.
The power is completely depleted or low.
If you wear the watch every day and this
occurs, the most likely cause is the watch
is hidden by your sleeves or other
clothing when you wear it and it is not
sufficiently exposed to light.
Sufficiently charge the battery until it
reaches stable hand movement.
When you wear the watch, try to make
sure that the watch is not hidden by
your sleeves or other clothing.
Additionally, when you take the watch
off, try to place it in a bright place.
P.17
The seconds hand
is moving at two-
second intervals.
(For models with a
seconds hand)
The watch
temporarily gains/
loses time.
The watch has been left in extremely
high or low temperatures for a long
time.
If the watch returns to room
temperature, the accuracy will return
to its original state.
If it does not return to its original
state, contact the retailer from whom
the watch was purchased.
-
The watch has been left close to an
object with a strong magnetic field.
Correct this condition by moving and
keeping the watch away from the
magnetic source, and reset the time.
If this action does not correct the
condition, contact the retailer from
whom the watch was purchased.
-
You drop the watch, hit it against a
hard surface, or wear it while playing
active sports.
The watch is exposed to strong
vibrations.
If accuracy does not return after
setting the time, consult the retailer
from whom the watch was purchased.
-
EN 39
4
TROUBLESHOOTING
Troubles Possible causes Solutions
Reference
The date changes
at 12 o’clock noon.
(For models with a
date display)
AM/PM is not properly set. Advance the hands by 12 hours. P.12
Blur in the display
persists.
A small amount of water has got
inside the watch due to deterioration
of the gasket, etc.
Consult the retailer from whom the
watch was purchased. -
* Contact the retailer from whom the watch was purchased for any other troubles.
EN 40
4
TROUBLESHOOTING

Specifications
Caliber number V114/V115/
V116
V111/V117/
V131 V137/V138 V147/V157/
V158 V187
1. Features
Basic watch with
two hands (Hour
and minute
hands)
Basic watch with
three hands
(Hour, minute
and seconds
hands)
Basic watch with three hands (Hour, minute and
seconds hands), date display
2. Frequency of
crystal oscillator 32,768 Hz (Hz= Hertz, cycles per second)
3. Loss/gain
(Monthly rate)
Monthly average loss/gain ±15 seconds (If worn on the wrist in a temperature range of
5°C to 35°C)
4. Operational
temperature range -10 °C ~ +60 °C
5. Driving system
Step motor
(Hour and
minute hands)
Step motor
(Hour, minute
and seconds
hands)
Step motor (Hour, minute and seconds hands), date
display
6. Power source Secondary battery, 1 piece
7. Duration Approx.
12 months Approx. 6 months Approx.
10 months
Approx.
2months
8. IC (Integrated
Circuit) Oscillator, frequency divider and driving circuit C-MOSIC, 1 piece
* The specifications are subject to change without prior notice due to product improvements.
EN 41
5
SPECIFICATIONS
Caliber number V181
1. Features Basic watch with three hands (Hour, minute and seconds hands)
2. Frequency of
crystal oscillator 32,768 Hz (Hz= Hertz, cycles per second)
3. Loss/gain
(Monthly rate)
Monthly average loss/gain ±20 seconds (If worn on the wrist in a temperature range
of 5°C to 35°C)
4. Operational
temperature
range
-5°C ~ +50°C
5. Driving system Step motor (Hour, minute and seconds hands)
6. Power source Secondary battery, 1 piece
7. Duration Approx. 2 months
8. IC (Integrated
Circuit) Oscillator, frequency divider and driving circuit C-MOSIC, 1 piece
* The specifications are subject to change without prior notice due to product improvements.
EN 42
5
SPECIFICATIONS
Other manuals for V111
2
This manual suits for next models
12
Table of contents
Other Seiko Watch manuals

Seiko
Seiko T001 User manual

Seiko
Seiko 5K25 User manual

Seiko
Seiko Prospex SNE585P User manual

Seiko
Seiko MOMENTUS CC238 User manual

Seiko
Seiko 5Y19A Quick start guide

Seiko
Seiko 5Y85 User manual

Seiko
Seiko 1B25 User manual

Seiko
Seiko Presage SRPB41J User manual

Seiko
Seiko 5D44A Installer manual

Seiko
Seiko Presage SSA457J User manual