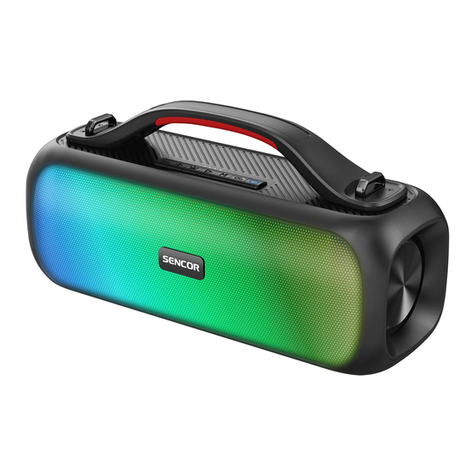
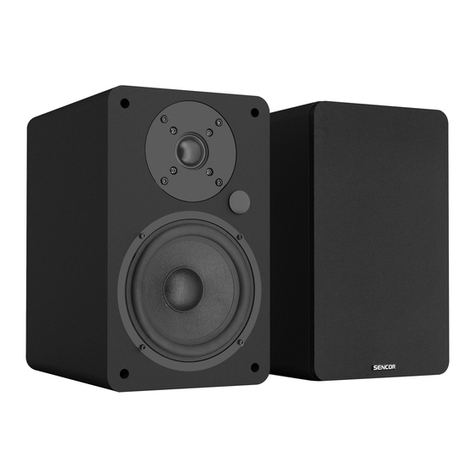
Sencor SSS 3200 KIDS User manual

SSS 3200 KIDS
EN User Manual DIgital audio system with Bluetooth
CZ Uživatelská příručka Digitální audio systém sBluetooth
SK Používateľská príručka Digitálny audio systém sBluetooth
HU Felhasználói kézikönyv Digitális audio rendszer Bluetooth-szal
PL Podręcznik użytkownika Cyfrowy system audio zBluetooth


EN 1
EN
2022 12/2022
Table of Contents
Safety Instructions....................................................................................................................................2
Guide to the Appliance............................................................................................................................4
Top View.............................................................................................................................................4
Getting Started ..........................................................................................................................................5
POWER SOURCE............................................................................................................................5
Operation instruction................................................................................................................................5
BASIC FUNCTION ...........................................................................................................................5
RADIO OPERATION ....................................................................................................................... 6
USB/ TF CARD OPERATION....................................................................................................... 6
RECORDING......................................................................................................................................7
BLUETOOTH OPERATION............................................................................................................8
LINE-IN OPERATION......................................................................................................................8
MIC/ GUITAR JACK OPERATION................................................................................................8
Technical Specifications......................................................................................................................... 9
GENERAL.......................................................................................................................................... 9
INSTRUCTIONS AND INFORMATION REGARDING THE DISPOSAL OF USED
PACKAGING MATERIALS..................................................................................................................... 10
DISPOSAL OF USED ELECTRICAL AND ELECTRONIC APPLIANCES...................................10

2 EN
EN
2022 12/2022
Safety Instructions
This product has been designed with the utmost safety in mind.
However, incorrect use may lead to electric shock or fire. This is why users should observe
the following instructions when using this device.
This device uses asemiconductor unit and contains no user serviceable parts. Do not
disassemble this device, otherwise you are exposed to the risk of electric shock. If any
damage to this product occurs, please have this product repaired by aqualified service
technician.
Power source
Power supply of this unit must be match the serial plate data.
Heat source
Keep this unit out of heat sources like stove or direct sunlight.
Cleaning
Prior to cleaning, please disconnect power first. For cleaning, don’t use liquid detergents or
caustic liquids - just clean the unit with asoft cloth.
Heavy objects
Do not place heavy objects on the unit, otherwise damage might occur.
Connecting other devices
Before connecting other devices to this unit, please make sure to disconnect power.
Otherwise damage to the unit or personal injury might occur.
Faults to be repaired
If any of the following problems occurs, please disconnect power to the unit and contact
aqualified service technician.
A. Power cord or plug is damaged.
B. Liquids or other foreign objects have penetrated inside the product.
C. If the unit does not work even if it’sbeing operated according to the instructions,
don’t press any buttons other than those described in these instructions. Otherwise,
damage to this unit may occur along with amore demanding repair.
D. This unit has fallen on the ground from abig height.
E. Burns can be smelled from the product inside.
Maintenance
If you don’t have enough technical knowledge necessary to maintain this unit, don’t
attempt to repair it by yourself. By removing cover, you are exposed to arisk of electric
shock. If needed, please contact aqualified service technician.

EN 3
EN
2022 12/2022
Replacement of parts
If you need to replace any part of this unit, ask your service technician to make
areplacement for equal spare part models. If other spare part models are used for
replacement, serious damage, electric shock or shortening the unit’slifetime may occur.
Safety check
When done with the maintenance, ask your service technician to perform an on-site
safety check to make sure that the unit’soperation is safe.
Note:
Before using this product, read these instructions carefully and keep it well for future
use.

4 EN
EN
2022 12/2022
Guide to the Appliance
Top View
2 qa ws qd ql qg qj
5 1 6 0 7 4 8 wa w; 9
qf
qs
3
qh
qk
1LED Screen
2VOLUME
3TF CARD Port
4USB Port
5PREVIOUS
6 PLAY/PAUSE button
7 NEXT
8Mode/SHIFT
9REC/DEL: Recording/delete
0MIC-IN: Microphone input jack 6,3 mm
qa LINE: LINE IN 3,5 mm
qs DC 9V: recharging port
qd DC IN: 12V recharging port
qf Recharging indicator light
qg Power: power switch:
“—” - ON; “ ” - OFF.
qh MIC: headphone/MIC 3,5 mm
qj MIC VOL:
microphone volume regulation knob
qk Earphone port
ql ECHO: Microphone reverberation
regulating knob
w; Environment Switching
wa GUITAR-IN:
Electric guitar input port 6,3 mm
ws TREBLE

EN 5
EN
2022 12/2022
Getting Started
POWER SOURCE
This unit works with rechargeable Li-ion battery (the battery capacity 1800 mAh). Fully
charge the unit (around 3 hours) before using the product for the first time. The playback
time has about 5 hours after full charging. Plugging the power adapter initiates the
charging of abattery, the charge LED indicator lights red during charging. When the
battery is fully charged the indicator will turn to blue. When the unit is with low battery,
the display will indicated battery in the right corner.
Warning:
Do not change the battery, only high-qualified personnel can perform this
operation.
Operation instruction
BASIC FUNCTION
TURNING THE UNIT ON/OFF
Press the power switch to turn the unit on/off.
SETTING THE FUNCTION MODE
By ashort press it allows to toggle between TF card / USB / LINE IN / FM / Bluetooth
receiving modes. Long press it allows to toggle between arecording folder (afolder with
the recorded files via this device) and MP3 folder.
ADJUSTING THE VOLUME/ECHO LEVEL
1. Rotate the VOLUME knob on the unit to increase or decrease the music volume.
Long press of PREVIOUS / NEXT button enables to decrease / increase the music
volume.
2. Rotate the MIC VOL. knob on the unit to increase or decrease the microphone volume.
3. Rotate the ECHO knob on the unit to increase or decrease the microphone/guitar echo
effect.
EQUALIZER (EQ) FUNCTION
In USB/TF reading status press Environment Switching to select an environment mode
(square, meeting, home, hall and personal). Along press enables to control adisco LED
lightning (turn on/off).

6 EN
EN
2022 12/2022
RADIO OPERATION
Listen to FM radio broadcasts. Repeatedly press the MODE/SHIFT button on the unit to
select aFM mode, then the display shows FM and the radio frequency.
Note: in order to get the best reception, extend the FM ANTENNA on the top of the unit
before use to its full length.
AUTO PRESET MEMORY / SCAN
To scan for stations within reception range and save them to preset memory
automatically, press shorty aPLAY/PAUSE button in an FM receiving status. It is
recommended to execute at least one full search before using radio receiving function.
All founded stations will be saved even in power-off.
After the unit is finished scanning, the unit will automatically tune to preset number
1 (P01).
TUNING TO ARADIO STATION
To tune to apreset station:
To tune to the next preset station, press the NEXT button.
To tune to the previous preset station, press the PREVIOUS button.
USB/ TF CARD OPERATION
1. Press the MODE/SHIFT button on unit to select “USB” or “TF card” mode. To insert
the TF card into the TF slot keep the TF card contacts upwards and insert the full
length of the card into the device until you hear a“click” sound. To eject the TF card
from the device press the TF card edge by afingernail or ablunt subject and the TF
card will be ejected.
2. Plug the USB memory stick/ TF card to its port. Playback will start automatically from
Track 1.
3. To pause playback, press the PLAY/PAUSE button on unit. To resume playback, press
the PLAY/PAUSE button again.
4. Long press enables to select one of playback sequencing modes (ALL - play all tracks
in sequence; FOLDER “FOd”– repeat the tracks from the folder; ONE - repeat one
track; RANDOM “rdO”– plays the tracks in arandom order).
5. To select adesired track, press repeatedly and shortly the PREVIOUS/NEXT button
respectively during playing until the desired track appears on the display. The unit will
start play automatically.
Important:
The USB port is intended for data transfer only, other devices cannot be used
with this USB connection. The use of USB extension cords is not recommended.
Don’t unplug the USB from the unit when playing or reading the USB device.

EN 7
EN
2022 12/2022
Attention:
With respect to the variety of devices on the market, the compatibility and
playability of all media is not guaranteed. Memory devices that you wish to
connect should be tested in advance or formatted to the FAT32 file format. It
may not be possible to playback protected media, files or content contained on
them. Playback tested and unprotected media and content.
Note:
Media with apower consumption greater than flash memory should only be connected
if it has its own power source.
RECORDING
Recording is available in AUX and FM mode.
Short press REC/DEL button to enable recording (USB/TF storage device need be
connected first), next short press stops the recording. During recording, reverberation
(ECHO) should be tuned to the minimum. Long press the REC/DEL button to delete
arecording file.
The sound will be saved in the RECORD folder as .WAV file.
Attention:
During recording in LINE IN mode, the input signal should be in proper strength
as you like.
During recording in FM receiving mode, keep the device in aproper location
where the radio signal will be received best to ensure optimized recording
performance.
During recording via External microphone, tune the ECHO knob to the minimum.
It is noticeable that the microphone should be located aproper distance away
from the speaker to prevent any howl-round or noise.
Note:
Arecording is available for atime depending on the storage capacity. All recorded
tracks have the same time and date of creation (the device does not support time and
date entry).

8 EN
EN
2022 12/2022
BLUETOOTH OPERATION
1. Press the MODE/SHIFT button on unit to switch to BLUETOOTH function. The LCD
display shows aflashing status message “BLUE” (ready to pair the devices).
2. Turn on the Bluetooth function on the device, scan the unit “SSS3200” and connect,
then input the password 0000 if required. The LCD display shows astatus message
“BLUE” (devices have been successfully paired).
3. Press Play to start playback.
4. Press and hold the PLAY/PAUSE button to disconnect Bluetooth.
Note:
The Bluetooth works best within 10 meters in open air.
Attention:
Some connected devices can support an undivided volume settings. If one of the
connected devices do not support this function then the volume adjustment will
work on both devices separately.
LINE-IN OPERATION
1. Press the MODE/SHIFT button on unit to select the “LINE” mode.
2. Connect your audio device to the LINE IN jack.
3. Control the playback with your audio device.
4. In LINE IN mode, short press PLAY/PAUSE button allows to toggle between mute and
normal volume.
MIC/ GUITAR JACK OPERATION
Microphone input is available in all modes.
1. Connect your microphone to the 6,3mm MIC-IN and/or to 3,5 mm MIC. Connect
your guitar to the 6,3 mm GUITAR-IN. Agreen light in “BAT FULL” area indicates
aconnected microphone/ guitar to the device.
2. Rotate the MIC VOL. knob on the unit to increase or decrease the microphone/ guitar
volume.
Note:
The TREBLE knob should be set to aminimum level while connecting an electric guitar
to the device.

EN 9
EN
2022 12/2022
Technical Specifications
GENERAL
Power Requirements AC100–240 V~60/50 Hz
Power consumption 33 W
Power output 30 W
FM frequency FM 87.5–108 MHz
AUX in jack 3.5 mm
Microphone jack 6.3 mm
Work temperature 5 °C–+40 °C
Bluetooth
Communication system Bluetooth Standard version 5.0+EDR
Reception Range 10 meter (line-of-sight distance)
Compatible Bluetooth profiles Advanced Audio Distribution Profile (A2DP)
ACCESSORIES
Instruction Booklet....................................................................................................................................1
AC Cord .......................................................................................................................................................1
Wired microphone ....................................................................................................................................1
Note:
Specifications are subject to change for continuous improvement without prior notice.

10 EN
EN
2022 12/2022
INSTRUCTIONS AND INFORMATION REGARDING THE DISPOSAL OF
USED PACKAGING MATERIALS
Dispose of packaging material at apublic waste disposal site.
DISPOSAL OF USED ELECTRICAL AND ELECTRONIC APPLIANCES
The meaning of the symbol on the product, its accessory or packaging
indicates that this product shall not be treated as household waste. Please,
dispose of this product at your applicable collection point for the recycling
of electrical & electronic equipment waste. Alternatively in some states of
the European Union or other European states you may return your products
to your local retailer when buying an equivalent new product. The correct
disposal of this product will help save valuable natural resources and help
in preventing the potential negative impact on the environment and human
health, which could be caused as aresult of improper liquidation of waste.
Please ask your local authorities or the nearest waste collection centre for
further details. The improper disposal of this type of waste may fall subject
to national regulations for fines.
For business entities in the European Union
If you wish to dispose of an electrical or electronic device, request the necessary
information from your seller or supplier.
Disposal in other countries outside the European Union
If you wish to dispose of this product, request the necessary information about the
correct disposal method from local government departments or from your seller.
The product meets EU requirements.
Hereby, FAST ČR, a.s. declares that the radio equipment type SSS 3200 KIDS is in
compliance with Directive 2014/53/EU.
The full text of the EU declaration of conformity is available at the following internet
address: www.sencor.eu
Changes in the text, design and technical specifications may be made without prior
notice and we reserve the right to make such changes.
The original version is in the Czech language.
Address of the manufacturer: FAST ČR, a.s., U Sanitasu 1621, Říčany CZ-251 01

EN Warranty conditions
Warranty card is not apart of the device packaging.
This product is warranted for the period of 24 months from the date of purchase to the end-user. Warranty is limited
to the following conditions. Warranty is referred only to the customer goods using for common domestic use. The
claim for service can be applied either at dealer’sshop where the product was bought, or at below mentioned
authorized service shops. The end-user is obligated to set up aclaim immediately when the defects appeared but
only till the end of warranty period. The end user is obligated to cooperate to certify the claiming defects. Only
completed and clean (according to hygienic standards) product will be accepted. In case of eligible warranty claim
the warranty period will be prolonged by the period from the date of claim application till the date of taking over
the product by end-user, or the date the end-user is obligated to take it over. To obtain the service under this
warranty, end-user is obligated to certify his claim with duly completed following documents: receipt, certificate of
warranty, certificate of installation.
This warranty is void especially if apply as follows:
Defects which were put on sale.
Wear-out or damage caused by common use.
The product was damaged by unprofessional or wrong installation, used in contrary to the applicable instruction
manual, used in contrary to legal enactment and common process of use or used for another purpose which
has been designed for.
The product was damaged by uncared-for or insufficient maintenance.
The product was damaged by dirt, accident of force majeure (natural disaster, fire, and flood).
Defects on functionality caused by low duality of signal, electromagnetic field interference etc.
The product was mechanically damaged (e.g. broken button, fall).
Damage caused by use of unsuitable media, fillings, expendable supplies (batteries) or by unsuitable working
conditions (e.g. high temperatures, high humidity, quakes).
Repair, modification or other failure action to the product by unauthorized person.
End-user did not prove enough his right to claim (time and place of purchase).
Data on presented documents differs from data on products.
Cases when the claiming product cannot be indentified according to the presented documents (e.g. the serial
number or the warranty seal has been damaged).
Authorized service centers
Visit www.sencor. for detailed information about authorized service centers.com

12 EN
EN
2022 12/2022
Notes

CZ 1
CZ
2022 12/2022
Obsah
Bezpečnostní pokyny ..............................................................................................................................2
Popis zařízení.............................................................................................................................................4
Pohled shora .....................................................................................................................................4
Začínáme....................................................................................................................................................5
ZDROJ NAPÁJENÍ..........................................................................................................................5
Pokyny kobsluze......................................................................................................................................5
ZÁKLADNÍ FUNKCE........................................................................................................................5
POUŽÍVÁNÍ RÁDIA......................................................................................................................... 6
POUŽÍVÁNÍ USB/ TF KARTY...................................................................................................... 6
ZÁZNAM ............................................................................................................................................7
POUŽÍVÁNÍ BLUETOOTH .............................................................................................................8
POUŽITÍ LINKOVÉHO VSTUPU..................................................................................................8
POUŽITÍ ZÁSUVKY PRO MIKROFON/ KYTARU....................................................................8
Technické údaje ....................................................................................................................................... 9
OBECNÝ ÚVOD............................................................................................................................... 9
POKYNY AINFORMACE KLIKVIDACI VYŘAZENÝCH OBALOVÝCH MATERIÁLŮ .............10
LIKVIDACE VYŘAZENÝCH ELEKTRICKÝCH AELEKTRONICKÝCH SPOTŘEBIČŮ .............10

2 CZ
CZ
2022 12/2022
Bezpečnostní pokyny
Tento výrobek byl navržen smaximálním ohledem na bezpečnost.
Jeho nesprávné použití však může vést kúrazu elektrickým proudem nebo kpožáru.
Proto musí uživatelé při používání tohoto zařízení dodržovat následující pokyny.
Toto zařízení používá polovodičovou jednotku aneobsahuje žádné součásti opravitelné
uživatelem. Nerozebírejte toto zařízení, mohli byste být vystaveni riziku úrazu elektrickým
proudem. Dojde-li knějakému poškození tohoto výrobku, nechejte si jej opravit
kvalifikovaným servisním technikem.
Zdroj napájení
Zdroj napájení pro toto zařízení musí odpovídat údajům na typovém štítku.
Zdroje tepla
Chraňte tento přístroj před zdroji tepla, jako jsou kamna nebo přímé sluneční světlo.
Čištění
Před čištěním nejprve odpojte napájení. Pro čištění nepoužívejte tekuté čisticí prostředky
ani žíravé kapaliny – přístroj očistěte jen měkkým hadříkem.
Těžké předměty
Nepokládejte těžké předměty na přístroj, mohlo by dojít kjeho poškození.
Připojení jiných zařízení
Před připojením jiných zařízení ktomuto přístroji nezapomeňte odpojit napájení.
Vopačném případě by mohlo dojít kpoškození přístroje nebo ke zranění osob.
Poruchy vyžadující opravu
Pokud dojde kněkterému znásledujících problémů, odpojte napájení přístroje aobraťte se
na kvalifikovaného servisního technika.
A. Došlo kpoškození napájecího kabelu nebo zástrčky.
B. Do přístroje se dostala kapalina nebo jiné cizí předměty.
C. Pokud přístroj nefunguje, přestože jej ovládáte podle návodu, nepoužívejte žádná jiná
tlačítka než ta, co jsou uvedena vtomto návodu. Mohlo by dojít kpoškození přístroje
azvýšení náročnosti jeho opravy.
D. Tento přístroj spadl na zem zvelké výšky.
E. Zevnitř přístroje je cítit zápach spáleniny.
Údržba
Pokud nemáte technické znalosti potřebné pro údržbu tohoto přístroje, nepokoušejte se jej
sami opravit. Po otevření krytu přístroje hrozí nebezpečí zasažení elektrickým proudem.
Vpřípadě potřeby kontaktujte kvalifikovaného servisního technika.

CZ 3
CZ
2022 12/2022
Výměna dílů
Potřebujete-li vyměnit kteroukoliv část tohoto přístroje, požádejte servisního technika
ovýměnu za stejné modely náhradních dílů. Pokud by na výměnu byly použity jiné
modely náhradních dílů, mohlo by dojít kúrazu elektrickým proudem nebo ke zkrácení
životnosti přístroje.
Kontrola bezpečnosti
Po dokončení údržby požádejte servisního technika oprovedení bezpečnostní kontroly na
místě, abyste měli jistotu, že přístroj funguje bezpečně.
Poznámka:
Před použitím tohoto výrobku si pečlivě prostudujte tyto pokyny apečlivě je uchovejte
pro budoucí použití.

4 CZ
CZ
2022 12/2022
Popis zařízení
Pohled shora
2 qa ws qd ql qg qj
5 1 6 0 7 4 8 wa w; 9
qf
qs
3
qh
qk
1LED displej
2VOLUME (hlasitost)
3Slot TF karty
4Konektor USB
5PREVIOUS (předchozí)
6 Tlačítko PLAY/PAUSE
(přehrávání/pauza)
7 NEXT (další)
8Mode/SHIFT (režim/ZMĚNA)
9REC/DEL: Záznam/smazat
0MIC-IN: Konektor mikrofonu 6,3 mm
qa LINE: Linkový vstup 3,5 mm
qs DC 9V: zásuvka dobíjení
qd DC IN: 12V zásuvka dobíjení
qf Indikátor dobíjení
qg Power (napájení): vypínač:
„—“ – ON (zapnuto); „ “ – OFF
(vypnuto).
qh MIC (mikrofon): headphone/MIC
(sluchátka/mikrofon) 3,5 mm
qj MIC VOL:
knoflík hlasitosti mikrofonu
qk Konektor pro sluchátka
ql ECHO: Knoflík regulace ozvěny
mikrofonu
w; Přepínání prostředí
wa GUITAR-IN:
Konektor elektrické kytary 6,3 mm
ws TREBLE (výšky)

CZ 5
CZ
2022 12/2022
Začínáme
ZDROJ NAPÁJENÍ
Toto zařízení používá dobíjecí Li-ion baterii (kapacita baterie je 1800 mAh). Zařízení nechte
úplně nabít (po dobu asi 3 hodin), než ho použijete poprvé. Doba přehrávání je přibližně
5 hodin při plném nabití. Připojením napájecího adaptéru se spustí nabíjení baterie,
během nabíjení bude svítit červený LED indikátor. Po úplném nabití baterie se indikátor
rozsvítí modře. Při vybité baterii se vpravém rohu displeje zobrazí symbol baterie.
Upozornění:
Nevyměňujte baterii, tuto operaci může provádět pouze vysoce kvalifikovaný
pracovník.
Návod kobsluze
ZÁKLADNÍ FUNKCE
ZAPNUTÍ/VYPNUTÍ ZAŘÍZENÍ
Stisknutím vypínače přístroj zapněte nebo vypněte.
NASTAVENÍ FUNKČNÍHO REŽIMU
Krátkým stisknutím se postupně přepíná vstup TF karty / USB / LINE IN /FM /
Bluetooth. Dlouhým stisknutím se přepíná mezi záznamovou složkou (složka se soubory
zaznamenanými tímto zařízením) asložkou MP3.
ÚPRAVA HLASITOSTI/ÚROVNĚ OZVĚNY
1. Otáčením knoflíku VOLUME (hlasitost) na zařízení se zvyšuje nebo snižuje hlasitost
hudby.
Dlouhým stisknutím tlačítka PREVIOUS¨/ NEXT (předchozí/další) se může snížit /
zvýšit hlasitost hudby.
2. Otáčením knoflíku MIC VOL (hlasitost mikrofonu) na zařízení se zvyšuje nebo snižuje
hlasitost mikrofonu.
3. Otáčením knoflíku ECHO (ozvěna) na zařízení se zvyšuje nebo snižuje projev ozvěny
mikrofonu nebo kytary.
FUNKCE EKVALIZÉRU (EQ)
Ve stavu čtení zUSB nebo TF můžete stisknutím Environment Switching vybrat typ
prostředí (náměstí, porada, domov, hala asoukromí). Dlouhé stisknutí dovoluje ovládat Led
osvětlení typu disko (zapnout nebo vypnout).

6 CZ
CZ
2022 12/2022
POUŽÍVÁNÍ RÁDIA
Poslech rozhlasových stanic vpásmu FM. Opakovaně mačkejte tlačítko MODE/SHIFT
(režim/změna) na zařízení, až se na displeji objeví FM avysílací frekvence.
Poznámka: abyste dosáhli co nejlepšího příjmu, vytáhněte nejprve anténu na horní straně
přístroje vcelé její délce.
AUTOMATICKÉ ULOŽENÍ STANIC NA PŘEDVOLBY
Chcete-li vyhledat stanice vdosahu přístroje aautomaticky je uložit do paměti předvoleb,
vrežimu FM příjmu stiskněte krátce tlačítko PLAY/PAUSE. Doporučujeme provést aspoň
jednou kompletní vyhledání stanic, než začnete funkci příjmu rádia využívat.
Všechny nalezené stanice zůstanou vpaměti ipo vypnutí napájení.
Až zařízení dokončí vyhledávání, automaticky naladí předvolbu číslo 1 (P01).
NALADĚNÍ ROZHLASOVÉ STANICE
Naladění stanice uložené na předvolbě:
Budete-li chtít přeladit na další předvolbu, stiskněte tlačítko NEXT (další).
POUŽÍVÁNÍ USB/ TF KARTY
1. Stisknutím tlačítka MODE/SHIFT (režim/změna) na zařízení vyberte režim „USB“
nebo „TF karta“. Při zasouvání do slotu držte TF kartu kontakty nahoru azasuňte ji
úplně do zařízení, až uslyšíte cvaknutí. Budete-li chtít TF kartu vysunout ze zařízení,
stiskněte její okraj nehtem nebo nějakým tupým předmětem akarta vyskočí.
2. USB paměť nebo TF kartu vložte do odpovídajícího portu. Přehrávání se automaticky
spustí od skladby 1.
3. Přehrávání pozastavíte stiskem tlačítka PLAY/PAUSE (přehrávání/pauza). Přehrávání
obnovíte opětovným stiskem tlačítka PLAY/PAUSE (přehrávání/pauza).
4. Dlouhé stisknutí dovolí zvolit jeden ze způsobů pořadí přehrávání (ALL – přehraje
postupně všechny skladby; FOLDER „FOd“ – bude opakovaně přehrávat skladby
ve složce; ONE – bude opakovat jednu skladbu; RANDOM „rdO“ – přehraje skladby
vnáhodném pořadí).
5. Budete-li si chtít vybrat určitou skladbu, stiskněte opakovaně akrátce tlačítko
PREVIOUS/NEXT (předchozí/další) vprůběhu přehrávání, až se požadovaná skladba
objeví na displeji. Zařízení začne spřehráváním automaticky.
Důležité:
Port USB je určen pouze pro přenos dat, jiná zařízení nesmíte do tohoto portu
připojovat. Použití USB prodlužovacích kabelů se nedoporučuje. Neodpojujte
USB paměťové zařízení, když zněj probíhá přehrávání, nebo když se načítá.
Table of contents
Languages:
Other Sencor Speakers manuals

Sencor
Sencor SIRIUS 2 MINI User manual

Sencor
Sencor SSS 3000 User manual

Sencor
Sencor SSS 5100 DOMUS User manual

Sencor
Sencor SSS 3100 User manual

Sencor
Sencor SSS 1400 User manual

Sencor
Sencor SSS 6701 User manual

Sencor
Sencor SSS 6800 TE User manual

Sencor
Sencor SSS 3600 KIDS User manual

Sencor
Sencor SMC BS30 User manual

Sencor
Sencor SSS 3900 KIDS User manual