21
Operation
Air is automatically drawn in after switching on the
pump. The air is scattered into very fine air bubbles by
the rotating pinwheel (4.13.1). The special construction
of the pump prevents loud noise. The skimmer (4.5) will
run full of saltwater. Accordingly, the water level of the
aquarium will sink slightly. Top up the tank accordingly
with saltwater. The pump will now blend water and air.
Starting a skimmer for the first time will often lead to
relatively strong foam formation: Extremely moist
foam will end up in the flotate cup (4.2) which quickly
runs full of water this way. In that case a temporarily
reduced air intake at the air regulator (4.19) or a very
low water level inside the skimmer will help. Each
aquarium has its own biology and its own protein level.
One day after starting up you should adjust the skim-
mer more accurately for the first time: First open the
air regulator (4.19) of air intake to the dispergator
pump as wide as possible. As a reaction, you will notice
that the water/foam level within the skimmer (4.5)
rises within the next minutes. This level can be further
raised by turning the flow adjustor (4.4) on the outlet
of the unit. The level within the skimmer should be
approximately 1 cm (0.4 in.) below the gray edge of the
flotate cup. Depending on whether you wish to skim
moist or rather dry foam you can adjust the air regula-
tor (4.19) and the flow adjustor (4.4) in combination.
However, the air intake should always be as wide open
as possible, i.e. you should primarily adjust the foam
amount with the flow adjustor (4.4). Fully open the
flow adjustor (4.4) before removing the flotate cup
(4.2) and switch off the pump if necessary as to prevent
water flowing over.
Cleaning
Although the flotate cup (4.2) is equipped with a flotate
outlet (4.2.2) through a hole in the bottom it needs to
be cleaned every few days. In particular, the inner tube
(4.2.1) of the flotate cup must be cleaned regularly as
to prevent the air bubbles of the rising foam from
bursting at the deposits that often contain fat. The flo-
tate outlet (4.2.2) in the flotate cup can be used for
directing the flotate into a larger collection container,
e.g. in case of prolonged absence.
Deposits may form on the bottom of the skimmer over
time, which reduce outflow at the bottom and thus
affect the skimmer performance. Therefore, the entire
skimmer should be cleaned regularly.
The pump (4.13) and the air intake (4.17, 4.18, 4.19)
should be checked monthly. Lime deposits may espe-
cially reduce the air intake (4.19). Clean the parts me-
chanically in case of lime deposits. Persistent deposits
can be removed by soaking the parts to be cleaned in
sera pH-minus. Do not use any household detergents.
Rinse the parts under running water before putting
them back in place. Depending on the situation, the
rotor (4.13.1) of the pump can be covered with mucous
and then needs to be cleaned. Simply twist the pump
head (4.15) carefully against the pump body, until both
parts separate at the bayonet. The rotor (4.13.1) can be
taken out of the pump along with the magnet after
you have taken off the pump head. The shaft (4.13.2)
can be pulled out of the rotor after removing the stick-
on rubber bearing (4.13.3).
SAFETY PRECAUTIONS:
Pull all mains plugs before every maintenance meas-
ure in the aquarium!
The pump performance will considerably increase in
case the air supply is suddenly switched off, the skim-
mer can overflow, and large amounts of water may be
pumped from the tank!
The sera marin Protein Skimmer 600 S is an open flow
unit. If the water flow back into the aquarium is
obstructed or otherwise not possible, large amounts
of water can be pumped from the aquarium and cause
water damage.
The sera marin Protein Skimmer 600 S is a high per-
formance, energy saving dispergator skimmer for fil-
ters underneath the aquarium (so-called filter sump). It
is easy to operate and suitable for aquariums up to
600 liters (159 US gal.).
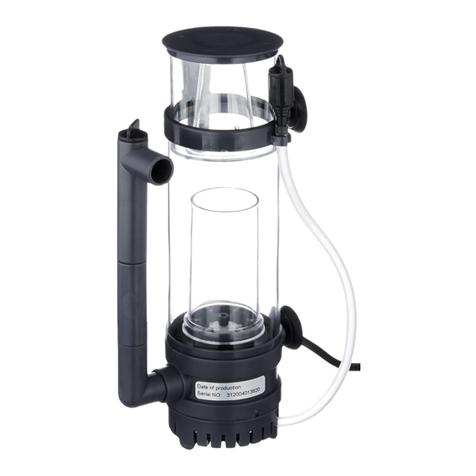
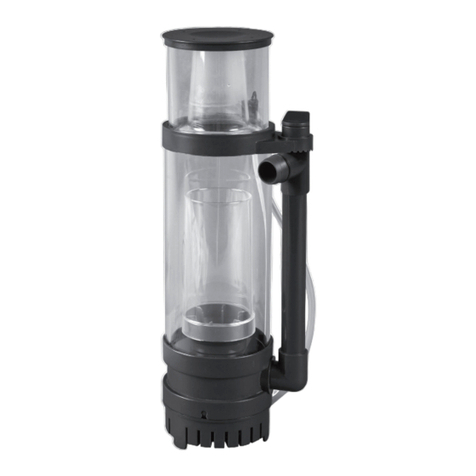
Included items (fig. 2)
2.1 Skimmer with hose connectors
2.2 Dispergator pump NP 1600 with pinwheel
2.3 Connecting hose
2.4 Flexible outlet hose
2.5 Air intake with intake nozzle and air regulator
for the dispergator pump
2.6 Flexible flotate outlet hose with adjustor
Skimmer tasks
A skimmer is the heart of saltwater aquarium filtration.
It removes protein that is permanently released into
the water by micro organisms, invertebrates and fish.
The skimmer removes particles such as floating matter
and aerates the aquarium. Protein not removed from
the water will lead to an increasing amount of harmful
substances such as ammonia, nitrite and nitrate (bac-
terial breakdown chain beginning with protein).
Keeping saltwater organisms in closed systems would
be considerably more difficult or, depending on the
requirements of the species in question, even impossi-
ble.
Function principle (fig. 3)
The dispergator pump of the sera marin Protein
Skimmer draws in the water from the aquarium or
from the filter chamber (3.1), mixes it with air drawn in
(3.3) by the resulting low pressure inside the gyro case
(3.2), where it is scattered into tiny air bubbles by the
sera pinwheel. The fine air bubbles provide a large sur-
face where the protein can settle.
This water/air mixture is pumped into the inner reac-
tion chamber of the protein skimmer (3.4). The outlet
directed sideways make the mixture rotate, keeping
the air bubbles floating for a longer time and therefore
increasing the flotate yield (3.5). The protein attaches
to the bubbles within this chamber. The bubbles accu-
mulate at the water surface and form a solid foam
while floating there. The narrowing standpipe of the
foam cup directs this foam into the flotate cup where
it is collected (3.6). The purified water flows into the
standpipe at the bottom end of the skimmer and back
into the aquarium or filter tank through the outlet
hose (3.7) connected to it.
Assembly instruction (fig. 4)
4.1 Cover
4.2 Flotate cup
4.2.1 Inner tube of flotate cup
4.2.2 Flotate outlet opening
with hose and adjustor
4.3 O-ring seal
4.4 Flow adjustor
4.5 Skimmer case
4.6 Water outlet opening
4.7 O-ring seal
4.8 Outlet hose for clean water
4.9 Hose connection
4.10 Water intake nozzle
4.11 O-ring seal
4.12.1 Hose fixture for flotate outlet
4.12.2 Hose fixture for air intake
4.12.3 Flotate outlet hose with adjustor
4.13 Dispergator pump
4.13.1 Rotor
4.13.2 Shaft
4.13.3 Rubber bearing
4.14 Holder plate
4.15 Pump head with bayonet lock
4.16 Intake opening
4.17 Air hose
4.18 Intake nozzle
4.19 Air regulator
Installation in a filter tank (fig. 1)
The sera marin Protein Skimmer 600 S is installed in a
cabinet filter. To do so, the pump (on the holder plate
4.14) is connected to the skimmer by means of the
included piece of hose before it is placed in the filter
sump (fig. 1). The recommended water level in the fil-
ter sump is between at least 10 cm (4 in.) and max.
20 cm (8 in.). It is advisable to maintain a constant water
level by means of automatic evaporation compensa-
tion as to prevent the pump running dry.
US
Information for use
sera marin Protein Skimmer 600 S
Please read these instructions carefully and keep for
future use.
Protein Skimmer 600 S
12
®
