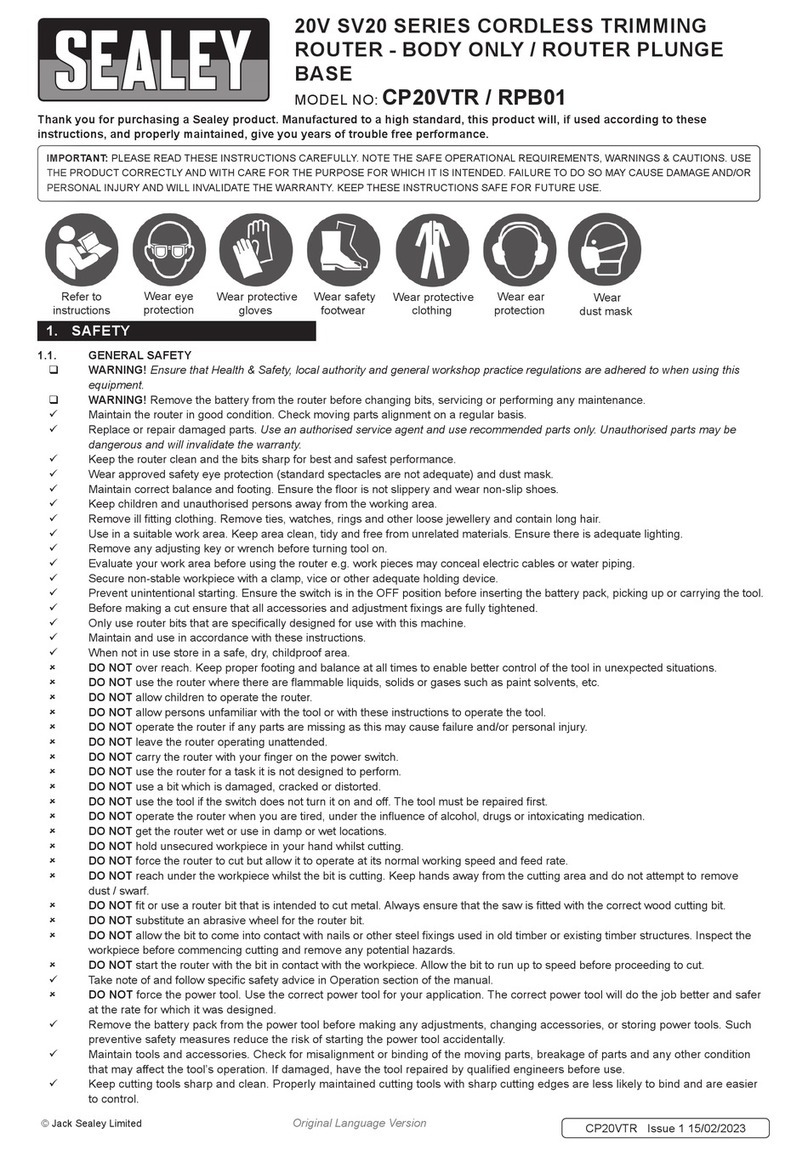
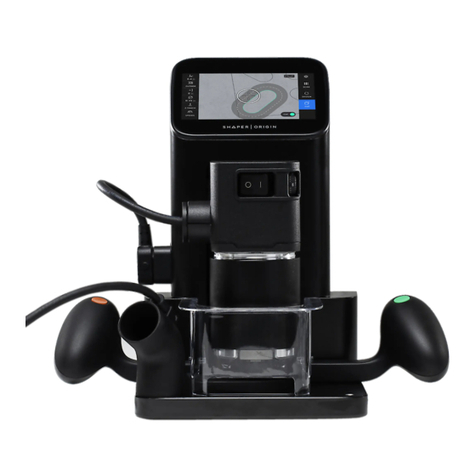
Shaper S01-EN User manual

shapertools.com
Product Manual
Guide d’utilisation
Bedienungsanleitung
S01-EN | SO1-SN | SO1-UN

i
Congratulations on your Shaper Origin™
purchase! We know you’re excited to start cutting
and carving, but please make sure to read all of
the operating instructions, warnings, and safety
notes in this booklet before operating Origin.
Welcome
More languages available
Plus de langues disponibles
Weitere Sprachen
www.shapertools.com/productmanual
Patent Infomation
Information relative aux brevets
Patentinformationen
www.shapertools.com/patents
Bienvenue
Willkommen
Nous te félicitons d’avoir acheté une Shaper
Origin™! Nous savons que tu es impatient
de commencer à fraiser et graver, mais veille
à t’assurer de bien lire toutes les directives
d’utilisation, les avertissements et les notes de
sécurité de ce manuel avant d’utiliser Origin.
Herzlichen Glückwunsch zum Kauf deiner
Shaper Origin™! Wir wissen, dass du dich
schnellstmöglich dem Fräsen und Gravieren
widmen möchtest, jedoch solltest du zuerst
sämtliche Bedienungsanweisungen, Warnungen
und Sicherheitshinweise in dieser Betriebs-
anleitung durchzulesen, bevor du Origin nutzt.

shapertools.com ii
support.shapertools.com
Our support page has answers to frequently
asked questions about using Origin: choosing
router bits, working with different materials,
effectively clamping and securing your workpiece,
maintaining Origin, and more. We highly
recommend you read these tips before getting
started. You’ll also nd contact info for Shaper
customer support.
tutorials.shapertools.com
Visit our tutorials page for written and video
instructions about Origin’s many features and
capabilities. The tutorial videos will also walk you
through the creation of ShaperHub™ projects.
hub.shapertools.com
When you’re ready to make your rst project,
check out ShaperHub for ready-to-cut projects
with detailed instructions, material lists, and
design les.
Visit the link below for a complete walk-
through and some demos to get you familiar
with Origin:
shapertools.com/start
Quick Start
English

iii
interior cut
black stroke and white ll
exterior cut
black stroke and black ll
on-line cut
gray stroke
pocketing cut
gray ll
guide
blue stroke or blue ll
Designing for Origin

shapertools.com iv
support.shapertools.com
Notre page de soutien contient des réponses aux
questions fréquemment posées sur l’utilisation
d’Origin : le choix de fraises, le travail avec divers
matériaux, le serrage et la xation efcaces
de ta pièce, l’entretien d’Origin etc. Nous te
recommandons fortement de lire ces conseils
avant de te lancer. Tu trouveras également les
coordonnées de soutien à la clientèle de Shaper.
tutorials.shapertools.com
Rends-toi sur notre page de tutoriels pour des
directives écrites et vidéos quant aux nombreuses
fonctionnalités et capacités d’Origin. Les tutoriels
te guideront également à travers la création de
projets ShaperHub™.
hub.shapertools.com
Lorsque tu es prêt à réaliser ton premier projet,
consulte ShaperHub pour accéder à des projets
prêts à fraiser accompagnés de directives
détaillées, de listes de matériaux et de chiers de
conception.
Rends-toi sur le site indiqué ci-dessous
pour bénécier d’un tour d’horizon complet
et de quelques présentations pour te
familiariser avec Origin:
shapertools.com/start
Guide de démarrage rapide
Français

v
Fraisage intérieur
Contour noir et intérieur blanc
Fraisage intérieur
Contour noir et intérieur noir
Fraisage sur ligne
Contour gris
Fraisage de poche
Intérieur gris
Guide
Contour bleu ou intérieur bleu
Concevoir pour Origin

shapertools.com vi
support.shapertools.com
Unsere Support-Seite hat Antworten auf häug
gestellte Fragen rund um die Nutzung von
Origin: Die Auswahl des Fräsers, die Bearbeitung
unterschiedlicher Materialien, die effektive
Befestigung und Sicherung deines Werkstücks,
die korrekte Instandhaltung des Geräts und vieles
mehr. Am besten schaust du dir diese Tipps vor
Inbetriebnahme deiner Origin an. Auf dieser Seite
ndest du außerdem Kontaktinformationen zum
Shaper Support.
tutorials.shapertools.com
Unsere Tutorial-Seite beinhaltet Anleitungen und
Videos zu Origins Eigenschaften und Fähigkeiten.
hub.shapertools.com
Sobald du für dein erstes Projekt bereit
bist, ndest du auf ShaperHub eine große
Auswahl an vorgefertigten Projekten mit
ausführlichen Anleitungen, Materiallisten und
Konstruktionsdateien.
Um einen Überblick über die ersten
Schritte mit Origin zu erhalten, besuche
folgenden Link:
shapertools.com/start
Schnellstart
Deutsch

vii
Innenkontur
schwarze Linie und weiße Füllung
Außenkontur
schwarze Linie und schwarze Füllung
Auf der Kontur
graue Linie
Tasche
graue Füllung
Hilfskontur
blaue Linie oder blaue Füllung
Gestalten für Origin

shapertools.com 1
Table of Contents
2 What’s Included
4 Overview
6 Basics
14 Using ShaperTape™
17 Safety & Care
23 Compliance
User Guide
(English Version)

2
What's Included
Shaper Origin
Dust Collection Hose
ShaperTape™

shapertools.com 3
What's Included
4mm T Handle
Hex Wrench
3mm Upcut
Router Bit 6mm Upcut
Router Bit
Finger Guard
Engraving
Bit
19mm Wrench

4
Overview
Touchscreen: Origin’s 5 inch multi-touch display
controls Origin’s many features.
SM1 Spindle: Origin is equipped with a powerful
720-Watt motor. It features variable speed control
and on-board electronics to deliver soft start,
thermal and overload protection, and constant
speed under load.
Dust Port: Origin is intended to be used with a
dust extraction system. Origin’s dust port accepts
many common vacuum hose sizes, or you may
use the hose that’s included with Origin.
Spindle Switch: You’re in control. For your
safety, Origin’s SM1 Spindle will never turn on
automatically. Use the spindle switch to turn on
the spindle when you’re ready to start cutting.
Spindle Mount: The SM1 Spindle is designed to
be removable for safe and easy router bit
changes. After loosening the spindle mount bolt,
simply remove or insert the SM1 Spindle.
Handles: Always rmly grasp both handles when
operating Origin. The buttons on each handle
map to the functions shown on the screen.
touchscreen
spindle
dust port
spindle switch
spindle mount
handle

shapertools.com 5
Overview
Speed Control: The SM1 Spindle has adjustable
speed from 10 000 to 26 000 RPM, with the lowest
speed mapped to 1 on the dial, and the highest
speed mapped to 6. Use this dial to adjust the
spindle rotation speed. For a list of recommended
cut speeds for various materials and applications,
visit support.shapertools.com.
Z-Axis: Origin’s Z-Axis is responsible for plunging
and retracting the SM1 Spindle.
Collet Lock: Press the collet lock and use the
included 19mm wrench to change router bits in
the SM1 Spindle.
Back Handle: On the go? Carry Origin using the
back handle.
Camera: Origin uses a computer vision system
to track its location on your workpiece. Keep the
camera unobstructed and the lens cover glass
clean to ensure the best cutting experience.
USB Port: No network? No problem. If your Origin
is not in range of a Wi-Fi network, you can also
transfer design les using a USB ash drive.
speed control
z-axis
collet lock
back handle
camera
usb port

6
Basics
2. Gently slide the spindle mount and spindle up.
3. Remove the red spindle lock by tilting it up
and pulling it forward.
Retain the shaft lock and spindle lock for
future use. Reinstall both locks to keep the
spindle stationary during transit or shipping.
1. Remove the red shaft lock by rmly pulling on
the circular handle.
Removing the Shaft Lock
and the Spindle Lock

shapertools.com 7
Basics
IMPORTANT: Always unplug the SM1 Spindle from
Origin before removing the spindle from the
spindle mount.
To enable unobstructed access to change the
router bit, the SM1 Spindle must be removed
from Origin. Use the included 4mm T-handle hex
wrench to loosen the spindle mount bolt. Once
loosened, lift the spindle to remove it.
To reinstall the spindle, slide it into the spindle
mount with the ON/OFF switch facing towards
you. A groove on the back of the spindle will only
allow it to be inserted in the correct orientation,
with the cable exiting on the left side. Gently
reinsert the spindle.
IMPORTANT: Be sure to tighten the spindle mount
bolt after fully inserting the spindle into the
spindle mount.
Finally, ensure the switch is in the “OFF” position
and plug the spindle cable back into the side
of Origin.
Removing and Installing the SM1 Spindle

8
Basics
To change router bits, rst unplug the SM1 Spindle
from Origin and remove it from the spindle
mount, as described earlier. Press the collet lock
while loosening or tightening the collet locking
nut with the included 19mm wrench. Do not
tighten the collet locking nut until a router bit is
inserted. To install a different collet, fully unscrew
the previous collet, and screw the new collet on
by hand.
WARNING: Maximum allowable cutter diameter is
1 inch (25 mm).
Powering Origin
Plug Origin into a grounded wall outlet, either
directly, or through a properly rated extension
cord, surge protector, or power strip.
WARNING: Do not plug Origin into the switched
outlet available on some dust extractors.
Unlike most power tools, Origin has an internal
computer, making these outlets unsuitable for
Origin.
Changing the Router Bit

shapertools.com 9
Basics
Safety rst. Always use eye and ear protection
when operating Origin. Always keep the nger
guard installed when the spindle is plugged in - it
snaps into place magnetically. Keep ngers and
other body parts away from the collet and the
router bit. Operate Origin with two hands.
Safely Using Origin
Use appropriate extension cords. Only use
undamaged extension cords that match Origin’s
plug. Extension cords should have an adequate
voltage and current rating that meets or exceeds
the electrical specications listed on the
product label.
Always make sure that the spindle motor
connector is securely plugged into the side of
Origin while operating.
Unplug Origin’s plug from the power receptacle
in the wall to completely remove power supplied
to the tool. The spindle power switch removes
power supplied to the spindle only. The OFF
switch position does not remove power supplied
to the non-spindle portions of Origin.
Origin is a class I tool with double insulation
and/or reinforced insulation throughout.
Origin includes a earthing connection used for
functional grounding purposes.

10
Basics
When setting up your workpiece, use clamps,
adhesives, or other practical means to secure
the workpiece to a stable work table. It is
recommended to use a spoil board underneath
your material when doing a through-cut.
Workpieces can be any size, so long as they are
xtured safely.
Origin is designed for cutting wood, plastic,
soft metals, and similar materials. Always use a
cutting bit that is appropriate for the task, and
that is designed to handle the spindle’s max
speed. The SM1 spindle on Origin can operate
between 10,000 RPM and 26,000 RPM.
Routing depth is set via the integrated
touchscreen. Do not attempt to adjust the
routing depth by lifting the whole tool. Always
install the spindle fully into the tool, and install
the nger guard by snapping it on magnetically.
If the spindle is stalled due to excess load it will
remain off until the spindle is turned off and
on again. Turn the spindle off and remove the
obstruction before turning the spindle on again.
Origin’s Power cord is not user-replaceable. If
Origin’s power cord is damaged, contact Shaper
customer support.
material
spoil board
table

shapertools.com 11
Basics
Only use Shaper-recommended accessories with
Origin.
Always Use Dust Extraction with Origin. Connect
a dust extractor hose to Origin’s dust port.
Keep Origin’s mechanisms clean. Wearing suitable
eye protection, use a vacuum to remove debris
from Origin’s mechanisms.
Periodically open chip tray to remove debris.
Adhere workpiece elements that may come
loose during cutting. When cutting items out of
workpiece materials, use PSA (Pressure Sensitive
Adhesive) or alternative methods to hold
elements down to your workbench and/or spoil
board. This will prevent items from coming loose
when cutting is complete.
Only use router bits with a shank size that
matches the collet installed in Origin’s spindle
(i.e. use 6mm shank bits with a 6mm collet,
and 1/4” shank bits with a 1/4” collet). Only use
collets available from Shaper. Cutter diameter
can exceed shank diameter, but the MAXIMUM
ALLOWABLE CUTTER DIAMETER is 1” (25mm).

12
Basics
Check work area for items added after
initial scan. Origin’s on-screen images are
reconstructions based on previous scans. They
may not show items on your workpiece that were
placed there after a scan. Always check your work
area for potential obstacles immediately before
routing.
Only operate Origin with the SM1 Spindle
provided by Shaper. Use with any other router
spindle will cause damage and may result in a
risk of electric shock.
Do not forcibly move the Z-Axis carriage up
and down. Doing so may cause damage to
Origin’s electronics.
Do not forcibly move the spindle mount from
side to side. Doing so may cause damage to
Origin’s electronics.
Cut at an appropriate depth per pass. Origin can
easily and consistently do multiple passes on
your design at increasing depths. Do not attempt
to cut deeper in one pass than Origin’s movement
stage or spindle can handle. If Origin sounds
like it is audibly struggling, reduce the depth of
your cut, change your material or router bit, or
adjust spindle speed. Visit support.shapertools.
com for recommendations on how to cut various
materials.
Cut at an appropriate feed rate. If Origin’s
correction range is unable to keep up with your
feed rate, move Origin slower, reduce the depth
of cut, change your router bit, and/or adjust the
spindle speed. Visit support.shapertools.com for
recommendations on appropriate feed rates for
various materials.
Other manuals for S01-EN
1
This manual suits for next models
2
Table of contents
Languages:
Other Shaper Wood Router manuals