ENGLISH
CONTENTS
IMPORTANT SAFETY INSTRUCTIONS ....
E-2
•WARNING ....................................................E-2
•CAUTIONS CONCERNING OPERATION ...E-2
•REMOTE CONTROL LIMITATIONS ............E-3
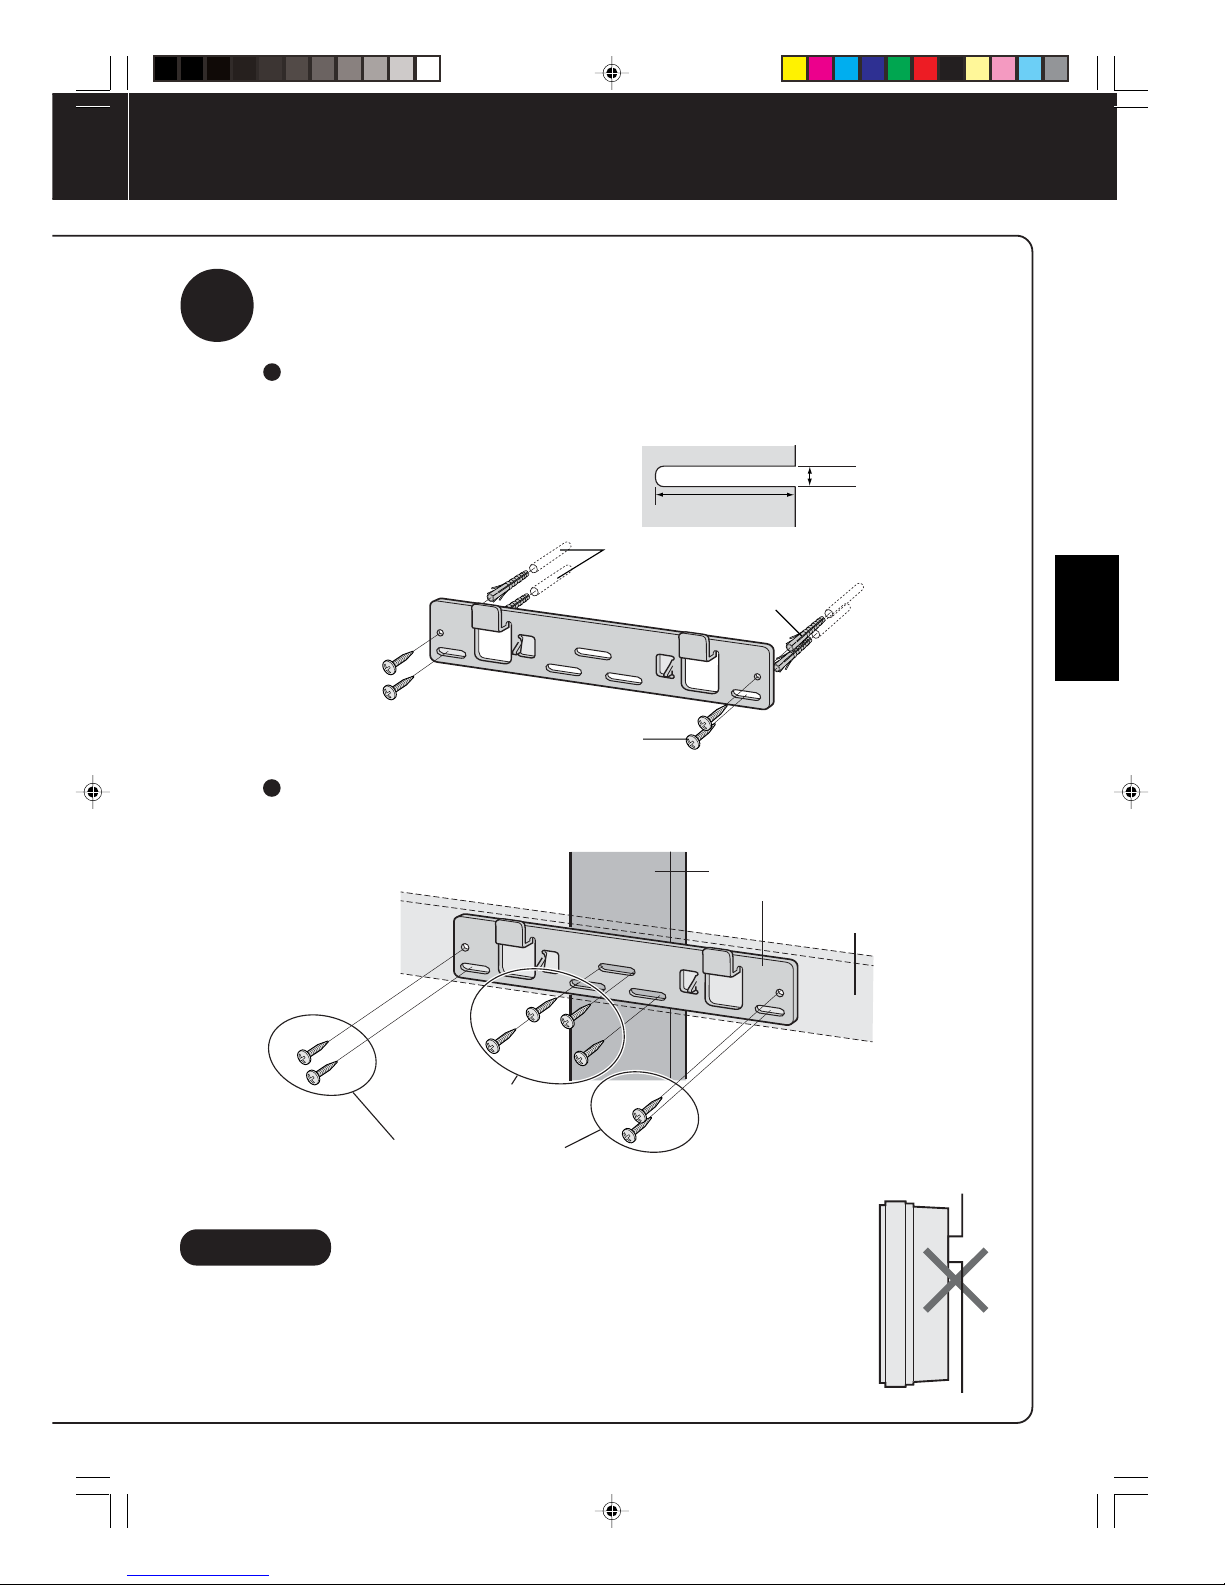
•CAUTIONS WHEN MOUNTING
THIS PRODUCT TO A WALL ....................... E-3
•FILTER GUIDELINES ..................................E-3
PART NAMES.......................................... E-4
•MAIN UNIT DISPLAY ...................................E-4
• BACK ...........................................................E-4
• ACCESSORIES ...........................................E-4
PREPARATION........................................ E-5
•INSERTING BATTERIES
IN THE REMOTE CONTROL ......................E-5
•REMOTE CONTROL USE ...........................E-5
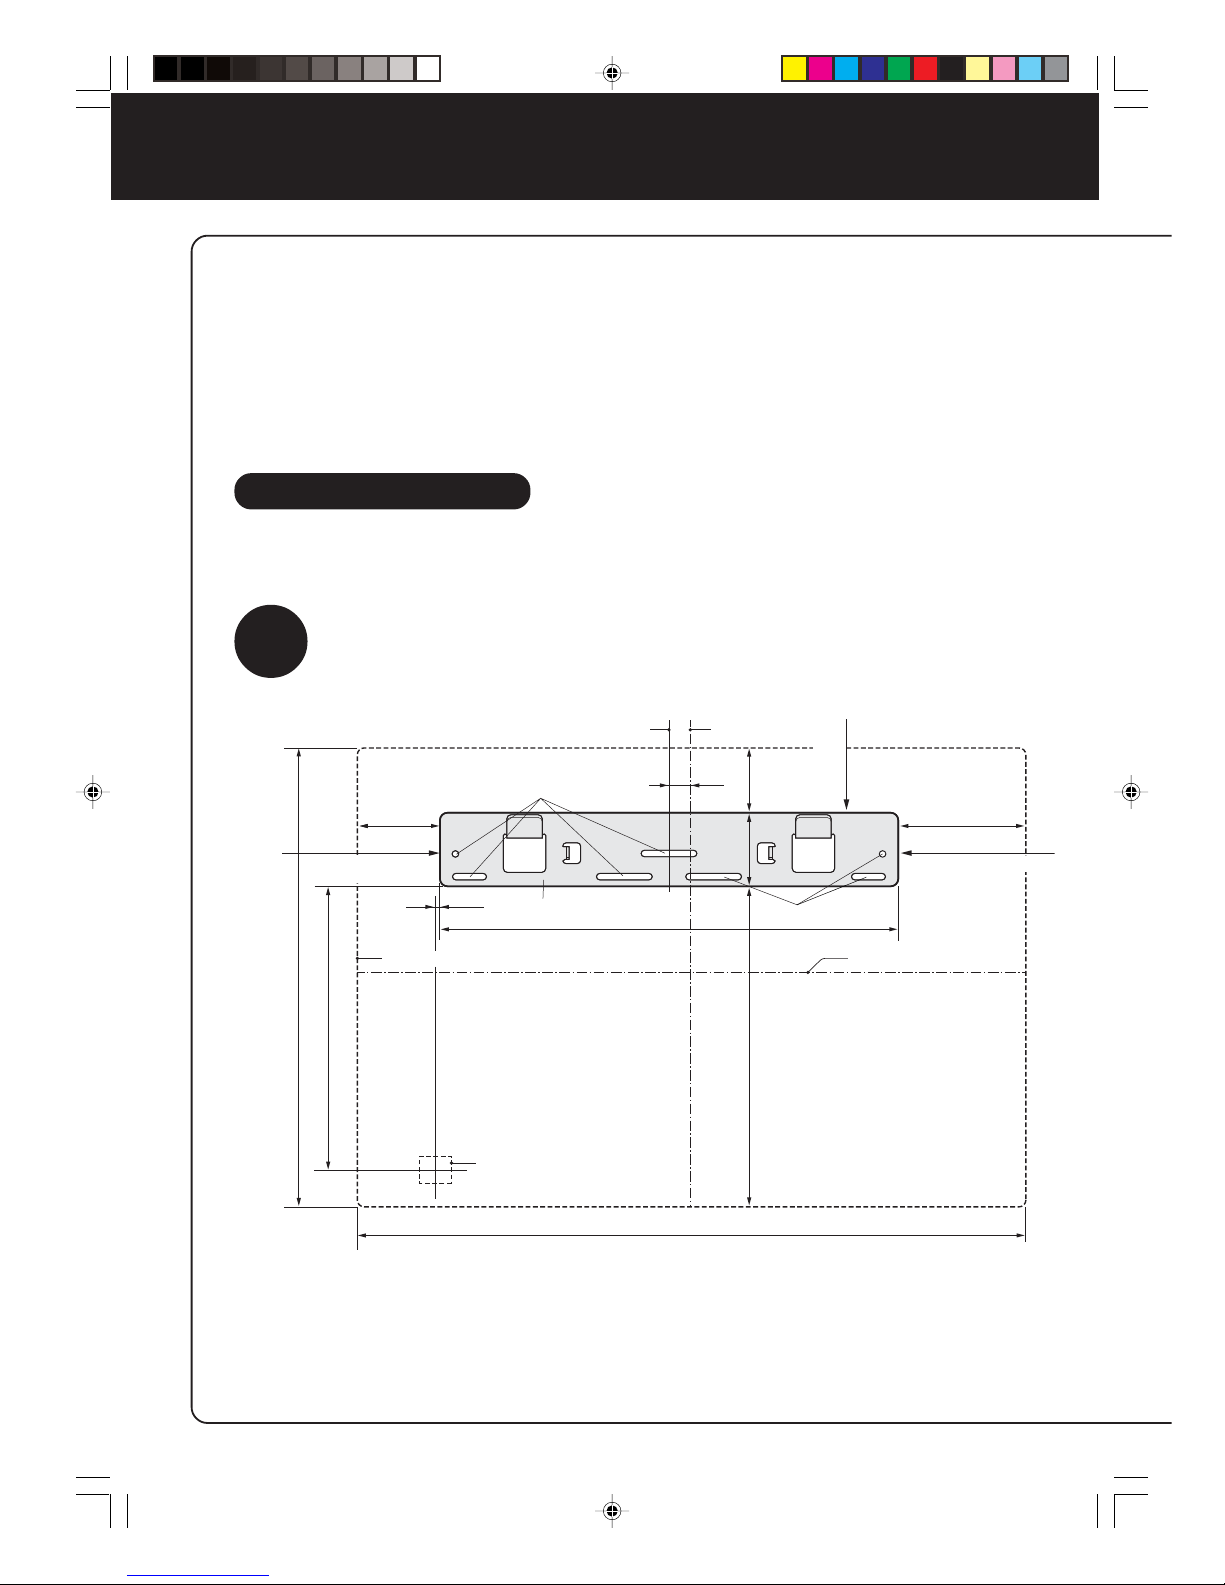
INSTALLATION ....................................... E-6
FILTER INSTALLATION ........................ E-10
OPERATION .......................................... E-12
•MAIN UNIT OPERATION .......................... E-12
•REMOTE CONTROL OPERATION .......... E-13
CARE AND MAINTENANCE ................. E-14
•FILTER REPLACEMENT
GUIDELINES ............................................ E-14
•MAIN UNIT ................................................ E-15
•ODOUR SENSOR .................................... E-15
• PRE-FILTER ............................................. E-15
SPECIFICATIONS ................................. E-15
TROUBLE SHOOTING.......................... E-16
E-1
ENGLISH
Thank you for purchasing the SHARP FU-28H.
Please read this manual carefully for the correct
usage information. Before using this product, be
sure to read the section: “Important Safety In-
structions.”
After reading this manual, retain it in a conven-
ient location for future reference.
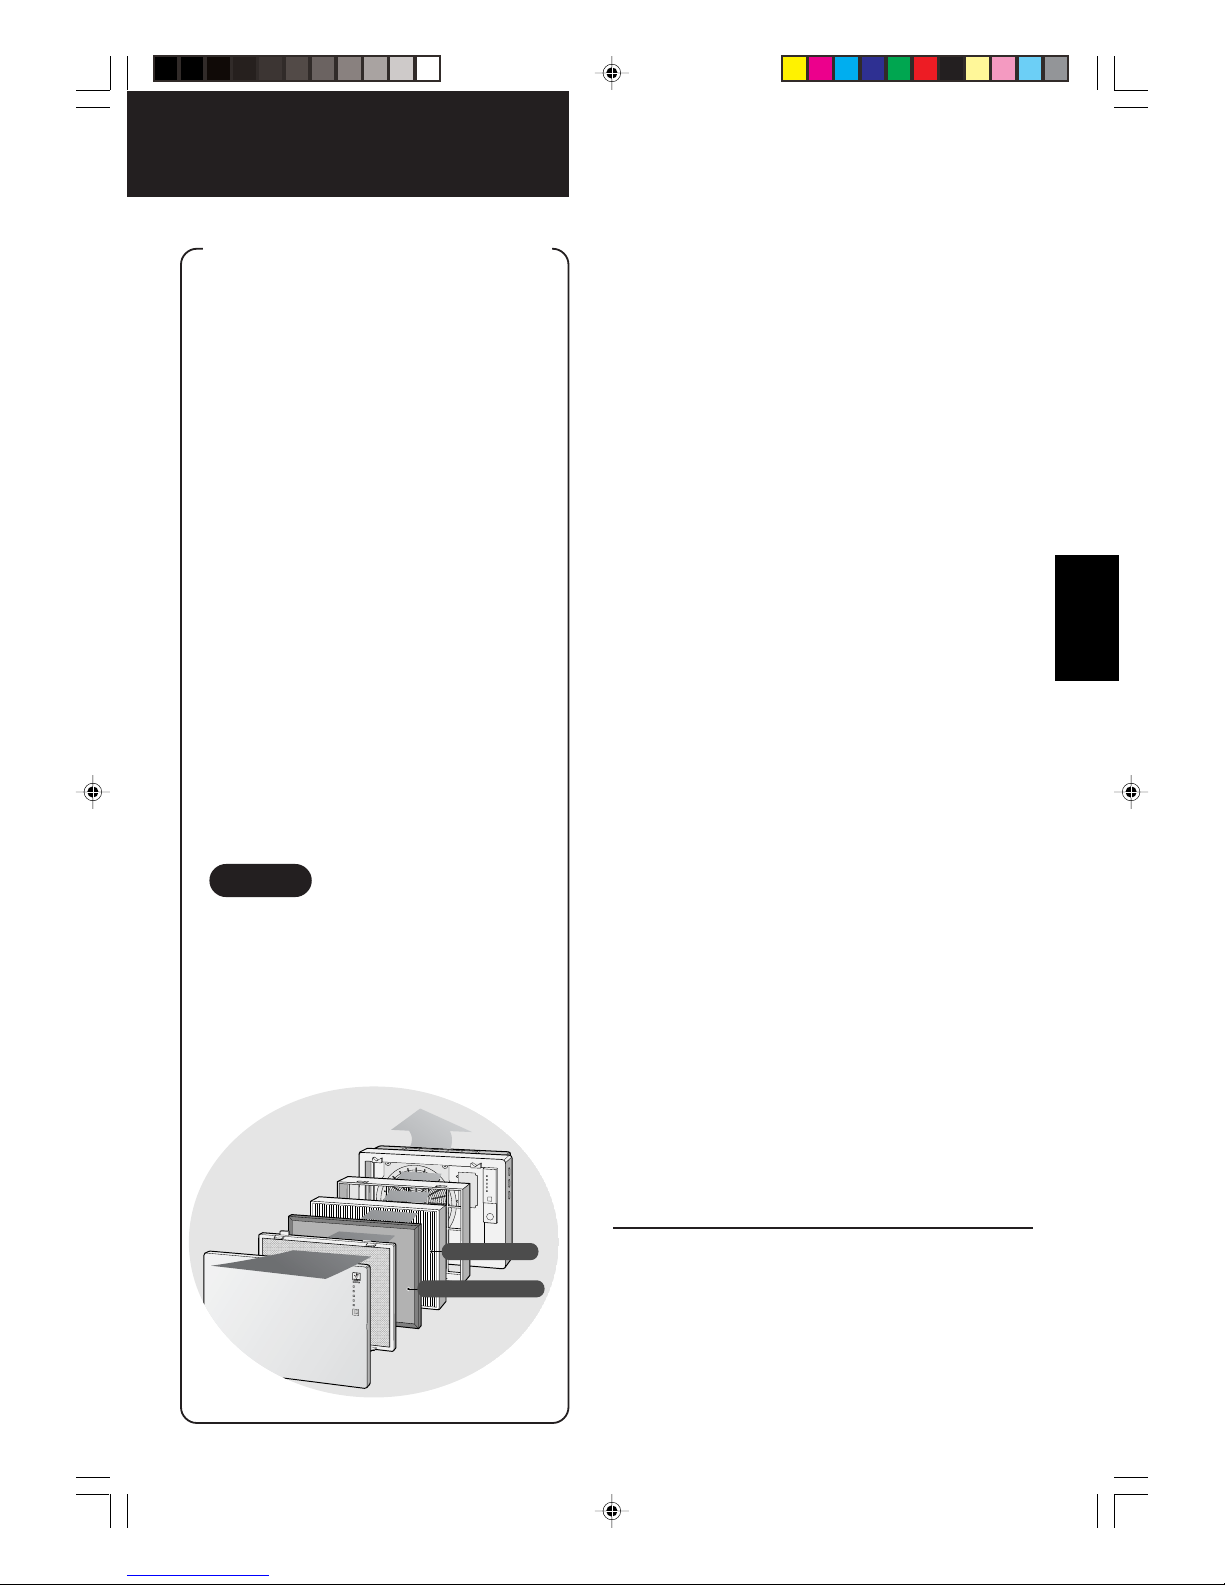
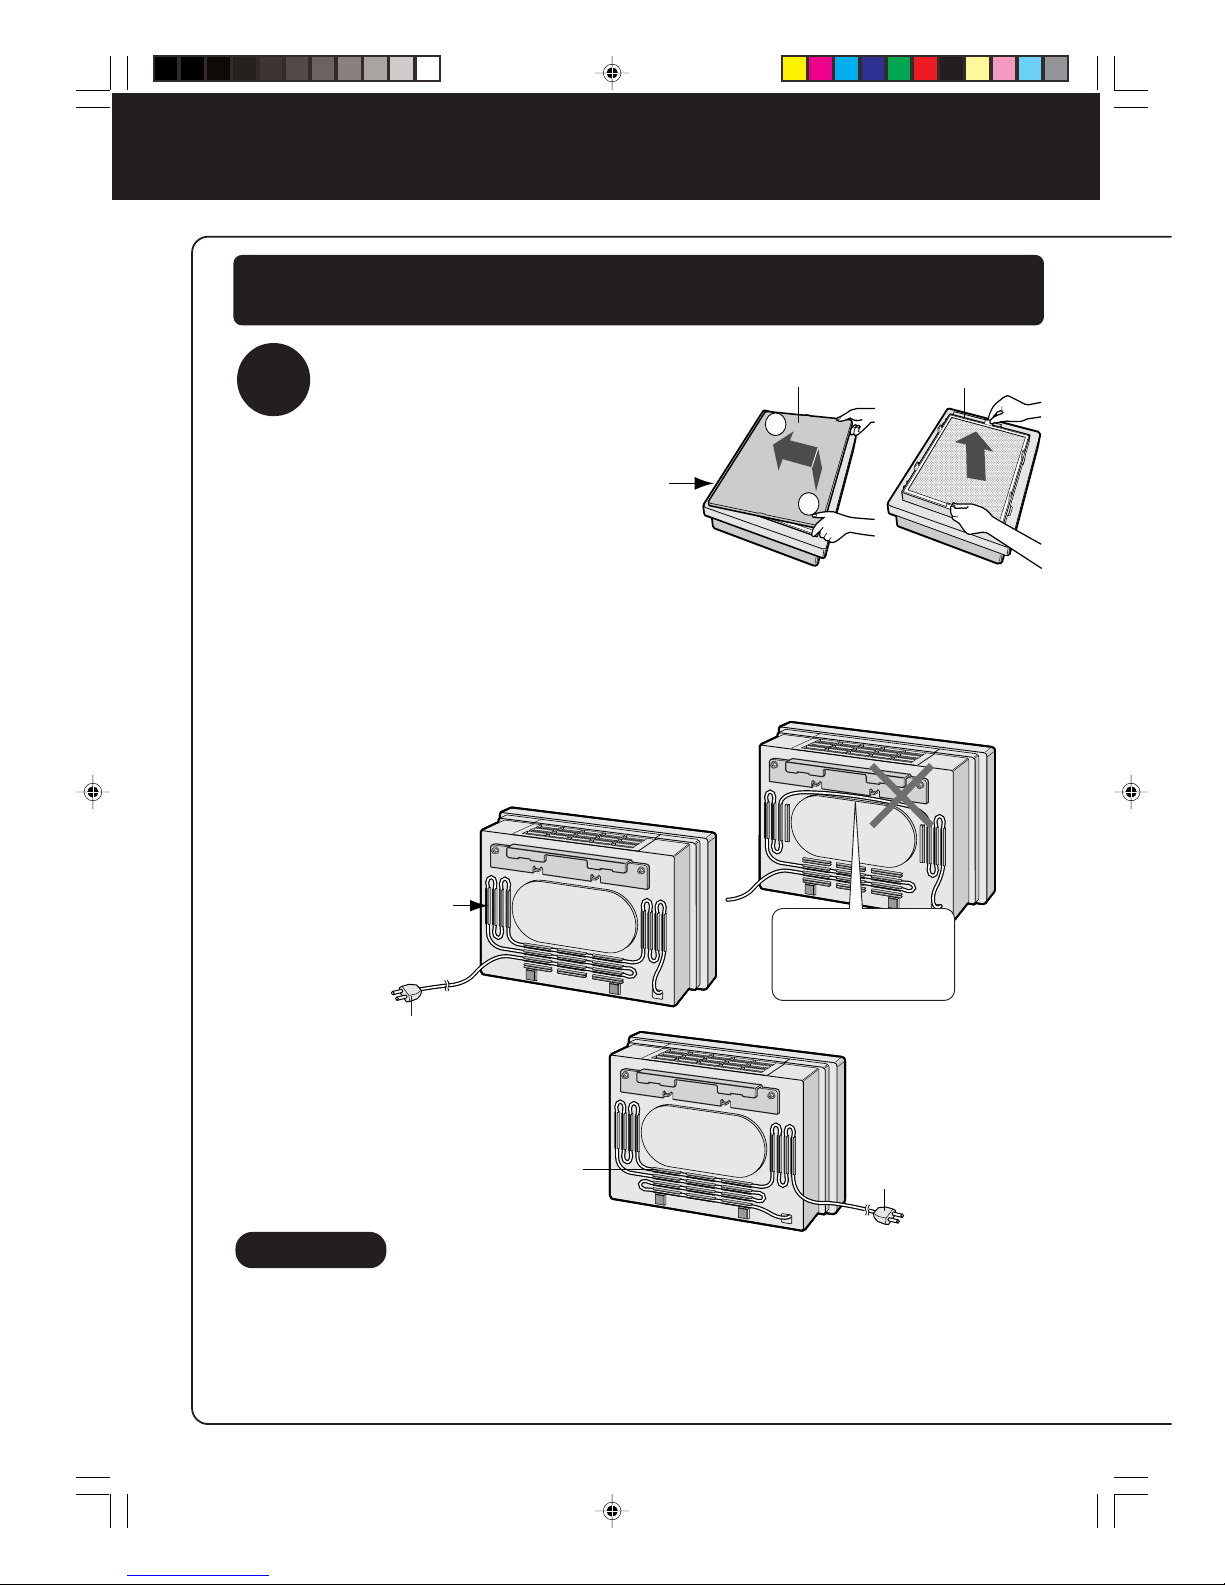
HOW SHARP AIR PURIFIER WORKS
An air purifier draws in room air from
its air intake, lets the air pass through
an Active Carbon Filter (Deodorizing
Filter) and a HEPA Filter (dust collec-
tion filter) inside of the unit, then
discharges the air from its air outlet.
The air purifier unit repeats this
process by moving its internal fan.
As air passes through, the HEPA
Filter can remove dust particles. The
Active Carbon Filter gradually absorbs
odour elements as they repeatedly
pass through the filter.
(Odour elements are absorbed by
HEPA Filter as well.)
Some odour ingredients absorbed by
the filters may become separated and
may be discharged through the air
outlet and result in additional odour.
Depending on the usage environ-
ment, this odour may become strong
in a shorter period than expected.
In this case, purchase the optional
replacement filter kit FZ-28SEF.
NOTE
The air purifier is designed to remove
air-suspended dust and odour, but not
harmful gases (for example, carbon
monoxide contained in cigarette
smoke). Neither can it completely
remove odours that are always
present (for example, odours from
construction materials and pet
odours).
HEPA Filter
Active Carbon Filter