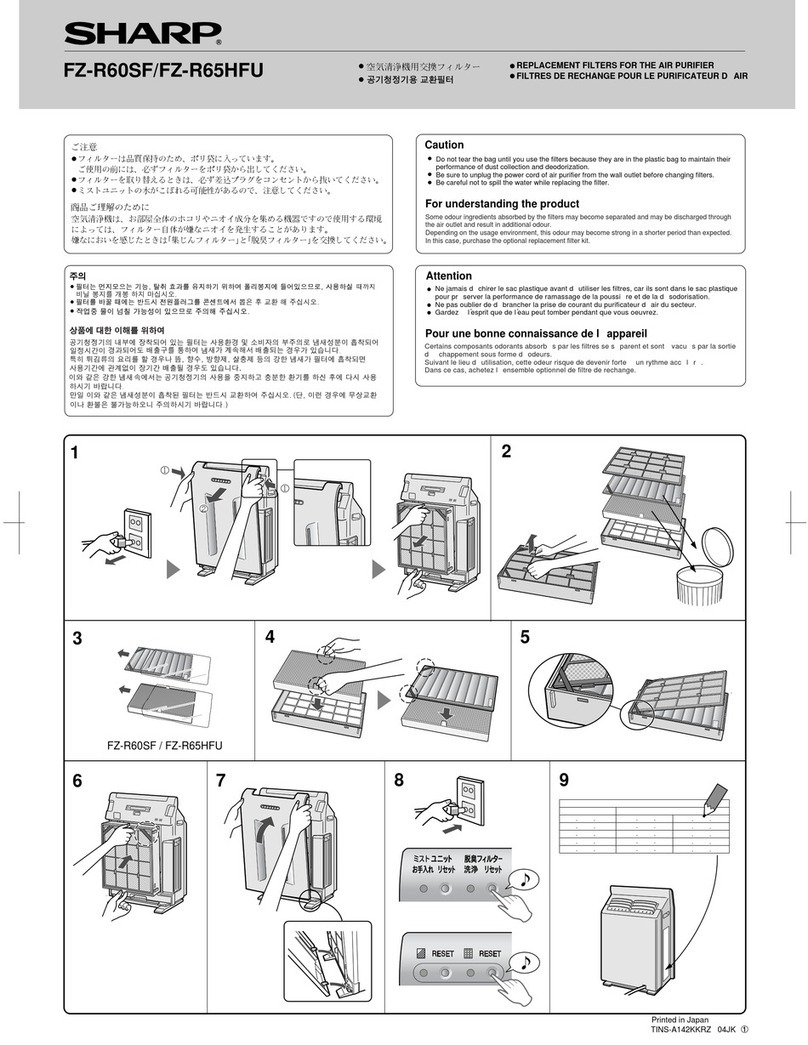
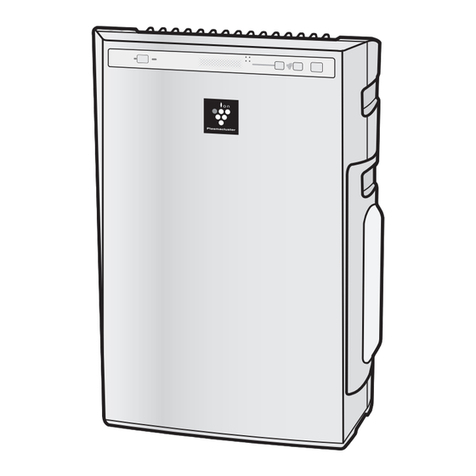
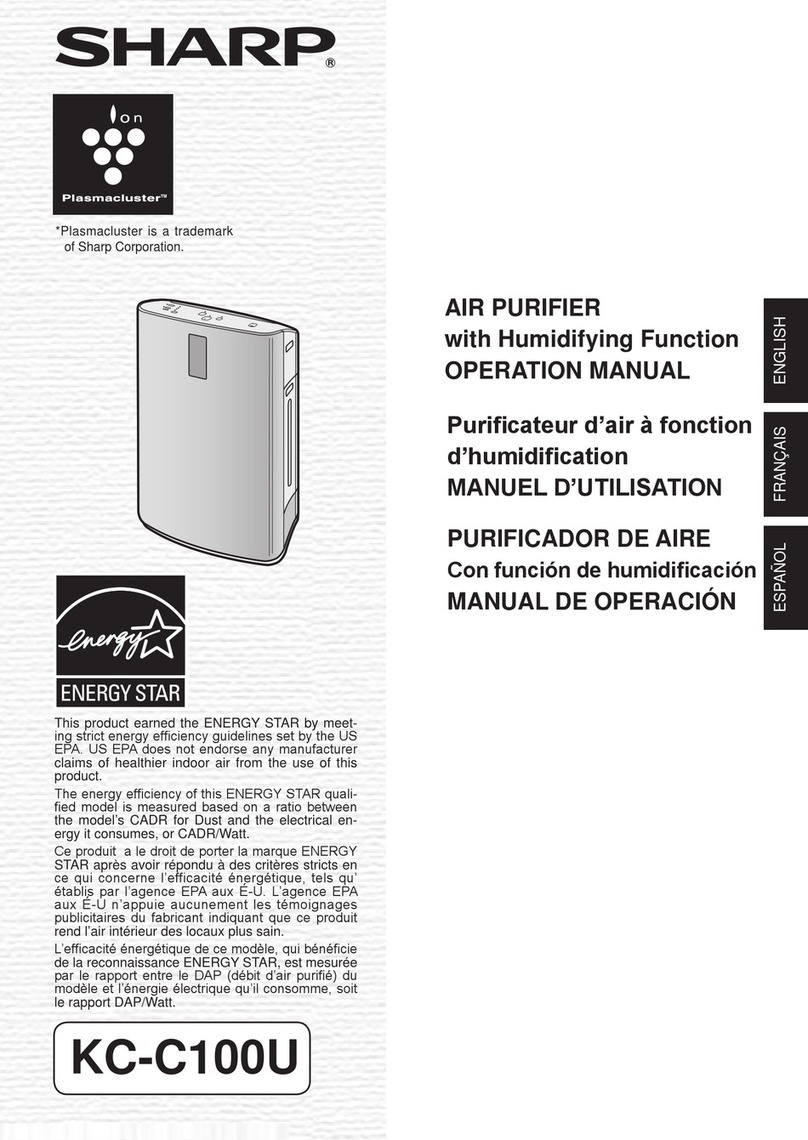
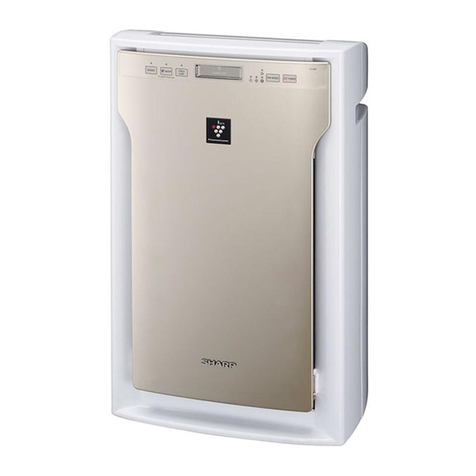
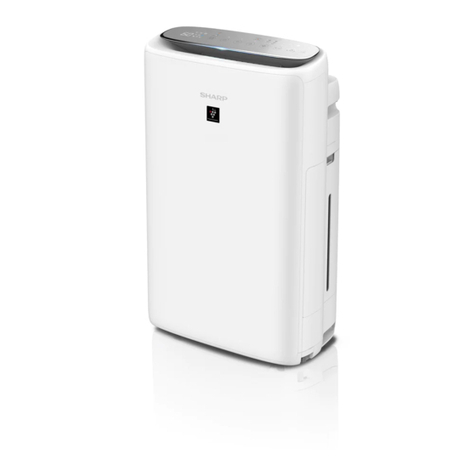
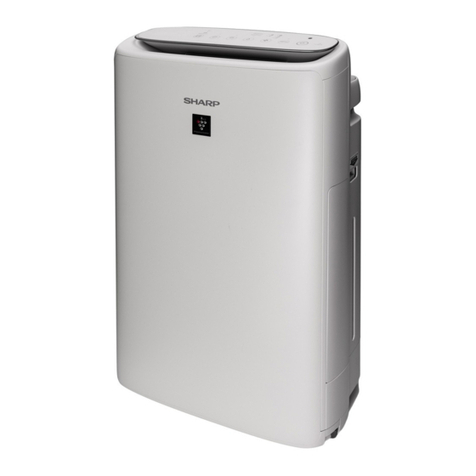
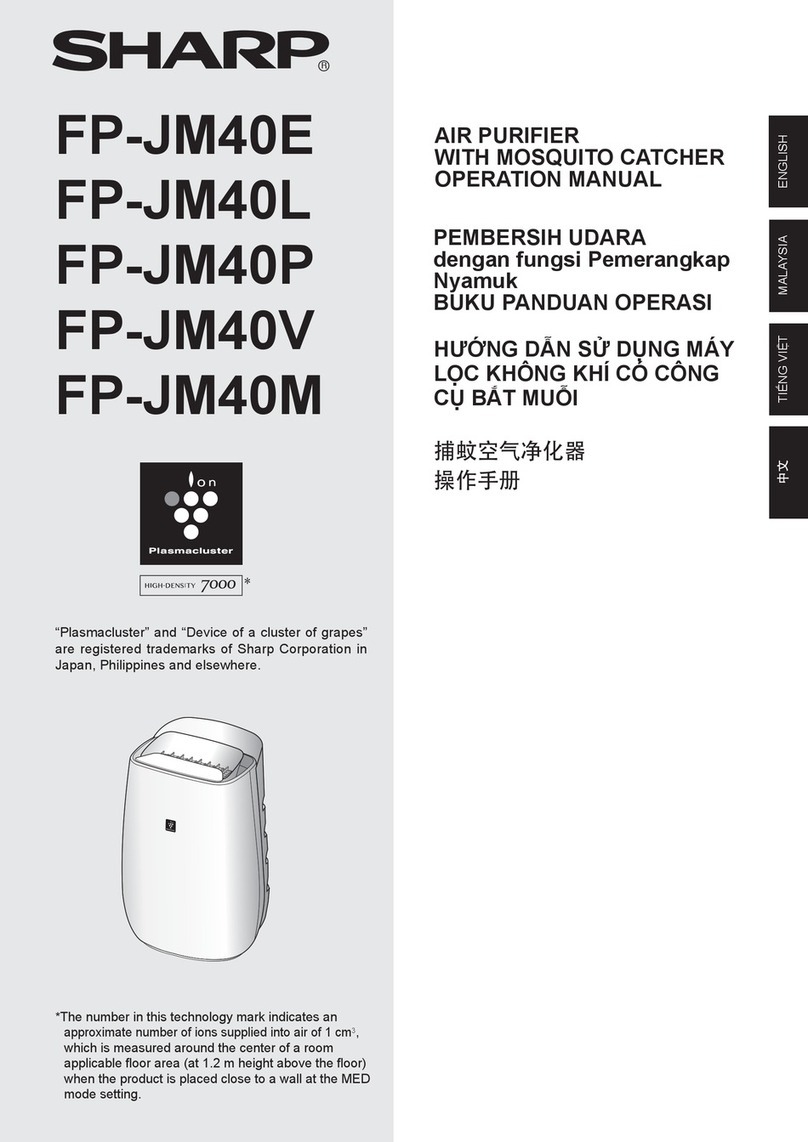
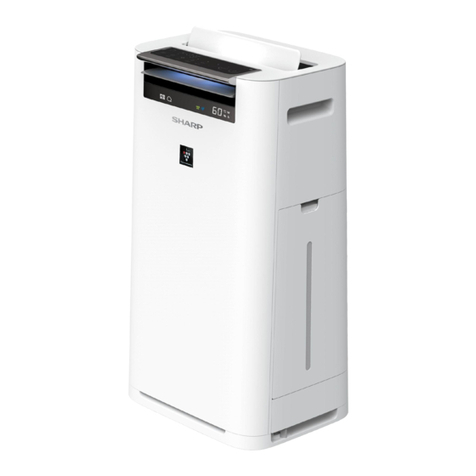
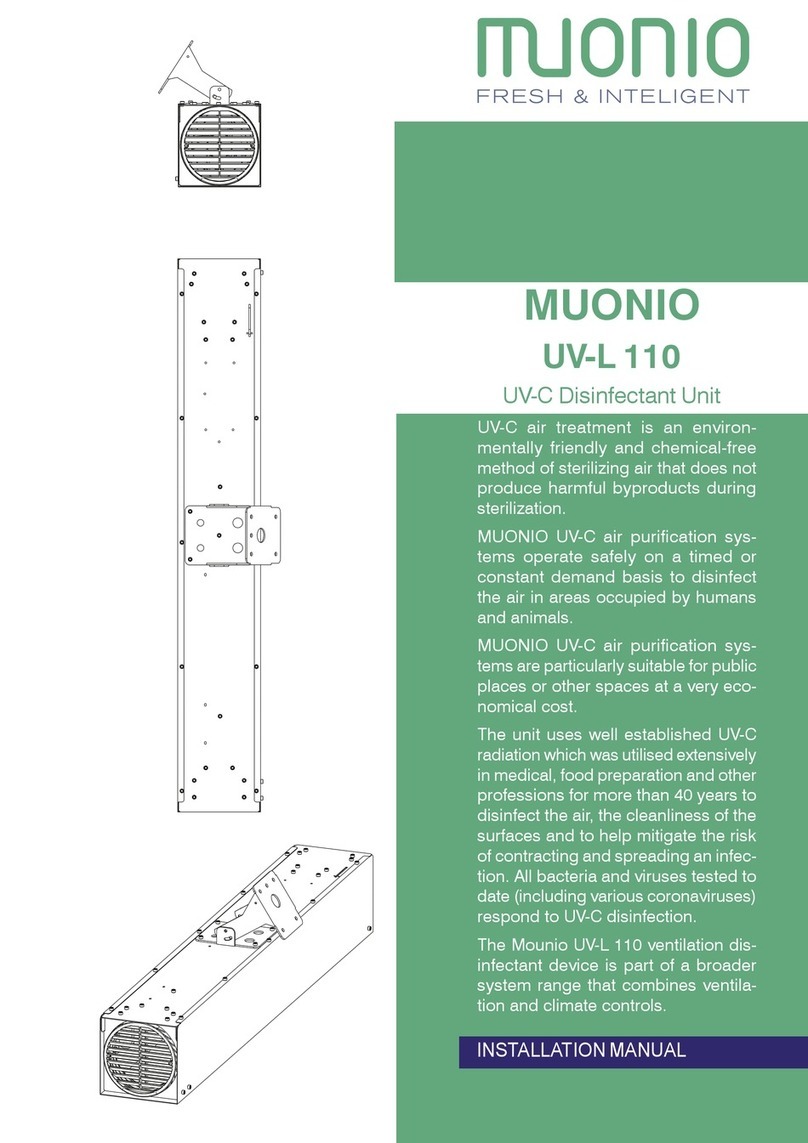
Sharp KC-G60E User manual

Device of this mark is a trademark of Sharp
Corporation.
“Plasmacluster” and “Device of a cluster of
grapes” are registered trademarks of Sharp
Corporation in Japan, Philippines and elsewhere.
KC-G60E
KC-G50E
KC-G40E
KC-G60L
KC-G50L
KC-G40L
KC-G60M
KC-G40M
AIR PURIFIER
with Humidifying Function
OPERATION MANUAL
Free standing type
Jenis berdiri sendiri
直立式
ENGLISH
* The number in this technology mark indicates an
approximate number of ions supplied into air of 1 cm3,
which is measured around the center of a room with the
close to a wall at the MED mode setting.
PEMBERSIH UDARA
dengan Fungsi Melembap
BUKU PANDUAN OPERASI
加湿空气净化器
使用说明书
B. MELAYU
中文

E-1
FEATURES
A unique Combination of Air Treatment
Technologies
Triple Filtration System + Plasmacluster +
Humidication
TRAPS DUST
particles.
DECREASES ODORS
1
and many common household odors.
REDUCES TINY DUST, POLLEN & MOLD*2
0.3 microns.
FRESHENS
By emitting a balance of positive and negative ions,
Plasmacluster air treatment is a natural process.
HUMIDIFIES
Controls humidity by sensing temperature and
humidity automatically.
*1: Toluene etc. The deodorizing performance for
a single component odors substance in a 1m3
test container may be different than the
deodorizing performance in actual use.
Sensor Technology continuously monitors air quality
and room condition, and automatically adjusts
operation.
• When in Intelligent mode you can manually switch
• Front Display and Air Outlet LED automatically switch ON
• When the Motion Sensor senses that no one has been in
the room for a set interval of time it determines that the
room is unoccupied.
• You can change brightness of Display / Monitor, sensor
• Motion sensor may sense movement other than persons
6 sensors sensing
7 factors precisely
control automatic
operation.
INTELLIGENT MODE When a person or pet is in the sensory area*4
•When there is little movement of a person or pet
•When the room is dark, the Front Display,
Cleanliness Monitor and Air Outlet LED turn off
automatically.
When there is no movement in the sensory area
•The Front Display, Cleanliness Monitor and
Air Outlet LED turn off, humidifying stops, and
consumption.
•
is bright, Plasmacluster Ions are emitted with
Air Outlet LED
Front Display,
Cleanliness Monitor
NOTE
SENSOR DETECTION
Dust
(sensitive)
etc.
Tobacco smoke,
mite feces and remains,
Odor
Tobacco, cosmetic,
alcohol, spray, and
other odors
Temperature
Humidity
Light
Motion*3Movement of persons
or pets
*3: Senses only when Intelligent mode is in operation.
7 detection by 6 sensors

ENGLISH
E-2
air intake, circulates it through a Pre-Filter, a
Deodorizing Filter and a HEPA Filter inside
the unit, and then discharges it through the air
of dust particles as small as 0.3 microns that
odors.The Deodorizing Filter gradually absorbs
down over time, causing additional odors.
Depending on usage conditions, and especially
more severe than a normal household, these
odors may become noticeable sooner than
expected. If these odors persist, replace the
When minerals in tap water adhere to the
absorb odors in the room that can cause the
emission of an unpleasant odor when the
•
and the odors.
such as carbon monoxide contained in cigarette smoke.
source of the odor is still present.
Please read before operating
your new Air Purier
Pre-Filter
Deodorizing Filter
HEPA Filter
ENGLISH
Please read this manual carefully before using
After reading, keep the manual in a convenient
location for future reference.
CONTENTS
IMPORTANT SAFETY INSTRUCTIONS
...E-3
•NOTE
•INSTALLATION GUIDELINES
PART NAMES.............................................
PREPARATION .......................................... E-7
OPERATION ...............................................E-7
•INTELLIGENT MODE
•AUTO MODE
•SELECTING MODE
•HUMIDIFICATION SETTING
•SELECTING DISPLAY
•
•
CARE AND MAINTENANCE ................. E-11
TROUBLESHOOTING ............................
SPECIFICATIONS....................................
NOTE

E-3
IMPORTANT SAFETY INSTRUCTIONS
Always follow basic safety precautions
when using electrical appliances,
including the following:
WARNING – Always observe the following
injury:
•
•
•This appliance is not intended for use
by persons (including children) with
reduced physical, sensory or mental
capabilities, or lack of experience
and knowledge, unless they have
been given supervision or instruction
concerning use of the appliance by a
person responsible for their safety.
Children should be supervised to
ensure they do not play with the
appliance.
•If the power cord is damaged, it must
be replaced by the manufacturer, its
service agent, a Sharp authorized
Service Center or similarly qualied
persons in order to avoid a hazard.
•Be sure to remove the power plug
when relling the Wa t e r Ta n k , b e f o r e
performing maintenance, when
removing and attaching and replacing
the lter and when not using for a long
time. Failure to do so can cause a short
circuit resulting in electrical shock or
re.
•Do not use the unit if the power cord or
plug is damaged or if the connection to the
wall outlet is loose.
•Periodically remove dust from the plug.
•
the air intake or air outlet.
•When removing the power plug, always
hold the plug and never pull on the cord.
Failure to do so can cause a short circuit
•When removing the unit, do not damage
the power cord with the casters.
Failure to do so can cause electric shock,
•Be careful not to damage the power cord,
it may cause electric shock, excess heat
•Do not remove the plug when your hands
are wet.
•Do not place the unit near gas appliances
•Only a Sharp Authorized Service Center
nearest Service Center for any problems,
adjustments, or repairs.
•Do not operate the unit in rooms where
aerosol insecticides are present. Do not
operate the unit in rooms where there
is oily residue, incense, sparks from lit
cigarettes, or chemical fumes in the air. Do
not operate the unit in places where it may
get wet, such as a bathroom.
•Be cautious when cleaning the unit. Strong
corrosive cleansers can damage the
exterior.
•
Water Tank and Humidifying Tray, and then
hold the unit by the handles on both sides.
•Do not drink the water in the Humidifying
Tray or Water Tank.
•Do not expose the unit to water. Doing
so can cause a short circuit or electrical
shock.
•
with fresh tap water, and regularly clean
in use, dispose of the water in the Water
Tank and Humidifying Tray. Leaving water
in the Water Tank or Humidifying Tray can
cause mold, bacteria, and bad odors.
In rare cases, such bacteria can be a
health hazard.
NOTE – What to do if the unit interferes with
television reception, try one or more of the
following measures:
•Adjust or reposition the receiving antenna.
•Increase the distance between the unit and
•Connect the equipment into an outlet on a
receiver.
•
CAUTIONS CONCERNING
OPERATION
•Do not block the air intake or air outlet.
•Do not place the unit near or on hot
objects, such as stoves or heaters, or
where it may come into contact with steam.
ENGLISH
•Always operate the unit in an upright
position.
•When moving the unit, use the handles on
both sides.
Do not move the unit when it is in
operation.
•
uneven surface, or thick-piled carpet, lift it
up when moving.
•When moving the unit by its casters, move
it slowly and in a horizontal direction.
•Turn the unit off and remove the water tank
before moving, take care not to catch your
•
the Water Tank, and the Humidifying Tray
properly installed.
•
and can also cause electric shock or
operating malfunctions.
•Clean the exterior with a soft cloth only.
The unit surface may be damaged or
cracked with Benzene paint thinner or
polishing powder. In addition, the sensors
may malfunction as a result.
•The frequency of descaling maintenance
will depend on the hardness of and the
impurities in the water that you use; the
harder the water the more often descaling
will be necessary.
•
•
of no water leaking from the Water Tank.
•Be sure to wipe off any excess water on
the outside of the Water Tank.
•
chemical agents, aromatic substances,
dirty water, or other damaging substances.
Doing so can deform the unit or cause it to
malfunction.
•Use only fresh tap water. Using other water
sources risks the growth of molds, fungi, or
bacteria.
•Do not shake the Water Tank with holding
the carrying handle.
•Do not remove the Humidifying Filter from
•Avoid spilling water when removing or
cleaning the Humidifying Tray.
•Do not remove the Float.
If it comes off, refer to E-13.
•Do not use the detergents for maintenance
of the Humidifying Tray and Cover.
If cause deformation, tarnishing, cracking
•Do not scrub the Back Panel hard during
its maintenance.
INSTALLATION GUIDELINES
•Avoid locations where the sensors are
exposed to direct wind.
Doing so can cause the unit to malfunction.
•Avoid locations where furniture, fabrics, or
other objects can come in contact with the
unit and interfer with the intake and outtake
of air.
•Avoid locations where the unit is exposed
to condensation or drastic changes in
temperature. Appropriate room temperature
•Place the unit on a level and stable surface
When placed on heavy carpet, the unit
may vibrate slightly.
Place the unit on a level surface to avoid
water leakage from the Water Tank and
Humidifying Tray.
•Avoid locations that generate grease or oily
smoke.
Doing so can cause the unit exterior to
crack and the sensors to malfunction.
•The dust collecting ability of the unit is
effective even when the unit is as close to
3 cm from the wall,the surrounding walls
unit at a distance from the wall.
The wall directly behind the air outlet may
become dirty over time. When using the
unit for an extended period of time at the
same location, periodically clean the walls
adjacent to it.
FILTER GUIDELINES
•Follow the instructions in this manual for

PART NAMES
FRONT
BACK
1Handle
2
Sensor
Temperature / Humidity / Odor*
3Air Outlet
4Caster Stopper
5Operation Panel
6Front Louver
7Front Display
8Unit
9Caster
1Water Tank 7Back Louver
2Tank Cap 8Air Outlet
3Humidifying Filter 9Air Outlet LED
4Float 10 HEPA Filter
5Humidifying Tray 11 Deodorizing Filter
6Dust(sensitive) Sensor /
Sensor Filter
12 Back Panel (Pre-Filter)
13 Air Inlet
14 Power Cord / Plug
Locked Unlocked
Front
20°
20°
1
3
5
2
4
10
11
12
13
78
9
6
7
8
9
5
1
2
3
4
6
14
Detection range
Light Sensor
Motion Sensor
Do not install the unit in the
following places.
The Light Sensor may not sense
correctly.
Sensory range is the area shown
below.
1.6m
2m
30°
30°
2.3m
2m 30° 30°
Front
Right and Left
Directly under
In shadow

ENGLISH
1
Humidity /Temperature Monitor
Indicates the approximate humidity level or
temperature in the room. The humidity setting cannot
be adjusted.
Wattage Monitor
Indicates wattage by current operation.
Timer Monitor
Indicates setting time or remaining time of ON/OFF
timer.
4Odor Light
Indicates the Odor Sensor detects odors.
5Dust Light
dust.
6HAZE / PM2.5 Light
microscopic dust.
7Motion Sensor
8
Cleanliness Monitor
Indicates the air purity of the room in 7 levels with
color changes.
Blue Clean
Red Impure
2Plasmacluster Ion Light
3
Humidify Light
Green Humidity ON
Off Humidity OFF
Red
1POWER ON / OFF Button 7
ON / OFF TIMER Button, Indicator Light
<Press 3 sec.> FILTER RESET Button
2
INTELLIGENT MODE Button, Indicator Light
3HAZE Button, Indicator Light 8DISPLAY SELECT Button
<Press 3 sec.> CHILD-LOCK Button
4Plasmacluster Ion SPOT Button,
Indicator Light 9CHILD-LOCK Indicator Light
5
HUMIDIFY ON / OFF Button, Indicator Light
10 FILTER RESET Indicator Light
6MODE Button, Indicator Light 11 Light Sensor
OPERATION PANEL
FRONT DISPLAY
654 32 1
12 3 4 56 78
109 11
Press the button with " " to start.
8Front Louver
7
Temperature 0oC to
0oC is displayed.
or less
or more
oC
or more
-1oC
or less

E-7
PREPARATION
1
2
3
4
Remove the Back Panel.
Remove the plastic bag
from the each lter.
Install the lters in the correct order as
shown.
Install the Back Panel.
OPERATION
START STOP
The fan speed is automatically controlled depending on the
alternates between Low and High level for 20 minutes each.
10 minutes: Max High fan level
20 minutes: Low fan level
20 minutes: High fan level
NOTE
2
1
3
3
Back Panel
HEPA Filter Deodorizing Filter
The fan speed is automatically controlled depending on the 7
Click
Deodorizing Filter
HEPA Filter
Tag
•Front Display, Cleanliness Monitor and Air Outlet LED
automatically switch ON and OFF based on room
NOTE
NOTE
use date is recommended.
START/STOP
HAZE MODE AUTO MODE
INTELLIGENT MODE
FILTER INSTALLATION
Always be sure to remove the
power plug from the wall outlet.

ENGLISH
1
2
3
4
Remove
the Water Tank.
Fill the Water Tank
with the tap water.
Install
the Water Tank.
ON OFF
Use this mode when you want to remove adhering odor,
germs, and other substances from cloths, sofas and curtains.
NOTE
Temperature
Humidity
ALL MODE
SLEEP
MODE
SLEEPPOLLEN MEDLOW
SLEEP
The unit will operate quietly, and the fan speed is
automatically switched depending on the amount of impurities
in the air.
The Front Display, Cleanliness Monitor and Air Outlet LED
go off automatically.
POLLEN
and quickly detects impurities such as dust and pollen and
clean the air powerfully.
NOTE
ON CANCELLATION
Operation of the operation panel will be locked.
2
1
2
1
Click
To prevent leaks ,
securely tighten the
Tank Cap.
more
3 sec.
•Emits highdensity Plasmacluster Ions only in the forward
direction.
NOTE
PLASMACLUSTER ION
SPOT MODE
SELECTING MODE
CHILD LOCK
HUMIDIFICATION SETTING
more
3 sec.
table below, the unit automatically controls humidity by sensing
REFILLING THE WATER TANK
Adjust Front Louver manually.
Push the handle
down.
Pull it forward.

HOW TO CHANGE VARIOUS SETTINGS
Select the length of time you want. The unit automatically
stops once the selected time is reached.
Select the length of time you want. The unit automatically
starts once the selected time is passes.
Humidity Temperature Wattage
OFFON
When the Plasmacluster function is ON, the Plasmacluster
2hour
10hour
6hour
14hour
4hour
12hour
8hour
CANCELLATION
1
3
4
5
Select "Function number" from the
table on next page.
Select "Setting number" from the table
on next page.
Press Power button to nish the
setting.
Set
or
or
Forward
Forward
Reverse
Reverse
Set
⋯
You can change the functions in the "Type of setting" table
on the next page.
2hour1hour 4hour 8hour
CANCELLATION
Turn off
ON TIMER
OFF TIMER
SELECTING DISPLAY
PLASMACLUSTER ION ON/OFF
more
3 sec.
more
3 sec.
more
3 sec.
Turn the unit power OFF.
2

ENGLISH
E-10
Type of setting
Function Setting
Light Control
You can select the brightness of the
Front Display, Cleanliness Monitor
and Air Outlet LED.
Auto
Light automatically switches ON or OFF based
on room brightness.
Darker
Turn off
●
illuminates for 3 seconds after operation
starts and then the light turns off.
●
the unit needs water.
Sound Indicator Setting
You can set the unit to make a
beeping sound when the Water
Tank is empty.
Cancellation
ON
Auto Restart
If the unit is unplugged or if there is
a power failure, the unit will resume
operation with the previous settings
after power is restored.
Cancellation
ON
Adjusting Senser Sensitivity (F4-F7)
Light Sensor Low
Dust(sensitive) Sensor Standard
Odor Sensor
High
Motion Sensor
You can set the time until the
Motion Sensor detects that no
one is in the room . You can also
cancel Motion Sensor sensing.
ON(Standard sensing time )
ON(Longer sensing time)
Cancellation
HOW TO CHANGE VARIOUS SETTINGS

E-11
it with water and dry it thoroughly.
1. Add a small amount of kitchen
detergent to water and soak for
about 10 minutes.
clean water.
wellventilated area.
Clean the inside of
the Water Tank with
a soft sponge and
the Tank Cap with
a cotton swab or
toothbrush.
CARE AND MAINTENANCE
1
4
23
5
2
Place Ref.
1Water Tank
E-112
3Sensors
4Humidifying Filter E-12
Humidifying Tray
5HEPA Filter E-13
Deodorizing Filter
This is a reminder to perform the maintenance described
below. After performing maintenance, reset the Filter
Indicator.
Do not apply excessive pressure
when scrubbing the back panel.
RESET
Rinse the inside
with water.
Wipe with a dry, soft cloth.
Remove the dust gently with
a cleaning tool such as a
vacuum cleaner.
NOTE
NOTE
How to clean hard to remove dirt.
Tank Cap
Toothbrush
Sensors
Back Panel
Sensor Filter
CAUTION
Back Panel
Sensor Filter
FILTER INDICATOR
CARE INDEX
WATER TANK
UNIT / BACK PANEL
more
3 sec.

ENGLISH
E-12
2
1
After maintenance, correctly
reattach the parts.
Remove the Humidifying Tray Cover.
Rinse with plenty of water.
Reattach the Humidifying Tray Cover.
NOTE How to clean and remove stubborn dirt.
Kitchen detergent
Citric acid
100% bottled lemon juice
with no pulp
1
1.Fill the tray half-way with water.
2.Add a small amount of kitchen
detergent.
2 1/2 cups of
water
3 teaspoons
3 cups of
water
2
Soak for
30 minutes.
Soak for 30 minutes.
descaling solution, allow for more
3
1
2
2
1
1
2
3
•Do not remove the Float and the Tray Panel. If they
come off, refer to E-13.
2
1
HOW TO REMOVE THE
HUMIDIFYING FILTER
AND TRAY.
HOW TO ATTACH THE
HUMIDIFYING FILTER
AND TRAY.
Gray White
NOTE
2
1
If you remove the Humidifying Filter shaft,
be sure to reattach it to its original position.
Tray Cover
Click
Click
HUMIDIFYING FILTER AND TRAY
Humidifying Filter Humidifying Tray

E-13
How to install the Float and the Tray Panel
LIFE OF FILTERS
Filter life varies depending on the room environment,
usage conditions, and location of the unit.
replacement suggestions are based on purifying
the unit's dust collection and deodorizing performance
•HEPA Filter About 10 years after opening
•Deodorizing Filter About 10 years after opening
•Humidifying Filter About 10 years after opening
Replacement Filter Model
Consult your dealer when purchasing a replacement
Disposing of lters
regulations.
HEPA Filter material:
• Filter: Polypropylene
• Frame: Polyethylene
Deodorizing Filter material:
• Filter: Paper
• Frame: ABS resin
Humidifying Filter material:
Maintain only the tagged
surface. Do not clean up
the opposite surface. The
not to apply too much
pressure.
Both surfaces can be
maintained.
if being too much power
is applied on it, so please
handle it with care.
Remove the dust on the HEPA Filter and
Deodorizing Filter.
Tray Panel
Float
Filter KC-G60 KC-G50 KC-G40
HEPA Filter
FZ-D60HFE FZ-D40HFE FZ-D40HFE
Deodorizing
Filter FZ-G60DFE FZ-G40DFE FZ-G40DFE
Humidifying
Filter FZ-G60MFE FZ-G60MFE FZ-G60MFE
Humidifying Filter
1.
this tab.
3. Insert the tab on the
into the hole.
Tab
Float
Cross-Section view
2. Insert the tab of
Tag
KC-G60
KC-G50 / KC-G40
CAUTION
causing additional odors. Depending on usage conditions, and
severe than a normal household, these odors may become
noticeable sooner than expected.
removed after maintenance.
FILTER REPLACEMENT
HEPA FILTER /
DEODORIZING FILTER
HEPA FILTER
DEODORIZING FILTER
*Do not dispose these parts.

ENGLISH
TROUBLESHOOTING
Before contact for service, review the troubleshooting chart below to make sure that the problem is not a unit
malfunction.
SYMPTOM REMEDY
Odor and smoke persists.
The Cleanliness Monitor is blue even
when the air is not clean.
•The air may have been dirty when the unit was plugged in.
Unplug the unit, wait one minute, and then plug the unit in again.
The Cleanliness Monitor light is red
even when the air is clean.
The unit makes a clicking or ticking
sound.
•The unit may make clicking or ticking sounds when it is
generating ions.
Air discharged from the unit has an
odor.
•Use only fresh tap water. Using other water sources risks the
growth of mold, fungi, or bacteria.
The unit does not operate when
cigarette smoke is in the air.
•Make sure the unit is installed in a location in which the sensors
can detect cigarette smoke.
The FILTER RESET Indicator Light is on.
connect the power cord to an outlet and then press the Filter
The Front Display is turned off. •When Light control is set to "Auto", the light automatically turns
off when the room is dark. Moreover, when Light control is set
to "Turn off", the light is always off. If you do not want the light to
The Humidify Light on the Front Display
does not light up when the tank is
empty.
•The room has reached the appropriate level of humidity and has
stopped humidifying.
The water level in the tank does not
decrease or decreases slowly.
•Check to see if the Humidifying Tray and Water Tank are
The Cleanliness Monitor changes color
frequently.
•The Cleanliness Monitor automatically changes color when the
If you are concerned about the change, you can change sensor
There is a discrepancy between the
unit’s Humidity Monitor and another
hygrometer in the room.
•There is a difference in the humidity level within the same room.
•The sensor have different measurement parameters.
•If the monitor indicates wattage or temperature, switch the
The unit HAZE / PM2.5 Light does not
match weather report or other local
PM2.5 data.
ERROR DISPLAY If error occurs repeatedly, contact the Sharp Service Center.
DIGITAL INDICATION REMEDY
Make sure that the Humidifying Filter and Humidifying Tray are properly
installed, and then turn the power to ON again.
Unplug the unit, wait one minute, and then plug the unit in again.

SPECIFICATIONS
*2 • The recommended room size is appropriate for operating the unit of maximum fan speed.
• The recommended room size is an area in which a given amount of dust particles can be removed in 30 minutes.
Standby Power
When the unit’s power plug is inserted in a wall outlet it consumes about 1.2 watts of standby power in order to
operate electrical circuits.
To conserve energy, unplug the power cord when the unit is not in use.
Model
Power supply
Fan Speed Adjustment MED LOW MED LOW MED LOW
CLEAN
3 72 120
72 31 12
CLEAN
HUMIDIFY
3 72 120 210 120
33
20 20
1 200 300 300
22
High density Plasmacluster ion
2
*3 ~21
3.0
Sensors
Dust / Light /
2.0

ENGLISH
ENGLISH
MEMO

M-1
CIRI-CIRI
Gabungan Unik Teknologi Rawatan Udara
Sistem Penapisan Tiga Serangkai +
Plasmacluster + Pelembapan
MEMERANGKAP HABUK
Prapenapis memerangkap habuk yang lebih besar
daripada zarah-zarah yang beranggaran
240 mikron.
MENGURANGKAN BAU
Penapis Penyahbau menyerap gas-gas berbahaya
dalam HAZE*1
dan kebanyakan bau biasa yang terdapat di rumah.
MENGURANGKAN DEBUNGA & KULAPUK*2
Penapis HEPA memerangkap 99.97% zarah sekecil
0.3 mikron.
MENYEGARKAN
Dengan mengeluarkan ion positif dan negatif yang
seimbang, rawatan udara Plasmacluster merupakan
proses yang semula jadi.
MELEMBAPKAN
Kawal kelembapan dengan mengesan suhu dan
kelembapan secara automatik.
*1:
Toluena dll. Prestasi penyahbau untuk bekas ujian
bahan bau komponen tunggal dalam 1m3
mungkin berbeza daripada prestasi penyahbau
dalam penggunaan sebenar.
*2: Apabila udara diedarkan melalui sistem penapisan.
Teknologi Penderia terus memantau kualiti udara
dan keadaan bilik serta melaraskan operasi secara
automatik.
• Apabila dalam mod Intelligent anda boleh tukar pelembap
kepada ON atau OFF secara manual. (Ruj.M-8)
•
Paparan Depan dan LED Salur Keluar Udara bertukar kepada
ON dan OFF secara automatik mengikut kecerahan bilik.
(Apabila kawalan lampu ditetapkan kepada "Auto". Ruj.M-10)
• Apabila Penderia Gerakan tidak mengesan sesiapa
di dalam bilik untuk selang masa yang ditetapkan ia
menunjukkan bahawa bilik tidak berpenghuni.
• Anda boleh tukar kecerahan bagi Paparan / Pemantau,
sensitiviti penderia dan masa pengesanan Penderia
Gerakan. (Ruj.M-10)
• Penderia gerakan mungkin mengesan pergerakan
selain daripada individu atau haiwan peliharaan. (langsir
berkibaran dll.)
6 penderia mengesan
7 faktor yang tepat
untuk mengawal
operasi automatik.
MOD INTELLIGENT Apabila individu atau haiwan peliharaan berada di
kawasan yang dipasang penderia*4(*4: Ruj.M-5)
• Apabila terdapat sedikit pergerakan individu atau
haiwan peliharaan (contoh: apabila tidur), akan
bertukar secara automatik kepada aliran udara
senyap.
• Apabila bilik gelap, Paparan Depan, Pemantau
Kebersihan dan LED Salur Keluar Udara tertutup
secara automatik.
Apabila tiada pergerakan di kawasan yang
dipasang penderia
• Paparan Depan, Pemantau Kebersihan dan LED
Salur Keluar Udara tertutup, pelembap berhenti
dan unit bertukar kepada aliran udara yang
minimum untuk menjimatkan penggunaan kuasa.
• Apabila kelembapan bilik melebihi 80% dan bilik
cerah, Plasmacluster Ion dikeluarkan dengan aliran
udara yang kuat.
LED Salur Keluar Udara
Paparan Depan,
Pemantau Kebersihan
NOTA
(KC-G60 / KC-G50)
PENDERIA PENGESANAN
Habuk
(sensitif)
PM2.5 (zarah lebih kecil
daripada 2.5 mikron), dll.
Asap rokok, habuk di
rumah (kotoran, najis dan
bangkai tungau, spora
kulapuk, debunga)
Bau Rokok, kosmetik, alkohol,
penyembur dan bau lain
Suhu Suhu bilik
Kelembapan Kelembapan bilik
Lampu Kecerahan bilik
Gerakan*3Pergerakan individu
atau haiwan peliharaan
*3: Mengesan hanya apabila mod Intelligent sedang
beroperasi.
7 pengesanan oleh 6 penderia

B. MELAYU
M-2
Pembersih udara menyedut udara dalam bilik
melalui salur masuk udara, mengalirkannya
melalui Prapenapis, Penapis Penyahbau
dan Penapis HEPA di dalam unit, kemudian
mengeluarkannya melalui salur keluar udara.
Penapis HEPA boleh menyingkirkan 99.97%
habuk sekecil 0.3 mikron yang dapat melalui
penapis dan juga membantu menyerap bau.
Penapis Penyahbau menyerap bau sedikit demi
sedikit semasa udara mengalir melalui penapis.
Sesetengah bau yang diserap oleh penapis
akan terurai lama-kelamaan, menyebabkan
bau semakin kuat. Bergantung pada keadaan
penggunaan, dan terutama sekali jika produk
digunakan dalam persekitaran yang jauh
lebih teruk berbanding isi rumah biasa, bau
ini mungkin menjadi kuat lebih cepat daripada
jangkaan. Jika bau ini berlarutan, ganti
penapis. (Ruj. M-13)
Apabila mineral dalam air paip melekat pada
penapis serta menjadi keras dan putih, ia
akan menyerap bau di dalam bilik yang boleh
menyebabkan pengeluaran bau yang tidak
menyenangkan apabila penapis pelembap
kering. (Berbeza-beza mengikut kualiti air
dan faktor persekitaran lain) Jika ini berlaku,
jalankan penyelenggaraan penapis pelembap.
(Ruj. M-12)
• Pembersih udara direka untuk menyingkirkan habuk yang
terampai di udara dan bau yang disebabkannya.
Pembersih udara ini tidak direka untuk menyingkirkan
gas-gas berbahaya seperti karbon monoksida yang
terkandung dalam asap rokok. Pembersih udara ini
mungkin tidak dapat menghapuskan bau sepenuhnya jika
sumber bau masih ada di situ.
Sila baca sebelum
mengendalikan Pembersih
Udara baru anda
Prapenapis
Penapis Penyahbau
Penapis HEPA
B. MELAYU
Terima kasih kerana membeli Pembersih Udara
SHARP ini. Sila baca manual ini dengan teliti
sebelum menggunakan pembersih udara anda.
Selepas membacanya, simpan manual, di lokasi
yang mudah dicari untuk rujukan pada masa
akan datang.
ISI KANDUNGAN
ARAHAN KESELAMATAN PENTING
...... M-3
• AMARAN
• NOTA
• AMARAN BERKAITAN OPERASI
• GARIS PANDUAN PEMASANGAN
• GARIS PANDUAN PENAPIS
NAMA-NAMA BAHAGIAN......................M-5
• DEPAN
• BELAKANG
• PANEL OPERASI
• PAPARAN DEPAN
PERSEDIAAN............................................M-7
• PEMASANGAN PENAPIS
OPERASI....................................................M-7
• MULA / BERHENTI
• MOD HAZE
• MOD INTELLIGENT (KC-G60 / KC-G50)
• MOD AUTO (KC-G40)
• MOD SPOT PLASMACLUSTER ION
• MEMILIH MOD
• KUNCI KANAK-KANAK
• TETAPAN PELEMBAPAN
(MENGISI SEMULA TANGKI AIR)
• PEMASA HIDUP
• PEMASA MATI
• MEMILIH PAPARAN
• PLASMACLUSTER ION ON/OFF
• CARA MENGENDALIKAN TETAPAN PELBAGAI
PENJAGAAN DAN PENYELENGGARAAN
.... M-11
• PENUNJUK PENAPIS
• INDEKS PENJAGAAN
• TANGKI AIR
• UNIT / PANEL BELAKANG
• PENAPIS DAN DULANG PELEMBAP
• PENAPIS HEPA / PENAPIS PENYAHBAU
• PENGGANTIAN PENAPIS
PENGENALPASTIAN DAN PENYELESAIAN
MASALAH................................................M-14
SPESIFIKASI...........................................M-15
NOTA

M-3
ARAHAN KESELAMATAN PENTING
Sentiasa ikuti langkah keselamatan asas
semasa menggunakan perkakas elektrik,
termasuk yang berikut:
AMARAN – Sentiasa perhatikan yang
berikut untuk mengurangkan risiko kejutan
elektrik, kebakaran atau kecederaan:
•
Baca semua arahan sebelum menggunakan unit ini.
•Hanya gunakan salur keluar 220-240 volt.
•
Perkakas ini tidak direka untuk digunakan
oleh mereka (termasuk kanak-kanak)
yang cacat tubuh badan, cacat deria atau
mental, mahupun mereka yang kurang
berpengalaman dan pengetahuan, kecuali
jika mereka diberikan penyeliaan atau
arahan yang betul tentang cara penggunaan
perkakas oleh orang yang bertanggungjawab
atas keselamatan mereka.
Kanak-kanak hendaklah diawasi bagi
memastikan mereka tidak bermain
dengan perkakas ini.
•
Jika kord kuasa rosak, ia mesti digantikan oleh
pengilang, wakil servis, Pusat Servis Sharp
yang sah atau individu yang berkelayakan
sama bagi mengelakkan bahaya.
•
Pastikan anda menanggalkan palam kuasa
apabila mengisi semula Tangki Air sebelum
menjalankan penyelenggaraan, apabila
menanggalkan, memasang dan menggantikan
penapis serta apabila tidak menggunakannya
untuk masa yang lama. Kegagalan melakukan
sedemikian akan menyebabkan litar pintas
berlaku yang mengakibatkan kejutan elektrik
atau kebakaran.
•Jangan gunakan unit ini jika kord kuasa
atau palamnya rosak atau jika sambungan
ke salur keluar dinding longgar.
•Dari semasa ke semasa buang habuk yang
melekat pada palam.
•Jangan masukkan jari atau objek asing ke
dalam salur masuk atau salur keluar udara.
•
Sentiasa pegang palam dan jangan sesekali
tarik kordnya apabila hendak menanggalkan
palam kuasa. Kegagalan berbuat demikian
boleh menyebabkan litar pintas yang boleh
mengakibatkan kejutan elektrik atau kebakaran.
•Apabila mengeluarkan unit ini, jangan
biarkan rodanya merosakkan kord kuasa.
Kegagalan berbuat demikian boleh menyebabkan
kejutan elektrik, penjanaan haba atau kebakaran.
•Berhati-hati agar kord kuasa tidak rosak,
jika tidak, boleh menyebabkan kejutan
elektrik, terlebih panas atau kebakaran.
•
Jangan tanggalkan palam dengan tangan yang basah.
•
Jangan letakkan unit ini berhampiran perkakas
yang menggunakan gas atau tempat berdiang.
•Hanya Pusat Servis Sharp yang Sah boleh
menservis pembersih udara ini. Sila hubungi
Pusat Servis yang berdekatan bagi sebarang
masalah, pelarasan atau pembaikan.
•
Jangan kendalikan unit ini di dalam bilik
di mana penyembur pembunuh serangga
digunakan. Jangan kendalikan unit ini di
dalam bilik di mana udaranya berminyak,
kemenyan atau setanggi sedang dibakar,
terdapat nyalaan api untuk menyalakan rokok
atau udaranya berwasap bahan kimia. Jangan
kendalikan unit ini di lokasi di mana unit ini
mungkin basah, seperti di dalam bilik air.
•Sila berhati-hati semasa membersihkan
unit ini. Bahan pencuci yang kuat mengakis
boleh merosakkan bahagian luar unit.
•Apabila mengangkat unit ini, keluarkan
dahulu Tangki Air dan Dulang Pelembapnya,
kemudian pegang unit pada pemegangnya
di sebelah kiri dan kanan.
•Jangan minum air di dalam Dulang
Pelembap atau Tangki Air.
•Jangan dedahkan unit kepada air. Berbuat
demikian boleh menyebabkan litar pintas
atau kejutan elektrik.
•
Ganti air di dalam TangkiAir setiap hari dengan
air bersih dari paip, dan selalulah bersihkan
TangkiAir dan Dulang Pelembap (Ruj. M-8,
M-11 dan M-12).Apabila unit ini tidak digunakan,
buang air di dalam TangkiAir dan Dulang
Pelembap. Membiarkan air di dalam TangkiAir
atau Dulang Pelembap boleh mengakibatkan
kulapuk, bakteria dan bau busuk.
Dalam kes-kes yang jarang berlaku, bakteria
sedemikian boleh membahayakan kesihatan.
NOTA – Apa harus dilakukan jika unit
mengganggu penerimaan radio atau TV
Jika pembersih udara mengganggu
penerimaan radio atau televisyen, cuba satu
atau lebih langkahlangkah berikut:
• Ubah atau alih kedudukan antena penerima.
• Jauhkan unit dari radio atau TV.
•
Sambungkan alat ini kepada salur keluar pada
litar yang berbeza dengan yang bersambung
kepada penerima radio atau TV.
• Dapatkan nasihat penjual atau juruteknik
radio atau TV yang berkelayakan.
AMARAN BERKAITAN OPERASI
•
Jangan halang salur masuk atau keluar udara.
•Jangan letak unit ini berdekatan atau di atas
objek panas, seperti dapur masak atau alat
pemanas, atau di mana ia mungkin terkena
wap air.
This manual suits for next models
7
Table of contents
Languages:
Other Sharp Air Cleaner manuals

Sharp
Sharp FP-F40A User manual

Sharp
Sharp FZ-R60SF User manual

Sharp
Sharp FP-J60TA User manual

Sharp
Sharp FX-J80U User manual

Sharp
Sharp EH-HS41 User manual

Sharp
Sharp IG-DX10A User manual

Sharp
Sharp KI-L80 Manual

Sharp
Sharp Plasmacluster IG-CL15U Setup guide

Sharp
Sharp FZ-C70HFE User manual

Sharp
Sharp FU-S40E User manual

Sharp
Sharp FZ-C150DFE User manual

Sharp
Sharp KI-N50TA User manual

Sharp
Sharp FZ-S63MF User manual

Sharp
Sharp FU-A80J User manual

Sharp
Sharp FU-Y30J-W User manual

Sharp
Sharp FU-551KB User manual

Sharp
Sharp Plasmacluster KC-840E User manual

Sharp
Sharp KI-N50A User manual

Sharp
Sharp Plasmacluster KC-850U User manual

Sharp
Sharp FU-A28TA User manual