manuals.online logo
Brands
  1. Home
  2. •
  3. Brands
  4. •
  5. Sharp
  6. •
  7. Cash Register
  8. •
  9. Sharp XE-A201 Parts list manual

Sharp XE-A201 Parts list manual

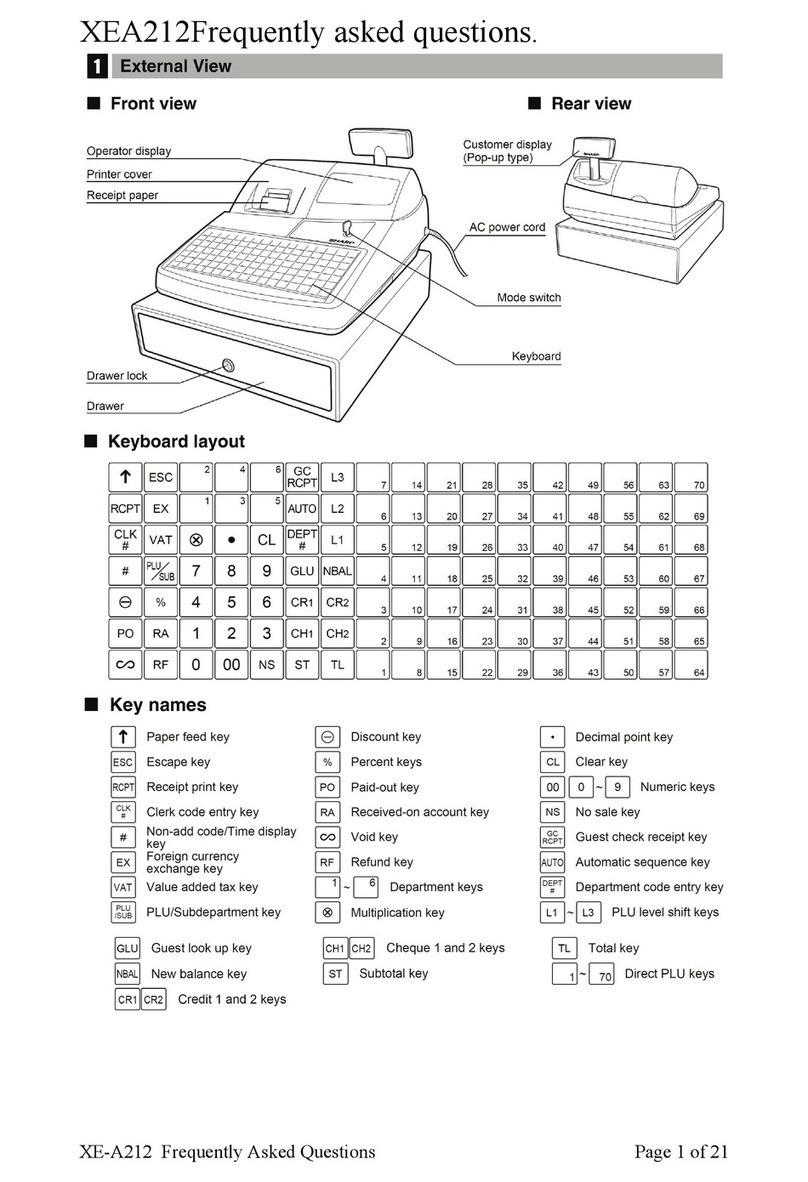
XEA201 Frequently Asked Questions Page 1 of 17
XEA201 Frequently Asked Questions.
XEA201 Frequently Asked Questions Page 2 of 17
How do I prepare my XEA201 for set-up?
Take the XEA201 out of its box, remove the packing materials. Place the XEA201 on a flat stable surface,
close to a power outlet. Also insure it will not be exposed to direct sunlight, and is away from water (taps,
sinks, etc).
How do I clear the XEA201 to ready it for programming?
It is very important that you “initialise” the XEA201 correctly once you have removed it from the box, and
are ready to start programming. If you do not “initialise” the XEA201, it might not work correctly.
1. Insert the Mode key into the mode switch and turn it to the REG position.
2. Plug the AC adapter connector into the AC adapter jack, then plug the AC adapter into the wall
outlet.
This must be done without the batteries installed. If you have installed batteries; be sure to remove
them before you start this procedure.
After a few seconds, the register should beep three times, and the display should look as indicated
below.
The register is initialised.
If the beeps are not heard as described, the initialisation has not been successful. If this is the case:
disconnect the register from the AC outlet, wait at least one minute, and then try again.
If there were any data from a previous programming attempt, they would have been cleared
XEA201 Frequently Asked Questions Page 3 of 17
How to install the batteries, and why should I do so?
The XEA201 uses 3 x AA size batteries to hold its preset, and sales data in memory when it is switched
off. If you do not install 3 x AA size batteries; the XEA201 will be cleared of all preset, and sales data
when it is turned off.
1. Lift the printer cover up and forward, and detach it. Be careful of the paper cutter to avoid cutting
yourself.
2. Open the battery compartment cover next to the paper roll cradle.
3. Install 3 alkaline AA size batteries.
4. When the batteries are properly installed the “ ” message on the display will disappear.
Note: If you press a key by mistake, an error symbol “PPPPPPPPPP” might be displayed. Press CL
to clear the symbol after installing the paper rolls. (see next question).
5. Close the battery compartment cover.
A set of new alkaline batteries once installed will keep the memory for up to one year without power.
Please see the question on how to replace the batteries for details on when and how to replace the batteries.
If the unit is not used for some months, you might not get any warning when you turn it on that the
batteries have failed. In this instance, the XEA201 will initialise itself.
XEA201 Frequently Asked Questions Page 4 of 17
What sort of paper roll do I use, and how do I install it?
The XEA201 uses a thermally sensitised paper roll which is: 57mm wide. Its maximum diameter should
be no more than 80mm.
1. Pull the printer cover forward and detach it. The paper cutter is mounted on the printer cover, be
careful not to cut yourself.
2. Make sure the print head release lever is positioned as per the diagram below.
3. Before placing a new paper roll in the paper roll cradle, cut off the pasted (taped), part of the paper
and confirm that the cut end of the paper is straight.
4. Set the paper roll into the paper roll cradle as per the diagram below.
XEA201 Frequently Asked Questions Page 5 of 17
5. Insert the end of the paper into the printer until it is caught by the printer auto-feeds and comes out
of the top of the printer. If the printer does not catch the paper, feed the paper while pressing the 
key.
6. Cut off the excess paper and replace the printer cover.
7. Press the key to make sure the paper end comes out of the printer cover and clean paper appears.
If the paper end does not come out. Open the printer cover, and pass the paper end between the
paper cutter and the paper guide of the printer cover, and replace the cover.
XEA201 Frequently Asked Questions Page 6 of 17
How do I set the time and date?
1. Set the mode key to the PGM position.
2. Enter the time as a four digit number. Use the 24 hour format. For example
2:30pm would be entered as 1 4 3 0
3. Press the #/TM/ST key
4. Enter the date as an eight digits using the day-month-year format. For example
5. 7th of December 2012 would be entered as 0 7 1 2 2 0 1 2
6. Press the #/TM/ST key
How do I set a 10% GST rate?
1. Set the mode key to the PGM position
2. Enter:
#/TM/ST 9 1 1 0 0 0 0 0 #/TM/ST TL/NS
XEA201 Frequently Asked Questions Page 7 of 17
How do I set a Department as taxable or not taxable?
1. Set the mode key to the PGM position
2. To make a department taxable, enter:
-1--0-0 -8--1-DEPT KEY TL/NS
For example to make department 1 taxable enter:
-1--0-0 -8--1-1 17 TL/NS
For example to make department 1 non-taxable enter:
-8--1-1 17 TL/NS
Press _SHIFT then the department key for departments 17 to 32
For example to make department 17 taxable enter:
-1--0-0 -8--1-SHIFT 1 17 TL/NS
For example to make department 17 non-taxable enter:
-8--1-SHIFT 1 17 TL/NS
XEA201 Frequently Asked Questions Page 8 of 17
How do I set the letters GST to print on the receipt?
1. Set the mode key to the PGM position
2. Enter: #/TM/ST -3-_●_9 
-G--S--T-#/TM/ST TL/AT/NS
You can enter characters with the department and function keys. You will see the
letters of the Alphabet that a key covers in the bottom right hand corner of the key.
You can also enter text using 3 digit codes. Please refer to the full instruction manual (pages 33 -34)
for details.
How do I set the $ symbol to print on receipts?
1. Set the mode key to the PGM position
XEA201 Frequently Asked Questions Page 9 of 17
2. Enter:
#/TM/ST 8 5 _●0 3 2 _00_0 3 2 _00_0 3 2 _00_
0 3 6 _00_#/TM/ST TL/NS
How do I make cash sales amounts round to the nearest 5 cents?
3. Set the mode key to the PGM position
4. Enter:
#/TM/ST 6 7 _1 1 8 _2_1 0 1 0 #/TM/ST TL/NS
How do I change the power save (screen off) time?
5. Set the mode key to the PGM position
6. Enter:
#/TM/ST 1 0 _9 9 9 #/TM/ST TL/AT/NS
This will set the power save function off.
XEA201 Frequently Asked Questions Page 10 of 17
How do I stop the Electronic Journal near full error symbol from dispalying?
7. Set the mode key to the PGM position
8. Enter:
#/TM/ST 6 8 _0 0 1 _0_0 0 1 0 #/TM/ST TL/AT/NS
This will cause the near full symbol for the Electronic Journal (EJ), not to display. The EJ near full
warning symbol is a ●displayed right below the 8th and 9th places on the display. If this warning is
disabled records in the EJ will be deleted on a first in first out (FIFO) basis. The EJ has a 2000 line
capacity.
How do I give a department a descriptive name?
1. Set the mode key to the PGM position
2. Enter: #/TM/ST -1-_●_DEPT KEY enter characters
#/TM/ST TL/NS
You can enter up to 12 characters with the function and department keys. You will see the
letters of the Alphabet that a key covers in the bottom right hand corner of the key.
You can also enter text using 3 digit codes. Please refer to the full instruction manual (pages 33 -34)
for details.
XEA201 Frequently Asked Questions Page 11 of 17
How do I get my business name and ABN to print on the receipt?
1. Set the mode key to the PGM position
2. Enter: #/TM/ST 1 1 __3 #/TM/ST TL/NS
3. Type each line of your information, up to 6 lines as follows:
4. Enter the Top (first) line do the following:
#/TM/ST -4-_●_-1-__use the keyboard to enter
up to 24 characters #/TM/ST TL/NS
Enter the second line do the following:
#/TM/ST -4-_●_-2-__use the keyboard to enter
up to 24 characters #/TM/ST TL/NS
5. Enter the third line do the following:
#/TM/ST -4-_●_-3-__use the keyboard to enter
up to 24 characters #/TM/ST TL/NS
6. Enter the fourth line do the following:
#/TM/ST -4-_●_-4-__use the keyboard to enter
up to 24 characters #/TM/ST TL/NS
7. Enter the Fifth line do the following:
#/TM/ST -4-_●_-5-__use the keyboard to enter
up to 24 characters #/TM/ST TL/NS
XEA201 Frequently Asked Questions Page 12 of 17
8. Enter the sixth (last) line do the following:
#/TM/ST -4-_●_-6-__use the keyboard to enter
up to 24 characters #/TM/ST TL/AT/NS
You can enter up to 24 characters with the function and department keys. You will see the
letters of the Alphabet that a key covers in the bottom right hand corner of the key.
The line number you are currently entering will show at the left end of the operator display, and the
number of characters you have entered will be shown at the right end of the operator display.
To enter numbers, press the key on the keyboard. You may then use the numeric keypad to
enter numbers. Press the again to turn off number enter.
You can also enter text using 3 digit codes. Please refer to the full instruction manual (pages 33 -34)
for details.
How do I enable copy receipts?
9. Set the mode key to the PGM position
10. Enter:
#/TM/ST 6 3 _0 1 0 _1_0 0 0 1 #/TM/ST TL/NS
How do I stop the receipt printing after each sale?
1. Turn the mode key to OPX/Z mode
2. Ensure no sale is in progress by pressing TL/NS
XEA201 Frequently Asked Questions Page 13 of 17
3. Press _RCPT/PO_
This key toggles the receipt printing from ON to OFF or OFF to ON
Press the _RCPT/PO_key when in REG mode to print a receipt after the sale if required. If
there are more than 30 items in the sale, the receipt will print the total of the sale only.
How shall I know when it is time to replace the batteries?
The XEA201 has a “Low Battery” symbol which is: , and a “Flat Battery/No Battery” symbol which
is:
When the “Low Battery” symbol is displayed, you should replace the batteries with new ones within two
days of the low battery symbol being first displayed. Failure to do so will mean that the XEA201 might
lose its programmed settings and any sales data in the event of a power failure.
When the “Flat Battery/No Battery” symbol is displayed the battery must be replace immediately. If not
the XEA201 will lose all its programmed settings, and any sales data if the power fails or is turned off.
To replace the batteries, do the following.
1. Make sure the XEA201 is plugged in.
2. Remove the printer cover.
3. Open the battery compartment cover next to the paper roll cradle, and remove the old batteries.
4. Install three (3) new alkaline batteries (AA size), in the battery compartment. Be sure the positive
and negative poles of each battery are facing in the correct direction. When they are installed
correctly, the low battery or no battery message will disappear.
5. Close the battery compartment cover.
6. Replace the printer cover.
XEA201 Frequently Asked Questions Page 14 of 17
The XEA201 display shows “E32” and I cannot make a sale. How to I fix this?
You must sign a clerk on. Please do the following to fix this problem.
1. Press the CL button to clear the “E32” message.
2. Enter: 1 CLK# to sign on clerk 1.
How do I make a Correction after finalizing a Transaction (void mode)?
When you need to correct (void) incorrect entries after the sale has been finalised, Please use the following
procedure:
1. Turn the mode key to the Position with the MA key.
2. Re-enter the sale information you wish to remove. All the amounts you enter will be removed from the
relevant Department and/or PLU as well as the Transaction totals such as Cash in Drawer. The
amounts removed will be added to the Void Mode Transaction totaliser. A Void Mode receipt will
print even if the receipt is switched off.
XEA201 Frequently Asked Questions Page 15 of 17
The XEA201 displays “E34” when I try to finalise a sale to cash. How do I fix this?
1. First you must either: finalise the sale to Credit card CR1 and CR2 or Cheque CH1 or CH2
or do a subtotal void to clear the sale. Subtotal void is done by entering:
#/TM/ST #/TM/ST
2. Turn the mode key to PGM
3. Enter the following:
-8 -#/TM/ST TL/NS
4. Turn the mode key back to REG.
The “E34” problem should be fixed.
XEA201 Frequently Asked Questions Page 16 of 17
How do I produce sales reports?
There are two type types of reports: X or e(X)amine reports
Z or (Z)ero reports
X reports read out your sales data, but do not clear it from the XEA201
Z reports read out your sales data, and clear it from the XEA201
There are two levels of X and Z reports: Daily
Period
A daily X report allows you to examine your daily figures anytime during the day without clearing them.
A daily Z report allows you to print out your daily figures at the end of the day, and clear them. This is
done to ready the XEA201 for the next day’s trading. The daily Z report also adds its data to the Period
report memory.
A Period X report allows you to see your sales data for the period up to the time of the last Daily Z report.
A Period Z report allows you to print out your period sales data, and clears it to ready the XEA201 for the
next period.
To produce a daily X report, do the following:
1. Turn the mode key to X1/Z1 position
Press the TL/NS key
A daily X report will print. It will have *X1* printed at the top of the report.
To produce a daily Z report, do the following:
2. Turn the mode key to X1/Z1 position
Press ●TL/NS key
A daily Z report will print. It will have *Z1* printed at the top of the report.
XEA201 Frequently Asked Questions Page 17 of 17
To produce a period X report, do the following:
3. Turn the mode key to X2/Z2 position
Press the TL/NS key
A period X report will print. It will have *X2* printed at the top of the report.
To produce a period Z report, do the following:
1. Turn the mode key to X2/Z2 position
Press ●TL/NS key
A period Z report will print. It will have *Z2* printed at the top of the report.
This list of Frequently Asked Questions is not intended to replace the XEA201 instruction manual. It
does not list all the functions and features of the XEA201. Please refer to the XEA201 instruction
manual for more guidance on functions and programming steps not covered in these “Frequently Asked
Questions”.

Other manuals for XE-A201

7

Other Sharp Cash Register manuals

Sharp UP-600 User manual

Sharp

Sharp UP-600 User manual

Sharp ER-2100 User manual

Sharp

Sharp ER-2100 User manual

Sharp ER-3241 User manual

Sharp

Sharp ER-3241 User manual

Sharp ER-A170 User manual

Sharp

Sharp ER-A170 User manual

Sharp XE-A207 User manual

Sharp

Sharp XE-A207 User manual

Sharp ER-A450T Owner's manual

Sharp

Sharp ER-A450T Owner's manual

Sharp ER-A520 User manual

Sharp

Sharp ER-A520 User manual

Sharp ER-A420 User manual

Sharp

Sharp ER-A420 User manual

Sharp XE-A110 User manual

Sharp

Sharp XE-A110 User manual

Sharp UP-600 User manual

Sharp

Sharp UP-600 User manual

Sharp ER-A411 User manual

Sharp

Sharp ER-A411 User manual

Sharp ER-A320 Owner's manual

Sharp

Sharp ER-A320 Owner's manual

Sharp ER-87MA User manual

Sharp

Sharp ER-87MA User manual

Sharp XE-A406 Parts list manual

Sharp

Sharp XE-A406 Parts list manual

Sharp XE-A177BK User manual

Sharp

Sharp XE-A177BK User manual

Sharp XE-A106 User manual

Sharp

Sharp XE-A106 User manual

Sharp XE-A404 User manual

Sharp

Sharp XE-A404 User manual

Sharp XE-A201 User manual

Sharp

Sharp XE-A201 User manual

Sharp ER-A440 User manual

Sharp

Sharp ER-A440 User manual

Sharp ER-A347A User manual

Sharp

Sharp ER-A347A User manual

Sharp XE-A507 Setup guide

Sharp

Sharp XE-A507 Setup guide

Sharp XE-A110 User manual

Sharp

Sharp XE-A110 User manual

Sharp UP-600 User manual

Sharp

Sharp UP-600 User manual

Sharp ER-2386S User manual

Sharp

Sharp ER-2386S User manual

Popular Cash Register manuals by other brands

Olivetti ECR 5600 reference guide

Olivetti

Olivetti ECR 5600 reference guide

QUORION QMP 3000 user manual

QUORION

QUORION QMP 3000 user manual

Sam4s ER-260EJ Operating and programming manual

Sam4s

Sam4s ER-260EJ Operating and programming manual

Casio CE-6000 User and programming manual

Casio

Casio CE-6000 User and programming manual

Casio SE-S10 Service manual

Casio

Casio SE-S10 Service manual

Sam4s ER-180T Operation and programming manual

Sam4s

Sam4s ER-180T Operation and programming manual

Casio QT-2000 user manual

Casio

Casio QT-2000 user manual

TEC MA-1595-1 SERIES owner's manual

TEC

TEC MA-1595-1 SERIES owner's manual

POSIFLEX PST-6000 SERIES Technical manual

POSIFLEX

POSIFLEX PST-6000 SERIES Technical manual

Puloon ECDM-400 manual

Puloon

Puloon ECDM-400 manual

Sanyo ECR-525 instruction manual

Sanyo

Sanyo ECR-525 instruction manual

POSMicro CR3001 user manual

POSMicro

POSMicro CR3001 user manual

ELCOM Euro-2000TE Alpha user manual

ELCOM

ELCOM Euro-2000TE Alpha user manual

Royal 240DX instruction manual

Royal

Royal 240DX instruction manual

Casio SE-S300 Service manual

Casio

Casio SE-S300 Service manual

Japan Cach Machine G356E Service manual

Japan Cach Machine

Japan Cach Machine G356E Service manual

Olivetti ECR 5900 user guide

Olivetti

Olivetti ECR 5900 user guide

National Cash Register Class 500 user manual

National Cash Register

National Cash Register Class 500 user manual

manuals.online logo
manuals.online logoBrands
  • About & Mission
  • Contact us
  • Privacy Policy
  • Terms and Conditions

Copyright 2025 Manuals.Online. All Rights Reserved.