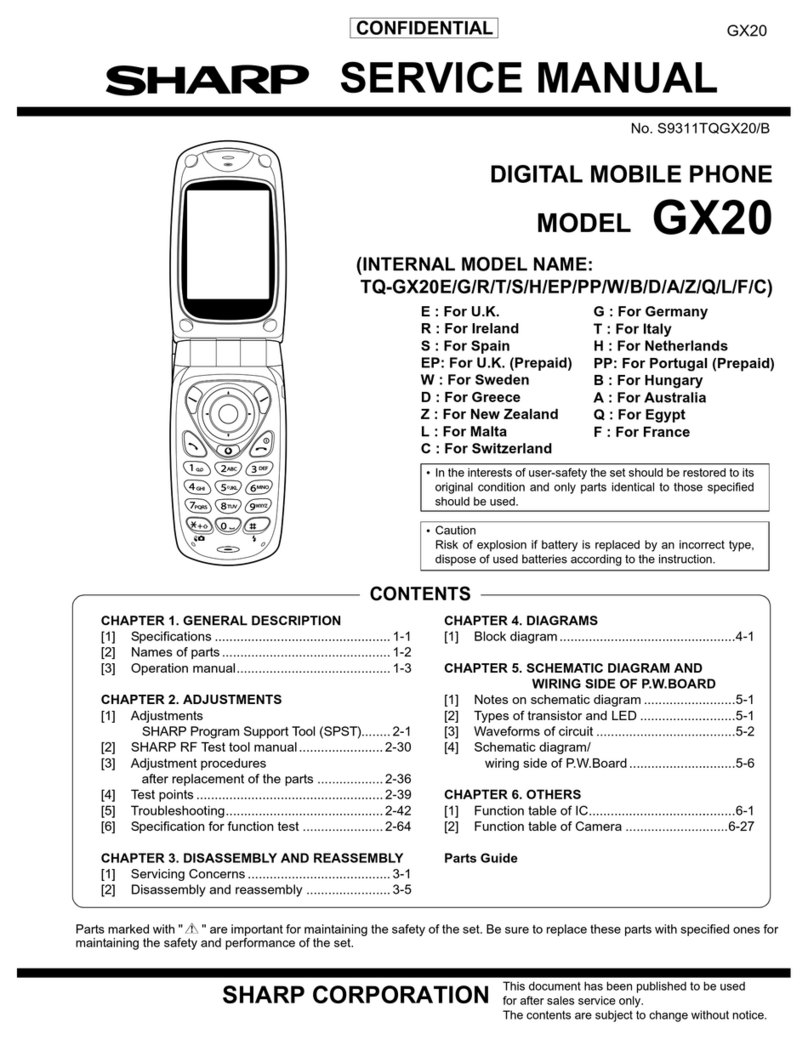
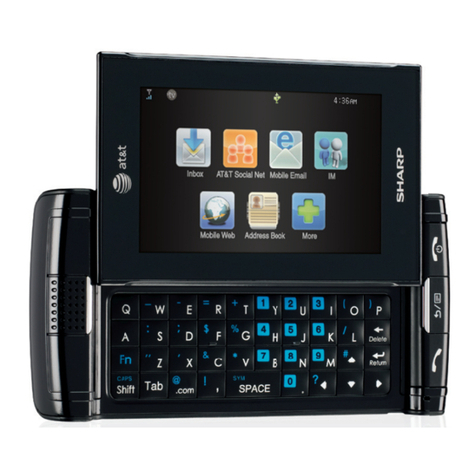
Sharp GX30 User manual

CONFIDENTIAL
SERVICING CONCERNS
CHAPTER 1. GENERAL DESCRIPTION
[1] Specifications................................................. 1-1
[2] Names of parts............................................... 1-2
[3] Operation manual .......................................... 1-3
CHAPTER 2. ADJUSTMENTS,
PERFORMANCE CHECK, AND
FIRMWARE UPGRADE
[1] SHARP Program Support Tool SPST).......... 2-1
[2] Test points.................................................... 2-44
[3] Troubleshooting ........................................... 2-48
CHAPTER 3. DISASSEMBLY AND REASSEMBLY
[1] Servicing Concerns........................................ 3-1
[2] Disassembly and reassembly ........................ 3-4
CHAPTER 4. DIAGRAMS
[1] Block diagram................................................ 4-1
CHAPTER 5. SCHEMATIC DIAGRAM AND
WIRING SIDE OF P.W.BOARD
[1] Notes on schematic diagram......................... 5-1
[2] Types of transistor and LED .......................... 5-1
[3] Waveforms of circuit ...................................... 5-2
[4] Schematic diagram/
Wiring side of P.W.Board ............................. 5-5
CHAPTER . OTHERS
[1] Function table of IC ....................................... 6-1
[2] Function table of Camera ............................ 6-27
[3] Function table of Display ............................. 6-28
Parts Guide
SERVICE MANUAL
GX30
No. S5409TQGX30/B
DIGITAL MOBILE PHONE
GX30
MODEL
SHARP CORPORATION
CONTENTS
Parts marked with " " are important for maintaining the safety of the set. Be sure to replace these parts with specified ones for
maintaining the safety and performance of the set.
This document has been published to be used
for after sales service only.
The contents are subject to change without notice.
(INTERNAL MODEL NAME:
TQ-GX30E/G/R/T/S/H/EP/PP/W/B/D/A/Z/Q/L/F/C/K/U)
E :
R :
S :
EP:
W :
D :
Z :
L :
C :
U :
G :
T :
H :
PP:
B :
A :
Q :
F :
K :
• In the interests of user-safety the set should be restored to its
original condition and only parts identical to those specified
should be used.
• Caution
Risk of explosion if battery is replaced by an incorrect type,
dispose of used batteries according to the instruction.
For U.K.
For Ireland
For Spain
For U.K. (Prepaid)
For Sweden
For Greece
For New Zealand
For Malta
For Switzerland
For Belgium
For Germany
For Italy
For Netherlands
For Portugal (Prepaid)
For Hungary
For Australia
For Egypt
For France
For Austria

GX30
i
CONFIDENTIAL
PhoneGX30Service ManualService ManualMarketE
SERVICING CONCERNS
1. When requested, back-up user’s handset data using SPST (S ARP Program Support Tool). Otherwise, before servicing, warn the user that data
in the memory may be lost during repairs.
2. Upgrade the firmware to the latest version using SPST before returning the handset to the customer.
3. After repairs, inspect the handset according to the following flowchart.
4. When storing or transporting a PWB, put it into a conductive bag or wrap it in aluminum foil. (C-MOS IC may be damaged by electrostatic
charges.)
5. Do not leave fingerprints, etc. on ornamental parts including a cabinet, especially clear windows for main and sub displays. Wear fingerstalls to
avoid this.
Also, ensure not to leave fingerprints on the surface of main and external display panels.
6. To prevent oxidation which causes connection problems, do not touch any terminals on the electric board, microphone, vibrator, earpiece and
speaker.
When handling these parts, wear fingerstalls. Should you touch these parts, clean them with a soft dry cloth.
Always wear fingerstalls when handling a shield case on the electric board. Otherwise oxidation may occur causing handset performance deterio-
ration.
7. The FPC is a precision device. andle it carefully to prevent any damages.
8. Do not expose the moisture sensor to liquids.
If the sheet gets wet, red ink runs. In this case, replace the sheet with a new one.
Be careful about your perspiration.
9. Before you disassemble or reassemble handset, make sure to remove the Li-Ion battery.
10.Be sufficiently careful with static electricity of integrated circuits and other circuits. Wear static electricity prevention bands while servicing.
Repairs are completed.
(Fixed parts have been checked for proper operation.)
Check IMEI NO./Operator code (Destination)/
Firmware version by Identity function of SPST.
Inspect each device using performance check
adjustment function of SPST.
Carry out RF performance check with SPST.
All completed.

GX30
1 – 1
CONFIDENTIAL
PhoneGX30Service ManualService ManualMarketE
CHAPTER 1. GENERAL DESCRIPTION
[1] Specifications
FOR A COMPLETE DESCRIPTION OF THE OPERATION OF THIS UNIT, PLEASE
REFER TO THE OPERATION MANUAL.
Genera : Quad - ba d (GSM 850 MHz/GSM 900 MHz/
DCS 1800 MHz/PCS 1900MHz)
GPRS-e abled
WAP, MMS, SMS
Dimensions
(fo ded, exc ud-
ing the aeria )
(H x W x D): 95 x 49 x 26 mm
Weight: 110 g
Battery operating
temperature: 0°C - 40°C
Main disp ay: Display dime sio s: 240 x 320 pixels
LCD display: CGS 262,144 colours with back-
light
LCD back light: LED back light white colour LEDs
Externa disp ay: Display dime sio s: 64 x 96 pixels
LCD display: STN 65,536 colours LCD with back
light
Camera: CCD 1M pixels built-i camera
Zoom: Wide a d zoom mode
[Supported 20 (whe image size is
160 x 120 pixels) x zoom]
Le s: F2.8, f = 3.7 mm
Sound: 40-polypho ic ri g melodies
Mobi e ight: 7 colours
Externa DC
supp y vo tage: 5.2 V
Battery: 3.7 V, 780 mAh, Li-Io
Standby time: 100 ~ 250 hours
Ta k time: 160 ~ 240 mi .
Others: Side key
I frared port 1.2 L/P (maximum dista ce 20 cm)
Co ector for AC charger a d data cable
Sta dard ha ds free co ector (ø2.5)
Battery ru i g time depe ds o the battery a d SIM card as well as
the etwork co ditio s a d usage
Specificatio s for this model are subject to cha ge without prior
otice.
Powered by JBlend Copyright 1997-
2003 Aplix Corporation. All rights reserved.
JBlend and all JBlend-based trade arks
and logos are trade arks or registered
trade arks of Aplix Corporation in Japan
and other countries.
Powered by Mascot Capsule /Micro3D Edition
Mascot Capsule is a registered trade ark of HI Corpora-
tion
2002-2003 HI Corporation. All Rights Reserved.
Licensed by Inter Digital Technology Corporation under
one or ore of the following United States Patents and/or
their do estic or foreign counterparts and other patents
pending, including U.S. Patents: 4,675,863: 4,779,262:
4,785,450 & 4,811,420.
Licensed under U.S. Patent 4,558,302 and foreign counter-
parts.
T9 Text Input is licensed under one or ore of the following:
U.S. Pat. Nos. 5,818,437, 5,953,541, 5,187,480, 5,945,928,
and 6,011,554; Australian Pat. No. 727539; Canadian Pat.
No. 1,331,057;United Kingdo Pat. No. 2238414B; Hong
Kong Standard Pat. No. HK0940329; Republic of
Singapore Pat. No. 51383; Euro. Pat. No. 0 842 463
(96927260.8) DE/DK, FI, FR, IT, NL,PT.ES,SE,GB;
Republic of Korea Pat. Nos. KR201211B1 and
KR226206B1; and additional patents are pending
worldwide.
SD logo is a trade ark.
Bluetooth is a trade ark of the Bluetooth SIG, Inc.
The Bluetooth word ark and logos are owned by the
Bluetooth SIG, Inc. and any use of such arks by Sharp is
under license. Other trade arks and trade na es are
those of their respective owners.
CP8 PATENT
TM
TM
R
R
C
GX30
1 – 2
CONFIDENTIAL
[2] Names of parts
20
21
22
23
1
2
3
4
5
6
7
8
9
12
10
11
13
14
15
18
16
17
19
24
25
26
27
1. Earpiece
2. Navigation Keys (Arrow Keys):
Moves cursor to select
menu items, etc.
,,, inthis
manual indicate these keys.
Up/Down arrow keys: Displays Contacts List
entries in stand-by mode.
Left arrow key: Displays list of
pplications in stand-by
mode.
Right arrow key: Displays Pictures screen in
stand-by mode.
3. Centre Key: Displays Main menu in
stand-by mode and
executes functions.
in this manual indicates
this key.
4. Left Soft Key: Executes the function at the
bottom left of the screen.
in this manual indicates
this key.
5. Send Key: Makes or accepts calls,
views the call in stand-by
mode.
. Voice Mail Key:Press and hold this key to
connect to the Voice mail
centre automatically.
(Depends on the SIM card.)
7. * /Shift Key,
Viewfinder Switch Key:
Switches character case
among four modes: bc,
BC, 123 and abc.
Switches viewfinders
between main display and
external display in digital
camera/video camera
mode.
8. Main Display
9. Right Soft Key: Executes the function at the
bottom right of the screen.
in this manual indicates
this key.
Used to access “Vodafone
live!” by opening the
browser in stand-by mode.
10.End/Power Key: Ends a call, turns power on/
off.
11.Camera Key: Starts the digital camera in
stand-by mode.
12.Keypad
13.#/Flash light Key: Switches symbol screens.
Press and hold this key to
shift text input method
between multi-tap and T9
mode.
Turns the flash/auxiliary
light on or off in digital
camera/video camera
mode.
14.Microphone
15.Aerial
1 .Camera
17.Speaker
18.Mobile Light:Usedasaflashoran
auxiliary light in digital
camera/video camera
mode, as a battery charge
indicator, or notification for
incoming calls, data/fax
calls or messages.
19.External Display
20.Infrared Port:Sendsandreceivesdatavia
infrared.
21.RF Connector
22.Side-Up/Side-Down Keys:
Moves cursor to select
menu items, adjusts
earpiece volume, etc.
In stand-by mode, press
and hold this key to turn the
mobile light on and off.
When the mobile light is
on,pressthiskeytochange
the light colour.
23.Battery Cover
24.Macro Switch: Switches between normal
(Close-up) ()andmacro()
position.
25.Handsfree Kit Connector
2 .Memory Card Slot Cover
27.External Connector:
Used to connect either the
charger or USB data cable.

GX30
1 – 3
CONFIDENTIAL
[3] Operation manual
(Page numbers refer to the user guide)
Spare Lithium-ion battery (XN-1BT30)
High capacity Lithium-ion battery (XN-1BT31)
Cigarette lighter charger (XN-1CL30)
USB ata cable (USB cable: XN-1DC30)
AC charger (XN-1QC30, XN-1QC31, XN-1QC32)
Personal han sfree kit (XN-1ER20)
The above accessories may not be available in all regions.
For etails, please contact your ealer.
[Optional Accessories]
[Quickstart Guide]

GX30
1 – 4
CONFIDENTIAL
12
New Messages
Download Games
News Sport

GX30
1 – 5
CONFIDENTIAL
1-3
6-3-3
7-5

GX30
1 – 6
CONFIDENTIAL
– MEMO –

GX30
2 – 1
CONFIDENTIAL
PhoneGX30Service ManualService ManualMarketE
CHAPTER 2. ADJUSTMENTS, PERFORMANCE CHECK, AND FIRMWARE
UPGRADE
SPST (SHARP Program Support Tool) allows you to adjust sett ngs, conduct performance checks, and upgrade the f rmware.
[1] SHARP Progra Support Tool (SPST)
1. Syste require ents
• IBM PC compat ble personal computer (standard COM1 115,200 bps ser al port and USB requ red)
Supported OS: W ndows 98/98SE/2000/XP (except for W ndows 95/ME/NT)
(Engl sh, German, Ital an, Span sh, French and Ch nese vers ons)
• Data cable
<Dur ng RF adjustment>
• GSM tester: CMU200
• GPIB nterface: Nat onal Instruments USB-GPIB cable (Model No.: NI GPIB-USB-B)
2. Introduction
2.1. Functions
SPST offers seven key funct ons:
1) F rmware download
2) User data transfer (processes all data at once but not nd v dually.)
3) RF cal brat on check and test
4) Default sett ng
5) Ident f cat on
6) Performance check and adjustment
7) User password reset
2.2. Installation
1. Use W ndows Explorer to execute the “setup.exe” f le on the CD-ROM.
2. The SPST GX30 setup w zard appears. Follow the nstallat on nstruct ons.
3. After the nstallat on s complete, shortcuts to SPST are created on the desktop and under the “Start” — “Programs” — “GX30” menu. Start SPST
from the shortcuts.

GX30
2 – 2
CONFIDENTIAL
2.3. Starting up
Connect GX30 to an operable ser al port of the PC w th the suppl ed data cable. Make sure that the battery s fully charged.
Start SPST from the desktop.
1. The Input password d alog box appears. Enter the password, select a port where GX30 s connected from the l st box, and cl ck “OK”.
If you do not know SPC, cl ck “Cancel” to ex t.
Figure 1
2. To change the password, enter the current password n f gure 1, and then cl ck “Change Password”.
Figure 2
3. To check the usage status of tools, cl ck “Show Repa r Log” n f gure 1.
4. Cl ck “Downloader for Emergency”.
Figure 3
The above screen appears. Select a model to use and execute the Downloader. (Use th s to n t al ze the flash, etc.)

GX30
2 – 3
CONFIDENTIAL
5. When the password is correct, a connection is established and the following screen appears.
Figure 4
Buttons
Attach ent 1 Destination and Operator na e Chart
Default Set Refer to “4.1. Default setting”. (see page 2-5)
User Data Back-up Refer to “4.2. User data back-up”. (see page 2-6)
User Data Restore Refer to “4.3. User data restore”. (see page 2-7)
Downloader Refer to “4.4. Downloader”. (see page 2-8)
RF Calibration & Check Refer to “4.5. RF calibration & check”. (see page 2-19)
RF Test Refer to “4.6. RF test tool”. (see page 2-28)
User Password Reset Refer to “4.7. Password reset”. (see page 2-34)
Perfor ance check adjust ent Refer to “4.8. Perfor ance check and adjust ent”. (see page 2-35)
**** ode release Refer to “4.9. **** ode release”. (see page 2-42)
Exit End SPST.
No. Operator name Country Model name
01 Vodafone UK Post-Paid UK A4TQGX30E
02 Airtel Post-Paid Spain A4TQGX30S
03 SFR Post-Paid France A4TQGX30F
04 Vodafone O nitel Post-Paid Italy A4TQGX30T
05 D2 Post-Paid Ger any A4TQGX30G
06 Vodafone NL Post-Paid Netherlands (Holland) A4TQGX30H
08 Vodafone Ireland Post-Paid Ireland A4TQGX30R
10 Vodafone Greece Post-Paid Greece A4TQGX30D
11 Vodafone Hungary Post-Paid Hungary A4TQGX30B
12 Vodafone Australia Post-Paid Australia A4TQGX30A
13 Vodafone New Zealand Post-Paid New Zealand A4TQGX30Z
14 Vodafone Sweden Post-Paid Sweden A4TQGX30W
15 Vodafone Egypt Post-Paid Egypt A4TQGX30Q
16 Vodafone Malta Post-Paid Malta A4TQGX30L
17 Swissco Post-Paid Switzerland A4TQGX30C
18 obilko austria Post-Paid Austria A4TQGX30K
19 Belgaco obile Post-Paid Belgiu A4TQGX30U
48 Vodafone PT Pre-Paid Portugal A4TQGX30PP
50 Vodafone UK Pre-Paid UK A4TQGX30EP
Software version:
A02-006-0184-GX30
Refer to the attachment 1
for the destination and
operator name.

GX30
2 – 4
CONFIDENTIAL
3. Adjust ents for GX30
1. Adjustments are requ red after replac ng the follow ng parts. ( )
When replac ng other parts n the RF sect on, carry out RF cal brat on.
2. Cl ck the buttons on the SPST screen for adjustments.
Figure 5
3. The follow ng screen appears.
Figure 6
Parts Te perature
adjust ent
(Ca era)
Te perature
adjust ent
(Battery)
Main display
flicker
adjust ent
External dis-
play contrast
adjust ent
White defect
correction
Black defect
correction
TH101
TH701
Ma n d splay un t
External d splay un t
Camera un t
To adjust the device, click this button
(Performance check adjustment).
RF calibration
Temperature adjustment (Camera section)
Temperature adjustment (Battery section)
Main display flicker adjustment
External display contrast adjustment
White defect correction
Black defect correction

GX30
2 – 5
CONFIDENTIAL
4. Functions
4.1. Default setting
SPST can restore the factory sett ngs.
Th s funct on
1. Deletes all user data n the f le system;
2. Restores all WAP sett ngs to default; and
3. Restores the values set by the user to default;
(MEP_LOCK sett ngs and the dest nat on and operator name do not change.)
<Operat on>
1) Set the COM port on the SPST n t al screen and cl ck “Default Set”.
2) Cl ck “Yes” to proceed. Cl ck “No” to ex t.
Figure 7
3) Cl ck “Yes” to back-up the MEPLOCK data. Cl ck “No” to restore default sett ngs.
Figure 8
4) Commun cat on starts.
Figure 9
5) The follow ng appears when you select “Yes” n step 3 and MEPLOCK data ex sts. Cl ck “Yes” to restore the data.
Figure 10

GX30
2 – 6
CONFIDENTIAL
6) After the handset s turned on, the n t al zat on s complete.
Figure 11
4.2. User data back-up
SPST saves all the data stored on the handset.
1. Set the COM port on the SPST n t al screen and cl ck “User Data Back-up”.
2. Spec fy the f le name n the follow ng d alog box and cl ck “Save”.
Figure 12
3. The commun cat ng d alog box appears wh le process ng.
Figure 13
4. When completed, the follow ng message appears. Cl ck “OK”.
Figure 14

GX30
2 – 7
CONFIDENTIAL
4.3. User data restore
SPST completely restores the backed up data.
1. Set the COM port on the SPST n t al screen and cl ck “User Data Restore”.
2. Spec fy the f le name n the follow ng d alog box and cl ck “Save”.
Figure 15
3. The commun cat ng d alog box appears wh le process ng.
Figure 16
4. When the restore s complete, cl ck “OK”.
Figure 17

GX30
2 – 8
CONFIDENTIAL
4.4. Downloader
4.4.1 Introduction
Downloader allows you to upgrade the f rmware.
1) Required devices
The follow ng dev ces are requ red to rewr te MOT f les us ng Commun cat on Box.
Conversion connector (16-pin → 10-pin)
Th s convers on connector s requ red to connect GX30 w th Commun cat on Box s nce the cable connector of Commun cat on Box has 16 p ns.
Figure 18
2) Connecting handset to a PC
A) Using a cable for upgrading
1. Connect the cable to a PC.
2. Connect the cable to handset.
3. The photo below shows handset connected to a PC.
Figure 19
B) Using Co unication Box
1. Connect a PC to Commun cat on Box v a a ser al cable.
2. Connect the AC charger to Commun cat on Box and then plug t nto the outlet.
All SET POWER SW on Commun cat on Box must be turned off.
3. Connect the convers on connector to Commun cat on Box Cables.
Connect the convers on connector n the follow ng order, label s de up.
From upper r ght end: Cable No. 1, 3, 5, 7, and 9.
From lower r ght end: Cable No. 2, 4, 6, 8, and 10.
Figure 20

GX30
2 – 9
CONFIDENTIAL
4. The photo below shows the convers on connector connected to Commun cat on Box Cable 1.
Figure 21
5. Connect the other end of the convers on connector to handset.
Figure 22
6. The photo below shows handset, Commun cat on Box and a PC (all connected).
Make sure handset and Commun cat on Box Cable 1 are connected v a the convers on connector.
Figure 23
[Note]
Handset ust be turned off before aking any connections.
Press and hold the Power key to turn off handset.
Do not turn off n other ways. Malfunct on may occur and the MOT f le rewr te operat on may fa l.
Make sure the handset battery is sufficiently charged.
If the battery s low, the MOT f le rewr te operat on may fa l.
Charge the battery before the operat on.
Disconnect the AC charger fro a cable for upgrading.
When rewr t ng MOT f les us ng the upgrad ng tool, do not connect the AC charger to the cable.
If you connect the cable connected to the AC charger to handset, charg ng starts and the MOT f le rewr te operat on s nterrupted.
All SET POWER SW on Co unication Box ust be turned off.
If handset s connected w th SET POWER SW turned on, charg ng starts and the MOT f le rewr te operat on s nterrupted.
Make sure handset and Co unication Box Cable 1 are connected via the conversion connector.
(When us ng Commun cat on Box, the only handset connected to Cable 1 can be operated on the PC.)

GX30
2 – 10
CONFIDENTIAL
4.4.2 Rewriting MOT files
Th s sect on descr bes how to rewr te MOT f les us ng the upgrad ng tool.
1) Activating Software
1. Double cl ck the shortcut con on your desktop or cl ck “The GX30 Upgrad ng Tool” on the Start menu.
Figure 24
2. The upgrad ng tool s act vated.
Figure 25
[Note]
D sable the power sav ng mode before rewr t ng MOT f les.
If the power sav ng mode s act ve, the rewr te operat on may fa l depend ng on the PC.

GX30
2 – 11
CONFIDENTIAL
2) Selecting options and COM port
1. Uncheck the check box when us ng a cable for upgrad ng. Leave t checked when us ng Commun cat on Box.
2. To n t al ze user area, check the F le System In t al ze check box. (User data w ll be deleted and the handset status w ll return to the default.)
3. Cl ck here and n the pull-down l st, select a commun cat ons port where the cable or Commun cat on Box s connected.
Figure 26
When us ng Commun cat on Box, set Wa t T me.
Check the Commun cat on Box check box to adjust Wa t T me (default: 8 seconds). The t me to delete the program data var es between handsets.
Handsets wa t for the set Wa t T me unt l the whole process s completed. If an error occurs, ncrease the value.
Figure 27
[Notes for the Wait Ti e setting]
When the set value s smaller than the default (8), the message on the left appears alert ng you a poss ble error.
Cl ck the “OK” button to proceed, and cl ck the “Cancel” button to change the value.
Figure 28
1
2
3

GX30
2 – 12
CONFIDENTIAL
You can shorten t me for the MOT f le rewr te operat on by select ng a smaller value for Wa t T me.
Example: T me to rewr te two MOT f les at a t me.
At the default sett ng (8 seconds), rewr te t me s approx mately one hour.
If the value s set to 1, the rewr te t me w ll be reduced to approx mately 30 m nutes.
If an error occurs at 1, ncrease the value.
The error screen w ll appear on handsets No. 2 to No.10.
If th s screen appears, ncrease Wa t T me and retry.
Figure 29
When the F le System In t al ze check box s checked, a conf rmat on message appears.
Figure 30
[Note]
When you check F le System In t al ze check box and cl ck the “OK” button, handset status returns to the default.
In th s case, user data s n t al zed after the MOT f le rewr te operat on. Uncheck the check box to avo d th s.
Flash Loader 5.02
CORRESPONDENCE_ERROR
Error screen
Click the [OK] button.
Other manuals for GX30
3
Table of contents
Other Sharp Cell Phone manuals

Sharp
Sharp AQUOS sense7 User manual

Sharp
Sharp ROUVO V User manual

Sharp
Sharp 942SH User manual

Sharp
Sharp GX30 User manual

Sharp
Sharp AQUOS sense3 Service manual

Sharp
Sharp AQUOS sense3 User manual

Sharp
Sharp AQUOS R compact SHV41 Service manual

Sharp
Sharp DM007SH User manual

Sharp
Sharp AQUOS K SHF34 User manual

Sharp
Sharp 770SH Reference guide

Sharp
Sharp GZ100 User manual

Sharp
Sharp 550SH User manual

Sharp
Sharp Aquos Xx3 mini User manual

Sharp
Sharp Aquos U SHV37 Installation guide

Sharp
Sharp AQUOS Crystal User manual

Sharp
Sharp SH837W User manual

Sharp
Sharp SoftBank 203SH User manual

Sharp
Sharp GX33 User manual

Sharp
Sharp AQUOS CRYSTAL 2 User manual

Sharp
Sharp SH837Wi User manual