Huawei C2281 User manual


Copyright © 2006 Huawei Technologies Co., Ltd.
All Rights Reserved
No part of this manual may be reproduced or transmitted in any form or by
any means without prior written consent of Huawei.
The information in this manual is subject to change without notice. Every
effort has been made in the preparation of this manual to ensure accuracy
of the contents, but all statements, information, and recommendations in
this manual do not constitute the warranty of any kind, express or implied.
Safety Precautions
Do not switch on the phone when phone use is prohibited.
Do not use the phone while driving.
Switch off the phone near medical apparatus.
Switch off the phone in an aircraft.
Switch off the phone near high-precision electronic devices.
Do not attempt to disassemble the phone or its accessories.
Do not place the phone or its accessories in containers with
strong electromagnetic field.
Do not place magnetic storage media near the phone.
Do not put the phone in a high-temperature place or use it in a
place with flammable gas such as a gas station.
Do not allow children to use the phone without guidance.
Use approved batteries and chargers only to avoid explosion.
Observe the laws or regulations on phone use. Respect others’
privacy and legal rights when using the phone.

Agreement
Operation
Format Meaning
Press and hold Press one button for teo to three seconds and
release it.
Press Press one button and release quickly
Interface Language
Format Meaning
Bold The character displayed on the bottom of the screen
corresponding to the right/left soft key, such as
“Menu”.
>Multi-level menu is separated by “>”.
such as “Menu > Messages” means “ Messages” is
the submenu under “Menu”.
Symbols
Symbol Description Meaning
Caution Warnings and precautions for operations
Note Description and note for operations

i
Contents
1 Getting to Know Your Phone..................................................................1
Your Phone........................................................................................1
Key and Functions.............................................................................2
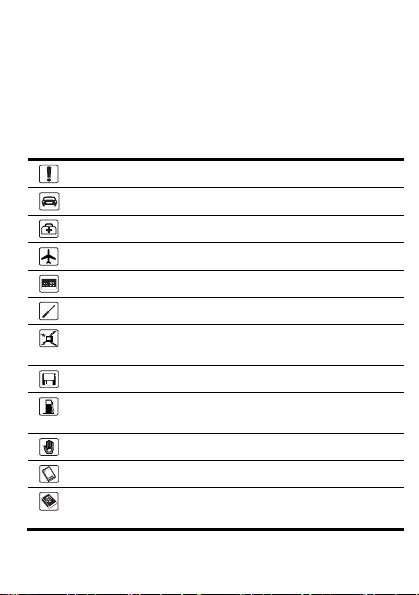
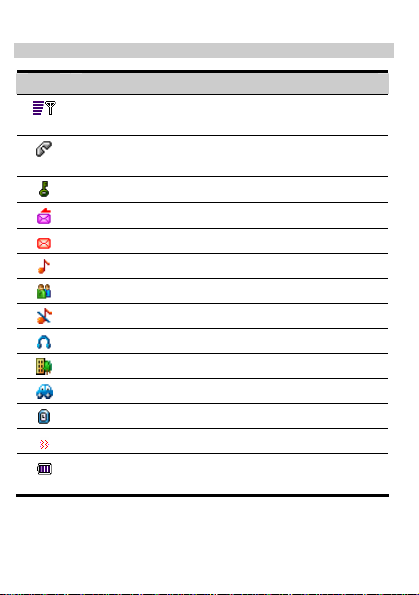
Screen Icons......................................................................................3
Interfaces...........................................................................................4
2 Getting Started.........................................................................................5
Installing the Battery..........................................................................5
Installing the UIM Card ......................................................................5
Charging the Battery..........................................................................5
Powering On/Off the Phone...............................................................6
Using the Function Menu...................................................................6
3 Voice Services.........................................................................................7
Making a Call.....................................................................................7
Receiving a Call.................................................................................7
Operations During a Call....................................................................7
4 Text Entry.................................................................................................8
Text Input Mode.................................................................................8
Entering English ................................................................................8
Entering Number................................................................................9
Entering Symbols.............................................................................10
5 Writing and Sending Messages............................................................11
6 Phone Book............................................................................................12
Adding a New Contact.....................................................................12
Searching for a Contact...................................................................12

ii
7 Alarm Clock........................................................................................... 13
Activating the Alarm Clock............................................................... 13
Deactivating the Alarm Clock .......................................................... 13
8 Security.................................................................................................. 14
Enabling/Disabling the Phone Lock................................................. 14
Changing the Phone Lock Code...................................................... 14
Enabling/Disabling the PIN Lock ..................................................... 14
Changing the PIN Code .................................................................. 15
9 Menu Commands.................................................................................. 16
10 Warnings and Precautions................................................................. 24

1
1 Getting to Know Your Phone
Your Phone
Meeting Mode Key
.@bc d f
jkl mn
o
pq
rstuv wx
hi
z
+
Screen
Earpiece
Arrow Key
Left Soft Key
Key Guard Key
Right Soft Key
End/Power Key
Talk/Send Key
Number Keys

2
Key and Functions
Key Function
zPower on or off the phone.
zEnd a call.
zReturn to the home screen.
zMake a call.
zView dialed calls.
zDisplay the Menu.
zSelect the highlighted menu option.
Returns to the previous menu.
zQuick access to: Profiles; Messages (press)
and Write Message (press and hold); Scheduler;
Ringer volume.
zDuring a call: and to increase volume,
and to decrease the volume.
+
~
wx
z
zEnter numbers and characters.
zSelect a menu item.
zSet the meeting mode in the standby mode (by pressing
and holding it for two seconds).
zEnter the *symbol in the standby mode (press).
zLock the keypad in the standby mode (by pressing and
holding it for two seconds).
zEnter the #symbol in the standby mode (press).

3
Screen Icons
Icon Meaning
Indicate the signal strength. The larger the number of bars is,
the stronger the signal is.
Indicate that there is an incoming call, a call is being set up,
or the phone is in conversation.
Indicate that the keypad is locked.
Indicate that a new message is received.
Indicate that the Inbox is full.
Indicate that the General mode is activated.
Indicate that the Meeting mode is activated.
Indicate that the Silent mode is activated.
Indicate that the Outdoor mode is activated.
Indicate that the Headset mode is activated.
Indicate that the Carkit mode is activated.
Indicate that an alarm clock is set.
Indicate that the alert type is set to Vibration.
Indicate the battery power level. The larger the number of
bars is, the more power of the battery is left.

4
Interfaces
Your phone provides two interfaces.
Interface Function
Charger interface Located at the bottom of your phone, it is used to
connect the travel charger.
Headset jack Located at the upper left corner of the phone, it is
used to connect the headset.

5
2 Getting Started
Installing the Battery
b
a
ab
Installing the UIM Card
If the phone is powered on, press and hold for two seconds to
power off it. Then, remove the battery.
Charging the Battery
1. Connect the travel charger to the charger interface at the bottom of
your phone.
2. Connect the charger to an AC power socket.
3. Wait until the phone is fully charged. During the charging, the
icon on the upper right corner of the screen is in an animated status.
4. When the animation becomes static, the charging finishes.
Disconnect the charger from the AC power socket.
5. Press the gray buttons on both sides of the charger connector to
disconnect it from the phone.
Caution:
zDo not use a damaged battery or charger.
zBefore using the travel charger, ensure that the battery is
installed in your phone.

6
Powering On/Off the Phone
Press and hold for two seconds to power on or off the phone.
Using the Function Menu
1. In the standby mode, press (Menu).
2. Press the arrow key to select the desired function menu.
3. Press (Select) to display the selected menu.
4. Display the submenu in either of the ways:
zPress to select a submenu and then press (Select) to
display the selected submenu.
zPress the number key corresponding to the serial number of a
submenu to display it.
5. To return to the previous menu or quit the function menu, press
(Back).
To return to the standby mode, press .

7
3 Voice Services
Making a Call
1. In the standby mode, enter the phone number.
2. Press to dial this number.
3. To cancel or end the call, press .
Receiving a Call
When there is an incoming call, you can press or to answer it,
or press or to reject it.
zIf the Any-key Answer function is enabled, you can press any key
to answer an incoming call except and .
zIf the Headset Auto Answer function is enabled and the headset is
connected to the phone, the incoming call is answered
automatically.
Note:
zSet Any-key Answer in the Settings > Call Settings.
zSet Headset Auto Answer in the Profiles > Headset >
Edit.
Operations During a Call
Press or to increase the volume, and press or to
decrease the volume.
During a call, press (Options) for the following options:
zSave Number: Save the phone number to the phone book.
zPhone Book: Enter the Phone Book menu.
zMessages: Enter the Messages menu.
zThird Party Call: Call a third party to make a third party call.
zVoice Privacy: Set the voice privacy function.
Note:
The third party call is network dependent. For more information,
consult the service provider.

8
4 Text Entry
Text Input Mode
You can enter English or Hindi letters/characters and numbers.
While entering text, you can change the input mode by pressing .
The following table lists the input modes and their indicators.
Indicator Text Input Mode
eZiEn Smart English
Abc Alphabetical English
ABC English upper case
abc English lower case
123 Number input
Note:
zPress (Clear) once to delete the letter on the left of the
cursor. Press and hold (Clear) for about two seconds
to delete all letters at a time.
zIf you press any of the number keys or in any of the text
input modes, your phone displays the maximum number of
characters allowed to enter for the current input mode.
Entering English
Alphabetical Text Input
Alphabetical text input allows you to enter uppercase ("ABC") or
lowercase ("abc") English letters. You can press a number key labeled
with required letters once to enter the first letter on the key, twice to enter
the second letter on the key, and so on.
If the letter you want to enter is on the same key as the previous one,
you can enter the latter only after the cursor appears again or after you
move the cursor to the next space.

9
In the "Abc" input mode, only the first letter of a sentence is capitalized. A
sentence may end with any of the following punctuations: period (.),
question mark (?), exclamation mark (!), ellipsis (...), line feed character.
Notes:
zPress .@repeatedly to choose and enter the commonly
used punctuations.
zPress +once to enter a space, twice to enter “0”, and
three times to move the cursor to the next line.
zPress to select the desired symbols.
Smart English Input
In the "eZiEn" input mode, follow these steps to enter English.
1. According the desired word, press the corresponding number key
once, and then the phone will make out candidate words.
2. Press or to select the desired word.
3. Press to confirm your selection. The word is displayed in the
input area.
Alternatively, press +and confirm your selection and enter a
space behind the word.
Notes:
zAfter you enter several letters, the phone can give other
letters to make out the candidate words. Press or
to select the desired word and press to confirm; or press
the number key to enter desired letters.
zPress .@to enter a point.
zPress +to enter a space.
zPress to select the desired symbol.
zIn the editing area, you can press to switch the
selected characters between upper case and lower case. If
no character is selected, press it to switch between text input
modes.
Entering Number
You can use either of the following methods to enter numbers:

10
zIn the "123" input mode, you can directly press number keys labeled
with desired digits.
zIn the "ABC" or "abc" input mode, you can press the number key
repeatedly until the desired digit appears on the screen.
zIn the "eZiEn" input mode, you can press the number key and then
press until the desired digit appears on the screen.
Entering Symbols
1. In any input mode, press to display the symbol list.
2. Press to scroll up or down the symbol list.
3. Press the corresponding number key to enter the symbol.

11
5 Writing and Sending Messages
Follow these steps to write and send a message:
1. Press (Menu) and select Messages >Write Message.
2. Enter the content. For the information on text input method, see
"Text Entry" on P8. You can enter up to 160 characters or 70 Hindi
characters.
While entering the content, press (Options) for the following
operations.
zInsert Template: Insert a common phrase.
zInsert Phone Number: Insert a phone number from the
phonebook.
3. Press (Options) for the following operations:
zSend: Send the message without saving.
zSend & Save: Send the message and save it to the outbox if it is
sent successfully or save it to the draft if it is sent unsuccessfully.
zSave: Save the message to the draft.
4. You can add up to 10 recipients. There are three methods.
zEnter phone numbers directly.
zPress (Search) and select Search Phone Book to select the
phone number of one contact from the phonebook.
zPress (Search) and select Search Groups to select phone
numbers of a group of contacts.
5. Press (Send) to send a message.

12
6 Phone Book
Adding a New Contact
The new contact will be saved to the memory in use.
1. Press (Menu) and select Phone Book >Add New.
2. Enter the name, and press (OK).
3. Set other items:
zIf you save the contact to your phone, you can enter the following
information: General Number, Home Number, Office Number,
Memo and Group (you need to set at least one number).
zIf you save the contact to the UIM card, you can only enter General
Number.
4. Press (OK) to save the current settings and press to set
other items.
5. Press (Save) to save the contact; press (Back) to cancel.
Searching for a Contact
1. Press (Menu) and select Phone Book >Search.
2. Enter the name and press (OK).
3. Press to search the contact.
4. Press (View) to view the details and (Options) for any of
the following options.
zEdit: Modify or view the contact.
zDelete: Delete the contact.
zCopy To Phone (Copy To UIM): If the contact is saved on the UIM
card, copy the contact to the phone memory; If the contact is saved
in the phone memory, copy it to the UIM card.
zSend Message: Send a message. After selecting the number,
press (OK) to edit and send the message.
Note:
Directly press (OK) to display the phonebook. Press the
number key labeled with the initial of the contact name. Then the
contacts whose names begin with the letter (or the adjacent letter)
will be displayed.

13
7 Alarm Clock
After the alarm clock is activated, the phone rings or vibrates at the
specified time when the phone is powered on. You can set five alarm
clocks at most.
Activating the Alarm Clock
1. Press (Menu) and select Fun & Utility >Alarm.
2. Press to select an alarm clock.
3. Select Alarm On to activate the alarm clock.
4. Set the time, and press (OK).
5. Select the alerting mode:
zIf you select Once, the alarm clock alerts once.
zIf you select Everyday, the alarm clock alerts once a day.
zIf you select Custom, the alarm clock alerts at a specified time.
Note:
zWhen the alarm clock alerts, press (Stop) to stop it.
Alternatively, press any key except (Stop) to snooze it
for five minutes, after which the alarm alerts again.
zIf nothing is done to the alarm clock when it alerts, it stops
temporarily and alerts again 5 minutes later. It alerts for five
times before it stops.
Deactivating the Alarm Clock
1. Press (Menu) and select Fun & Utility >Alarm.
2. Press to select an alarm clock.
3. Select Alarm Off to deactivate the alarm clock.

14
8 Security
Enabling/Disabling the Phone Lock
1. Press (Menu) and select Settings >Security >Phone Lock.
2. Enter the correct phone lock code and press (OK).
3. Select On/Off to enable/disable the phone lock.
Changing the Phone Lock Code
The default phone lock code is “000000”, You can change it into any
numeric string of 4 to 8 digits. Do remember your phone lock code. If you
forget it, contact your local dealer.
1. Press (Menu) and select Settings >Security >Phone Lock.
2. Enter the correct phone lock code and press (OK).
3. Select Change Code.
4. Enter a new phone lock code and press (OK).
5. Re-enter the new phone lock code and press (OK).
Enabling/Disabling the PIN Lock
PIN protects your UIM card from unauthorized use. You can use the
personal unlocking key (PUK) to unlock PIN. PIN and PUK are delivered
with UIM card.
Note:
zIf you enter wrong PINs for 3 times (the upper limit is
determined by the UIM card), the phone prompts you to
enter the correct PUK.
zIf you enter wrong PUKs for 10 times (the upper limit is
determined by the UIM card), the UIM card is invalid. Contact
the service provider for a new card. When you enter wrong
PUK for several times, confirm your PUK with the service
provider.
zFor details of PIN and PUK, consult your service provider.
To set the PIN lock, do as follows.
1. Press (Menu) and select Settings > Security > PIN Lock.
2. Enter the correct PIN and press (OK).
3. Select On/Off to enable/disable PIN lock.

15
Changing the PIN Code
If your PIN is locked, you can change your PIN by entering the correct
PUK.
1. Enter the correct PUK code and press (OK).
2. Enter a new PIN and press (OK).
3. Re-enter the PIN and press (OK).
Table of contents
Other Huawei Cell Phone manuals

Huawei
Huawei G5760 User manual

Huawei
Huawei U8650NFC-1 User manual

Huawei
Huawei Mate 50 Pro User manual

Huawei
Huawei Y5 2019 User manual

Huawei
Huawei Y221-U03 User manual

Huawei
Huawei RIO-L01 User manual

Huawei
Huawei AMN-LX3X User manual

Huawei
Huawei : BTK-W09 User manual

Huawei
Huawei G6-L11 User manual

Huawei
Huawei V100R001 Installation guide

Huawei
Huawei P8 lite User manual

Huawei
Huawei Eco User manual

Huawei
Huawei T711 User manual

Huawei
Huawei P9 LITE User manual

Huawei
Huawei Mate X3 User manual

Huawei
Huawei P20 lite User manual

Huawei
Huawei Ascend Y 101 User manual

Huawei
Huawei Y330-U15 User manual

Huawei
Huawei Y625 User manual

Huawei
Huawei P8 Lite 2017 User manual