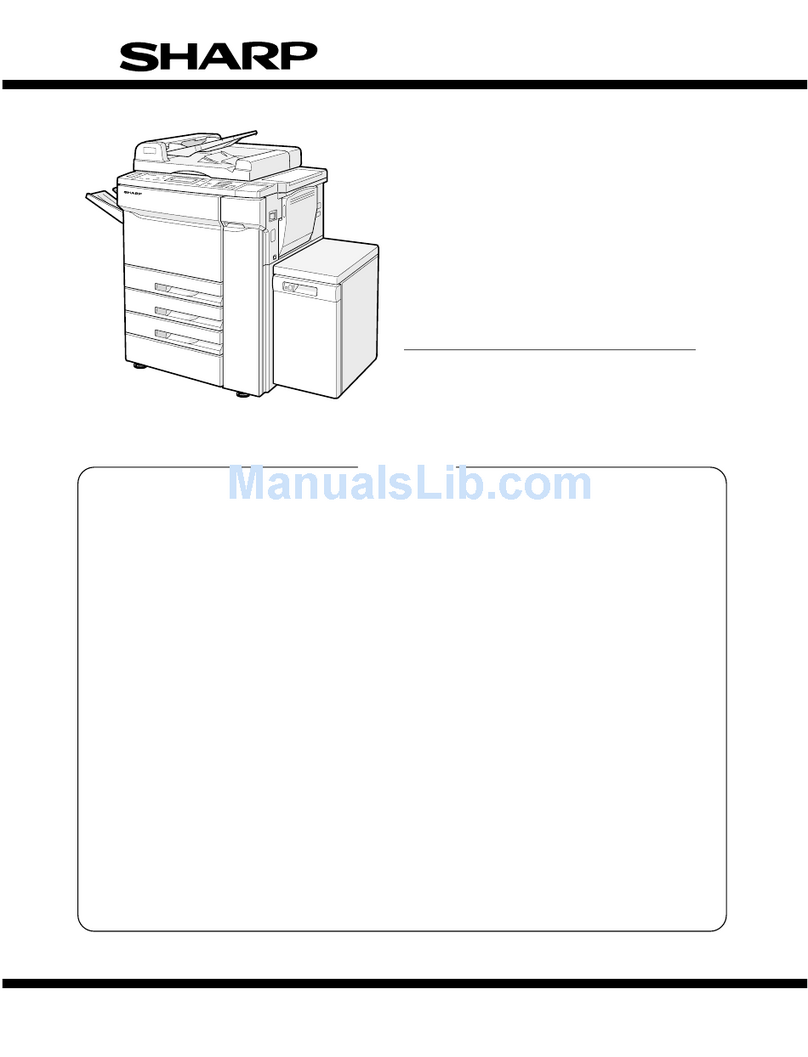
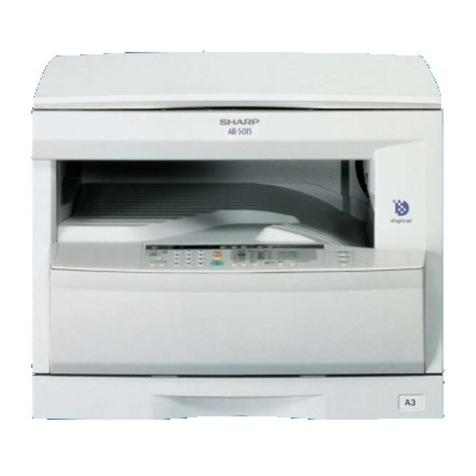
Sharp AR-FX4 User manual

FACSIMILE EXPANSION KIT
OPERATION MANUAL
MODEL
AR-FX4
•BEFORE USING
THE MACHINE
•BASIC OPERATIONS
•CONVENIENT
FUNCTIONS 1
•CONVENIENT
FUNCTIONS 2
•TROUBLESHOOTING
•
USEFUL INFORMATION
•
KEY OPERATOR PROGRAMS
AND INDEX
9
27
69
105
119
131
137
Page

This device complies with Part 15 of the FCC rules. Operation is subject to
the following two conditions: (1) This device may not cause harmful
interference, and (2) this device must accept any interference received,
including interference that may cause undesired operation.
WARNING:
FCC Regulations state that any unauthorized changes or modifications to
this equipment not expressly approved by the manufacturer could void the
user's authority to operate this equipment.
Note:
This equipment has been tested and found to comply with the limits for a
Class A digital device, pursuant to Part 15 of the FCC Rules. These limits
are designed to provide reasonable protection against harmful interference
when the equipment is operated in a commercial environment. This
equipment generates, uses, and can radiate radio frequency energy and, if
not installed and used in accordance with the operation manual, may cause
harmful interference to radio communications. Operation of this equipment
in a residential area is likely to cause harmful interference in which case the
user will be required to correct the interference at his own expense.
Note
●This manual (fax function) describes the AR-275 model with optional
reversing single pass feeder (RSPF)(AR-RP3), job separator tray kit (AR-
TR3), and optional facsimile expansion kit (AR-FX4) installed. Depending
on the model you have and on the options installed, some of the
illustrations in this manual may be different, however, the basic operations
are the same.
Caution
●To reduce the risk of fire, use only UL-Listed NO.26 AWG or larger
telecommunication line cord.
FOR USE WITH COMPATIBLE SHARP COPIERS.
SEE SHARP COPIER OPERATION MANUAL TO DETERMINE SUITABILITY.
HOࡍࠫ㧞㧜㧜㧝ᐕ㧣㧠ᣣޓ᳓ᦐᣣޓඦ೨㧥ᤨ㧞㧞ಽ

i
INTRODUCTION
TYPE OF SERVICE
This equipment may not be used on coin service provided by the telephone company. Connection to
party lines is subject to state tariffs. Contact your state's public utility commission, public service
commission, or corporation commission for more information.
ABOUT THE TELEPHONE CONSUMER PROTECTION ACT OF 1991
"The Telephone Consumer Protection Act of 1991 makes it unlawful for any person to use a computer
or other electric device to send any message via a telephone facsimile machine unless such message
clearly contains in a margin at the top or bottom of each transmitted page or on the first page of the
transmission the following information:
(1) The date and time of transmission.
(2) Identification of either the business, business entity or individual sending the message.
(3) Telephone number of either the sending machine, business, business entity or individual.
In order to program this information into your facsimile machine, please refer to the appropriate
instructions in the operation manual."
Important safety information
●If any of your telephone equipment is not operating properly, you should immediately remove it from
your telephone line, as it may cause harm to the telephone network.
●The AC power outlet shall be installed near the equipment and shall be easily accessible.
●Never install telephone wiring during a lightning storm.
●Never install telephone jacks in wet locations unless the jack is specifically designed for wet locations.
●Never touch uninsulated telephone wires or terminals unless the telephone line has been
disconnected at the network interface.
●Use caution when installing or modifying telephone lines.
●Avoid using a telephone (other than a cordless type) during an electrical storm. There may be a remote
risk of electric shock from lightning.
●Do not use a telephone to report a gas leak in the vicinity of the leak.
●Do not install or use the machine near water, or when you are wet. Take care not to spill any liquids
on the machine.
DQQMKࡍࠫ㧞㧜㧜㧝ᐕ㧣㧝㧣ᣣޓἫᦐᣣޓඦᓟ㧢ᤨ㧡㧢ಽ

INTRODUCTION
ii
FCC Notice to users:
This equipment complies with FCC rules, Part68. On this equipment is a label that contains, among other
information, the FCC Registration Number and Ringer Equivalence Number (REN) for this equipment. If
requested, this information must be provided to your telephone company.
The REN is used to determine the quantity of devices which may be connected to your telephone line
and still have all of those devices ring when your number is called. Too many devices on one line may
result in the devices not ringing in response to an incoming call. In most, but not all, areas the sum of the
RENs of all devices should not exceed five (5.0). To be certain of the number of devices that may be
connected to your line, as determined by the total REN, contact your local telephone company.
If this equipment cause harm to the telephone network, your telephone company may disconnect your
service temporarily. If possible, They will notify you in advance. If advance notice is not practical, you will
be notified as soon as possible. You will also be advised of your right to file a compliant with the FCC.
Your telephone company may make changes in its facilities, equipment, operations, or procedures that
could affect the operation of your equipment. If this happens, the telephone company will provide
advance notice in order for you to make necessary modifications to maintain uninterrupted service. If the
equipment is causing harm to the telephone network, your telephone company may ask you to
disconnect the equipment until the problem resolved.
If you have any questions or problems which cannot be solved by reading this manual, please contact
An FCC compliant telephone cord and modular plug is provided with this equipment. This equipment is
designed to be connected to the telephone network or premises wiring using a compatible modular jack
which is Part68 compliant. This equipment connects to the telephone network through a standard USOC
RJ-11C network interface jack.
When programming and/or making test calls to emergency numbers:
●Remain on the line and briefly explain to the dispatcher the reason for the call.
●Perform such activities in the off-peak hours, such as early morning or late evening.
Sharp Electronics Corporation
P.O. Box 650
Mahwah, NJ 07430-2135
Telephone: 1-800-BE-SHARP
DQQMKKࡍࠫ㧞㧜㧜㧝ᐕ㧣㧝㧣ᣣޓἫᦐᣣޓඦᓟ㧢ᤨ㧡㧢ಽ

1
2
ABOUT THIS MANUAL
This chapter contains basic information
about using the fax functions of this
product. Procedures that are also related
to copy functions such as loading paper
and removing paper jams are explained
in the copier manual. Please refer to the
copier manual as necessary.
* This manual assumes that the machine
settings are in their initial state. If any
settings are changed, procedures for
certain operations may change and it
may not be possible to perform an
operation as explained in the manual.
The illustrations in this manual are of
the U.S.A. model. The Canadian model
differs slightly in its appearance;
however, the operation is the same.
BEFORE USING THE MACHINE
This chapter explains basic knowledge and settings that
are required before the fax feature of the machine can be
used. Be sure to read this chapter before using the fax
feature. 1
BASIC OPERATIONS
This chapter explains procedures for basic fax operations
such as sending and receiving faxes, and procedures for
establishing settings. 2
CONVENIENT FUNCTIONS 1
ADVANCED COMMUNICATION METHODS
This chapter explains functions that are designed for
specific purposes and circumstances. Please read those
sections that are of interest to you. 3
CONVENIENT FUNCTIONS 2
CONVENIENT METHODS OF USE
This chapter explains functions that expand the scope of
use of the fax feature, such as convenient functions for
sending faxes and connecting an extension phone. Please
read those sections that are of interest to you.
4
TROUBLESHOOTING
This chapter explains how to check function settings and
what to do if you encounter a problem while operating the
machine. 5
USEFUL INFORMATION
This chapter gives useful reference information for using
the fax feature of the machine. 6
KEY OPERATOR PROGRAMS AND INDEX
DQQMࡍࠫ㧞㧜㧜㧝ᐕ㧣㧝㧣ᣣޓἫᦐᣣޓඦᓟ㧢ᤨ㧡㧢ಽ

2
TABLE OF CONTENTS
ABOUT THIS MANUAL. . . . . . . . . . . . . . . . . . . . . . . . . . . . . . . . . . . . . . 1
TABLE OF CONTENTS . . . . . . . . . . . . . . . . . . . . . . . . . . . . . . . . . . . . . 2
FORMAT OF THE MANUAL . . . . . . . . . . . . . . . . . . . . . . . . . . . . . . . . . . 5
TO USE THE MACHINE CORRECTLY AS A FAX MACHINE. . . . . . . . 6
MAIN FEATURES . . . . . . . . . . . . . . . . . . . . . . . . . . . . . . . . . . . . . . . . . . 7
CHAPTER 1 BEFORE USING THE MACHINE
PART NAMES AND FUNCTIONS. . . . . . . . . . . . . . . . . . . . . . . . . . . . . 10
●Operation Panel . . . . . . . . . . . . . . . . . . . . . . . . . . . . . . . . . . . . . . . . . 10
●Overall View . . . . . . . . . . . . . . . . . . . . . . . . . . . . . . . . . . . . . . . . . . . . 12
●Message Screen . . . . . . . . . . . . . . . . . . . . . . . . . . . . . . . . . . . . . . . . . 13
●Arrow Keys ( ) . . . . . . . . . . . . . . . . . . . . . . . . . . . . . . . . . . . 13
TURNING THE POWER ON AND OFF. . . . . . . . . . . . . . . . . . . . . . . . . 14
●Turning On the Power. . . . . . . . . . . . . . . . . . . . . . . . . . . . . . . . . . . . . 14
●Turning Off the Power. . . . . . . . . . . . . . . . . . . . . . . . . . . . . . . . . . . . . 14
●Selecting Fax Mode . . . . . . . . . . . . . . . . . . . . . . . . . . . . . . . . . . . . . . 15
INITIALLY REQUIRED PROGRAMMING AND SETTINGS . . . . . . . . . 16
●Program Your Own Number and Name . . . . . . . . . . . . . . . . . . . . . . . 16
●Set the Date and Time . . . . . . . . . . . . . . . . . . . . . . . . . . . . . . . . . . . . 16
●Installation and Connections. . . . . . . . . . . . . . . . . . . . . . . . . . . . . . . . 16
ACCOUNT AUDIT MODE . . . . . . . . . . . . . . . . . . . . . . . . . . . . . . . . . . . 17
●Using Account Audit Mode . . . . . . . . . . . . . . . . . . . . . . . . . . . . . . . . . 17
SETTING THE PAPER SIZE OF THE PAPER TRAYS . . . . . . . . . . . . 18
ABOUT THE ORIGINAL . . . . . . . . . . . . . . . . . . . . . . . . . . . . . . . . . . . . 19
●Originals that can be Faxed . . . . . . . . . . . . . . . . . . . . . . . . . . . . . . . . 19
ABOUT THE SPF . . . . . . . . . . . . . . . . . . . . . . . . . . . . . . . . . . . . . . . . . 20
●Originals that can be Used . . . . . . . . . . . . . . . . . . . . . . . . . . . . . . . . . 20
LOADING ORIGINALS . . . . . . . . . . . . . . . . . . . . . . . . . . . . . . . . . . . . . 21
●Using the SPF. . . . . . . . . . . . . . . . . . . . . . . . . . . . . . . . . . . . . . . . . . . 21
●Using the Platen Glass . . . . . . . . . . . . . . . . . . . . . . . . . . . . . . . . . . . . 22
SETTING THE ORIGINAL SIZE . . . . . . . . . . . . . . . . . . . . . . . . . . . . . . 23
●Selecting an Inch-based Original Size . . . . . . . . . . . . . . . . . . . . . . . . 23
●Setting an AB Original Size. . . . . . . . . . . . . . . . . . . . . . . . . . . . . . . . . 23
SELECTING THE RESOLUTION AND EXPOSURE . . . . . . . . . . . . . . 24
●Selecting the Resolution and Exposure . . . . . . . . . . . . . . . . . . . . . . . 24
CONVENIENT DIALING FEATURES . . . . . . . . . . . . . . . . . . . . . . . . . . 25
●Auto Dialing. . . . . . . . . . . . . . . . . . . . . . . . . . . . . . . . . . . . . . . . . . . . . 25
●Redialing . . . . . . . . . . . . . . . . . . . . . . . . . . . . . . . . . . . . . . . . . . . . . . . 26
●On-hook Dialing . . . . . . . . . . . . . . . . . . . . . . . . . . . . . . . . . . . . . . . . . 26
Chapter 2 BASIC OPERATIONS
SENDING A FAX . . . . . . . . . . . . . . . . . . . . . . . . . . . . . . . . . . . . . . . . . . 28
●Sending a Fax Using the SPF. . . . . . . . . . . . . . . . . . . . . . . . . . . . . . . 28
●Sending a Fax from the Platen Glass . . . . . . . . . . . . . . . . . . . . . . . . . 30
●Memory Transmission Mode. . . . . . . . . . . . . . . . . . . . . . . . . . . . . . . . 31
●Direct Transmission . . . . . . . . . . . . . . . . . . . . . . . . . . . . . . . . . . . . . . 31
●Changing the Transmission Mode . . . . . . . . . . . . . . . . . . . . . . . . . . . 32
●Sending a Fax by Auto Dialing . . . . . . . . . . . . . . . . . . . . . . . . . . . . . . 32
●
Storing a Transmission Job while the Machine is Sending or Receiving
. . . . 35
CANCELING FAX TRANSMISSION/RECEPTION . . . . . . . . . . . . . . . . 37
●Canceling scanning or direct transmission . . . . . . . . . . . . . . . . . . . . . 37
●Canceling a Fax Transmission or Reception in Progress . . . . . . . . . . 37
●Canceling a Stored Transmission Job . . . . . . . . . . . . . . . . . . . . . . . . 39
RECEIVING A FAX . . . . . . . . . . . . . . . . . . . . . . . . . . . . . . . . . . . . . . . . 41
DQQMࡍࠫ㧞㧜㧜㧝ᐕ㧣㧝㧣ᣣޓἫᦐᣣޓඦᓟ㧢ᤨ㧡㧢ಽ

TABLE OF CONTENTS
3
●Methods for Receiving Faxes . . . . . . . . . . . . . . . . . . . . . . . . . . . . . . . 41
●Setting the Reception Mode . . . . . . . . . . . . . . . . . . . . . . . . . . . . . . . . 42
●Earlier Output of Received Data . . . . . . . . . . . . . . . . . . . . . . . . . . . . . 43
●Fax Output . . . . . . . . . . . . . . . . . . . . . . . . . . . . . . . . . . . . . . . . . . . . . 43
●Receiving a Fax . . . . . . . . . . . . . . . . . . . . . . . . . . . . . . . . . . . . . . . . . 44
●Substitute Reception to Memory. . . . . . . . . . . . . . . . . . . . . . . . . . . . . 46
STORING, EDITING, AND CLEARING AUTO DIAL KEYS AND NUMBERS
. 47
●Storing an Auto Dial Key or Number. . . . . . . . . . . . . . . . . . . . . . . . . . 47
●Selecting Option Settings . . . . . . . . . . . . . . . . . . . . . . . . . . . . . . . . . . 52
●Editing an Auto Dial Key or Number . . . . . . . . . . . . . . . . . . . . . . . . . . 55
●Clearing an Auto Dial Key or Number. . . . . . . . . . . . . . . . . . . . . . . . . 60
ENTERING CHARACTERS . . . . . . . . . . . . . . . . . . . . . . . . . . . . . . . . . 63
●Characters that can be Entered . . . . . . . . . . . . . . . . . . . . . . . . . . . . . 63
●Changing to Entry Mode . . . . . . . . . . . . . . . . . . . . . . . . . . . . . . . . . . . 64
●Character Entry Keys . . . . . . . . . . . . . . . . . . . . . . . . . . . . . . . . . . . . . 65
●Initial Procedure for Entering Characters . . . . . . . . . . . . . . . . . . . . . . 66
Chapter 3 CONVENIENT FUNCTIONS 1
ADVANCED COMMUNICATION METHODS
BROADCAST TRANSMISSION . . . . . . . . . . . . . . . . . . . . . . . . . . . . . . 70
●Using Broadcast Transmission . . . . . . . . . . . . . . . . . . . . . . . . . . . . . . 71
TIMER TRANSMISSION . . . . . . . . . . . . . . . . . . . . . . . . . . . . . . . . . . . . 72
●Timer Transmission Settings . . . . . . . . . . . . . . . . . . . . . . . . . . . . . . . 72
●Setting Up a Timer Transmission . . . . . . . . . . . . . . . . . . . . . . . . . . . . 73
CONFIDENTIAL TRANSMISSION/RECEPTION . . . . . . . . . . . . . . . . . 74
●Using the Confidential Function . . . . . . . . . . . . . . . . . . . . . . . . . . . . . 75
RELAY REQUEST TRANSMISSION . . . . . . . . . . . . . . . . . . . . . . . . . . 77
●Storing a Relay Group . . . . . . . . . . . . . . . . . . . . . . . . . . . . . . . . . . . . 78
●Using the Relay Request Function . . . . . . . . . . . . . . . . . . . . . . . . . . . 80
POLLING . . . . . . . . . . . . . . . . . . . . . . . . . . . . . . . . . . . . . . . . . . . . . . . . 81
●Using Polling . . . . . . . . . . . . . . . . . . . . . . . . . . . . . . . . . . . . . . . . . . . . 82
●Using Memory Polling . . . . . . . . . . . . . . . . . . . . . . . . . . . . . . . . . . . . . 84
●Restricting Polling to Specified Machines (Polling Security). . . . . . . . 86
F-CODE COMMUNICATION . . . . . . . . . . . . . . . . . . . . . . . . . . . . . . . . . 87
●F-code Memory Boxes . . . . . . . . . . . . . . . . . . . . . . . . . . . . . . . . . . . . 87
●Using F-code Transmission (F-code Confidential Transmission
and F-code Relay Request Transmission) . . . . . . . . . . . . . . . . . . . . . 87
●F-code Confidential Transmission . . . . . . . . . . . . . . . . . . . . . . . . . . . 89
●F-code Relay Request Transmission . . . . . . . . . . . . . . . . . . . . . . . . . 90
●Using F-code Polling. . . . . . . . . . . . . . . . . . . . . . . . . . . . . . . . . . . . . . 91
●F-code Memory Polling . . . . . . . . . . . . . . . . . . . . . . . . . . . . . . . . . . . . 93
PROGRAMS . . . . . . . . . . . . . . . . . . . . . . . . . . . . . . . . . . . . . . . . . . . . . 96
●Using a Program . . . . . . . . . . . . . . . . . . . . . . . . . . . . . . . . . . . . . . . . . 98
DUAL ACCESS . . . . . . . . . . . . . . . . . . . . . . . . . . . . . . . . . . . . . . . . . . . 99
●Storing a Transmission Job . . . . . . . . . . . . . . . . . . . . . . . . . . . . . . . 100
CHAIN DIALING . . . . . . . . . . . . . . . . . . . . . . . . . . . . . . . . . . . . . . . . . 101
TRANSFER FUNCTION . . . . . . . . . . . . . . . . . . . . . . . . . . . . . . . . . . . 102
●Using the Transfer Function . . . . . . . . . . . . . . . . . . . . . . . . . . . . . . . 102
ANTI JUNK FAX . . . . . . . . . . . . . . . . . . . . . . . . . . . . . . . . . . . . . . . . . 103
Chapter 4 CONVENIENT FUNCTIONS 2
CONVENIENT METHODS OF USE
DUPLEX SCANNING . . . . . . . . . . . . . . . . . . . . . . . . . . . . . . . . . . . . . 106
●Setting Duplex Scanning. . . . . . . . . . . . . . . . . . . . . . . . . . . . . . . . . . 106
PAGE DIVISION SCANNING . . . . . . . . . . . . . . . . . . . . . . . . . . . . . . . 107
DQQMࡍࠫ㧞㧜㧜㧝ᐕ㧣㧝㧣ᣣޓἫᦐᣣޓඦᓟ㧢ᤨ㧡㧢ಽ

TABLE OF CONTENTS
4
●Selecting Page Division Scanning . . . . . . . . . . . . . . . . . . . . . . . . . . 107
COVER SHEET FUNCTION . . . . . . . . . . . . . . . . . . . . . . . . . . . . . . . . 108
●Selecting the Cover Sheet Function . . . . . . . . . . . . . . . . . . . . . . . . . 108
TRANSMISSION MESSAGE. . . . . . . . . . . . . . . . . . . . . . . . . . . . . . . . 109
●Selecting a Transmission Message . . . . . . . . . . . . . . . . . . . . . . . . . 109
INDEX . . . . . . . . . . . . . . . . . . . . . . . . . . . . . . . . . . . . . . . . . . . . . . . . . 110
EXTENSION PHONE CONNECTION . . . . . . . . . . . . . . . . . . . . . . . . . 111
●Connecting an Extension Phone. . . . . . . . . . . . . . . . . . . . . . . . . . . . 112
●Using an Extension Phone . . . . . . . . . . . . . . . . . . . . . . . . . . . . . . . . 112
JOB/FUNCTION CHECK . . . . . . . . . . . . . . . . . . . . . . . . . . . . . . . . . . 114
●Checking Fax Function Settings (Function Review) . . . . . . . . . . . . . 114
●Checking the Status of Received Faxes (Print Jobs) . . . . . . . . . . . . 114
●Checking the Status of Transmission (Transmission Job Status). . . 115
●Checking the Status of Stored Transmission Jobs
(Transmission Reserve status) . . . . . . . . . . . . . . . . . . . . . . . . . . . . . 116
●Checking Faxes Received by Confidential Reception
(Confidential Reception Status) . . . . . . . . . . . . . . . . . . . . . . . . . . . . 117
Chapter 5 TROUBLESHOOTING
PRINTING LISTS. . . . . . . . . . . . . . . . . . . . . . . . . . . . . . . . . . . . . . . . . 120
●Lists. . . . . . . . . . . . . . . . . . . . . . . . . . . . . . . . . . . . . . . . . . . . . . . . . . 120
●Printing a List . . . . . . . . . . . . . . . . . . . . . . . . . . . . . . . . . . . . . . . . . . 128
STATUS MESSAGES . . . . . . . . . . . . . . . . . . . . . . . . . . . . . . . . . . . . . 129
●Self-diagnosis Function. . . . . . . . . . . . . . . . . . . . . . . . . . . . . . . . . . . 130
●Message Screen During Normal Operation . . . . . . . . . . . . . . . . . . . 130
Chapter 6 USEFUL INFORMATION
INSTALLATION AND CONNECTION. . . . . . . . . . . . . . . . . . . . . . . . . 132
●Selecting the Line Type . . . . . . . . . . . . . . . . . . . . . . . . . . . . . . . . . . 132
SUPPLIES AND OPTIONS . . . . . . . . . . . . . . . . . . . . . . . . . . . . . . . . . 133
●Supplies . . . . . . . . . . . . . . . . . . . . . . . . . . . . . . . . . . . . . . . . . . . . . . 133
●Options . . . . . . . . . . . . . . . . . . . . . . . . . . . . . . . . . . . . . . . . . . . . . . . 133
TROUBLESHOOTING. . . . . . . . . . . . . . . . . . . . . . . . . . . . . . . . . . . . . 134
SPECIFICATIONS. . . . . . . . . . . . . . . . . . . . . . . . . . . . . . . . . . . . . . . . 136
APPENDIX KEY OPERATOR PROGRAMS AND INDEX
LIST OF KEY OPERATOR PROGRAMS . . . . . . . . . . . . . . . . . . . . . . 138
KEY OPERATOR PROGRAM LIST . . . . . . . . . . . . . . . . . . . . . . . . . . 140
USING KEY OPERATOR PROGRAMS . . . . . . . . . . . . . . . . . . . . . . . 143
●Initial Procedure . . . . . . . . . . . . . . . . . . . . . . . . . . . . . . . . . . . . . . . . 143
●List Print/Set . . . . . . . . . . . . . . . . . . . . . . . . . . . . . . . . . . . . . . . . . . . 144
●Initial Settings . . . . . . . . . . . . . . . . . . . . . . . . . . . . . . . . . . . . . . . . . . 146
●Sending Functions . . . . . . . . . . . . . . . . . . . . . . . . . . . . . . . . . . . . . . 152
●Receive Functions . . . . . . . . . . . . . . . . . . . . . . . . . . . . . . . . . . . . . . 157
●Special Functions . . . . . . . . . . . . . . . . . . . . . . . . . . . . . . . . . . . . . . . 162
INDEX . . . . . . . . . . . . . . . . . . . . . . . . . . . . . . . . . . . . . . . . . . . . . . . . . 169
DQQMࡍࠫ㧞㧜㧜㧝ᐕ㧣㧝㧣ᣣޓἫᦐᣣޓඦᓟ㧢ᤨ㧡㧢ಽ
5
FORMAT OF THE MANUAL
The format of the manual is as shown below.
The difference between 8-1/2" x 11" and 8-1/2" x 11"R
This manual uses both 8-1/2" x 11" and 8-1/2" x 11"R to indicate paper and original sizes. The "R" is
used to distinguish the loading orientation of originals and paper. (This is also true of 5-1/2" x 8-1/2".)
[Example] Distinguishing the loading orientation of 8-1/2" x 11" size and 8-1/2" x
11"R size
8-1/2" x 11" (as well as 5-1/2" x 8-1/2") indicates
an original loaded as follows:
8-1/2" x 11"R (as well as 5-1/2" x 8-1/2"R)
indicates an original loaded as follows:
17
Account Audit Mode
1
ACCOUNT AUDIT MODE
When Account Audit mode is turned on, you can restrict use of the fax machine to specific departments
(maximum of 21 departments), and the amount of time that each department uses the fax machine can
be tracked. The Dept.Usage List can be printed out (See page 144) to show the usage time and pages
transmitted by each department.
This function is turned on with the key operator program. (See page 150)
Using Account Audit Mode
When Account Audit mode is turned on, the department code entry screen is displayed. Enter your
department code (five-digit identification number) as explained below before performing a fax
operation.
1Enter your department code (five digits) with the numeric keys.
As the department code is entered, the hyphens (-) change to asterisks ( ). If you enter
an incorrect digit, press the CLEAR key and then enter the correct digit.
2When you have completed the fax operation, press the AUDIT CLEAR
key.
Notes
If you enter a department code for Copy mode has also been programmed for Fax mode, you
can change to Fax mode after completing the copy operation and continue with the fax
operation without re-entering your department code.
If you enter a department code for Copy mode has not been programmed for Fax mode, your
department code for Fax mode must be entered after changing to Fax mode in order to perform
a fax operation.
If "Account Number Security" has been turned on using the Copy mode key operator program
and you incorrectly enter your department code three times, the machine will not accept any
further operations for one minute. (Refer to the copier manual.)
Note: This provides related information, further details, or a supplemental explanation.
Important: This explains restrictions and other information to help you avoid problems.
Detailed explanation
This gives a more
detailed explanation
of the step.
Title
This indicates the
operation or subject to
be explained.
Procedure
The procedure for the
operation is explained in
steps. Each step is
illustrated and has an
easy-to-understand
explanation.
Explanatory text
This is an easy-to-
understand explanation
of the operation or
function.
Chapter tab
The chapter tabs are
arranged sequentially to
allow quick reference to
each chapter from the
Table of Contents.
Vertically oriented
Top
Top
Horizontally oriented
Top
Top
DQQMࡍࠫ㧞㧜㧜㧝ᐕ㧣㧝㧣ᣣޓἫᦐᣣޓඦᓟ㧢ᤨ㧡㧢ಽ
6
TO USE THE MACHINE CORRECTLY
AS A FAX MACHINE
In order to use the machine correctly as a fax machine, please note of the following points.
Programming and Settings
Programming and settings that must be completed before using the machine as a fax are explained in
"Initially Required Programming and Settings" on page 16. Please read this section and program the
required information.
Lithium battery
A lithium battery inside the machine is used to retain settings and programmed information such as auto-
dial numbers when the power is off.
●Battery power is consumed when the power switch is turned off. (Battery power is consumed even if
nothing is programmed and no settings have been established.) Very little battery power is consumed
when the power switch is turned on.
●When the battery dies, settings and programmed information will be lost, so please keep a record of
this information. (See page 120)
●The life of the battery is approximately 5 years when the power switch is kept continuously off.
●When the battery dies, please consult your dealer or your nearest Sharp customer assistance center.
The machine will not operate once the battery dies.
Others
●In the event of a thunderstorm, it is safest to remove the power cord from the power outlet. Memory
contents such as faxes received by substitute memory reception will not be lost.
●The power switch should normally always be kept on. If turned off, faxes cannot be received.
DQQMࡍࠫ㧞㧜㧜㧝ᐕ㧣㧝㧣ᣣޓἫᦐᣣޓඦᓟ㧢ᤨ㧡㧢ಽ
7
MAIN FEATURES
1Rapid dialing
●You can send a fax to a programmed destination (maximum 50 destinations) by simply
pressing a rapid key. (See page 25)
2Speed Dialing
●You can send a fax to a programmed destination (maximum 300 destinations) by pressing the
SPEED DIAL key, entering a 3-digit Speed Dial number, and then pressing the START key.
(See page 25)
3Memory transmission
●An original can be scanned into memory and then transmitted. (See page 31)
4Substitute memory reception
●
If you run out of paper or toner during reception, the fax will be received to memory. (See page 46)
5Address list
●You can search for the name of a destination in the message screen and then dial that
destination. (See page 25)
6Polling
●Your machine can call another machine and automatically initiate reception of an original that
is loaded in the other machine. (See page 81)
7Memory Polling
●When another machine calls and polls your machine, your machine can send an original that
has been stored in memory. (See page 84)
8Confidential Communication
●You can send and receive confidential documents without the concern that they will be picked
up by anyone other than the intended recipient. (See page 74)
9Broadcast Transmission
●You can send the same document to multiple recipients in a single operation. (See page 70)
10 Relay Request Transmission
●You can have another machine relay a document to multiple end receiving machines. (See
page 77)
11 Timer Transmission
●You can set up an original to be automatically transmitted at a selected time. (See page 72)
12 Programs
●
You can store an operation sequence in a program to allow simplified transmission. (See page 96)
13 Storing transmission jobs
●When the machine is occupied with another operation, you can store a transmission job. (See
page 99)
14 Chain Dialing
●Additional digits can be dialed after a programmed destination number. (See page 101)
15 Transfer function
●A received fax can be transferred to another fax machine. (See page 102)
16 F-code Communication
●
An F-code (sub-address and passcode) can be programmed in accordance with the
international standards of the ITU-T, which enable communication with other machines
regardless of the manufacturer or model. This machine supports F-code confidential
communication, F-code relay request transmission, and F-code memory polling. (See page 87)
DQQMࡍࠫ㧞㧜㧜㧝ᐕ㧣㧝㧣ᣣޓἫᦐᣣޓඦᓟ㧢ᤨ㧡㧢ಽ
DQQMࡍࠫ㧞㧜㧜㧝ᐕ㧣㧝㧣ᣣޓἫᦐᣣޓඦᓟ㧢ᤨ㧡㧢ಽ
9
CHAPTER 1
BEFORE USING THE MACHINE
This chapter explains basic knowledge and settings that are
required before the fax feature of the machine can be used. Be
sure to read this chapter before using the fax feature.
Page
●PART NAMES AND FUNCTIONS . . . . . . . . . . . . . . . . . . . . . . 10
Operation Panel . . . . . . . . . . . . . . . . . . . . . . . . . . . . . . . . . . . . 10
Overall View . . . . . . . . . . . . . . . . . . . . . . . . . . . . . . . . . . . . . . . 12
Message Screen . . . . . . . . . . . . . . . . . . . . . . . . . . . . . . . . . . . . 13
Arrow Keys ( ) . . . . . . . . . . . . . . . . . . . . . . . . . . . . . . 13
●TURNING THE POWER ON AND OFF . . . . . . . . . . . . . . . . . . 14
Turning On the Power . . . . . . . . . . . . . . . . . . . . . . . . . . . . . . . . 14
Turning Off the Power . . . . . . . . . . . . . . . . . . . . . . . . . . . . . . . . 14
Selecting Fax Mode . . . . . . . . . . . . . . . . . . . . . . . . . . . . . . . . . 15
●INITIALLY REQUIRED PROGRAMMING AND SETTINGS . . 16
Program Your Own Number and Name . . . . . . . . . . . . . . . . . . 16
Set the Date and Time . . . . . . . . . . . . . . . . . . . . . . . . . . . . . . . 16
Installation and Connections. . . . . . . . . . . . . . . . . . . . . . . . . . . 16
●ACCOUNT AUDIT MODE. . . . . . . . . . . . . . . . . . . . . . . . . . . . . 17
Using Account Audit Mode . . . . . . . . . . . . . . . . . . . . . . . . . . . . 17
●SETTING THE PAPER SIZE OF THE PAPER TRAYS . . . . . . 18
●ABOUT THE ORIGINAL . . . . . . . . . . . . . . . . . . . . . . . . . . . . . 19
Originals that can be Faxed . . . . . . . . . . . . . . . . . . . . . . . . . . . 19
●ABOUT THE SPF . . . . . . . . . . . . . . . . . . . . . . . . . . . . . . . . . . . 20
Originals that can be Used . . . . . . . . . . . . . . . . . . . . . . . . . . . . 20
●LOADING ORIGINALS. . . . . . . . . . . . . . . . . . . . . . . . . . . . . . . 21
Using the SPF. . . . . . . . . . . . . . . . . . . . . . . . . . . . . . . . . . . . . . 21
Using the Platen Glass . . . . . . . . . . . . . . . . . . . . . . . . . . . . . . . 22
●SETTING THE ORIGINAL SIZE. . . . . . . . . . . . . . . . . . . . . . . . 23
Selecting an Inch-based Original Size . . . . . . . . . . . . . . . . . . . 23
Setting an AB Original Size. . . . . . . . . . . . . . . . . . . . . . . . . . . . 23
●SELECTING THE RESOLUTION AND EXPOSURE. . . . . . . . 24
Selecting the Resolution and Exposure . . . . . . . . . . . . . . . . . . 24
●CONVENIENT DIALING FEATURES. . . . . . . . . . . . . . . . . . . . 25
Auto Dialing. . . . . . . . . . . . . . . . . . . . . . . . . . . . . . . . . . . . . . . . 25
Redialing. . . . . . . . . . . . . . . . . . . . . . . . . . . . . . . . . . . . . . . . . . 26
On-hook Dialing . . . . . . . . . . . . . . . . . . . . . . . . . . . . . . . . . . . . 26
DQQMࡍࠫ㧞㧜㧜㧝ᐕ㧣㧝㧣ᣣޓἫᦐᣣޓඦᓟ㧢ᤨ㧡㧢ಽ

10
Part Names and Functions
PART NAMES AND FUNCTIONS
Operation Panel
The operation panel for the U.S.A. is used in the following explanation. Refer to the table below for
differences between the panel for the U.S.A. and the panel for Canada.
When the rapid key overlay is open
Differences between the U.S.A. and
Canadian panels
SHIFT (character entry) / SPEAKER key (See
pages 26, 63)
This key is used when entering characters and
for on-hook dialing.
REDIAL/PAUSE key (See pages 26, 48)
This key is used to automatically redial the last
number dialed. When entering a number to be
dialed, the key can be used to insert a pause.
SYMBOL (character entry) / SPEED key (See
pages 25, 63)
This key is used to enter symbols, and to dial a
Speed Dial number.
SPACE / - (character entry) / COMM. SETTING
key (See pages 32, 63)
This key is used to enter a space or a hyphen (-),
and to change between memory transmission
and direct transmission. The key is also used to
change between automatic reception and
manual reception.
Rapid keys (01 to 25) (See page 25)
These keys are used for rapid dialing.
COPY key
This key is used to change to copy mode.
PRINT key
This key cannot be used in fax mode.
SCAN key
This key cannot be used in fax mode.
Message screen (See page 13)
This key displays the initial screen and the
function setting screen.
i key
This key is used when an mark appears in
the display, or to display information about an
operation.
BACK key
In a setting or programming screen, this key is
used to move back to the previous screen.
Number U.S.A. Canada
DQQMࡍࠫ㧞㧜㧜㧝ᐕ㧣㧝㧣ᣣޓἫᦐᣣޓඦᓟ㧢ᤨ㧡㧢ಽ
PART NAMES AND FUNCTIONS
11
Part Names and Functions
1
JOB STATUS key (See page 114)
This key is used to check the status of a job.
OK key (See page 18)
This key is used to confirm a setting after
selection with the arrow keys ( ).
Rapid key overlay tab
This tab is used to flip the rapid key overlay.
Rapid key overlay (See page 64)
Open or close to use Rapid dialing or Group
dialing, or to enter characters.
LINE light (See page 44)
This lights while a fax is being sent or received.
FAX key (See page 15)
Press this key to change to Fax mode.
DATA light
This light blinks when a fax has been received
to memory.
The light stays on constantly when a fax is
waiting in memory for transmission.
RESOLUTION key (See page 24)
This key is used to set the resolution.
PROGRAM key (See page 98)
This key is used when using a program.
ADDRESS key (See page 25)
This key is used to search the Address list for a
destination programmed in an auto-dial number.
BROADCAST key (See page 70)
This key is used to perform a Broadcast
transmission.
DUPLEX SCAN key (See page 106)
This key is used to scan two-sided originals.
ORIGINAL SIZE key (See page 23)
This key is used to set the size of the original to
be transmitted.
Arrow keys ( ) (See page 13)
These keys are used to select an item or move
to a different page.
SPECIAL FUNCTION key (See page 18)
This key is used to select a special function for
sending or receiving, and to establish function
settings and store auto-dial numbers.
AUDIT CLEAR / TONE key (See page 17)
When audit mode is turned on and used for fax,
this key is used to enter an account password.
This key can also be pressed when using the
phone line to issue tone signals.
Numeric keys
These keys are used to dial numbers. They are
also used when establishing settings and
storing information.
# / PROGRAM / READ-END key (See page 30)
This key is used when dialing, and to end
scanning when performing memory
transmission from the platen glass. (The key is
not used for fax programs.)
CLEAR key
This key is used to cancel an operation. When
entering characters and numbers, the key is
used to correct a mistake.
CLEAR ALL key
This key is used to end or cancel a setting and
return to the initial screen.
START key
This key is used for the following:
(1) To begin transmission (2) To scan an
original (3) To begin reception manually (4) To
establish a setting or store information
Rapid (26 to 49) / A to Z (character entry) keys
(See pages 25, 63)
These keys are used for rapid dialing and to
enter characters.
Rapid (50) / SP (character entry) key (See
pages 25, 63)
This key is used for rapid dialing and to enter
special characters.
Notes
●When the auto power shutoff function turns
on, all displays turn off except for the mode
key lights. For more information on the auto
power shutoff function, see the copier manual.
●For information on keys and lights used for the
copy function and other functions, refer to the
"Operation panel" section of the appropriate
manual.
DQQMࡍࠫ㧞㧜㧜㧝ᐕ㧣㧝㧣ᣣޓἫᦐᣣޓඦᓟ㧢ᤨ㧡㧢ಽ
PART NAMES AND FUNCTIONS
12
Part Names and Functions
Overall View
The following illustration shows the overall configuration of the AR-275 model with the optional
reversing single pass feeder (RSPF) (AR-RP3), job separator tray kit (AR-TR3), and optional facsimile
expansion key (AR-FX4) installed.
Depending on your model, see the illustrations below.
Exit area
The original is output to this tray after
transmission or after being scanned into
memory.
Document feeder tray (See page 21)
The original is place face up in this tray for
transmission.
Original guides (See page 21)
Adjust these guides to the size of the original.
Platen glass (See page 22)
Place books and other originals that cannot be
loaded in the SPF on this glass.
Job separator tray
Received faxes and printouts used for the fax
function are output here.
*If the optional finisher has been installed, the
job separator tray cannot be used. Also, the
output tray can be changed using the Copy
mode key operator program. Refer to the "Key
Operator’s Guide" for copying.
Center tray
Received faxes can be output to the center tray
by establishing the appropriate setting with the
copier key operator program.
Operation panel (See pages 10, 11)
Front cover (Copier manual)
Open this cover to remove a paper jam.
Paper trays (Copier manual)
These trays hold paper for received faxes and
copies. Each tray can hold 500 sheets of paper.
Power switch (See page 14)
This switch turns the power on and off.
Speaker
The speaker lets you hear the line when dialing
by on-hook dialing, and the beep sound at the
end of fax communication.
LINE jack (See page 132)
Connect the telephone line to this jack.
TEL jack (See page 112)
An extension phone can be connected to this
jack.
Platen cover
Close this cover to flatten the original on the
platen glass.
Note
●For explanations of parts of the machine that
are also related to copying and printing (paper
misfeeds and loading paper), refer to "PART
NAMES AND FUNCTIONS" in the copier
manual.
Models with platen
cover installed
Models with single
pass feeder (SPF)(AR-SP4)
DQQMࡍࠫ㧞㧜㧜㧝ᐕ㧣㧝㧣ᣣޓἫᦐᣣޓඦᓟ㧢ᤨ㧡㧢ಽ
PART NAMES AND FUNCTIONS
13
Part Names and Functions
1
Message Screen
The status of fax functions is shown in the message screen. Settings are also selected in the message
screen.
Arrow Keys ( )
The arrow keys are used to select a setting in the message screen, or to move to the next page.
Notes
●When you have completed a setting, press the OK key to store it.
●Press the BACK key to move back to the previous screen.
Message display
A message showing the current status of the machine
appears in this display.
.......This appears when a confidential fax has been
received.
...This shows the amount of free memory
remaining as a percentage.
Date and time display
This shows the date and time.
Send mode display
This shows the send mode.
MEMORY ...
Memory transmission mode (See page 31)
DIRECT
.....Direct transmission mode (See page 31)
MANUAL ....
Manual transmission mode (See page 29)
Exposure display (See page 24)
This shows the exposure setting for scanning an original.
Resolution display (See page 24)
This shows the resolution setting for scanning an original.
Reception mode display
This shows the reception mode.
AUTO ........Auto reception mode (See page 41)
MANUAL ...Manual reception mode (See page 41)
Original display
When an original has been loaded, this shows the
location and size of the original.
...SPF
...Platen glass
...Duplex scanning is selected
Size of original
Location of original
Example: Original size setting
Press the keys to move
the cursor and select a setting.
Press the key
Press the keys to move
to the next page.
Press the key
DQQMࡍࠫ㧞㧜㧜㧝ᐕ㧣㧝㧣ᣣޓἫᦐᣣޓඦᓟ㧢ᤨ㧡㧢ಽ
14
Turning the Power On and Off
TURNING THE POWER ON AND OFF
Use the power switch on the left side of the front cover to turn the power on and off.
Turning On the Power
After turning on the power, the machine performs a system check and then reverts to the mode that
was selected when the power was turned off. If the power was turned off with the machine in fax mode,
fax mode will be the initial mode.
1Turn on the power switch.
Note
●To change from fax mode to a different mode, press the desired mode key. (See next page)
Turning Off the Power
There is normally no need to turn off the power. Turn off the power if a machine problem occurs, a
foreign object falls into the machine, or you need to move the machine.
Important
●When using the machine as a fax machine, do not turn off the power. When the power is turned
off, the machine cannot receive faxes.
●Before turning off the power, make sure the machine is idle. If the power is turned off while the
machine is in operation, a paper jam may occur. If a setting operation is being performed, the
setting will be canceled.
1Make sure the machine is idle and then turn the power switch to the
off position.
●The machine is idle if "Stand-by." appears in the display, or if the LINE light is off. (See
next page)
Note
●If only the mode key lights are on (auto power shutoff), the machine is idle.
On
Off
DQQMࡍࠫ㧞㧜㧜㧝ᐕ㧣㧝㧣ᣣޓἫᦐᣣޓඦᓟ㧢ᤨ㧡㧢ಽ
TURNING THE POWER ON AND OFF
15
Turning the Power On and Off
1
Selecting Fax Mode
When the Fax mode is selected, the mode key light illuminates. To select Fax mode, press the FAX key.
1Press the FAX key.
●The Fax mode light illuminates, and the initial screen of Fax mode appears.
Notes
●Automatic fax reception and several other fax functions can operate in Copy mode (see below).
●If the FAX key is pressed while the machine is busy with a copy operation, the changeover to
Fax mode is stored and the Fax mode light blinks. When the copy operation ends, the Fax
mode light illuminates steadily and the machine changes to Fax mode.
Fax functions that can operate in Copy mode
●Automatic reception (See page 44)
●Timer transmission (See page 72)
●Memory polling (See page 84)
●Relay Broadcast transmission (See page 77)
●Transmission of stored memory transmission jobs (See page 31)
●Remote reception (See page 112)
●Manual reception (See page 44)
Initial state of Fax mode
In the initial state of Fax mode, the following message screen appears and the lights illuminate as
indicated. The information displayed may vary due to key operator program settings or types of use.
DQQMࡍࠫ㧞㧜㧜㧝ᐕ㧣㧝㧣ᣣޓἫᦐᣣޓඦᓟ㧢ᤨ㧡㧢ಽ

16
Initially Required Programming and Settings
INITIALLY REQUIRED
PROGRAMMING AND SETTINGS
After installation and before using the machine as a fax, complete the following settings.
Program Your Own Number and Name
Program the fax number and name of the user of the machine.
●The programmed name and number appear at the top of each fax page you send.
●The programmed number serves as a passcode number when you poll another machine (See page
86).
●If you do not program your fax number, Confidential transmission (See page 74) will not be possible.
●The user's number and name are programmed using the key operator program. (See page 147)
●You can check the programmed name and number by printing out the Passcode List. (See page 126)
Set the Date and Time
The machine has an internal clock. Set the correct date and time in the clock.
●The date and time appear in the message screen.
●The date and time are used for the Timer Transmission function (See page 72). Be sure the correct
date and time are set.
●The date and time are set with the key operator program. (See page 151)
Installation and Connections
Installation and connections that are required for the fax functions are explained in "Installation and
Connections" in this manual (See page 132). Please read this section and complete the necessary
connections and settings for using the fax feature.
DQQMࡍࠫ㧞㧜㧜㧝ᐕ㧣㧝㧣ᣣޓἫᦐᣣޓඦᓟ㧢ᤨ㧡㧢ಽ
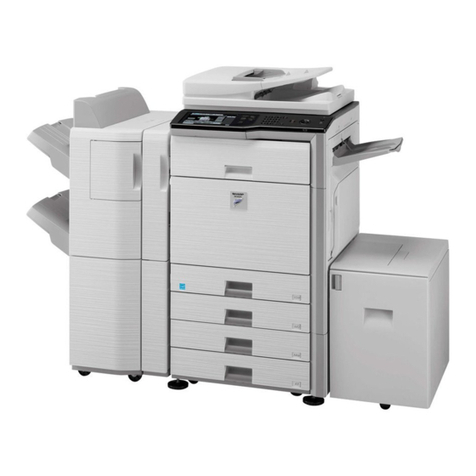
Table of contents
Other Sharp Copier manuals

Sharp
Sharp AL-1040 User manual

Sharp
Sharp SF-7320 User manual

Sharp
Sharp AR-150 SERIES User manual

Sharp
Sharp Multi Access User manual

Sharp
Sharp AL-1217D User manual

Sharp
Sharp AL-800 User manual

Sharp
Sharp AR-C150 User manual

Sharp
Sharp AR-C330 Key operators User manual

Sharp
Sharp AR-235 User manual

Sharp
Sharp AL-1216 User manual

Sharp
Sharp AL-2020 Manual

Sharp
Sharp AR-5015 N User manual

Sharp
Sharp MX 5500N - Color Laser - Copier User manual

Sharp
Sharp AR-5132 User manual

Sharp
Sharp SF-2530 User manual

Sharp
Sharp IMAGER AR-5316 User manual

Sharp
Sharp AL-1041 - B/W Laser Printer User manual

Sharp
Sharp AR-FX7 User manual

Sharp
Sharp AR-LC1 User manual

Sharp
Sharp Z-810 User manual