MX-FXX1 SPECIFICATIONS 2 – 3
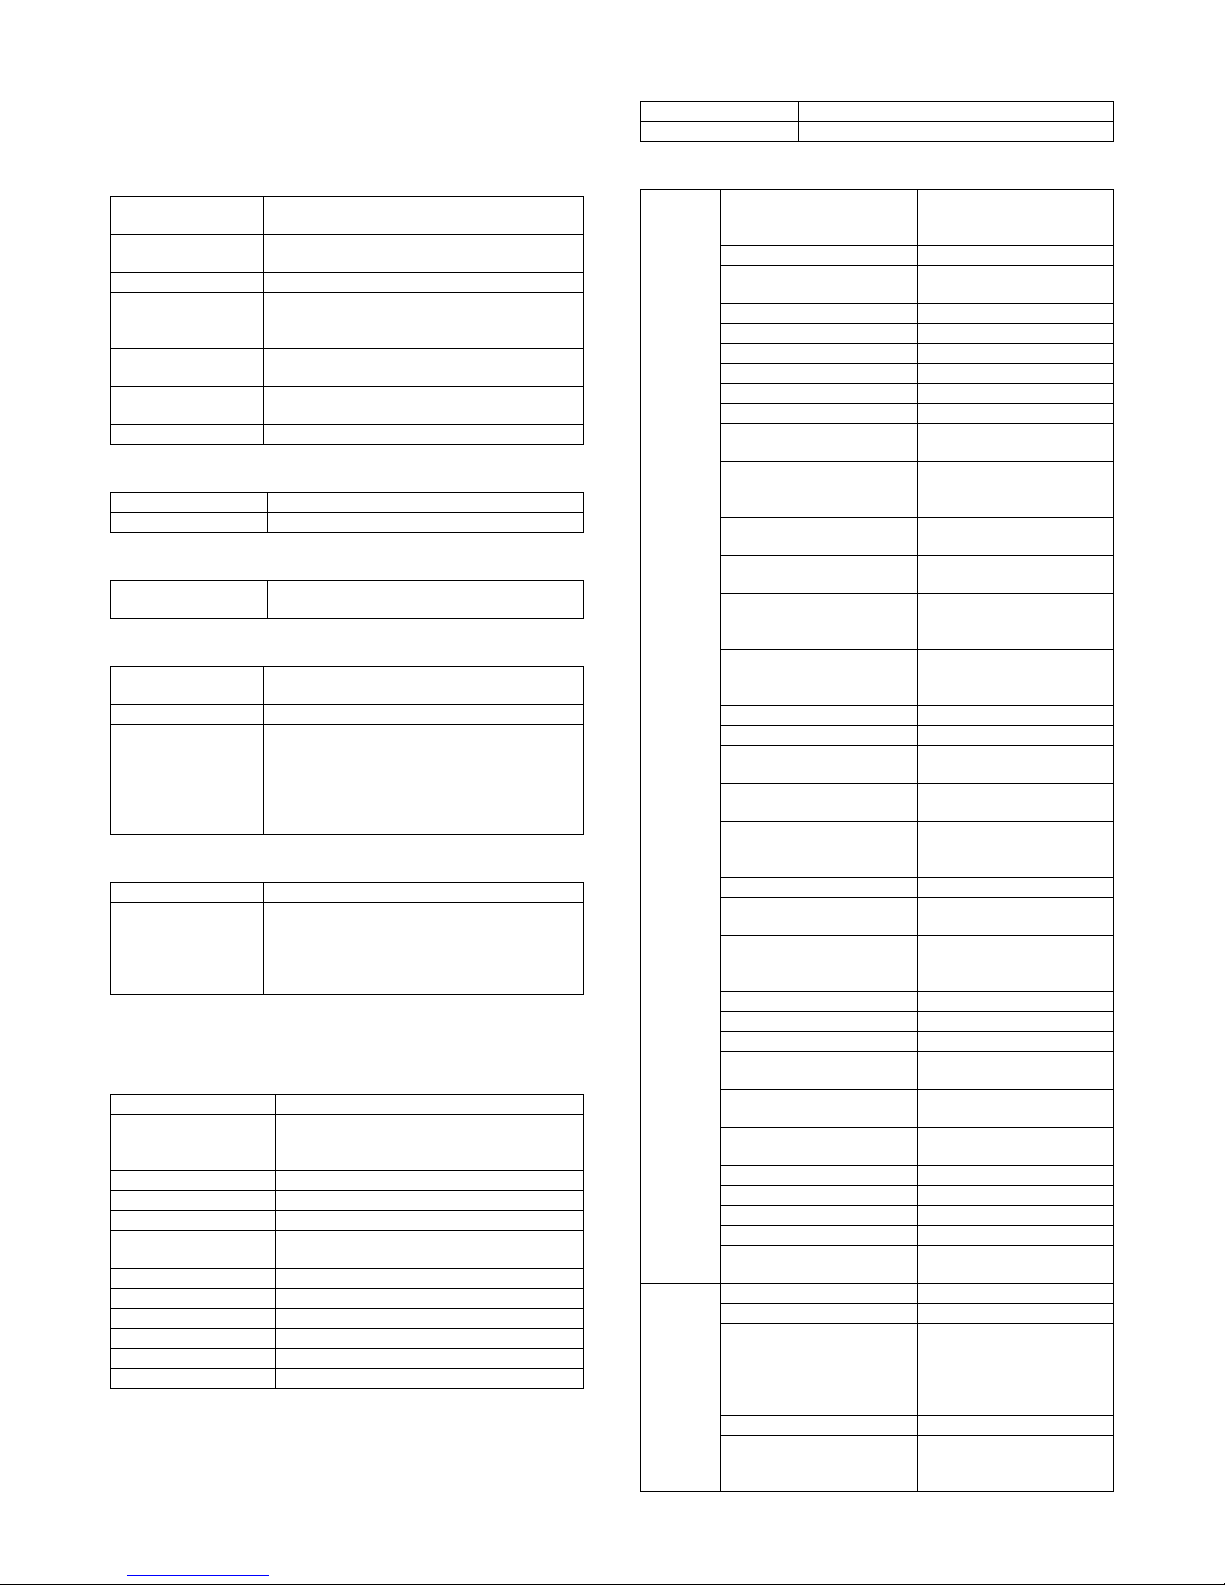
(5) Transmission function
(6) Reception function
*1: This function saves all received data in memory and starts out
put after password entry. (Confidential reception is excluded.)
Setting only on the reciver side.
(7) Report/list function
(8) Other Functions
* This function means that e-mail address setteing on F code relay
broadcast allowed.
FAX
Memory transmission 94 destinations in all
On-hook Yes
Quick online transmission Yes
Direct transmission Yes
(Switching: Memory transmission ↔
Direct transmission)
Automatically-reduced
transmission
Yes
Rotated transmission Yes
Scaled transmission Yes
Enlargement/reduction is allowed
only from a fixed size to another.
Reduction may be done on the
receiver side with Fax/Internet Fax
sending.
Recall mode Error Yes
Busy Yes
Number/time to be set up through
system setup
Long original transmission Yes
Maximum of 800mm (single side
only/black-white 2 values only)
Confidential transmission (Sharp
mode)
No
Relay broadcast transmission
(Sharp mode)
No
Large capacity original mode Yes
Scanning of thin paper Yes
Mixed originals feeder Yes (Random + MIX)
Default date sender transmission Yes (ON only)
FAX
Automatic reception Yes
Manual reception No
Switching from manual reception to
automatic reception. (Allowed only
for SEF and Japan)
Memory reception Yes
Fixed size reduced reception Yes
Specified size scaled reception No
Rotated reception Yes
Setting of received data print
condition
Equal size print (partition not
allowed)
Equal size print (partition allowed)
Equal or reduced size print
2-sided reception Condition setting through system
setting
2-in-1 reception No
Automatic reduction setting upon
receiving A3
Yes
Automatic reduction setting upon
receiving letter
Yes
Reception from a specific number
not allowed. (To be rejected)
Specified numbers only (50 numbers
/20 digits)
External phone connection
remote
Yes
Confidential reception (Sharp
mode)
No
Received data bypass output Yes
Index printing No
Transfer function upon disabling
of output.
Yes (1 receiver (of transfer)
registration)
Internet Fax/Fax to e-mail
(Transfer of Internet Fax/Fax
reception data to e-mail, inbound
routing)
Yes
Exit tray setting Yes
Insertion of job separator sheet No
Staple function of received data Yes
Auto wake up print Yes
Received data print hold *1 Yes
Color toner print when black toner
runs out.
No
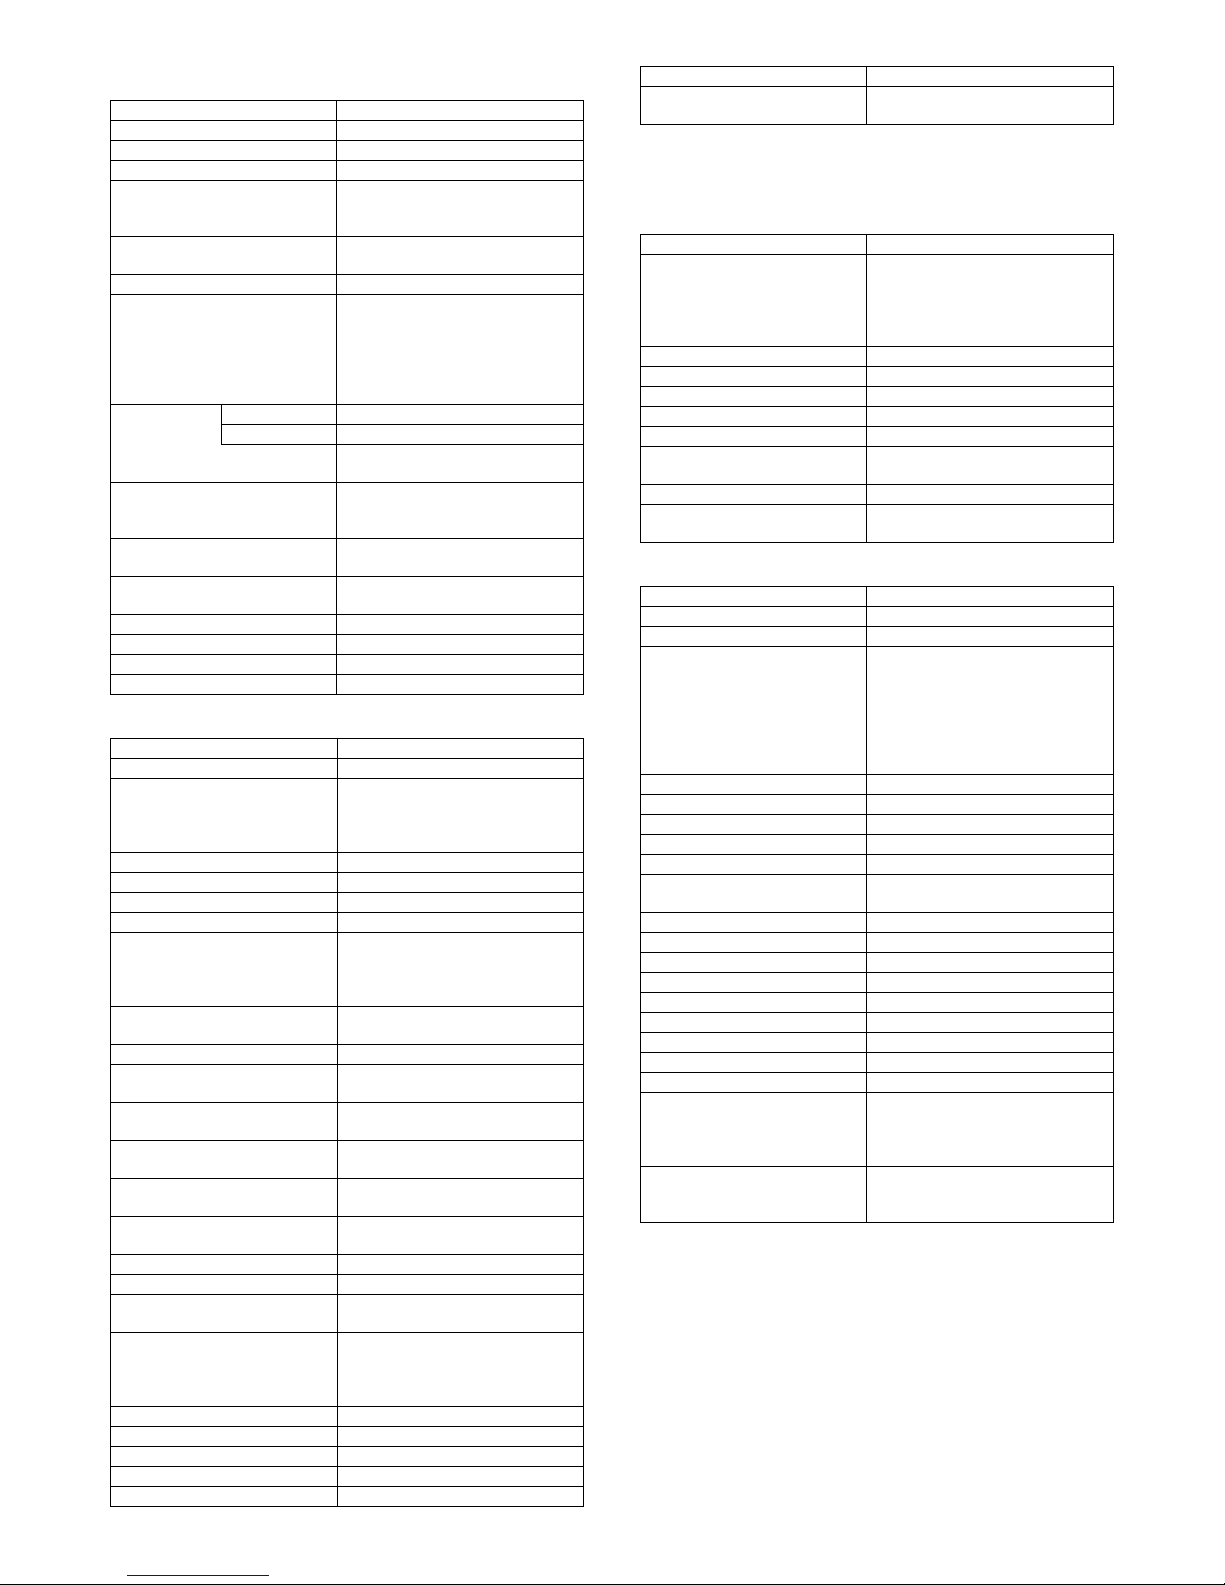
FAX
Image sending activity report Yes
Time-specified output
Output with memory full
* Maximum of 200 times including
both transmission and reception
Transaction report Yes
Address/phone number table Yes
Group table Yes
Program table Yes
Memory box table (F code) Yes
Communication original contents
print
Always print/Upon error/no print
List of rejected reception numbers Yes
Table of control record for each
account
No
FAX
Time specification Yes
Polling reception Yes
Bulletin board transmission Yes
Up to 100 registrations allowed with
bulletin board, confidential and relay
broadcast all combined. (Free area :
1 registration)
Setting of the number of
transmission: 1/no limit.
Cover sheet function No
Transmission message No
Sender print Yes
Sender selection Yes
Page number print Yes
Date print Yes (Date can be expressed
alternatively)
Polling protection function Yes
Page partition transmission Yes
Page connection No
Confidential (receiver unit) Yes (F code method)
Relay broadcast instructions Yes (F code method)
Fax to e-mail (F code) * Yes
Edge erase Yes
Center erase Yes
2 in 1 Yes
Card shot Yes (Equivalent or enlargement up to
the paper width. The maximum
enlargement is not allowed to exceed
400%)
Forward data transmission/
reception (Document Admin)
Yes
Data transmission by PC-Fax/PC-
Internet Fax is allowed, too.
FAX