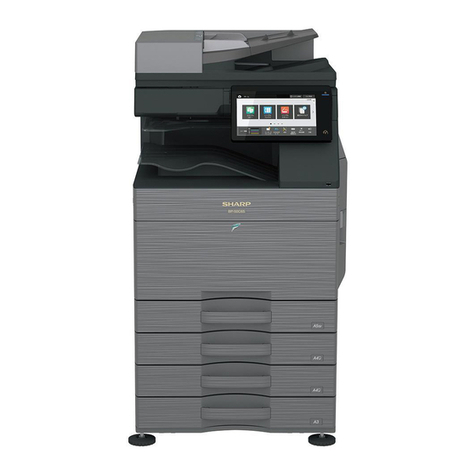
Sharp BP-FR12U User manual

Data Security Kit
Operation Guide
Model: BP-FR12U
Thank you very much for purchasing the BP-FR12U Sharp data security kit. Please read this
Operation Guide carefully to ensure correct use.
Keep this Operation Guide in a safe place for future reference.
It can be a useful guide if you are have any questions about using the data security kit, or if
problems occur during use.

Warranty
While every effort has been made to make this document as accurate and
helpful as possible, SHARP Corporation makes no warranty of any kind with
regard to its content. SHARP is not responsible for any loss or damages,
direct or indirect, arising from or related to the use of this operation manual.
© Copyright SHARP Corporation 2022. All rights reserved. Reproduction,
adaptation or translation without prior written permission is prohibited,
except as allowed under copyright laws.
Note:
"Settings (Administrator)" in this manual refers to the setting mode that
require logging in with administrator rights, and "Settings (General)" refers to
the setting mode that can be logged in by general users (including the
administrator). All information included herein is subject to change without
notice.
Icons used in the manuals
The icons in this manual indicate the following types of information:
This provides a supplemental explanation of a function or procedure.
This explains how to cancel or correct an operation.
The display screens, messages, and key names shown in the manual may differ
from those on the actual machine due to product improvements and
modifications.

1
Introduction
This manual provides instructions for using the data security kit
"BP-FR12U".
This product adds a security function to the SHARP Digital Full-color
Multifunctional System (or SHARP Digital Multifunctional System).
When the copy, printer, or fax function of a SHARP Digital Full-color
Multifunctional System (or SHARP Digital Multifunctional System) with the
security function is used, image data generated in each job is encrypted,
and when the job is finished, the encrypted data is immediately erased from
the local drive.
QProduct Key
To initially enable the security function, you must use "System Settings" in
the setting mode (administrator) to enter the product key (password) or the
application number. The name of the system setting used for this purpose is
"DATA SECURITY KIT". Please ask your dealer for the product key or the
application number. (This work is performed by a service technician at the
time of installation of the data security kit.)
QBacking up and clearing data stored with the document
filing function
After the data security kit is installed to the machine, data previously
stored in the machine with the document filing function becomes
unavailable. It is recommended to save any data that you need to keep to
a computer or other devices, delete document filing data from the
machine, and then install the data security kit. Data copied to a computer
can be brought back to the machine to use again after the data security kit
is installed. (This work is normally performed by a service technician at
the time of installation of the data security kit.)
Only confidential folders can be used to return data from a computer to
the machine after installation of the data security kit. Before returning data
from a computer to the machine, create confidential folders if needed.

2
QAbout passwords for the Web page
User authentication is required in order to access the web page of the
machine.
If an incorrect password is entered 3 times in a row during user
authentication, the user account is locked and access to the Web pages
of the machine by that user will be prohibited for 5 minutes.
For more information, see "About the lockout function" (page 16 of this
manual)
QNote for the owner of the data security kit and the machine
with the data security kit installed
The matters to be observed for ensuring the machine installed the data
security kit provides further secure status are described below.
Note for the operational environment
OAs the operational environment for the machine, provide physical security,
commensurate with the value of the data the machine processes.
OWhen connecting a machine with the data security kit installed to a network, do
not connect the machine directly to the Internet; join the machine to one of
subnetworks into which routers divide a LAN protected by a firewall; and only
devices (computers, etc.) permitted to communicate with the machine should be
on such a subnetwork together with the machine. And, to maintain such condition
at all times, be sure to manage devices on the subnetwork for the machine.
OConfigure devices (computers, etc.) that communicate with the machine so as to
require users to log in, to keep such devices away from others than the users of
the machine.
OIt is discouraged from connecting an external facsimile machine to the TEL Jack.
Regardless of the hold setting in the machine for received data, the external
facsimile machine connected to the machine might receive and print them out.
OSet the authentication server to suspend against repeated wrong passwords
when using network (LDAP or AD) authentication or Sharp OSA external
authentication.
Note:
Some of the procedures for operating the machine change when the data
security kit is installed. The manuals for the machine explain the procedures for
operating the machine when data security kit is not installed. This manual and
"BP-FR12U Notice" explain the changes to those procedures when the data
security kit is installed.

3
Note for user management
OThe administrator plays an important role in maintaining security. Exercise
appropriate care in selecting the person that will assume the job of administrator
of a machine with the data security kit installed.
OProvide instructions for the users (including the administrators) of the machine to
let them understand the security policies of the organization and perform the
proper control/operation of the data security kit and the machine with the data
security kit installed according to this guidance. In addition, keep users informed
the following matters.
• The user bears responsibility for control of documents copied or printed and
faxes received using the machine.
• When you have finished performing machine operations at the operation panel,
be sure to press the [LOGOUT] key to log out.
• When you have finished performing machine operations in the Web pages, be
sure to click the [Logout] button or close the Web browser to log out.
• For the user password, do not use one that can easily be guessed, and control
securely to avoid disclosure to others.
• Note that the data of fax transmissions and internet fax transmissions that are
not completed due to a broken connection or the line being busy, and the image
data of jobs that are not completed due to out of paper or a paper misfeed are
held on the local drive of the machine in an encrypted state. This data will not be
cleared until the job or jobs are completed or cancelled.
• When the connection is broken accidentally during the communication with the
device (computers, etc.) permitted to communicate with the machine, check
whether the connection is physically broken such as disconnection of the LAN
cable or whether the device of the communication counterpart has any problem.
If no problem is found as a result of checking, power off and on the machine and
try again. (If the connection is still broken even after powering off and on are
repeated several times, please contact your dealer or nearest authorized
service representative.)
OKeep administrators of the machine informed of the following matters.
• For the default administrator (admin) password, do not use one that can easily
be guessed.
• Carry out thorough control of the password information of all the users including
the default administrator (admin) to prevent leakage to third parties.
• Be sure to change the default administrator (admin) password immediately
each time a new person takes over as administrator.
• When you leave even just for a second while using the "Settings
(administrator)" on the operation panel, be sure to press [Home Screen] button
then tap [LOGOUT] key to log out.

4
• When you leave even just for a second while using the "Settings
(administrator)" on the web page, be sure to click the [Logout] button or close
the Web browser to log out.
• If [Admin] is specified for the [Authority Group] of general users in User Control,
the settings of the machine may be changed in a way unintended by the
administrator. It is recommended not to specify [Admin] for users other than the
administrator when you add/modify users.
• The setting change of Authority Group indicating the belonging of user is
reflected instantly. However, for the user who has logged in at the time of setting
change, the old setting of Authority Group before the change is applied before
he is logged out. Therefore, such users should be alerted to log out once and
log in again.
Other Caution
OAny encrypted data exported under the data security was enabled before
installing this kit can no longer be imported after this kit is installed.
O[Initialize Private Data/Data in Machine] is a function in which all data in the
machine are returned to default. All data stored in the machine, such as personal
information, user information and job data are deleted after executing this
function and all the setting information are returned to the factory default. This
function should be executed when the machine is disposed or the owner of the
machine is changed.
• This function can be executed from the operation panel by the administrator
only.
• Initialization is executed by tapping [Execute] key in the [System Settings] →
[Security Settings] →[Initialize Private Data/Data in Machine] of "Settings
(administrator)", then tapping [OK] key in the displayed execution confirmation
message.
• It takes some times from start to end of the initialization. Execution cannot be
stopped in the middle. Be sure not to leave the spot until the initialization is
completed. Pay sufficient attention to the breakage of power supply of the
machine during the initialization.
• If any problem happened in the middle of initialization, “Call for service.” will be
displayed on the operation panel. In that case, please contact your dealer or
nearest authorized service representative.
• If the machine is shut down before completing the initialization due to power
failure, log in as the default administrator (admin) and execute the initialization
according to the above procedure again after power recovery. In addition, the
default administrator (admin) password may be initialized. If you cannot log in
with the specified password, use the default password to log in.

5
• When the initialization is completed, the machine reboots automatically. After
the reboot, the initialization completion report is printed out and the initialization
completion message is displayed on the operation panel. If “Setting a high level
of security” (page 24 of this manual) is enabled, a report will be printed by
temporarily turning the power off after the system has been initialized and
restarted and then turning the power on again.
• If [OK] button is not displayed on the operation panel after the completion of
initialization, the machine is locked temporarily and cannot be operated. In that
case, please contact your dealer or nearest authorized service representative.

6
Contents
Introduction ..........................................................................................1
1. When the data security kit is installed ...........................................7
OSecurity settings of the data security kit ....................................................8
ODocument control function.........................................................................8
ODocument Filing.........................................................................................8
OAuthority group registration screen............................................................9
OProtecting passwords ..............................................................................10
ORestrictions on tandem copying and tandem printing..............................13
OSecurity Settings in the FTP Pull Print Function......................................14
OTransferring copied data..........................................................................15
OAbout the lockout function .......................................................................16
2.Security settings .............................................................................17
OUsing the security settings in the setting mode (administrator) ...............17
OSettings added to the security settings....................................................18
OData Clearance Settings..........................................................................19
OCondition Settings ...................................................................................22
OSetting a high level of security.................................................................24
3.Document Control Setting..............................................................25
ODocument control .................................................................................... 25
OModes to which the document control function can be added.................26
OEnabling the document control function ..................................................27
OUsing the document control function .......................................................30

7
1When the data security kit is installed
When the data security kit is installed, the following icon appears on the
touch panel.
Tap the icon ( ) to display the next screen, and then tap the icon ( ) to
view information on the data security kit.
The following information on this product is displayed.
"BP-FR12U Data Security Kit"
When the data security kit is installed, data remaining in the machine is
automatically erased after each job.
When data clearing begins, the message "Data is being cleared." appears
for 6 seconds*.
* The duration of the message display can be changed with "Message Time
Setting" in the setting mode (administrator).
("Settings (Administrator)" > "System settings" > "Common Settings" > "Operation
Settings" > "Condition Settings" > "Message Time Setting")
The version information for this product can be displayed by selecting
"Settings (Administrator)" > "Status" > "Firmware Version".
If the machine power is turned off while image data is being cleared from
the local drive or before a job is finished, the data may not be completely
erased. If you do not wish to leave partially cleared data when the power
is turned off, it is recommended that you use the program "Clear All
Memory" (page 19 of this manual), to complete data clearing before
turning off the power.

8
When the data security kit is installed
Security settings of the data security kit
When the data security kit is installed, settings to enhance security of the
machine can be added. For more information, see "Security settings" (page
17 of this manual).
Document control function
The document control function is used to embed a document control pattern
on the paper when print jobs, copies, and received faxes are printed.
The embedded document control pattern prevents secondary copying,
faxing and other operations of a printed document. For more information,
see "Document Control Setting" (page 25 of this manual).
Document Filing
To use the document filing function to store jobs in the machine when the
data security kit is installed, set the file property to "Confidential".
Files set to the "Sharing" or "Protect" properties cannot be stored. In
addition, to print from a computer using the retention function, enter a
password in the printer driver settings (when the factory default setting is in
effect).

9
When the data security kit is installed
Authority group registration screen
When the data security kit is installed, the following items are added to the
"Authority Group Registration" menu screen in the setting mode
(administrator). This screen is displayed by selecting "Settings
(Administrator)" > "User Control" > "Access Control Settings"> "Authority
Group".
When the [OK] key is tapped, print jobs other than hold jobs are allowed in
authority group registration when user authentication is enabled.
After tapping [Allowed], tap the [Submit] key.
When storing an authority group for user authentication, tap this key to
select whether or not document filing is allowed in each filing mode and for
each job type.
To enable a filing mode, tap the checkbox of the mode to select it.
After tapping [Allowed], tap the [Submit] key.
Print Jobs Other than Print Hold Job
Document Filing Approval Setting
Document filing must be allowed in the following settings.
By default, document filing is only allowed in confidential mode.
OAllow document filing in authority group registration (this setting)
ODisabling of Document Filing in the security settings (page 22 of this
manual)

10
When the data security kit is installed
Protecting passwords
When the data security kit is installed, passwords entered from the operation
panel of the machine or the Web pages can be protected.
QAdministrator Password/User Password
When the data security kit is installed, if an incorrect administrator
password is entered 3 times in a row when the user authentication
function is not enabled, or if an incorrect administrator password or user
password is entered 3 times in a row when the user authentication
function is enabled, authentication for the administrator or user who
entered the incorrect password will be prohibited for 5 minutes.
For more information, see "About the lockout function" (page 16 of this
manual)
QConfidential folders and confidential files of the document
filing function
If an incorrect password is entered 3 times in a row for a specific
confidential folder or file, the folder or file will be locked. To unlock the
folder or file, use "Release Operation Lock Status (File/Folder)" (page 23
of this manual).
QFile search screen of document filing
When the data security kit is installed, the password entry setting will not
appear in the document filing search screen.
OAll files with the same user name and password can be printed at once
using the Batch Print feature of the document filing function.
Files that have a password different from the password that was
entered at the time of the search will be treated as files for which an
incorrect password was entered. For this reason, it is recommended
that you avoid executing searches using [All Users] and [User
Unknown] in so far as is possible.
OWhen the use of a file is prohibited, the following will apply when the
document filing function is used:
OWhen batch print is performed, a prohibited file will not be printed
even if it matches the search conditions.

11
When the data security kit is installed
QEncrypt PDF
When a job is printed by encrypted PDF direct printing, the job will appear
in the spool queue of the job status screen and a password must be
entered to begin printing.
If an incorrect password is entered 3 times in a row when the data
security kit installed, the message "Operation is disabled. Please see
your administrator for your assistance." will be displayed for 6 seconds
and printing will be locked.
If you tap a file in the spool screen for which an incorrect password was
entered 3 times, the message "The print of this job is disabled. Delete the
job?" will appear.
OTap the [Yes] key to delete the print job.
OTap the [No] key to cancel deletion of the print job.
To unlock the print job, use "Release Operation Lock Status (File/Folder)"
(page 23 of this manual).
QAdministrator Authority Setting
When the data security kit is installed, "Password Change" will not appear
in "Settings (Administrator)" > "System Settings" > "Document Filing
Settings" > "Condition Settings" > "Administrator Authority Setting". (The
administrator password cannot be entered to change the password that
has been set for a file or folder.)
QFTP Pull Print
When the FTP Pull Print function is used to directly print a file on an FTP
server, a "User Name" and "Password" must be entered when the FTP
server is selected.

12
When the data security kit is installed
QLogin when user authentication is enabled
When "User Authentication" in the setting mode (administrator) is
enabled, login is required in the login screen before the machine can be
used. When "A Warning when Login Fails" ("Settings (Administrator)" >
"System Settings" > "Authentication Settings" > "Default Settings") is
enabled, if an incorrect password is entered 3 times in a row, login
operations for the user who entered the incorrect password will be
prohibited for 5 minutes.
For more information, see "About the lockout function" (page 16 of this
manual)
The number of incorrect entries made during login is counted separately
for each user.
The "A Warning when Login Fails" setting is always enabled when the
data security kit installed.
* If a high level of security is set, user authentication will always be
necessary before using any of this device's functions. For more
information, see "Setting a high level of security" (page 24 of this
manual)

13
When the data security kit is installed
Restrictions on tandem copying and tandem
printing
Tandem copying and tandem printing operate as shown below based on the
configuration of the master machine and slave machine (whether or not the
data security kit is installed).
QTandem copying
QTandem printing
Slave machine
Data security kit: Yes Data security kit: No
Master machine
Data
security
kit: Yes
The tandem function can be
used. Data is encrypted and
cleared from both the master
and slave machines.
The tandem function cannot
be used.
Data
security
kit: No
The tandem function can be
used. Data is encrypted and
cleared from the slave
machine.
The regular tandem function
can be used.
Slave machine
Data security kit: Yes Data security kit: No
Master machine
Data
security
kit: Yes
The tandem function can be
used. Data is encrypted and
cleared from both the master
and slave machines.
The tandem function can be
used. Data is encrypted and
cleared from the master
machine.
Data
security
kit: No
The tandem function can be
used. Data is encrypted and
cleared from the slave
machine.
The regular tandem function
can be used.

14
When the data security kit is installed
Security Settings in the FTP Pull Print Function
When the machine is used as a network printer and the FTP Pull Print
function is used, the data security kit enables authentication of the user by
means of a "User Name" and "Password" for the FTP server. (The Pull Print
function allows a file on a previously stored FTP server to be printed directly
from the operation panel of the machine without using the printer driver.)
User authentication is enabled by selecting the [Enable User Authentication]
checkbox on the machine for configuring FTP Pull Print settings. This
checkbox appears when the data security kit is installed, and is initially
selected (a checkmark appears).
QProcedure for directly printing a file on an FTP server
(when user authentication is enabled)
Your user name and password must be entered following selection of the
FTP server that contains the file to be printed from the touch panel of the
machine.
When the FTP server is selected in step 3 of "DIRECTLY PRINTING A
FILE ON AN FTP SERVER" in "PRINTER" in the User’s Manual (PC), a
screen will appear prompting you to enter your user name and password
for the FTP server.
Tap the [User Name] key to enter your user name and the [Password] key
to enter your password. A letter entry screen will appear in each case.
When you have finished entering your user name/password, tap the
[Enter] key.
After entering your user name and password, continue from step 4 of
"DIRECTLY PRINTING A FILE ON AN FTP SERVER" in "PRINTER" in
the User’s Manual (PC).

15
When the data security kit is installed
Transferring copied data
When the data security kit is installed and the Web pages are used to copy
data stored with the document filing function to a computer, the copied data
can only be transferred back to the original machine from which it was
copied.
The data cannot be transferred to another machine even if the machine
conditions are the same.
The [Restore from PC] key will only appear on the Web page and transfer of
data back to the machine will only be possible when a confidential folder is
selected.

16
When the data security kit is installed
About the lockout function
When entering passwords, including administrator passwords, during user
authentication, the number of incorrect password attempts is counted, and if
the number of attempts reaches the specified number (three), the user
account is locked, and the user is blocked from making any more attempts
at authenticating their account until a period of five minutes has elapsed.
The number of incorrect entries made is counted separately for each user,
and the count is reset when the correct password is entered.
QLockout settings
The lockout settings can be checked by the following procedure.
Tap "Settings (Administrator)" > "System Settings" > "Authentication
Settings" > "Default Settings" > "A Warning when Login Fails" on the
operation panel.
* The "A Warning when Login Fails" setting is always enabled when the
data security kit is installed. Users who have been locked out cannot
carry out printing while they are locked out, even if "Settings
(Administrator)" > "System Settings" > "Authentication Settings" >
"Default Settings" > "Disable Printing by Invalid User" is not enabled.
QCanceling lockout
The lockout status for a user's account is cleared after five minutes have
elapsed since that user was locked out.
The lockout status cannot be cleared by turning the power off.
If the power is turned off before the full lockout period has elapsed, the
lockout period will run for five more minutes the next time the power is
turned back on. (This includes unforeseen occurrences such as power
outages.)
If the same user has been locked out, the "Release Operation Lock
Status" key is displayed in the "User Registration" screen for that user. An
administrator can tap this key to carry out a manual clear.
* If the security level is set to High, manual cancellation is not possible.
For more information, see "Setting a high level of security" (page 24 of
this manual)
Automatic cancellation after a period of time has elapsed
Manual cancellation

17
2Security settings
This section explains the "Security Settings" items that are added when the
data security kit is installed.
Using the security settings in the setting mode
(administrator)
For details on how to perform operation when using setting mode
(administrator), refer to the description in "SETTING MODE" in the User’s
Manual (PC).
For explanations of each of the settings, see the following pages.
If an incorrect administrator password is entered 3 times in a row on a
machine that has the data security kit installed, entry of the administrator
password will be locked for 5 minutes. For more information, see "About
the lockout function" (page 16 of this manual)

18
Security settings
Settings added to the security settings
When the data security kit is installed, settings related to security are added
to the "Security Settings".
* When user authentication is enabled, a user cannot configure this setting even
when the authority group gives the user the authority to configure security
settings. (This operation can only be performed by the default administrator
(admin).)
In addition, Security Settings include such as "SSL/TLS Settings" ("System
Settings" > "Security Settings" in "SETTING MODE" of the User's Manual
(PC)), "S/MIME Settings" ("System Settings" > "Security Settings" in
"SETTING MODE" of the User's Manual (PC)), "IPsec Settings" ("System
Settings" > "Security Settings" in "SETTING MODE" of the User's Manual
(PC)), "Audit Log" ("System Settings" > "Security Settings" in "SETTING
MODE" of the User's Manual (PC)), and "Document Control Setting" (Page
25 and the following pages of this manual).
Setting Page Explanation
Data Clearance Settings 19
Use this to manually clear stored
data from each area of the
machine’s local drive.
QClear All Memory* 19
QClear All Data in Jobs Completed
List*
20
QClear Document Filing Data* 20
QClear Address Book and
Registered Data
21
Condition Settings 22
QPower Up Auto Clear 22 Select data clear times.
QDisabling of Document Filing 22 Set the items that you wish to
disable. Use this to disable
specific operations to prevent the
output of sensitive document
data.
QDisabling of List Print 23
QRelease Operation Lock Status
(File/Folder)
23 Use this to release locked files
and folders.
The "Condition Settings" in the above settings can also be configured in
the Web page of the machine.
Table of contents
Other Sharp Printer manuals

Sharp
Sharp AR-215 User manual

Sharp
Sharp DX-B450P User manual

Sharp
Sharp AR-M450 Imager User manual

Sharp
Sharp MX-FR44U User manual

Sharp
Sharp AR-M280 User manual

Sharp
Sharp AR-FX5 User manual

Sharp
Sharp AM-300 User manual

Sharp
Sharp AR-C265P User manual

Sharp
Sharp CE-140P User manual

Sharp
Sharp AJ-2000 Setup guide

Sharp
Sharp MX-C607P User manual

Sharp
Sharp CS-2635RH User manual

Sharp
Sharp JX-9300 User manual

Sharp
Sharp AR-235 User manual

Sharp
Sharp MX-M904 User manual

Sharp
Sharp DSPF User manual

Sharp
Sharp BP-50M26 User manual

Sharp
Sharp JX-730 User manual

Sharp
Sharp AL-840 - B/W Laser Printer User manual

Sharp
Sharp BP-70M90 User manual