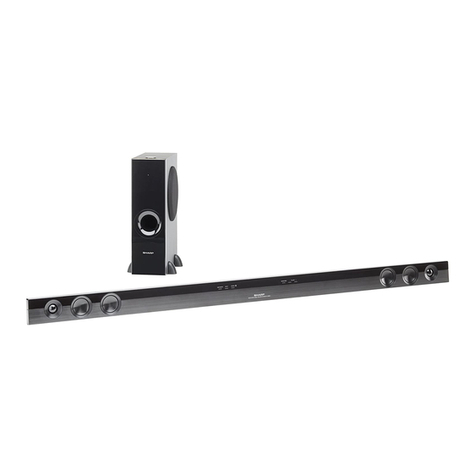
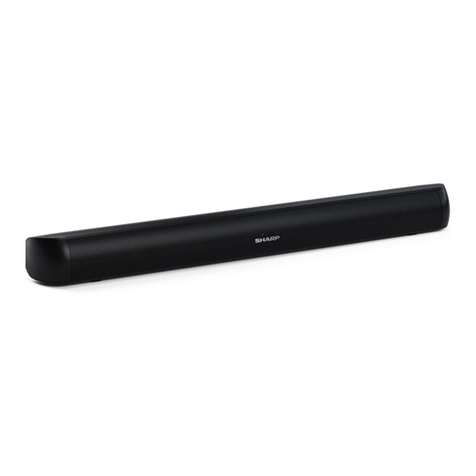
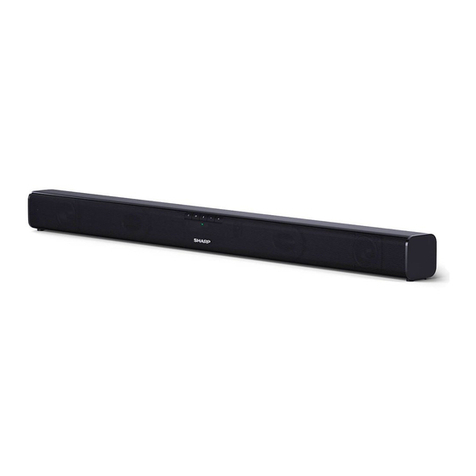
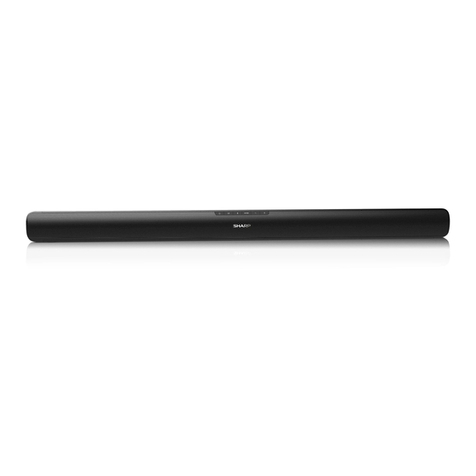
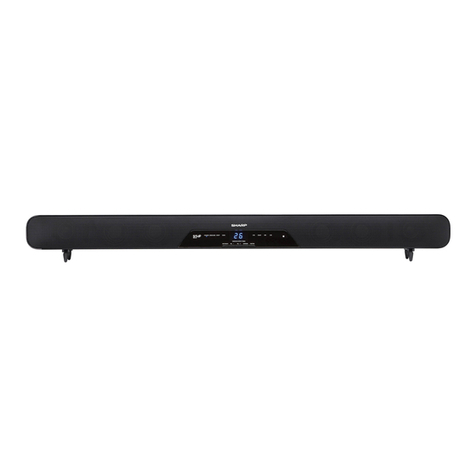
Sharp HT-SBW125 User manual

Thank you for purchasing this SHARP product. To obtain the best performance from this product,
please read this manual carefully. It will guide you in operating your SHARP product.
HT-SBW125 consisting of Sound Bar Home Theater System (Sound Bar) and CP-SW125 (Active
Subwoofer System).
ENGLISH
OPERATION MANUAL
MODEL
HT-SBW125
SOUND BAR HOME THEATER SYSTEM
21H R AS 1
TINSEA569AWZZ
B
arcodesof
t
http://www.barcodesoft.com
Barcode Symbology: Code 93; Font Facename: Code93
M
Data To Encode: TINSEA569AWZZ
Point Size 8 : *TINSEA569AWZZ#D*|
Point Size 10 : *TINSEA569AWZZ#D*|
Point Size 12 : *TINSEA569AWZZ#D*|
Point Size 14 : *TINSEA569AWZZ#D*|
Note:
This product is recommended for flat panel TV (LED, LCD and Plasma).

E-1
Accessories
Special notes
The following accessories are included.
Remote control x 1
“AAA” size battery
(UM/SUM4, R3, HP-16
or similar) x 2
Dolby, Dolby Audio, and the double-D symbol
are trademarks of Dolby Laboratories Licensing
Corporation.
The Bluetooth®word mark and logos are
registered trademarks owned by Bluetooth SIG,
Inc. and any use of such marks by SHARP is
under license. Other trademarks and trade
names are those of their respective owners.
The terms HDMI, HDMI High-Definition
Multimedia Interface, and the HDMI logo are
trademarks or registered trademarks of HDMI
Licensing Administrator Inc.
Supply of this product does not convey a license
nor imply any right to distribute content created
with this product in revenue-generating broadcast
systems (terrestrial, satellite, cable and/or other
distribution channels), revenue-generating
streaming applications (via Internet, intranets
and/or other networks), other revenue-generating
content distribution systems (pay-audio or audio-
on-demand applications and the like) or on
revenue-generating physical media (compact discs,
digital versatile discs, semiconductor chips, hard
drives, memory cards and the like). An independent
license for such use is required. For details, please
visit http://mp3licensing.com
MPEG Layer-3 audio coding technology licensed
from Fraunhofer IIS and Thomson.
Warnings:
When the HT-SBW125 button is set at STANDBY
position, mains voltage is still present inside the
unit. The unit may be brought into operation by
the remote control.
This unit contains no user serviceable parts.
Never remove covers unless qualified to do so.
This sound bar contains dangerous voltages,
always remove mains plug from the socket before
any service operation and when not in use for a
long period.
To prevent fire or shock hazard, do not expose
this appliance to dripping or splashing. No
objects filled with liquids, such as vases, shall be
placed on the apparatus.
This equipment is a Class II or double
insulated electrical appliance. It has been
designed in such a way that it does not require a
safety connection to electrical earth.

E-2
General
Please ensure that the equipment is positioned
in a well ventilated area and ensure that there is
a free space along the sides, top and back of the
equipment as below.
10 cm (4”)
10 cm (4”)
10 cm (4”)
10 cm (4”) 10 cm (4”)
10 cm (4”)
10 cm (4”)
The ventilation should not be impeded by
covering the ventilation openings with items,
such as newspapers, tablecloths, curtains, etc.
No naked flame sources, such as lighted candles,
should be placed on the apparatus.
Attention should be drawn to the environmental
aspects of battery disposal.
Use the unit on a firm, level surface free from
vibration.
Keep the unit away from direct sunlight, strong
magnetic fields, excessive dust, humidity and
electronic/electrical equipment (home computers,
facsimiles, etc.) which generate electrical noise.
Do not place anything on top of the unit.
Do not expose the unit to moisture, to
temperatures higher than 60°C (140°F) or to
extremely low temperatures.
If the unit does not work properly, unplug and
plug it in again. Then turn it on.
In case of an electrical storm, unplug the unit for
safety.
Hold the AC power plug by the head when
removing it from the wall socket, as pulling the
lead can damage internal wires.
The AC power plug is used as a disconnect
device and shall always remain readily operable.
Do not remove the outer cover, as this may
result in electric shock. Refer internal service
to your local SHARP service facility.
This unit should only be used within the range of
5°C - 35°C (41°F - 95°F).
This apparatus is designed for use in moderate
climates.
SHARP is not responsible for damage due to
improper use. Refer all servicing to a SHARP
authorised service centre.
Do not use chemicals for cleaning (benzine,
thinner or alcohol). Also do not allow volatile
substances such as insecticides, cosmetics
(perfumes, creams, sprays, etc.), sunscreens,
insect repellents, etc. to adhere to the unit’s
surface. It may damage the surface finish or
cause discoloration.
Warnings:
The voltage used must be the same as that
specified on this sound bar. Using a higher
voltage is dangerous and may result in a fire or
other type of accident causing damage. SHARP
will not be held responsible for any damage
resulting from such usage.
In case of repairing, please bring the entire
system set to the service centre.
Volume control
The sound level at a given volume setting depends
on speaker efficiency, location and various other
factors. It is advisable to avoid exposure to high
volume levels, which occurs whilst turning the
sound bar on with the volume control setting up
high, or while continually listening at high volumes.
Precautions
E-3
Controls and indicators
4 5 6 7 8
1 2 3 4 5
1. LED Indicators
RED In Standby mode
MAGENTA In USB mode
BLUE In Bluetooth mode or Dolby
Digital signal
WHITE In HDMI mode
GREEN In Audio In mode or PCM signal
ORANGE In Optical mode
2. Wall bracket holes
3. Remote Control Sensor
4. Duct ports
5. button
Switch the sound bar between ON and
STANDBY mode.
6. button
Select the input function.
7. button
Press to activate the pairing function in
Bluetooth mode or disconnect the existing
paired Bluetooth device.
8. button
Play or pause in Bluetooth and USB modes.
9. buttons
Decrease or increase the volume level.
1
44
2
3
HDMI (ARC) USB AUDIO
IN OPTICAL
IN
5678 9
Front panel

E-4
1. HDMI ARC terminal
Connect to a TV via HDMI cable.
2. USB terminal
Plug in USB device to playback audio files from
it.
3. Audio In terminal
Connect to an external audio device.
4. Optical In terminal
Optical input jack.
HDMI (ARC) USB AUDIO
IN OPTICAL
IN
12 34
Controls and indicators (continued)
Rear panel
1. Bass Reflex Duct
2. Woofer
3. SW LINK (Subwoofer Link) button
4. Subwoofer level +
5. Subwoofer level -
6. LED indicator
7. AC power lead
Subwoofer
2
1
4
5
3
7
6

E-5
1. button – Switch the sound bar between ON
and STANDBY mode.
2. button – Increase the volume level.
3. button – Skip to previous sound track.
4. button – Select the input function.
5. button – Press to activate the pairing
function in Bluetooth mode or disconnect the
existing paired Bluetooth device.
6. EQ button – Select a preset sound mode.
7. button – Mute or resume the sound.
8. button – Play or pause playback.
9. button – Skip to next sound track.
10. button – Decrease the volume level.
11. BASS button – Change the bass level.
12. TREBLE button – Change the treble level.
1
7
8
9
10
11
12
3
4
5
6
2
Controls and indicators (continued)
Remote control

E-6
Placing the system
Installation image:
Place the system as shown.
Notes:
Remove the protective film covering the sound bar and subwoofer before turning on the system.
The front panel of the sound bar is not removable.
The maximum transmission distance of the wireless signal between the subwoofer and sound bar is
about 10 metres (32 feet), but may vary depending on your operating environment. If a steel-concrete or
metallic wall is between the subwoofer and the sound bar, the system may not operate at all, because
the wireless signal cannot penetrate metal.
Caution:
Do not change the installation direction when the sound bar is turned on.
Do not stand or sit on the sound bar or subwoofer as you may be injured.
Do not allow any objects to fall into or to be placed in the bass reflex duct.
TV
VCR DVD player
Subwoofer

E-7
Falling prevention
Safety wires (not supplied) are useful to prevent the sound bar from falling.
When placing on the shelf/table
Rack/
table Screw eye
(not supplied)
Safety wires
(not supplied)
Screw eye
(not supplied)
Sound bar
When mounting on the wall
Safety wires (not supplied)
Sound bar
Screw eye (not supplied)
Wall

E-8
Make sure to unplug the AC power lead be-
fore installing the sound bar or changing the
position.
To mount the sound bar on the wall
Caution:
Be very careful to prevent the sound bar [1.7 kg
(3.7 lbs.)] from falling when mounting on the wall.
Before mounting, check the wall strength. (Do not
put on the veneer plaster or whitewashed wall.
The sound bar may fall.) If unsure, consult a qual-
ied service technician.
Mounting screws are not supplied. Use appropri-
ate ones.
Check all wall mount angle screws for looseness.
Select a good location. If not, accidents may oc-
cur or the sound bar may get damaged.
SHARP is not responsible for accidents re-
sulting from improper installation.
Driving screws
SHARP designed the sound bar so you may hang it
on the wall. Use proper screws (not supplied). See
below for size and type.
3.2 mm
9 mm
22 mm
5 mm
Installing the sound bar
1 Mark two screw points on the wall as below
distance.
Ø5.5~6mm
32m
403 mm
2 Make a hole on the wall following the screw
point marks on the pattern paper by using a
drill.
Wall surface
32 mm
8-9 mm
3 Fix a wall mount plug into the hole using a
hammer, until it is ush with the wall surface.
32 mm
8-9 mm
Wall sur
face
4 Fasten the screws to the wall as shown be-
low. (Total screw is 2 pieces)
Wall surface
Wall surface
Screw using
screwdriver
4.5 mm - 5 mm
Gap from wall
surface
5 Hang the sound bar onto the screws.
System preparation

E-9
System connections
Caution:
Turn off all other equipment before making any connections.
Notes:
To connect to TV/player, use HDMI ARC, AUDIO IN or OPTICAL IN terminals located at the rear of the
sound bar.
Refer the operation manual of the equipment to be connected.
Fully insert the plugs to avoid fuzzy pictures or noises.
If the TV volume is continuously at low level, the sound bar will automatically power off. Increase the TV
output volume to enjoy the sound from the system.
To avoid desynchronized audio and video when using an external player, connect the output signal from
the player to TV and the audio output (from TV) to the sound bar.
HDMI ARC input
The ARC (Audio Return Channel) function allows
you to send audio from your ARC- compliant TV to
your sound bar through a single HDMI connection.
To enjoy the ARC function, please ensure your TV
is both HDMI-CEC and ARC compliant and set up
accordingly. When correctly set up, you can use
your TV remote control to adjust the volume output
(VOL +/- and MUTE) of the sound bar.
Connect the HDMI cable (not included) from the
sound bar’s HDMI (ARC) terminal to the HDMI
(ARC) terminal on your ARC compliant TV. Then
press the remote control to select HDMI ARC.
Notes:
Your TV must support the HDMI-CEC and ARC
function. HDMI-CEC and ARC must be set to
On.
The setting method of HDMI-CEC and ARC may
differ depending on the TV. For details about
ARC function, please refer to your TV owner’s
manual.
Only HDMI cables of version 1.4 or higher can
support the ARC function.
If the sound bar is to be hung on the wall, it is
recommended to use an ‘L’ shape 270 degree
HDMI adapter (commercially available).
< 23 mm
270 Degree HDMI adaptor

E-10
System connections (continued)
Optical input
Remove the protective cap of the OPTICAL ter-
minal, then connect an OPTICAL cable (not in-
cluded) to the TV’s OPTICAL OUT terminal and
the OPTICAL terminal on the sound bar.
Note:
While in HDMI ARC or OPTICAL mode, if there’s
no sound output from the sound bar and the HDMI
ARC or OPTICAL indicator blinks quickly, you may
need to activate Dolby Digital or PCM signal output
on your source device (eg. TV, DVD or Blu-ray play-
er).
Audio In
HDMI (ARC) USB AUDIO
IN OPTICAL
IN
A
B
AUDIO
IN
< 21 mm
A. Use a 3.5mm to 3.5mm audio cable to con-
nect the TV’s or external audio device head-
phone terminal to the Audio In terminal on
the sound bar.
B. Use an RCA to 3.5 mm audio cable (not in-
cluded) to connect the TV’s audio output ter-
minals to the Audio In terminal on the sound
bar.
Note:
When you use the headphone output on the TV
set, you will be able to adjust the volume level di-
rectly using the TV remote control, depending on
the TV model.
L-shaped adaptor or cable head is recom-
mended for wall mount installation.

E-11
System connections (continued)
Connect to power
Make sure to unplug the AC power lead before making any connections.
Sound Bar
HDMI (ARC) USB AUDIO
IN OPTICAL
IN
Wall socket
(AC 100 - 240 V
~ 50/60 Hz )
Notes:
Before connecting the AC power cord, ensure
you have completed all other connections.
Risk of product damage! Ensure that the
power supply voltage corresponds to the volt-
age printed on the back or the underside of the
sound bar.
Connect the mains cable into a mains socket.
Subwoofer
Wall socket
(AC 100 - 240 V
~ 50/60 Hz )

E-12
Remote control General control
Battery installation
1 Open the battery cover.
2 Insert the batteries according to the terminal
indicated in the battery compartment. When
inserting or removing the batteries, push them
toward the (–) battery terminals.
3 Close the cover.
Caution:
Replace all old batteries with new ones at the
same time.
Do not mix old and new batteries.
Remove the batteries if the unit will not be used
for a long period of time. This will prevent poten-
tial damage due to battery leakage.
Do not use rechargeable batteries (nickel-cad-
mium battery, etc.).
Installing the batteries incorrectly may cause the
unit to malfunction.
Batteries (battery pack or batteries installed)
shall not be exposed to excessive heat such as
sunshine, re or the like.
Notes concerning use:
Replace the batteries if the operating distance
is reduced or if the operation becomes erratic.
Purchase 2 “AAA” size batteries (UM/SUM-4,
R3, HP-16 or similar).
Periodically clean the transmitter on the remote
control and the sensor on the unit with a soft
cloth.
Exposing the sensor on the unit to strong light
may interfere with operation. Change the light-
ing or the direction of the unit.
Keep the remote control away from moisture,
heat, shock, and vibrations.
Test of the remote control
The remote control can be used within the range
shown below:
0.2 m - 6 m
Remote sensor
To turn the power on
When you first connect the sound bar and the sub-
woofer to the main socket, it will be in STANDBY
mode.
The LED indicator will light up red.
Press the button on the sound bar or remote
control to switch the sound bar ON or OFF.
Disconnect the main plug from the main socket
if you want to switch off the sound bar and sub-
woofer completely.
Notes:
The system will automatically power on if TV or
similar component which supports HDMI CEC, is
turned on.
To set the sound bar to standby mode
During stand by mode, the sound bar will auto-
matically power on if it detects audio signal from
HDMI/ARC, OPTICAL connection that has been
set up between the sound bar and your device.
When the sound bar has no input signal for over
15 minutes, it will automatically switch to Stand-
by mode.
\Eco mode
The rst time the unit is plugged in it will enter
standby mode (Eco mode off). Sound bar indi-
cator turns red.
To cancel the standby mode, perform the follow-
ing procedure.
During standby mode, press and hold the button
for 6 seconds
- Sound bar indication light turned off.
Notes:
When turning on the power from Eco mode, it
may take some time until the power is turned on.
Caution:
During Eco mode, very small power is con-
sumed when the power cord is connected.
To cancel the Eco mode:
When the sound bar is turned off, press and hold
the POWER button for 6 seconds.
- Sound bar indication lights up in red.

E-13
General control (continued)
Pairing with the Subwoofer
The sound bar and subwoofer will link automat-
ically (wirelessly) when turned on as it is already
pre-linked at the factory.
SW LINK
Rear Subwoofer
If the link cannot be established, please set the
connection by the following method.
1. Turn on subwoofer. Press and hold the SW
LINK button at back of the subwoofer for more
than 3 seconds.
2. Within 3 minutes, turn on sound bar. Then press
and hold the button on sound bar or remote
control for more than 3 seconds to enter subwoof-
er link mode.
During pairing process:
On sound bar: indicator green and orange
indicator blink alternately
On subwoofer: indicator blink in blue.
When pairing is successful:
On sound bar: indicator green and orange light
up 3 seconds and disappears.
On subwoofer: indicator turns red.
Notes:
If a device such as microwave oven, wireless
LAN card, Bluetooth device or any other device
that uses the same 2.4GHz frequency is placed
near the system, some sound interruption may
be heard due to interference.
The maximum transmission distance of the
wireless signal between the subwoofer and
sound bar is about 10 metres (32 feet), but may
vary depending on your operating environment.
If a steel-concrete or metallic wall is between
the subwoofer and the sound bar, the system
may not operate at all, because the wireless
signal cannot penetrate metal.
Please check that the volume level of the sub-
woofer is set to your preference.
Caution:
Keep the subwoofer away from water and
moisture.
To get the optimum listening performance,
make sure the area around the sound bar and
subwoofer is clear of any obstacles.
Subwoofer level control (subwoofer)
To increase or decrease the Subwoofer level,
select LEVEL + /-.
Notes:
When the level is maximum or minimum the
LED indicator blinks 3 times.
Volume control
Press the + or – buttons on the sound bar or
remote control to adjust the volume.
Notes:
While adjusting the volume, each time the + or
- button is pressed, the status indicator blinks
once.
When the volume level reaches its minimum
or maximum level, if + or – button is pressed
again, the status indicator blinks 3 times.
To increase or decrease the volume continu-
ously, press and hold the +/- buttons.
Muting (remote control)
If you wish to turn the sound off, press the
button on the remote control. Press the button
again or press the + or – buttons on the sound bar
or remote control to resume normal listening.
Select Equaliser (EQ) effect
Press the EQ button on the remote control repeat-
edly to select between preset equalisers.
NEWS Magenta LED flashed in 2 seconds
MOVIE White LED flashed in 2 seconds
MUSIC Green LED flashed in 2 seconds
GAME Orange LED flashed in 2 seconds
Function selection
Press the button on the sound bar or remote
control repeatedly to select the desired mode.
LED indicator colour Function
MAGENTA In USB mode
BLUE In Bluetooth mode
WHITE In HDMI mode
GREEN In Audio In mode
ORANGE In Optical mode

E-14
General control (continued)
Audio format
During the HDMI ARC and OPTICAL IN function
the LED indicator will light up to indicate the audio
format.
Audio format LED
indicator
Dolby
Digital
One of the digital audio
systems for theatrical use.
You can also enjoy the ste-
reophonic effect in the home
theatre system. Lights up
when detecting Dolby Digital
signal.
Blue
PCM
(Pulse
Code
Modu-
lation)
This is a general term for
digitally encoded audio
signals on a CD or DVD.
This sound bar lets you
enjoy playback of digital
signals from sources such as
CD or DVD.
Green
Note:
While in HDMI ARC or OPTICAL mode, if there
is no sound output from the sound bar and the
HDMI ARC or OPTICAL indicator blinks Dolby
Digital or PCM signal output on your source
quickly, you may need to activate device (eg. TV,
DVD or Blu-ray player).
Auto power on function
Auto power on function works only during
standby mode. It will not work if the sound bar is
in low power consumption mode .
Optical In:
Turn off the external source. The sound bar will
automatically power on if the external source is
turned on again.
Auto power off and auto detect signal
The sound bar will automatically go to standby
mode if:
Optical In:
No audio signal is detected after approximately 15
minutes.
Bluetooth:
Not connected condition, in the pause or stop
mode and no incoming signal from device after
approximately 15 minutes.
USB:
In the stop mode or no USB device is plugged in
after approximately 15 minutes.
Bass and Treble Control (remote control)
Bass Control
1. Press the BASS button.
2. Within 5 seconds, press the + / - button to
adjust the bass.
Treble Control
1. Press the TREBLE button.
2. Within 5 seconds, press the + / - button to
adjust the treble.
HDMI ARC/OPTICAL/AUDIO IN
1. Ensure that the sound bar is connected to the
TV or audio device.
2. While in power on mode, press the button
on the sound bar or remote control repeatedly
to select the desired mode.
LED indicator colour Function
WHITE HDMI mode
GREEN Audio In mode
ORANGE Optical mode
3. Operate your audio device directly for playback
features.
4. Press the + or – button to adjust the volume to
your desired level.
Note:
While in HDMI ARC or OPTICAL mode, if there is
no sound output from the sound bar and the HDMI
ARC or OPTICAL indicator blinks quickly, you
may need to activate Dolby Digital or PCM signal
output on your source device (eg. TV, DVD or Blu-
ray player).

E-15
Bluetooth operation
Pairing Bluetooth-enabled devices
First time you connect your Bluetooth device to
this sound bar, you need to pair your device to
this sound bar.
Notes:
The operation range between this sound bar
and a Bluetooth device is approximately 10 me-
ters (without any object between the Bluetooth
device and the sound bar).
Before you connect a Bluetooth device to this
sound bar, ensure you know the device’s capa-
bilities.
Compatibility with all Bluetooth devices is not
guaranteed.
Any obstacle between this sound bar and a
Bluetooth device can reduce the operation
range.
If the signal strength is weak, your Bluetooth re-
ceiver may disconnect, but it will re-enter pair-
ing mode automatically.
Bluetooth pairing from your device to this unit
can be done during stand by and power on
mode at all functions. However, Bluetooth play-
back from the source device is applicable at
Bluetooth function only.
1. While in power on mode, press the button
on the sound bar or remote control repeated-
ly to select Bluetooth mode. The blue indica-
tor will be blinking.
2. Activate your Bluetooth device and select the
search mode. “HT-SBW125 SHARP” will ap-
pear on your Bluetooth device list.
If you cannot find the sound bar, press the
button on the sound bar or remote control to
be searchable. The blue indicator will blink
rapidly.
3. Select “HT-SBW125 SHARP” in the pairing
list. The system is successfully connected
when the blue indicator lights up.
4. Begin playing music from the connected
Bluetooth device.
To disconnect the Bluetooth function, you can:
Switch to another function on the sound bar.
Disable the Bluetooth function on your device.
The device is successfully disconnected from
the sound bar when the blue indicator blinks
rapidly.
Press the button on the sound bar or remote
control.
Notes:
Enter “0000” for the password if necessary.
If no other Bluetooth device pairs with this
sound bar in 2 minutes, the sound bar will re-
connect to the previous connection.
The sound bar will also be disconnected when
your device is moved beyond the operational
range.
If you want to reconnect your device to this
sound bar, place it within the operational range.
If the device is moved beyond the operational
range, when it is brought back, please check if
the device is still connected to the sound bar.
If the connection is lost, follow the instructions
above to pair your device to the sound bar
again.
Listen to music from Bluetooth device
If the connected Bluetooth device supports Ad-
vanced Audio Distribution pro file (A2DP), you
can listen to the music stored on the device
through the sound bar.
If the device also supports Audio Video Remote
Control Pro file (AVRCP), you can use the sound
bar’s remote control to play music stored on the
device.
1. Pair your device with the sound bar.
2. Play music via your device (if it supports
A2DP).
3. Use supplied remote control to control play
(if it supports AVRCP).
To pause or resume play, press the but-
ton on the sound bar or remote control.
To skip to a track, press the or but-
tons on the remote control.
Various Bluetooth functions
(remote control)
Function Remote
control Operation
Play/
Pause
To play or pause.
Skip Up/
Fast For-
ward
Skip to next song.
Press and hold to fast
forward.
Skip
Down/
Fast
Reverse
Skip to song begin-
ning.
Press and hold to fast
reverse.
Notes:
Fast forward/reverse is invalid depends on the de-
vice connected.

E-16
USB operation
Notes:
This product is not compatible with MTP and
AAC file systems from USB mass storage de-
vice.
USB L-shaped adaptor (commercially available)
is recommended for wall mount installation as
shown below.
< 22 mm
To play back USB
1. Press the button on sound bar or remote
control repeatedly to select USB function.
Magenta indicator will light up.
2. Plug in the USB memory device that has MP3
format files to the USB terminal on the sound
bar.
3. Playback will start automatically or else press
the button.
4. To skip to a track, press the or but-
ton on the remote control.
To remove USB
1. Press the button to pause playback.
2. Unplug the USB memory device from the
USB terminal.
Various USB functions (remote control)
Function Remote
control Operation
Play/
Pause
To play or pause.
Skip Up/
Fast For-
ward
Skip to next song.
Press and hold to fast
forward.
Skip
Down/
Fast
Reverse
Skip to song begin-
ning.
Press and hold to fast
reverse.
Notes:
Fast forward/reverse is invalid depends on the de-
vice connected.

E-17
Many potential problems can be resolved by the
owner without calling a service technician.
If something is wrong with this product, check the
following before calling your authorised dealer or
service centre.
General
Symptom Possible cause
z
No sound is heard.
z
The input signal (selection) is not
set properly.
z
The volume level is set to “0”.
z
Muting is activated.
z
The equipment used with this
system is not HDMI compliance.
z
The HDMI cable is not correctly
connected.
Connect the HDMI cable correctly
and then perform the reset
procedure. (refer page 19)
z
Do not connect or disconnect
an HDMI cable while power is
on. This may lead to operation
problems.
z
The sound from
subwoofer is not
well balanced.
z
The subwoofer level is set to
minimum or maximum level.
z
Power turns off
suddenly.
z
The HDMI cable is not correctly
connected. Connect it correctly
and then perform the reset
procedure.
z
Noise is heard
during playback.
z
Move the speaker away from any
computers or mobile phones.
z
When a button
is pressed, the
sound bar does not
respond.
z
Set the sound bar to the standby
mode and then turn it back on.
z
The power is not
turned on.
z
The sound bar is unplugged.
z
The protection circuit may be
activated. Unplug and plug in the
power lead again after 5 minutes
or more.
z
Background noise
appears when
connecting with
RCA audio output
terminal connection
from a TV-set/
DVD/Blu-ray Disc
Player.
z
Please change to HDMI/ARC or
headphone terminal from TV-Set/
DVD/Blu-ray Disc Player. This
effect may occur depending on
TV/DVD/Blu-ray Disc Player-
Brand, model and age, and it is
not the sound bar problem.
z
Wireless
connection cannot
be established.
z
Check the distance between the
sound bar and subwoofer (less
than 10 metres (32 feet)).
z
Make sure there is no other
wireless devices near the unit.
z
Make sure there is no obstacles
(especially metal) blocking
between the sound bar and
subwoofer.
z
Manually re-link the sound bar and
subwoofer (refer page 13.
Remote control
Symptom Possible cause
z
The remote control
does not operate
properly.
z
The battery polarity is incorrect.
z
The battery is dead.
z
The distance or angle is incorrect.
z
There are obstructions in front of
the sound bar.
z
There is a strong light shining on
the remote sensor.
z
The remote sensor for another
equipment is used simultaneously.
z
The remote control is not
connected with the sound bar.
z
The sound bar
cannot be turned
on with the remote
control.
z
The AC power lead of the sound
bar is not plugged in.
z
Battery is not inserted.
Bluetooth
Symptom Possible cause
z
No sound is heard.
z
The unit is too far from the
Bluetooth stereo audio source
device.
z
The unit is not paired with the
Bluetooth stereo audio source
device.
z
Bluetooth sound
is interrupted or
distorted.
z
The unit is too near to a device
that generates electromagnetic
radiation.
z
There is an obstacle between
the unit and the Bluetooth stereo
audio source device.
USB
Symptom Possible cause
z
Device cannot be
detected.
z
Playback does not
start.
z
There is no MP3 file inside the
device.
z
The device is not properly plugged
in.
z
A MTP device is plugged in.
z
The device contains AAC file only.
z
A false MP3 file is being played
back.
Troubleshooting chart

E-18
Condensation
Sudden temperature changes, storage or
operation in an extremely humid environment may
cause condensation inside the cabinet or on the
transmitter on the remote control. Condensation
can cause the sound bar to malfunction. If
this happens, leave the power on until normal
playback is possible (about 1 hour). Wipe off any
condensation on the transmitter with a soft cloth
before operating the sound bar.
If problem occurs during operation
When this product is subject to strong external
interference (mechanical shock, excessive static
electricity, abnormal supply voltage due to lightning,
etc.) or if it is operated incorrectly, it may malfunction.
If such a problem occurs, do the following:
1. Set the sound bar to the standby mode and turn
the power on again.
2. If the sound bar is not restored in the previous
operation, unplug and plug in the sound bar
again, and then turn the power on.
Factory reset, clearing all memory
Make sure to disconnect all output and input cables
attached to the sound bar before performing the
factory reset.
1. During standby mode, on the sound bar, press the
button.
2. Then, press and hold the
button until
white, green and orange LED indicator light up
simultaneously.
Caution:
This operation will erase all data stored in memory.
Maintenance
Cleaning the cabinet
Periodically wipe the cabinet with a soft cloth.
Caution:
zDo not use chemicals for cleaning (petrol, paint
thinner, etc.). It may damage the cabinet finish.
zDo not apply oil to the inside of each component.
It may cause malfunctions.
Error indicators and warnings
When you fail to perform operations properly, the
following messages are displayed.
On sound bar Meaning
Power indicator
(blinks red)
zWhen the protection
circuit is activated.
Note:
Should the same message appear even if the
sound bar is unplugged and plugged in, or is set
to the standby mode and on again, contact your
local dealer where you purchased the sound bar.
Troubleshooting chart (continued)

E-19
As part of our policy of continuous improvement,
SHARP reserves the right to make design and
specification changes for product improvement
without prior notice. The performance specification
figures indicated are nominal values of production
unit. There maybe some deviations from these
values in individual unit.
Sound Bar
Power
source
AC 100 - 240 V ~ 50/60Hz
Power
consumption
15 W
Dimensions Width: 800 mm
Height: 72 mm
Depth: 95mm
Weight 1.7 kg
Output
power
Total : 60 W
RMS : 30 W +30 W
(10% T.H.D.)
Input
terminal
500 mV / 47 kΩ(AUDIO IN)
Optical digital input (OPTICAL):
Square type x 1
HDMI input: (audio/HDMI ARC)
x 1
Speaker
system
Type: 1-way Bass Reflex stereo
speaker system
5.7 cm full range
Bluetooth
Frequency
band
2.400GHz - 2.480GHz
Compatible
Bluetooth
Profile
A2DP (Advanced Audio
Distribution Profile), AVRCP
(Audio/Video Remote Control
Profile)
Bluetooth 4.0 BLE (Remote
Control)
Bluetooth 2 .1 + ED R
Bluetooth
Version V 5.2
Maximum
power
transmitted
< 20dbm
Frequency
bands
2.402 GHz - 2.480
GHz
Compatible
Bluetooth
Profile
A2DP (Advanced
Audio Distribution
Bluetooth 2.1
+EDR
USB (MP3)
USB host
interface
zComplies with USB 1.1 (Full
Speed)/2.0 Mass Storage Class.
zSupport Bulk only and CBI
protocol.
Support file MPEG 1 Layer 3
Bitrate
support
MP3 (32 ~ 320 kbps)
Other Maximum total number of MP3
files is 999.
File system
support
Supports USB devices with
FAT32.
Subwoofer
Power
source
AC 100 - 240 V ~ 50/60Hz
Power
consumption
30 W
Output
power
MPO: 150 W (10% T.H.D.)
RMS: 150 W (10% T.H.D.)
RMS: 118 W (1% T.H.D.)
Type Subwoofer system
13 cm woofer
Dimensions Width: 188 mm
Height: 282 mm
Depth: 300 mm
Weight 3.5 kg
Specifications
Table of contents
Other Sharp Speakers System manuals

Sharp
Sharp CD-C690X User manual

Sharp
Sharp HT-SBW110 User manual

Sharp
Sharp MD-MX30 MD User manual

Sharp
Sharp CD-C410W User manual

Sharp
Sharp HT-SB32D User manual

Sharp
Sharp CP-USB50 Parts list manual

Sharp
Sharp CD-K477W User manual

Sharp
Sharp HT-SB117 User manual

Sharp
Sharp CD-C1W User manual

Sharp
Sharp PS-919 User manual

Sharp
Sharp HT-SBW110 User manual

Sharp
Sharp PS-920 User manual

Sharp
Sharp MD-MX30H User manual

Sharp
Sharp HT-SB150 User manual

Sharp
Sharp androidtv 40BN2KA User manual

Sharp
Sharp CD-BA1300H User manual

Sharp
Sharp HT-SB147 User manual

Sharp
Sharp PS-919 User manual

Sharp
Sharp XL-E75H User manual

Sharp
Sharp HT-SBW420 User manual