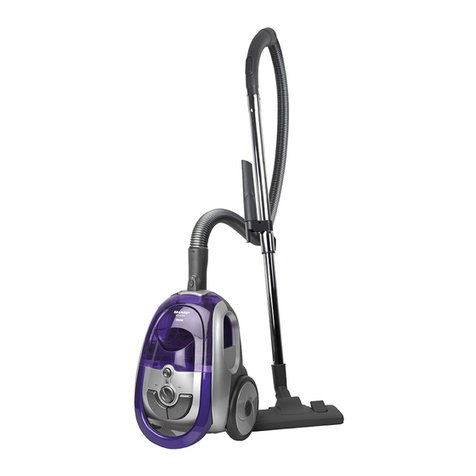
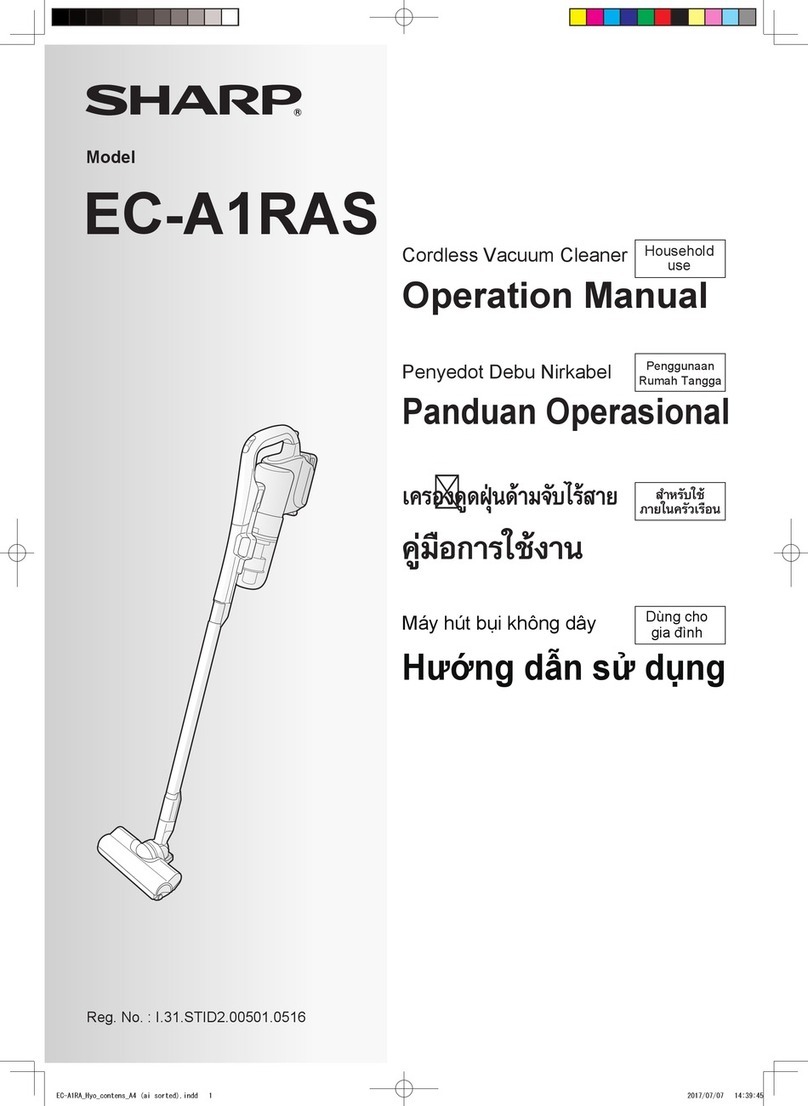
Sharp EC-A1RHK User manual

EC-A1RHK Pages
Operation Manual
Model/型號
Cordless Vacuum Cleaner
CONTENTS Pages
Household
use
SAFETY PRECAUTIONS EN-1
PART NAMES EN-5
PREPARATION EN-7
VACUUMING EN-9
EMPTYING THE DUST CUP EN-13
MAINTENANCE EN-15
STORAGE EN-19
SPECIFICATIONS EN-20
TROUBLESHOOTING EN-21
使用說明書
充電式吸塵機 家庭用
頁
目錄 頁數
安全注意事項
CN-1
各部份名稱
CN-5
準備
CN-7
操作方法
CN-9
清理垃圾
CN-13
保養
CN-15
收納
CN-19
規格
CN-20
故障時的檢查事項
CN-21
非常感謝您購買本產品。
請詳細閱讀此說明書後,再正確使用。
在使用前,請務必閱讀「安全注意事項」。
請務必把此說明書與保固書放在隨時看得到的地方。
Printed in China
TINSQA001VBRZ 18L− ①
製造廠商:SHARP CORPORATION
(中國生產) MADE IN CHINA
ENGLISH
中文
EC-A1RHK_A4(W page imposition).indd 1-2 2018/12/06 14:26:56

EN-22
−
−
−
−
−
EN-9
EN-9
EN-15, 16
EN-13, 14
EN-16
EN-16
EN-17
EN-17
EN-14
EN-16
EN-16
EN-15, 16
Reference
Pages
EN-1
CautionDanger Warning
Warning
SAFETY PRECAUTIONS
Matters that must be observed in order to prevent danger to humans and damages to property
are explained.
Details that related to "matters
with high probability of death
or sustaining serious injury".
Details that related to
"matters with probability of
death or serious injury".
Details that relate to "matters with
probability of sustaining minor
injury or damage to property".
Matters for preventing electrocution, fire disaster, electricity leaks and
major injuries
Charger
Stop using the product immediately when there is any abnormality or malfunction.
Location of using product and when
product is in use
Do not damage the power plug or power cord.
Do not use any power outlet that is loose.
Do not insert or remove the power plug with
wet hands.
(Risk of electrocution, short circuiting, ignition of
fire or cause injury.)
Do not use any damaged power plug or
power cord.
Always use the charger that is a genuine
accessory.
Do not use an extension cord.
Remove dust on the power plug periodically.
Remove the plug and wipe with a dry cloth.
Securely insert the power plug to the base.
Burning smell is emitted.
Abnormally hot with the vacuum cleaner body or the
charger deforming from heat.
Abnormal sound is emitted while the product is in operation.
Moving the power plug or the power cord of the
charger results in the Charging lamp on the charger
turning on and off.
The product does not always operate even when the
switch is turned on.
(Risk of fire disaster, electrocution and product
malfunction.)
(Dust accumulating on the power plug may lead to
insulation defects due to humidity and the like, which
can cause fire disaster.)
(Incomplete insertion of a plug may cause fire
disaster, electrocution or short circuiting.)
Do not force the cord or plug to bend Do not
pull the cord or plug Do not twist the cord or plug
Do not bundle the cord Do not pinch the cord
or plug Do not modify the cord or plug Do not
allow the cord or the plug to be tangled up in the
Rotary brush of the Suction head
Do not scratch or damage the cord or the plug
Do not place any heavy object on top of the cord or
the plug
(The cord may be damaged and cause fire disaster or
electrocution.)
Do not overload power outlets.
(Risk of fire disaster or electrocution.)
Refer to in
"TROUBLESHOOTING" and contact your nearest
service center approved by SHARP.
Disconnect the power cord of the charger from
the electrical outlet.
Press the and remove the battery from
the vacuum cleaner body immediately.
Do not throw the product
into a fire or heat it.
Do not apply water or detergent on the
vacuum cleaner body or the charger and do
not wash them with water (excluding
components that can be washed with water).
Do not use the product near any substance
that is flammable or allow such
substance to be suctioned
into the product.
Never use the product in a location that is wet
or where it can become wet such as a
bathroom, or where there is high temperature
and high humidity and never allow water to be
suctioned into the product.
(Risk of electrocution, short circuiting and
ignition of fire.)
(Risk of electrocution, short circuiting and
ignition of fire.)
(Risk of explosion or fire disaster.)
Combustible substances
such as toner
Cigarette stubs
Benzene thinners
Kerosene, gasoline and incense
(Risk of short circuiting,
ignition of fire, liquid leakage
and explosion.)
Furthermore, do not
place the product
near fire or space
heater, a location exposed
to direct sun light or at a
location with high
temperature such as inside
a car parked under the
flaming sun and the like.
If the Filter care lamp (red) and the Battery level indicator lamp (green) on the vacuum cleaner body are blinking
simultaneously the product may be malfunctioning. Contact your nearest service center approved by SHARP.
A part of the Pleat
filter appears to be
white and floating.
A rattling sound is
coming out of the
Suction head.
The Rotary brush
does not rotate.
The Dust cup
assembly cannot be
assembled.
The Dust cup assembly
cannot be installed on
the vacuum cleaner body
The vacuum cleaner
body is hot Is there any clogging on the Mesh filters or Pleat filter?
Heat is generated due to the electrical current that is supplied to the
control circuit, but this is not abnormal.
Are respective components of the Dust cup assembly assembled
properly?
Are respective components of the Dust cup assembly assembled properly?
Is the Suction head assembled properly?
During the cleaning of mats or rugs, the Suction head may get stuck to
the material and the Rotary brush may stop.
In this case, continue cleaning in Standard mode.
Is any hair or lint tangled on the brush?
Is the pipe dislodged from the vacuum cleaner body?
The Rotary brush stops automatically for safety purpose when the
Suction head is off the floor. (Safety Stop)
The Rotary brush may stop in some instances as the automatic stop
function is triggered when the Suction head becomes stuck on a surface
when the product is used to clean carpets and mats on which the Suction
head can become closely attached and blocked. In such instances, turn
off the product.
The automatic stop function will be released and the product can then be
used again.
Is there any dirt entangled on the Mesh filters?
Is there any dirt accumulating at the bottom of the Dust Cup?
Is the Pleat filter properly installed to the Filter Cover?
This is a sound emitted by the Roller Switch, due to the structure
(safety stop mechanism).
This is not abnormal.
The white filter material can become visible at times, but there is no quality
issue with such a situation.
Has the Mesh filters or the Pleat filter been washed with water and then
sufficiently dried? [Using the product while moisture remains on or in the
product may lead to the emission of an odor]
Is there much dirt accumulating in the Dust Cup?
(Depending on the type of accumulated dirt some odor may be emitted.)
The temperature of the vacuum cleaner body can rise to about 40°C during operation, but this is
not abnormal.
The charger or the
battery becomes hot
while charging.
The air discharged
from the vacuum
cleaner body smells.
Symptoms Check here
■Descriptions of conditions that occur due to erroneous uses are classified in the following manner
for the purpose of providing explanations.
EN-21 and 22
Check details described
below (prior to requesting
for repairs or contacting
for inquiries).
Hot
Dust cup
assembly
OdorOthers Suction head &
Rotary brush
ENGLISH
MEMO
EC-A1RHK_A4(W page imposition).indd 3-4 2018/12/06 14:26:57

MEMO
EN-21
−
−
−
−
−
EN-13, 14
EN-15, 16
EN-15, 16
EN-17, 18
EN-6
EN-4
EN-13, 14
EN-13, 14
EN-15, 16
EN-6
EN-6
EN-7
EN-7
EN-1
EN-7
EN-8
EN-14
EN-16
EN-4
Reference
Pages
EN-6
EN-6
EN-2
Terminal Terminal
Caution
EN-7
Terminal
TROUBLESHOOTING
Symptoms Check here
The product does not
operate
(Movements are
strange)
Operation time is
shorter.
was pressed but
the operation does not
stop immediately.
Abnormal sound is
emitted.
The suction power
becomes weak during
operation in the "High
mode".
The suction power is
weak.
The product stops
during operations.
Filter care lamp (red)
blinks rapidly.
The operating sound
changed or became
louder.
The battery cannot be
charged.
(The Charging lamp
(red) of the charger is
not turned on)
The battery cannot be
charged.
(The Charging lamp
(red) of the charger
blinks rapidly)
The Charging lamp
(red) of the charger
blinks slowly)
Contact your nearest service center approved by SHARP
if the product still stops during cleaning even
if the measures described above have been implemented.
Filter care lamp (red)
turns on.
Remove the battery from the vacuum cleaner body, wait for about one
minutes to pass and then reinstall the battery on the vacuum cleaner
body and restart the operation.(The vacuum cleaner body circuit
becomes reset and the product is restored to normal operation.)
Is there any dirt or foreign matter trapped between the Pleat filter and the
Mesh filters?
Is the filter of the Dust cup assembly is dirty?
Remove the Dust cup assembly, dispose of dirt and remove the dirt
and dust on the filter.
Is the Suction head blocked? (When cleaning a mat or a enclosed nozzle is
used)
Press the and then restarting operation turns the lamp off.
Is there any clogging on the Mesh filters or Pleat filter?
Clean the filter by rinsing with water.
Is there any dirt clogging the pipe or the Suction head?
Remove the clogging dirt.
There is no malfunction if the product blinks slowly in an environment
with a low temperature (about 5°C or lower) or a high temperature
(about 35°C or higher). Charge the battery in an environment that is
between 5°C to 35°C.
Is there any dirt or foreign matter attached to a terminal of the charger
or the battery?
Remove the dirt or foreign matter with dry cloth.
If the slow blinking occurs when the room temperature is between 5°C and
35°C, then it is time to replace the battery. Replace the battery.
The symptom may be caused by malfunction of the charger,deterioration
or malfunction of the battery.
Contact your nearest service center approved by SHARP.
(Leaving a battery without charging and depleted for a prolonged period of
time can deteriorate the battery, which may need to be replaced.)
Continuously performing power operation at a location exposed to
direct sun light or in an environment with high temperature such as
inside a car parked under the flaming sun and the like can
automatically reduce the suction power as the overheating
protection circuit is triggered to prevent deterioration of the battery.
The motor keeps on turning for a while even after the is pressed,
but this is not a malfunction.
The operating time gradually becomes shorter as the battery is used
repeatedly.Replace the battery when the operating time is extremely
short even when the battery has been charged.
Is the battery correctly set to the vacuum cleaner body?
Is the Dust cup assembly correctly installed on the vacuum cleaner body?
Is there any large dirt such as a piece of tissue paper entangled inside the
Dust Cup?
Is there much dirt accumulating in the Dust Cup?
Is the charge remaining in the battery low? Charge the battery.
Is the battery correctly set to the charger?
Is the power plug of the charger securely inserted in the power outlet?
Is the vacuum cleaner body overheating? Leave the product in a cool
place for a while.
Is there any clogging on the Mesh filters or Pleat filter?
Clean the filter by rinsing with water.
Is the charge remaining in the battery low? Charge the battery.
Details on the types of matters that must be observed
are explained using following symbols.
Do not do this Must do this
When product is used When product is used
Charger
Matters for preventing electrocution,
fire disaster and malfunction of
vacuum cleaner body
(Risk of deformation of vacuum
cleaner body, ignition of fire
and fire disaster due to
overheating.)
(Risk of electrocution and
malfunction of product.)
(Risk of injury or malfunction of product
when the vacuum cleaner body becomes
dislodged or falls.)
(Risk of electrocution, electric current leakage and
fire disaster due to deterioration of insulation.)
(Risk of electrocution or injury.)
(Risk of injury of a hand or the like.)
Be particularly careful with children!
(Risk of heating, ignition of fire, electrocution or
product malfunction.)
(
Risk of
fire disaster, electrocution or injury.)
Contact your nearest service center approved by
SHARP.
(Risk of burns.)
Disconnect the power cord of the charger
from the electrical outlet.
Press the and remove the battery
from the vacuum cleaner body.
(Risk of electrocution, short circuiting and ignition
of fire.)
Do not operate the product over a
long period of time with the Suction
head blocked.
Do not allow any metal objects or pins to
enter in the pipe insertion slots, pipe
contacts or air exhaust port.
Do not transport the product by
holding on a pipe or the Dust Cup.
Disconnect the power cord of the product
from the electrical outlet when not using
the product over a long period of time.
Must do the followings when servicing
or inspecting the product
Do not touch the Rotary Brush or Roller
Switch (with safety stop mechanism).
Do not touch the terminals of the vacuum
cleaner body, the charger or the battery with
a metal object such as a needle or a pin.
Do not touch the terminals of the charger
or the battery while charging or
immediately after completing charging.
Never modify the structure of the vacuum
cleaner body or the charger and do not
disassemble and no one must repair the
product unless the individual is a repair
technician.
Be sure to remove the power plug from
the power outlet by holding onto the
power plug with a hand.
Do not block the air exhaust port
Pipe contact
Roller
Switch
Rotary
brush
Problems with vacuum cleaner body during operation
Charging
This appliance is not intended for use by persons (including children) with reduced physical, sensory or mental capabilities, or
lack of experience and knowledge, unless they have been given supervision or instruction concerning use of the appliance by
a person responsible for their safety.
Children should be supervised to ensure that they do not play with the appliance.
If the Cord of the Charger is damaged, it must be replaced by the manufacturer, its service agent or similarly qualified
persons in order to avoid a hazard.
The Suction head and Pipe (accessories) are only to be used with the appliance. Do not connect these accessories with
the power outlet or plug, socket-outlet, connector or appliance inlet that is connected with the power outlet.
ENGLISH
EC-A1RHK_A4(W page imposition).indd 5-6 2018/12/06 14:26:57

-
-
CN-16
CN-15、16
安全注意事項
為避免危害人體與造成財產損失,以下將說明必須遵守的事項。
本書將使用方式不當所引發的內容,分為以下類別進行說明。
危險 警告 注意
「極可能會造成死亡或
重傷」的內容。
「可能會造成死亡或
重傷」的內容。
「可能會造成輕傷或財物受損」
的內容。
防止觸電、火災、漏電、重大傷害
警 告
充電器 使用地點與使用時
請勿在可燃性的物體旁邊使用,或是使吸
塵機吸入該物體。
切勿在浴室等潮濕的地點、可能會被淋濕
的地點、高溫多濕的地點使用,或是使吸
塵機吸入水分。
請勿對主機與充電器潑水或潑灑清潔劑,
或是用水清洗(可水洗的零件除外)。
(否則可能造成觸電、短路、起火燃燒)
(否則可能造成觸電、短路、起火燃燒)
請避免造成電源插頭與電源線破損。
請勿使用已鬆弛的電源插座。
請勿以濕的手插拔電源插頭。
電源插頭或電源線已受損時,請勿使用。
(否則可能造成觸電、短路、起火燃燒、受傷
事故。)
請務必使用本產品所附的充電器。
請勿使用延長線。
(否則可能造成火災、觸電、故障。)
電源插頭請確實整個插入插座。
(若未完全插入的話,可能會造成火災、
觸電、短路。)
請定期清理電源插頭上的灰塵:拔出插頭,
以乾布擦拭乾淨。
(若插頭上累積過多灰塵,恐因濕氣等因素而造
成絕緣不良,並引發火災。)
請勿過度彎曲、拉扯、扭轉、綑綁,並避免
遭到其他物品夾住,且不可自行加工。
避免捲入吸頭的旋轉刷頭內。
煤油、汽油、線香
揮發油、稀釋劑
菸蒂
碳粉等可燃物等
(否則可能引起爆炸與火災)
避免造成損傷或於上方放置重物(否則可能
導致電線受損,引發火災與觸電事故。)
請勿使用於分接插座。
(否則可能造成火災、觸電。)
出現異常或故障時,請立即停止使用。
常出現開啟開關時無法運作的情況。
充電中移動充電器的電源插頭或電源線時,
充電指示燈出現亮燈或熄滅的情況。
運作期間發出異常聲響。
主機與充電器變形或異常過熱。
發出焦臭味。
CN-21、22
請先確認「故障排除」 後,
再與客戶服務中心聯繫。
充電器須立即將電源插頭由插座上拔出。
主機需立即按下 ,拆下電池。
不得投入火中或進行
加熱。
此外請勿放置於火源
或暖爐旁、受到陽光
直接照射的地方、以
及酷熱天氣下的車內
等高溫處。
(否則可能引發短路、起
火燃燒、電池液外漏、爆
炸等事故。)
送修或洽詢前,請先
調查以下內容。
異常情況 參考
頁面
調查內容
主機運作時,溫度會上升至 40°C 左右,此為正常現象,並非異常。
主機發熱 圓筒形濾網與高性能折疊濾網是否堵塞?
這是因電流流過控制電路而產生熱能,屬於正常現象,並非異常。
集塵筒組的各零件組裝方式是否正確?
CN-14
集塵筒的底部有無累積過多垃圾?
CN-16
有無垃圾纏繞在圓筒形濾網上?
CN-16
高性能折疊濾網是否正確安裝在濾網盒上?
CN-16
集塵筒組的各零件組裝方式是否正確?
CN-17
地板吸頭
清潔踏墊和小型地毯等時可能會有異物進入吸頭導致旋轉刷停止。
這種情況下,請使用標準模式清潔。
的組裝方式是否正確?
-
延長管是否與主機脫離?
CN-9
CN-9
將吸頭抬離地面時,為了確保安全,旋轉刷將會自動停止。
(安全停止)
-
這是因安全滾輪開關(安全停止機構)的構造特性所產生的聲音,絕非異
常。
看到高性能折疊濾網上的白色濾紙,此為正常現象,
並
非品質上的問題。
CN-15、16
以清水清洗圓筒形濾網與高性能折疊濾網後,是否充分讓其乾燥?
【若在仍殘留水分的狀態下使用,將會產生異味。】
CN-13、14
集塵筒內的垃圾是否已滿?
(部分種類的垃圾可能會發出異味。)
-
打掃地板吸頭緊密貼合地板或腳踏墊等物品時,可能會出現地板吸頭吸住
不放,而觸動自動停止功能,導致旋轉刷停止。如遇此情況,請先關閉電
源。解除自動停止功能後即可使用。
CN-17
是否被毛髮或線頭等物品纏住?
充電期間的充電器與
電池溫度極高。
無法安裝至主機上。
旋轉刷
不會轉動。
吸頭發出咔拉咔拉的
聲響。
高性能折疊式濾網上的
白色濾紙。
排出來的氣體有味道。
無法組裝集塵筒組。
主機的清理濾網燈(紅色)與電池剩餘電力指示燈(綠色)同時閃爍時,可能是發生故障。請洽詢客戶服務中心。
熱
過
味
異
他
其
組
筒
塵
集
刷
轉
旋
、
頭
吸
板
地
CN-22
CN-1
中文
EN-3
Warning
Caution
Danger
EN-20
EN-4
0.13 L
SAFETY PRECAUTIONS
SPECIFICATIONS
Information on Battery
Preventing accidents and major injuries from
electrocution or fire disaster and the like.
Matters for preventing electrocution, fire disaster, electricity leaks
and major injuries
Matters for preventing electrocution, fire disaster and
malfunction of base unit
(Risk of heating, ignition of fire or electrocution.)
(Risk of harm to the eyes.)
(Risk of heating, smoke generation, bursting or ignition of fire.)
(Risk of fire disaster, electrocution or injury.)
(Risk of heating, smoke generation, bursting, ignition of fire or liquid leakage.)
(Risk of heating, smoke generation, bursting or ignition of fire.)
Use and store the product in a location where there is little humidity or dust.
Stop charging the battery if the charging is not completed even after exceeding the
prescribed charging time and replace the battery.
Keep the battery at a place that is out of reach of infants.
Do not touch the battery with a wet hand.
Always use a battery that is specified by Sharp.
Do not use any charger for a battery that is not specified by Sharp.
Do not immerse or wet the product with water.
Do not place the product near fire or space heater, a location exposed to direct sun light
or at a location with high temperature such as inside a car parked under the flaming sun
and the like.
Do not throw the product into fire or heat it.
Do not use any battery that has been deformed or scratched from dropping and the like.
Do not pierce the product with a nail, hit with a hammer, step on the product or otherwise
give strong impact or throw the product.
Do not allow any metal object, such as a needle or a pin to contact a terminal and do not
transport or store the product with such articles as necklaces or hair pins.
Do not use the battery when there is emission of smell, heat, liquid leakage, discoloration,
deformation and any other abnormality that was not present previously.
When the liquid from inside the battery leaks and comes in contact with the eye, do not
rub and immediately rinse out the liquid from the eye using clean water such as tap water
and receive treatment by a physician right away.
Do not use the battery with any appliances other than the vacuum cleaners manufactured
by Sharp and do not disassemble, modify or separately charge the battery.
When the liquid from inside the battery leaks and comes in contact with the skin or clothing,
immediately rinse out the liquid from the eye using clean water such as tap water.
A battery must be charged in an environment with the temperature in the range of 5°C to
35°C.
(Risk of heating, generation of smoke, bursting and ignition of fire, as well as improper charging or
deterioration of the battery.)
(Risk of harm to the skin.)
When a single battery is used (fully charged and initial condition of the battery / 20°C).
Conditions may vary depending on the material of the floor surface, environment in which the product
is used and the condition under which the product is used.
Cord length
charger dimensions
Base unit dimensions
Weight
Charging time
Dust collecting capacity
Electric power consumption
Continuous operation
time*
Power supply method
Power supply Input 100 - 240 V 50-60 Hz (charger)
Rechargeable type (lithium ion battery, 18V )
While charging: Approx. 40 W; After charging: Approx. 0.5 W
1.5 kg (Suction head, pipe, base unit and battery included)
0.6 kg (charger)
222 mm W x 220 mm D x 980 mm H
200 mm W x 90 mm D x 133 mm H
80 cm (charger)
Approx. 80 minutes (charging may take up to maximum of
about 2 hours depending on the conditions of use, such as
the surrounding temperature or duration of use)
High mode: Approx. 8 minutes
Standard mode: Approx. 30 minutes
INSTRUCTION MANUAL FOR BATTERY PACK ( BY-5SB )
“ Charging Information ”
Nominal Specifications
Item Specifications Remark
0~10℃
10~60℃
0~45℃
45~60℃
0~60℃
Charging Current (Std.)
Charging Voltage (Std.)
Charging cut current
1.95A
3.90A
20.75V
20.25V
100mA
Charge Limits
Battery Pack Model Maximum Charge Current, A
BY-5SB
Maximum Charge Voltage, V
3.9A(0~10℃)20.87V
7.8A(10~60℃)
“ Disposal method and Storage method ”
After extended periods of storage, it may be necessary to charge and
discharge the cells or batteries several times to obtain maximum
performance. Do not store cells or batteries haphazardly in a box or drawer
where they may short-circuit each other or be short-circuited by other metal
Replace only with same SHARP Corporation type BY-5SB battery pack.
Dispose of used batteries according to local ordinances and/or regulations.
objects. Keep cells and batteries clean and dry.
ENGLISH
EC-A1RHK_A4(W page imposition).indd 7-8 2018/12/06 14:26:57

CN-6
故障時的檢查事項
運作期間的主機異常
充電
異常情況 調查內容 參考
頁面
本書使用以下圖示說明須遵守之內容的種類。
不能做的事。 必須遵守的事。
使用時請遵守以下事項。 使用時請遵守以下事項。
充電器請遵守以下事項。
注意 防止觸電、火災、主機故障、
傷害事故
不要堵住排氣口。
不要以堵住吸頭的狀態長時間運作。
不要將金屬類或針等物品放入延長管插
入口、延長管接點、排氣口。
(否則可能造成觸電或故障)
不要以握住延長管或集塵筒的方式搬運
主機。
(否則可能導致主機脫落或倒下,造成
受傷事故或故障。)
長期間不使用時,一定要拔掉插頭。
(否則可能因絕緣劣化導致觸電、漏電、火災)
拔插頭時,一定要抓著插頭拔。
(否則可能造成觸電、短路、起火燃燒)
(否則可能因過熱造成主機變形、
起火燃燒、引發火災)
延長管接點
保養與檢查時務必遵守以下事項。
充電器需將電源插頭拔出。
(否則可能造成觸電或受傷事故)
主機需按下 ,拆下電池。
旋轉刷
端子 端子 端子
安全滾輪
開關
不得觸碰旋轉刷與安全滾輪開關
(安全停止裝置)。
(否則可能造成手部等部位受傷)
請特別注意兒童。
不得以鐵絲或針等的金屬物品,觸碰主
機、充電器、電池的端子。
(否則可能造成發熱、起火燃燒、故障)
充電期間或剛充完電時,不得觸碰充
電器與電池的端子。
(否則可能造成灼傷)
不可自行改造主機與充電器,並且不得
由非專業維修人員進行分解或修理。
(否則可能造成火災、觸電、受傷事故)
如需修理時,請洽詢客戶服務中心。
無法運作
(動作異常)
按下 時,不會立即停
止運作。
運作時間變短。
清理濾網燈(紅色)亮
燈。
以「強力模式」運作時,
吸力變弱。
運作聲忽大忽小,
或變得很大聲。
清理濾網燈(紅色)快
速閃爍。
吸力變弱
中途停止
無法充電
(充電器的充電指示燈
(紅色)不會亮燈)
無法充電
(充電器的充電指示燈
(紅色)快速閃爍)
充電器的充電指示燈
(紅色)緩慢閃爍
發出異常聲響
CN-6
CN-6
CN-7
採取上述處置後,仍出現吸塵機在清掃過程中停止運作的情況時,請洽詢客戶服務中心。
CN-7
電池的剩餘電力是否已耗盡?敬請充電。
CN-14
集塵筒組是否以正確的方式安裝在主機上?
CN-6
主機是否過熱?請於陰涼處放置片刻。
-
充電器的電源插頭是否確實的完全插入電源插座中?
CN-7
電池是否正確安裝在充電器上?
CN-17、18
充電器與電池的端子上,有無污垢或異物附著?
請以乾布擦拭乾淨。
CN-4
在室溫 5°C∼35°C 的環境中緩慢閃爍時,代表電池已屆更換時期。
敬請更換電池。
-
在低溫(約 5°C 以下)或高溫(約 35°C 以上)的環境中緩慢閃爍時,
屬於正常現象,並非故障。請於 5°C∼35°C 的環境中充電。
可能是充電器故障或電池劣化與故障。
請洽詢客戶服務中心。
(在電池未充電的狀態下長期間放置未使用時,可能會導致電池劣化,
必須更換電池。)
CN-13、14
集塵筒內的垃圾是否已滿?
CN-13、14
有無面紙等大型垃圾纏繞在集塵筒內部?
-
延長管與吸頭等處是否被垃圾堵住?
請清除堵住的垃圾。
CN-7
電池的剩餘電力是否已耗盡?敬請充電。
CN-15、16
圓筒形濾網與高性能折疊式濾網是否堵塞?請用水清洗濾網。
CN-13、14
CN-15、16
集塵筒組的濾網有無過髒?
請拆下集塵筒組並清理垃圾,再去除濾網上的污垢與灰塵。
CN-1
在會受到陽光直接照射的地點或酷熱天氣的車內等高溫使用環境中,
以強力模式連續運作時,主機可能會為了防止電池劣化而觸發過熱保
護電路,導致吸力自動減弱。
CN-6
吸頭是否被堵住?(清掃踏墊時或使用附屬吸頭等情況)
請先按下 後,再讓吸塵機運作,指示燈即會熄滅。
CN-15、16
圓筒形濾網與高性能折疊式濾網是否堵塞?請用水清洗濾網。
CN-16
高性能摺疊式濾網與圓筒形濾網之間,有無混入垃圾或異物。
CN-8
電池是否正確安裝在主機上?
-
請由主機上拆卸電池,靜待1分鐘左右後,再將電池裝回主機,重新進行
操作。(主機電路將被重置,恢復成正常狀態。)
-
按下 後的短暫期間,馬達會因慣性作用而轉動片刻,此為正常現象,
並非故障。
CN-4
電池會因反覆使用而導致運作時間逐漸縮短。充滿電後若仍僅能運作一段
極短的時間,請更換電池。
中文
CN-21
CN-2
除非有安全人員在場指導或協助,並確保使用者的安全,否則本產品不可由兒童、精神病人、殘疾人士及反應過慢之人士
使用。
切勿讓兒童把玩本產品。
電源線只能由廠方、服務代理或同權合資格的人員進行更換,以免發生意外。
吸頭和吸管(配件)只可配品本產品一同使用。
切勿將此等配件連接電源插座,或與已連接電源的插頭、插座、連接器或設備插口連接。
EN-19
EN-4
EN-7
EN-6
Terminal
EN-15 and 16
Back side
STORAGE
Tips
Replacing Battery
Storing Product
Precautions for Details
When the product is not
used for a long time.
Care is needed when leaving the product standing leaning against a wall, as the
product may fall.
Store the product in the condition described in the diagram below when not using
the product for a long period of time.
Store the product by hooking the holder section on furniture or the like, in a gap between a furniture
and the wall, in the corner of the room or inside a closet where the product is unlikely to fall.
Care must be taken as the holder section may slide and leave pigment on the
contacted surface, depending on the type of the wall or furniture.
If the product cannot be easily secured by hooking due to slippery floor or furniture,
do not force the product to hook at a location but disassemble the product for
storage instead.
Verify that there is nothing in the vicinity of the product that can be damaged easily.
Pay particular attention to ensure no infant or pet is allowed to get near the product.
Holder
section
There may be cases where the floor surface is damaged when the
roller switch on the bottom side of the Suction head, wheels or
the Napped cushion is worn.
Wheel
Napped cushion
Napped cushion
Integrated with
Suction head
Integrated with
Rotary brush
cover
Roller
Switch
In the event the part becomes
worn it is necessary to replace it
with a new one.
Stop using the product and contact
your nearest service center
approved by SHARP.
The replacement of the part for the
is performed while the product
is left with Sharp.
Replacement part (Rotary brush
cover) is available for purchase.
Do not drag the charger (Risk of scratching on the floor
surface).
This product is for indoor use only.
Do not operate the product while the Dust cup assembly
has been removed.
Large dirt or a large amount of dirt suctioned at the same time.
Sharp objects (glass, razor blade and the like).
Liquid or moist dirt. A large amount of sand.
(Risk of heating, ignition of fire or
electrocution.)
Furthermore, store the product in a
location where there is little humidity
or dust.
Do not transport or store the product
together with any metal object, such
as a needle, necklace or hair pin.
It is recommended that the power
plug of the charger be removed from
the power outlet.
The charger consumes about 0.5 W
of power while the power plug is
connected to the power outlet.
Removing the power plug when the
charger is not in use can keep down
wasteful power consumption.
Consider following precautions
when storing the battery.
Remove the battery from the base
unit and completely charge the
battery before storing.
Twines
Do not apply lubricant to the Rotary brush (Risk of
plastic parts cracking).
Do not hit the Suction head hard on the steps on the
floor surface or gaps in floor heights, as well as
furniture or wall (Risk of the floor surface becoming
scratched).
Clean respective filters when fine powder (plaster, cement,
chalk and the like) has been suctioned.
Do not suction any of the following types of items
(Risk of scratching of the product interiors and clogging of the
product, as well as product malfunction).
This cordless vacuum cleaner is intended for
household use and must not be used for commercial
applications. Furthermore, the product must not be
used for any purpose other than cleaning.
There are instances where the operation of the
product causes noise to appear on the screen of
television sets. There is no negative impact on
the television set when this occurs.
There is no malfunction if the the Charging lamp (red) on
the charger blinks slowly when charging in an
environment with a low temperature (about 5°C or lower)
or a high temperature (about 35°C or higher).
Charge the battery in an environment that is between
5°C to 35°C.
Recommended time for replacing
the battery.
When the Charging lamp (red) of the charger blinks slowly
whenever charging in an environment with room temperature of
between 5°C and 35°C.
When the operating time is extremely short even when the battery
has been charged.
We invite you to recycle the spent battery.
Information on handling of spent battery.
Insulate the terminal sections using plastic tape or the like that are available on the market.
Furthermore, do not disassemble the product.
The battery (lithium-ion battery) is a precious resource that can be recycled.
Bring in the spent battery to a store that accepts batteries for recycling, rather than disposing of
them as waste material.
Batteries are consumable products.The operating time
gradually becomes shorter as the battery deteriorates with
repeated use. Although the deterioration of batteries vary
depending on the condition of use or operating
environments, the battery should be replaced if any of the
following conditions apply.
CAUTION
EN-5
ENGLISH
EC-A1RHK_A4(W page imposition).indd 9-10 2018/12/06 14:26:57
安全注意事項
關於電池
危 險 防止觸電或火災等事故與重傷事故
充電器請勿用非本公司指定的電池進行充電。
(否則可能出現發熱、冒煙、破裂、起火燃燒、電池液外漏)
請務必使用本公司指定的電池。
(否則可能出現發熱、冒煙、破裂、起火燃燒)
電池內部的液體外漏並誤入眼睛時,請勿搓揉眼睛,並立即以自來水等清水充分沖洗眼睛後,
盡快就醫。
(否則可能造成眼睛受損)
察覺電池出現異臭、發熱、液體外漏、變色、變形等未曾出現過的異常情況,請勿繼續使用。
(否則可能出現發熱、冒煙、破裂、起火燃燒)
請勿以濕手觸碰電池。
(否則可能造成發熱、起火燃燒、觸電)
超過規定的充電時間仍無法完全充滿電時,請停止充電並更換電池。
請於濕氣和灰塵較小的地方使用與保存。
(否則可能造成發熱、起火燃燒、觸電)
充電請務必在5℃∼35℃的環境中進行。
(否則可能出現發熱、冒煙、破裂、起火燃燒的情況,或是無法正常充電與電池劣化的情況。)
電池請放置於嬰幼兒無法取得之處。
當電池的端子不潔時,以清潔的乾布擦拭。
電池內部的液體外漏,接觸皮膚或衣物上時,請立即以自來水等清水充分沖洗。
(否則可能造成皮膚受損)
電池不可短路,請勿以鐵絲或針等金屬類接觸端子,或是與項鍊或耳環等物品一同搬運及保管。
電池不可使用於本公司吸塵機以外的其他機器上,且不可自行將電池分解、改造或單獨
充電。(否則可能造成火災、觸電、受傷事故)
不可泡水或淋濕。
不可放置於火源或暖爐旁、受到陽光直接照射處、以及酷熱天氣下的車內等高溫處。
不可投入火中或進行加熱。
電池因掉落等因素而變形或受損時,請勿繼續使用。
請勿釘入釘子、用鐵鎚敲打、用力踩踏等造成強大衝擊的行為並且請勿丟擲。
不可使用本產品隨附的充電器以外的充電器。
警 告
注 意
防止觸電、火災、漏電、重大傷害
防止觸電、火災、主機故障、傷害事故
CN-4
規格
使用 1 個電池的情況(完全充滿電、電池使用初期/20°C)。
會因地板材質、使用環境、使用狀態而改變。
80cm(充電器)
0.6kg(充電器)
1.5kg(包含地板吸頭、延長管、主機、電池)
0.13L
強力模式:約 8 分鐘
標準模式:約 30 分鐘
充電中:約 40W/充電完成後:約 0.5W
充電式(二次鋰電池組、18V )
輸入:100V-240V 50-60Hz(充電器)
約 80 分鐘(可能會因環境溫度、使用時間等因素,
最長需充電至 2 個小時左右。)
寬200mm×長90mm×高133mm
寬222mm×長220mm×高980mm
電線長度
充電器尺寸
主機尺寸
重量
充電時間
集塵容量
耗電量
電源方式
電源
最長連續運作時間※
CN-3
CN-20
中文
EN-5
Accessories
EN-4, 7
EN-15, 16
EN-7
EN-7
EN-18
CAUTION
Terminal
Rotary brush cover
Gear
Slot
Slot
Tab
Warning
[Risk of electrocution or injury.]
PART NAMES
Names of each part and how to assemble
When using the product in the Stick state
Right side surface
Dust cup assembly
Press Release button to remove respective parts.
Battery
Exhaust port
Dust disposal
hook (yellow)
Dust Cup
Cord
(Approx. 80 cm)
Charger (1 unit) Battery (1 piece) Cleaning Brush (1 piece)
(Already attached to
Charger at shipping)
(Shape of plug depends on country) (Attached to vacuum cleaner body)
Contacts (terminals) of charging section
Strap on
a belt
Installation is not
possible when the left
and right are reversed.
Strap the belt on the gear of the Rotary brush and
insert it into the slot.
Slide the Release lever in the direction of
the arrow.
Clip on the tab on the Rotary brush cover in the
slot.
Insert the side without a gear of the Rotary brush,
as far as it goes into the slot.
Do not apply any hot air, such as air blown by a hair dryer.
[Risk of deformation or product malfunction]
Do not use any detergent, paint thinner, benzene product
or hot water (exceeding approx. 40°C).
[Risk of deterioration or deformation]
Attach
Attach the brush in the direction
shown in the diagram after use.
Wipe off any dirt
with a dry cloth.
Mesh filter
Wash respective filter with water when the Filter care
lamp (red) blinks rapidly
Press the Dust disposal hook (yellow) to split the
Dust Cup from the Cover section.
Filter Cover
Pleat filter
Dirt accumulates
here.
Cover section
The built in filter cannot
be removed.
Cleaning is not
required.
Battery release button
The Suction head and Pipe described above are also accessories.
Always do the following during maintenance:
Disconnect the power cord of the Charger from the
electrical outlet.
Press the to stop the operation of the product and
remove the battery.
EN-10, 19
EN-17
EN-13
EN-6
EN-9
Suction head
Pipe
Back side
Release button
Release button
Holder
section
Lamps
Handle / Control switch
Always hold on the handle on the
vacuum cleaner body to transport the
product.Holding onto other parts
(such as a pipe of the Dust Cup) can
dislodge such parts from the vacuum
cleaner body and the product may
fall and lead to injury or product
malfunction.
Cup release
lever (black)
ENGLISH
EN-11, 12
Duster Nozzle
(1 piece)
Crevice Nozzle
(1 piece)
Enclosed Nozzles
EC-A1RHK_A4(W page imposition).indd 11-12 2018/12/06 14:26:58

收納
重要須知
更換電池
收納方式
請於牆壁與家具間的縫隙、房間牆角、衣櫃內等不易傾倒的地點,
以將固定墊扣住家具等物品的方式,進行收納。
注意!
直接靠在牆上時,可能會翻覆,請多加注意。
部分種類的牆壁與家具,可能會因為固定墊摩擦而變
髒,請多加注意。
地板或家具等物品過於平滑,無法扣住時,請勿強行
扣住,請以分解的方式收納。
請確認周圍有無容易損壞的物品。
尤其應注意避免嬰幼兒與寵物靠近。
固定墊
反面
長期間不使用時,請先調整成下
圖中的狀態後,再行收納。
亦須注意的其他事項
長時間不使用注意事項
地板吸頭反面的安全滾輪開關、車輪、緩衝毛墊已磨損時,
可能會刮傷地面。
車輪
緩衝毛墊
與吸頭一體
與刷頭蓋一體
緩衝毛墊
安全滾輪開關
部位已磨損時,必須更換
為新品。
請停止使用,並洽詢客戶服
務中心。
的零件需以送修方式
修理。
更換用零件(皮帶保護蓋)
可單獨選購。
吸塵機避免吸入以下物品。
(否則可能造成內部受損、垃圾堵塞、或故障)
吸塵機吸入細小的粉末類(石膏、水泥、粉筆等)物質時,
請保養各濾網。
不可用於打掃赤腳行走的玄關處。
不可讓吸塵機吸入大型垃圾,或一次吸入大量垃圾。
尖銳的物品(玻璃、刮鬍刀等)。
液體或潮濕的垃圾。
請勿對旋轉刷加油(否則可能造成塑膠龜裂)。
請勿拖行充電器(否則可能刮傷地板等處)。
請勿將吸頭用力頂住地板與門檻的高低差部分、家具、
以及牆壁等處(否則可能刮傷地面等處)。
不可在拆下集塵筒組 的狀態下運作。
CN-5
CN-15、16
大量砂礫
繩索類
本充電式吸塵機為家庭用,請不要當作商用
吸塵機使用。
此外,請不要使用在吸地以外的用途上。
運作期間可能會造成電視機畫面出現雜訊,
但不會對電視機造成影響。
建議拔掉充電器電源插頭。
維持在插入電源插頭狀態時,
將耗用約 0.5W 的電力。
不需使用時請拔掉電源插頭,可避
免耗電。
CN-7
請由主機上拆卸電池,並務必將
電池完全充滿電之後,再進行保
存。
請勿與鐵絲、項鍊、耳環等
金屬類一同搬運及收納。
請保存於濕氣和灰塵較小的地方。
(否則可能造成發熱、起火燃燒、觸電)
經長時間存放後,可能需對電池充電、
放電數次以達到其最大效能。
收納電池時,請注意以下事項。
電池的更換基準
CN-6
在低溫(約 5°C 以下)或高溫(約 35°C 以上)
的環境中充電,充電器的充電指示燈(紅色)
緩慢閃爍時,屬於正常現象,絕非故障。
請於 5°C∼35°C 的環境中充電。
端子
請以市售的絕緣膠帶等物品將端子部位絕緣,並請勿將其分解。
請根據當地政府制定的規則進行處理。
不再使用之電池的處理方式
請協助回收電池。
電池(鋰離子電池)為可回收使用的珍貴資源。
不需再使用的電池請勿丟棄,並送至提供充電式電池回收服務的店家。
電池屬於消耗品,會因反覆使用而導致運作時間逐漸縮短。
雖然電池的劣化速度會因使用狀況與工作環境而改變,但只
要出現以下任一情況時,即請更換電池。
每次在室溫 5°C∼35°C 的環境中充電時,充電器
的充電指示燈(紅色)皆緩慢閃爍時。
即使已完全充滿電,仍只能運作極短時間。
CN-19
CN-4
中文
EN-6
EN-17
Rotary brush cover
EN-16
EN-4
Removal
CAUTION
Wheel
Rotary brush cover Release lever
Belt
Gear
MAINTENANCE
Suction head, vacuum cleaner body,
Enclosed nozzles and contacts
(terminals) of charging section
Suction head (Rotary brush)
Vacuum cleaner body, Enclosed nozzles and
contacts (terminals) of charging section
When lint, rubber band, hair or pet hair and the like is attached.
Removing the dirt
Roller
Switch
Napped cushion
Remove dirt that became attached to
fine parts with a pair of scissor or a pair
of tweezers with thin tips.
Cut along the slot of the Rotary brush for
removal.
(Do not cut the tips of the bristles of the brush.)
Remove the dust attached to the
Suction head with a Duster Nozzle
and cut off the hair and lint
entangled in the section and then
wipe with wrung cloth.
Stop using the product when the section
becomes worn, check and contact
your nearest service center approved by
SHARP.
When heavily dirtied
Vacuum cleaner body
Wipe with cloth moistened with some water
or thinned neutral detergent. Do not use any
paint thinner or benzene product. [Risk of
deterioration or discoloration]
Enclosed nozzles
Release
button
When using the product in the
Handy state
Wash with water
or thinned neutral
detergent.
The vacuum cleaner body,
charger and battery cannot
be washed with water.
Dry the parts after washing
with water.
Press Release button to remove
respective parts.
Remove the Rotary brush cover by sliding the
Release lever to the "OPEN" position.
The Suction head cannot be washed with water in its entirety.
When heavily dirtied
Wash with water
Remove the belt from the gear while lifting up the
Rotary brush and remove the Rotary brush.
After removing the Rotary brush and washing it with water,
remove water and moisture properly and sufficiently dry in
a ventilated location before re-installing.
Rotary brush
Remove
the belt
Click!
EN-4
Tips for making the battery last
Charge the battery every time the product is used,
regardless of how long it was used.
When the product is not used for a long time
Recommended Time for replacing the battery
About 1,100 times of charge/discharge ◆
The battery lasts longer when charged before the charge level
becomes low.
Leaving a discharged battery without charging will lead to the
deterioration of the battery.
According to tests conducted based on Sharp's standard
for repeatedly charging and charge/discharge a battery.
The life of a battery can vary depending on the conditions
of use and the environment.
*2
*1
EN-7
Lamps notify status of the vacuum cleaner body
Filter care lamp
(red)
Battery level indicator
lamp (green) *1
Indicated State/ Explanation
Lamp State
Filter care lamp (red)
Battery level indicator
lamp (green)
Turned
on *2
Fast
blinking
Turned on
Blinking
Fast
blinking
The filter of the Dust cup assembly is dirty.
Clean the filter by rinsing with water.
There is sufficient charge remaining in the battery.
The charge remaining in the battery is low.
The filter of the Dust cup assembly is clogged with dust.
The vacuum cleaner body is overheating.
Leave the product in a cool place for a while.
Operating the product without allowing it to cool leads to the
overheating protection circuit of the vacuum cleaner body triggering,
which disables the product for some time.
The charge remaining in the battery is quite low.
(There is no charge remaining in the battery.)
Charge the battery.
Empty the dust cup and clean the filter.
The Battery level indicator lamp is turned on in following situations. (The lamp is not turned on when there
is no charge left in the battery.)
The lamp may also turn on when the Suction head is clogged even when the filter is not dirty.
In such instances, press the and then restart operation to turn the lamp off.
(The lamp goes off in about 10 seconds after the machine is stopped.)
About 5 seconds after the battery is reinstalled on the vacuum cleaner body.
While using the product for cleaning
About 5 seconds after pressing the and stopping the operation of the product.
EN-13, 14
EN-15, 16
ENGLISH
EC-A1RHK_A4(W page imposition).indd 13-14 2018/12/06 14:26:58

EN-7
Insert securely to as far as it goes.
Power plug
Charger
-
1
2
3
CAUTION
Notices
EN-6
EN-16
Battery release button
CAUTION
1
Turn
2
3
Turn
Click!
Protrusion
EN-17 EN-17 EN-17
Top side
Warning
PREPARATION See for
tips for making the
battery last.
Charging battery
The battery is not charged when the product is purchased, so the battery must be removed from
the vacuum cleaner body and charged until the Charging lamp on the charger is turned off.
Remove the battery from the vacuum cleaner body.
Insert the power plug of
the charger in the power
outlet.
Set the battery on the charger and recharge.
Align the terminals.
Verify that the Charging
lamp (red) is turned on.
If the lamp blinks (repeating the "blinking" in
intervals of about one second) the battery has
not been securely inserted.
Insert the battery securely to as far as it goes.
Remove the battery by
sliding it in the direction
of the arrow.
Press the Battery release
button in the direction of
the arrow
The estimated duration of
time required for charging
varies depending on the
remaining charge in the
battery at the time charging
starts.
Do not touch the terminals of the charger or the
battery since they become hot while charging
or immediately after completing charging. [Risk
of burns.]
Do not apply any hot air, such as air blown by a hair dryer.
[Risk of deformation or product malfunction.]
Caution is required to ensure that the
Mesh filters (Upper and Lower) are
not lost while throwing out dirt or
cleaning.
Each part must be assembled
correctly in order for them to fit onto
the vacuum cleaner body.
Align the protrusion on the Dust Cup and the
Dust disposal hook (yellow) and insert.
Align the salient part of the Pleat
filter to the recessed section of the
Filter Cover and press in.
Install the Filter Cover and the Mesh
filters (Upper and Lower).
Install the Dust Cup.
Align the
positions..
Align the
positions..
Install the Dust Cup.
Properly remove moisture, gently wipe off moisture
with a towel or the like, dry in shade at a well
ventilated location to thoroughly dry.[Risk of
emission of odor or product malfunction.]
Thoroughly dry prior to assembling.
[Risk of filter clogging not improving even after
cleaning.]
Wash with water or thinned neutral detergent.
Pleat filter (blue)
Remove dirt and dust with a cleaning brush.
Dislodge and remove dirt and dust by
dusting.
Pleat Filter
Parts that may be washed with water
Dust in the direction illustrated in
the diagram on the right as dirt
tends to accumulate on the back
side.
Do not use a cleaning brush
[Risk of damages].
Mesh filters (Upper and Lower), Filter Cover
When heavily dirtied, wash with water.
Cleaning the Filters Assembling the Filters
Filter Cover
Carefully wash
the back side.
When the odor stands out,
dilute bleach for clothing in
water and immerse the filter
in this solution following
instruction for the bleach,
then rinse with
water.
Mesh filter Dust Cup
Dry the parts after washing with
water.
Estimated
drying time:
12 hours.
(This may vary depending on
the environment and season.)
The charger or the
battery becomes hot
while charging, but this
is not abnormal.
Lamp state Charging status
ChargingTurned on
Turned off Charging completed
(fully charged) About 80 minutes
Estimated duration from start
of charging*
[Risk of electrocution or injury.]
Always do followings during maintenance
Disconnect the power cord of the charger from the
electrical outlet.
Press the to stop the operation of the product
and remove the battery.
Dust
disposal
hook
(yellow)
Recessed
section
Salient
section
Gently rub
the mesh.
ENGLISH
(Shape of plug depends on country)
各部份名稱
各部份名稱與組裝方法
以直立狀態使用時
右側面
要拆下各零件時,請以同時按住「裝卸按鍵」的方式拆下。
電池
排氣口
內建式濾網無法拆下。
不須保養。
電池拆卸鍵 CN-7
CN-7
CN-15、16
CN-4、7
集塵筒組
垃圾清理鍵(黃色)
濾網盒部位
摺疊濾網
集塵筒
垃圾會累積在此處。
濾網盒
圓筒形濾網
濾網保養燈(紅色)快速閃爍時,請用水清洗各濾網。
按下垃圾清理鍵(黃色)後,將分離成集塵筒與濾網盒部位
兩個部位。
附屬配件 上述的「地板吸頭」與「延長管」亦屬於附屬配件。
充電器(1 個) 鋰電池(1 個) 清潔刷(1 個)
電線
(約 80cm)
(包裝時安裝於充電器) (裝在主機上) 使用後請依照圖中
方向裝入。
端子
以乾布擦拭污垢。
充電部位的接點(端子)
齒輪
套上皮帶
左右方向相反時,
無法裝上。
將皮帶套住旋轉刷的齒輪,並放入溝槽中。
將旋轉刷無齒輪的一方插入溝槽最深處。
將開關拉桿朝箭頭指示方向滑動。
將刷頭保護蓋的扣爪扣住溝槽進行安裝。
齒輪
溝槽
溝槽
扣爪
刷頭保護蓋
注意!
請避免吹到吹風機等機器的熱風。
【否則將造成變形或故障】
請勿使用清潔劑、稀釋劑、揮發油、
以及熱水(約 40°C 以上)。
【否則將造成變質或變形】
安裝
警 告
【否則將造成觸電或受傷事故】
保養時請務必遵守以下事項。
充電器需將電源插頭拔出。
主機需按下 停止運作後,再拆下電池。
指示燈
主機把手/開關
搬運時請務必握住主機把手。握住其他
部位(延長管或集塵筒等)時,會使主
機脫落或傾倒,造成受傷事故或故障。
反面
固定墊
集塵筒拆卸開關
(黑色)
CN-10、19
裝卸按鍵
裝卸按鍵
延長管
地板吸頭
CN-17
CN-13
CN-6
CN-9
CN-11、12
附屬吸頭
除塵毛刷吸頭(1 個) 狹縫吸頭(1 個)
CN-5
CN-18
中文
(插頭圖樣並不代表該國家所使用的插頭)
EC-A1RHK_A4(W page imposition).indd 15-16 2018/12/06 14:26:59

清理濾網燈(紅色)
電池剩餘電力指示燈(綠色)
請清理垃圾,並去除濾網上的污垢與灰塵。
集塵筒組的濾網過髒。
主機過熱。
請於陰涼處放置片刻。
若繼續讓吸塵機運作,未將其冷卻,將觸發主機的過熱保護
功能,導致吸塵機暫時無法使用。
電池剩餘電力即將耗盡。
(電池剩餘電力已耗盡。)
敬請充電。
請用水清洗濾網。
集塵筒組的濾網阻塞。
延長電池使用壽命
的要訣
保養 地板吸頭、主機、附屬吸頭、
充電部位的接點(端子)
被線頭、橡皮筋、毛髮、寵物的毛等物質纏住時。
地板吸頭(旋轉刷)
主機、附屬吸頭、充電部位的接點(端子) 感覺已髒污時
CN-15、16
CN-13、14
CN-16
CN-4
CN-7
附屬吸頭
請先水洗後,再充分去除
水分。
使用清水或稀釋
過的中性清潔劑
清洗。
主機
以含有清水或稀釋的中性清潔劑的抹布
擦拭。請勿使用稀釋劑與揮發油類。
【否則將造成變質或變色】
注意! 主機、充電器、電池不可
水洗。
裝卸按鍵
要拆下各零件時,請以同時按住「裝卸按鍵」
的方式拆下。
以手提狀態使用時
主機指示燈的亮燈方式 透過指示燈告知使用者主機的狀況
清理濾網燈(紅色)
電池剩餘電力指示燈(綠色)※1
直接在電池電力完全耗盡的狀態下放置時,將
造成電池劣化。
在電池剩餘電力尚未完全耗盡前即充電的做法,
較能延長電池的使用壽命。
不論使用時間長短,清掃完畢後請務必充
電。
長期間不使用時的須知
電池的更換基準
充放電約 1,100 次◆
依據反覆充放電的本公司基準進行試驗的情況。
電池的使用壽命會因使用條件與環境而改變。
指示燈的亮燈方式 異常狀況/通知內容
亮燈※2
快速閃爍
快速閃爍
閃爍
亮燈 電池剩餘電力充足。
電池剩餘電力過低。
自按下 停止運作的時間點起算約 5 秒鐘
清掃期間
自電池安裝至主機上的時間點起算約 5 秒鐘
吸頭被堵住時,即使濾網不髒,亦可能會亮燈。如遇此情況,請先按下 後,再讓吸塵機運作,
指示燈即會熄滅。(停止約10秒後燈光將熄滅)
電池剩餘電力指示燈的亮燈時機如下。(電池剩餘電力完全耗盡時,不會亮燈。)
1
2
CN-4
沿著旋轉刷的溝槽剪下。
(不可剪到刷毛的毛尖。)
使用除塵毛刷吸頭吸取附著在吸頭上的灰塵,
並將纏繞在 部位的毛髮與線頭剪下後,
以用力擰乾的濕布擦拭。
附著於窄小部位中的垃圾,
請使用細長型剪刀或鑷子等工具去除。
皮帶保護蓋
拆下旋轉刷用水清洗後,將水分徹底瀝乾,並放置於通風處
充分風乾後,再裝回主機。
不可將整個吸頭水洗。
水洗 髒污非常嚴重時
清除垃圾
將開關拉桿滑動至「OPEN」處,拆下皮帶保護蓋。
①
在將旋轉刷抬高的狀態下,將皮帶由齒輪上拆下,
並拆卸旋轉刷。
②
拆下
部位已磨損時,請停止使用,並確認
的內容後,洽詢客戶服務中心。
安全滾輪開關
車輪
緩衝毛墊
(左右各 3 處)
旋轉刷
皮帶保護蓋 開關拉桿
拆下皮帶
皮帶
齒輪
FILTER
FILTER
中文
CN-6
CN-17
EN-15
EN-8
4
EN-17, 18
EN-6
EN-4
Click!
Tips
1
2
3
②
①
Slot
MAINTENANCE
Dust cup assembly
(Red: Turned on)
(Red: Rapidly
blinking)
The operating sound changes or
becomes louder
When fine powder has been suctioned
When the vacuum cleaner body is
heated.
When the Filter care lamp (red) turns
on frequently.
Do not use any paint thinner, benzene product or
hot water (exceeding approx. 40°C).
Care must be taken when
inserting a cleaning brush, since
inserting a cleaning brush too far
may lead to damage.
The Mesh filters (Upper and Lower) may have
different sequence for removal, depending on
how they are matched.
Mesh filter
(Upper)
Mesh filter
(Lower)
Mesh filter
(Upper)
Pleat filter (blue)
Hold on the
handle to lift.
Lift the Cover
section.
Press the Dust disposal
hook (yellow).
Filter Cover
Filter Cover
Dust Cup
Dust disposal
hook (yellow)
Cover section
Turn and remove the Mesh
filters (Upper and Lower).
Remove the Pleat filter
Remove the Dust Cup.
Insert the battery into the vacuum cleaner body.
Notices
Information on Charging
When the remaining charge in the battery becomes low, the
Battery level indicator lamp (green) blinks to notify the
status.
There is no malfunction if the product blinks in an environment with a low temperature (about 5°C or lower) or a high
temperature (about 35°C or higher). Charge the battery in an environment that is between 5°C to 35°C.
The operating time gradually becomes shorter as the
battery is used repeatedly.
If the blinking occurs when the room temperature is between 5°C and 35°C, then it is time to replace the battery.
Information on operating time
The Charging lamp (red) of the charger blinks slowly)
When the Charging lamp (red) of the charger rapidly blinks, that may be caused by malfunction of the charger,
or deterioration or malfunction of the battery. Contact your nearest service center approved by SHARP.
The charging time may be long in following cases.
The battery is charged in an environment at a low temperature (approx. 5°C or lower) or a high temperature
(approx. 35°C or higher) (charge the battery in an environment with at room temperature between 5°C and 35°C).
When not in use for long period of time
Is the battery correctly set to the charger?
Is the power plug of the charger dislodged? Is there any dirt or foreign matter attached to a terminal of
the charger or the battery? Remove the dirt or foreign
matter with dry cloth.
In cases where charging is not possible, verify followings.
Remove the battery
from the charger.
Insert the battery
into the vacuum
cleaner body.
Securely insert the battery along the
grooves on the vacuum cleaner body until
the "click" sound is emitted.
Once the terminals are connected, the Battery Level
Indicator lamp on the vacuum cleaner body turns on
for about five seconds to notify the remaining
charge in the battery. Be sure to securely insert the
battery until the "click" sound is heard, even if the
lamp starts to light up during the process.
Align the
terminals.
Use the hand grip on the cleaning brush to tap on the
raised section (plastic) of the Pleat filter to dislodge dirt
and dust with vibration for easier cleaning.
Continuing the use without cleaning will lead to
automatic stop of the operation.
Cleaning of the filters must be performed.
Lay down newspapers and the like when cleaning
the filters.
If the Filter care lamp (red) rapidly
blinks even after the filter has been
sufficiently cleaned, purchase a Pleat
filter and replace the filter.
The lamp may also turn on when the Suction head is
blocked (when cleaning a mat or when using an
enclosed nozzle and the like) even when the filter is
not dirty. In such instances, press the and then
restart operation to turn the lamp off.
When the suction force is weak
The product stops during operations
Removal
Dispose of dirt and remove the dirt and
dust on the filter in following cases.
Clean the filter by rinsing with water in
following cases.
When the Filter care lamp (red)
is turned on*
When the Filter care lamp (red)
is rapidly blinking*
When a single battery is used
(fully charged and initial condition
of the battery / 20°C). Conditions
may vary depending on the
material of the floor surface,
environment in which the product
is used and the condition under
which the product is used.
Continuous operation time*
High mode
About 8
minutes
About 30
minutes
Standard mode
Raised
section
ENGLISH
Guide for cleaning
EC-A1RHK_A4(W page imposition).indd 17-18 2018/12/06 14:26:59

EN-9
CAUTION
EN-14
EN-13, 14
EN-7
EN-17
1
Click!
②
①
3
2
CAUTION
VACUUMING
Flow of cleaning process
Emptying the Dust Cup
Remove the Dust Cup and dispose of
the dirt.
Remove dirt on the Mesh filters
with a cleaning brush.
Press the Dust disposal
hook (yellow) on the side of
the Cover section.
Lift the Cover
section.
Ensure that no dirt
remains at the bottom
of the Dust Cup.
Cover
section
Mesh filter
Mount the Dust Cup.
Protrusion
Dust
disposal
hook
(yellow)
Align the protrusion on the Dust Cup and the
Dust disposal hook (yellow) and insert.
When used continuously for long time
Dust disposal
hook (yellow)
Securely push in the direction of
the arrow
Hook
(blue)
Click!
Recessed
section
Put the recessed section on the Dust
Cup to the hook (blue) on the vacuum
cleaner body
Install the Dust cup assembly
on the vacuum cleaner body.
When the dirt is
entangled and does
not come off
Clean the Dust cup
assembly.
Dust accumulates on the built
in Pleat Filter.
Clean this dust out.
Mounting the Dust
Cup Assembly
Control
switch The mode toggles between the "High mode" and the "Standard
mode" each time it is pressed.
High mode: When cleaning with maximum suction power.
Standard mode: When cleaning with subdued suction power.
(When a mat or a rug tends to block the Suction head,
for instance.)
Start
Finish
The Rotary brush stops automatically for safety
purpose when the Suction head (roller switch on the
bottom side ) is off the floor while cleaning.
The operation does not stop in such instances.
The rotation restarts when the Suction head contacts
the floor and moved.
Cleaning
completed
Notices
Safety Stop
Even when a cleaning session is completed in the Standard mode, the operation starts with the
High mode if the is pressed the next time.
The Rotary brush of the Suction head automatically turns when the cleaning starts.
When the remaining charge in the battery becomes depleted while operating, the operation is
automatically stopped to prevent excessive discharge that can deteriorate battery. Always charge
the battery each time the product is used for cleaning, regardless of how long it was used.
During the cleaning of mats or rugs, the Suction head may get stuck to the material and the
Rotary brush may stop.
In this case, continue cleaning in Standard mode.
Charging the
battery
Disposing of dirt is recommended
after each cleaning session, for the
purpose of hygiene.
Even when the Suction
head contacts the floor if
the Roller Switch is off the
floor the operation is
temporarily suspended.
Do not touch the Rotary Brush or Roller Switch while the operation is
temporarily suspended.
[Risk of injury when the Rotary brush starts to operate]
Be sure to press the to stop the operation when cleaning the Suction
head.
Caution is required to
ensure that the Mesh
filters (Upper and
Lower) are not lost
while throwing out dirt
or cleaning.
The Dust cup assembly cannot be
installed properly on the vacuum
cleaner body unless it is
completely assembled.
The Pleat filter cannot be installed
on the vacuum cleaner body unless
it is installed on the Dust Cup.
The suction power may decline,
abnormal noise may be heard, dirt
may enter into the motor and other
issues may arise that may lead to
product malfunction unless the Dust
cup assembly is securely installed
on the vacuum cleaner body.
EN-15, 16
EN-15, 16
ENGLISH
準備 為延長電池的使用壽命,
請參閱。 。
CN-6
CN-17 CN-17 CN-17
電池充電
剛購入時的電池尚未充分充電,使用前請務必先將電池由主機上拆下,並充電至充電器的充電指示燈
(紅色)熄滅為止。
將電池由主機上拆下。
電池拆卸鍵
在將電池拆卸鍵朝箭頭方向
按住不放的狀態下,
將電池朝箭頭方向拆下。
將充電器的電源插頭插入插座。
(插頭圖樣並不代表該國家所使用的插頭)
充電器
將電池裝到充電器上進行充電。
確實插到底。
請確認充電指示燈(紅色)是
否已亮燈。
持續閃爍時(以約 1 秒的間隔反覆「閃爍」),
代表未確實插到底。
請重新將電池插到底。
參考時間會因充電開始時的
電池剩餘電量而改變。
對準端子
充電指示燈(紅色)的
亮燈方式
自開始充電起算的
參考時間 ※
充電狀態
亮燈 充電中
熄滅 充電完成(完全充滿) 約 80 分鐘
重要須知 充電中的充電器與電池溫
度將會上升,此為正常現
象,並非異常。
充電中與剛充完電時,充電器與電池的端
子會處於高溫狀態,請勿觸碰。
【否則可能造成灼傷】
注意!
可水洗的物品
保養
摺疊濾網
外側
請勿使用清潔刷。
【否則可能造成破損】
垃圾常會累積於內側,請依照右圖
的方向敲擊。
將垃圾與灰塵敲落。
以清潔刷去除垃圾與灰塵。
圓筒形濾網(上/下)、濾網盒
輕輕刷拭
網眼。
髒污非常嚴重時請水洗。
摺疊濾網(藍色)
使用清水或稀釋過的中性清潔劑清洗。
若對異味及髒污比較在
意的話,可以用50˚C以
下的水浸泡1-2小時後,
再進行清洗。
請仔細清洗內側。
濾網盒 圓筒形濾網 集塵筒
請先水洗後,再充分去除水分。
充分去除水分後,再進行組裝。
【保養後仍無法改善濾網堵塞情況的原因】
不可吹到吹風機等機器的熱風。
【否則將造成變形或故障】
請確實瀝乾水分,並以毛巾等輕柔擦乾水分後,放置
於通風良好處陰乾,讓其充分乾燥。【發生異味與故
障的原因】
風乾時間參考值:12 小時
(會因環境或季節而改變) 注意!
清理垃圾或保養時,請注意避免遺失
圓筒形濾網(上/下)。
未正確組裝各零件時,將無法安裝至
主機上。
突起處
咔嚓
垃圾清理鍵
(黃色)
將集塵筒的突起處對準垃圾清理鍵(黃色)
後,將其推入。
安裝集塵筒。
請先確認圓筒形濾網內確實無垃圾與異物後,
再進行安裝。【發生異常聲響的原因】
卡榫 卡槽
將摺疊濾網的卡榫對準濾網盒
的卡槽後,將其推入。
對準位置 轉動
對準位置 轉動
安裝濾網盒與圓筒形濾網
(上/下)。
組裝
警 告
保養時請務必遵守以下事項。
【否則將造成觸電或受傷事故】
充電器需將電源插頭拔出。
主機需按下 停止運作後,再拆下電池。
電源插頭
CN-7
CN-16
中文
EC-A1RHK_A4(W page imposition).indd 19-20 2018/12/06 14:27:00

重要須知
保養 集塵筒組
進行保養的時候 拆下
如有以下情況,請去除濾網中的垃圾與
灰塵。
清理濾網燈(紅色)亮燈時※
(紅色:亮燈)
(紅色:快速閃爍)
運作中途停止時
吸力變弱時
運作聲忽大忽小,或變得很大聲時。
如有以下情況,請用水清洗濾網。
清理濾網燈(紅色)快速閃爍時
充分保養濾網後,清理濾網燈(紅色)仍
快速閃爍時,請購買選購品中的摺疊濾網
,並進行更換。
清理濾網燈(紅色)頻繁亮燈時
吸塵機吸入細微粉末類物質時
主機過熱時
吸頭被堵住時(清理踏墊或使用附屬吸頭等情況),
即使濾網並不髒,亦可能會亮燈。如遇此情況,請先
按下 後,再讓吸塵機運作,指示燈即會熄滅。
重要須知
請勿使用稀釋劑、揮發油、以及熱水(約 40°C
以上)。
在未進行保養的情況下讓其繼續運作時,將自動停
止。請務必保養。
請先鋪上報紙等物品後,再進行保養。
拆下集塵筒。
拆下摺疊濾網。
以轉動方式拆下圓筒形濾網
(上/下)。
按下垃圾清理鍵
(黃色)。 濾網盒部位
集塵筒
垃圾清理鍵
(黃色)
摺疊濾網(藍色)
握住濾網盒部位
向上抬高
握住握把
向上抬高
濾網盒
圓筒形濾網(上)
圓筒形濾網(下)
圓筒形濾網(上)
濾網盒
圓筒形濾網(上/下)的拆解順序,可能會因嵌合的
狀態而改變。
使用清潔刷的握柄輕拍高性能摺疊式濾網的頂端部位
(塑膠)時,可藉由震動將垃圾與灰塵彈落,簡化保
養作業。
頂端部位
將清潔刷插入深處時,可能會造
成破損,敬請小心注意。
咔嚓
將電池插入主機
將電池由充電器中
抽出。
將電池插入主機。
重要須知
請沿著主機的凹槽,確實插入至聽見「咔嚓」
聲為止。
端子接觸後,主機的電池指示燈將亮燈約
5 秒鐘,顯示電池的剩餘電力。即使在尚
未完全插入的狀態下指示燈即已亮燈,仍
請務必完全插入至聽見「咔嚓」聲為止。
凹槽
對準端子
無法充電時,請確認以下事項。
充電器的電源插頭是否鬆脫?
電池是否正確安裝在充電器上?
CN-17、18
充電器與電池的端子有無污垢或異物附著?請以乾布
擦拭乾淨。
<填寫位置>
開始使用日期
年 月 日
開始使用電池時
請於電池上填寫開始使用日期。
(以便在修理等情況下作為參考)
關於充電
關於運作時間
充電器的充電中指示燈(紅色)緩慢閃爍時
以下情況可能會導致充電時間變長。
長時間未使用時
於低溫(約 5°C 以下)或高溫(約 35°C 以上)的環境中充電時 (請於室溫為 5°C∼35°C 的環境中充電。)
電池剩餘電力耗盡時,主機的電池剩餘電力指示燈
(綠色)將以持續閃爍的方式通知使用者。
電池會因反覆使用而使運作時間逐漸縮短。
充電器的充電中指示燈(紅色)快速閃爍時,可能是充電器故障,或是電池劣化及故障。
請洽詢客戶服務中心。
在低溫(約 5°C 以下)或高溫(約 35°C 以上)的環境中閃爍時,屬於正常現象,並非故障。
請於 5°C∼35°C 的環境中充電。
在室溫為 5°C∼35°C 的環境中閃爍時,代表電池已屆更換時期。
CN-6
CN-4
最長連續運作時間※
強力模式
約8 分鐘
約30 分鐘
標準模式
使用 1 個電池的情況(完全
充滿電、電池使用初期/
20°C)。
會因地板材質、使用環境、
使用狀態而改變。
中文
CN-15
CN-8
EN-13
Tips
EN-15, 16
CAUTION
EN-10
CAUTION
EN-
17
EMPTYING THE DUST CUP
Guide for disposing
of dirt
Mesh filter
Disposing of dirt is recommended after
each cleaning session, for the purpose of
hygiene.
"MAX" line
MAX
(Red: Turned on)
Pull out from the
position depicted
in the diagram.
It is on the vacuum cleaner body
side after the Dust cup assembly
has been removed.
Removing the Cleaning Brush
Removal
Removing the Dust cup assembly
Cup release lever
For cleaning
floors.
Moving the Suction head (wheel) sideways or diagonally can result in scratches and markings on
the floor surface.
The product can be left in the conditions depicted in the diagrams below when pausing
the cleaning operation.
Resting the
vacuum cleaner
Do not leave the product while leaning on an object.
Verify that there is nothing in the vicinity of the product that can be damaged easily when standing
the vacuum cleaner body leaned on an object.
Pay particular attention to ensure no infant or pet is allowed to get near the product.
Keep the Suction head contacting the floor surface when pausing the cleaning operation.
[Risk of falling or tumbling of the product]
Hook the holder
section onto a
table or the like.
Hook the holder
section on a chair
or the like.
Place the product on a flat floor.
Always press the and stop the
operation of the product.
Standing state
Do not clean while pressing the Suction head hard against the floor surface.
The wheels and Napped cushions may wear quickly and scratch the floor surface.
Always install the Suction head or an Accessory Suction head when cleaning.
[Risk of scratching of floor surface or product malfunction]
There are instances where the rotation of the wheels deteriorate due to the entanglement of pet hair and
the like on the wheels. Be sure to clean the wheels often.
Move the Suction head so that it moves
lightly and glides slowly.
More dirt is suctioned this way than quickly
moving the Suction head back and forth.
This also prevents scratching of the vacuum
cleaner and the floor surface.
Stick state Handy state
For cleaning
stairs.
Pull the Cup release lever
while standing the vacuum
cleaner body vertically.
Cleaning is not
required for the built
in filter.
Do not remove the
filter.
Dispose of the dirt in the Dust Cup and
follow the procedure described on the right
to remove the dirt on the Mesh filter. If the
lamp still does not turn off, clean the unit.
The lamp may also turn on when the Suction head is
blocked (when cleaning a mat or when using an
enclosed nozzle and the like) even when the filter is
not dirty. In such instances, press the and then
restart operation to turn the lamp off.
Dispose of the dirt on newspapers or over a dirt
bin. [Dust could spill out]
Continuing to operate the product without
disposing of the accumulating dirt results in the
deterioration of the suction power due to the
attachment of the dirt on the Mesh filters. Be sure
to dispose of the dirt.
Continuing to operate the product without
disposing of the dirt may lead to the product
malfunction.
When the level of the accumulated
dirt reaches the "MAX" line.
When the Filter care lamp (red)
is turned on*
Removal
Tips for Vacuuming
Dispose of the dirt before the level of the
accumulated dirt exceeds the height of the
line, even when the dirt is leaning on one
side or the other.
Holder
section
MAX
EN-
17
ENGLISH
EC-A1RHK_A4(W page imposition).indd 21-22 2018/12/06 14:27:00

EN-11
EN-12
CAUTION
Using Accessory Suction Inlet (Duster nozzle and Crevice nozzle)
CAUTION
VACUUMING
Using accessory nozzles (Duster nozzle and Crevice nozzle)
Duster nozzle
Use
Attach
Click!
Release
button
Removal
Attach
Click!
Release
button
Removal
Attach
Use
Click!
Release
button
Removal
Attach
Click!
Release
button
Removal
Careful not to pinch a hand or a finger!
Press the Release button for the vacuum cleaner
body or the pipe to remove the accessory.
Insert securely and use.
Crevice nozzle
For cleaning gaps between furniture and sash on
the windows.
Do not use the product to
clean items that scratch
easily, such as a piano.
The accessory may be used by attaching on the
vacuum cleaner body or on a pipe.
This is a hole intended to
prevent overheating of the
motor in an enclosure.
Do not block the hole.
Tip
Rotating
section
Lock Release
Press the Release button for the vacuum cleaner
body or the pipe to remove the accessory.
Careful not to pinch a hand or
a finger in the rotating section
when changing the angle!
Insert securely and use.
Turn while pressing the Lock
Release to change the angle.
Do not press the while operating
when cleaning with the vacuum
cleaner body facing up.
Press the after facing the Suction
head downward to stop the operation.
Pressing the while the product is
facing up may lead to the dirt spilling out
of the vacuum cleaner body.
For cleaning high places, such as above furniture.
The accessory may be used by attaching on the
vacuum cleaner body or on a pipe.
ENGLISH
●
●
●
操作方法
開關
操作流程
開始
結束
每次按下時,將在「強力模式」⇔「標準模式」之間進行切換。
強力模式:希望以最大吸力清掃時
標準模式:希望降低吸力清掃時
(吸住踏墊或小型地毯等物品時)
清掃完成
CN-7
CN-17
CN-13、14
CN-15、16
CN-15、16
電池充電
基於衛生考量,建議每次清掃
時皆清空垃圾。
重要須知
安全停止
開始清掃後,吸頭上的旋轉刷將自動開始旋轉。
清潔踏墊和小型地毯等時可能會有異物進入吸頭導致旋轉刷停止。
這種情況下,請使用標準模式清潔。
即使於標準模式下結束清掃,下次按下 時,仍會以強力模式開始運作。
電池剩餘電力於運作期間耗盡時,將自動停止,以避免因過度放電造成電池劣化。
不論使用時間長短,清掃完畢後請務必對電池充電。
清掃期間將吸頭(反面的安全滾輪開關 )抬離
地板時,旋轉刷將自動暫停以確保安全。此時運作動作
不會停止。
將吸頭貼在地板上移動後,即會繼續旋轉。
注意! 暫停期間請勿觸碰旋轉刷或安全滾輪開關。
【否則將造成旋轉刷開始運作,引發受傷事故。】
保養吸頭時,請務必先按下 停止運作後,再開始保養。
即使吸頭仍貼著地板,
但安全滾輪開關離開地
板時依然會暫停。
清理垃圾 安裝
拆下集塵筒清空垃圾。
按下濾網盒部位
側面的清理垃圾
鍵(黃色)。
握住濾網盒部位
向上抬高
濾網盒部位
垃圾清理鍵
(黃色)
請確認集塵筒的底部是
否無垃圾殘留。
以清潔刷清除圓筒形濾網上的垃圾。
圓筒形濾網
無垃圾纏繞時
保養集塵筒組。
長期持續使用後
內建的摺疊濾網將積滿灰塵。
請進行保養。
安裝集塵筒。
將集塵筒的突起處對準垃圾清理鍵(黃色)後,
將其推入。
咔嚓
突起處
垃圾清理鍵
(黃色)
注意!
清理垃圾或保養時,請
注意避免遺失圓筒形濾
網(上/下)。
集塵筒組必須事先組裝完成,
否則無法確實安裝至主機上。
未將摺疊濾網安裝於集塵筒
上時,無法安裝至主機上。
未將集塵筒組確實安裝於主
機時,將引發吸力減弱、發
出異常聲響、垃圾混入馬達
中等故障。
咔嚓
朝箭頭指示方向確實推入
鉤扣
(藍色)
卡槽部位
將集塵筒的卡槽部位扣住主機
上的鉤扣(藍色)。
將集塵筒組安裝至主機上。
CN-9
CN-14
中文
●
EC-A1RHK_A4(W page imposition).indd 23-24 2018/12/06 14:27:00

清理垃圾
需清理垃圾時 拆下
清掃要訣
累積的垃圾量接近「MAX」指示
線附近時
清理濾網燈(紅色)亮燈時※
圓筒形濾網
「MAX」指示線
基於衛生考量,建議每次清掃時皆清空
垃圾。
累積的垃圾不平均時,亦請在超出
「MAX」指示線之前即加以清理。
(紅色:亮燈)
清空集塵筒內的垃圾後,請依照右側的
順序,一併清理圓筒形濾網上的垃圾。
採取以上措施後燈號仍未熄滅時,請進
行保養。
CN-15、16
吸頭被堵住時(清理踏墊或使用附屬吸頭等情況),
即使濾網並不髒,亦可能會亮燈。如遇此情況,請先
按下 後,再讓吸塵機運作,指示燈即會熄滅。
重要須知
清理垃圾的動作,請於報紙或垃圾桶等物品
的上方進行。【垃圾可能會溢出】
未清理垃圾即繼續運作時,將會使垃圾附著
在圓筒形濾網上,造成吸力減弱。請務必清
空垃圾。
未清空垃圾並繼續運作時,將引發故障。 由圖中位置取出
取出清潔刷
安裝於主機卡槽上。
拆下
內建式濾網不須保養。
請勿拆下。
集塵筒拆卸開關
在將主機垂直立起的狀態下,
拉動集塵筒拆卸開關。
同時將集塵筒組拆下。
適用於清掃樓梯。適用於清掃
地板。
直立狀態 手提狀態
注意!
清掃榻榻米時,需沿著縫隙移動。
挺直背部,減少身體負擔。
以讓吸頭緩慢地輕輕滑動的方式移動。
與快速前後移動的方式相較,可更有效地
吸入垃圾,並且防止吸塵機或地板刮傷。
要暫停清掃時,可放置成下圖中的狀態。
斜靠的狀態 扣住的狀態
將固定墊斜靠
在桌子等物品
上。
將固定墊扣住
椅子等物品。
固定墊
請放置於平坦的地板上。
請務必先按下 停止運作。
注意!
為防止主機傾倒,請勿放置於地毯、椅墊、踏墊類、軟質地板、表面凹凸不平或波浪狀
的地板、傾斜的地面、地板以外的其他地點等場所。
以斜靠方式放置主機時,請確認周圍有無容易損壞的物品。
尤其請注意避免嬰幼兒與寵物靠近。
要暫停清掃時,請將吸頭調整成與地面貼合的狀態。
【否則將使其掉落或傾倒】
請勿長時間以斜靠的方式放置主機。
CN-17
CN-17
寵物毛髮可能會纏繞在車輪上,導致車輪轉動不良。
請頻繁保養。
將地板吸頭(車輪)朝側面或斜向移動時,可能會造成地板刮傷或留下痕跡。
因移動吸頭而導致新建築物等上蠟的地板光澤出現落差時,請使用乾的抹布擦拭後,再次上蠟並讓其
乾燥。
請勿將吸頭用力頂住地板清掃。
否則恐造成車輪與緩衝毛墊 加速磨損,導致地板刮傷。
清掃時請務必裝上地板吸頭或附屬吸頭配件。
【否則可能造成損傷或故障】
杉木、日本扁柏、松木、塑膠地板等容易刮傷的地板,以及使用地板蠟、塗裝劑後的地板,可能會因
吸頭移動而造成刮傷。
尤其請避免將吸頭用力頂住地板移動,或是持續在相同位置運作。
中文
CN-13
CN-10
EN-11
EN-12
CAUTION
Using Accessory Suction Inlet (Duster nozzle and Crevice nozzle)
CAUTION
VACUUMING
Using accessory nozzles (Duster nozzle and Crevice nozzle)
Duster nozzle
Use
Attach
Click!
Release
button
Removal
Attach
Click!
Release
button
Removal
Attach
Use
Click!
Release
button
Removal
Attach
Click!
Release
button
Removal
Careful not to pinch a hand or a finger!
Press the Release button for the vacuum cleaner
body or the pipe to remove the accessory.
Insert securely and use.
Crevice nozzle
For cleaning gaps between furniture and sash on
the windows.
Do not use the product to
clean items that scratch
easily, such as a piano.
The accessory may be used by attaching on the
vacuum cleaner body or on a pipe.
This is a hole intended to
prevent overheating of the
motor in an enclosure.
Do not block the hole.
Tip
Rotating
section
Lock Release
Press the Release button for the vacuum cleaner
body or the pipe to remove the accessory.
Careful not to pinch a hand or
a finger in the rotating section
when changing the angle!
Insert securely and use.
Turn while pressing the Lock
Release to change the angle.
Do not press the while operating
when cleaning with the vacuum
cleaner body facing up.
Press the after facing the Suction
head downward to stop the operation.
Pressing the while the product is
facing up may lead to the dirt spilling out
of the vacuum cleaner body.
For cleaning high places, such as above furniture.
The accessory may be used by attaching on the
vacuum cleaner body or on a pipe.
ENGLISH
EC-A1RHK_A4(W page imposition).indd 25-26 2018/12/06 14:27:01

EN-13
Tips
EN-15, 16
CAUTION
EN-10
CAUTION
EN-
17
EMPTYING THE DUST CUP
Guide for disposing
of dirt
Mesh filter
Disposing of dirt is recommended after
each cleaning session, for the purpose of
hygiene.
"MAX" line
MAX
(Red: Turned on)
Pull out from the
position depicted
in the diagram.
It is on the vacuum cleaner body
side after the Dust cup assembly
has been removed.
Removing the Cleaning Brush
Removal
Removing the Dust cup assembly
Cup release lever
For cleaning
floors.
Moving the Suction head (wheel) sideways or diagonally can result in scratches and markings on
the floor surface.
The product can be left in the conditions depicted in the diagrams below when pausing
the cleaning operation.
Resting the
vacuum cleaner
Do not leave the product while leaning on an object.
Verify that there is nothing in the vicinity of the product that can be damaged easily when standing
the vacuum cleaner body leaned on an object.
Pay particular attention to ensure no infant or pet is allowed to get near the product.
Keep the Suction head contacting the floor surface when pausing the cleaning operation.
[Risk of falling or tumbling of the product]
Hook the holder
section onto a
table or the like.
Hook the holder
section on a chair
or the like.
Place the product on a flat floor.
Always press the and stop the
operation of the product.
Standing state
Do not clean while pressing the Suction head hard against the floor surface.
The wheels and Napped cushions may wear quickly and scratch the floor surface.
Always install the Suction head or an Accessory Suction head when cleaning.
[Risk of scratching of floor surface or product malfunction]
There are instances where the rotation of the wheels deteriorate due to the entanglement of pet hair and
the like on the wheels. Be sure to clean the wheels often.
Move the Suction head so that it moves
lightly and glides slowly.
More dirt is suctioned this way than quickly
moving the Suction head back and forth.
This also prevents scratching of the vacuum
cleaner and the floor surface.
Stick state Handy state
For cleaning
stairs.
Pull the Cup release lever
while standing the vacuum
cleaner body vertically.
Cleaning is not
required for the built
in filter.
Do not remove the
filter.
Dispose of the dirt in the Dust Cup and
follow the procedure described on the right
to remove the dirt on the Mesh filter. If the
lamp still does not turn off, clean the unit.
The lamp may also turn on when the Suction head is
blocked (when cleaning a mat or when using an
enclosed nozzle and the like) even when the filter is
not dirty. In such instances, press the and then
restart operation to turn the lamp off.
Dispose of the dirt on newspapers or over a dirt
bin. [Dust could spill out]
Continuing to operate the product without
disposing of the accumulating dirt results in the
deterioration of the suction power due to the
attachment of the dirt on the Mesh filters. Be sure
to dispose of the dirt.
Continuing to operate the product without
disposing of the dirt may lead to the product
malfunction.
When the level of the accumulated
dirt reaches the "MAX" line.
When the Filter care lamp (red)
is turned on*
Removal
Tips for Vacuuming
Dispose of the dirt before the level of the
accumulated dirt exceeds the height of the
line, even when the dirt is leaning on one
side or the other.
Holder
section
MAX
EN-
17
ENGLISH
注意!
使用隨附吸頭時(毛刷吸頭、狹縫吸頭)
操作方法
使用附屬吸頭時(除塵毛刷吸頭、狹縫吸頭)
除塵毛刷吸頭
狹縫吸頭
適用於清掃家具上方等高處。
請確實插入後再使用。
可安裝於主機或延長管上使用。
使用
以主機朝上的方式清掃時,運作期間
請勿按下 。
要停止運作時,請先將吸頭朝向下方
後,再按下 。
在朝向上方的狀態按下 時,垃圾
可能會由主機上掉落。
咔嚓
安裝
咔嚓
安裝
裝卸按鍵
拆下
裝卸按鍵
拆下
咔嚓
安裝
裝卸按鍵
拆下 咔嚓
安裝
裝卸按鍵
拆下
卡榫
要改變角度時,請按住卡榫並同時轉動。
注意!
改變角度時,請注意避免手掌
或手指被旋轉部位夾傷。
前端部位
旋轉部位
注意! 請避免手掌或手指被夾傷。
請同時按住主機或延長管上的裝卸
按鍵拆下。
請確實插入後再使用。
使用
避免馬達因密閉而過熱的
開孔。
請勿將其堵住。
適用於清掃家具之間的縫隙及窗框等處。
可安裝於主機或延長管上使用。
※請勿用於清掃鋼琴等
容易刮傷的物品。
同時按住主機或延長管上的裝卸按鍵拆下。
CN-11
CN-12
中文
EC-A1RHK_A4(W page imposition).indd 27-28 2018/12/06 14:27:01

注意!
使用隨附吸頭時(毛刷吸頭、狹縫吸頭)
操作方法
使用附屬吸頭時(除塵毛刷吸頭、狹縫吸頭)
除塵毛刷吸頭
狹縫吸頭
適用於清掃家具上方等高處。
請確實插入後再使用。
可安裝於主機或延長管上使用。
使用
以主機朝上的方式清掃時,運作期間
請勿按下 。
要停止運作時,請先將吸頭朝向下方
後,再按下 。
在朝向上方的狀態按下 時,垃圾
可能會由主機上掉落。
咔嚓
安裝
咔嚓
安裝
裝卸按鍵
拆下
裝卸按鍵
拆下
咔嚓
安裝
裝卸按鍵
拆下 咔嚓
安裝
裝卸按鍵
拆下
卡榫
要改變角度時,請按住卡榫並同時轉動。
注意!
改變角度時,請注意避免手掌
或手指被旋轉部位夾傷。
前端部位
旋轉部位
注意! 請避免手掌或手指被夾傷。
請同時按住主機或延長管上的裝卸
按鍵拆下。
請確實插入後再使用。
使用
避免馬達因密閉而過熱的
開孔。
請勿將其堵住。
適用於清掃家具之間的縫隙及窗框等處。
可安裝於主機或延長管上使用。
※請勿用於清掃鋼琴等
容易刮傷的物品。
同時按住主機或延長管上的裝卸按鍵拆下。
CN-11
CN-12
中文
EN-9
CAUTION
EN-14
EN-13, 14
EN-7
EN-17
1
Click!
②
①
3
2
CAUTION
VACUUMING
Flow of cleaning process
Emptying the Dust Cup
Remove the Dust Cup and dispose of
the dirt.
Remove dirt on the Mesh filters
with a cleaning brush.
Press the Dust disposal
hook (yellow) on the side of
the Cover section.
Lift the Cover
section.
Ensure that no dirt
remains at the bottom
of the Dust Cup.
Cover
section
Mesh filter
Mount the Dust Cup.
Protrusion
Dust
disposal
hook
(yellow)
Align the protrusion on the Dust Cup and the
Dust disposal hook (yellow) and insert.
When used continuously for long time
Dust disposal
hook (yellow)
Securely push in the direction of
the arrow
Hook
(blue)
Click!
Recessed
section
Put the recessed section on the Dust
Cup to the hook (blue) on the vacuum
cleaner body
Install the Dust cup assembly
on the vacuum cleaner body.
When the dirt is
entangled and does
not come off
Clean the Dust cup
assembly.
Dust accumulates on the built
in Pleat Filter.
Clean this dust out.
Mounting the Dust
Cup Assembly
Control
switch The mode toggles between the "High mode" and the "Standard
mode" each time it is pressed.
High mode: When cleaning with maximum suction power.
Standard mode: When cleaning with subdued suction power.
(When a mat or a rug tends to block the Suction head,
for instance.)
Start
Finish
The Rotary brush stops automatically for safety
purpose when the Suction head (roller switch on the
bottom side ) is off the floor while cleaning.
The operation does not stop in such instances.
The rotation restarts when the Suction head contacts
the floor and moved.
Cleaning
completed
Notices
Safety Stop
Even when a cleaning session is completed in the Standard mode, the operation starts with the
High mode if the is pressed the next time.
The Rotary brush of the Suction head automatically turns when the cleaning starts.
When the remaining charge in the battery becomes depleted while operating, the operation is
automatically stopped to prevent excessive discharge that can deteriorate battery. Always charge
the battery each time the product is used for cleaning, regardless of how long it was used.
During the cleaning of mats or rugs, the Suction head may get stuck to the material and the
Rotary brush may stop.
In this case, continue cleaning in Standard mode.
Charging the
battery
Disposing of dirt is recommended
after each cleaning session, for the
purpose of hygiene.
Even when the Suction
head contacts the floor if
the Roller Switch is off the
floor the operation is
temporarily suspended.
Do not touch the Rotary Brush or Roller Switch while the operation is
temporarily suspended.
[Risk of injury when the Rotary brush starts to operate]
Be sure to press the to stop the operation when cleaning the Suction
head.
Caution is required to
ensure that the Mesh
filters (Upper and
Lower) are not lost
while throwing out dirt
or cleaning.
The Dust cup assembly cannot be
installed properly on the vacuum
cleaner body unless it is
completely assembled.
The Pleat filter cannot be installed
on the vacuum cleaner body unless
it is installed on the Dust Cup.
The suction power may decline,
abnormal noise may be heard, dirt
may enter into the motor and other
issues may arise that may lead to
product malfunction unless the Dust
cup assembly is securely installed
on the vacuum cleaner body.
EN-15, 16
EN-15, 16
ENGLISH
EC-A1RHK_A4(W page imposition).indd 29-30 2018/12/06 14:27:02

EN-15
EN-8
4
EN-17, 18
EN-6
EN-4
Click!
Tips
1
2
3
②
①
Slot
MAINTENANCE
Dust cup assembly
(Red: Turned on)
(Red: Rapidly
blinking)
The operating sound changes or
becomes louder
When fine powder has been suctioned
When the vacuum cleaner body is
heated.
When the Filter care lamp (red) turns
on frequently.
Do not use any paint thinner, benzene product or
hot water (exceeding approx. 40°C).
Care must be taken when
inserting a cleaning brush, since
inserting a cleaning brush too far
may lead to damage.
The Mesh filters (Upper and Lower) may have
different sequence for removal, depending on
how they are matched.
Mesh filter
(Upper)
Mesh filter
(Lower)
Mesh filter
(Upper)
Pleat filter (blue)
Hold on the
handle to lift.
Lift the Cover
section.
Press the Dust disposal
hook (yellow).
Filter Cover
Filter Cover
Dust Cup
Dust disposal
hook (yellow)
Cover section
Turn and remove the Mesh
filters (Upper and Lower).
Remove the Pleat filter
Remove the Dust Cup.
Insert the battery into the vacuum cleaner body.
Notices
Information on Charging
When the remaining charge in the battery becomes low, the
Battery level indicator lamp (green) blinks to notify the
status.
There is no malfunction if the product blinks in an environment with a low temperature (about 5°C or lower) or a high
temperature (about 35°C or higher). Charge the battery in an environment that is between 5°C to 35°C.
The operating time gradually becomes shorter as the
battery is used repeatedly.
If the blinking occurs when the room temperature is between 5°C and 35°C, then it is time to replace the battery.
Information on operating time
The Charging lamp (red) of the charger blinks slowly)
When the Charging lamp (red) of the charger rapidly blinks, that may be caused by malfunction of the charger,
or deterioration or malfunction of the battery. Contact your nearest service center approved by SHARP.
The charging time may be long in following cases.
The battery is charged in an environment at a low temperature (approx. 5°C or lower) or a high temperature
(approx. 35°C or higher) (charge the battery in an environment with at room temperature between 5°C and 35°C).
When not in use for long period of time
Is the battery correctly set to the charger?
Is the power plug of the charger dislodged? Is there any dirt or foreign matter attached to a terminal of
the charger or the battery? Remove the dirt or foreign
matter with dry cloth.
In cases where charging is not possible, verify followings.
Remove the battery
from the charger.
Insert the battery
into the vacuum
cleaner body.
Securely insert the battery along the
grooves on the vacuum cleaner body until
the "click" sound is emitted.
Once the terminals are connected, the Battery Level
Indicator lamp on the vacuum cleaner body turns on
for about five seconds to notify the remaining
charge in the battery. Be sure to securely insert the
battery until the "click" sound is heard, even if the
lamp starts to light up during the process.
Align the
terminals.
Use the hand grip on the cleaning brush to tap on the
raised section (plastic) of the Pleat filter to dislodge dirt
and dust with vibration for easier cleaning.
Continuing the use without cleaning will lead to
automatic stop of the operation.
Cleaning of the filters must be performed.
Lay down newspapers and the like when cleaning
the filters.
If the Filter care lamp (red) rapidly
blinks even after the filter has been
sufficiently cleaned, purchase a Pleat
filter and replace the filter.
The lamp may also turn on when the Suction head is
blocked (when cleaning a mat or when using an
enclosed nozzle and the like) even when the filter is
not dirty. In such instances, press the and then
restart operation to turn the lamp off.
When the suction force is weak
The product stops during operations
Removal
Dispose of dirt and remove the dirt and
dust on the filter in following cases.
Clean the filter by rinsing with water in
following cases.
When the Filter care lamp (red)
is turned on*
When the Filter care lamp (red)
is rapidly blinking*
When a single battery is used
(fully charged and initial condition
of the battery / 20°C). Conditions
may vary depending on the
material of the floor surface,
environment in which the product
is used and the condition under
which the product is used.
Continuous operation time*
High mode
About 8
minutes
About 30
minutes
Standard mode
Raised
section
ENGLISH
Guide for cleaning
清理垃圾
需清理垃圾時 拆下
清掃要訣
累積的垃圾量接近「MAX」指示
線附近時
清理濾網燈(紅色)亮燈時※
圓筒形濾網
「MAX」指示線
基於衛生考量,建議每次清掃時皆清空
垃圾。
累積的垃圾不平均時,亦請在超出
「MAX」指示線之前即加以清理。
(紅色:亮燈)
清空集塵筒內的垃圾後,請依照右側的
順序,一併清理圓筒形濾網上的垃圾。
採取以上措施後燈號仍未熄滅時,請進
行保養。
CN-15、16
吸頭被堵住時(清理踏墊或使用附屬吸頭等情況),
即使濾網並不髒,亦可能會亮燈。如遇此情況,請先
按下 後,再讓吸塵機運作,指示燈即會熄滅。
重要須知
清理垃圾的動作,請於報紙或垃圾桶等物品
的上方進行。【垃圾可能會溢出】
未清理垃圾即繼續運作時,將會使垃圾附著
在圓筒形濾網上,造成吸力減弱。請務必清
空垃圾。
未清空垃圾並繼續運作時,將引發故障。 由圖中位置取出
取出清潔刷
安裝於主機卡槽上。
拆下
內建式濾網不須保養。
請勿拆下。
集塵筒拆卸開關
在將主機垂直立起的狀態下,
拉動集塵筒拆卸開關。
同時將集塵筒組拆下。
適用於清掃樓梯。適用於清掃
地板。
直立狀態 手提狀態
注意!
清掃榻榻米時,需沿著縫隙移動。
挺直背部,減少身體負擔。
以讓吸頭緩慢地輕輕滑動的方式移動。
與快速前後移動的方式相較,可更有效地
吸入垃圾,並且防止吸塵機或地板刮傷。
要暫停清掃時,可放置成下圖中的狀態。
斜靠的狀態 扣住的狀態
將固定墊斜靠
在桌子等物品
上。
將固定墊扣住
椅子等物品。
固定墊
請放置於平坦的地板上。
請務必先按下 停止運作。
注意!
為防止主機傾倒,請勿放置於地毯、椅墊、踏墊類、軟質地板、表面凹凸不平或波浪狀
的地板、傾斜的地面、地板以外的其他地點等場所。
以斜靠方式放置主機時,請確認周圍有無容易損壞的物品。
尤其請注意避免嬰幼兒與寵物靠近。
要暫停清掃時,請將吸頭調整成與地面貼合的狀態。
【否則將使其掉落或傾倒】
請勿長時間以斜靠的方式放置主機。
CN-17
CN-17
寵物毛髮可能會纏繞在車輪上,導致車輪轉動不良。
請頻繁保養。
將地板吸頭(車輪)朝側面或斜向移動時,可能會造成地板刮傷或留下痕跡。
因移動吸頭而導致新建築物等上蠟的地板光澤出現落差時,請使用乾的抹布擦拭後,再次上蠟並讓其
乾燥。
請勿將吸頭用力頂住地板清掃。
否則恐造成車輪與緩衝毛墊 加速磨損,導致地板刮傷。
清掃時請務必裝上地板吸頭或附屬吸頭配件。
【否則可能造成損傷或故障】
杉木、日本扁柏、松木、塑膠地板等容易刮傷的地板,以及使用地板蠟、塗裝劑後的地板,可能會因
吸頭移動而造成刮傷。
尤其請避免將吸頭用力頂住地板移動,或是持續在相同位置運作。
中文
CN-13
CN-10
EC-A1RHK_A4(W page imposition).indd 31-32 2018/12/06 14:27:02

●
●
●
操作方法
開關
操作流程
開始
結束
每次按下時,將在「強力模式」⇔「標準模式」之間進行切換。
強力模式:希望以最大吸力清掃時
標準模式:希望降低吸力清掃時
(吸住踏墊或小型地毯等物品時)
清掃完成
CN-7
CN-17
CN-13、14
CN-15、16
CN-15、16
電池充電
基於衛生考量,建議每次清掃
時皆清空垃圾。
重要須知
安全停止
開始清掃後,吸頭上的旋轉刷將自動開始旋轉。
清潔踏墊和小型地毯等時可能會有異物進入吸頭導致旋轉刷停止。
這種情況下,請使用標準模式清潔。
即使於標準模式下結束清掃,下次按下 時,仍會以強力模式開始運作。
電池剩餘電力於運作期間耗盡時,將自動停止,以避免因過度放電造成電池劣化。
不論使用時間長短,清掃完畢後請務必對電池充電。
清掃期間將吸頭(反面的安全滾輪開關 )抬離
地板時,旋轉刷將自動暫停以確保安全。此時運作動作
不會停止。
將吸頭貼在地板上移動後,即會繼續旋轉。
注意! 暫停期間請勿觸碰旋轉刷或安全滾輪開關。
【否則將造成旋轉刷開始運作,引發受傷事故。】
保養吸頭時,請務必先按下 停止運作後,再開始保養。
即使吸頭仍貼著地板,
但安全滾輪開關離開地
板時依然會暫停。
清理垃圾 安裝
拆下集塵筒清空垃圾。
按下濾網盒部位
側面的清理垃圾
鍵(黃色)。
握住濾網盒部位
向上抬高
濾網盒部位
垃圾清理鍵
(黃色)
請確認集塵筒的底部是
否無垃圾殘留。
以清潔刷清除圓筒形濾網上的垃圾。
圓筒形濾網
無垃圾纏繞時
保養集塵筒組。
長期持續使用後
內建的摺疊濾網將積滿灰塵。
請進行保養。
安裝集塵筒。
將集塵筒的突起處對準垃圾清理鍵(黃色)後,
將其推入。
咔嚓
突起處
垃圾清理鍵
(黃色)
注意!
清理垃圾或保養時,請
注意避免遺失圓筒形濾
網(上/下)。
集塵筒組必須事先組裝完成,
否則無法確實安裝至主機上。
未將摺疊濾網安裝於集塵筒
上時,無法安裝至主機上。
未將集塵筒組確實安裝於主
機時,將引發吸力減弱、發
出異常聲響、垃圾混入馬達
中等故障。
咔嚓
朝箭頭指示方向確實推入
鉤扣
(藍色)
卡槽部位
將集塵筒的卡槽部位扣住主機
上的鉤扣(藍色)。
將集塵筒組安裝至主機上。
CN-9
CN-14
中文
●
EN-7
Insert securely to as far as it goes.
Power plug
Charger
-
1
2
3
CAUTION
Notices
EN-6
EN-16
Battery release button
CAUTION
1
Turn
2
3
Turn
Click!
Protrusion
EN-17 EN-17 EN-17
Top side
Warning
PREPARATION See for
tips for making the
battery last.
Charging battery
The battery is not charged when the product is purchased, so the battery must be removed from
the vacuum cleaner body and charged until the Charging lamp on the charger is turned off.
Remove the battery from the vacuum cleaner body.
Insert the power plug of
the charger in the power
outlet.
Set the battery on the charger and recharge.
Align the terminals.
Verify that the Charging
lamp (red) is turned on.
If the lamp blinks (repeating the "blinking" in
intervals of about one second) the battery has
not been securely inserted.
Insert the battery securely to as far as it goes.
Remove the battery by
sliding it in the direction
of the arrow.
Press the Battery release
button in the direction of
the arrow
The estimated duration of
time required for charging
varies depending on the
remaining charge in the
battery at the time charging
starts.
Do not touch the terminals of the charger or the
battery since they become hot while charging
or immediately after completing charging. [Risk
of burns.]
Do not apply any hot air, such as air blown by a hair dryer.
[Risk of deformation or product malfunction.]
Caution is required to ensure that the
Mesh filters (Upper and Lower) are
not lost while throwing out dirt or
cleaning.
Each part must be assembled
correctly in order for them to fit onto
the vacuum cleaner body.
Align the protrusion on the Dust Cup and the
Dust disposal hook (yellow) and insert.
Align the salient part of the Pleat
filter to the recessed section of the
Filter Cover and press in.
Install the Filter Cover and the Mesh
filters (Upper and Lower).
Install the Dust Cup.
Align the
positions..
Align the
positions..
Install the Dust Cup.
Properly remove moisture, gently wipe off moisture
with a towel or the like, dry in shade at a well
ventilated location to thoroughly dry.[Risk of
emission of odor or product malfunction.]
Thoroughly dry prior to assembling.
[Risk of filter clogging not improving even after
cleaning.]
Wash with water or thinned neutral detergent.
Pleat filter (blue)
Remove dirt and dust with a cleaning brush.
Dislodge and remove dirt and dust by
dusting.
Pleat Filter
Parts that may be washed with water
Dust in the direction illustrated in
the diagram on the right as dirt
tends to accumulate on the back
side.
Do not use a cleaning brush
[Risk of damages].
Mesh filters (Upper and Lower), Filter Cover
When heavily dirtied, wash with water.
Cleaning the Filters Assembling the Filters
Filter Cover
Carefully wash
the back side.
When the odor stands out,
dilute bleach for clothing in
water and immerse the filter
in this solution following
instruction for the bleach,
then rinse with
water.
Mesh filter Dust Cup
Dry the parts after washing with
water.
Estimated
drying time:
12 hours.
(This may vary depending on
the environment and season.)
The charger or the
battery becomes hot
while charging, but this
is not abnormal.
Lamp state Charging status
ChargingTurned on
Turned off Charging completed
(fully charged) About 80 minutes
Estimated duration from start
of charging*
[Risk of electrocution or injury.]
Always do followings during maintenance
Disconnect the power cord of the charger from the
electrical outlet.
Press the to stop the operation of the product
and remove the battery.
Dust
disposal
hook
(yellow)
Recessed
section
Salient
section
Gently rub
the mesh.
ENGLISH
(Shape of plug depends on country)
EC-A1RHK_A4(W page imposition).indd 33-34 2018/12/06 14:27:02

EN-6
EN-17
Rotary brush cover
EN-16
EN-4
Removal
CAUTION
Wheel
Rotary brush cover Release lever
Belt
Gear
MAINTENANCE
Suction head, vacuum cleaner body,
Enclosed nozzles and contacts
(terminals) of charging section
Suction head (Rotary brush)
Vacuum cleaner body, Enclosed nozzles and
contacts (terminals) of charging section
When lint, rubber band, hair or pet hair and the like is attached.
Removing the dirt
Roller
Switch
Napped cushion
Remove dirt that became attached to
fine parts with a pair of scissor or a pair
of tweezers with thin tips.
Cut along the slot of the Rotary brush for
removal.
(Do not cut the tips of the bristles of the brush.)
Remove the dust attached to the
Suction head with a Duster Nozzle
and cut off the hair and lint
entangled in the section and then
wipe with wrung cloth.
Stop using the product when the section
becomes worn, check and contact
your nearest service center approved by
SHARP.
When heavily dirtied
Vacuum cleaner body
Wipe with cloth moistened with some water
or thinned neutral detergent. Do not use any
paint thinner or benzene product. [Risk of
deterioration or discoloration]
Enclosed nozzles
Release
button
When using the product in the
Handy state
Wash with water
or thinned neutral
detergent.
The vacuum cleaner body,
charger and battery cannot
be washed with water.
Dry the parts after washing
with water.
Press Release button to remove
respective parts.
Remove the Rotary brush cover by sliding the
Release lever to the "OPEN" position.
The Suction head cannot be washed with water in its entirety.
When heavily dirtied
Wash with water
Remove the belt from the gear while lifting up the
Rotary brush and remove the Rotary brush.
After removing the Rotary brush and washing it with water,
remove water and moisture properly and sufficiently dry in
a ventilated location before re-installing.
Rotary brush
Remove
the belt
Click!
EN-4
Tips for making the battery last
Charge the battery every time the product is used,
regardless of how long it was used.
When the product is not used for a long time
Recommended Time for replacing the battery
About 1,100 times of charge/discharge ◆
The battery lasts longer when charged before the charge level
becomes low.
Leaving a discharged battery without charging will lead to the
deterioration of the battery.
According to tests conducted based on Sharp's standard
for repeatedly charging and charge/discharge a battery.
The life of a battery can vary depending on the conditions
of use and the environment.
*2
*1
EN-7
Lamps notify status of the vacuum cleaner body
Filter care lamp
(red)
Battery level indicator
lamp (green) *1
Indicated State/ Explanation
Lamp State
Filter care lamp (red)
Battery level indicator
lamp (green)
Turned
on *2
Fast
blinking
Turned on
Blinking
Fast
blinking
The filter of the Dust cup assembly is dirty.
Clean the filter by rinsing with water.
There is sufficient charge remaining in the battery.
The charge remaining in the battery is low.
The filter of the Dust cup assembly is clogged with dust.
The vacuum cleaner body is overheating.
Leave the product in a cool place for a while.
Operating the product without allowing it to cool leads to the
overheating protection circuit of the vacuum cleaner body triggering,
which disables the product for some time.
The charge remaining in the battery is quite low.
(There is no charge remaining in the battery.)
Charge the battery.
Empty the dust cup and clean the filter.
The Battery level indicator lamp is turned on in following situations. (The lamp is not turned on when there
is no charge left in the battery.)
The lamp may also turn on when the Suction head is clogged even when the filter is not dirty.
In such instances, press the and then restart operation to turn the lamp off.
(The lamp goes off in about 10 seconds after the machine is stopped.)
About 5 seconds after the battery is reinstalled on the vacuum cleaner body.
While using the product for cleaning
About 5 seconds after pressing the and stopping the operation of the product.
EN-13, 14
EN-15, 16
ENGLISH
重要須知
保養 集塵筒組
進行保養的時候 拆下
如有以下情況,請去除濾網中的垃圾與
灰塵。
清理濾網燈(紅色)亮燈時※
(紅色:亮燈)
(紅色:快速閃爍)
運作中途停止時
吸力變弱時
運作聲忽大忽小,或變得很大聲時。
如有以下情況,請用水清洗濾網。
清理濾網燈(紅色)快速閃爍時
充分保養濾網後,清理濾網燈(紅色)仍
快速閃爍時,請購買選購品中的摺疊濾網
,並進行更換。
清理濾網燈(紅色)頻繁亮燈時
吸塵機吸入細微粉末類物質時
主機過熱時
吸頭被堵住時(清理踏墊或使用附屬吸頭等情況),
即使濾網並不髒,亦可能會亮燈。如遇此情況,請先
按下 後,再讓吸塵機運作,指示燈即會熄滅。
重要須知
請勿使用稀釋劑、揮發油、以及熱水(約 40°C
以上)。
在未進行保養的情況下讓其繼續運作時,將自動停
止。請務必保養。
請先鋪上報紙等物品後,再進行保養。
拆下集塵筒。
拆下摺疊濾網。
以轉動方式拆下圓筒形濾網
(上/下)。
按下垃圾清理鍵
(黃色)。 濾網盒部位
集塵筒
垃圾清理鍵
(黃色)
摺疊濾網(藍色)
握住濾網盒部位
向上抬高
握住握把
向上抬高
濾網盒
圓筒形濾網(上)
圓筒形濾網(下)
圓筒形濾網(上)
濾網盒
圓筒形濾網(上/下)的拆解順序,可能會因嵌合的
狀態而改變。
使用清潔刷的握柄輕拍高性能摺疊式濾網的頂端部位
(塑膠)時,可藉由震動將垃圾與灰塵彈落,簡化保
養作業。
頂端部位
將清潔刷插入深處時,可能會造
成破損,敬請小心注意。
咔嚓
將電池插入主機
將電池由充電器中
抽出。
將電池插入主機。
重要須知
請沿著主機的凹槽,確實插入至聽見「咔嚓」
聲為止。
端子接觸後,主機的電池指示燈將亮燈約
5 秒鐘,顯示電池的剩餘電力。即使在尚
未完全插入的狀態下指示燈即已亮燈,仍
請務必完全插入至聽見「咔嚓」聲為止。
凹槽
對準端子
無法充電時,請確認以下事項。
充電器的電源插頭是否鬆脫?
電池是否正確安裝在充電器上?
CN-17、18
充電器與電池的端子有無污垢或異物附著?請以乾布
擦拭乾淨。
<填寫位置>
開始使用日期
年 月 日
開始使用電池時
請於電池上填寫開始使用日期。
(以便在修理等情況下作為參考)
關於充電
關於運作時間
充電器的充電中指示燈(紅色)緩慢閃爍時
以下情況可能會導致充電時間變長。
長時間未使用時
於低溫(約 5°C 以下)或高溫(約 35°C 以上)的環境中充電時 (請於室溫為 5°C∼35°C 的環境中充電。)
電池剩餘電力耗盡時,主機的電池剩餘電力指示燈
(綠色)將以持續閃爍的方式通知使用者。
電池會因反覆使用而使運作時間逐漸縮短。
充電器的充電中指示燈(紅色)快速閃爍時,可能是充電器故障,或是電池劣化及故障。
請洽詢客戶服務中心。
在低溫(約 5°C 以下)或高溫(約 35°C 以上)的環境中閃爍時,屬於正常現象,並非故障。
請於 5°C∼35°C 的環境中充電。
在室溫為 5°C∼35°C 的環境中閃爍時,代表電池已屆更換時期。
CN-6
CN-4
最長連續運作時間※
強力模式
約8 分鐘
約30 分鐘
標準模式
使用 1 個電池的情況(完全
充滿電、電池使用初期/
20°C)。
會因地板材質、使用環境、
使用狀態而改變。
中文
CN-15
CN-8
EC-A1RHK_A4(W page imposition).indd 35-36 2018/12/06 14:27:03

準備 為延長電池的使用壽命,
請參閱。 。
CN-6
CN-17 CN-17 CN-17
電池充電
剛購入時的電池尚未充分充電,使用前請務必先將電池由主機上拆下,並充電至充電器的充電指示燈
(紅色)熄滅為止。
將電池由主機上拆下。
電池拆卸鍵
在將電池拆卸鍵朝箭頭方向
按住不放的狀態下,
將電池朝箭頭方向拆下。
將充電器的電源插頭插入插座。
(插頭圖樣並不代表該國家所使用的插頭)
充電器
將電池裝到充電器上進行充電。
確實插到底。
請確認充電指示燈(紅色)是
否已亮燈。
持續閃爍時(以約 1 秒的間隔反覆「閃爍」),
代表未確實插到底。
請重新將電池插到底。
參考時間會因充電開始時的
電池剩餘電量而改變。
對準端子
充電指示燈(紅色)的
亮燈方式
自開始充電起算的
參考時間 ※
充電狀態
亮燈 充電中
熄滅 充電完成(完全充滿) 約 80 分鐘
重要須知 充電中的充電器與電池溫
度將會上升,此為正常現
象,並非異常。
充電中與剛充完電時,充電器與電池的端
子會處於高溫狀態,請勿觸碰。
【否則可能造成灼傷】
注意!
可水洗的物品
保養
摺疊濾網
外側
請勿使用清潔刷。
【否則可能造成破損】
垃圾常會累積於內側,請依照右圖
的方向敲擊。
將垃圾與灰塵敲落。
以清潔刷去除垃圾與灰塵。
圓筒形濾網(上/下)、濾網盒
輕輕刷拭
網眼。
髒污非常嚴重時請水洗。
摺疊濾網(藍色)
使用清水或稀釋過的中性清潔劑清洗。
若對異味及髒污比較在
意的話,可以用50˚C以
下的水浸泡1-2小時後,
再進行清洗。
請仔細清洗內側。
濾網盒 圓筒形濾網 集塵筒
請先水洗後,再充分去除水分。
充分去除水分後,再進行組裝。
【保養後仍無法改善濾網堵塞情況的原因】
不可吹到吹風機等機器的熱風。
【否則將造成變形或故障】
請確實瀝乾水分,並以毛巾等輕柔擦乾水分後,放置
於通風良好處陰乾,讓其充分乾燥。【發生異味與故
障的原因】
風乾時間參考值:12 小時
(會因環境或季節而改變) 注意!
清理垃圾或保養時,請注意避免遺失
圓筒形濾網(上/下)。
未正確組裝各零件時,將無法安裝至
主機上。
突起處
咔嚓
垃圾清理鍵
(黃色)
將集塵筒的突起處對準垃圾清理鍵(黃色)
後,將其推入。
安裝集塵筒。
請先確認圓筒形濾網內確實無垃圾與異物後,
再進行安裝。【發生異常聲響的原因】
卡榫 卡槽
將摺疊濾網的卡榫對準濾網盒
的卡槽後,將其推入。
對準位置 轉動
對準位置 轉動
安裝濾網盒與圓筒形濾網
(上/下)。
組裝
警 告
保養時請務必遵守以下事項。
【否則將造成觸電或受傷事故】
充電器需將電源插頭拔出。
主機需按下 停止運作後,再拆下電池。
電源插頭
CN-7
CN-16
中文
EN-5
Accessories
EN-4, 7
EN-15, 16
EN-7
EN-7
EN-18
CAUTION
Terminal
Rotary brush cover
Gear
Slot
Slot
Tab
Warning
[Risk of electrocution or injury.]
PART NAMES
Names of each part and how to assemble
When using the product in the Stick state
Right side surface
Dust cup assembly
Press Release button to remove respective parts.
Battery
Exhaust port
Dust disposal
hook (yellow)
Dust Cup
Cord
(Approx. 80 cm)
Charger (1 unit) Battery (1 piece) Cleaning Brush (1 piece)
(Already attached to
Charger at shipping)
(Shape of plug depends on country) (Attached to vacuum cleaner body)
Contacts (terminals) of charging section
Strap on
a belt
Installation is not
possible when the left
and right are reversed.
Strap the belt on the gear of the Rotary brush and
insert it into the slot.
Slide the Release lever in the direction of
the arrow.
Clip on the tab on the Rotary brush cover in the
slot.
Insert the side without a gear of the Rotary brush,
as far as it goes into the slot.
Do not apply any hot air, such as air blown by a hair dryer.
[Risk of deformation or product malfunction]
Do not use any detergent, paint thinner, benzene product
or hot water (exceeding approx. 40°C).
[Risk of deterioration or deformation]
Attach
Attach the brush in the direction
shown in the diagram after use.
Wipe off any dirt
with a dry cloth.
Mesh filter
Wash respective filter with water when the Filter care
lamp (red) blinks rapidly
Press the Dust disposal hook (yellow) to split the
Dust Cup from the Cover section.
Filter Cover
Pleat filter
Dirt accumulates
here.
Cover section
The built in filter cannot
be removed.
Cleaning is not
required.
Battery release button
The Suction head and Pipe described above are also accessories.
Always do the following during maintenance:
Disconnect the power cord of the Charger from the
electrical outlet.
Press the to stop the operation of the product and
remove the battery.
EN-10, 19
EN-17
EN-13
EN-6
EN-9
Suction head
Pipe
Back side
Release button
Release button
Holder
section
Lamps
Handle / Control switch
Always hold on the handle on the
vacuum cleaner body to transport the
product.Holding onto other parts
(such as a pipe of the Dust Cup) can
dislodge such parts from the vacuum
cleaner body and the product may
fall and lead to injury or product
malfunction.
Cup release
lever (black)
ENGLISH
EN-11, 12
Duster Nozzle
(1 piece)
Crevice Nozzle
(1 piece)
Enclosed Nozzles
EC-A1RHK_A4(W page imposition).indd 37-38 2018/12/06 14:27:03

EN-19
EN-4
EN-7
EN-6
Terminal
EN-15 and 16
Back side
STORAGE
Tips
Replacing Battery
Storing Product
Precautions for Details
When the product is not
used for a long time.
Care is needed when leaving the product standing leaning against a wall, as the
product may fall.
Store the product in the condition described in the diagram below when not using
the product for a long period of time.
Store the product by hooking the holder section on furniture or the like, in a gap between a furniture
and the wall, in the corner of the room or inside a closet where the product is unlikely to fall.
Care must be taken as the holder section may slide and leave pigment on the
contacted surface, depending on the type of the wall or furniture.
If the product cannot be easily secured by hooking due to slippery floor or furniture,
do not force the product to hook at a location but disassemble the product for
storage instead.
Verify that there is nothing in the vicinity of the product that can be damaged easily.
Pay particular attention to ensure no infant or pet is allowed to get near the product.
Holder
section
There may be cases where the floor surface is damaged when the
roller switch on the bottom side of the Suction head, wheels or
the Napped cushion is worn.
Wheel
Napped cushion
Napped cushion
Integrated with
Suction head
Integrated with
Rotary brush
cover
Roller
Switch
In the event the part becomes
worn it is necessary to replace it
with a new one.
Stop using the product and contact
your nearest service center
approved by SHARP.
The replacement of the part for the
is performed while the product
is left with Sharp.
Replacement part (Rotary brush
cover) is available for purchase.
Do not drag the charger (Risk of scratching on the floor
surface).
This product is for indoor use only.
Do not operate the product while the Dust cup assembly
has been removed.
Large dirt or a large amount of dirt suctioned at the same time.
Sharp objects (glass, razor blade and the like).
Liquid or moist dirt. A large amount of sand.
(Risk of heating, ignition of fire or
electrocution.)
Furthermore, store the product in a
location where there is little humidity
or dust.
Do not transport or store the product
together with any metal object, such
as a needle, necklace or hair pin.
It is recommended that the power
plug of the charger be removed from
the power outlet.
The charger consumes about 0.5 W
of power while the power plug is
connected to the power outlet.
Removing the power plug when the
charger is not in use can keep down
wasteful power consumption.
Consider following precautions
when storing the battery.
Remove the battery from the base
unit and completely charge the
battery before storing.
Twines
Do not apply lubricant to the Rotary brush (Risk of
plastic parts cracking).
Do not hit the Suction head hard on the steps on the
floor surface or gaps in floor heights, as well as
furniture or wall (Risk of the floor surface becoming
scratched).
Clean respective filters when fine powder (plaster, cement,
chalk and the like) has been suctioned.
Do not suction any of the following types of items
(Risk of scratching of the product interiors and clogging of the
product, as well as product malfunction).
This cordless vacuum cleaner is intended for
household use and must not be used for commercial
applications. Furthermore, the product must not be
used for any purpose other than cleaning.
There are instances where the operation of the
product causes noise to appear on the screen of
television sets. There is no negative impact on
the television set when this occurs.
There is no malfunction if the the Charging lamp (red) on
the charger blinks slowly when charging in an
environment with a low temperature (about 5°C or lower)
or a high temperature (about 35°C or higher).
Charge the battery in an environment that is between
5°C to 35°C.
Recommended time for replacing
the battery.
When the Charging lamp (red) of the charger blinks slowly
whenever charging in an environment with room temperature of
between 5°C and 35°C.
When the operating time is extremely short even when the battery
has been charged.
We invite you to recycle the spent battery.
Information on handling of spent battery.
Insulate the terminal sections using plastic tape or the like that are available on the market.
Furthermore, do not disassemble the product.
The battery (lithium-ion battery) is a precious resource that can be recycled.
Bring in the spent battery to a store that accepts batteries for recycling, rather than disposing of
them as waste material.
Batteries are consumable products.The operating time
gradually becomes shorter as the battery deteriorates with
repeated use. Although the deterioration of batteries vary
depending on the condition of use or operating
environments, the battery should be replaced if any of the
following conditions apply.
CAUTION
EN-5
ENGLISH
清理濾網燈(紅色)
電池剩餘電力指示燈(綠色)
請清理垃圾,並去除濾網上的污垢與灰塵。
集塵筒組的濾網過髒。
主機過熱。
請於陰涼處放置片刻。
若繼續讓吸塵機運作,未將其冷卻,將觸發主機的過熱保護
功能,導致吸塵機暫時無法使用。
電池剩餘電力即將耗盡。
(電池剩餘電力已耗盡。)
敬請充電。
請用水清洗濾網。
集塵筒組的濾網阻塞。
延長電池使用壽命
的要訣
保養 地板吸頭、主機、附屬吸頭、
充電部位的接點(端子)
被線頭、橡皮筋、毛髮、寵物的毛等物質纏住時。
地板吸頭(旋轉刷)
主機、附屬吸頭、充電部位的接點(端子) 感覺已髒污時
CN-15、16
CN-13、14
CN-16
CN-4
CN-7
附屬吸頭
請先水洗後,再充分去除
水分。
使用清水或稀釋
過的中性清潔劑
清洗。
主機
以含有清水或稀釋的中性清潔劑的抹布
擦拭。請勿使用稀釋劑與揮發油類。
【否則將造成變質或變色】
注意! 主機、充電器、電池不可
水洗。
裝卸按鍵
要拆下各零件時,請以同時按住「裝卸按鍵」
的方式拆下。
以手提狀態使用時
主機指示燈的亮燈方式 透過指示燈告知使用者主機的狀況
清理濾網燈(紅色)
電池剩餘電力指示燈(綠色)※1
直接在電池電力完全耗盡的狀態下放置時,將
造成電池劣化。
在電池剩餘電力尚未完全耗盡前即充電的做法,
較能延長電池的使用壽命。
不論使用時間長短,清掃完畢後請務必充
電。
長期間不使用時的須知
電池的更換基準
充放電約 1,100 次◆
依據反覆充放電的本公司基準進行試驗的情況。
電池的使用壽命會因使用條件與環境而改變。
指示燈的亮燈方式 異常狀況/通知內容
亮燈※2
快速閃爍
快速閃爍
閃爍
亮燈 電池剩餘電力充足。
電池剩餘電力過低。
自按下 停止運作的時間點起算約 5 秒鐘
清掃期間
自電池安裝至主機上的時間點起算約 5 秒鐘
吸頭被堵住時,即使濾網不髒,亦可能會亮燈。如遇此情況,請先按下 後,再讓吸塵機運作,
指示燈即會熄滅。(停止約10秒後燈光將熄滅)
電池剩餘電力指示燈的亮燈時機如下。(電池剩餘電力完全耗盡時,不會亮燈。)
1
2
CN-4
沿著旋轉刷的溝槽剪下。
(不可剪到刷毛的毛尖。)
使用除塵毛刷吸頭吸取附著在吸頭上的灰塵,
並將纏繞在 部位的毛髮與線頭剪下後,
以用力擰乾的濕布擦拭。
附著於窄小部位中的垃圾,
請使用細長型剪刀或鑷子等工具去除。
皮帶保護蓋
拆下旋轉刷用水清洗後,將水分徹底瀝乾,並放置於通風處
充分風乾後,再裝回主機。
不可將整個吸頭水洗。
水洗 髒污非常嚴重時
清除垃圾
將開關拉桿滑動至「OPEN」處,拆下皮帶保護蓋。
①
在將旋轉刷抬高的狀態下,將皮帶由齒輪上拆下,
並拆卸旋轉刷。
②
拆下
部位已磨損時,請停止使用,並確認
的內容後,洽詢客戶服務中心。
安全滾輪開關
車輪
緩衝毛墊
(左右各 3 處)
旋轉刷
皮帶保護蓋 開關拉桿
拆下皮帶
皮帶
齒輪
FILTER
FILTER
中文
CN-6
CN-17
EC-A1RHK_A4(W page imposition).indd 39-40 2018/12/06 14:27:03
Table of contents
Other Sharp Vacuum Cleaner manuals

Sharp
Sharp EC-A1RAS User manual

Sharp
Sharp EC-6312P User manual

Sharp
Sharp EC-S5170 User manual

Sharp
Sharp EC-SC95H-H User manual

Sharp
Sharp EC-LH17-WH User manual

Sharp
Sharp EC-S2142 User manual

Sharp
Sharp EC-12TWT9 User manual

Sharp
Sharp EC-SA86B User manual

Sharp
Sharp EP703C User manual

Sharp
Sharp EC-NS16 User manual

Sharp
Sharp EC-A1RA User manual

Sharp
Sharp EC-CB18 User manual

Sharp
Sharp EC-C1819-R User manual

Sharp
Sharp EC-SC95U-H User manual

Sharp
Sharp EC-T2840 User manual

Sharp
Sharp EC-C1219-S User manual

Sharp
Sharp EC-HX100M-S User manual

Sharp
Sharp EC-SC75H-H User manual

Sharp
Sharp EC-LS18 User manual

Sharp
Sharp EC-T2860 User manual