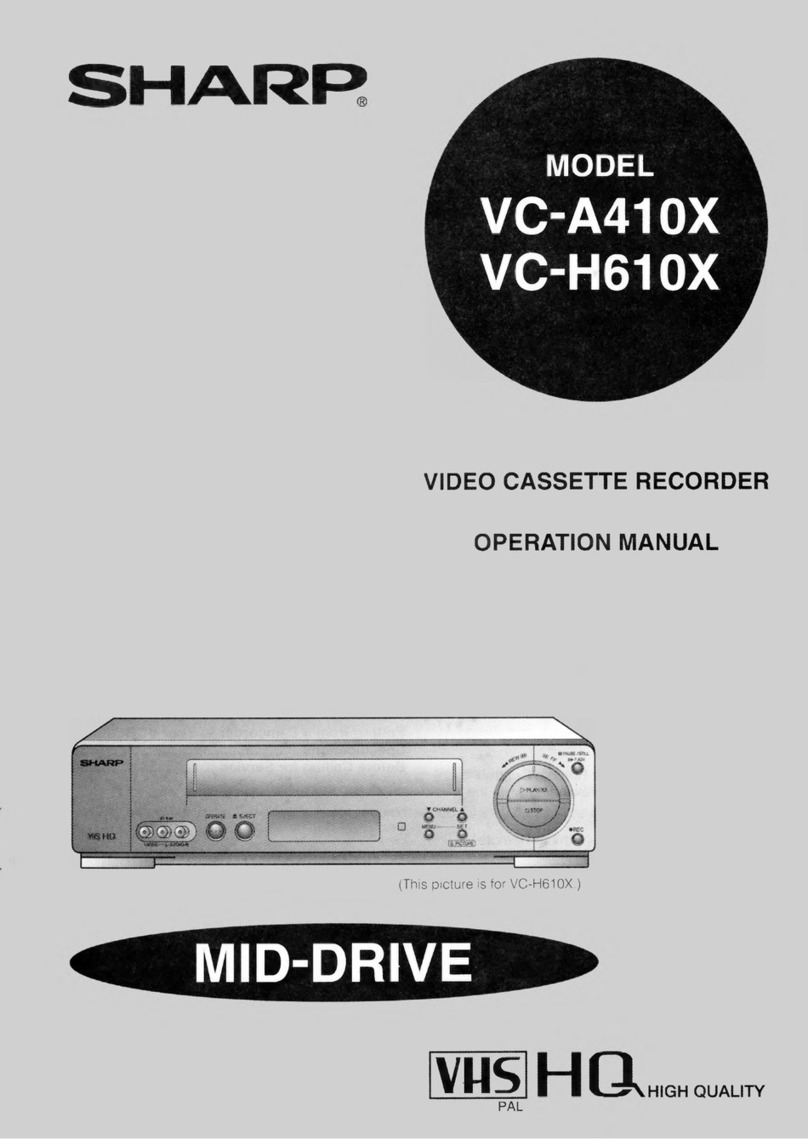
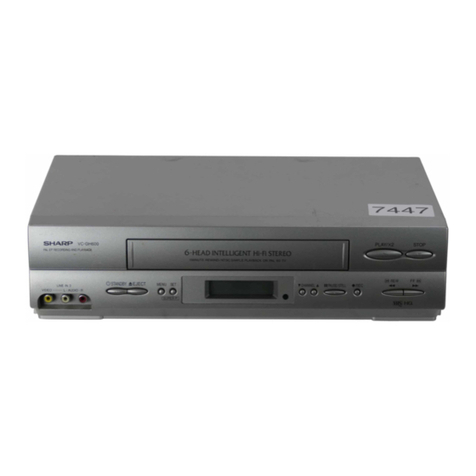
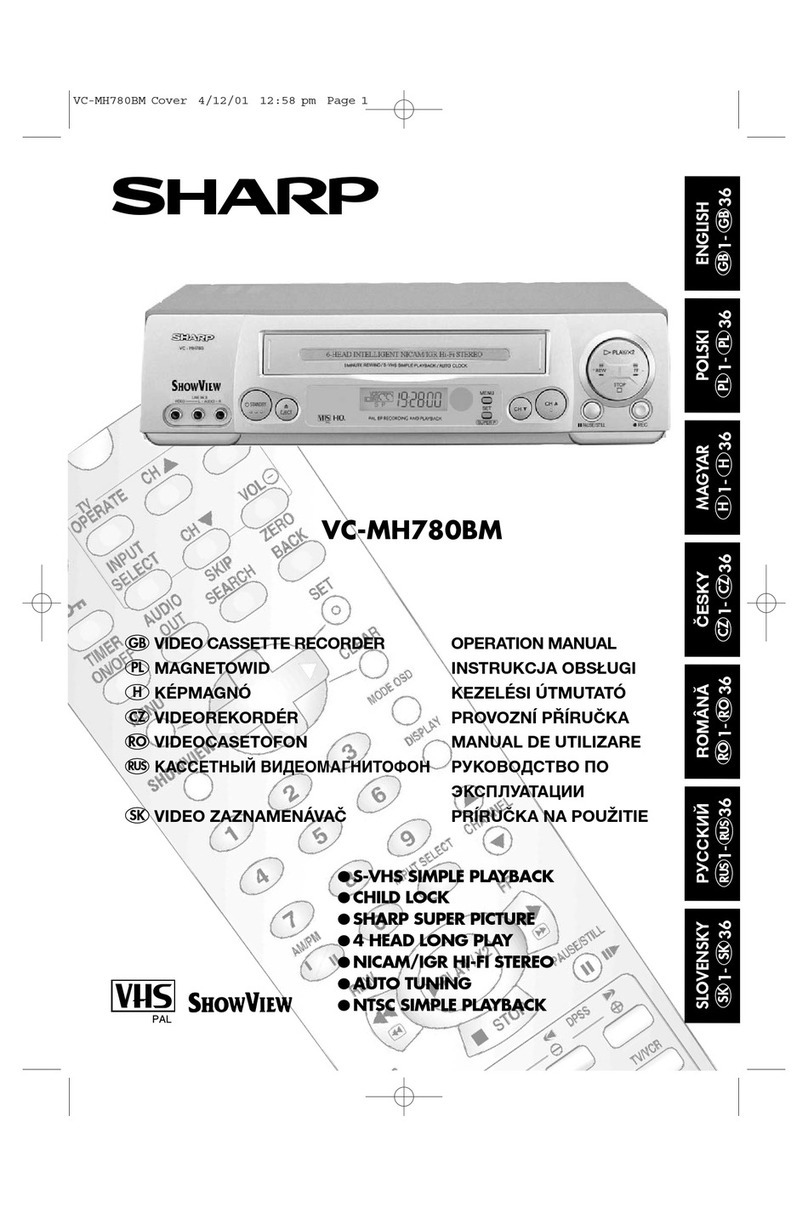
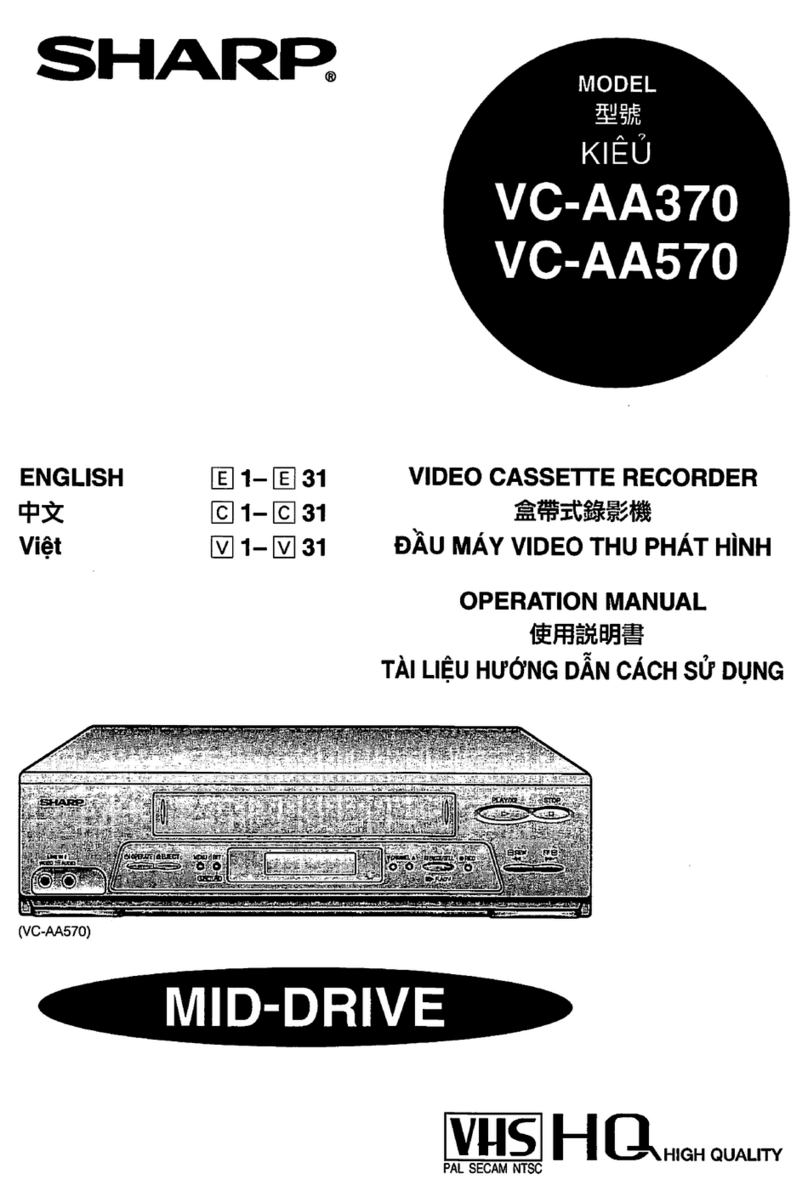
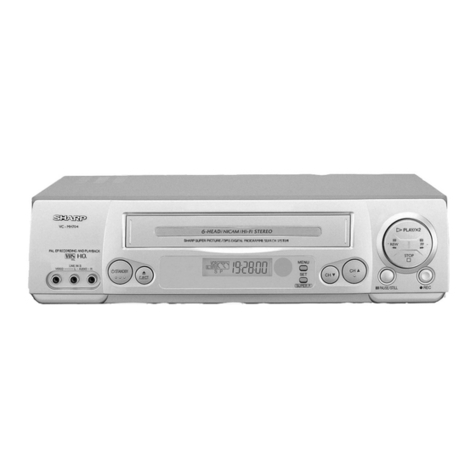
Sharp VC-H726X User manual

VIDEO
CASSETTE
RECORDER
OPERATION
MANUAL
Please
read
this
operation
manual
carefully
before
using
the
VCR.
vnsiHQ
HIGH
QUALITY
PAL
NTSC
As
an
Energy
Star®
Partner,
SHARP
has
determined
that
this
product
meets
the
ENERGY
STAR®
guidelines
for
energy
efficiency.
ENERGY
STAR
is
a
U.S.
registered
mark.

CONTENTS
GENERAL
INFORMATION
IMPORTANT
SAFEGUARDS
AND
PRECAUTIONS.
Features.
Accessories...
POWER
ON
Feature.
Major
Components
of
Your
VCR
.
Remote
Control.
•
Inserting
the
Batteries
3
4
4
5
6
7
SETTING
UP
Connections..
Connecting
to
a
Stereo
TV...
Connecting
to
TV
and
Audio
Equipment
Adjusting
the
Video
Channel.
Menu
Screen.....
OSD
(On
Screen
Display)..
•
How
to
Display
Indicators
Setting
the
Language..
Setting
the
Clock....
Setting
the
Channels.....
Channel
Skip/Cancelling
Skip..
Mode
Selection..
8
8
8
9
10
10
11
12
13
15
16
RECORDING
Recording
a
TV
Programme.
•
Cassette
Erase
Protection
•
Recording
a
TV
Programme
•To
Watch
Another
TV
Programme
While
Recording
Recording
Hi-Fi
Stereo
Sound..
NTSC
AV
Recording.
Simple
Recording
Timer.
Recording
with
the
Timer....
•Confirming
Timer
Programmes
•
Cancelling
Timer
Programmes
21
22
23
24
25
SPECIAL
FUNCTIONS
Intelligent
Timer
Recording
(JUST
REC)...
Sharp
Super
Picture....
DPSS
(Digital
Programme
Search
System)
Auto
Repeat..
Skip
Search......
Zero
Back
Function.....
New
Child-Proof
Lock....
VCR
Display....
Tape
Speed
Selection.
Tape
Remaining
Display.
Editing
from
a
Camcorder
to
Your
VCR.
28
28
29
29
30
30
31
32
32
33
34
BASIC
OPERATIONS
Playback...17
•
Inserting
a
Video
Cassette
•
Playback
•Video
Search
•
Fast
Forwarding
and
Rewinding
•
Slow
Motion
Playback
(with
the
Remote
Control)
•
Still
Picture
and
Frame
Advance
•
Double
Speed
Playback
•
Colour
Mode
•
NTSC
Tape
Playback
on
PAL
TV
•Auto
Tracking
Control
System
•Auto
Head
Cleaning
System
•
Quick
Start
with
Full
Loading
Mechanism
•Auto
Rental
Mode
•
Blue
Back
•
Full
Auto
Playback
•
Playback
of
Hi-Fi
Recorded
Tapes
•Audio
Output
Mode
•Adjusting
Hi-Fi
Audio
Tracking
HELPFUL
HINTS
Specifications..
Before
Calling
for
Service
34
35
2

IMPORTANT
SAFEGUARDS
AND
PRECAUTIONS
CAUTION--—----
DppQD£
OPERATING
YOUR
NEW
VCR,
PLEASE
CAREFULLY
READ
THIS
OPERATION
MANUAL
AND
THEN
SAVE
IT
FOR
FUTURE
REFERENCE
AS
IT
WILL
BE
USEFUL
IF
YOU
HAVE
ANY
PROBLEMS
OPERATING
YOUR
VCR
IN
THE
FUTURE.
III
Location
and
Handling-—---
1.
A
ir
vents
are
provided
in
the
VCR
cabinet
to
prevent
excessive
temperatures
inside
the
unit
Do
not
place
your
VCR
in
closed
spaces,
cover
it,
or
otherwise
block
the
vents.
2.
D
o
not
place
the
VCR
in
direct
sunlight,
or
near
heat
sources.
3.
K
eep
the
VCR
and
tapes
away
from
strong
magnetic
objects.
4.
D
o
not
insert
or
drop
anything
into
the
VCR
through
the
air
vents
or
cassette
compartment
as
this
could
cause
serious
damage,
possibly
resulting
in
fire.
5.
D
o
not
place
any
object
containing
water
or
other
liquids
on
the
VCR.
In
the
event
that
liquid
should
enter
the
cabinet,
unplug
the
VCR
immediately
and
contact
the
retailer
or
a
service
centre
approved
by
Sharp
immediately.
6.
D
o
not
remove
the
VCR
cabinet.
Touching
parts
inside
the
cabinet
could
result
in
electric
shock
and/or
damage
to
the
VCR.
For
service
and
adjustment
inside
the
cabinet,
call
a
qualified
dealer
or
service
centre
approved
by
Sharp.
7.
T
o
prevent
fire,
never
place
any
type
of
candle
or
naked
flames
on
the
top
or
near
the
VCR
set.
8.
T
o
prevent
fire
or
shock
hazard,
do
not
expose
this
products
to
dripping
or
splashing.
No
objects
filled
with
liquids,
such
as
vases,
should
be
placed
on
the
products.
9.
T
he
use
of
head
cleaning
tapes
is
not
recommended
as
they
may
cause
damage
to
your
machine.
Caution—Prevent
Condensation--
When
moving
the
VCR
from
a
cold
place
to
a
warm
one,
condensation
(dew)
is
likely
to
form
on
the
VCR
drum
and
heads.
If
you
try
to
play
back
or
record
in
these
circumstances,
the
videotape
and
VCR
may
be
damaged.
To
prevent
this,
turn
the
power
switch
on
and
wait
for
a
few
hours
for
the
VCR
to
warm
up
and
dry
before
attempting
playback
or
recording.
This
is
particularly
important
before
loading
a
cassette
for
the
first
time
after
purchasing
the
VCR.
3

IMPORTANT
SAFEGUARDS
AND
PRECAUTIONS
Service-——
-
Do
not
attempt
to
service
this
VCR
yourself.
Please
carry
out
the
user
checks
on
page
35.
if
you
still
experience
a
problem,
contact
your
dealer
or
nearest
Sharp
service
facility.
Others---
Copyright
may
exist
in
material
you
wish
to
record.
Copying
such
material
without
permission
of
the
relevant
licensee(s)
or
owner(s)
of
the
copyright
is
prohibited
by
law.
SHARP
is
not
in
a
position
to
authorize
the
recording
of
copyright
works
and
nothing
in
this
manual
should
be
read
or
implied
as
giving
that
authority.
Features
•
VHS
Hi-Fi
Stereo
Sound
System/A2
Stereo
System
•
New
Centre-Mounted
Mechanism
•
HQ.
(High
Quality)
Circuitry
•
Multi
Language
On
Screen
Display
(English,
French,
Spanish,
Chinese)
•
Sharp
Super
Picture
—
Enhances
picture
quality
during
playback.
•
OSD
(On
Screen
Display)
with
Menu
Screen
Guidance
•
DPSS
(Digital
Programme
Search
System)
•
Quick
Start
with
Full
Loading
Mechanism
•
365-Day,
8-Programme
Timer
(Daily/Weekly
Programmable)
•
S-VHS
Quasi
Playback
Notes
for
S-VHS
tape
•
Playback
of
S-VHS
recorded
tapes
is
possible.
•Playback
of
S-VHS
image
quality
is
not
available.
•Picture
noise
or
distortion
may
appear
on
the
screen
during
playback
in
the
SLOW
or
STILL
mode.
•
S-VHS
recording
is
not
available.
However,
HQ
recording
is
possible
with
S-VHS
tape.
•Auto
Channel
Tuning
•
48-Channel
Preset
PLL
Frequency
Synthesized
Tuner
•
POWER
ON
Feature
•
Built-in
Front
AV
Jacks/Video
Input
Terminals
•
60-minutes
Timer
Memory
Backup
—
T
imer
settings,
etc.
remain
in
memory
after
power
interruptions
of
up
to
60
minutes.
•
X380
Super
Speed
Rewind
—
Enhances
rewinding
at
a
speed
380
times
faster
than
the
LP
mode
recording/playback
speed
(only
with
an
E-180tape).
•
NTSC
Recording
—
NTSC
signals
can
be
recorded
through
the
AV
input
terminals.
•
PAL
EP
(Extended
Play)
mode
—
Triple
Recording/Playback
Time,
than
SP
(Standard
Play)
mode.
•
Auto
Head
Cleaning
System
POWER
SUPPLY:
The
voltage
supply
of
this
VCR
is
AC
240
V,
50/60
Hz.
CASSETTE
TAPE:
Use
only
video
cassette
tapes
that
carry
the
PIS
or
IVHSI
mark.
Coaxial
cable
(TV-VCR
cable)
Remote
control
unit
Two
(R6
UM/SUM-3
or
AA)
batteries
for
the
remote
control
unit

POWER
ON
Feature
STANDBY
button
Clock
keeps
time
regardless
of
this
button.
It
^.h
1
"
■
r
■
■
■
■
■
This
VCR
is
not
equipped
with
a
mains
power
switch.
Accordingly,
nominal
current
to
drive
the
clock
is
drawn
at
all
times
when
the
AC
power
cord
is
plugged
into
a
wall
socket.
If
the
VCR
is
not
to
be
used
for
an
extended
period,
be
sure
to
unplug
the
cord.
_
1.
D
efinitions
of
POWER
modes
POWER
ON
mode
•
VCR
in
operation
or
ready
for
operation.
•
VCR
display
is
on.
POWER
STANDBY
mode
•
VCR
in
standby
mode.
•
VCR
display
is
off.
2.
D
u
r
ing
POWER
ON
mode
Each
time
STANDBY
on
the
VCR
or
the
remote
control
is
pressed,
the
POWER
MODE
changes
as
shown
below.
(
Current
)
(Press
STANDBY
on
the
VCR
or
the
remote
control)
POWER
ON
mode
POWER
STANDBY
mode
3.
S
witching
from
POWER
STANDBY
mode
to
POWER
ON
mode.
'O
Press
STOP
on
the
VCR
or
the
remote
control
to
switch
from
POWER
STANDBY
mode
to
POWER
ON
ft
Bv
oressinq
one
of
the
tape
operation
buttons
on
the
remote
control
(PLAY,
REW,
FF,
etc.)
with
a
video
tape
in
the
VCR,
the
mode
will
automatically
switch
to
POWER
ON
and
the
tape
operation
will
begin.

[Front]
Cassette
compartment
(see
Playback,
Recording)
y>'i
wr
m?.
rr:
y&
t>
puy/jcs
(
■
:<
octpp
GWilto.
WE$ftB)P«GE/5IlUL
HflEC
B
PEW
PF
B
STANDBY
button
EJECT
button
—
Basic
function
controls
(See
Playback,
Recording.)
Channel
tuning
controls
(See
Setting
the
Channels.)
VCR
Display
(explained
throughout
the
operation
instructions)
1
“
□
V
CR
E
0
I
/"T
7
"\
\.y
•I
CHTI
D-0
III
SI
EPVP
■
dMaI
-UI
l\Hjl
III
•Tape
counter
is
displayed
during
playback,
fast
forward,
rewind
or
recording.
•
When
the
VCR
is
on,
the
LCD
backlight
will
light
up.
•
When
the
power
is
turned
off,
the
clock
is
displayed
and
the
LCD
backlight
will
light
off.
The
meaning
of
the
main
indicators
is
shown
below.
(This
list
does
not
include
all
indicators.)
m
Cassette-In
Indicator
\
1
J
_
L
_
J
_
1
_
Rec
Pause
Ei
Audio
Output
mode
(“j
Playback
\
*
t
JZZZI[
Slow,
Still,
Frame
Advance
t
\/u
LINE
IN
1/2
tel
(3®]
Rewind,
Video
Search
Rewind
SfflP
When
AC
power
cord
is
first
plugged
in.
m
RF
Output
Channel
"V
1
rr
1
f
Rotate]
[rapldlyj
Fast
Forward,
Video
Search
Forward
m
Stop
Record
@xn3
New
Child-Proof
lock
•
The
display
will
return
to
channel
setting
mode
when
STOP
is
pressed
during
operation
mode.
•The
display
changes
each
time
DISPLAY
on
the
remote
control
is
pressed.
(See
page
32.)
•
Some
of
the
indicators
above
will
light
up
only
for
a
couple
of
seconds
when
the
VCR
is
set
up
the
corresponding
mode.
[Rear]
Connection.terminals
(See
Connections
on
page
8.)

o
STANDBY
button
©
©ttti
button
(New
Child-Proof
Lock)
©
TIMER
ON/OFF
button
©AUDIO
OUT
button
©
MENU
button
©
TIMER
button
©
Numeric
buttons
©
AM/PM
button
Digit
select
(When
inputting
up
to
two
digit
numbers)
©
REW
button
©
PLAY/X
2
button
©
REC
button
©
TAPE
SPEED
button
©
0
TIME
button
©
TV
functions
control
buttons
(TV
OPERATE,
CH
A/T,
VOL
0/e
and
INPUT
SELECT)
•
This
remote
control
can
control
Sharp’s
TVs.
©
ZERO
BACK
button
©
SKIP
SEARCH
button
©
SET
button
©
◄
/
►
/A/
▼
button
©
CLEAR
button
©
MODE
OSD
button
®
DISPLAY
button
©CHANNEL
A/
▼
button
®
INPUT
SELECT
button
©
FF
button
@
PAUSE/STILL
(F.
ADV)
button
©
STOP
button
©
SLOW/©/©
buttons
(SLOW
©/©,
DPSS
e>/«)
Inserting
the
Batteries
First,
install
the
batteries
properly.
Fit
two
R6
{UM/SUM-3,.
AA)
1.5
volt
batteries
(included)
or
equivalent.
If
the
remote
control
stops
working,
insert
new
batteries.
Ensure
the
batteries
are
inserted
correctly,
matching
the
polarities
(©/©)
indicated
in
the
remote
control.
•
Do
not
subject
the
remote
control
to
shock,
water
or
excessive
humidity.
•
The
remote
control
may
not
function
if
the
VCR
sensor
is
in
direct
sunlight
or
any
other
strong
light,
•
Incorrect
use
of
batteries
may
cause
them
to
leak
or
burst.
Read
the
battery
warnings
and
use
the
batteries
properly.
•
Do
not
mix
old
and
new
batteries
or
mix
brands
in
use.
•
Remove
the
batteries
if
you
will
not
use
the
remote
control
for
an
extended
period
of
time.

0
Disconnecting
TV
Cable
Disconnect
the
aerial
cabie
from
the
back
of
your
TV
set.
0
Connecting
Aerial
Cabie
to
VCR
Connect
the
aerial
cable
to
the
ANTENNA
IN
terminal
of
your
VCR.
0
Connecting
VCR
to
TV
Connect
the
supplied
coaxial
cable
to
the
RF
OUT
terminal
of
the
VCR.
Plug
the
other
end
into
your
TV’s
ANTENNA
IN
terminal.
K1
Connecting
to
a
Stereo
TV
I
NOTE
>
•
Stereo
sound
output
is
only
possible
using
the
AUDIO
OUT
terminals.
Sound
from
the
radio
frequency
converter
(RF
OUT)
is
mono
only.
•
The
power
cord
should
not
be
plugged
into
the
power
outlet
until
the
above
connections
have
been
completed.
•
if
TV
reception
is
weak,
use
a
TV
signal
booster
(not
supplied).
Connecting
to
TV
and
Audio
Equipment
From
VIDEO
OUT
To
AUDIO
INR/L
From
RF
OUT
From
AUDIO
OUT
R/L
To
ANTENNA
IN
To
VIDEO
IN
8

To
view
the
output
of
your
VCR
on
the
television
screen,
you
must
select
an
unused
channel
on
your
TV
and
tune
it
to
the
output
of
your
VCR
(factory
preset
to
UHF
channel
37).
O
Turn
on
the
TV,
select
the
AV
channel
or
an
unused
channel
on
the
TV
and
turn
on
the
VCR.
©
Load
a
prerecorded
tape
(not
supplied)
into
the
VCR.
........
©
If
the
erasure
protection
tab
on
the
tape
is
removed,
the
VCR
will
automatically
playback
the
tape.
Otherwise
press
PLAY/
x
2.
0
Tune
the
selected
channel
on
the
TV
until
the
picture
from
the
VCR
is
displayed
on
the
TV
screen.
(This
TV
channel
must
be
selected
each
time
the
VCR
is
u
sed.)
_
•
If
picture
interference
appears
on
the
TV
screen
in
step
©
above,
you
can
change
the
video
channel
(RF
output
channel
from
the
VCR)
with
the
following
procedure.
(If
UHF
channel
37
is
an
active
broadcast
channel
in
your
area,
manually
select
a
different
channel
(UHF
28
to
UHF
69)
(see
below)
and
then
retune
your
TV
as
(A)
Press^
S
TANDBY
on
the
VCR
or
the
remote
control.
The
VCR
enters
POWER
STANDBY
mode.
(Bf
Keep
pressing
MENU
for
more
than
two
seconds
to
light
up
the
-InTf
on
the
VCR
display,
(C)
Press
CHANNEL
a/T
on
the
VCR
or
A/T
of
%
►
on
the
remote
control
to
manually
select
an
unused
channel
for
use
as
the
video
channel,
then
press
SET.
(D)
Repeat
steps
©
to
©
above
using
the
newly
selected
video
channel.

MENU
screen
is
a
home
screen
used
to
select
various
screen
functions.
A
sub¬
menu
will
appear
once
you
select
an
item
for
the
menu.
0
Turn
on
your
TV
and
select
the
video
channel.
©
Turn
on
the
VCR,
©
Press
MENU
to
display
the
MENU
screen.
0
Select
the
item
you
want
by
pressing
A
or
T
on
the
remote
control.
Refer
to
the
pages
listed
below
for
details
on
each
item.
The
following
5
items
can
be
set
by
using
the
On
Screen
Display
(OSD).
1:
TIMER.Setting
a
timer
recording
(and
checking
it).
(See
page
25
for
the
setting
procedure.)
2:
MODE.VCR
operating
conditions
are
set
according
to
the
broadcast
reception
and
tape
playback
conditions.
(See
page
16.)
3:
CHANNEL
PRESET.Setting
the
channels.
(See
page
13.)
4:
CLOCK.Setting
the
present
time.
(See
page
12.)
5:
LANGUAGE.Selection
of
language
to
be
used
for
the
On
Screen
Display.
(See
page
11.)
©
Press
SET.
The
screen
changes
to
the
item
which
you
have
selected,
©
To
cancel
the
MENU
screen,
press
MENU.
OSD
(On
Screen
Display)
The
tape
counter
and
VCR
mode
can
be
shown
on
the
screen
while
you
are
playing
back
a
tape
or
watching
a
broadcast
on
the
video
channel.
...
.
_
Display
example
►
PLAY,
X2
VSF,
FF
◄◄
VSR,
REW
■
STOP,
CASSETTE
IN
II
►
F.ADV
II
►
SLOW
II
STILL
•
REC
•II
REC
PAUSE
Sharp
Super
Picture
Operating
mode
•
Tape
speed-
Simple
Recording
timer
•
Clock
display
-
Calendar
display-
S.
PICTURE
ON
0START
11:
0OAK
STEREO-
-SP
I
STOP
11:3
0JIH1
L
R-
REPEAT
—
-12:3
0AM
|21/0S
03
|
I
REM
1:051
0
:
0
0
.
0
0
Real
time
counter-
■
Programme
channel
position
-Audio
System
(STEREO)
-
Audio
output
indicator
■
Auto
Repeat
display
■
Tape
remaining
for
DPSS)
“
DPSS
T
•
If
REPEAT
mode
has
been
set
to
ON,
"REPEAT'
will
be
displayed
on
the
TV
screen.
Select
display
off
mode
for
the
OSD
or
turn
REPEAT
mode
to
OFF
(see
page
29)
to
remove
indication
from
the
screen.
How
to
Display
Indicators
O
Turn
on
your
TV
and
select
the
video
channel.
©
Turn
on
the
VCR.
Mode
indicators
are
displayed
in
the
AUTO
display
screen.
©
Each
time
MODE
OSD
is
pressed,
the
screen
changes
as
follows:
O
AUTO
Display
—
►
©
FULL
Display
—
►
©
COUNTER
Display
—
►
0
Display
off
AUTO
Display
When
each
of
the
operation
buttons,
numeric
buttons
or
CHANNEL
a/T
is
pressed,
the
current
mode
or
the
number
of
the
channel
will
be
displayed
in
the
upper
section
of
the
TV
screen
for
about
3
seconds.
•
When
you
record
a
video
signal
output
from
this
VCR
on
another
VCR,
press
MODE
OSD
to
select
Display
Off.
(If
the
mode
indicator
is
displayed
on
the
screen,
it
is
also
recorded
on
the
tape.)
10

gg
Setting
the
Language
PREPARATION
•
Select
the
video
channel
on
your
TV
and
turn
power
ON
the
VCR.
I
NOTE
f>
•
Language
setting
screen
will
appear
when
the
VCR
is
used
for
the
first
time.
If
the
power
has
been
disconnected,
clock
setting
screen
will
appear
first.
____——--
•
While
in
MENU,
the
CHANNEL
A/
CHANNEL
T/REW^/FF
on
the
VCR
operates
the
following
functions
(same
functions
on
the
remote
control):
CHANNEL
A
A
CHANNEL
T
-»
T
REW
◄◄
-4
A
FF
►
0
REW
FF
0
e
rr
C
CHANNa
Y
A
O
O
o;
OPSMTE
CH
A
VOL®
O
CD
CD
INPUT
v
•
x
:
__^
SELECT
CHY
■
yds
■
nMEH
AUDIO
SKIP
2ER0
'<
pES*
OlfT
BEARO*
HACK
CD
,0
O
CD
"MENU
iiMfn
L*
V
-
)
Tj
cuah
Hueaa
CD
d>
d>
ot.
iOW'iVi
I
©©©
o
CzKjKD
Q>
Initial
Setting
of
Language
f'
LANGUAGE
FRANCA3S
BflPAflOL
A
SET
Y>0
O
Select
the
language
with
A/
▼
and
press
SET.
Ex.;
ENGLISH
|NOTE
>
A
▼
i
S
ELECT
SET:ENTER
MENU
x
EXIT
-J
•
Refer
to
page
12
to
set
the
clock.
Changing
Language
•
If
the
language
has
already
been
set
previously
and
you
want
to
change
it,
follow
the
steps
below.
MENU
0*
---
MENU
TIMER
MODE
CHANNEL
PRESET
CLOCK
A
T*.
SELECT
SETiENTER
MENU5EXIT
----—
A
SET
S'O
0
Press
MENU.
Select
item
“LANGUAGE”
with
A/T
and
press
SET.
-
1
■
LANGUAGE
FRAN^AIS
BSRAflOL
A
▼
:
S
ELECT
SET:ENTER
MENU:EXIT
A
SET
T
*
O
©
Select
the
language
with
A/T
and
press
SET.
Ex.:
ENGLISH
MENL
1
a
Normal
Cj
"
Screen
©
To
return
to
the
normal
screen,
press
MENU.
11

Setting
the
Clock
When
you
use
the
VCR
for
the
first
time
or
after
a
power
failure
of
more
than
60
minutes
the
clock
have
to
be
reset.
Apply
power
to
the
unit
to
switch
it
on.
Then
perform
the
following
procedure.
PREPARATION
•
Select
the
video
channel
on
your
TV
and
turn
on
the
VCR.
SET
A/
▼
/
◄
/
►
initial
Setting
of
Clock
0
First
set
the
language
(refer
to
page
11).
Then
press
SET,
A
or
T
f
.
‘
N
CLOCK
HOP
E
TIME
PATE
YEAR
PTD
3.2'DOM
1/Ql
□
D
MOPEi24H/12E
A
hi
SELECT
A
Y
j
CHANGE
SET:ENTER
MENU:EXIT
.
J
—
CLOCK
Numeric
HOPE
TIME
PATE
YEAR
buttons
12H
HjiWHETTl
1/
oi
oo
or
A/T
«
Vi
SELECT
A
V
sCHANGE
SET;ENTER
MENU
s
EXIT
.-
.
,
-
-
--
'
Numeric
buttons
or
A/T
f
—
5
———-—>
CLOCK
MODE
TIME
DATE
YEAR
12H
10;2&U
HWJilH
0
D
DATE
iDAY/MOHTB
Numeric
buttons
or
A/T
CLOCK
HOPE
TIME
PATE
YEAR
12H
10:29M
15/12
SET
o
Normal
Screen
©
Select
whether
the
clock
should
show
12-hour
AM/PM
time
or
24-hour
time
by
pressing
A/T
and
then
press
►
.
Ex.:
12H
^
^
I
NOTE
>
°
“24H".24-hour
display.
•
“12H”.12-hour
AM/PM
display.
•
12H
(AM/PM)
mode
Is
preset
at
the
factory.
©
Set
the
present
time
with
the
numeric
buttons
or
A/T
on
the
remote
control.
(First
set
the
‘hour’
digits
and
then
the
‘minute’.
If
there
is
only
one
'hour'
or
one
'minute'
digit,
enter
a
0
first.)
W
^
Set
AM
or
PM,
using
AM/PM
(12
hour)
and
then
press
►
.
Ex.:
10:28AM
I
NOTE
>
•
If
12H
mode
was
selected,
then
set
the
AM/PM
indicator.
0
*
►
©
Set
the
date
with
the
numeric
buttons
or
A/T
on
the
remote
control.
(First
set
the
'day
1
digits
and
then
the
‘month’.
If
there
is
only
one
’day’
or
one
‘month’
digit,
enter
a
0
first)
and
then
press
►
,
Ex.:
15/12
(Dec.
15)
Set
the
year
digits
with
the
numeric
buttons
or
A/T
on
the
remote
control.
(Enter
the
last
two
digits
of
the
year.)
Ex.:
03
(2003)
©
Press
SET
button
to
return
to
the
normal
screen.
Changing
the
Clock
Setting
MENU
o»
-
HEHO
B-COD&
TIH8H
HDDS
CKM1ITBL
PJIHHBT
A
SET
T>
O
O
Press
MENU.
Select
item
“CLOCK”
with
A/T
and
press
SET.
©-©
Follow
steps
©
through
©
above
and
step
©
below.
A
▼
;SELECT
BBT
f
BITTER
N
Btl
IT
t
BXZT
...
4
t
MENU
.
Normal
O
?
O
f
Screen
©
Press
SET.
To
return
to
the
normal
screen,
press
MENU.
12

Setting
the
Channels
Your
VCR
can
receive
VHF
channels
0
to
12
and
UHF
channels
28
to
69.
Your
VCR
has
48
programmable
channel
positions,
each
of
which
can
be
set
to
any
of
the
above
broadcast
channels.
The
channel
positions
have
been
preset
at
the
factory
as
shown
below.
Posllton
Preset
TV
Channel
Position
Preset
TV
Channel
□
Skipped
channel
8
Skipped
channel
1
Skipped
channel
9
VHF
9
2
VHF
2
10
VHF
10
3
Skipped
channel
11'27
Skipped
channels
4
Skipped
channel
28
UHF
28
5
Skipped
charnel
29-46
Skipped
channels
6
Skipped
channel
7
VHF
7
47
Skipped
channel
I
NOTE~>
•
Use
the
a
/
Y
/
◄
/
►
■
buttons
on
the
remote
control
to
set
the
OSD.
•
Channel
position
numbers
0,
1,
3
to
6,
8,
11
to
27,
and
29
to
47
have
been
factory
set
to
be
skipped
when
CHANNEL
A
is
used.
•
If
the
picture
is
not
clear,
if
you
want
a
different
channel
from
the
one
preset
or
if
you
wish
to
reset
a
skipped
channel,
reset
the
channel
as
follows.
AUTO
TUNING
PREPARATION
•Select
the
video
channel
on
your
TV
and
turn
on
the
VCR.
MENU
O*
MB
HU
TIMER
MODE
CLOCK
LANGUAGE
A
SELECT
SET
l
ENTER
MB
HU
1
EXIT
-
---
siO
O
Press
MENU.
Select
item
"CHANNEL
PRESET”
with
A/Y
and
press
SET.
A
or
▼
manual
A
Tz
SELECT
8
ES*:
ENTER
HBHO;
EXIT
-J
SET
♦
o
©
Select
item
"AUTO"
with
A/Y
and
press
SET.
1
AUTOMATIC
TUNING.
TLEA6K
WJIIT»
HBirU;
EXIT
V
_»____
x
Normal
*
Screen
©
The
channel
display
on
the
TV
screen
will
continue
through
all
of
the
channels
and
when
finished,
the
TV
screen
will
return
to
the
normal
screen.
The
bar
display
indicates
the
estimated
amount
of
channels
tuned.
I
NOTE
>
•
If
additional
unwanted
channels
were
found,
refer
to
page
15
to
skip
unwanted
channels.
•
If
some
channels
were
unable
to
be
found,
refer
to
Manual
Tuning
on
page
14.
13

Setting
the
Channels
MANUAL
TUNING
PREPARATION
•
Select
the
video
channel
on
your
TV
and
turn
on
the
VCR,
Example:
Tuning
Broadcast
TV
Channel
7
to
preset
Channel
3.
MENU
o*
|CHANNEL
A
SET
O
O
Press
MENU,
Select
item
"CHANNEL
PRESET"
with
a/Y
and
press
SET.
CHANNEL
PRESET
AUTO
A
▼
:
S
E
LECT
SET*ENTER
MENU
*
EXIT
k
..
..
..
A
SET
o
©
Select
item
“MANUAL"
with
A/Y
and
press
SET.
Numeric
buttons
or
◄
/
►
[Preset
CH]
Bpubsbt
or
B
CHANNEL
25
pine
>rnNlKa
<
►
skip
oh
tOTM
A.
Vi
SELECT
<
►
:
CHARGE
SETlEHIBR
MENUiEXIT
»
T
©
Select
the
preset
channel
position
number
with
the
numeric
buttons
or
A/^
and
then
press
Y.
Numeric
buttons
or
◄
/
►
[Broadcast
CH]
PRESET
CH
3
Qchannel
EE
PINE
TUNING
4
►
skip
on
E229
A.
Vi
SELECT
4
►
;CHANGE
SET:ENTER
MEND
I
EXIT
-
J
©
Press
the
numeric
buttons
or
A/>*
until
you
see
the
desired
broadcast
channel
on
your
TV
and
then
press
Y.
1
NOTE
>
*
When
Digit
select
is
set
to
two
digit
input,
and
the
channel
number
is
only
one
digit,
enter
“0"
first.
[Fine
tuning]
^...
.
PRESET
CH
3
CHANNEL
07
Seine
tuning
JgJgOjJ
SKIP
ON
HE9
A
V;£
ELECT
4
>
:CHANGE
SET*
ENTER
ME
HU
*
EXIT
^
.—...
✓
◄
or
►
©
For
fine
tuning,
press
A!>-
until
the
broadcast
channel
comes
in
clearly
on
your
TV.
a
Next
"
Screen
©
Press
SET.
If
you
wish
to
preset
more
channels,
repeat
steps
©
through
©.
MENU
ki
,
x
Normal
(J
"
Screen
©
To
return
to
the
normal
screen,
press
MENU.
1
NOTE
>
•
Numeric
buttons
on
the
remote
control
can
also
be
used
to
select
channel
numbers.
Press
-/»•
to
switch
between
one
and
two
digit
numbers
for
step
©.
14

Channel
skip
If
there
are
channel
positions
that
are
not
preset,
you
can
skip
them
with
the
following
procedure.
PREPARATION
w
_
_
•
Select
the
video
channel
on
your
TV
and
turn
on
the
VCR.
Example:
Skip
channel
position
12.
MENU
o»
MENU
timeu
MODE
CLOCK
LANGUAGE
A
yl
S
ELECT
SEtTt
ENTER
MENUtEXXT
_——J
A
SET
T>0
O
Press
MENU.
Select
item
“CHANNEL
PRESET"
with
A/V
and
press
SET.
•
A
or
▼
CHANNEL
PRESET
SET
♦
o
0
Select
item
"MANUAL"
with
A/
▼
and
press
SET.
◄
/
►
or
/Numeric)
\
buttons
)
r~
Epreset
cb
EE
CHANNEL
02
FINE
TUNING
SKIP
ON
ESB
0
Set
the
channel
position
you
wish
to
skip
with
◄
/
►
(or
numeric)
buttons.
Ex.:
12
A
or
T
r
"
PRESET
CH
12
CHANNEL
0
2
FINE
TUNING
►
gSKIP
on
EH3
0
Select
SKIP
setting
mode
with
A/'f
.
◄
or
►
PRESET
CE
12
CHANNEL
02
FINE
TUNING
4
►
Bskip
EM
0FF
SET
♦
o
0
Press
<*/
►
•
to
select
SKIP
ON
and
press
SET.
®
If
you
wish
to
set
more
channels
to
be
skipped,
repeat
steps
0
through
©.
4
Normal
rj
*
Screen
0
To
return
to
the
normal
screen,
press
MENU.
Cancelling
skip
PREPARATION
•
Select
the
video
channel
on
your
TV
and
turn
on
the
VCR.
Example:
Reset
chan
nel
position
12.
_____
•
Follow
the
same
procedures
O.
©
in
Channel
skip
and
then
the
procedures
©-©
below.'
or
/
Numeric)
\
buttons
J
c
~»
Epreset
cb
EE
CHANNEL
02
PINE
TUNING
4
>
SKIP
EB
0FF
0
Select
the
channel
position
you
wish
to
unskip
with
the
numeric
or
buttons.
Ex:
12
A
or
T
r
PRESET
CH
12
CHANNEL
02
FINE
TUNING
►
Bskip
■
v
0FF
0
Select
SKIP
setting
mode
by
pressing
A
/
▼
•
◄
or
►
PRESET
CH
12
CHANNEL
02
FINE
TUNING
i_jL
Bskip
G“
K‘1E
J
SET
♦
o
0
Press
-41^
to
select
SKIP
OFF
and
press
SET.
0
If
you
wish
to
unskip
more
channels,
repeat
steps
©
through
©.
<
Normal
t
Screen
0
To
return
to
the
normal
screen,
press
MENU.
15

Mode
Selection
You
can
set
the
basic
functions
listed
in
the
table
below
on
the
MODE
selection
screen.
PREPARATION
•Turn
on
your
TV
and
select
the
video
channel
and
turn
on
the
VCR.
-A-
|o
KSHU
TIMER
SET
►
O
O
Press
MENU.
ClIAHllHL
PRRflBT
CLOCK
L
AH
QUA
OB
A
▼
i
5
BLRCT
0
RT
t
ENTER
M
SHU
j
BRIT
©
Select
the
MODE
selection
mode
with
A/Y
and
then
press
SET.
[COLOUR]
'-
g)COLODA
Rl
iiTf'%
PA
Ii
HTSC
II
sue
3
-
5£L
4.0
ItMlFufl
blub
Back
TTrrgj
op?
AUTO
RRJJTAL
OPP
BSP
BAT
OH
M-Nl
JDBT
BBC
07P
A
YiD
RLECI
-4
h
*
CBAN<l£
MSWBiBXlT
or
}
T
►
©
Select
the
COLOUR
mode
by
pressing
-*(/
►
and
then
press
Y.
(For
details,
see
Colour
Mode
on
page
18.)
AUTO.Usually
select
AUTO
mode.
PAL.Strict
PAL
colour
mode.
NTSC.Strict
NTSC
colour
mode.
[NTSC
mode]
”
.
...
COLO
DJI
ECHJ
PAL
HTSC
EjHTflC
3.
SB
4.4
2
EnJEf
BLUB
BACK
LUMjl
OPP
AUTO
RENTAL
OPP
RAP
BAT
OH
BIM
JBflT
RBO
OPP
A
YxBELECT
■
<
►
iCHAHOB
a
BT
»
BlITZm
HBHU
|
a
bit
or
^
T
©
Select
the
NTSC
mode
by
pressing
and
then
press
Y.
(For
details,
see
NTSC
AV
Recording
on
page
23.)
NTSC
3.58.When
using
NTSC
3.58
TV
system
format.
(Input
signal:
NTSC
3.58)
(Input
signal:
NTSC
4.43)
PAL
TV.When
using
PAL
TV
system
format.
(Input
signal:
NTSC
4.43)
[BLUE
BACK]
COLOUR
IJMCI
PAL
HTSC
NT
tic
3.59
4.43
pB3
0BLDE
BACK
OFF
AUTO
RSHTAL
OFF
BBPBAT
OH
EEH
JUST
RSC
EEZB
077
A
YiSELSCT
M
>
xCRANQB
GBT1SHIER
HBHUI
8X1T
.—
of
|
Y
►
©
Select
the
BLUE
BACK
mode
by
pressing
«</
►
and
then
press
Y.
(For
details,
see
Blue
Back
on
page
19.)
AUTO.Usually
select
AUTO.
A
blue
screen
will
appear
when
your
VCR
receives
no
TV
signal
or
an
unrecorded
tape
is
played
back.
OFF.Select
OFF
if
the
screen
turns
blue
due
to
weak
TV
signal
reception
or
playback
of
a
poorly
recorded
tape.
[AUTO
RENTAL]
COLOUR
(ISO
PAL
UTGC
1IT0C
3,5
0
4.43
[iMIit
1
]
BLUB
BACA
QEQj
aV
*
Qau
TO
RSHTAL
BW
OPP
RRPBAT
OKI
JUST
REC
p-IM
OPP
A
TlSBLSCT
<
>
tCCAHflS
GETjEHTER
MENU*
EXIT
or
^
Y
►
©
Select
the
AUTO
RENTAL
mode
by
pressing
and
then
press
Y.
(For
details,
see
Auto
Rental
Mode
on
page
19.)
[REPEAT]
COLOUR
PAL
HTSC
HTSC
3.20
4.43
fg'iWflJ
BLUE
BACK
ECCQI
opp
AUTO
RSHTAL
EM
077
Erepeat
oh
EQ3
JUST
REC
WW
OPP
A
TiflHLRCT
4
V
iCBAHQR
EETxEHTER
MKUUiBXIT
w
^
T
©
Select
the
REPEAT
mode
by
pressing
and
then
press
Y.
(For
details,
see
Auto
Repeat
on
page
29.)
[JUST
REC]
COLOUR
fiMHM
PAL
ZITSC
HTSC
3,58
4.43
8Lns
back
Lvwj
off
AUTO
RSHTAL
ES
OPP
RRPBAT
Oil
M-IUM
Qjust
rsc
ESH
opp
A
YtORLBCT
<
►
tCHAHaS
SB
11
BltTsR
HBHtl
»
ST
XT
◄
.
or
^
T
►
©
Select
the
JUST
REC
mode
by
pressing
and
then
press
Y.
(For
details,
see
Intelligent
Timer
Recording
(JUST
REC)
on
page
28.)
SIT
Normal
(__)
~
(_)
~
Screen
©
Press
SET.
To
return
to
the
normal
screen,
press
MENU.
16

Inserting
a
Video
Cassette
Gently
insert
the
video
cassette
into
the
cassette
compartment.
The
VCR
turns
on
automatically.
If
the
cassette
is
inserted
incorrectly,
the
loading
system
will
not
function.
Do
not
force
the
cassette
into
the
VCR.
When
the
cassette
has
been
properly
loaded,
"[ctd]"
appears
on
the
VCR
display.
To
remove
the
cassette,
press
EJECT
during
stop
mode._
Playback
PREPARATION
•
Turn
on
your
TV
and
select
the
video
channel.
f'
Insert
a
cassette,
PLAY/X2
'
i
p
LAY/x2
.
t
®
®
^f|
REW
■
—
FF
"
:"
\
/
SIOP-;f
^3
eject
lsy
r.:;§;@i
o-r/v
k
innv
I'
*,
V!V.•
«tr*;
■
STOP-Hr
I
EJECT
STANDBY
.
i
'
;i
'iVhiV
sHAPtr*
■
vm«i
cu^pBptconakf
i
E
''
■■■
)Vj|
O
Turn
on
the
VCR.
©
Insert
a
cassette.
©
Press
PLAY/X2.
(The
auto
tracking
control
system
engages
and
“
►
"
flashes
on
the
TV
screen
for
a
few
seconds.)
©
To
stop
playback,
press
STOP.
(If
the
tape
reaches
its
end,
the
VCR
will
automatically
rewind
the
tape
to
the
beginning,
turn
off
the
power
and
eject
the
tape.)
•
NTSC
tapes
recorded
in
Hi-Fi
and
EP
mode
may
appear
distorted
during
playback.
This
does
not
indicate
a
malfunction.
The
tracking
function
can
be
used
to
slightly
enhance
the
picture
quality.
Notes
for
S-VHS
tape
•
Playback
of
S-VHS
recorded
tapes
is
possible.
•
Playback
of
S-VHS
image
quality
is
not
available.
•
Picture
noise
or
distortion
may
appear
on
the
screen
during
playback
in
the
SLOW
or
STILL
mode.
•
S-VHS
recording
is
not
available.
However,
HQ
recording
is
possible
with
S-VHS
tape.
Video
Search
Use
the
following
procedure
to
quickly
find
the
section
you
want,
while
viewing
the
picture.
O
During
playback,
press
FF
for
forward
video
search
or
REW
for
reverse
search.
PAL
TAPE
Faster
Video
Search
Slower
Video
Search
SP
x9
X5
LP
Xll
X5
EP
X27
X9
SP/LP
X7
X5
EP
X21
X9
NTSC
TAPE
There
are
2
search
speeds
in
each
direction.
The
VCR
switches
between
them
each
time
the
button
is
pressed.
©
Press
PLAY/
X
2
to
resume
normal
playback.
i
NOTE
>
•
During
video
search
of
a
tape
recorded
in
the
LP
mode
and
EP
mode,
the
upper
part
of
the
picture
may
be
skewed
to
one
side.
Fast
Forwarding
and
Rewinding
©
To
move
through
the
cassette
faster,
press
STOP
and
then
press
FF
or
REW
to
fast
forward
or
rewind
the
cassette.
(The
picture
cannot
be
viewed
in
this
mode.)
©
Press
STOP
to
stop
fast
forward
or
rewind.
•
If
you
use
other
than
E-90/E-180
cassettes,
fast
for¬
ward
and
rewind
may
take
somewhat
longer.

Playback
Slow
Motion
Playback
(with
the
Remote
Control)
O
Press
SLOW
on
the
remote
control
during
playback.
©
Press
SLOW
©
or
0
(to
the
right
of
SLOW)
to
vary
the
slow
motion
playback
speed
between
Vs
and
Vso
of
the
normal
playback
speed.
_
©
Press
PLAY/X2
to
resume
normal
playback.
I
NOTE
>
•
No
noise
can
be
erased
when
a
tape
recorded
in
the
NTSC
SP
mode
is
played
back
in
special
modes
(still
picture,
slow
motion,
etc.).
However,
this
does
not
indicate
a
malfunction
with
the
VCR.
•
During
slow
motion,
still
picture,
frame
advance
and
double
speed
playback
with
a
tape
recorded
in
the
PAL
EP
mode,
noise
may
appear.
•
When
playback
a
tape
recorded
in
the
PAL
EP
mode
during
slow
motion,
auto
tracking
function
is
prohibited
in
use,
O
DPSS
I
►
S
LOW
—
©-©
CD
CD
CD
Still
Picture
and
Frame
Advance
O
Press
PAUSE/STILL
(F.ADV)
during
playback.
This
will
freeze
the
picture
on
your
TV.
©
If
noise
bars
appear
on
the
screen
during
still
picture,
set
your
VCR
to
the
slow
mode
and
press
CHANNEL
A/T
to
make
the
noise
disappear.
Then
press
PAUSE/STILL
(F.ADV)
again
©
if
there
is
vertical
jitter
during
Still
Picture
Playback,
press
CHANNEL
a/T
to
stop
the
jitter.
0
Press
PAUSE/STILL
(F.ADV)
during
still
mode
for
frame
advance.
©
Press
PLAY/X2
again
to
resume
normal
playback.
Double
Speed
Playback
O
Press
PLAY/X2
during
playback.
The
tape
will
be
played
back
at
twice
the
normal
speed.
©
Press
PLAY/X2
to
resume
normal
playback,
NOTE
>
•
Sound
is
muted
during
video
search,
slow
motion,
still
picture,
frame
advance
and
double
speed
playback.
•
To
avoid
damage
to
the
tape,
your
VCR
will
resume
normal
playback
after
about
5
minutes
of
slow
motion
playback
and
still
picture.
•
During
slow
motion,
still
picture,
frame
advance
and
double
speed
playback
with
a
tape
recorded
in
the
LP/EP
mode,
the
upper
part
of
the
picture
may
be
skewed
to
one
side.
•
During
Standard
Play
(SP),
video
search,
slow
motion,
still
picture,
frame
advance
and
double
speed
playback,
some
picture
noise
will
remain.
Colour
Mode
If
a
colour
recording's
quality
is
poor,
the
picture
may
turn
black
and
white.
In
this
event,
set
the
COLOUR
mode
on
the
MODE
selection
screen
to
"PAL”
(strict
PAL
colour
mode)
or
“NTSC”
(strict
NTSC
colour
mode).
Normally,
the
colour
mode
should
be
set
to
“AUTO”.
(See
Mode
Selection
on
page
16.)
I
NOTE
>
•
When
the
colour
mode
is
set
to
fixed
colour
mode
while
the
VCR
is
playing
back
a
black
and
white
tape
or
is
receiving
a
black
and
white
broadcast,
the
picture
may
be
coloured.
In
this
event,
set
the
COLOUR
mode
on
the
MODE
selection
screen
to
"AUTO”.
Bcolouh
EEBal
E
AL
NTSC
NTSC
3.
SB
4
,
4
3
HTTWET]
BLUE
SACK
223
OFF
AUTO
RENTAL
E3B
0FF
REPEAT
ON
TTJJ
JUST
REC
EEH
OFF
A
T:
S
E
LECT
«
►
:CHANGE
SET:ENTER
MENU:
E
X
IT
(Change
with
M
or
►
.
)
Then
press
SET.
NTSC
Tape
Playback
on
PAL
TV
When
you
playback
an
NTSC
tape
on
your
VCR,
it
is
possible
to
use
a
PAL
or
multi-system
compatible
TV..
However,
please
note
the
following:
•
The
picture
will
shrink
vertically
to
some
degree,
as
shown
in
the
diagram,
but
this
does
not
indicate
a
malfunction
in
your
TV
or
VCR.
•
If
your
TV
does
not
have
a
V-HOLD
control,
the
picture
may
roll
and
be
unwatchable.
However,
if
you
use
a
TV
with
a
V-HOLD
control,
you
can
stop
the
rolling
by
adjusting
the
V-HOLD
control
and
watch
the
picture.
•
Horizontal
noise
bars
may
appear
on
the
screen
during
special
effect
playback
(video
search,
still,
slow,
frame
advance,
and
double
speed
playback),
possibly
accompanied
by
discolouring.
•Although
NTSC
tapes
can
be
played
back
into
a
PAL
TV,
those
tapes
cannot
be
dubbed
by
a
PAL
system
VCR
connected
to
the
AUDIO
OUT
and
VIDEO
OUT
terminals
of
this
product.
Tapes
recorded
in
this
way
cannot
be
played
back
on
PAL
system
VCRs.
•
Set
the
COLOUR
mode
to
AUTO.
If
the
COLOUR
mode
is
set
to
PAL,
you
cannot
playback
the
tape.
18

Playback
Auto
Tracking
Control
System
This
function
automatically
adjusts
the
tracking
to
match
the
J
yl
recorded
tape.
Auto
tracking
engages
in
the
following
cases:
•When
you
insert
the
cassette
and
begin
playback.
Ofu
•When
you
press
CHANNEL
A
and
Y
at
the
same
time.
--—
--
•
When
the
VCR
has
been
playing
back
an
unrecorded
poor
tracking
section
of
tape
and
then
reaches
a
recorded
tape
segment.
When
auto
tracking
engages,
“
►
"
on
the
TV
screen
flashes
for
a
few
seconds.
Normal
tracking
I
NU
I
C
•
When
a
poorly
recorded
tape
is
played
back,
auto
tracking
may
not
operate
normally.
In
this
event,
manually
adjust
the
tracking
with
CHANNEL
±/Y
to
make
any
noise
disappear.
Auto
Head
Cleaning
System
When
the
tape
is
inserted
or
ejected,
this
system
automatically
cleans
the
drum
and
heads
with
a
special
roller
before
recording
or
playback
begins,
protecting
the
heads
and
drum
from
dirt
and
preserving
beautiful
picture
quality,
Quick
Start
with
Full
Loading
Mechanism
Your
VCR
has
a
standby
function
(Full
Loading
Mechanism)
to
allow
immediate
recording
and
playback.
After
pressing
REC
or
PLAY/X2,
it
takes
about
2
seconds
until
recording
or
playback
is
engaged
when
in
the
standby
mode.
Auto
Rental
Mode
(This
function
only
works
when
AUTO
RENTAL
mode
on
the
MODE
selection
screen
is
set
to
ON.)
The
convenient
auto
rental
mode
lets
you
enjoy
playback
with
ease.
When
you
insert
a
cassette
with
the
erasure
protection
tab
removed
(rental
videos,
etc.),
your
VCR
automatically
turn
on
the
power,
rewind
the
tape
forward
to
find
the
recorded
section
and
playback
the
tape.
When
the
tape
reaches
the
end
of
recorded
section,
the
VCR
automatically
rewind
the
tape,
turn
off
the
power
and
eject
the
tape.
•
If
there
is
more
than
a
15
second
unrecorded
section
between
recorded
sections,
the
tape
will
automatically
stop
and
rewind.
To
watch
the
next
recorded
section,
press
STOP
fast
forward
to
that
section
and
play
the
tape.
•
If
the
erasure
protection
hole
is
covered,
press
PLAY/
x
2
after
the
power
turns
on
automatically.
(Auto
Rental
Mode
does
not
work.)
•
If
Auto
Rental
and
Repeat
(Auto
Repeat)
modes
on
the
MODE
selection
are
set
to
ON
simultaneously,
Auto
Rental
will
not
function.
(If
this
happens,
set
Repeat
(Auto
Repeat)
mode
to
OFF.)
•
The
AUTO
REPEAT
mode
has
priority
over
the
AUTO
RENTAL
mode.
If
the
AUTO
REPEAT
mode
is
set
to
ON
and
the
video
cassette
reaches
its
end,
the
VCR
will
rewind
the
tape
and
play
it
back
again
without
ejecting
the
tape
or
turning
off
the
POWER.
Blue
Back
Set
the
BLUE
BACK
mode
to
AUTO
on
the
MODE-selection
screen.
(See
Mode
Selection
on
page
16.)
This
function
eliminates
monitor
noise
and
mutes
sound
during
playback
of
unrecorded
portions
of
a
tape
and
when
receiving
a
non-broadcasting
channel.
A
blue
screen
will
also
appear
if
the
VCR
is
set
to
the
Auxiliary
input
(LINE
IN)
mode
but
no
video
signal
is
fed
to
the
VCR.
(The
BLUE
BACK
mode
is
set
to
AUTO
at
the
factory.)
I
NOTE
>
•
Blue
Back
does
not
function
during
still
picture,
variable
slow
motion
and
video
search.
•
Blue
Back
may
not
function
properly
if
the
broadcast
signal
is
too
strong
or
too
weak.
•
Blue
Back
cannot
be
recorded.
•
If
the
antenna
signal
is
weak
while
recording
a
TV
programme,
or
if
the
input
signal
is
weak
while
tape
dubbing,
the
monitor
screen
may
turn
blue
back
since
the
unit
may
not
recognize
whether
or
not
a
proper
signal
is
being
received.
In
this
event,
set
the
BLUE
BACK
mode
to
OFF.
19

Playback
irai
nm
-
Full
Auto
Playback
(This
function
only
works
when
AUTO
RENTAL
mode
on
the
MODE
selection
screen
is
set
to
OFF.)
Full
Auto
Playback
lets
you
enjoy
playback
with
ease.
When
you
insert
a
cassette
with
the
erasure
protection
tab
removed,
your
VCR
automatically
turn
on
the
power
and
playback
the
tape.
When
the
tape
reaches
its
end,
the
VCR
automatically
rewind
the
tape,
turn
off
the
power
and
eject
the
tape.
I
NOTE
>
•
if
the
erasure
protection
hole
is
covered,
press
PLAY/X2
after
the
power
turns
on
automatically.
Playback
of
Hi-Fi
Recorded
Tapes
This
VCR
will
playback
both
video
and
audio-only
tapes
recorded
in
the
Hi-Fi
mode.
I
NOTE
>
•
Stereo
sound
output
is
only
possible
using
the
AUDIO
OUT
terminals.
Sound
from
the
radio
frequency
converter
(RF
OUT)
is
mono
only.
A
blue
screen
will
appear
if
audio-only
Hi-Fi
tapes
are
played
back.
Audio
Output
Mode
The
audio
output
mode
is
controlled
by
AUDIO
OUT
on
the
remote
control.
The
VCR
is
normally
set
to
the
Hi-Fi
mode,
with
fl
and
B
displayed
on
the
On
Screen
Display
(OSD),
and
normal
stereo
sound
output.
Select
B,
and
only
the
Hi-Fi
Left
channel
audio
is
heard
from
both
the
Right
and
Left
speakers.
Select
El,
and
only
the
Hi-Fi
Right
channel
audio
is
heard
from
both
the
Right
and
Left
speakers.
If
you
select
the
mono
linear
track,
B
and
H
will
disappear.
I
NOTE
>
•
Should
the
Hi-Fi
output
level
be
poor,
the
VCR
will
automatically
select
the
mono
linear
track
output.
•
When
playing
back
tapes
which
have
only
Hi-Fi
sound
recorded:
if
Hi-Fi
sound
is
not
reproduced,
or
if
there
is
some
noise
in
the
audio,
press
CHANNEL
A
or
Y
until
the
sound
improves.
Adjusting
Hi-Fi
Audio
Tracking
(To
adjust
the
Hi-Fi
tracking
manually
when
playing
back
a
poorly
recorded
Hi-Fi
tape)
•
Normally
you
can
simultaneously
press
and
hold
both
CHANNEL
A
and
V
to
obtain
the
optimal
Hi-Fi
audio
tracking.
•
If
Hi-Fi
audio
is
unstable
(frequent
dropouts,
etc.)
with
a
rental
video,
a
tape
recorded
on
another
VCR,
restore
normal
tracking
while
playing
back
the
tape
as
described
below:
©
Press
MODE
OSD
and
select
the
Full
Display
mode.
(See
page
10.)
©
Simultaneously
press
CHANNEL
A
and
▼
.
©
Press
CHANNEL
▼
repeatedly
at
equal,
short
intervals
until
the
B
and
H
indicators
disappear
from
the
On
Screen
Display
(OSD),
©
Press
CHANNEL
A
in
the
same
manner
while
counting
button
operations
until
the
fl
and
H
indicators
reappear
and
then
disappear
again.
©
Press
CHANNEL
T
again
for
half
the
number
of
times
counted
in
step
©
above
to
obtain
optimal
tracking.
20
Other manuals for VC-H726X
1
Table of contents
Other Sharp VCR System manuals

Sharp
Sharp VC-A410X User manual

Sharp
Sharp VC-MH770SM User manual

Sharp
Sharp VC-H800X User manual

Sharp
Sharp VC-MH714HM User manual

Sharp
Sharp VC-A10 User manual

Sharp
Sharp VC-MH705HM/LM User manual

Sharp
Sharp VC-M522HM User manual

Sharp
Sharp VC-MH80 User manual

Sharp
Sharp DV-NC100S User manual

Sharp
Sharp VC-A410U User manual

Sharp
Sharp VC-M313HM User manual

Sharp
Sharp DV-NC55U User manual

Sharp
Sharp VC-H982U Assembly instructions

Sharp
Sharp VC-FH30FPM User manual

Sharp
Sharp VC-A400U User manual

Sharp
Sharp VC-SA350 User manual

Sharp
Sharp VC-MH71SM User manual
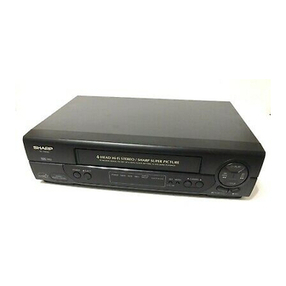
Sharp
Sharp DV-NC150U User manual

Sharp
Sharp VC-AA370 User manual
Sharp
Sharp VC-FH30GMS User manual