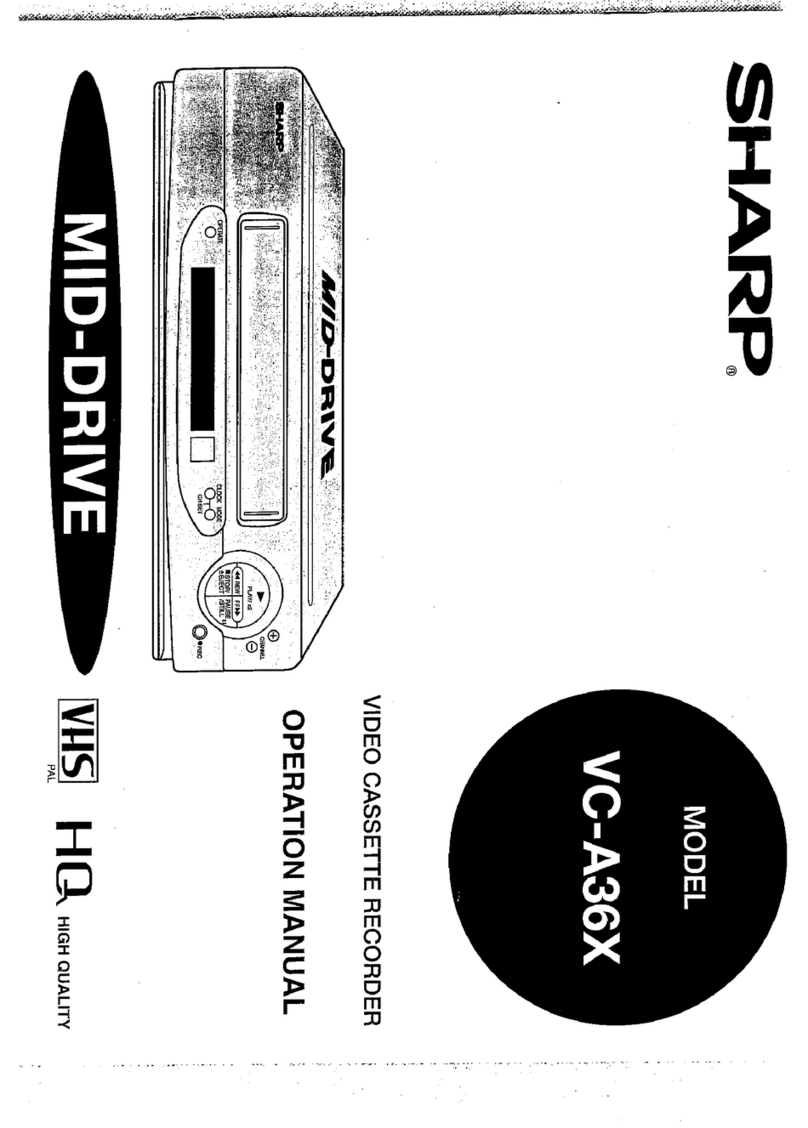
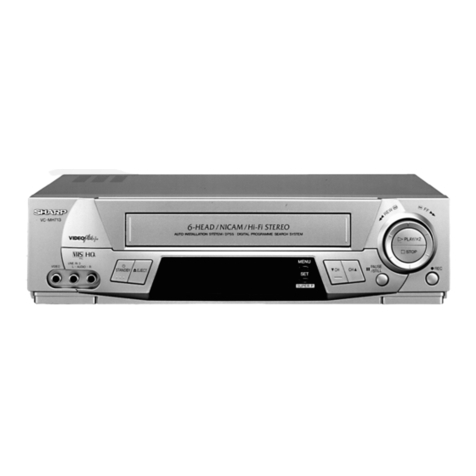
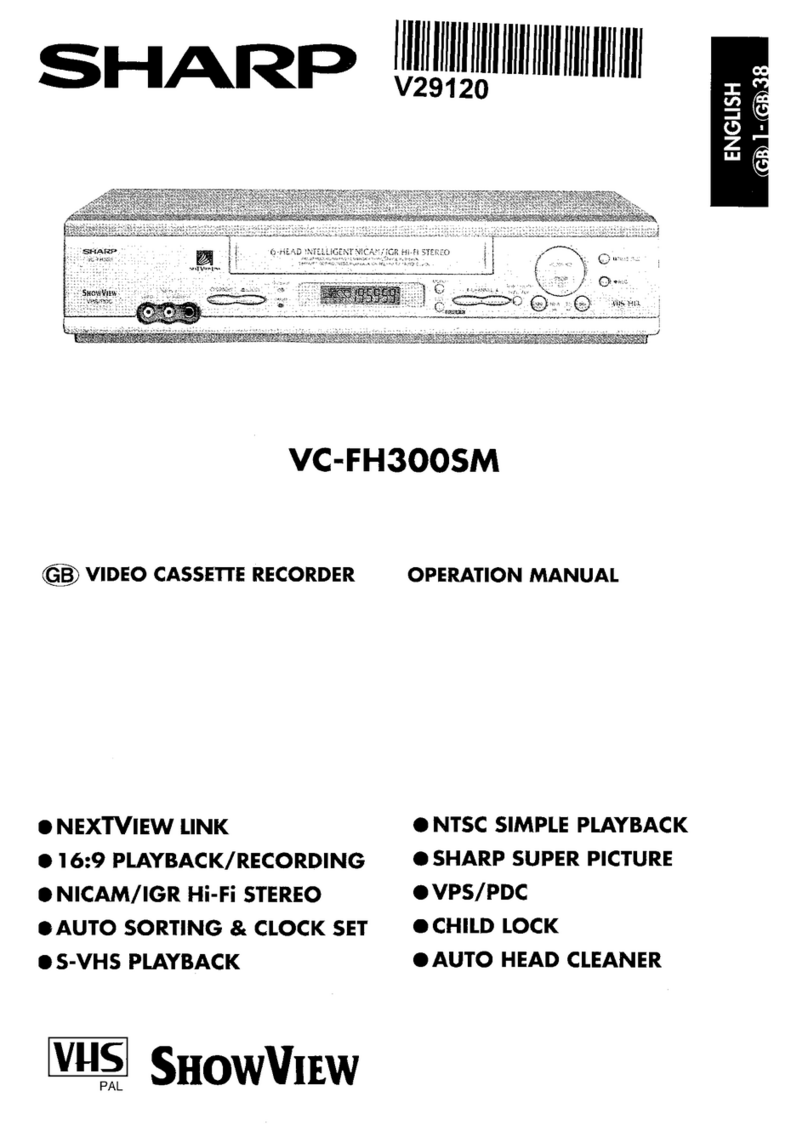
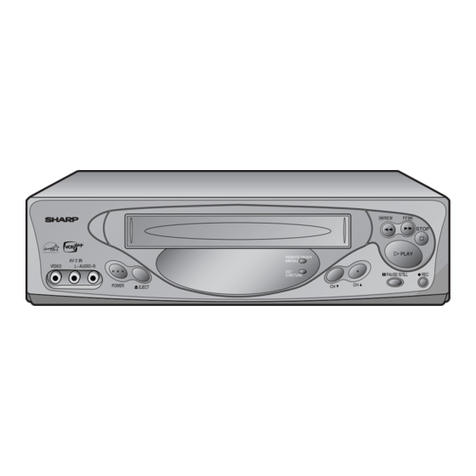
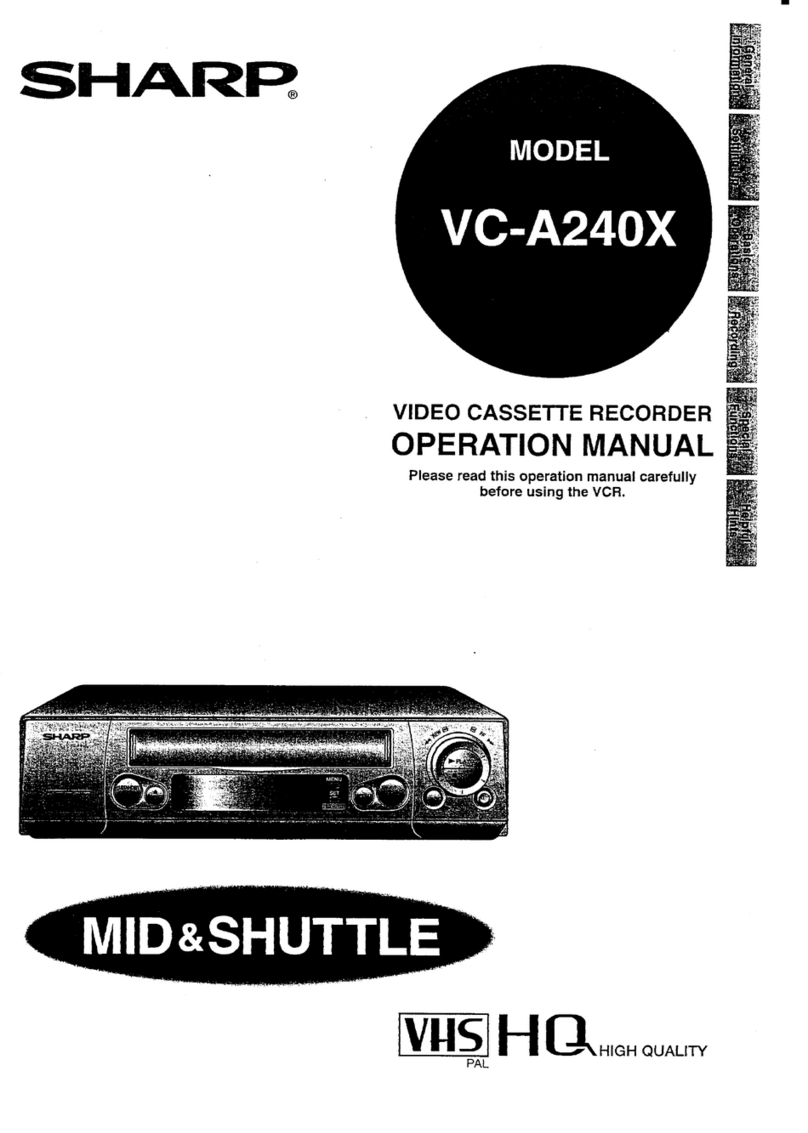
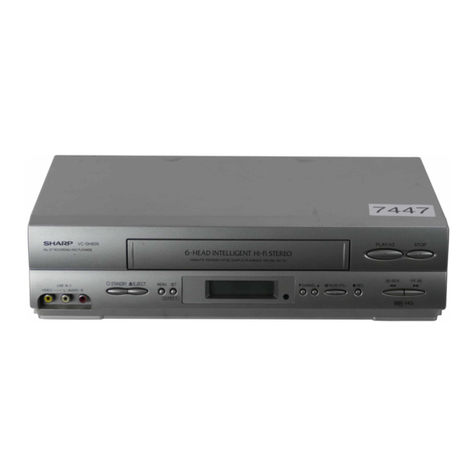
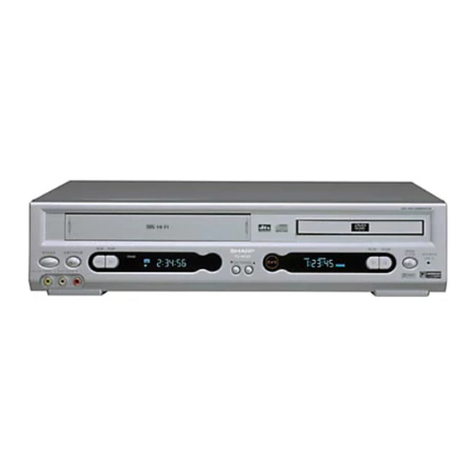
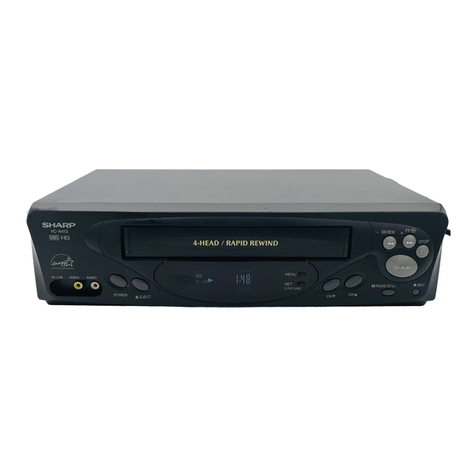
Sharp VC-AA370 User manual

SHARR
111
333
国回団
一一一
111
回回団
VIDEOCASSETTERECORDER
當帯式録影機
AD恥
uMAYvIDEoTHuPHATHiNH
DAuMAYⅥDEoTHuPHATHiNH
ENGLISH
中文
Viet
OPERATIONMANUAL
使用説明書
TAILIEuHuONGDANcAcHsI)DuNG
錘
趣蕊
驚謹
話
t,鰊
、
職、奪鑓−
4 、
識
懸議蕊総蕊患
…八盈匡
…
]
号郵
(VC‑AA570)
MHQ、HIGHQUALITY
PALSECAMNTSC
織患
総繍蕊擦纈蟻韓蕊
ご浮動i蕊
…
…鰹醤港
蟻篭
慧驚
蕊蕊蕊燕蕊

CONTENTS
ZG""F‑oⅧ
RecordingaTVProgramme.。.......。..…...…。
・CassetteEraseProtection
oRecordingaTVprogramme
。ToWatchAnotherTVProOrammeWhi
le
晋
Recordinq
警
SimpleRecordingTimer。..…....................、o
RecordingwiththeTimer.…..…....。..….......
・ConfirminqTimerProqrammes
曾
一
・Cancel
l
ingTimerProgrammes
21
IMPORTANTSAFEGUARDSAND
PRECAUTIONS…。.........。......……...………..……….、
Features.。..。....…........。.................。……。。......….....….
Accessories..…........................。......。....。..。.。...........、
MajorComponentsofYourVCR"………...………
RemoteControl
.....。.。..。……...。....。.。..........。.。..….。....・
・│nsertinOtheBatteries
BroadcastingSystemandSystemSet‑up....。....
23345
22
23
6
mSPECIALFUN~
Connections...。….。..…..….….。......…....。.......…..。.....、
7
AdjustingtheVideoChannel
.…..……。...……….….、
7
UsingtheRemoteControiforTVOperation
篇(onlyforVC‑AA570).…。.……。…….。.….….……凸。〃8
AutoTuningSystem.。.....。..…......…….…...…….。...、。
9
SettingtheLanguage。….…。...….............................10
SettingtheClock..。....。........…..…....….。....……...。….
11
SettingtheChannels。..........……..….。..".。…........。...
12
ChanneISkip/CancellingSkip.........…....。...…….…15
MenuScreen…..........。.。..。....…。....…....。..。.........。.。...、
16
OSD(OnScreenDisplay)
.….。...…...。..…..。......…....
16
・HowtoDisplavIndicators
ジ
ModeSelection……....……....….....................…….…17
SharpSuperPicture。...............…....………..……….."26
ZeroBackFunction.......….....….".…。...........。....。....、26
DPSS(DigitalProgrammeSearchSystem)……..26
AutoRepeat…...。.....…..............…....……................、27
SkipSearch.。.......。..。....。..。............。....。..….。."..。..…...、27
ReviewSearch
〃ル
II
ぎ
:
"。"¥
:
.,
=ざ鐸,
.
f
"
f
(onlyforVC‑AA570)6bj...。6……。.、5...曲…..a...6...527
里U異…、
雅凸
『
・
ⅡL…甜』〕』
1
二
・Ⅱ#
罐燕
NewChild‑ProofLock。.......….....….....................。.、28
VCRDisplay….。.....……..…….……...…...….……..…….29
EditingfromaCamcordertoYourVCR…….….…30
唖HELPFULHINTS
mBASlCOPERATION・
Specifications。........….......
BeforeCallingforService
30
31
PIayback。....…..".........。.....…"..。.。..。.。.。.......….......…..、
18
o│nsertinqaVideoCassette
・P│ayback
・VideoSearch(withtheRemoteControl)
・FastForwardingandRewinding
(withtheRemoteControl)
・SIowMotionPlayback(withtheRemoteControl)
・Sti
l
lPictureandFrameAdvance
・DoubleSpeedPlavback
・NTSCTapePlaybackonPALTV
・Ful
lAutoPlayback
・AutoHeadCleaningSystem
・AutoTrackingControISystem
oQuickStartwithFuIILoadingMechanism
・AutoRentalMode
・CoIourMode
・BlueBack
圧ヨ1
!MPORTANT
SAFEGUARDS
AND
PRECAUT.ONS
CAUTION
BEFORE
0PERA!!NG
YOUR
NEW
VCR,
PEEASE
CAREFUEEY
READ
TH!S
0PERAT!0N
MANUAE
AND
IHEN
SAVE
!T
FOR
FUYURE
REFERENCE
AS
اًا
W!LE
BE
USEFUE
!F
YOU
HAVE
ANY
PROBEEMS
OPERAT!NG
YOUR
VCR
اN
THE
FUTURE.
Location
and
Handling
1.
A!r
vents
are
prov!ded
in
the
VCR
cabinet
to
prevent
excessive
temperatures
lns!de
the
unit.
Do
not
p.ace
your
VCR
in
c!osed
spaces,
cover
it,
or
ottierwise
b!ockthe
vents.
1
2.
Do
not
p.ace
the
VCR
in
d!rect
sun.
ight,
or
near
heat
sources.
3.
Keep
the
VCR
and
tapes
away
from
strong
magnetic
objects.
Do
not
insert
or
drop
anything
into
the
VCR
through
the
air
vents
or
cassette
compartment
as
this
could
cause
serious
damage,
possibly
resulting
in
fire.
4
5.
Do
not
place
any
object
containing
water
or
other
liguids
on
the
VCR.
In
the
event
that
liquid
should
enter
the
cabinet,
unplug
the
VCR
immediately
and
contact
the
retai
ler
or
a
service
centre
approved
by
Sharp
immediately.
6.
Do
not
remove
the
VCR
cabinet.
Touching
parts
inside
the
cabinet
could
result
in
electric
shock
and/or
damage
to
the
VCR.
For
service
and
adjustment
inside
the
cabinet,
call
a
qualified
dealer
or
service
centre
approved
by
Sharp.
Caution—Prevent
Condensation
When
moving
the
VCR
from
a
cold
place
to
a
warm
one,
condensation
(dew)
is
likely
to
form
on
the
VCR
drum
and
heads.
If
you
try
to
play
back
or
record
in
these
circumstances,
the
videotape
and
VCR
may
be
damaged.
To
prevent
this,
turn
the
power
switch
on
and
wait
for
a
few
hours
for
the
VCR
to
warm
up
and
dry
before
attempting
playback
or
recording.
This
is
particularly
important
before
loading
a
cassette
for
ttie
first
time
after
purchasing
the
VCR.
warm
ฒ2

!MP٥RTANT
SAFEGUARDS
AND
PRECAUT!ONS
Service
Do
not
attempt
to
service
this
VCR
yourse.f.
refer
any
serv؛ce
to
the
nearest
service
centre
approved
by
Sharp.
Others
Audio-visual
material
may
consist
of
copyrighted
works
which
must
not
be
recorded
without
ttie
authority
of
the
owner
of
the
copyright.
Please
refer
to
relevant
laws
in
your
country.
[
OPERATE
button
(turns
VCR
on/off)
-
Ctock
will
work
regardless
of
this
button
this
VCR
is
not
equipped
with
a
main
power
switch.
Accordingly,
nominal
current
to
drive
the
clock
is
drawn
at
all
times
when
ttie
AC
power
cord
is
plugged
into
a
wall
socket.
If
the
VCR
is
not
to
be
used
for
an
extended
period,
be
sure
to
unplug
the
cord.
[I
يب
It
tl
(VC-AA37D)
(VC-flflS7D)
the
VC-AA370,
VC-AA57٥
can
record
and
playback
in
MESECAM
and
SECAM
colour
systems.
Follow
the
descriptions
in
this
operation
manual
for
use
of
this
VCR
with
the
MESECAM
system.
This
VCR
is
compatible
with
PAI
and
MESECAM
colour
systems,
(t)
this
VCR
can
receive
SECAM-ß/G,
D/KIV
broadcast
signals,
record
them
in
SECAM/MESECAM
format,
and
play
them
back.
(2)
It
a
cassette
recorded
with
SECAM-B/G,
D/K
broadcast
signals
on
this
VCR
is
played
back
on
another
VCR
that
uses
a
PAI
system
VCR,
the
picture
quality
may
be
poor.
(3)
this
VCR
cannot
be
used
in
France:
a
SECAM-l
system
VCR
must
be
used
instead.
(4)
Use
a
SECAM-B/G,
D/K
compatible
television
set
when
playing back
cassettes
recorded
with
SECAM-B/G,
D/K
broadcast
signals
in
SECAM/MESECAM
system
format,
or
when
viewing
SECAM-B/G,
D/K
broadcasts
using
this
VCR'S
tuner.
Features
٠
Double
Azimuth
4-Head
—
only
for
VC-AA57٥
٠
Multi
System
(PAƯSECAM/MESECAM/NTSC
3.58,
NTSC
4.43
Playback)
(PAL/SECAM/MESECAM
Recording
by
using
this
VCR's
tuner
and
only
AV
Recording
by
NTSC
3
58,
NTSC
4.4ر^
.Multi
Language
Cn
Screen
Display
(English,
Chinese,
French,
Spanish,
Arabic,
Malay)
with
Menu
Screen
Guidance
٠
MID-Drlve
(New
Centre-Mounted
Mechanism)
•
на
(High
Quality)
Circuitry
٠
Sharp
Super
Picture
—
Enhances
picture
quality
during
playback.
٠
OSD
(On
Screen
Display)
with
Menu
Screen
Guidance
٠
24
Hours
Timer
Memory
Backup
٠
365-Day,
8
Programme
Timer
(Dally/Weekly
Programmable)
.Auto
Head
Cleaning
System
Only
for
VC-AA570
٠
380-times
High
Speed
Rewinding
Function
Enhances
rewinding
at
a
speed
380
times
faster
than
the
LP
mode
recording/playback
speed
(only
with
an
Ε-180
tape).
ا
PAL
EP
(Extended
Play)
mode
—
triple
Recording/Playback
Speed
than
SP
(Standard
Play)
mode.
POWER
SUPPLY:
The
voltage
supply
of
this
VCR
is
AC
110-240
V,
50/60ΗΖ.
CASSETTE
TAPE:
This
VCR
uses
IVHSi
,
IVHSI
standard
video
signals.
Use
only
video
cassette
tapes
that
carry
the
Щ
or
I
mark.
I
Accessories
Be
sure
ttiat
the
following
accessories
are
all
included
with
your
VCR.
]
ةة؛ة
؛
ỉ
؛
9ββ
see
θ@»®βΕΛ®
\IC-KN2,٦0
Coaxial
cable
(tV-VCR
cable)
two
(R6
UM/SUM-3
or
AA)
batteries
for
the
remote
control
unit
Remote
control
unit
ฒ3

Major
Components
ofYour
VCR
Front
Basic
function
contro.s
(See
Pfayback,
Recording.)
-
Channe!
tuning
contro!s
(See
Setting
the
Channels.)
OPERATE
(Turns
VCR
on/off.)
Clock
will
work
regardless
of
this
button.
Cassette
compartment
(See
Playback,
Recording.)
1
■.
¿
—
vT،
"
:
:.
٠١
“
ق
١
؟1
Ь:
L
I
(VC-AA370)
У
(VC-AA57D)
لا
I
The
ALL
CLEAR
button
is
located
on
the
bottom
of
the
VCR.
(See
page
3f.)
If
this
button
is
pressed,
all
VCR
settings
must
be
set
again.
VCR
Display
(explained
throughout
the
operation
instructions)
iiisieiii
I
SP/ЕРЛР
(only
for
VC-AA57٥
NOTE
*
Tape
counter
is
displayed
during
playback,
fast
forward,
rewind
or
recording.
*
When
the
power
is
turned
off,
the
clock
is
displayed
and
the
ICD
backl
ight
will
light
off.
The
meaning
of
the
main
indicators
is
shown
below.
(This
list
does
not
include
all
indicators.)
-قي-
Slow,
Still,
Frame
Advance
Cassette-In
Indicator
Ể[
When
AC
power
cord
is
first
plugged
in.
٠٦اآ
ا
!٦
Rotate
s!ow!y
Playback
u
1-1
ًا
ؤ
R
เ
Rewind.
Video
Search
Rewind
otate
rapid!y
stop
Ể[
Fast
Forward,
Video
Search
Forward
Rotate
rapld!y.
®fo
New
Child-Proof
lock
ى٠ًاةةادًام(
LINE
IN
(Onlyforv0-AA370)
on
П
Record
١(
LINE
IN
1/2
(only
fo
r
VC-AA570)
/
-
เ،-
Rec
Pause
c
N٥TE
٠
Itie
display
will
return
to
channel
setting
mode
when
ST٥P
is
pressed
during
operation
mode.
.The
display
changes
each
time
DISPLAY
on
the
remote
control
is
pressed.
(See
page
29.)
*
Some
of
the
indicators
above
will
light
up
only
for
a
couple
of
seconds
when
ttie
VCR
is
set
up
the
corresponding
mode.
Rear
Connection
terminals
(See
Connections
on
page
7.)
ฒ4

I
Remote
Control
Remote
Contro!
o
OPERATE
button
©!!MERON/OFF
button
Θ
MENU
button
О
á/Τ/◄/►
button
θ
!!MER
button
Press
to
directly
select
lhe
TIMER-
setting
mode.
Θ
ΡΙΑΥ/Χ2
button
©
REW
button
Θ
STOP
button
Θ
REC
button
Фи
TIME
button
Only
for
VC-AA570
Ф
SP/EPẾP
(TAPE
SPEED
button)
Ф
Numeric
buttons
Ф
ΑΜ/ΡΜ
button
Digit
select
(when
inputting
channel
number,
1
or
2
digit
can
be
selected.)
SKIP
SEARCH
button
Only
for
VC-AA570
Ф
REVIEW
SEARCH
button
Ф
Stow
button
Ф
๏/Θ
buttons
(SLOW©/©,
DPSS
II»)
Ф
SET
button
Ф
ClEAR
button
FF
button
Ф
PAUSE/SIltl
(F.ADV)
button
©
MODE
OSD
button
©
DISPtAY
button
©
CH
(CHANNEL)
دا
!
buttons
©
INPUT
SEIEC!
button
©ZERO
BACK
button
button
(New
Child-Proof
lock)
For
the
operation
of
Sharp
brand
televisions.
Ф
©
®
©
BříRAH
Ф
o
;
ح-
О
۶فثأ
٩
©
——OM:
©
(*)
©
© ©
٥
ф
؛H=
e-Jõ
؛-—®
фЦа
๏®(ฐ
®—®®ج
φ
Φ®®Γο——φ
๏®®”®-—φ
—
®®®ج
φ
——ΘΦ^Γρ——®
φ
φ
-แ:
REW
©
►PLAY/«
Θ
©
®
0~ΐΘ
L!
I:
STOP
Θ
©
^OPSSŞ
хцп-
—
(*)
фф
etime
ф
ф
фф
SHARP
VIDEO
CASSIE
RECORDER
SHARP
VIDEO
CASSETTE
RECORDER
VC-AA370
*
These
buttons
are
for
the
exclusive
operation
of
Sharp
brand
televisions.
TV
OPERATE
for
Sharp
TV
button
INPUT
SEIECI
for
Sharp
TV
button
©
VOL
Φ/Θ
for
Sharp
TV
buttons
CH
عا
!
for
Sharp
TV
buttons
VC-AA570
©
EdECT
button
VCR
button
©
TV
button
©
VOL
Φ/Θ
buttons
NOTE
*
(*)These
buttons
cannot
be
used
with
this
model.
!nsertlng
the
Batteries
F)٢st,
)nsta!!
the
batteries
properly.
Fit
two
(R6
UM/SUM-3,
AA)
1.5
volt
batteries
(included)
or
equivalent.
If
the
remote
control
does
not
function,
insert
new
batteries.
Ensure
the
batteries
are
inserted
correctly,
matching
the
polarities
(๏/θ)
indicated
in
the
remote
control
.
NOTE
Do
not
subject
the
remote
control
to
shock,
water
or
excessive
humidity.
The
remote
control
may
not
function
if
the
VCR
sensor
is
in
direct
sunlight
or
any
other
strong
light.
Incorrect
use
of
batteries
may
cause them
to
leak
or
burst.
Read
the
battery
warnings
and
use
the
batteries
properly.
Do
not
mix
old
and
new
batteries,
or
mix
brands
in
use.
Remove
the
batteries
if
you
will
not
use
the
remote
control
for
an
extended
period
of
time.
ฒ5

Broadcasting
System
and
System
Setup
Se(
your
mu^tl-system
VCR
to
the
appropriate
broadcasting
system
for
use
in
your
regfon
as
!!sted
below,
o
System
Mode
Set-up
OPERATION
Settings
Setting
item
(!)SYSTEM
Set
the
system
for
RF
output
from
the
VCR
to
TV.
See
"Adjusting
the
Video
Channel"
(See
page
7.)
I
,B/G,
D/K
(2)
COtOUR
MODE
*
Used
in
the
normal
AUTO
mode.
•
Set
to
the
fixed
colour
system
if
the
screen
changes
to
black
and
white
during
playback
or
when
receiving
a
broadcasting.
AUTO,
PAL,
SECAM,
NTSC
Set
in
the
MODE
Item
on
the
MENU
screen.
(See
page
17.)
(3)
NTSC
MODE
Set
NTSC
detail
mode
for
playing
back
an
NTSC
tape.
3.58.4.43,
PAI
TV
(4)
SECAM
MODE
Set
the
recording
system
for
SECAM
signals.
SECAM,
MESECAM
See
"SEITING
THE
CHANNELS"
for
setting.
(See
pages
12-14.)
(5)
l
,B/G,D/K
(Receiving
System)
Set
when
programming
each
channel
to
the
VCR,
I,
B/G,
D/K
NOTE
>
٠
A
cassette
recorded
in
the
NTSC
4.43
format
with
NTSC
signals
being
played
back
in
the
NTSC
3.58
format
will
cause
the
picture
to
discolour
during
its
playback.
٠
Play
back
an
NTSC
cassette
in
the
NTSC
3,58
format
and
record
it
in
the
same
format
(NTSC
3.58).
Or
play
it
back
in
the
NTSC
4.43
format
and
record
it
in
the
same
fomiat
(NTSC
;3لأ).
©
Setting
the
TV
Broadcasting
System
with
the
VCR
System
Selting"MODE"
item
and
setting
item
of
On
Screen
Display
(Page
17)
Broadcasting
system
Recording
system
COLOUR
MODE
SECAM
MODE
NTSC
MODE
l
,B/G,
D/K
PAL-BZG
AUTO
or
PAL
B/G
PAL-1
PAL
recording
AUTO
or
PAL
I
ANY
SETTING
Any
position
PAL-D/Κ
AUTO
or
PAL
D/K
SECAM-BZG
SECAM
recording
SECAM
ة|ة
MESECAM
recording
MESECAM
AUTO
or
SECAM
SECAM-l
SECAM
recording
SECAM
Any
position
MESECAM
recording
MESECAM
SECAM-D/Κ
SECAM
recording
SECAM
D/K
MESECAM
recording
MESECAM
NOTE
٠
This
VCR
does
not
have
a
SECAM-l
(French
SECAM-l)
tuner.
٠
When
recording
a
French
SECAM-l
broadcast
and
when
playing
back
a
SECAM
tape
using
a
SECAM-l
TV,
connect
the
TV
using
the
AUDIO
ΙΝ/Ουί
and
VIDEO
ΙΝ/Ουτ
terminals.
Set
the
channel
position
to
"AV"
or
"L1/L2"during
recording.
©
Selection
of
Tape
Recording
(NTSC:
AV
in
Recordingj/Playback
Speeds
(Only
forVC-AA570)
(Only
for
VC-AA370)
Type
of
tape
Type
of
tape
Tape
recording
speeds
Tape
playback
speeds
Tape
recording
speeds
Tape
playback
speeds
PAL
SPZEPZLP
SP/EP*'/IP
PAL
SP
SP
SECAM
SPZLP
SECAM
SP
SPZLP
SP
MESECAM
SPZLP
MESECAM
SP
SP
SP/LP
NTSC
SPZEP
SPZEPZLP
NTSC
SP
SP
*1
-
For
best
result,
it
is
advisable
to
playback
or
recording
EP
mode
with
this
VCR.
PAL
EP
mode
may
not
function
normally
when
playback
with
"others
PAL
EP
VCR"
or
"others
brand
PAL
EP
VCR".
Θ
Setting
the
Recording/Playback
system
with
the
VCR
system
Playback
Recording
COLOUR
MODE
Signal
input
system
The
recording
system
Tape
playback
system
NTSC
MODE
NTSC
MODE
SECAM
MODE
SECAM
Your
AZ
system
AUTO
or
ANY
SETTING
PAL
PAL
PAL PAL
ANY
SEniNG
PAL
ANY
SEniNG
ANY
SEniNG
SECAM
AUTO
or
SECAM
SECAM
SECAM
SECAM
SECAM
SECAM
MESECAM
MESECAM MESECAM
MESECAM
SECAM
NTSC3.58
3.58
3.58
3.58
AUTO
or
NISC
ANY
SEniNG
ANY
SETTING
NTSC
NTSC
4.43 4.43
4.43
NTSC
4.43
PAI
PAL
TV
PAL
TV
N٥TE
*
Recording
and
playback
are
possible
when
you
connect
your
TV
to
the
VCR
using
either
the
AUDIO
INZOLJI
and
VIDEO
INZOLJI
terminals
or
the
RF
OUT
terminal.
«
The
following
are
definitions
of
eacti
kind
of
tape:
Commercially
marketed
PAL
tapes,
and
tapes
on
which
PAl-BZG,
ΡΑΙ-Ι,
PAl-DZK
(OIRT)
broadcasts
have
been
recorded.
Commercially
marketed
SECAM
tapes
(including
those
marketed
In
France),
and
tapes
on
which
SECAM-BZG,
SECAM-DZK,
kl
(OIRI),
and
SECAM-L
broadcasts
have
been
recorded.
Tapes
on
which
SECAM-BZG,
SECAM-DZK,
and
K1
(OIRI)
broadcasts
have
been
recorded
in
the
MESECAM
system.
Commercially
marketed
NTSC
tapes
and
tapes
on
wtiich
NTSC-M
broadcasts
have
been
recorded
by
using
the
AV
connection.
PAL
tapes:
SECAM
tapes
MESECAM
tapes:
NTSC
tapes:
Ε6

Connections
о
Disconnecting
TV
Cable
Disconnect
the
aer!a!
cable
from
the
back
of
your
TV
set.
©
Connecting
Aerial
Cable
to
VCR
Connect
the
aerial
cable
to
the
ANTENNA
IN
terminal
of
your
VCR.
©
Connecting
VCR
to
TV
Connect
the
supplied
coaxial
cable
to
the
RF
OUT
terminal
of
the
VCR.
Plug
the
other
end
into
your
TV'S
ANTENNA
IN
terminal.
IN
ANTENNA
IN
TV
back
panel
RFOUT
ANTENNA
IN
Adjusting
the
Video
Channel
to
view
the
output
of
your
VCR
on
the
television
screen,
you
must
select
an
unused
channel
on
your
TV
and
tune
it
to
the
output
of
your
VCR
(see
table
1
for
factory
preset
to
UHF
channel),
o
Make
sure both
units
(IV
and
VCR)
are
connected
(power
cord)
to
the
power
outlet.
©
turn
on
your
IV.
©
Select
an
unused
channel
on
your
IV.
Θ
Set
the
power
on
the
VCR
to
off.
(If
the
VCR
is
ON.
press
the
oPERATE
button
to
turn
off
the
power.)
©
Keep
pressing
the
MENU
button
for
more
than
two
seconds
to
light
up
the
UHF
channel
(see
table
1)
on
the
VCR
display.
©
Adjust
the
tuning
of
the
selected
tv
channel
until
the
RF
pattern
appears
on
your
TV
screen.
(Refer
to
your
Operation
Manual
for
tuning
procedures.)
©
Press
the
buttons
of
to
select
the
RF
output
system
that
corresponds
to
your
TV
by
referring
to
the
chart
shown
to
the
right
and
press
the
SET
button.
©
Press
the
OPERATE
button
to
turn
on
the
power
of
the
VCR.
Select
any
channel
on
the
VCR
tuner.
If
a
picture
appears
and
sound
can
be
heard,
then
the
RF
output
system
is
correctly
set.
If
a
picture
appears
but
no
sound
can
be
heard,
then
perform
step
©
above
to
select
another
RF
output
system
-
*
Make
sure
the
sound
is
not
muted
when
checking
the
RF
output
system.
table
1
Factory
Preset
UHF
Channel
South
East
Asia,
Hong
Kong
60
Ex.
Middle
East,
South
Africa,
Saudi
Arab
39
(RF
pattern)
ل
SYSTEM
IB/GD/Κ
l
,B/G,D/K
(RF
system)
Hong
Kong
I
E^
D/K
China,
Russia
South
East
Asia
B/G
*
If
picture
interference
appears
on
the
IV
screen
in
step
@
above,
you
can
change
the
video
channel
(RF
output
channel
from
the
VCR
to
IV)
with
the
following
procedure.
[If
UHF
channel
(see
table
1)
is
an
active
broadcast
channel
in
your
area,
manual
ly
select
a
different
channel
(UHF
21
to
UHF
69)
(see
below)
and
then
retune
your
tv
as
above.]
(A)
Press
the
oPERATE
button
to
turn
off
the
power.
(B)
Keep
pressing
the
MENU
button
for
more
than
two
seconds
to
light
up
the
UHF
channel
(see
table
1
)
on
the
VCR
display.
(C)
Press
the
CHANNEL
A/CHANNEL
▼
button
on
the
VCR
or
the
Ấ/Ĩ
button
of
on
the
remote
control
to
manual
ly
select
an
unused
channel
for
use
as
the
video
channel.
(D)
Perform
steps
©
to
©
above
using
the
newly
selected
video
channel.
(E)
Repeat
steps
(C)-(D)
to
select
the
optimal
video
channel.
4VC-AA370)
©
(RF
pattern)
(C)
©~©آه
—
М١Г[К5[1Ж
؛
У5П
؛؛
-
в
Θ
(А)
(В)
©
(С)
-
:
-
■
■٥
II
Θ
(VC-AA570)
(VC-AA370)
(VC-AA57D)
ฒ7

0٧ا,ا
for
VC-AA570
Using
the
Remote
Control
forTV
operation
!he
prov؛ded
remote
contro!
can
operate
the
basic
functions
of
your
te!evision.
In
add!tion
to
Sharp
televisions,
other
manufacturers'
televisions
listed
below
can
also
be
controlled
by
setting
the
remote
control
to
the
corresponding
TV
brand.
The
remote
control’s
default
brand
is
"SHARP”,
which
enables
control
of
most
Sharp
televisions.
When
you
replace
the
batteries
in
the
remote
control,
the
control’s
TV
brand
setting
will
be
reset
to
SHARP.
Setting
the
TV
Brand
®Turn
on
your
TV.
@
Press
the
Switch
to
TV
control
mode.
©
Press
the
OPERATE
button
and
the
button
simultaneously
which
corresponds
to
the
brand
of
your
TV.
Hold
the
button
down
for
about
one
second.
Refer
to
the
table
of
brands
below.
When
setting
Is
complete,
the
remote
control
will
send
a
"power
off”
signal
(ئ)
to
the
TV,
and
it
should
turn
off.
button
to
select
the
TV
control
mode.
(For
examp.e)
TV
brand:
SHARP
(Corresponding
button
is
“I")
ОРШГ!
٥g
Press
these-
buttons
simultaneously
and
hold
for
more
than
1
second.
Φ
Φ
๑:0
๑®
-
Φ
Ỗ
ج
®0๐
I
،етор'
(VC-AA57D)
NOTE
setting
procedure
and
select
the
button
for
a
different
brand.
»
If
the
TV
does
not
turn
off
in
step
repeat
the
step
TV
BRAND
NAME
Corresponding
button
TV
BRAND
NAME
Corresponding
button
GRAETZ
SHARP
1
lUXOR
PHILIPS
7
2
SALORA
THOMSON
7
3or4
SEIECO
lElEFUNKEN
3or4
7
SONY
NORDMEND
3or4
TOSHIBA
9
BRANDT
3or4
PANASONIC
SABA
0
or
-A-
3or4
SANYO
ΐν-νοί(-)
TELAVIA
3or4
INPUT
SELECT
HITACHI
GRUNDIG
5
CH
▼
MITSUBISHI
BLAUPUNKT
5
JVC
CH
A
FERGUSON
6
ιπ
NOKIA
7
TV
Functions
to
be
Controlled
Return
to
VCR
control
mode.
«
Press
VCR
to
select
the
VCR
control
mode.
Switch
to
•
Press
the
TV
button
to
select
the
TV
control
mode.
control
mode.
TV
function
control
®
Press
the
©
Use
the
following
buttons
on
your
remote
control
to
operate
your
TV
set.
TV
function
٠TV
POWER
(ئ)
.TV
CHANNEt
UP/DOWN
.TV
VOlUME
UP/DOWN
.INPUT
SEtECI
button
(TV-AV
selector)
©
Press
the
VCR
button
to
return
to
the
VCR
control
mode.
button
to
select
the
TV
control
mode.
IMPORTANT
NOTE^
Although
the
provided
remote
control
unit
is
compatible
with
most
SHARP
televisions,
as
well
as
many
TV
models
manufactured
by
others,
it
is
possible
that
the
provided
remote
control
will
not
work
with
your
TV,
or
will
control
only
some
of
the
functions.
If
the
button
listed
in
the
table
does
not
work
with
your
TV
set,
you
may
want
to
try
another:
occasionally,
models
vary
within
a
brand.
Consequently,
Sharp's
warranty
does
not
cover
all
of
the
models
under
the
brands
l
isted
in
the
table.
-
٠
When
you
replace
the
batteries
in
the
remote
control,
if
your
television
is
not
a
Sharp
model
you
must
reset
the
TV
brand.
٠
If
the
MENU,
PLAY,
STOP,
FF
or
REW
buttons
are
pressed
in
the
TV
control
mode, the
VCR
will
return
to
VCR
control
mode.
Ε8

Auto
Tuning
System
This
VCR
is
equ!pped
with
an
Auto
Tun!ng
System
to
prov!de
easier
set
up
of
the
un!t.
After
fo!!ow!ng
the
instructions
for
Connections
on
page
7
and
Adjusting
the
Video
Channel
on
page
7,
turn
on
your
TV,
press
the
OPERATE
button
to
turn
on
the
VCR
power
and
select
the
video
channel.
The
VCR
will
automatically
display
the
setting
screens
as
shown
below.
NOTE
٠
If
(tie
Language
selection
and
Auto
luning
have
already
been
performed,
the
Clock
setting
screen
will
first
appear,
to
reset
all
VCR
settings
and
perform
the
Auto
Tuning
from
the
language
setting
screen,
see
page
10.
(Perform
VCR-ReSET.)
--
Selection
of
language
to
be
used
for
the
On
Screen
Display.
(See
page
10.)
LANGUAGE
setting
screen
T
Press
the
SET
button.
(Manual
operation)
د
r
--
Selection
of
broadcast
system
(SYSTEM)
(I,
B/G
or
D/K)
that
corresponds
with
your
area.
(See
page
12,
step
0.)
SYSTEM
setting
screen
I
Press
the
SET
button.
(Manual
operation)
r
--
Setting
and
sorting
the
channels
for
your
area.
(See
pages
12
and
13.)
A٧T0MATاC
TUN.NG
screen
I
Press
the
MENU
button
to
cancel
the
next
step.
r
-
-
Setting
the
present
time.
(See
page
11.)
CLOCK
setting
screen
Ţ
Press
the
SEŢ
button.
(Manual
operation)
ị
Normal
screen
appears.
Ε9

Setting
the
Language
PREPARAT!٥N
.Se!ect
the
video
channe!
on
your
!V.
And
turn
on
the
VCR.
This
VCR
!s
factory
preset
to
dاspاay
the
!anguage
settاπg
screen
after
the
MENU
button
is
pressed
when
the
VCR
Is
operated
for
the
f!rst
t!me.
!Π
some
cases,
the
retaا
اer
may
have
a!ready
set
the
language,
and
the
CIOCK
setting
screen
will
appear
after
ttie
MENU
button
is
pressed.
To
reset
the
VCR,
perform
the
fol
lowing
steps.
VCR-RESET
o
Press
the
OPERATE
button
to
POWER
OFF
on
the
VCR.
Press
the
OPERATE
button
to
POWER
ON
on
the
VCR.
Press
the
MENU
button
and
CH
(CHANNEL)
(The
language
setting
screen
should
appear.)
button
on
the
VCR
at
the
same
time
for
five
seconds.
N٥TE
.When
the
VCR
is
reset,
all
channel
settings
and
timer
setting
will
be
cancelled.
opmrt
от
SREW
FFS
o
٣
CHANNEL
i
ffCT
n
0
0๘
tQr
©0
(VCR
buttons
on
the
unit)
I/
'/
/I
OMifZO
๏๏๏0
©KD
®๏๏
Ỗ
®®0๐
Í
TCHANNE^A
©j
®๏๏
®®๐
RSW
REW.
►PUY/«
kfai]
(VC-AA570)
(VC-AA370)
-
٠
You
can
use
either
the
remote
buttons
or
buttons
on
the
front
panel
.
Buttons
on
the
remote
control
are:
-Up
▼
-
Down
◄
-Left
-Right
Buttons
on
the
front
panel
are
▲
-CHANNEL
▼
-CHANNEL
-REW
-FF
Initial
Setting
of
Language
٥
Select
the
language
with
the
i/T
button
and
press
the
SET
button.
SET
FBARÇAIS
BSPASOL·
MSLAYO
ةببدعلا
o
or
٠
Refer
to
page
11
to
set
the
c!ock.
A
▼iSSLeCT
SBTlBNTBR
MBSOiBIIT
Changing
the
Language
«
If
the
language
has
already
been
set
previously
and
you
want
to
change
it,
fol
low
the
steps
below.
o
Press
the
MENU
button.
Select
item
"LANGUAGE"
with
SET
button.
HBKU
./▼
button
and
press
the
TIMBR
MOOS
CRAMMSL
PRBSBT
CLOCK
SET
MENU
»๐
0»
د
TiSBLBCT
SBT:BMTBR
HBRU:BXIT
@
Select
the
language
with
the
Á/'
SET
button.
button
and
press
the
LAMOUAQE
SET
FRAMCAIS
،SPAflOL
MRLAYO
برلا
»๐
ع
YiSRLBCÍ
SBT.EMTBR
HBMUlEXIT
Θ
To
return
to
the
normal
screen,
press
the
MENU
button
MENU
Normal
Screen
o
^10

Setting
the
Clock
When
you
use
the
VCR
for
the
f!rst
t!me
or
after
a
power
fa!!ure
of
more
than
24
hours
the
c!ock
have
to
be
reset.
Appاy
power
to
the
un!t
to
sw!tch
it
on.
fhen
perform
the
fo!
!owing
procedure.
s
؛
D?£RM
oPERAtE
الساه
0^
å
ji
6
/SET
r
SET
MENU
'/■
/1
r
/ا
๐
о
®¡®هك
ộ'
®о
о
ф®®
®®®
Numeric
buttons
ΑΜ/ΡΜ
Numeric
buttons
ΑΜ/ΡΜ
Set
the
present
time:
!n
this
example,
set
to
10:28,
December
15,
2002
(24
hour
time)
®
!■غال
-.)ج
(VC-AA37D)
(VC-AA570)
!nitla!
Setting
of
Clock
o
First
set
the
language
and
system
setting
(Refer
to
page
9).
then
press
the
SET
button.
©
Select
whether
the
clock
should
show
12-hour
ΑΜ/ΡΜ
time
or
24-hour
time
with
the
Α/Τ
button
and
press
the
Ex.:24H
button.
CLOCK
TIME
0:00
DATE
TEAR
1/01
00
I
ب
NOTE
M٥DE!24H/12H
i
►:SELECT
SETiENTER
24Η
''
٠
^
."12H
24-hour
display.
12-hour
ΑΜ/ΡΜ
display.
CHANGE
:
د▼
ΕΧΙΤ
:
ΜΕΝ٥
©
Set
the
present
time
with
the
numeric
buttons
or
i/T
button
on
the
remote
control
and
press
the
►
button.
(First
set
the
'hour'
digits
and
then
the
'minute'.
If
there
is
only
one
'hour'
or
one
‘minute’
digit,
enter
a 0
first.)
Ex.
.'
10;2S
CLOCK
Numeric
buttons
MODE
TIME
DATE
TEAR
1/01
00
ậ
/
i
►:SELECT
SETrBNTBR
AT
;CHANGE
ΜΒΝ٧:ΕΧΙΤ
٠lf12H
mode
is
selected,
set
the
AM
or
PM
indicator.
٠
Set
the
date
with
the
numeric
buttons
or
A/▼
button
on
the
remote
control
and
press
the
►
button.
(First
set
the
'day'
digits
and
then
the
'month'.
If
there
is
only
one
'day'
or
one
'month'
digit,
enter
a
٥
first.)
Ex.
.'
Dec.
15(15112)
Numeric
buttons
CLOCK
MODE
TIME
24«
10:28
YEAR
/
DATS
:DAT/MONTH
Numeric
buttons
©
Set
the
year
digits
with
the
numeric
buttons
or
Α/Τ
button
on
the
remote
control
.
(If
there
is
only
one
'year'
digit,
enter
a
0
first.)
Ex.
..
02
(2002)
CLOCK
MODE
TIME
DATE
TEAR
or
10:28
/
©
Press
the
SET
button.
SET
Normal
Screen
0»
Changing
the
Clock
Setting
*
If
the
clock
has
already
been
set
previously
and
you
want
to
change
It,
select
"CIOCK”
from
the
MENU,
and
then
follow
the
procedures
above.
SET
в
Press
the
MENU
button.
Select
item
"CtoCK”
with
the
button,
fo
return
to
the
normal
screen,
press
the
MENU
button.
button
and
press
the
SE
o
MENU
T
TIMER
MODE
MENU
؛
o*
or
MENU
o
A
T:SELECT
SET:ENTER
ΜΕΝ٧:ΕΧΙΤ
»
If
the
precise
clock
time
is
regulred
(within
a
second),
do
not
press
the
SET
button
until
the
exact
start
of
the
minute
after
setting
the
year
(after
completing
step
©).
fhe
clock
will
start
operation
as
soon
as
the
SET
button
is
pressed.
٠
If
you
prefer
the
clock
display
time
in
the
12-hour
ΑΜ/ΡΜ
system,
select
“12Η”
in
step
©.
In
this
case,
when
you
set
the
present
time
using
the
numeric
buttons,
first
press
the
ΑΜ/ΡΜ
button
on
the
remote
control
to
select
AM
or
PM.
and
then
set
the
present
time.
IIİ11

Setting
the
Channels
Your
VCR
can
rece!ve
VHF
channe!s
1A
to
Ε12
(Cl
to
C12),
CATV
channe.s
SI
to
S41
(Z1
to
Ζ37)
and
UHF
channe!s
Ε21
to
Ε69
(C13
to
C57).
Your
VCR
has
84
programmable
channel
positions,
each
of
which
can
be
set
to
any
of
the
broadcast
and
CATV
channels.
.Channel
positions
13
through
83
wil
l
not
be
displayed
when
selected.
These
channel
positions
have
been
set
at
the
factory
to
be
skipped.
*To
view
a
skipped
channel
position,
tune
that
position
to
a
broadcast/CATV
channel
,
or
cancel
the
channel
skip
function
for
that
position.
BROADCAST
TV
CHANNEL
BROADCAST
TV
CHANNEL
VCR
VCR
SOUTH
EASTAS!A
SOUTH
AFR.CA
SOUTH
EAST
ASIA
SOUTH
AFRICA
CHANNEL
CHANNEL
CHINA
CHINA
001
1A
081
S-1
002
C-1
C
0ธฺ2
S-2
z-
1
003
Ε-3
-2
C
004
Ε-4
-
-3
08S
S-5
Ζ-4
005
Ε-5
c-
SA-4
-7
086
S-6
006
Ε-6
c-
SA-5
087
s-
z-
-
5
007
E-
C-9
SA-6
S-8
Ζ-6
008
Ε-8
SA-7
089
s
z-
009
Ε-9
С-10
090
5-10
c-s
010
Ε-10
C-11
SA-8
091
3-11
Ζ-9
SA-11
oil
Ε-11
C-12
SA-9
S-12
092
7-10
012
Ε-12
Ζ-8
SA-10
093
S-13
SA-13
11
094
S-14
S-.15
021
Ε-21
.13
095
Ζ-.12
032
Ε-32
C-24
120
S-40
Ζ-37
033
Ε-33
121
S-41
122
X
037
ع-ة7
123
Y
C-4
C-25
038
Ε-38
124
z
C-5
125
Ztl
C-56
069
Ε-69
126
Ζ+2
C-57
070
127
Ζ-12
Auto
Tuning
PREPARATION
.Select
the
video
channel
on
your
TV.
Press
the
OPERATE
button
to
turn
on
the
VCR.
o
Press
the
MENU
button.
Select
item
"CHANNEl
PRESET"
with
the
and
press
the
SET
button.
HENU
SET
button
MENU
TIMER
MODE
*o
0»
٥٢
CLOCK
LANGUAGE
@
Select
item
"AUTO"
with
the
SET
button.
./▼
button
and
press
the
CHANNEL
PRESET
SET
»0
MANUAL
©
Select
the
SYSTEM
you
desire
with
press
the
SET
button.
Select
the
broadcast
system
used
for
areas
where
I,
B/G,
D/K
reception
is
necessary.
button
and
1/1
AUTOMATIC
TONING
SYSTEM
B/G
D/K
I.B/G,D/k
(Receiving
system)
SET
Hong
Kong
I
»0
China.
Russia
D/K
Ex.
South
East
Asia
i
►
:CHANGE
ΜΕΝΟϊΕΧΙΤ
SET:ENTER
NOTE
٠
If
the
broadcast
signal
system
does
not
match
the
VCR
receiving
system,
tuning
is
not
possible.
o
The
channel
display
on
the
TV
screen
wil
l
continue
through
all
of
the
channels.
The
bar
display
indicates
the
estimated
amount
of
channels
tuned.
AUTOMATIC
TUNING
PLEASE
WAIT.
MENUjEXIT
Continued
on
next
page
ฒ12

Setting
the
Channels
Φ
ًا0
change
the
order
of
tuned-in
broadcast,
se!ect
ttie
channel
to
be
moved
with
the
◄/►/Α/Τ
button.
Ex.
..
CH078
Press
the
SET
button.
"SEIECIED:
CH078”
will
appear.
MOVE
1СН002
7
2CH003
8
3CH004
9
4CH075
10
1/1
SET
o
or
r
ấĩi
►:SELECT
SETiENTER
ΜΕΝ٥:ΕΧΙΤ
Θ
Select
the
new
position
for
the
channel
with
the
,/▼
button.
Then,
press
the
SET
button.
"SELECTED:
CH078"
will
disappear.
1/1
/
MOVE
2CH002
ЗСНООЗ
9
4CH004
10
SCH075
11
1/1
SET
»0
or
SELECTED
:СН071
i
►:SELECT
SBT:ENTER
MEND:EXIT
©
To
move
additional
channels,
repeat
steps
©
and
@.
©
When
the
channels
have
been
sorted
into
the
desired
order,
press
the
MENU
button
to
return
to
the
normal
screen.
NOTE
٠
If
additional
unwanted
channels
are
found,
refer
to
page
15
to
skip
them.
٠
If
some
channels
are
unable
to
be
found,
refer
to
page
14
for
Manual
Tuning.
ฒ13

Setting
the
Channels
Manua!
Tuning
PREPARATION
*Select
the
video
channel
on
your
TV.
Press
the
OPERATE
button
to
turn
on
the
VCR,
Example:
Tuning
Channel
Position
48
to
Broadcast
TV
Channel
Ε7
(VCR
CHANNE007
؛
for
system
ا
area.)
٥
Press
the
MENU
button.
Select
item
"CHANNE؛
PRESET"
with
the
and
press
the
SET
button.
MENU
MENU
SET
button
TIMER
MODE
๛
*o
o
٥٢
CLOCK
LANGUAGE
@
Select
item
"MANUA؛”
with
the
the
SET
button.
/'
button
and
press
SET
CHANNEL
PRESET
»๐
AUTO
@
Select
the
preset
channel
position
number
48
with
the
button.
numeric
buttons
or
button
and
press
the
[PRESET
CH]
Numeric
buttons
Epreset
ch
SYSTEM
CHANNEL
PINE
TUNING
SKIP
B/G
D/K
002
ệ
/
Select
the
"SYSTEM”
you
desire
with
the
press
the
Ex.
.'
ا
button.
[SYSTEM]
I/►
button
and
PRESET
CH
JSYSTEM
CHANNEL
PINE
TUNING
SKIP
B/G
D/K
002
ب
or
؛[
CHANNE
]
Press
the
numeric
buttons
or
the button
unti
l
you
see
the
desired
broadcast
channel
Ε7
(VCR
CHANNE؛
007)
on
your
TV
and
press
the
▼
button.
Numeric
buttons
PRESET
CH
SYSTEM
BcHANNEL
PINE
TUNING
SKIP
B/G
D/K
/
©
For
fine
tuning,
press
the
button
unti
l
the
broadcast
channel
comes
in
clearly
on
your
TV.
[FINE
TUNING]
PRESET
CH
SYSTEM
CHANNEL
JFINE
TUNING
SKIP
B/G
D/K
007
®
To
check
that
the
broadcast
channel
you
tuned
the
VCR
to
is
VHP
Ε7,
select
channel
7
using
the
TV
tuner.
©
Select
the
video
channel
on
your
TV
again.
»If
the
channel
you
tuned
the
VCR
to
and
the
oneatheTV
do
not
match,
repeat
steps
@
through
©.
©
Press
the
SET
button.
(This
will
set
channel
position
48
in
memory
and
return
to
channel
position
49
for
tuning.)
If
you
want
to
set
additional
channels,
repeat
steps
@
through
©.
MENU
Φ
To
return
to
the
normal
screen,
press
the
MENU
button.
Normal
Screen
o
Use
Auto
Tuning
normal
ly
for
presetting.
o
Auto
tuning
may
not
be
able
to
preset
some
broadcasts.
Use
manual
tuning
to
preset.
@
The
same
broadcast
may
be
preset
more
than
once.
Select
the
channel
with
the
clearer
broadcast.
©
After
auto
tuning
is
completed,
confirm
the
preset
ctiannels
in
order.
If
no
sound
can
be
heard
from
any
of
ttie
preset
channels,
reset
the
SYSTEM
(I
,
ธ/G,
D/K)
with
manual
tuning.
Ε14

Channe!
Skíp/Cancelllng
Skip
Channe!
skip
ا؛
there
are
Channe!
positons
that
are
not
preset,
you
can
skip
them
with
the
fo!lowing
procedure,
PREPARATioN
.turn
on
your
tv
and
VCR
and
se!ect
the
video
Channe!
on
your
tv.
Exampte:
Skip
channe!
position
12.
٥
Press
the
MENU
button,
the
MENU
screen
wi
ll
appear,
button
Select
item
“CHANNEl
PRESEI"
with
the
MENU
TIHER
MODE
and
press
ttie
SET
button.
MENU
SET
๐.
CLOCK
LANGUAGE
♦o
A
▼:SELECT
SET:ENTER
MENUjEXIT
©
Select
item
"MANUAt"
with
SET
button.
/▼
button
and
press
the
CHANNEL
PRESET
SET
AOTO
»0
or
/
©
Set
the
channel
position
you
wish
to
skip
with
the
button
or
numeric
buttons.
Ex.:
12
1/1
Epreset
ch
SYSTEM
CHANNEL
PINE
TUNING
or
B/G
D/K
012
Numeric
buttons
Θ
Set
"SKIP"
with
the
۵/'
button.
CHANNEL
FINE
TUNING
©
Press
the
◄/I
SET
button.
button
to
set
"SKIP
ON”
and
press
the
SET
CHANNEL
FINE
TONING
»0
©
!؛you
wish
toset
more
channels
to
be
skipped,
repeat
steps
©
through
@.
MENU
©
To
return
to
the
normal
screen,
press
the
MENU
button
Normal
Screen
o.
*
When
making
chanกeا
inputs
with
the
numeric
buttons,
first
select
the
one
figure
input
or
two
figures
input
using
the
button
on
the
remote
control.
Cancelling
skip
PREPARATICN
*turn
on
your
TV
and
VCR
and
select
the
video
channel
on
your
TV.
Example:
Reset
channel
position
12.
.Follow
the
same
procedure
®.
@
in
Channel
skip,
and
then
the
procedure
©-©
below.
/
©
Select
the
channel
position
you
wish
to
unskip
with
the
I/►
button
or
numeric
buttons.
Ex'.
12
Epreset
ch
SYSTEM
CHANNEL
PINE
TUNING
or
B/G
D/K
012
Numeric
buttons
Θ
Set
"SKIP”
with
the
ها
'
button.
CHANNEL
PINE
TUNING
JSKIP
or
©
Press
the
SET
button.
1/1
button
to
set
"SKIP
OFF"
and
press
the
CHANNEL
PINE
TUNING
JSKIP
SET
»0
or
©
If
you
wişh
to
unskip
more
channels,
repeat
steps
@
through
©.
MENU
©
To
return
to
the
normal
screen,
press
the
MENU
button.
Normal
Screen
o
Ε15

Menu
Screen
اً
u٢n
on
your
TV
and
se!eci
the
video
channe!
.
Press
the
oPERATE
button
to
turn
on
the
VCR
and
then
press
the
MENU
button
to
disp.ay
the
MENU
screen.
©
Se!ect
the
Item
you
want
with
the
Å/T
button
on
the
remote
control
.
Refer
to
the
pages
l
isted
below
for
details
on
each
item.
The
following
5
items
can
be
set
by
using
the
On
Screen
Display
(OSD).
Setting
a
timer
recording
(and
checking
it).
(See
page
23
for
the
setting
procedure.)
VCR
operating
conditions
are
set
according
to
the
broadcast
reception
and
tape
playback
conditions.
(See
page
f7.)
Setting
ttie
cliannels.
(See
pages
12.)
Setting
the
present
time.
(See
page
11.)
Selection
of
language
to
be
used
for
the
On
Screen
Display.
(See
page
10.)
Θ
Press
the
SET
button.
Ihe
screen
changes
to
the
item
which
you
have
selected.
©
To
cancel
the
MENU
screen,
press
the
MENU
button
.
MENU
IMER
MODE
CHANNEL
PRESET
CLOCK
LANGUAGE
1:
TIMER
A
▼:SELECT
SET:ENTER
MEN
2:
MODE
3:
CHANNEL
PRESET
4:
CLOCK.....
. .
..
.......
..
.
5:
LANGUAGE
.
.....
..
...
U:EXIT
0ร0'(0ท
Screen
Display)
The
tape
counter
and
VCR
mode
can
be
shown
on
the
screen
while
you
are
playing
back
a
tape
or
watching
a
broadcast
on
the
video
channel.
Display
example
PlAY,
Χ2
VSF,
FF
Operating
mods
s.
PICTURE
(Sharp
Super
Picture)
Tape
Speed
(Only
for
VC-AA57Ũ)
Repeat
display
Clock
display
Calendar
display
Programme
channel
position
VSR,
REW
s.PICTURE
ON
asTART
11:00
STOP
11:30
STOP,
CASSETE
IN
11
EADV
Simple
Recording
timer
11
Slow
-REPEAT
-8:00
15/12
02
11
STitt
0:00.00
REC
ا!
REC
PAUSE
Real
time
counter
DPSS
1
91
How
to
D!sp٠ay
!ndlcators
o
Turn
on
your
TV
and
select
the
video
channel.
@
Press
the
OPERATE
button
to
turn
on
the
VCR.
Operating
mode
indicators
are
displayed
in
the
AUTO
display
screen.
©
Each
time
the
MODE
OSD
button
is
pressed,
the
screen
changes
as
follows:
®AUTO
Display
©COUNTER
Display
®Display
off
FULl
Display
t
AUTO
Display
When
an
operation
button,
numeric
button,
or
the
CH
(CHANNEL)
ili
button
is
pressed,
the
current
mode
or
the
number
of
the
ctiannel
wi
l
l
be
displayed
in
the
upper
section
of
the
TV
screen
for
about
3
seconds.
NOTE
*
When
you
record
a
video
signal
output
from
this
VCR
on
another
VCR,
press
the
MODE
OSD
button
to
select
Display
Off.
(If
the
mode
indicator
is
displayed
on
the
screen,
it
is
also
recorded
on
the
tape.)
ฒ16

Mode
You
сап
sei
the
basic
functions
,!sted
in
the
tab.e
be!ow
on
the
MODE
se!ect!0n
screen.
PREPARATION
.Turn
on
your
TV
and
se!ect
the
video
channel.
Press
the
OPERATE
button
to
turn
on
the
VCR,
o
Press
the
MENU
button.
HSHU
TIHBR
MENU
SET
CKRNHBl،
1
CLOCK
LKMaUAOS
Θ
Select
the
MODE
selection
mode
with
the
Ằ/'
press
the
SET
button.
buttons
and
then
.O
o
or
1
▼:SBLBCT
SBTjBKTBR
HBNU;BXIT
©
Select
the
COLOUR
mode
by
pressing
the
then
press
the
—
(For
details,
see
Colour
Mode
on
page
20.)
AUTO
button.
Usually
select
AUTO
mode.
[COLOUR]
1/1
buttons
and
Bea-
PAL
SECAK
NTSC
1410
4■
43
PAL
TV
ЗЕСАИ
secahE
NTSC
SECAN
BLUE
BACK
AOTO
RENTA
REPEAT
Fixed
PAL
colour
mode.
Fixed
SECAM
colour
mode.
Fixed
NTSC
colour
mode.
ậ
A0T٥
or
PAL
SECAM
NTSC..
.
د
»:SELECT
SBTiBNTKR
4
►
:CHANSB
ΝΒΝ0:ΕΧΐτ
Θ
Select
the
NTSC
mode
by
pressing
the
press
the
▼
button.
NTSC
3.58
When
using
NTSC
3.58
T
1/1
button
and
then
[NTSC
mode]
COLOUR
V
system.
(Input
signal:
NTSC
3.58)
When
using
NTSC
4.43
TV
system.
(Input
signal:
NTSC
4.43)
When
using
PAL
TV
system.
(Input
signal:
NTSC
4.43)
PAL
SECAN
NTSC
□4.43
PAL
TV
-
NESBCAN
OPP
¡NTSC
m
¡ECAN
BLUE
BACK
AUTO
RENTAL
REPEAT
ب
or
NTSC
4.43
PAL
TV
د
▼:SELECT
SET:ENTBR
i
►
:CHANGE
ΗΕΝ٥:ΕΧΙΤ
©
Select
the
SECAM
mode
by
pressing
the
◄/►
button
and
then
button.
press
the
[SECAM
mode]
SECAM
..
COLOUR
Ι.1Ι٧»1
PAL
SECAN
When
using
SECAM
TV
system.
(Input
signal:
SECAM)
When
using
MESECAM
TV
system.
(Input
signal
;
MESECAM)
NTSC
4.43
PAL
TV
ШП
MESBCAH
-
OFP
-
OPP
NTSC
-
ج
\3ةحس
BLUB
BACK
AUTO
RENTAL
ậ
MESECAM
á
▼:SELECT
SBT:ENTBR
i
►
:CHANGE
ΗΕΝ٧:ΒΧΙΤ
©
Set
the
BLUE
BACK
mode
by
pressing
the
button.
then
press
the
I/►
buttons
and
[Blue
Back]
(For
details,
see
Blue
Back
on
page
2٥.)
Usually
select
AUTO.
A
blue
screen
will
appear
when
your
VCR
receives
no
TV
signal
or
an
unrecorded
tape
is
played
back.
Select
OFF
if
the
screen
turns
blue
due
to
weak
AUTO
OFF
COLOUR
PAL
SECAM
NTSC
4.43
PAL
TV
-
MBSBCAM
-
OPF
NTSC
-
SBCAM
ئ
BSLUE
BACK
AUTO
RENTAL
REPEAT
or
á
▼:SELECT
SST:BHTBR
4
►
:CHANGE
ΜΒΝ0:ΒΧΙΤ
TV
signal
reception,
or
playback
of
a
poorly
recorded
tape.
в
Set
the
AUTO
RENTAL
mode
by
pressing
the
◄/►
buttons
and
ttien
press
the
(For
details,
see
Auto
Rental
Mode
on
page
20.)
button.
[Auto
Rental]
COLOUR
-
PAL
SECAM
NTSC
NTSC
SECAM
BLUB
BACK
AUTO
RENTAL
sbcahE
SECAM
OPF
ậ
*
▼:SELECT
SBT:BNTBR
4
►
:CHANGE
ΗΒΜ٧:ΒΧΙΤ
[Repeat]
©
Set
the
REPEAT
mode
by
pressing
the
◄/►
buttons
and
then
press
the
(For
details,
see
Auto
Repeat
on
page
27.)
button
COLOUR
тттта
PAL
SECAN
NTSC
4.43
PAL
TV
wn
MBSBCAM
"
OFF
NTSC
i
SECAM
BLUE
BACK
AUTO
RENTAL
Brbpeat
A
▼:SELECT
SBT:BNTER
4
►
:CHANGE
ΜΕΝΠ:ΒΧΙΤ
©
Press
the
SET
button.
To
return
to
the
normal
screen,
press
the
MENU
button.
SET
MENU
Normal
Screen
0.0.
ฒ17

и
Playback
!nsertlng
а
video
Cassette
Gent!y
insert
the
v!deo
cassette
!nto
the
cassette
compartment,
the
VCR
turns
on
automatica!ly.
!f
the
cassette
is
inserted
incorrect.y,
the
!oad!ng
system
will
not
function.
Do
not
force
the
cassette
into
the
VCR.
When
the
cassette
has
been
properly
loaded,
“ج”
appears
on
the
VCR
display,
to
remove
the
cassette,
press
the
EJECT
button
during
stop
mode.
Playback
PREPARATION
.turn
on
your
TV
and
select
the
video
channel.
(VC-ftfl37ũ)
OPERATE
ỗg
٥So
٥
SHARP
φ®®0
๏®®0
®؛®®ج(
๐0
๏®®0
๏®®®
ج®
؟.
ΡΙΑΤΙΧ
OPERATE
рскпхг
FF
REW
REW.
Insert
a
cassette.
STOP
EJECt
■ţ(
(►ЯАш)
)'r
}fuctia)
(VC-AA570)
"Θ
(■STOP
"STOP
STOP
مجئ
у
ฮ..ل\
/
ί
REW
FF
دسل
SHARP
١«0С،и،Щ1٠ССЯС1،Я
(VC-AA37D) (VC-AA57D)
О
Press
the
OPERATE
button
to
turn
on
the
VCR.
®
Insert
a
cassette.
©
Press
the
PLAY/X2
button.
(The
auto
tracking
control
system
engages
and
few
seconds.)
Θ
To
stop
playback,
press
the
STOP
button,
(If
the
tape
reaches
its
end,
the
VCR
will
automatically
rewinds
the
tape
to
the
beginning,
turns
its
power
off
and
ejects
the
tape.)
Video
Search
(with
the
Remote
Control)
Use
the
following
procedure
to
guickly
find
the
section
you
want,
while
viewing
the
picture,
o
During
playback,
press
the
FF
button
for
forward
video
search
or
the
REW
button
for
reverse
search.
There
are
2
search
speeds
in
each
direction.
The
VCR
switches
between
them
each
time
the
button
is
pressed.
©
Press
the
PLAY/X2
button
to
resume
normal
playback.
flashes
on
the
TV
screen
for
a
TAPE
SPEED
for
VC-AA370
VSF/VSR
(Ф)
VSF/VSR
m
PAL
TAPE
SECAM
TAPE
MESECAMTAPE
Χ5
Χ9
NTSC
TAPE
xs
Χ7
forVC-AA570
VSF/VSR
(®)
VSFWSR
(®)
PAL
TAPE
SP
Χ5
Χ9
SECAM
lAPE
MESECAMTAPE
IP
Χ5
XI
ا
PAL
TAPE
EP
Χ9
Χ27
SP/LP
Χ5
Χ7
NTSC
TAPE
EP
Χ9
Χ21
VSF:
Video
Search
Forward
VSR:Video
Search
Reverse
Only
،or
VC-AA570
*
During
video
search
of
a
tape
recorded
in
the
IP
mode
and
EP
mode,
the
upper
part
of
the
picture
may
be
skewed
to
one
side.
Only
for
VC-AA370
.The
recorded
tape
on
the
IP
and
EP
mode
cannot
be
used
for
the
VC-AA370.
Fast
Forwarding
and
Rewinding
(with
the
Remote
Control)
o
To
move
through
the
cassette
faster,
press
the
STOP
button
and
then
press
the
FF
button
or
the
REW
button
to
fast
forward
or
rewind
the
cassette.
(The
picture
cannot
be
viewed
in
this
mode.)
@
Press
the
STOP
button
to
stop
fast
forward
or
rewind.
NOTE
*
If
you
use
other
ttian
E-90/E-f
80
cassettes,
fast
forward
and
rewind
may
take
somewhat
longer.
ฒ18

ค
p.ayback
Slow
Motion
Playback
(with
the
Remote
Control)
o
Press
the
SLOW
button
on
the
remote
control
during
playback.
@
Press
the
SLOW
button
©
or
Θ
(to
the
right
of
the
SLOW
button)
to
vary
the
slow
motion
playback
speed
between
1/s
and
1/30
of
the
normal
playback
speed.
Θ
Press
the
PLAY/X2
button
to
resume
normal
playback.
^DPSS^
!►SLOW-©—Φ
٥٥٥
INOTE
>
«
No
noise
can
be
erased
when
a
tape
recorded
in
the
NfSC
SP
mode
is
played
back
in
special
modes
(stil
l
,
slow
motion,
etc).
However,
this
does
not
Indicate
a
malfunction
with
the
VCR.
For
VC-AA570
٠
During
slow
motion,
still
picture,
frame
advance
and
double
speed
playback
with
a
tape
recorded
in
the
PAI
EP
mode,
noise
may
appear.
«
When
playback
a
tape
recorded
in
the
PAI
EP
mode
during
slow
motion,
auto
tracking
function
is
prohibited
in
use.
Still
Picture
and
Frame
Advance
0
Press
the
PAUSE/STILL
(F.ADV)
button
during
playback,
this
will
freeze the
picture
on
your
tv.
®
If
noise
bars
appear
on
the
screen
during
still
picture,
set
your
VCR
to
the
slow
mode
and
press
the
CH
(CHANNEL)
ả/Τ
button
to
make
the
noise
disappear,
then
press
the
PAUSE/STILL
(F.ADV)
button
again.
®
If
؛ege
¡g
vertical
jitter
during
still
picture
playbac١,
press
the
CH
(CHANNEL)
A/?
button
to
stop
jitter.
Θ
Pr^Ss
th؛
PlAy/xZ
buttoC
agai'n
t0؛es؛me؛Or^؛i
ρΙ^^^.
٢ج
Double
Speed
Playback
0
Press
the
PLAY/X2
button
during
playback.
Ihe
tape
wil
l
be
played
back
at
twice
the
normal
speed.
Θ
Press
the
PLAY/X2
button
to
resume
normal
playback.
-
٠
Sound
is
muted
during
video
search,
slow
motion,
still
picture,
frame
advance
and
double
speed
playback,
*fo
avoid
damage
to
the
tape,
your
VCR
will
resume
normal
playback
after
about
5
minutes
of
slow
motion
playback
and
still
picture.
For
VC-AA370
»This
model
cannot
playback
a
tape
recorded
in
ttie
LP/EP
mode.
»
During
video
search,
slow
motion,
still
picture,
frame
advance
and
double
speed
playback
with
a
tape
recorded
in
the
sp
mode,
picture
noise
and
noise
bar
will
appear.
For
VC-AA570
«
During
slow
motion,
still
picture,
frame
advance
and
double
speed
playback
with
a
tape
recorded
in
the
LP/EP
mode,
the
upper
part
of
the
picture
may
be
skewed
to
one
side.
NTSCTape
p.ayback
on
PAL
TV
When
you
play
back
an
NTSC
tape
on
your
VCR,
it
is
possible
to
use
a
PAI
or
multi-
system
compatible
TV.
However,
please
note
the
following:
»The
picture
will
shrink
vertically
to
some
degree,
as
shown
in
the
diagram,
but
this
does
not
indicate
a
malfunction
in
your
TV
or
VCR.
»If
your
TV
does
not
have
a
V-HOLD
control
,
the
picture
may
roll
and
be
unwatchable.
However,
if
you
use
a
TV
with
a
V-HOID
control,
you
can
stop
the
rolling
by
adjusting
the
V-HOLD
control
and
watch
the
picture.
»Horizontal
noise
bars
may
appear
on
ttie
screen
during
special
effect
playback
(video
search,
still,
slow,
frame
advance
and
double
speed
playback),
possibly
accompanied
by
discolouring.
»Although
NTSC
tapes
can
be
played
back
into
a
PAL
TV,
those
tapes
cannot
be
dubbed
by
a
PAI
system
VCR
connected
to
the
AUDIO
OUT
and
VIDEO
OUT
terminals
of
this
product.
Tapes
recorded
in
this
way
cannot
be
played
back
on
PAL
system
VCRs,
»
Set
the
Colour
mode
to
AUTO
or
NTSC
and
set
the
NTSC
mode
to
PAL
TV.
Full
Auto
Playback
(This
function
only
works
when
AUTO
RENTAL
mode
on
the
MODE
selection
screen
is
set
to
"OFF”.)
Ful
l
Auto
Playback
lets
you
enjoy
playback
with
ease.
When
you
insert
a
cassette
with
the
erasure
protection
tab
removed,
your
VCR
automatically
turns
on
the
power
and
playback
the
tape.
When
the
tape
reaches
its
end,
the
VCR
automatically
rewinds
the
tape,
turns
its
power
off
and
ejects
the
tape.
NOTE
»
If
the
erasure
protection
hole
is
covered,
press
the
ΡΙΑΥ/Χ2
button
after
the
power
turns
on
automatically.
Auto
Head
Cleaning
System
When
the
tape
is
inserted
or
ejected,
this
system
automatically
cleans
the
drum
and
heads
with
a
special
roller
before
recording
or
playback
begins,
protecting
the
heads
and
drum
from
dirt
and
preserving
beautiful
picture
guality.
جا9
This manual suits for next models
1
Table of contents
Other Sharp VCR System manuals

Sharp
Sharp VC-MH75FPM User manual

Sharp
Sharp WQ-T37OA User manual

Sharp
Sharp VC-780E User manual

Sharp
Sharp VC-FH30GMS User manual

Sharp
Sharp VC-H600X User manual

Sharp
Sharp VC-M313HM User manual

Sharp
Sharp VC-A210X User manual

Sharp
Sharp VC-H965U User manual

Sharp
Sharp VC-A10 User manual

Sharp
Sharp VC-AA350A User manual

Sharp
Sharp VC-A410U User manual

Sharp
Sharp VC-GH611GM User manual

Sharp
Sharp VC-6300G User manual

Sharp
Sharp vc-a260x User manual

Sharp
Sharp DV-NC100S User manual

Sharp
Sharp DV-NC55U User manual

Sharp
Sharp VC-A53X User manual

Sharp
Sharp VC-MH715HM User manual

Sharp
Sharp VC-496GSN User manual

Sharp
Sharp VC-TA350 User manual