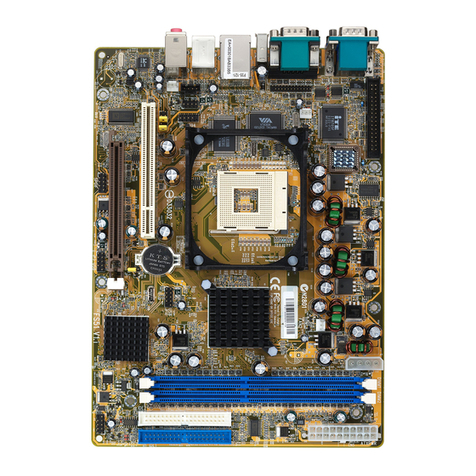
Shuttle AE23 User manual

RAID Administrator
User's Manual
M483
40-012-A87121

- 1 -
Chapter 1
Getting Started..........................................................................................................3
1-1 Introduction ...................................................................................................3
1-2 Main Features & Benefits..............................................................................3
Chapter 2
Installation of Driver .................................................................................................4
2-1 Windows 98/ME............................................................................................4
2-2 WindowsNT4.0 ............................................................................................6
2-3 Windows 2000..............................................................................................7
2-4 Windows XP.................................................................................................9
Chapter 3
Use RAID Administrator .........................................................................................12
3-1 InstallRAIDAdministrator............................................................................13
3-2 Run RAIDAdministrator ..............................................................................13
3-3 Create Stripe Array.....................................................................................15
3-4 Create Mirror Array .....................................................................................17
3-5 Add/Remove Spare Disk ............................................................................18
3-6 Synchronize/Validate/VerifyMirrorArray......................................................19
3-7 Create Span Array......................................................................................21
3-8 Create 0+1 Array ........................................................................................22
3-9 Remove Disk Array.....................................................................................23
3-10 SetTransferMode ....................................................................................24
3-11 Device Status............................................................................................25
3-12 Hot-swapping Hard Disks of Mirror Array ..................................................26
3-13 Event Log .................................................................................................27
TABLE OF CONTENTS

- 2 -
Chapter 4
BIOS Configuration ................................................................................................28
4-1 Enter into BIOSConfigurationUtility ............................................................29
4-2 Create RAID ...............................................................................................30
4-3 Delete RAID............................................................................................... 31
4-4 RebuildMirrorArray....................................................................................31
4-5 Add Spare Disk......................................................................................... 32
4-6 Remove Spare Disk ...................................................................................32
4-7 Set Disk Mode............................................................................................32
4-8 Set Boot Disk .............................................................................................33

- 3 -
************************************************
1.1 Introduction
1.2 Main Features & Benefits
************************************************
1.1 Introduction
HPT372 is UDMA/ATA133 RAID controller.
RAID Administrator is a Windows- ased RAID management utility for
HPT372 RAID Controller. With graphical user interface, RAID Administrator
ena le users easily configure and manage disk and disk arrays connected to
HPT372 RAID controller.
1.2 Main Features & Benefits
Below are the main features and enefits of RAID Administrator.
(1) Support RAID 0, 1,0+1 & JBOD
(2) Allowed maximum 4 disks connection to every controller
(3) Hot-swapping failed hard disk in mirror array
(4) Support independent use of hard disk
(5) Support hot spare disk
(6) Support Operating Systems: DOS/Windows 3.x, Windows98/Me,
Windows NT4.0, Windows 2000, Windows XP and Linux.
(7) Windows- ased software for RAID management(compati le with
BIOS)
(8) Disk error alarm mechanism
(9) Event log for easy trou le shooting
(10) Plug-and-play
GETTING STARTED Chapter 1

- 4 -
INSTALLATIONOFDRIVER
Chapter 2
************************************************
This chapter will guide user to install drivers for HPT372 RAID controller. Contents
include:
2.1 Windows 98/Me
2.2 Windows NT4.0
2.3 Windows 2000
2.4 Windows XP
************************************************
2.1 Windows 98/Me
6Automatic Installation
After the computer start-up, Windows system will find the newly installed
RAID adapter and ask you to install its driver. Please follow the prompt to
finish the driver installation.
6Manual Installation
If Windows can not find new hardware, the driver can e installed through the
following steps :
1. Shut down all programs.
2. Click Start-->Setup-->Control Panel, then dou le-click on Add
New Hardware icon.
3. Click Next in the popup window to continue.
4. A dialog ox will appear and ask whether to let windows search new
hardware. Select No,I want to select the hardware form a list. and
then click Next to continue.
5. Hardwares of different types will e shown in the follow-on window.
Select SCSI Controllers and then click Next to continue.
6. Insert the CD disk of driver into the CD-ROM drive, then click Ha e
Disk....

- 5 -
7. A dialog ox will pop up, input the path of drive D:\RAID\Win9X.
Then click OK to continue.
8. In the follow-on window, driver will list out the controller type you
need to install, please just click Next to continue.
9. Follow the system prompt to install driver. When finished, restart
the computer.
6Verify Installation
When the driver has een successfully installed and the computer restarted:
1. Right-click My Computer icon on desktop, and then select Property
item from the popup menu.
2. Select De ice Manager item from the popup window.
If there is HPT372 items under SCSI Controllers, it indicates that the
driver has een installed properly.
If you cannot find these two a ove-mentioned device items,or there are ? or !
on device icon, it indicates that the driver has not een correctly installed
and needs reinstallation.

- 6 -
2.2 Windows NT4.0
6Install driver under Windows NT4.0
1. Click Start -->Setup -->Control Panel, then dou le-click SCSI
Adapter icon.
2. In the follow-on window, select Dri er item. then click Add utton.
3. In the follow-on window, select Ha e Disk....
4. Insert the CD disk of driver, input the path of driver D:\RAID\WinNT,
then click OK.
5. In the follow-on window, select HPT372 UDMA/ATA133 RAID
Controller item, then click OK.
6. Follow the system prompt to install the driver. When finished, restart
the computer.
6Install driver in the process of Windows NT4.0 installation
1. Press F6 key when the system prompts Setup is inspecting your
computers hardware configuration.
2. Press F6 key, the installation will continue. Later, installation pro-
gram will remind user to press S key to specify other devices. Please
press S key.
3. In the follow-on De ice Type window, select Other item, then
press Enter to confirm.
4. The installation program will prompt users to insert the CD disk
of driver. Please insert it and then press Enter to confirm.
5. In the follow-on window, select HPT372 UDMA/ATA133 RAID
Controller, then press Enter to confirm.
6. The follow-on interface will list the devices to e installed, in which
HPT372 UDMA/ATA133 RAID Controller item should e included.(
If users want to install other devices,please operate at this time. If all
devices have een successfully installed, please go to next.)
7. Press Enter to continue the installation of Windows NT4.0.
6Verify Installation
When the driver has een successfully installed and the computer restarted:
1. Click Start -->Setup -->Control Panel, and then dou le-click SCSI
Adapter item.

- 7 -
2. If there is HPT372 UDMA/ATA133 RAID Controller item in the
popup window, it indicates that the driver has een successfully
installed. Otherwise, users need to reinstall the driver.
2.3 Windows 2000
6Install driver under Windows 2000
Automatic Installation
Start the computer and enter the operating system of Windows 2000,
the system will automatically detect new hardware and prompt users to
install the driver. Please insert the CD disk of driver and follow the
system prompt to finish the driver installation and restart the computer.
Manual Installation
If Windows can not find new hardware, the driver shall e installed
through the following steps :
1. Click Start -->Setup -->Control Panel, select Add/Remo e New
Hardware. In the follow-on window, Click Next to continue.
2. In the follow-on window, select the first item Add/Troubleshoot a
de ice, then click Next to continue.
3. In the follow-on device list, select the first item Add New De ice,
then click Next to continue.

- 8 -
4. Then the system will ask Did you want Windows to search for
your new hardware? Please select No, I want to select the hardware
from a list. then click Next to continue.
5. In the follow-on window of device types, select SCSI and RAID
controllers, then click Next to continue.
6. In the follow-on window, select Ha e Disk....
7. Please insert the CD disk of driver and input path name
D:\RAID\Win2k into Copy manufacturers files from: column, then
click OK.
8. In the follow-on type column, select HPT372 UDMA/ATA133 RAID
Controllers.
9. Follow the system prompt to finish the installation, and restart the
computer.
6Install driver in the process of Windows 2000 installation
1. If Windows 2000 is installed from the CD-ROM drive, please F6 key
when the message Press F6 if you need to install third party SCSI or
RAID dri er appears. If it is to type Winnt and install, after files have
een copied and the computer restarted, press F6 key when the
message Setup is inspecting your computers hardware configura-
tion appears.
2. Press S key to specify additional devices when the Windows 2000
Setup window appears.
3. In the follow-on window of device type, please select Other and
press Enter to continue.
4. Insert the CD disk of driver, then press Enter to continue.
5. The system will ask whether to install driver under WinNT or under
Windows 2000, please select to install driver under Windows 2000.
6. The follow-on interface will list the devices to e installed, in which
HPT372 UDMA/ATA133 RAID Controller item should e included.(
If users want to install other devices,please operate at this time. If all
devices have een successfully installed, please go to next.)
7. Press Enter to continue Windows 2000 setup.

- 9 -
6Verify Installation
When the driver has een successfully installed and the computer restarted:
1. Right-click My Computer icon, select Property item in the popup menu.
2. In the popup window, select Hardware item and then click De ice
Manager utton.
If there is HPT372 UDMA/ATA133 RAID Controller item in the popup
De ice Manager window, it indicates that the driver has een successfully
installed. Otherwise, please reinstall the driver.
2.4 Windows XP
6Install driver under Windows XP
Automatic Installation
Start the computer and enter the operating system of Windows XP, the
system will automatically detect new hardware and prompt users to
install the driver. Please insert the CD disk of driver and follow the
system prompt to finish the driver installation and restart the computer.
Manual Installation
If Windows can not find new hardware, the driver shall e installed
through the following steps :

- 10 -
1. Click Start -->Setup -->Control Panel, select Add/Remo e New
Hardware. In the follow-on window, Click Next to continue.
2. In the follow-on window, select the first item Add/Troubleshoot a
de ice, then click Next to continue.
3. In the follow-up device list, select the first item Add New De ice,
then click Next to continue.
4. Then the system will ask Did you want Windows to search for
your new hardware? Please select No, I want to select the hardware
from a list. then click Next to continue.
5. In the follow-on window of device types, select SCSI and RAID
controllers, then click Next to continue.
6. In the follow-on window, select Ha e Disk....
7. Please insert the CD disk of driver and input path name D:\RAID\WinXP
into Copy manufacturers files from: column, then click OK.
8. In the follow-on type column, select HPT372 UDMA/ATA133 RAID
Controllers.
9. Follow the system prompt to finish the installation, and restart the
computer.
6Install driver in the process of Windows XP installation
1. Booting from CD-ROM, when the Windows XP Setup lue screen
appear and prompt user to press F6 key to install third party SCSI or
RAID driver, please press F6 Key.
2. Press S key to specify additional devices when the Windows XP
Setup window appears.
3. Insert the CD disk of driver, then press Enter to continue.
4. In the follow-on window of device type, please select HPT372
UDMA/ATA133 RAID Controller for Windows XP to continue.
5. The system will ask whether to install driver under WinNT or under
Windows XP, please select to install driver under Windows XP.
6. The follow-on interface will list the devices to e installed, in which
HPT372 UDMA/ATA133 RAID Controller item should e included.(
If users want to install other devices, please operate at this time. If all
devices have een successfully installed, please go to next.)
7. Press ENTER to continue Windows XP setup.

- 11 -
6Verify Installation
After the driver has een installed and the computer restarted:
1. Right-click My Computer icon, then select Property item from the popup
menu.
2. In the popup window, select Hardware ta and then click De ice Manager
utton.
If HPT372 UDMA/ATA133 RAID Controller and HighPoint RCM De ice
items exists in the popup De ice Manager window (see a ove), it indicates that
the driver has een successfully installed.
Otherwise, if user cannot find these four device items,or there is ? or ! markings
on device icon, it indicates that the driver has not een correctly installed and
user need to delete the devices and reinstall the drivers.

- 12 -
USERAIDADMINISTRATOR
Chapter 3
************************************************
3.1InstallRAIDAdministrator
3.2 Run RAID Administrator
3.3 Create Stripe Array
3.4 Create Mirror Array
3.5 Add/Remove Spare Disk
3.6Synchronize/Validate/Verify Mirror Array
3.7 Create Span Array
3.8 Create 0+1 Array
3.9 Remove Disk Array
3.10 Set Transfer Mode
3.11 Device Status
3.12 Hot-swapping Hard Disks of Mirror Array
3.13 Event Log
************************************************

- 13 -
3.1 Install RAID Administrator
Please take the following steps to install RAID Administrator:
1. Dou le click on the setup program: setup.exe, then follow the pro-
gram prompt to finish the installation.
2. After the installation is complete, restart the computer.
With the implicit option, the setup program will create program group:
Start>Program>RAID Administrator. This program group
contains the following contents:
RAID Administrator running program
RAID Help help file
Uninstall RAID uninstalling program
3.2 Run RAID Administrator
The following steps should e taken to run RAID Administrator.:
1. Click Start -->Program -->RAID Administrator -->RAID Adminis
trator, the elow welcome interface will come up.
2. The a ove interface stays only for a while. Coming up is the main
interface of RAID Administrator(see elow).

- 14 -
Tool Bar:
It provides shortcut way to execute the common commands. Commands shown
y Tool Bar can also e found under Configuration menu.
Disk Tree:
It shows the connecting information of all hard disks in two ways:View by
De ice and View by Adapter.
Status Pane:
It lists the infromation and working status of selected hard disks or disk arrays.

- 15 -
3.3 Create Stripe Array
The following steps shall e taken to create the stripe array.
1. Click Stripe icon on the tool ar.
2. Select the strip size in the follow-on window, and then click Next
utton.
3. In the follow-on dialog ox, select hard disk from A ailable Disks
column. Add them into Stripe Array Member Disks column y
clicking the corresponding arrow utton. Then click Next utton.
4. In the follow-on dialog ox, click Create utton to create stripe array,
or click Cancel utton to cancel this creation. If the cancel operation
has een selected, the system will remain unchanged.
5. After the completion of creating stripe array , shut down all other
programs. Then click Yes to restart the computer, or select No to
restart the computer later .
Note:
1. At least two hard disks are needed to create the stripe array.Disks can
e connected at any ca le and setted as either master or slave device.
2. The capacity of the stripe array is eaqual to the product of the num er
of total hard disks and the smallest HD capacity.

- 16 -
Suggestion:
1. When selecting the strip size , if the user does not know which one
is suita le, please select the default size 64K.
2. In order to avoid the capacity waste , try to use hard disks with the
identical capacity to create stripe array .
3. For the consinderation of performance, if two hard disks are used,
please connect them to different IDE channels respectively.
Warning:
1. The data on all disks will e destroyed after the creation of the stripe
array.

- 17 -
4. Click Create to egin the creation or Cancel to exit. If you select
the cancel operation, the system will remain unchanged.
5. After the creation is complete,the program will prompt you to
synchronize mirror,slect Yes to egin or No to cancel.
6. After your selection of either , the program will prompt you to
restart your computer.
If the user has set a spare disk, when the read/write failure of either the
source disk or the mirror disk, the program will automatically use the left
normal disk and the spare disk to re uild the mirror array, there y
providing dual security for data.
3.4 Create Mirror Array
The following steps shall e taken to create the mirror array:
1. Click Mirror icon on the tool ar.
2. In the follow-on dialog ox, select hard disks from A ailable Disks
column,add them into Source Disk column or Mirror Disk column
respectively y clicking the corresponding arrow utton.
3. If the user wants to use a spare disk, please select Use Spare Disk
item. Then select hard disks from A ailable Disks column, and add
it into Use Spare Disk column.

- 18 -
Note:
1. At least the source disk and the mirror disk are needed in the creation
of the mirror array. The spare disk is optional.Disks can e connected
at any ca le and setted as either master or slave device.
2. The capacity of either the mirror disk or the spare disk shall e no
less than that of the source disk.
3. The capacity of the mirror array is equal to that of the source disk.
Suggestion:
1. In order to avoid the capacity waste , please use hard disks with the
identical capacity to create mirror array.
Warning:
1. The creation of the mirror array will make only the data on the source
disk e preserved while the data on oth the mirror disk and the spare
disk destroyed.
3.5 Add/Remove Spare Disk
If the user does not want to set a spare disk during the creation of mirror, he
can add the spare disk into the mirror array later. The user can also remove
the spare disk that has een set. The steps to add/remove the spare disk are
as follows:
1. Select the mirror array to e add/remove the spare disk.
2. Click Spare icon on the tool ar.
3. In the popup dialog ox , select Add or Remo e operation, then
click Next utton.
4. If the user is to add the spare disk, select the hard disk to e used in
the follow-on dialog ox , and then click Finish utton .
5. If the user is to remove the spare disk, click Finish utton in the
follow-on dialog ox .

- 19 -
3.6 Synchronize/Validate/Verify Mirror Array
6Synchronize Mirror
After the completion of creating mirror array, the data on the source disk has
not een copied to the mirror disk. The data on the source disk and the mirror
disk do not keep identical yet. The user should synchronize mirror, y which
the data on the source disk will e fully copied to the mirror disk.Thus the data
on the disks in the mirror array ecome identical.
Once the creation of the mirror array is finished, the user will e asked
whether to synchronize mirror at once or not. Select Yes to egin the synchro-
nize operation or No to skip.
The status of the mirror array will remain locked if No selected to skip the
synchronize operation. The user may at any time synchronize mirror which is
in either locked status or normal status. The detailed steps to synchronize
mirror are as follows:
1. Right-click the mirror array to e synchronized.
2. Select Synchronize Mirror item from the popup menu.
The mirror array eing synchronized is la eled at locked status. By selecting
this disk array, the user can see the progress of synchronizing mirror.
Table of contents
Other Shuttle Motherboard manuals

Shuttle
Shuttle FS51 User manual

Shuttle
Shuttle AB61 User manual

Shuttle
Shuttle AV49 User manual

Shuttle
Shuttle ME21 User manual

Shuttle
Shuttle HOT-675Z User manual

Shuttle
Shuttle HOT-565 User manual

Shuttle
Shuttle MS52 User manual

Shuttle
Shuttle HOT-641/P User manual

Shuttle
Shuttle Spacewalker HOT-685Z User manual

Shuttle
Shuttle Spacewalker AB40 User manual

Shuttle
Shuttle FB95 User manual

Shuttle
Shuttle AV49V User manual

Shuttle
Shuttle HOT-559 User manual

Shuttle
Shuttle FN45 User manual

Shuttle
Shuttle Spacewalker HOT-687 User manual

Shuttle
Shuttle MV43P User manual

Shuttle
Shuttle MB48 User manual

Shuttle
Shuttle HOT-675 User manual

Shuttle
Shuttle FV24 User manual

Shuttle
Shuttle MT63 User manual