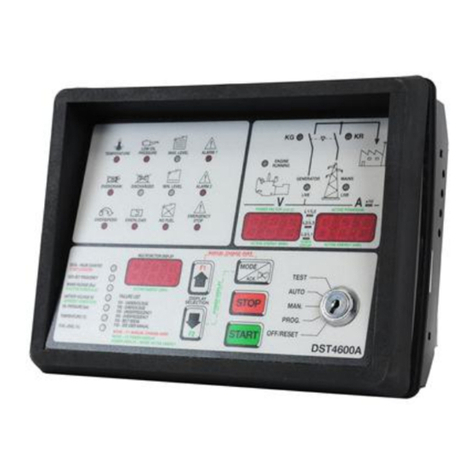
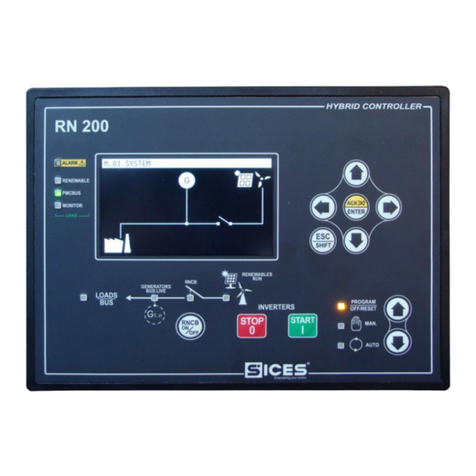
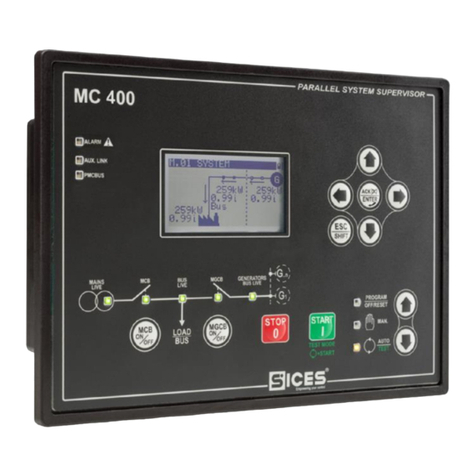
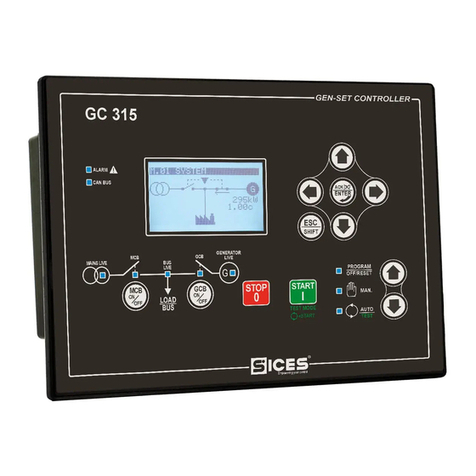
Sices DST4602 User manual

Filename: EAAM051100EN.docx
Rev. 00 Date: 23/10/2015
ID Document: EAAM0511
Product: DST4602Evolution
Evolution

ii DST4602Evolution User’s Manual
1. Safety information ...................................................................................................3
2. Recycling information.............................................................................................4
3. Definitions................................................................................................................4
4. Main functions .........................................................................................................5
4.1 Front panel ...........................................................................................................5
4.2 Selector (ref. to fig. 1)...........................................................................................6
4.3 Pushbuttons (ref. to fig. 1) ....................................................................................6
4.4 Indicators (ref. to fig. 1).........................................................................................8
4.5 Multifunctional display...........................................................................................9
4.5.1 LCD lighting....................................................................................................9
4.5.2 Brightness ......................................................................................................9
4.5.3 Mode navigation (ref. to fig. 2)......................................................................10
4.5.4 Display area layout (ref. to fig. 3)..................................................................11
4.5.5 Top status bar (ref. to fig. 4).........................................................................11
4.5.6 Bottom status bar (ref. to fig. 5)....................................................................12
4.6 Display mode......................................................................................................12
4.6.1 Programming (P.xx) (ref. to Fig. 6)...............................................................12
4.6.1.1 Access codes.......................................................................................13
4.6.1.2 Setting the parameters.........................................................................14
4.6.1.3 How to input string value......................................................................14
4.6.1.4 Direct access to the previous page ......................................................15
4.6.1.5 Alarms and protection parameters .......................................................15
4.5.5 Status information(S.xx)...............................................................................15
4.6.3 Electrical measurements(M.xx) ....................................................................18
4.6.4 Engine measurements (E.xx).......................................................................19
4.6.5 PMCB(B.xx) Power Management Communication Bus................................19
4.6.6 History logs(H.xx).........................................................................................20
5Special Functions.......................................................................................................20
5.1 Manual synchronization......................................................................................20
5.2 Manual power regulation ....................................................................................21
5.3 Selecting the language.......................................................................................22
5.4 Fuel pump...........................................................................................................22
5.4.1 Select function..............................................................................................22
5.4.2 Fuel pump mode ..........................................................................................22

DST4602 User’s Manual 3
INTRODUCTION
The manual must always be kept in a safe place where it is readily available for quick reference.
The manual should be read carefully, and every paragraph understood by the operators and
technicians doing routine and periodic maintenance.
If the manual is lost or damaged, ask the installer/manufacturer for a copy, quoting the model, code,
serial number and year of manufacture.
Many accidents are caused by poor knowledge and the non-observance of safety regulations, which
must be observed when operating and/or servicing the machine.
To prevent accidents, before using or servicing the machine you should read, understand and observe
the precautions and warnings in this manual.
The following words have been used to identify the safety messages in this manual.
WARNING! This word is used for safety messages in the manual when there are
potentially dangerous situations that could cause serious or mortal injury unless the
hazard is prevented.
These safety messages describe the usual precautions to take to avoid the dangerous
situation. Ignoring these precautions can cause serious damage to property and/or
injury to persons.
WARNING! This word is used in the safety messages for risks which, unless
avoided, can cause minor or moderate injuries or damage.
The message may also be used for hazards that can cause damage to property and/or
injury to persons.
INFORMATION! This term implies the message provides information useful for
performing the current operation, or explanations or clarifications for procedures.

4DST4602Evolution User’s Manual
Information on the disposal of old electrical and electronic equipment (applicable in European
countries that have adopted separate waste collection systems).
Products bearing the barred wheeled waste container symbol cannot be disposed of with normal
urban waste. Old electrical and electronic equipment should be recycled in a facility authorized to
process these items and dispose of the components. Contact your local authority for information on
where and how to deliver such products to the authorized site nearest you. Proper recycling and
disposal helps conserve resources and prevents detrimental effects for health and the environment.
LOCKOUT - is used to indicate a fault that prevents the generator from operating and causes automatic
and immediate emergency engine shutoff.
POWER-OFF - is used to indicate a fault that prevents the generator from operating and causes the
standard automatic engine shutoff (including a cooling phase).
WARNING - is used to indicate a fault that requires the intervention of the operator without engine
shutoff.

DST4602 User’s Manual 5
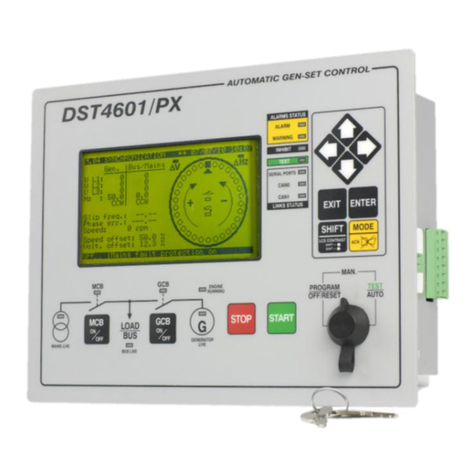
The controls consist of a lockable selector (1) and 12 pushbuttons (2).
The front panel also has some luminous indicators (3).
KEY
1 - Selector
2 - Pushbuttons
3 - Indicators

6DST4602Evolution User’s Manual
Selector position
Function
OFF/RESET
PROGRAM
The generator is disabled; warnings and lockouts are cancelled.
You can program the parameters.
MAN
The Gen-set control module is set for manual gen-set control.
Press the START button to start the engine.
Press the STOP button to stop the engine.
Buttons MCB and GCB are for the manual control of the
commutation/switches in accordance with system SW - HW configuration.
With BUS ON, synchronization is required.
AUTO
TEST
Gen-set is in automatic mode: all the functions are controlled
automatically. The combination of buttons ACK/TEST and START
lets you activate/deactivate the TEST mode; the STOP button
lets you stop the gen-set (with a lockout).
Buttons MCB and GCB let you switch devices (only
inTESTmode and on the basis of the type and plant configuration). The
activation of a suitably configured external input (or receiving a given
command via SMS or from a serial port) can force the starting of the
generator and the load outlet with the network connected or with the
inhibition input on (REMOTE START).
Pushbuttons
Function
SHIFT
Dead key. If this is pressed with another button, it changes the button function.
When HELP is available on thepage, holding this button down displays the HELP
message on the bottom status bar. LCD backlight ON.
LEFT/RIGHT
Horizontal scrolling buttons. These buttons let you select the previous or next
page on the display in all modes, except in the PROGRAM and HISTORY
LOGS mode.
In PROGRAM mode, they are used to position the cursor when entering the
strings. Used in combination with the SHIFT button, they can be used to
adjust the Brightness.
To lower the Brightness press the combination of buttons SHIFT + LEFT
. To increase the Brightness, press the combination of buttons SHIFT
+ RIGHT

DST4602 User’s Manual 7
Pushbuttons
Function
UP/DOWN
Vertical scrolling buttons. These buttons let you select the multifunctional
display mode.
In PROGRAM and HISTORY LOGS mode you can scroll the menus and the
variables/settings. You can increase/decrease the value of the variable to
change the settings. Used in combination with the SHIFT button you can
scroll through the menu ten entries at a time or increase/decrease the variables
ten units at a time. During the keyboard regulation phase you can increase or
decrease the engine speed (if set to synchronized) or the power supplied (if in
power mode).
ENTER
Lets you enter the PROGRAMMING mode and open submenus, change a
variable, and confirm the operation. Furthermore, you can enable the HISTORY
LOGS function and open the selected log, “acknowledge” any EEPROM errors
at power-up, in the manual synchronization and power setting phase, and enable
keyboard regulation.
EXIT
In programming mode, it cancels the changes made to a variable value, brings
up the previous menu level, or exits programming mode. If it is pressed for at
least two seconds in any menu, you exit the programming mode retaining the
current menu position for further programming access. Use the SHIFT
button to control the fuel pump manually. Used with the ACK/TEST , button,
it resets the partial counters selected with the ENTER button and reloads
the default programming parameters (in the version with CANBUS, it also lets
you force the exit BUS OFF mode). When used during the keyboard regulation
function, it aborts the function.
GCB
Used to command the General Circuit Breaker (GCB) or changeover. The
actual function depends also on the plant configuration. In parallel mode with at
least one other source powering the BUS, if the button is pressed it activates
the fast unload ramp before the circuit breaker opens.
In case no ramp is needed, simply keep it pressed for a few seconds until the
GCB is opened.
MCB
Used to command the Mains Circuit Breaker (MCB) or the changeover. The
actual function depends also on the plant configuration.
ACK/TEST
Used to acknowledge any kind of alarm and to silence the horn. In the case of a
malfunction, pressing this button deactivates the horn; pressing the button again
acknowledges the anomaly, cancelling any inactive warnings. In conjunction with
the START , button, with the selector in AUTO mode, it can be used to
activate/deactivate the TEST mode. Used with the EXIT button, it resets the
counters and reloads the default programming parameters (in the version with
CANBUS, it also lets you force the exit from BUS OFF mode).

8DST4602Evolution User’s Manual
START
In MAN. mode it can be used to start the engine. In AUTO mode, used with the
ACK/TEST button, with the selector in AUTO mode, it enables/disables
TEST mode.
STOP
Used to stop the engine. In AUTO, TEST or REMOTE START mode it also
triggers a lockout.
WARNING: Stopping the engine with the STOP button in AUTO, TEST
or REMOTE START mode, can cause malfunctions and damage property
and/or injure persons.
Pressed with the selector in OFF/RESET mode, it runs theLAMP TEST on all
the luminous indicators.
LED OFF
LED steady ON
LED flashing
Signalling
Function
FAULTS
There is at least one active warning
Signals at least one lockout or power-off or unload anomaly.
Signals at least one warning which has not yet been
acknowledged with the “ACK/TEST” button.
Signals at least one lockout or power-off which has not yet
been acknowledged with the “ACK/TEST” button.
No lockouts, power-offs, or unload functions.
No warnings.
INHIBIT
Signals an active inhibit command from digital input,
clock/calendar or load function.
It means that the input status is active, but the set waiting time
hasn't elapsed.
Means an inhibition command is active.
BUS LIVE
Signals BUS line ON.
Signals BUS line OFF.
Flashes at 50% during the synchronization phase (opposite
sequence to MCB or GCB).
MAINS LIVE
Network/Bus mains power is OFF or MAINS SIMULATION
digital input is disabled.
Mains power is ON and stable in the range of tolerance, or
MAINS SIMULATION digital input is enabled from the set
time.
Flashes at 50% during transition between the previous two
states.

DST4602 User’s Manual 9
GENERATOR
LIVE
Generator voltage and frequency are not present.
Generator voltage and frequency are present and stead within
the tolerance range.
Flashes at 50% during transition between the previous two
states.
ENGINE
RUNNING
The engine is OFF.
The engine is running
Cooling phase
MCB
The MCB is open.
The MCB is closed
Flashes at 25% ON if open after a closing command.
Flashing at 75% ON if closed after an opening command.
Flashing at 50% in synchronization phase with BUS LIVE
indicator.
GCB
The GCB is open.
The GCB is closed
Flashing at 25% ON if the GCB is open after a closing
command.
Flashing at 75% ON if closed after an opening command.
Flashing at 50% in synchronization phase with BUS LIVE
indicator.
The backlight lamp is managed by the Gen-set control module, which switches off the backlight after a
programmable time (P.492) if no buttons are pressed in the meantime. Press any button to switch the
lamp ON again, (we recommend using the SHIFT button as it has no function when used alone).
This function can be disabled by setting parameter P.492 to 0.
The Brightness can be adjusted by pressing the SHIFT + LEFT buttons to decrease the
Backlight or the SHIFT +RIGHT buttons to increase it.

10 DST4602Evolution User’s Manual
The display has different display modes with various pages.
Mode
Page identifier
Programming
P.XX
Status information
S.XX
Electrical
measurements
M.XX
Engine measurements
E.XX
PMCB
B.XX
History logs
H.XX
Generally, the UP and DOWN buttons are used to navigate between the modes.
Use the LEFT and RIGHT buttons to display the pages in the mode.
In some modes (ex.: mode P.xx and mode H.xx) to display the pages, press the ENTER , button, and then
the UP and DOWN buttons to browse the pages.
Information! If the UP and DOWN buttons have to be used to manage functions
in that mode, the ENTER button must be pressed to activate these functions, and the EXIT
button should be pressed to deactivate the same.
Fig. 2 - Mode navigation

DST4602 User’s Manual 11
Fig. 3 - Display areas
The top status bar contains information on navigation and times.
The current mode (1a) is shown in the relevant field of the top status bar.
The mode identifier (1a), and the page identifier (1b) identify and refer to the page so there is no chance of error.
The display on the top status bar with left , or right arrow buttons or both (1d), indicates there are other
pages which can be viewed using the relevant LEFT and RIGHT buttons.
E.01 ENGINE 18/07/2011 18:23
OFF |Engine stopped -
1
2
3
KEY:
1 - Status bar
2 - Data area
3 - Bottom status bar
1b
1c
1d
1e
1a
KEY:
1a - Mode identifier
1b - Page identifier
1c - Page title
1d - Pages to the left or right
1e - Date and time
E.02 ENGINE 18/07/2011 18:23
Fig. 4 - Top status bar

12 DST4602Evolution User’s Manual
The bottom status bar displays some information on the system status.
Operating mode (2a) is controlled by the lockable selector.
System status (2b) displays part of the information on page S.01 (STATUS) which is useful for the operator, as it
can be displayed also if other pages are being viewed and in other display modes.
In some pages, pressing the SHIFT button replaces the bottom status bar for the time the button is held
down with a HELP message. If the message is unavailable, the bar is cleared and restored when the button is
released.
WARNING: The parameters must only be changed by qualified personnel. Assigning an
incorrect value to one or more parameters can cause malfunctions, damage to things and/or
injury to people.
Information!: Parameters may be password protected
This mode lets you display and change the programming parameters.
Each programming parameter has a 4-digit numeric code (ex. P.0101) to identify the variables regardless of
the language used.
The first line under the top status bar identifies the current menu with the menu number and the relevant text.
A pair of numbers are displayed on the right in this line.
The first indicates which entry in the menu is selected or which page is displayed, the seconds indicates how
many entries or pages can be displayed in the current menu/submenu.
2a
2b
2a - Operating mode
2b - System status
OFF |Engine stopped -
Fig. 5 - Bottom status bar

DST4602 User’s Manual 13
Information!: If the password is lost, you can reconfigure it using a higher
level password. Contact our service centre if the “MANUFACTURER”
password is lost.
Access to the programming mode can be controlled by 4 different PASSWORD levels, which are listed in order
of priority.
1. SICES password
2. Manufacturer password
3. Installer password
4. User password
In the first page (000-Access Code) of the SYSTEM menu, will ask you for the access code if one or more
passwords have been assigned.
If a password is set to 0, it is not assigned and not required.
The USER can only display and change the User Password.
The INSTALLER can change the User Password and the Installer Password.
The MANUFACTURER can display and change all three passwords.
SICES can display and change some critical parameters for configuring
the plant parallel function.
The Password setting pages are displayed in the SYSTEM submenu, if the user is authorised to change the
settings.
In programming mode, if the page for changing the password isn't displayed when the Password is entered,
press EXIT to return to the previous menu and try opening the page again.
The set access code remains in the memory for about 10 minutes after programming has been completed.
After that it must be entered again to access the programming mode.
1a
1b
1a –Menu Item/Page
1b –Total Pages Menu/submenu
P.07 PROGRAMMING 18/07/11 18:23
2/07
1.3 Generator
Fig. 6 - Bottom status bar

14 DST4602Evolution User’s Manual
Enable the mode with the ENTER button.
Use the UP and DOWN buttons to select a menu and the ENTER button to open the
same. Select the variable or submenu with the UP and DOWN .buttons.
Pressing ENTER when there are no submenus, displays the page of variables for the menu entry.
The value of the variable is displayed in square brackets, for example: [400]
To change the variable, press ENTER ; the square brackets [ ] will flash. Use the
UP and DOWN buttons to change the value and press ENTER to confirm or EXIT
to abort.
To change the variables, the lockable selector must be OFF. Some variables can only be changed with the
lockable selector in another position other than OFF.
If you cannot change a variable in any condition, this is shown as follows:<400> showing that the parameter
cannot be changed in this status.
To exit the programming menu, use the EXIT button.
For some parameters you will have to set a value for the string data.
In this case, pressing ENTER makes the square brackets [ ] around the variable flash, and a cursor
appears under the first character of the string. Using the LEFT and RIGHT buttons, you can select
which character to change. Then, use the UP and DOWN buttons to change the character
selected. Repeat the procedure for each character that needs changing.
Use ENTER (confirm) or EXIT (abort) to end the procedure.

DST4602 User’s Manual 15
You can open the last programming page displayed directly. This is possible if, when exiting programming
mode, instead of going back though the menus until you exit programming, you hold down EXIT for
approximately 2 seconds.
The same is true when accessing the programming mode after Gen-set has automatically exited programming.
This is the case, if no programming operations are performed for 60 consecutive seconds or if the lockable
selector is switched to MAN or AUTO.
WARNING!: Setting the trip time of the parameters to 0 disables the protection.
Protections and alarms can generally be configured using dedicated variables. Generally, the trip time can also
be configured.
In this way, information on the system status is provided.
You can scroll through the various pages using the LEFT and RIGHT buttons.
Page S.01 (STATUS) shows system status information. Part of this information is shown on the bottom status
bar.
The alarms page S.02 (ANOMALIES) is displayed automatically in the case of an anomaly. This page also
contains the diagnostic information on engines with the J1939 or MTU interface.
- alarms code, the message consists of a letter that identifies the alarm category (W- Warning, A - Lockout, D
–Power-off. See Chapter 3), an identification number, and the description of the alarm status.
- engine diagnostic codes, in accordance with standard SAE J1939 or MTU specifications. In the case of the
J1939 standard, when a signal is present the SPN and FMI fault's codes, the number of occurrences (OC), a
specific diagnostic code of the family of engines (DTC), and an explanatory text are displayed. For MTU
engines the SPN, FMI and OC are not shown, but the DTC code and an alphanumeric description are always
displayed.
Information! For more information see document EAAM0380xxXA "Parameters table."
The engine diagnostic codes are stored (even if the engine removes them) until the yellow/red CanBus indicator
light warning is acknowledged with the ACK/TEST button.

16 DST4602Evolution User’s Manual
On page S.03 (GEN-SET CONTROL MODULE STATUS), as well as some information on the device (Serial
Number, Date, Firmware installed, Internal code), you can also change the language.
Page S.04 (SERIAL PORTS) is dedicated to serial communication status. In the case of operating errors,
check the information in this page. When using a GSM modem, the phone company and radio signal are also
shown.
Reception COM error counters are displayed. If the condition causing the malfunction has been eliminated,
you can reset the error counters on this page. To activate the error reset function, press the ENTER
button, use the vertical scroll UP and DOWN buttons to select the errors to reset. Hold down the
ACK/TEST + EXIT buttons for a few seconds to display the message “RESET/DEFAULT”. To exit
error selection, use the EXIT button.

DST4602 User’s Manual 17
Page S.05 (CAN BUS) is dedicated to the COM status of the following networks: CAN0 (ECU INTERFACE -
Engine Control Unit.J1939 or MTU), CAN1 (PMCBUS - Power Management Communication Bus) and CAN2
(EX-BUS - Expansion-BUS).
communication status of bus.
There are three possible indications:
- ERROR-ACTIVE: normal operation
- ERROR-PASSIVE: communication is working despite faults (errors).
- BUS-OFF: Gen-set has interrupted the connection to the bus due to too many errors.
Communication error counters display. If the condition causing the malfunction has been eliminated, you can
force exit from the BUS-OFF condition on this page.
The error reset function, press the ENTER button, use the UP and DOWN buttons to select
the errors to reset. Hold down the ACK/TEST + EXIT buttons until the “RESET/DEFAULT ”
message is displayed. To exit error selection, use the EXIT button.
Pages S.06, S.07, S.08, S.09, S.10, S.11, S.12 and S.13 (SYSTEM STATUS) display the generic status of the
digital inputs.
Information!: Digital inputs assigned as Warnings, Lockouts or Power-offs do not come
under this category.
The generic status function, and the display priority of the same in the pages are pre-assigned when configuring
the system parameters.
Page S.14 (DIGITAL INPUTS) displays the status of the digital inputs of the Gen-set control module and the
expansion modules (available only if the DITEL expansion module/s is/are installed).
Pressing the ENTER button, scrolls through three different pages (LOGIC STATE, PHYSICAL STATE,
BY FUNCTION), showing the acquisition of digital inputs:
- LOGIC STATE: Active or inactive level according to a logic configuration that inverts the electrical signal
actually acquired.
- PHYSICAL STATE: Active or inactive level of the electrical signal actually acquired.
- BY FUNCTION: Displays the status of the main events related to the digital inputs.
Page S.15 (DIGITAL OUTPUTS) shows the status of the Gen-set control module's digital outputs. The status
of the expansion module outputs is only shown if the DITEL expansion module/s is/are installed.
Pressing the ENTER , button, scrolls through three different pages (LOGIC STATE, PHYSICAL STATE,
BY FUNCTION), showing the status of the digital inputs:

18 DST4602Evolution User’s Manual
- LOGIC STATE: Output active or inactive on the basis of a logic configuration that inverts the electrical level.
- PHYSICAL STATE: Output active or inactive for the actual electrical level.
- BY FUNCTION: Displays the main states of the digital outputs.
Page S.16 (ANALOG INPUTS) displays the value of the Gen-set control module's analog inputs. The value of
the expansion modules' analog inputs is only displayed if the DITEMP (Ditherm/Digrin)/DIVIT expansion
module/s is/are installed.
Page S.17 (ANALOG OUTPUTS) displays the value of the Gen-set control module's analog outputs. The value
of the expansion modules' analog outputs is only displayed if the DANOUT expansion module/s is/are installed.
Pressing the ENTER , button, scrolls through two different pages (LOGIC STATE, BY FUNCTION),
showing the status of the analog inputs:
- LOGIC STATE: Displays the output value.
- BY FUNCTION: Displays the output value and the pre-assigned function.
You can scroll through the various pages using the LEFT and RIGHT buttons.
This mode displays all the information on the measurements taken by the Gen-set control module on the
electric lines.
Page M.01 (SYSTEM) displays a wiring diagram of the system. The states of the switches, the NETWORK/BUS,
the GENERATOR and the electrical values depend on the system configuration.
Furthermore, a window for controlling the main active power and the power factor is displayed, on the basis of
the type of system.
Page M.02 (NETWORK) displays the electrical magnitudes of the NETWORK or BUS.
Page M.03 (GENERATOR) displays the electrical magnitudes of the GENERATOR.
Page M.04 (POWER VALUES) shows the total and phase power values, the active, reactive and apparent
power values, and the power factor.
Page M.05 (ENERGY COUNTERS) displays the partial and total energy counters of the GENERATOR.
Page M.06 (AUXILIARY MEASUREMENTS) (displayed only if the “AUXILIARY CURRENT” and/or “INVERSE
SEQUENCE CURRENT” protection is enabled.

DST4602 User’s Manual 19
Page M.07 (SYNCHRONISATION) is used during synchronization. Use the synchroscope displayed with the
lockable selector in MAN mode for manual synchronisation (only displayed if the internal synchronisation system
is configured)
Page M.08 (PARALLEL) displays the parameters used to monitor the parallel function.
The engine related measurements are shown in this mode.
Page E.01 (ENGINE) displays the main analog measurements of the engine read by the analog sensors.
Some engine measurements are only displayed if the CAN J1939, MTU system is configured.
Page E.02 (ENGINE COUNTERS) displays the partial and total meters of the engine.
Pages E.03 (TEMPERATURES), E.04 (PRESSURES/ENGINE TORQUE) and E.05 (AUXILIARY DATA)
(only displayed if the CAN J1939 system is configured, MTU) contain information on the temperatures,
pressures, levels, etc. of the engine. The number of pages displayed may depend on the type of engine set.
Page E.06 (FUEL PUMP) (displayed only if FUEL PUMP management is configured) contains information on
the fuel pump. The fuel pump management system can be modified in this page
Pages E.07, E.08, E.09, E.10, E.11, E.12, E.13 and E.14 (EXTERNAL MEASUREMENTS) (displayed only if
the DITEMP/DIVIT expansion module/s is/are installed and/or the device inputs are configured for generic
measurements).
Information!: The analog inputs pre-assigned for main measurements do not come under
this category.
Page B.01 (GEN-SET CONTROL MODULES ON PMCBUS) displays status information about the PMCB
(Power Management Communication Bus) network. This includes the number of network devices, the
operating mode of the load function, the identifier of the pilot generator and the list of priorities.
Page B.02 (GENERATORS) displays measurements (Power reference, Power delivery, Reactive power,
Operating hours and State) of power values for gen sets in the PMCBUS (Power Management Communication
Bus) network.
Page B.03 (TOTALS ON PMCBUS) displays measurements (Power reference, Power delivery, Reactive
power, Active energy and Reactive energy) for the sum of the energy produced by all the gen sets in the
PMCBUS(Power Management Communication Bus) network.
Page B.04 (LOAD MANAGEMENT) displays all the information relating to load management configuration on
the PMCBUS(Power Management Communication Bus) network.
WARNING!: Changes should only be made to the pilot generator by qualified personnel.

20 DST4602Evolution User’s Manual
Press ENTER and the UP and DOWN buttons on this page to make changes to the pilot
generator.
Information!: See the following document for the meaning of the parameters: EAAM0380XX
(Parameters Table).
In this mode, you can access the events, data recording and Engine DTC logs.
A number and time/date stamp identify each record.
The number is shown in the second line on the right of the multifunctional display with the total number of
records.
When the archive is full, a new record overwrites the old one; so the identification number may change in time.
To activate the mode, press the ENTER button on the “History logs H.01” main page. Use the UP
and DOWN buttons to select the type of RECORD Recorded and confirm with the ENTER
button. Use the UP and DOWN buttons to select the log to display, and the LEFT and
RIGHT buttons to scroll through the details in the log pages.
Press EXIT to go to the next menu level or return to the main menu.
WARNING!: Before proceeding with manual synchronization, check the configuration is
set so the circuit breaker cannot close in the case of a phase speed alignment error.
With the lockable selector in the MAN position, depending on the plant type and on how the panel is wired,
you can command the closing of the GCB or MCB with manual synchronization.
In MAN mode, with the engine and the generator running and network/bus voltages present (BUS LIVE
indicator lit), the function can be activated by pressing the button of the open circuit breaker (MCB or
GCB ).
When the button is pressed, the circuit breaker will not close, but the manual SYNCHRO function is activated
and page M.07 (SYNCHRONISATION) is automatically displayed.
When using the internal synchronization module, the page will display a synchroscope.
To adjust the engine speed and/or voltage manually, press ENTER and the ACK/TEST button to
select speed and voltage regulation; use the UP and DOWN buttons to change the percentage
Other manuals for DST4602
2
Other Sices Controllers manuals
Popular Controllers manuals by other brands
gefran
gefran 1600 Installation and operation manual
Nitto Kohki
Nitto Kohki RC1000 instruction manual
RLE Technologies
RLE Technologies SeaHawk LD310 quick start guide
Siemens
Siemens Simatic S7-300 Hardware and installation guide

Bitstream
Bitstream 3x user manual
Nexmosphere
Nexmosphere XC-847 quick start guide
