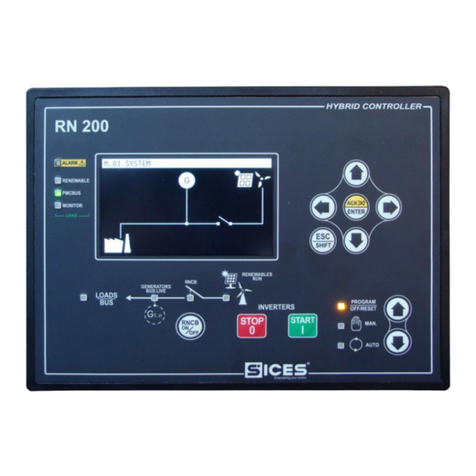
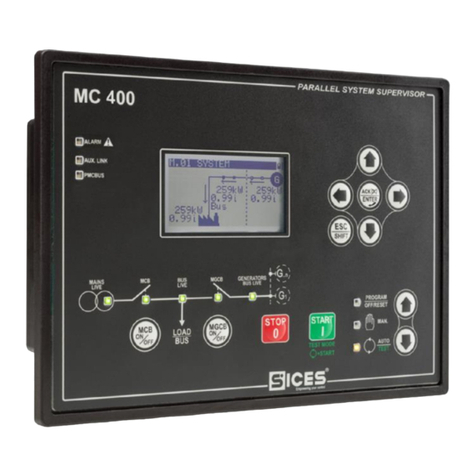
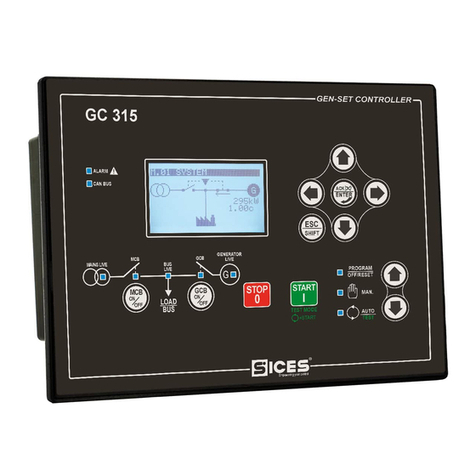
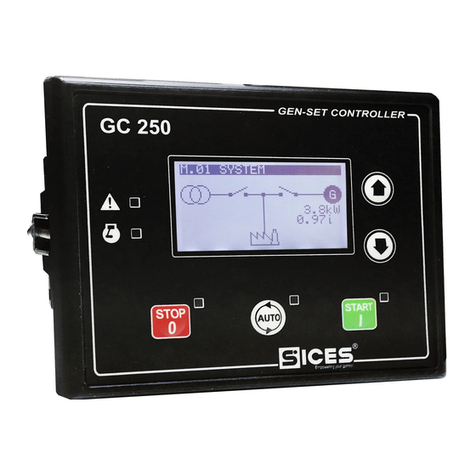
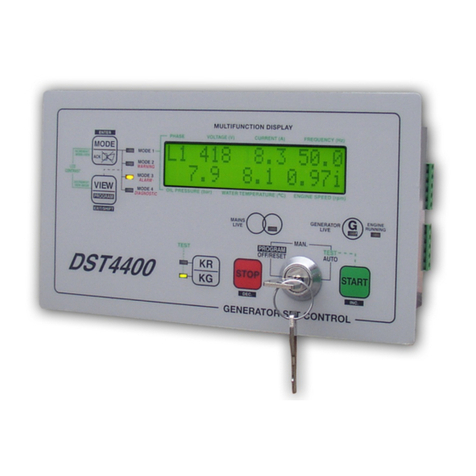
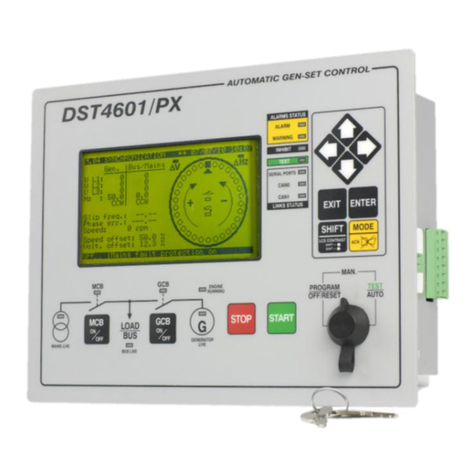
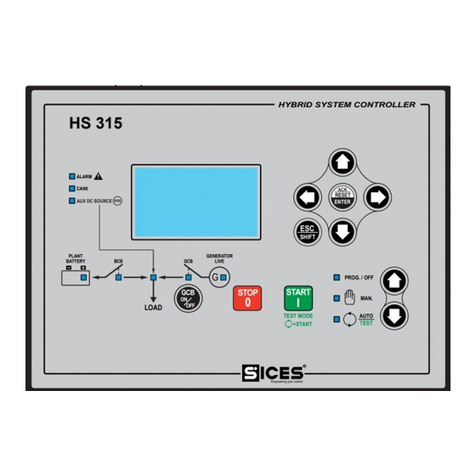
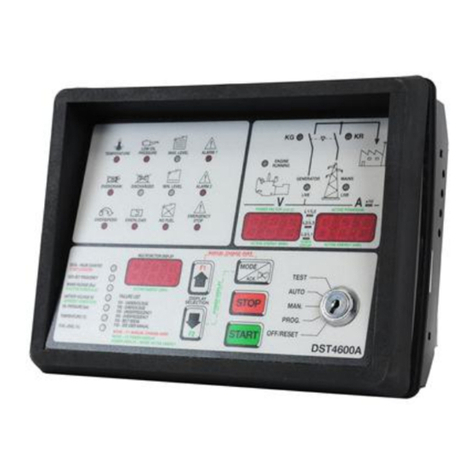
Sices GC315 User manual

Filename: EAAM045503EN.docx
Rev. 04 Date: 04/09/2015
ID Document:
Product: GC315xx-GC400xx
Plus Link
Mains Link
Mains+Link

ii User’s Manual GC315xx-GC400xx
INDEX
1Safety information........................................................................................................3
2Information concerning disposal................................................................................3
3Forward .........................................................................................................................4
4Definitions.....................................................................................................................4
5Main functions..............................................................................................................5
5.1 Front Panel GC315, GC315Plus and GC315Link ....................................................5
5.2 Front Panel GC400, GC400Link ............................................................................6
5.3 Front Panel GC400Mains, GC400Mains+Link .............................................................7
5.4 Buttons (ref. to fig. 1, 2, 3)....................................................................................8
5.5 Indicators (ref. to fig. 1).......................................................................................11
5.6 Multifunctional display.........................................................................................13
5.6.1 LCD lighting..................................................................................................13
5.6.2 Contrast adjustment .....................................................................................13
5.6.3 Mode navigation (ref. to fig. 2)......................................................................14
5.6.4 Display area layout (ref. to fig. 3)..................................................................15
5.6.5 Top status bar (ref. to fig. 4).........................................................................15
5.7 Display mode......................................................................................................16
5.7.1 Programming (P.xx) .....................................................................................16
5.7.2 Status information(S.xx)...............................................................................18
5.7.3 Electrical measurements(M.xx) ....................................................................21
5.7.4 Engine measurements (E.xx).......................................................................22
5.7.5 PMCBus.......................................................................................................23
5.7.6 History logs(H.xx).........................................................................................23
6Operating principles...................................................................................................23
6.1 GC315, GC315
Plus
,GC315
Link
............................................................................23
6.1.1 Off/Reset......................................................................................................24
6.1.2 Manual..........................................................................................................24
6.1.3 Automatic .....................................................................................................25
6.1.4 Test ..............................................................................................................26
6.2 GC400x ..............................................................................................................28
6.2.1 SSB + SSTP Pants - GC400Mains / GC400Mains+Link .....................................28
6.2.2 MPM Plants - GC400 and GC400Link ...........................................................30
7Special setting............................................................................................................31
7.1 Selecting the language.......................................................................................31
7.2 Date/Time setting ...............................................................................................32
8Fuel pump (if present on the system).......................................................................33
8.1 Select function....................................................................................................33

User’s Manual GC315xx-GC400xx 3
The manual must always be kept in a safe place where it is readily available for quick
reference.
The manual should be read carefully, and every paragraph understood by the
operators and technicians doing routine and periodic maintenance.
If the manual is lost or damaged, ask the installer/manufacturer for a copy, quoting
the model, code, serial number and year of manufacture.
Many accidents are caused by poor knowledge and the non-observance of safety
regulations, which must be observed when operating and/or servicing the machine.
To prevent accidents, before using or servicing the machine you should read, understand
and observe the precautions and warnings in this manual.
The following indications have been used to identify the safety messages in this manual:
WARNING! This indication is used in the safety messages for risks which,
unless avoided, can cause malfunction or damage to property or persons.
INFORMATION! This term implies the message provides information useful
for performing the current operation, or explanations or clarifications for
procedures.
INFORMATION! on the disposal of old electrical and electronic equipment (applicable in
European countries that have adopted separate waste collection systems).
Products bearing the barred wheeled waste container symbol cannot be disposed of with
normal urban waste. Old electrical and electronic equipment should be recycled in a facility
authorized to process these items and dispose of the components. Contact your local authority
for information on where and how to deliver such products to the authorized site nearest you.
Proper recycling and disposal helps conserve resources and prevents detrimental effects for
health and the environment.

4User’s Manual GC315xx-GC400xx
This manual describes the controllers GC315, GC315Plus, GC315Link, GC400, GC400Link,
GC400Mains and GC400Mains+Link.
Throughout this document, GC315x will refer to all controllers of the GC315 series and
GC400x will refer to all controllers of the GC400 series, while the names GC315, GC315Plus,
GC400, etc. will refer to a specific controller and the names GC315/GC315Plus o
GC400Mains/GC400Mains+Link will refer to a group of controllers.
LOCKOUT - is used to indicate a fault that prevents the generator from operating and causes automatic
and immediate emergency engine shut-down.
POWER-OFF - is used to indicate a fault that prevents the generator from operating and causes the
standard automatic engine shutoff (including a cooling phase).
WARNING - is used to indicate a fault that requires the intervention of the operator without engine
shutoff.
MAINS –Public power supply line.
LOAD/BUS –Electrical power supply line of the loads. It can be connected to more gensets
GENERATOR –Electricity line that is connected to the alternator of the Generator set
LOAD –Electrical power supply line of the loads. This can be connected to the Mains or to the
Generator
MCB - Switch or component to manage the switching between the Mains line and the Load line.
GCB –Switch or component to manage the switching between the Generator line and the Load line.
CANBUS - Interface for the control and diagnostics of engines equipped with SAE J1939 or CanBus
MTU interface.
ISLAND - Type of plant where one or more gensets supply the Load without being in parallel with the
Mains.
MPM –Type of plant working in Island mode and gensets working in parallel among them.
SSB + SSTP (Single Stand By + Single Short Time Parallel) - Type of plant where the genset starts and
supplies the Load in case of Mains failure; once back to normal conditions, it carries out a short time
parallel with the Mains, it disconnects from the Mains and from Load and it stops in stand-by. Depending
on the configuration of the plant, it is also possible to synchronize the Genset with the Mains before
disconnecting it in order not to leave the Load without supply.

User’s Manual GC315xx-GC400xx 5
5.1 Plus Link
KEY GC315/GC315
Plus
/GC315
Link
1 - Buttons
2 - Indicators
The controls consist of 12 buttons (1a, 1b, 1c, 1d, 1e, 1f).
The front panel also has some luminous indicators (2a, 2b, 2c).

6User’s Manual GC315xx-GC400xx
5.2 Link
Link
KEY GC400/GC400
Link
1 - Buttons
2 - Indicators
The controls consist of 12 buttons (1a, 1b, 1c, 1d, 1e, 1f).
The front panel also has some luminous indicators (2a, 2b, 2c).

User’s Manual GC315xx-GC400xx 7
5.3 Mains Mains+Link
Mains Mains+Link
KEY GC400Mains/GC400Mains+
Link
1 - Buttons
2 - Indicators
The controls consist of 12 buttons (1a, 1b, 1c, 1d, 1e, 1f).
The front panel also has some luminous indicators (2a, 2b, 2c).

8User’s Manual GC315xx-GC400xx
5.4
Pushbutton
Function
MODE UP
MODE
DOWN
Ref. 1a
OFF/RESET
PROGRAM
The genset is disabled; all anomaly signals are disabled. All possible alarms
are reset. You can program the parameters.
MAN
(Manual)
The Gen-set control module is set for manual gen-set control.
Press the START button to start the engine.
Press the STOP button to stop the engine.
With the engine running and up to speed:
GC315x : Press the MCB button for manual opening/closing control
of Load contactors on the Mains.
Press the GCB button for manual opening/closing control of Load
contactors on the Generator.
GC400/GC400Link : Press and hold down the ESC/SHIFT button , and
press the GCB button for the manual open/close command of MCB
circuit breaker with possible synchronisation if configured in the plant.
Press the GCB button for the manual open/close command of GCB
circuit breaker with possible synchronisation if configured in the plant.
GC400Mains/GC400Mains+Link
Press the MCB button for the manual open/close command of MCB
circuit breaker with possible synchronisation if configured in the plant.
Press the GCB button for the manual open/close command of GCB
circuit breaker with possible synchronisation if configured in the plant.
INFORMATION! For some types of plants, the sequences depend on
the Software and Hardware configuration of the plant during the installation
activity.
With the BUS under power-on condition, synchronization is required.
AUTO
(Automatic)
TEST
The controller automatically manages the genset operation, so it will be
started if required by the operating conditions.

User’s Manual GC315xx-GC400xx 9
Pushbutton
Function
By pressing the START button it is possible to activate/deactivate the
TEST mode. If there are no other specific configurations, it does not switch
the load from Mains to Genset and vice versa.
WARNING! The STOP button, causes the stop of the Generator
if running and the activation of a lockout unless configured otherwise.
Esc/SHIFT
Ref. 1b
In programming mode, it cancels the changes made to a variable value, brings
up the previous menu level, or exits programming mode. If it is kept pressed
for at least two seconds in any menu, allows you to exit the programming
mode, while retaining the current menu position for further programming
access.
Depending on the selected page, if pressed together with the ENTER
button for at least 5 seconds while in OFF/RESET mode, it can reset counters
to zero, reload default values of the programming parameters or cancel history
logs (in addition, the CANBUS equipped model allows to force exit from BUS
OFF mode). When used during the keyboard regulation function, it aborts the
function.
If it is pressed in any window, it displays the status information on the upper
line (displaying them cyclically).
When HELP is available on the page, holding this button down displays the
HELP message on the bottom status bar.
LEFT/RIGHT
Ref. 1c
Navigation buttons of the multifunction display. These buttons let you select
the previous or next page on the display in all modes, except in the
PROGRAM mode.
In PROGRAM mode, they are used to position the cursor when entering the
strings. The horizontal navigation buttons, used in combination with the
Esc/SHIFT button, allow to adjust the contrast.
To decrease the contrast (lighten), press the combination of buttons
Esc/SHIFT + LEFT .
To increase the contrast (darken), press the combination of buttons
Esc/SHIFT + RIGHT .
In PROGRAM and HISTORY LOGS mode you can scroll the menus and the
variables/settings. You can increase/decrease the value of the variable to
change the settings. Used in combination with the Esc/SHIFT button
you can scroll through the menu ten entries at a time or increase/decrease
the variables ten units at a time.

10 User’s Manual GC315xx-GC400xx
Pushbutton
Function
ENTER/ACK
Ref. 1d
In the PROGRAM menu, you can enter the programming mode and open a
submenu, change a variable or parameter, and confirm the operation.
In the LOG menu, you can activate the HISTORY LOG function and open the
selected log, “acknowledge” any EEPROM errors at power-up.
Upon the occurrence of an alarm or lockout, the pressing of the button
recognizes the presence of an error and turns off the siren. A further press of
the button resets any alarm signals if the operating conditions have returned
to normal. Lockout signals can only be reset by activating the "OFF/RESET"
mode.
MCB
Ref. 1f
GC315/GC315Plus /GC400Mains/GC400Mains+Link : The button is disabled in the
“OFF/RESET”, “AUTO” and “TEST” modes.
In “MAN” it is used to open and/or close the Mains contactor to the Load
line.
To open the Mains switch MCB, with the engine idle, press and hold the
“MCB” button for at least 5 seconds.
This button is not present on the devices GC400/GC400Link . Use the
buttons combination Esc/SHIFT and the button GCB for the
manual open/close command of the MCB circuit breaker with possible
synchronisation.
INFORMATION! For some types of plants, the sequences depend on
the Software and Hardware configuration of the plant during the installation
activity.
With the BUS under power-on condition, synchronization is required.
GCB
Ref. 1f
It is used to command the General Circuit Breaker (GCB) or the changeover
switch.
The button is disabled in the “OFF/RESET”, “AUTO” and “TEST” modes.
In “MAN” it is used to open and/or close the Generator contactor to the
Load line. The closure of the Load line to the Generator is only possible if
the relative electrical measures are within tolerance range.
GC315x: immediate closing of the genset circuit breaker.
GC400: the button function depends on the plant configuration. In parallel
mode with at least one other source powering the BUS, if the button is
pressed it activates the fast unload ramp before the circuit breaker opens.
In case no ramp is needed, simply keep it pressed for a few seconds until
the GCB is opened.
INFORMATION! For some types of plants, the sequences depend on
the Software and Hardware configuration of the plant during the installation
activity.

User’s Manual GC315xx-GC400xx 11
Pushbutton
Function
START
Ref. 1e
In MAN mode it can be used to start the engine.
The button can be configured in two ways:
Fully manual (the starter motor is engaged all the time the button is pressed
or until the engine running is detected).
Fully automatic (simply press and release the “START” button to activate an
automatic start sequence. If the start is not successful, start failure
anomalies will not be reported. The “START” button must be pressed and
released again to perform a new start attempt.
In AUTO mode, it enables/disables the TEST status. When the Gen-set
control module is activated, keeping it pressed at the same time as the
STOP button allows access to the special functions.
STOP
Ref. 1e
Used to control the stop of the engine in “MAN” mode.
The button can be configured in two ways:
1) Stop of the engine in AUTO, TEST or REMOTE START mode with
the activation of a lockout.
2) No function. The enabling of the button in AUTO, TEST or REMOTE
START is irrelevant.
Pressed with the Gen-set control module in OFF/RESET mode, runs the
LAMP TEST on all the indicator lights. When the Gen-set control module is
activated, keeping it pressed at the same time as the START button
allows access to the special functions.
5.5
LED OFF
LED steady ON
LED flashing
Signalling
Function
Ref. 2c
PROGRAM
OFF/RESET
Operation mode set to OFF/RESET
Indicates that you are accessing the PROGRAMMING menu
Different operation mode.
Ref. 2c
MANUAL
Operation mode set to MANUAL
Different operation mode.
AUTO
TEST
Operation mode set to AUTO
Flashing 50% - Operation mode set to TEST
Flashing 90% ON - Operation mode set to REMOTE START-
UP

12 User’s Manual GC315xx-GC400xx
Signalling
Function
Ref. 2c
Different operation mode.
Ref. 2a
ALARM
Indicates the presence of at least one lockout or power-off.
Signals at least one warning which has not yet been
acknowledged with the “ACK/ENTER” button.
No lockouts or warnings.
Ref. 2a
INTERFACE
ECU STATUS
Signals that the CAN-BUS interface is active and in ERROR-
ACTIVE mode. (J1939 or MTU)
Flashing at 25% ON signals a COM error (J1939 or MTU): the
port is in ERROR-PASSIVE mode.
Flashing at 75% ON signals a COM error (J1939 or MTU): the
port is in BUS-OFF mode.
Indicates that the CAN-BUS has been disabled.
Ref. 2b
MAINS LIVE
Mains power is ON and stable in the tolerance range.
The MAINS SIMULATION digital input is enabled from the set
time.
The Mains power is OFF.
The MAINS SIMULATION digital input is disabled.
Flashing at 50% during transition between the previous two
status.
Flashing at 25% the Mains power is on but below the tolerance
range.
Flashing at 75% the Mains power is on but over the tolerance
range.
Ref. 2b
GENERATOR
LIVE
Generator voltage and frequency are present and stead within
the tolerance range.
Generator voltage and frequency are not present.
Flashing at 50% during transition between the previous two
status.
Flashing at 25% ON - Power and frequency under tolerance
range.
Flashing at 75% ON - Power and frequency above tolerance
range.
Ref. 2b
MCB
The MCB switch is opened.
The MCB switch is closed.
Flashing at 25% ON if the KG is open after a closing command.
Flashing at 75% ON - If closed after an Open command.

User’s Manual GC315xx-GC400xx 13
Signalling
Function
Ref. 2b
BUSLIVE
Signals BUS line ON.
Signals BUS line OFF.
Flashing at 50% if the BUS line voltage is outside tolerance
range.
GC400x Flashing at 50% - During synchronization phase
(opposite sequence to GCB).
Ref. 2b
GCB
The GCB switch is opened.
The GCB switch is closed.
Flashing at 25% ON if the KG is open after a closing command.
Flashing at 75% ON - If closed after an Open command.
5.6
The back light lamp is managed by the Gen-set control module, which switches off the back
light after a programmable time (P.492) if no buttons are pressed in the meantime. Press any
button to switch the lamp ON again, (we recommend using the Esc/SHIFT button as it
has no function when used alone). This function can be disabled by setting parameter P.492
to 0.
Depending on the environmental temperature conditions, the contrast may require adjustment
in order to view the display correctly.
Press in sequence the Esc/SHIFT button + LEFT to reduce the contrast (lighten),
press the Esc/SHIFT button + RIGHT to increase it (darken).

14 User’s Manual GC315xx-GC400xx
The display has different display modes with various pages.
Mode
Description
Page identifier
PROGRAMMING
Programming
P.XX
STATUS
Status information
S.XX
MEASURES
Electrical measurements
M.XX
ENGINE
Engine measurements
E.XX
GC400PMCB
Parallel functions
B.XX
HISTORY
History logs
H.XX
Generally, navigation between modes takes place via buttons UP and DOWN
Ref. 1c.
Use the LEFT and RIGHT Ref. 1c buttons to display the pages in the mode.
In some modes (e.g.: mode P.xx and mode H.xx) to view the pages, the ENTER button, and
then the UP Ref. 1c and DOWN Ref. 1c buttons must be pressed to navigate between
pages.
If the UP and DOWN buttons have to be used to manage the functions within the mode,
the ENTER button must be pressed to activate the said functions, and the Esc/SHIFT
button to deactivate them.
Fig. 2 - Mode navigation

User’s Manual GC315xx-GC400xx 15
The top status bar contains information on navigation, times and/or some status information.
The current mode is shown in the relevant field of the top status bar (1a).
The mode identifier (1a), and the page identifier (1b) identify and refer to the page so there is no chance
of error.
The system status (2) displays part of the information of page S.01(STATUS) that is useful to the
operator, as it can be displayed even if other pages or display mode are being accessed.
In some pages, pressing the Esc/SHIFT button replaces the upper status bar with a System
Status message all the time the button is held down. By double clicking the Esc/SHIFT button,
the upper status bar is replaced with a System Status message so long as you remain on that page. If
the message is unavailable, the bar is cleared and restored when the button is released.
E.01 ENGINE
Oil Press. (bar):
XX
Coolant Temp. (°C):
XX
XX
1
2
KEY:
1 - Status bar
2 - Data area
Fig. 3 - Display areas
Fig. 4 - Top status bar
1b
1c
1a
KEY:
1a - Mode identifier
1b - Page identifier
1c - Page title
2 –System status
E.02 ENGINE
2

16 User’s Manual GC315xx-GC400xx
5.7
WARNING! Assigning an incorrect value to one or more parameters can cause
malfunctions, damage to things or injury to people. The parameters must only be changed by
qualified personnel. Parameters can be protected by password (see par. Access codes).
This mode allows the display and change of the programming parameters.
Each programming parameter Ref. 3 has a 4-digit numeric code (e.g. P.0133) to identify the variables
regardless of the language used. The current value of the parameter is displayed below the description
Ref.4.
The first line Ref.2, below the upper status bar, allows to identify the current menu using the ID number
of the menu and the associated text. A pair of numbers is displayed on the right of this line, 2/ 06 in the
example in fig. 3.
The first indicates which entry in the menu is selected or which page is displayed, the seconds indicates
how many entries or pages can be displayed in the current menu/submenu.
Access to the parameters programming mode can be controlled by 3 different PASSWORD levels,
which are listed in order of priority.
1. SICES password GC400x
2. Manufacturer password
3. Installer password
4. User password
If the password is lost, you can reconfigure it using a higher level password. Contact our service
centre if the “MANUFACTURER” password is lost.
Enter the authentication password on page 1.1.1.Authentication. To access, enter the various menus
and submenus following the path: PROGRAMMING, 1. SYSTEM, 1.1 Safety , 1.1.1. Authentication
The (000-Access Code) page of the Safety 1/02 menu requires the setting of the access code if one
or more passwords have been assigned.
The Password/s can be modified or cancelled (authentication level or lower) in submenu 1.1.2
Password, after being authenticated with the password.
P.07 PROGRAMMING
1.2 Engine 2/06
0133-Nominal speed
engine (primary)
[1500]
2
3
KEY:
1 - Status bar
2 - Current menu
3 - Current parameter
4 - Parameter value
Fig. 3 - Display areas
1
4

User’s Manual GC315xx-GC400xx 17
If a password is set to 0, it is not assigned and not required.
The USER can only display and change the User Password.
The INSTALLER can change the User Password and the Installer Password.
The MANUFACTURER can display and change all three passwords.
SICES can display and change some critical parameters for configuring the plant parallel function.
Warning: The critical parameters must not be changed by the user.
In programming mode, if the page for changing the password isn't displayed when the Password is
entered, press Esc/SHIFT to return to the previous menu and try opening the page again.
The set access code remains in the memory for about 10 minutes after programming has been
completed. After that it must be entered again to access the programming mode.
In the PROGRAMMING page, enable the mode with the ACK/ENTER button.
Use the UP Ref. 1a and DOWN Ref. 1a navigation buttons to select a menu and
ACK/ENTER to open it. Select the variable or submenu with the UP Ref. 1a and DOWN
Ref. 1a navigation buttons. Pressing ACK/ENTER when there are no submenus, displays
the page of variables for the menu entry.
The value of the variable is displayed in square brackets, for example: [0400]
To change the variable, press ACK/ENTER ; the square brackets [...] will flash. Use the UP
Ref. 1a and DOWN Ref. 1a navigation buttons to modify the value and press ACK/ENTER
to confirm or Esc/SHIFT to cancel the modification.
The variation of the parameters requires the “OFF/RESET” operating mode.
Some parameters can also be modified with operating modes different than “OFF/RESET”.
If it is not permitted to change a value in any condition, it will be represented in the following
manner:<400> showing that the parameter cannot be changed in this status.
To exit the programming menu, use the Esc/SHIFT button.

18 User’s Manual GC315xx-GC400xx
Some parameters require the setting or modification of the alphanumeric strings.
In this case, pressing ACK/ENTER makes the square brackets [...] around the variable flash,
and a cursor appears under the first character of the string.
Using the LEFT and RIGHT buttons, you can select which character to change. Then,
use the UP Ref. 1a and DOWN Ref. 1a buttons to change the character selected. Repeat
the procedure for each character that needs changing.
Use ACK/ENTER (confirm) or Esc/SHIFT (abort) to end the procedure.
You can open the last programming page displayed directly. This is possible if, when exiting
programming mode, instead of going back though the menus until you exit programming, you hold down
Esc/SHIFT for approximately 2 seconds.
It is also possible to obtain the same result entering programming mode after Gen-set automatically
exited programming. This occurs if, for 60 consecutive seconds, no operations are
performed on the programming or if the operating mode is changed to “MAN” or “AUTO”.
Protections and alarms can generally be configured using dedicated variables. Generally, the trip
time can also be configured.
INFORMATION! Setting the trip time of the parameters to 0 disables the protection.
In this mode, the information on the system status are supplied.
You can scroll through the various pages using the LEFT and RIGHT buttons.
Page S.01 (STATUS) shows system status information. Part of this information are displayed
in the upper title bar if you press and hold the ESC/SHIFT button.
The page S.02 (ANOMALIES) is automatically displayed in case a new anomaly arises. For
every anomaly, it is shown:
A letter that identify the type:
o“A”: Alarm (block).

User’s Manual GC315xx-GC400xx 19
o“U”: Unload (only GC400x).
o“D”: Deactivation.
o“W”: Warning.
A three digit numeric code that uniquely identify the anomaly. This code flashes if the
anomaly has not been acknowledged yet with ACK/ENTER .
The page S.03(GC315Plus/GC315Link)/S.04 (GC400x) (SERIAL COMMUNICATION)
displays the status of the serial communication towards the two serial ports and by USB.
In the case of operating errors, check the information in this page.
For each serial port (and for the USB too) the status is displayed (stand-by,
communicating, etc.).
On the Link controllers or in case the controller is connected to an external modem on
the RS232 serial port, the two first lines display:
oThe modem model
oThe name of the telephone provider.
oThe GSM signal level
The page S.04(GC315Plus/GC315Link) /S.05 (GC400x) (NETWORK) displays the status of
the connection and of the TCP/IP communication on the Ethernet interface or via GPRS.
On the controllers GC315Plus and GC400 (equipped with ETHERNET interface), the
controller shows the connection status:
The page S.05(GC315Plus/ GC315Link)/S.07(GC400x)/ (CAN_BUS) displays the status of the
CAN-BUS interfaces of the controller. Each interface displays
The communication status of the bus. There are three possible signalling:
o- ERROR-ACTIVE: normal operation
o- ERROR-PASSIVE: communication is working despite faults (errors).
o- BUS-OFF: Gen-set has interrupted the connection to the bus due to too many errors.
Communication error counters are displayed. The counters of the instantaneous
transmission/reception errors and the maximum values reached are displayed. It is
possible to reset the maximum values (and force the output status of BUS-OFF) by
pressing for 5 seconds the buttons ACK/ENTER (confirm) and Esc/SHIFT
.
The S.06(GC315x)/S.03(GC400x) (CONTROLLER) page displays the specific information of
the Gen-set: language set, date/time, serial number (ID code), firmware revision.
Only for GC400x: the necessary internal code to have a temporary SICES level
password.
The pages S.07-08-09(GC315x)/S.08-09-10(GC400x) (GENERIC STATUS) display the
general status of the digital inputs. Information!: Digital inputs assigned as Warnings,
Lockouts or Power-offs do not come under this category. The generic status functions,

20 User’s Manual GC315xx-GC400xx
and the display priority of the same in the pages are pre-assigned when configuring the
system parameters.
The page S.10(GC315x)/E.11(GC400x) (FUEL PUMP) (available only if the fuel pump
management output is configured) contains information and commands related to the fuel
pumps.
The page S.11 (GC315x) (DIGITAL INPUTS) displays the status of:
Digital inputs
Analogue inputs used as digital (if they are not used as digital they are displayed with
hyphens).
Virtual digital inputs
The page S.12 (GC400x) (DIGITAL INPUTS) (not available on GC315) is displayed only if
DITEL modules have been configures.
The page S.13 (GC315x) (DIGITAL OUTPUTS) shows the status of the controllers digital
outputs.
Pressing the ACK/ENTER , button, scrolls through three different pages (LOGIC
STATE, PHYSICAL STATE, BY FUNCTION), showing the status of the digital inputs:
- LOGIC STATE: The output's logic state (active or inactive) controlled by the Gen-set in
the management of the operating sequence.
- PHYSICAL STATE: Electrical level (active or inactive, or high or low) actually present on
the output; this can be the opposite in comparison to the corresponding logic state.
Displayed in negative.
- BY FUNCTION: Displays the main states of the digital outputs.
The page S.14 (GC315Plus/ GC315Link/GC400x) (DIGITAL OUTPUTS) is displayed only if
DITEL modules have been configured. It displays the status of the DITEL digital outputs.
The page is available only if the DITEL expansion module is installed in the system.
The page S.15 (GC315x/GC400x) (ANALOGUE INPUTS) displays the value of the controller
analogue inputs.
The page S.16 (GC315Plus/ GC315Link/GC400x) (ANALOGUE INPUTS) displays the value of
the controller analogue inputs. The page is available only if one or more DITEMP or
DIGRIN modules are installed in the system.
The page S.17 (GC315Plus/ GC315Link/GC400x) (ANALOGUE INPUTS) displays the value of
the controller analogue inputs. The page is available only if the DIVIT expansion module
is installed in the system.
The page S.18 (GC400x) (ANALOGUE OUTPUTS) displays the value of the controller
analogue outputs and the related function.
The page S.18 (GC315Plus/ GC315Link) (ANALOGUE OUPUTS) displays the analogue outputs
value of the DANOUT expansion module. The page is available only if the DANOUT
expansion module is installed in the system.
The page S.20 (GC400x) (MAINS PROTECTION) is displayed only if the type of plant
considers the temporary parallel with the mains.
Other manuals for GC315
2
This manual suits for next models
8
Other Sices Controllers manuals
Popular Controllers manuals by other brands

Mankenberg
Mankenberg UV 5.1 ATEX H2 SUPPLEMENT TO THE OPERATING INSTRUCTIONS
IMI
IMI STI RTC Series instruction manual
ESBE
ESBE CRA210 Series manual
Deprag
Deprag AST40-1 Operating instruction booklet
Trio
Trio MC664 Quick connection guide

Stavoklima
Stavoklima DITRONIC User manual, Instructions for Mounting
