A5E03391100E_RS-AE Seite 1 von 2 page 1 of 2
GAMMA instabus
Spannungsversorgung
N 125/02 (160 mA) 5WG1125-1AB02
N 125/12 (320 mA) 5WG1125-1AB12
N 125/22 (640 mA) 5WG1125-1AB22
Power Supply Unit
N 125/02 (160 mA) 5WG1125-1AB02
N 125/12 (320 mA) 5WG1125-1AB12
N 125/22 (640 mA) 5WG1125-1AB22
Bedien- und Montageanleitung
Operating and Mounting Instructions
Stand: Juni 2020
Issued: June 2020
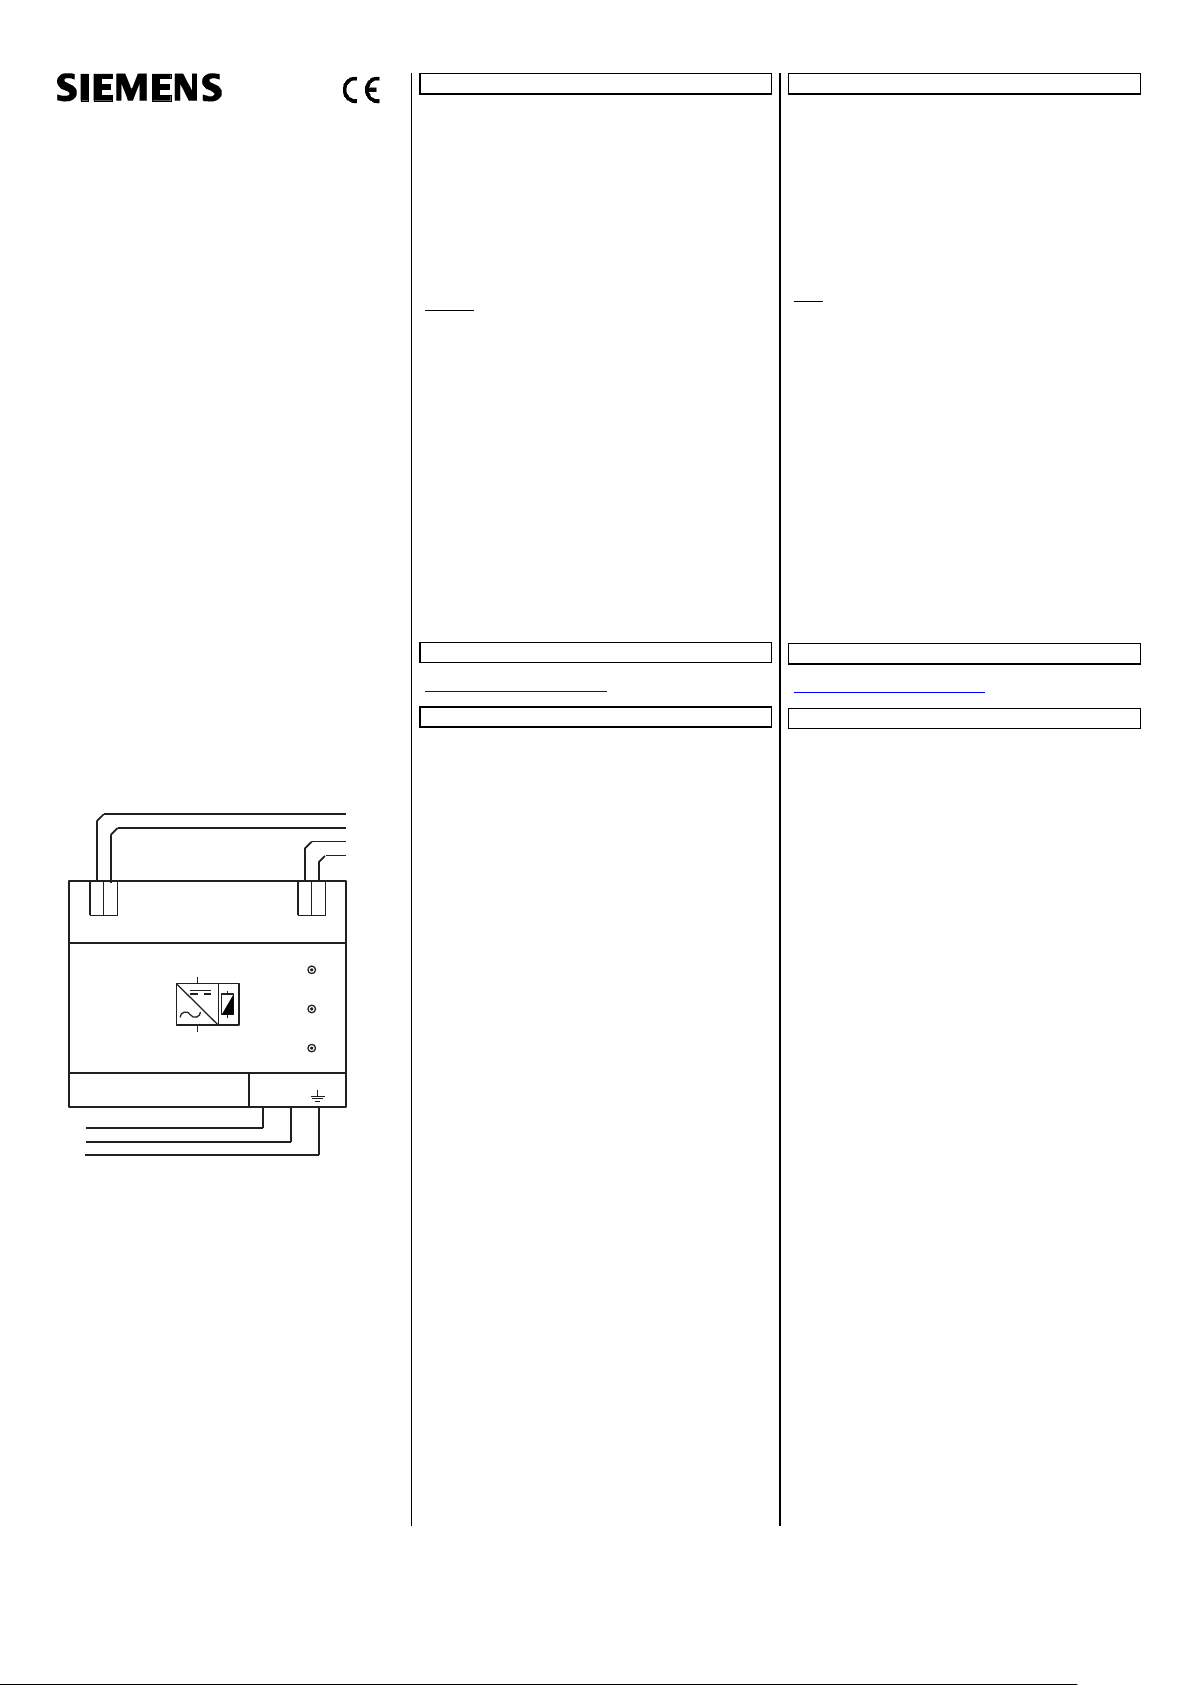
Anschlussbeispiel
Application example
8 9
RESET
Betr ieb/ ON
Ü ber last/ Over load
5WG1125-1AB22
N
+ -
L
+ -
N
L
PE
KNX +
KNX -
DC +
DC -
s
Produkt- und Funktionsbeschreibung
Die Spannungsversorgung erzeugt die für KNX erforderliche Sys-
temspannung. Die Verbindung mit der Buslinie erfolgt über die
frontseitige Busklemme.
Die integrierte Drossel verhindert den Kurzschluss der Datentele-
gramme auf der Buslinie. Durch Betätigen des eingebauten Reset-
Schalters werden die Busteilnehmer in den Grundzustand gesetzt
(Betätigung > 20 s).
Für jede Buslinie wird mindestens eine Spannungsversorgung be-
nötigt, die in einem Verteiler montiert wird. In einer Buslinie sind
maximal zwei Spannungsversorgungen zulässig. Eine zweite
Spannungsversorgung ist nur erforderlich, wenn die Betriebs-
spannung an einem Teilnehmer unter 21 V abfällt.
Hinweis: Werden zwei Spannungsversorgungen parallel an einer
Buslinie betrieben, so ist bei Aufleuchten der Überlastanzeige an
einer oder beiden Busspannungsversorgungen die Buskonfigura-
tion so zu ändern, dass keine Überlastanzeige mehr erfolgt.
Die Leitungslänge zwischen zwei parallel betriebenen Span-
nungsversorgungen ist nicht vorgegeben.
Werden mehr als 30 Busteilnehmer z.B. in einem Verteiler mit
kurzen Leitungsdistanzen (z.B. 10 m) eingebaut, soll die Span-
nungsversorgung in der Nähe dieser Busteilnehmer angeordnet
werden. Die Entfernung zwischen der Spannungsversorgung und
einem Busgerät darf max. 350 m sein.
Die Spannungsversorgung hat eine Spannungs- und Stromrege-
lung und ist damit kurzschlussfest. Kurze Netzunterbrechungen
überbrückt sie mit ca. 200 ms Pufferzeit.
Aus Gründen der Versorgungssicherheit wird empfohlen, für den
Netzanschluss der Spannungsversorgung einen eigenen, separat
abgesicherten Stromkreis zu verwenden.
Bei den Spannungsversorgungen kann die Ausgangsspannung
unverdrosselt DC 24 V an einem zusätzlichen Klemmenpaar
(gelb/weiß) frontseitig abgegriffen werden. Diese Ausgangsspan-
nung kann z.B. zur Versorgung einer zusätzlichen Linie über eine
separate Drossel genutzt werden.
Weitere Informationen
http://www.siemens.de/gamma-td
Technische Daten
Eingangsspannung
•Bemessungsspannungen: AC 120-230 V, 50 ... 60 Hz
DC 220 V
Bemessungsleistungsaufnahme
ca. 24 VA
Ausgangsspannung
•Bemessungsspannung DC 24 V
•Schutzkleinspannung (SELV)
•zulässiger Bereich DC 21 ... 30 V
Ausgangsstrom
•Bemessungsstrom 160 mA (N 125/02),
320 mA (N 125/12),
640 mA (N 125/22)
•Kurzschlussstrom:
begrenzt auf 1,0 A (N 125/02, N 125/12), 1,5 A (N 125/22)
Pufferzeit
bei Ausfall der Eingangsspannung ca. 200 ms
bei Bemessungsstrom
Anschlüsse
•Netzspannung, Steckklemmen schraubenlos:
Abisolierlänge 10...11 mm
Es sind folgende Leiterquerschnitte zulässig:
-0,5...2,5 mm² eindrähtig
-0,5...2,5 mm² feindrähtig unbehandelt
-0,5...2,5 mm² mehrdrähtig unbehandelt
-AWG 20 (0,75 mm²) - AWG 12 (3,3 mm²)
eindrähtig, feindrähtig
•Buslinie:
Druckkontakte auf Datenschiene,
Busklemme (schwarz/rot), schraubenlos
0,6 ... 0,8 mm
eindrähtig
•Ausgangsspannung (unverdrosselt):
Kleinspannungsklemme (gelb/weiß), schraubenlos
0,6 ... 0,8 mm
eindrähtig
Mechanische Daten
•Abmessungen: Reiheneinbaugerät im N-Maß,
Breite 4 TE (1 TE = 18 mm)
•Gewicht: ca. 260 g
Elektrische Sicherheit
•Schutzart (nach EN 60529): IP 20
Umweltbedingungen
•Umgebungstemperatur im Betrieb: - 5 ... + 45 C
•Lagertemperatur: - 25 ... + 70 C
•rel. Feuchte (nicht kondensierend): 5 % bis 93 %
Product and Applications Description
The power supply unit provides the system power necessary for
KNX. The connection to the bus line is established via the bus con-
nection block (red/black) located on the front side.
The integrated choke prevents the data telegrams from short-cir-
cuiting on the bus line. When the built-in reset switch is operated
(operation > 20s), the bus devices are returned to their initial
state.
For each bus line, at least one power supply unit is needed. Up to
two power supply units may be attached to a single bus line. A
second unit is not required unless the supply voltage at a bus de-
vice is less than 21 V.
Note: If two power supply units are operated in parallel on one
bus line and if the overload LED is lit on one or both power sup-
plies, then the bus configuration must be changed until the over-
load display disappears.
The cable length between the two power supply units operated
in parallel is not prescribed.
When more than 30 bus devices are installed in short bus cable
distance (e.g. 10 m), e.g. in distribution boards, the power supply
unit should be arranged near these bus devices. The distance be-
tween power supply unit and any of its bus devices must not ex-
ceed 350 m.
The power supply unit has a voltage and current regulation and
is therefore short-circuit proof. Short power failures can be
bridged with a backup interval of approximately 200 ms.
To ensure an uninterrupted power supply a separate circuit with
safety separation should be used for the power supply unit power
supply line.
The power supply units can supply DC 24 V power from an addi-
tional pair of terminals (yellow/white). This output voltage can be
used to power e.g. an additional line via a separate choke.
Additional Information
http://www.siemens.com/gamma-td
Technical specifications
Input voltage
•rated voltage: AC 120-230 V, 50 ... 60 Hz
DC 220 V
Rated power intake
approx. 24 VA
Output voltage
•rated voltage: DC 24 V
•safety extra low voltage (SELV)
•permissible range: DC 21 ... 30 V
Output current
•rated current 160 mA (N 125/02),
320 mA (N 125/12),
640 mA (N 125/22)
•short-circuit current:
limited to 1.0 A (N 125/02, N 125/12), 1.5 A (N 125/22)
Backup interval
on input voltage failure: approx. 200 ms at rated current
Connections
•mains connection, screwless plug-in terminals:
strip insulation for 10 ... 11 mm
permissible conductor types/cross sections:
-0.5...2.5 mm² single core
-0.5...2.5 mm² plain flexible conductor
-0.5...2.5 mm² stranded conductor
-AWG 20 (0.75 mm²) –AWG 12 (3.3 mm²) solid, stranded
•bus line:
pressure contacts on data rail,
screwless extra low voltage terminal (red/black)
0.6 ... 0.8 mm
•output voltage (no choke):
screwless extra low voltage terminal (yellow/white)
0.6 ... 0.8 mm
Physical specifications
•dimensions: N-system DIN-rail mounted device,
width: 4 SU (1 SU = 18 mm)
•weight: approx. 260 g
Electrical safety
•protection (according to EN 60529): IP 20
Environmental specifications
•ambient temperature operating: - 5 ... + 45 C
•storage temperature: - 25 ... + 70 C
•relative humidity (non-condensing): 5 % to 93 %


