Silvercrest PH1012 User manual

User Manual
Gebruikshandleiding
Brukerhåndbok
hb_voip_phone_cover_eu1.qxd 24.04.2007 15:49 Uhr Seite 2


1
Contents
Welcome 2
1. Connecting the USB Phone to the Computer 3
2. Installation of the Telephone Software Driver 4
2.1 Installing the Driver for the Silvercrest VoIP USB Phone PH1012 5
2.2 Configuring the USB Phone in Skype 6
3. Overview of Buttons and Functions 7
4. Making Telephone Calls with the USB-Phone 8
4.1 Dialling other Subscribers 8
4.2 Receiving Incoming Calls 9
4.3 Functions during a Call 10
4.4 Menu Navigation Functions 11
Security Information 12
Important Security Information 12
Compliant Use 12
Conformity 12
Appliance Disposal 12
Warranty Information 13
UK
Technical specifications System requirements
• USB 1.1 conformity • Windows Vista / XP / 2000
• USB Audio Device Release 1.0 • Internet connection by Modem
• 32 Ohm / 50 mW (min. 33.600 kbps), ISDN or ADSL
• 149 x 43 x 15mm / 103 g • 30 MB minimum HDD space required
• USB Type A plug (for e.g. Skype, DirectX is also required)

2
Welcome
This instruction booklet will show you how to install and operate the Silvercrest VoIP USB-Phone PH1012.
The USB telephone puts you in a position to engage in „voice over IP” telephone conversations via the internet
whilst enjoying all the comforts of a traditional telephone.
In order to be able to use your Silvercrest USB Phone, the Skype telephone software needs to be installed in your
computer. Only then can the driver for the USB Phone be installed in order to cooperate with the Skype software.
The included driver extends your existing Skype software by the function of the USB Phone but does
not represent an independent telephone software of its own.
It is hence advisable to check before installation that the Skype software has been properly installed in your
computer. You also need to be a registered Skype user to be able to use the service for telephone calls via internet.
Only if these conditions are met can the correct functioning of the USB Phone driver be guaranteed.
Please follow the instructions in this operating manual step by step to ensure a proper installation of your USB
Phone. Please also note the security information at the end of the document.
Package contents:
– USB-Phone with connection cable
– USB extension cable
– Driver CD
– Manual
3
UK
1. Connecting the USB Phone to the computer
You first need to connect the USB Phone to your computer. It will be configured and provided within the system
as a valid device in the process. You need to perform this step before installing the driver for Skype.
If the USB Phone can not be located, the driver installation will not work properly.
Before starting the installation ...
In Windows Vista/XP/2000 you need to log in via a user account which has been configured with
a computer administrator. Restricted users in Windows Vista/XP/2000 can not install any software
or drivers.
The USB Phone features a USB plug for connecting it to the computer. If the lead of the USB Phone is of
insufficient length you can use the USB extension cable included. The extension cable will provide you with a
great amount of freedom and comfort during your telephone conversations. Simply insert the plug of the USB
Phone into the socket of the extension cord. Now all you need to do is to connect the USB plug at the other end
of the cable to the computer.
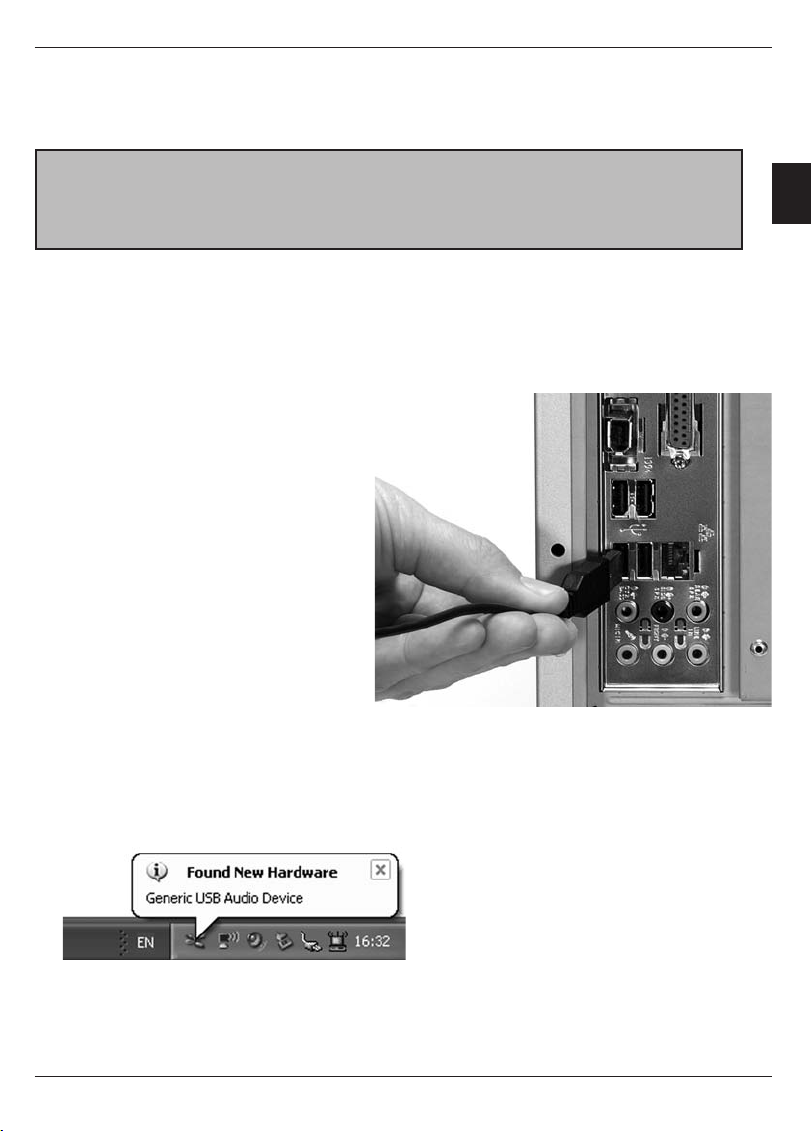
1. Connect the plug of the USB Phone or
extension cable, respectively, with one
of your computer’s USB ports. It makes
no difference which port you use as
all the USB ports are standardized. But
to ensure an optimal handling of the
telephone, a USB port at the front of
the computer is advisable.
2. Once the USB Phone is connected
to the computer, Windows will
recognize the device and activate it
within the system. Windows will then
configure all the required components
automatically.
3. The task bar at the lower right will
meanwhile indicate that the USB
Phone has been duly recognized and is currently being installed in the system. Once this process is
completed, Windows will inform you that the installation was successful and that the device is now ready
to be used. The installation process is therewith completed.
4
2. Installation of the Telephone Software Driver
In order to be able to use your USB Phone with your Skype software you need to install the included driver. The
driver ensures optimal communication and control between the telephone software and the USB Phone.
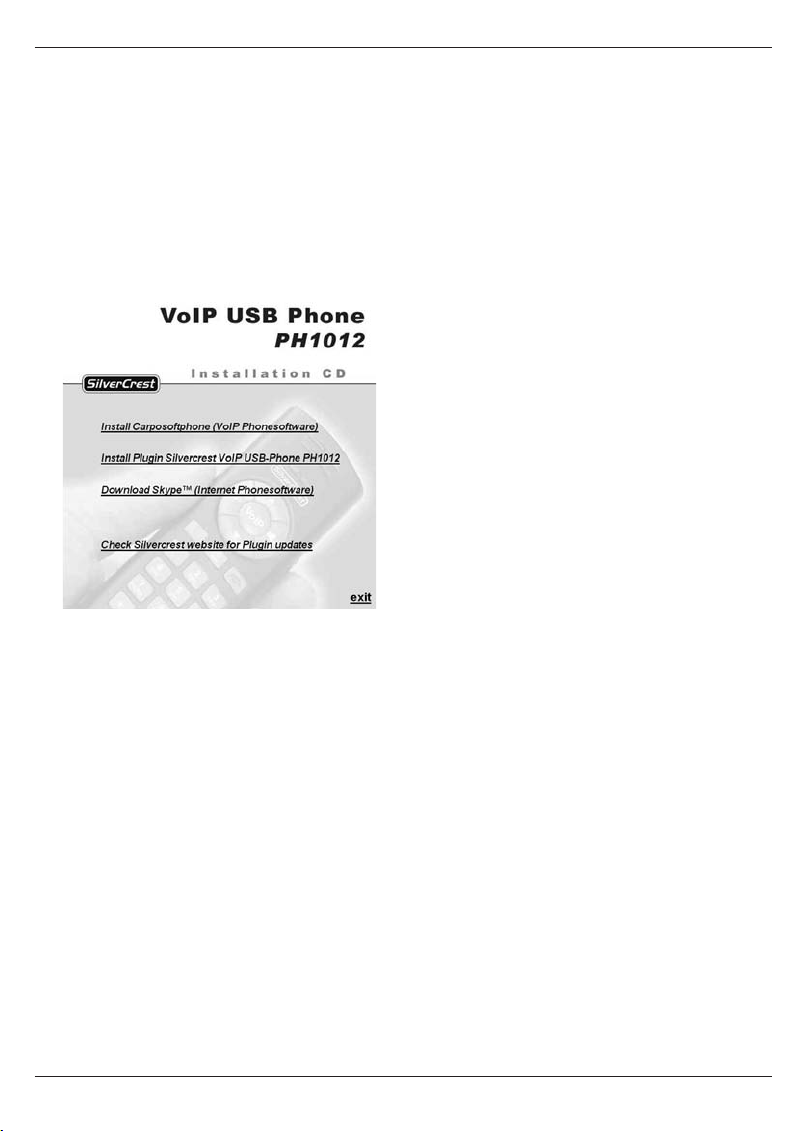
1. Simply insert the installation CD of the USB Phone in your computer drive.
2. The installation menu will be started automatically within a few moments.
3. Should the CD not start automatically, please open Windows Explorer and go to the desktop. Select the
CD/DVD drive there and then click the right mouse button once. This will open a menu from which you
need to select the option AutoPlay.
4. You will now see the installation CD’s main menu which offers you various options to chose from.
– Download Skype (Internet Phonesoftware)
This will take you to the Skype homepage. If you are not yet a Skype subscriber or require the latest
version of the software you can download everything you need here.
– Install Driver for Skype
If Skype is already installed in your computer you will only need this additional driver.
It will install all the files and configurations required to ensure the full functionality of your USB Phone.
– VoIP USB Phone Manual
Here you will find the manual of the USB Phone in PDF format for Adobe Reader.
– Installation Adobe Reader
If Adobe Reader is not yet installed on your computer you can install it via this menu entry.
– Check Silvercrest website for Driver updates
This option will take you to the Silvercrest homepage, where you will find updates for the driver,
help and support.
Further information on Skype is available online at: http://www.skype.com

5
UK
2. Installation of the Telephone Software Driver
2.1 Installing the Driver for the Silvercrest VoIP USB Phone PH1012
Das USB-Phone unter Windows Vista, XP oder 2000 installieren
The appearance of the windows displayed by the installation assistant may vary slightly depending
on the version of Windows used. The title bar in Windows Vista, for example, features the characteristic
Aero Glass design. The content areas of the windows nonetheless remain the same.
The general handling and the installation itself are identical in all versions of Windows.
1. You need to install the driver in order to use the USB Phone with your computer.
Please ensure that your telephone software is completely closed during the installation process.
2. First you need to select the entry Install Driver for Skype by a mouse click in the main menu of the
installation CD. This will automatically start the installation process.
3. The installation process is now being performed automatically, including the installation of all the
required drivers on your computer. This will only take a few moments.
4. As soon as the installation process is completed, a confirmation message appears. You can close this
window and finalize the installation by clicking on Finish. The USB Phone is ready to be used now.
6
2. Installation of the Telephone Software Driver
2.2 Configuring the USB Phone in Skype
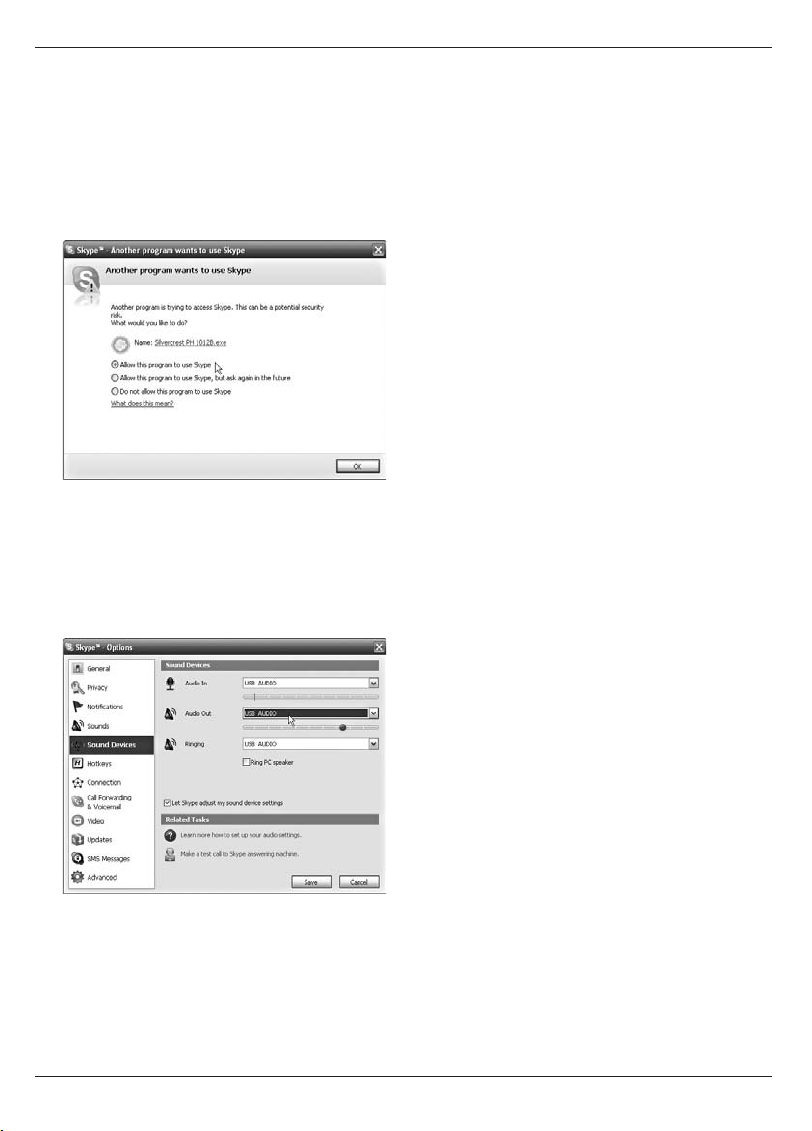
1. Skype is very security-oriented. When you start for the first time after installing the driver you need to
agree to Skype using this driver. To do this, simply select the op-tion Allow this program to use Skype
and confirm your selection by clicking OK.
2. The driver is now activated. You can also check at this stage whether the USB Phone has been configured
as your primary telephone. To do this, simply select the entry Tools/Options from the Skype menu.
3. This opens a new window. Select and enter the group Sound Devices. This is where you can specify the
device to be activated for speech input and output.
4. Your USB Phone is identified as USB Audio. Audio In and Audio Out need to be selected in order to hold
telephone conversations via the USB Phone.
5. Under the entry Ringing you can select whether an incoming call’s ring shall be transmitted via the
USB Phone or the speakers of your computer.
If you also select the USB Phone here, you will be given the opportunity to get an additional ring via
the computer speakers by selecting the option Ring PC speaker.
6. Use the Save button to confirm and save any changes you have made.

7
UK
3. Overview of Buttons and Functions
The concept of the Silvercrest USB Phone is exactly the same as that of a traditional telephone. Most buttons
and functions can hence be operated intuitively. But because telephoning via the internet offers a number of
additional functions as compared with a traditional telephone conversation, the USB Phone is also equipped
with several extra buttons.
1. Ear piece – This is where you hear the other subscriber.
2. Power LED – This LED is lit and hence shows that your USB Phone
is ready for operation.
3. Plus / Minus buttons – Serve to increase or lower the volume of
your conversation in the ear piece.
4. Mute button – Switch off the microphone during a conversation
for a short period of time in which the other subscriber will
not be able to hear you.
5. Back / Delete – While entering a telephone number you can
use this button to go back one step and delete the last figure.
6. Function button – With this button you can browse the menus
or tabs of the software.
7.
Up – To move within a menu.
8. Down - To move within a menu.
9. VoIP – This opens the Skype window. If you press the button again,
the Skype window is minimized into the task bar.
10. Lift Receiver – Use this button to start the telephone call after
entering a telephone number. This button can also be used for last
number redialling.
11. Hold – This button puts the current call on hold in the waiting loop.
12. Hang Up – Use this button to terminate a call.
13. Numeral keys – For entering telephone numbers.
14. Mouth piece – This is where your speech is captured.
15. /16. Line out / Line in – You can use these ports for connecting
external headphones or an external microphone,
for example a headset.
17. USB cable – The connection to your computer.
8
4. Making Telephone Calls with the USB Phone
In order to be able to use the USB Phone you need to ensure that the driver
for Skype has been installed in your computer as described. You also need to
ensure that the USB Phone is connected to a USB port properly and has been
recognized by Windows.
Start the Skype software in the Windows start menu. The main menu of the
telephone software opens. Now you can use your USB Phone for a telephone
call.
4.1 Dialling other Subscribers
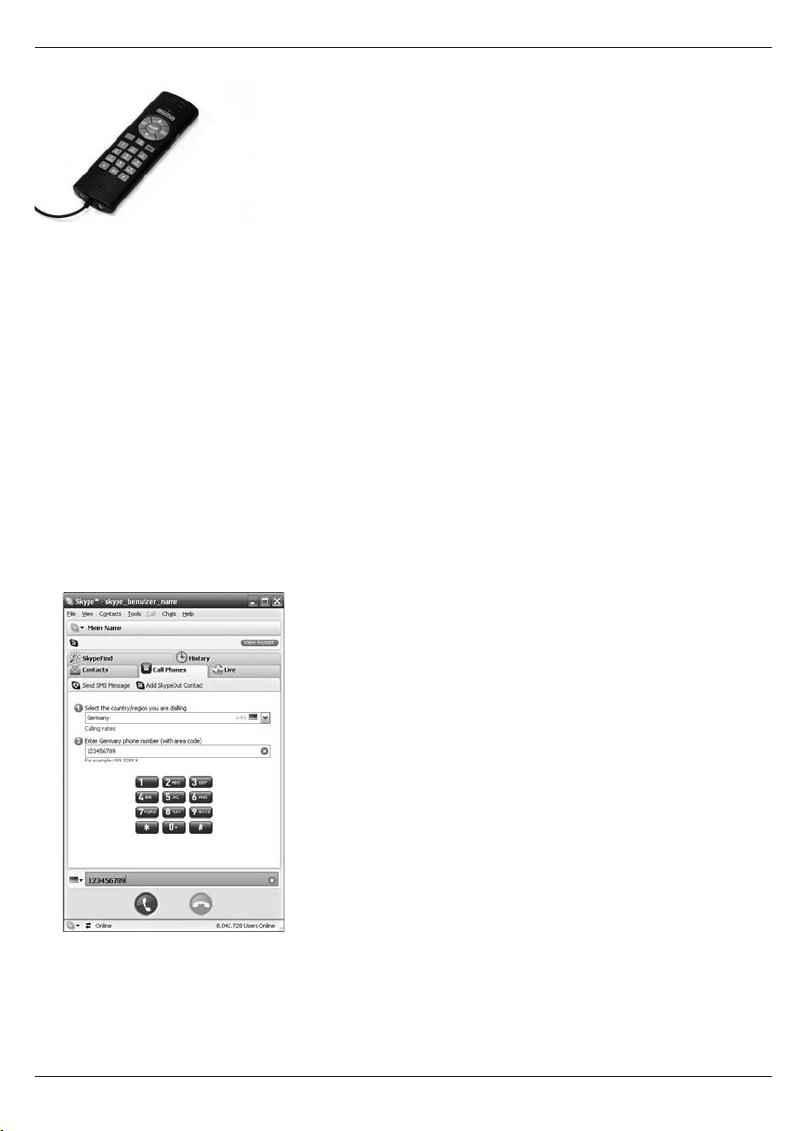
The simplest and fastest way to call another subscriber is by entering the telephone number directly.
1. To do this, take the USB Phone and enter the figures of the desired telephone number via the number
keys. The figures you enter will be displayed in the number field of the telephone software.
If an error occurs, the last figures can be deleted by using the Back button (5).
2. Next you need to press the Dial button marked with the green receiver symbol (10).
3. The Skype software displays the number and now creates a connection with the other subscriber.
A corresponding message is meanwhile displayed in the window.
4. You can now hold the USB Phone up to you ear like a traditional phone and engage in your telephone
conversation. The ear piece (1) transmitting the voice of your conversation partner is located at the top.
The mouth piece (14) capturing your speech is located at the bottom.
5. During the call the Skype window displays a symbol for your conversation partner and the call duration.
6. If you wish to end the conversation, simply press the Hang Up button marked with the red receiver (12).
Table of contents
Languages:
Other Silvercrest IP Phone manuals


