manuals.online logo
Brands
  1. Home
  2. •
  3. Brands
  4. •
  5. SimpliFire
  6. •
  7. Fireplace Accessories
  8. •
  9. SimpliFire SF-CHAF-36 User manual

SimpliFire SF-CHAF-36 User manual

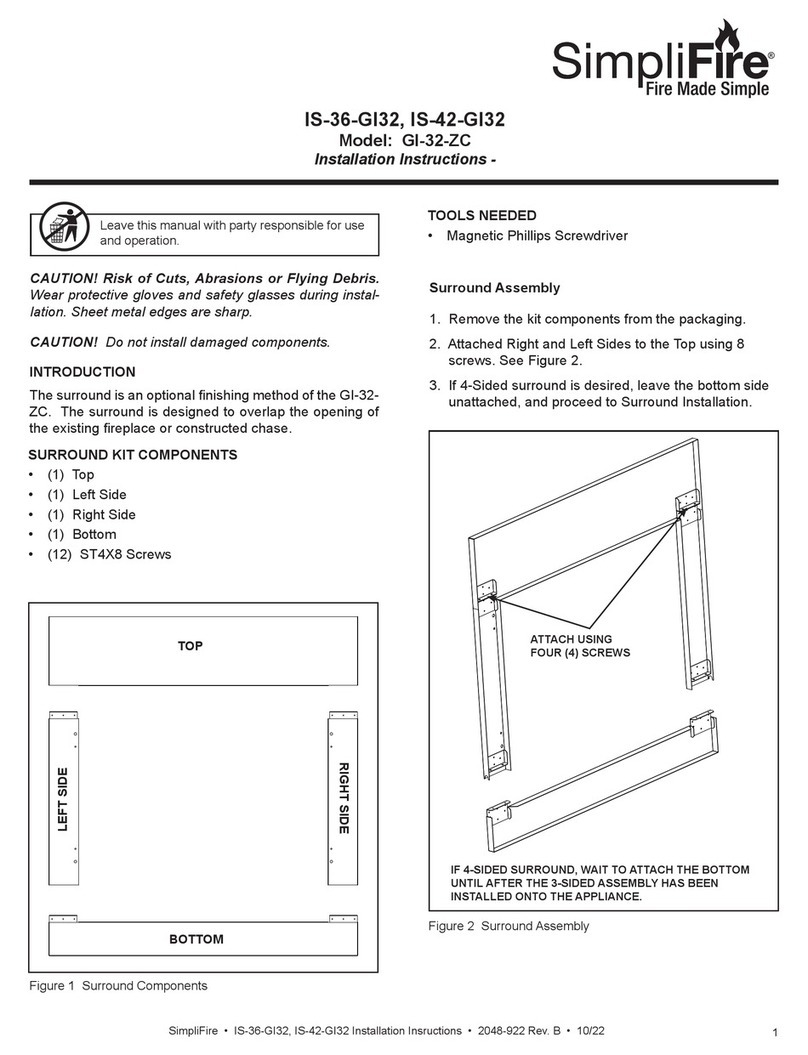
1SimpliFire • Inception Decorative Front Instructions (Chateau Forge, Halston) • 4200-930 • Rev B • 8/23
Leave this manual with party responsible for use
and operation.
CAUTION! Risk of Cuts, Abrasions or Flying Debris.
Wear protective gloves and safety glasses during instal-
lation. Sheet metal edges are sharp.
CAUTION! Do not install damaged components.
Figure 1 Decorative Front Styles
Note: To avoid potential damage to hearth pad or flooring,
protect area in front of fireplace by laying cardboard or
blanket down.
Inception Decorative Front
Model: SF-CHAF-36, SF-HAL-36
- Installation Instructions -
For Models: SF-INC36
HALSTON
CHATEAU
FORGE
SHIPPING BRACKET
(DISCARD)
MOUNTING SCREWS x 4 (10-24 X 3/4”)
(A)
SEPARATE AT
THESE POINTS
(BEFORE SEPARATION)
MOUNTING BRACKETS
(AFTER SEPARATION)
(B) (C)
MOUNTING BRACKETS
Figure 2 Components Overview
Figure 3 Side Panels Overview
LEFT AND RIGHT SIDE PANELS
NOTE: Side panels located in appliance
component box.
(D) (E)
2SimpliFire • Inception Decorative Front Instructions (Chateau Forge, Halston) • 4200-930 • Rev B • 8/23
A. Finishing Material
Table 1. Decorative Front Dimensions
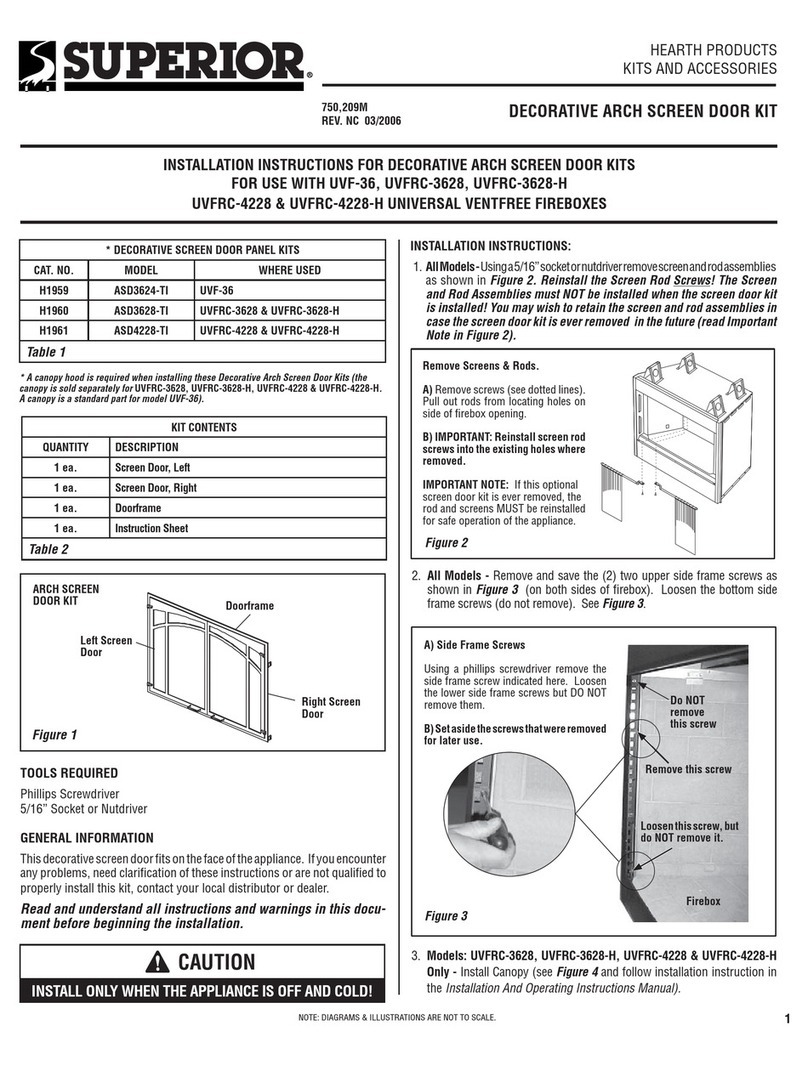
These decorative fronts are designed to be installed as
“Overlap” or “Inside Fit”. Refer to Table 1.
Overlap Method: Finishing material that is 1” or less
(such as marble or tile) is installed up to the replace
opening on the sides and top. The mounting brackets are
adjusted “out” so that the edges of the mounting brackets
are ush with the face of the nishing material. The back
of the decorative front contacts the face of the nish mate-
rial, thus the decorative front “overlaps” the nish materi-
al. Refer to the appliance installation instructions for more
detailed information. Reference Figure 4 for combustible
clearances required for 240VAC Supplied Appliances with
Overlap Fit Front Installations.
Inside Fit Method: Typically, the inside t method is
only used when nish material greater than 1” is preferred
(such as cultured stone). This nish material is installed
adjacent to the decorative front sides and top.
The mounting brackets are to be installed “ush” with the
black edges of the inside surround opening. Do not install
nish material greater than one inch thick up to the view-
ing area on top , bottom or sides.
When installed, the back of the decorative front contacts
the black surround on the replace, thus the decorative
front is “inside” the adjacent nish material on the top and
sides. Refer to the appliance installation manual for more
detailed information.
DECORATIVE
FRONT HEIGHT WIDTH
HAL-36 32-7/8 IN. 37-1/4 IN.
CHAF-36 32-7/8 IN. 37 IN.
INTRODUCTION
These are instructions for the Chateau Forge and Halston
decorative fronts. These decorative fronts are compatible
with the Inception appliance.
NOTE: The hammered pattern, decorative wire placement
and other features of the Chateau Forge decorative front
may vary from the showroom display model due to the hand-
crafted nature of the Chateau Forge decorative front.
Tools Needed:
• 1/4” Nut Driver 32-7/8 IN. MIN.
(835 mm)
Figure 4
When using 240VAC input, all overlapped
nishing material, behind the decorative front,
in the shaded area, must be a non-combustible
material only.
3SimpliFire • Inception Decorative Front Instructions (Chateau Forge, Halston) • 4200-930 • Rev B • 8/23
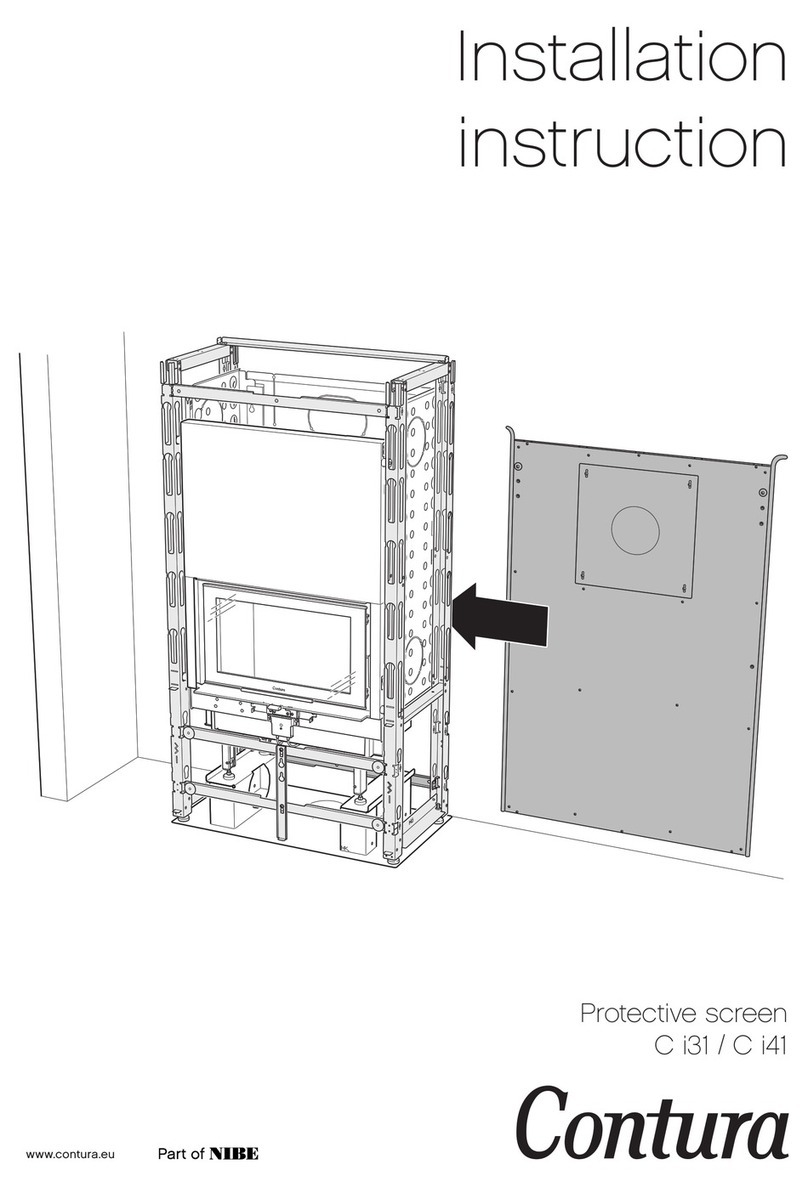
2. Remove mounting bracket assembly and bend the
mounting bracket assembly vertically to separate the
left and right brackets (B and C). See Figure 3.
Do not bend mounting bracket tabs.
Discard screws and shipping brackets. See Figure 3.
B. Installation
1. Remove components from package. Components in-
cluded will depend on the decorative front being installed.
The mounting brackets are secured to a shipping bracket
located on the back side of the decorative front. Remove
shipping bracket using 1/4 in. nut driver and remove
mounting brackets from packaging.
MOUNTING
BRACKETS
MOUNTING
SCREWS (A)
(B & C)
SIDE PANELS
(D & E)
Figure 5 Attach Side Panels
3. Remove side panels (D and E) from appliance compo-
nent box. See Figure 3.
4. Attach mounting brackets (B and C) and side panels
(D and E) to appliance using the four mounting screws
(A). See Figure 5. Locate the laser-cut number 36 on
the bracket which represents the size of the decora-
tive front. This marking also indicates the top of the
bracket. Install the bracket so that the front edge of the
bracket sits ush with the desired depth of the decora-
tive front. Mounting tabs should extend at least 1/8
inch past desired depth. See Figure 6. Side panels
install over the mounting brackets using the same
mounting screws (A).
For example: If the decorative front is to t tight
against the appliance (Inside Fit), install the brackets
ush with the face of the appliance. If the decora-
tive front is to t up tight against a nishing material
with maximum thickness of one inch (Overlap Fit), the
brackets should be ush with the face of the mate-
rial. For both inside t and overlap t applications, the
mounting tabs should extend at least 1/8 inch past
desired depth. Refer to Section A, “Finishing Material”
for more information.
CONNECT
WIRE
HARNESS
5. Connect the wire harness at the lower right of the front
to the corresponding connector from the appliance,
See Figure 5.
6. Install the decorative front to the mounting brackets
by engaging the brackets mounted on the decorative
front assembly to the mounting brackets located on
the appliance. See Figure 7. Ensure the decorative
front is properly attached and securely positioned on
the appliance.
NOTE: Before installing decorative front, make sure the
appliance junction box master switch is ipped to the
ON position.
Figure 6 Install Decorative Front
Figure 7 Install Decorative Front
MOUNTING TABS (4)MOUNTING TABS (4)
SLOTTEDSLOTTED
BRACKETS (4)BRACKETS (4)
4SimpliFire • Inception Decorative Front Instructions (Chateau Forge, Halston) • 4200-930 • Rev B • 8/23
C. Cleaning Instructions for Decorative
Fronts
Use a microber cloth and Windex® Original Glass
Cleaner or 03M003 Stove Bright® Glass Cleaner to
clean the decorative front immediately after installation
to remove acids deposited by the installer or technician.
Spray the cleaner onto the microber cloth and carefully
wipe the entire surface. The decorative front should
be cleaned in this manner annually by the homeowner
to remove ngerprints or other contaminants. Once
oxidation of the paint pigment has occurred, cleaning will
not restore the original color.
D. Replacement Parts
• Side Panels SRV4200-106
• Mounting Brackets SRV2353-216
• Vanity Panel Assembly SRV4200-034
• Door Buttons Jumper SRV4200-183
SimpliFire, a brand of Hearth & Home Technologies
7571 215th Street West, Lakeville, MN 55044
www.hearthnhome.com
Please contact your SimpliFire dealer
for the location of your nearest SimpliFire dealer,
please visit www.hearthnhome.com.

This manual suits for next models

1

Other SimpliFire Fireplace Accessories manuals

SimpliFire SF-OD43 User manual

SimpliFire

SimpliFire SF-OD43 User manual

SimpliFire SF-WM36 User manual

SimpliFire

SimpliFire SF-WM36 User manual

SimpliFire SF-SC43-BK User manual

SimpliFire

SimpliFire SF-SC43-BK User manual

SimpliFire SF-SC43-BK User manual

SimpliFire

SimpliFire SF-SC43-BK User manual

SimpliFire SF-OD43 User manual

SimpliFire

SimpliFire SF-OD43 User manual

SimpliFire SF-FORMAT36 User manual

SimpliFire

SimpliFire SF-FORMAT36 User manual

SimpliFire SF-ALL40-BK User manual

SimpliFire

SimpliFire SF-ALL40-BK User manual

SimpliFire SF-ALLP50-BK User manual

SimpliFire

SimpliFire SF-ALLP50-BK User manual

SimpliFire GI-32-ZC User manual

SimpliFire

SimpliFire GI-32-ZC User manual

SimpliFire SF-INS30-BK User manual

SimpliFire

SimpliFire SF-INS30-BK User manual

SimpliFire HERITAGE-26-CH User manual

SimpliFire

SimpliFire HERITAGE-26-CH User manual

SimpliFire SF-SCT43-BK User manual

SimpliFire

SimpliFire SF-SCT43-BK User manual

SimpliFire FOL-INC36 User manual

SimpliFire

SimpliFire FOL-INC36 User manual

SimpliFire SF-BI30-EB User manual

SimpliFire

SimpliFire SF-BI30-EB User manual

SimpliFire Wescott Mantel Kit User manual

SimpliFire

SimpliFire Wescott Mantel Kit User manual

SimpliFire CRESTWOODC23-OK User manual
SimpliFire

SimpliFire CRESTWOODC23-OK User manual

SimpliFire SF-FORMAT36 User manual

SimpliFire

SimpliFire SF-FORMAT36 User manual

SimpliFire SF-FORMAT36 User manual

SimpliFire

SimpliFire SF-FORMAT36 User manual

Popular Fireplace Accessories manuals by other brands

Dimplex SOP-272-W install guide

Dimplex

Dimplex SOP-272-W install guide

IHP EPIC-TRIM-B installation instructions

IHP

IHP EPIC-TRIM-B installation instructions

Superior Network Adapter 206M installation instructions

Superior

Superior Network Adapter 206M installation instructions

Twin-Star International 23DM537 Assembly instructions

Twin-Star International

Twin-Star International 23DM537 Assembly instructions

IHP F2624 manual

IHP

IHP F2624 manual

Cheminees Philippe RADIANTE 873 2V PR Installation & user manual

Cheminees Philippe

Cheminees Philippe RADIANTE 873 2V PR Installation & user manual

kozy heat NCK-SL42-SPB manual

kozy heat

kozy heat NCK-SL42-SPB manual

FireplaceXtrordinair 96100838 Installation

FireplaceXtrordinair

FireplaceXtrordinair 96100838 Installation

VLAZE VITREOUS ENAMEL WALL MOUNTED HEAT SHIELD quick start guide

VLAZE

VLAZE VITREOUS ENAMEL WALL MOUNTED HEAT SHIELD quick start guide

Valor 590FVK2 installation manual

Valor

Valor 590FVK2 installation manual

Hearth & Home LOGS-I30 Placement instructions

Hearth & Home

Hearth & Home LOGS-I30 Placement instructions

Costway JV10066 user manual

Costway

Costway JV10066 user manual

Valcourt AC04312 installation instructions

Valcourt

Valcourt AC04312 installation instructions

EcoSmart Fire Curved CLEARANCES & INSTALLATION

EcoSmart Fire

EcoSmart Fire Curved CLEARANCES & INSTALLATION

IHP WINSLOW PS40 installation instructions

IHP

IHP WINSLOW PS40 installation instructions

kozy heat KZK-1510A manual

kozy heat

kozy heat KZK-1510A manual

pleasant hearth BG7-215M manual

pleasant hearth

pleasant hearth BG7-215M manual

pleasant hearth ATTICUS FA617TL manual

pleasant hearth

pleasant hearth ATTICUS FA617TL manual

manuals.online logo
manuals.online logoBrands
  • About & Mission
  • Contact us
  • Privacy Policy
  • Terms and Conditions

Copyright 2025 Manuals.Online. All Rights Reserved.