manuals.online logo
Brands
  1. Home
  2. •
  3. Brands
  4. •
  5. SimpliFire
  6. •
  7. Indoor Fireplace
  8. •
  9. SimpliFire SF-BI30-E User manual

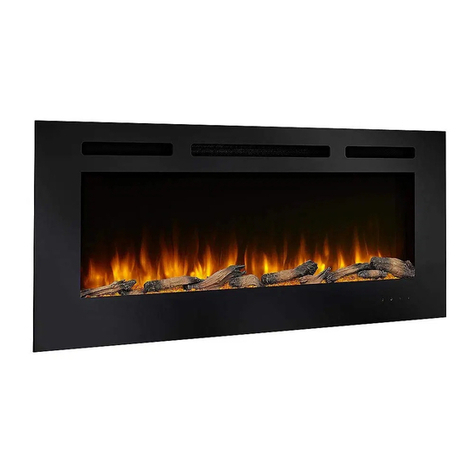
SimpliFire SF-BI30-E User manual

1
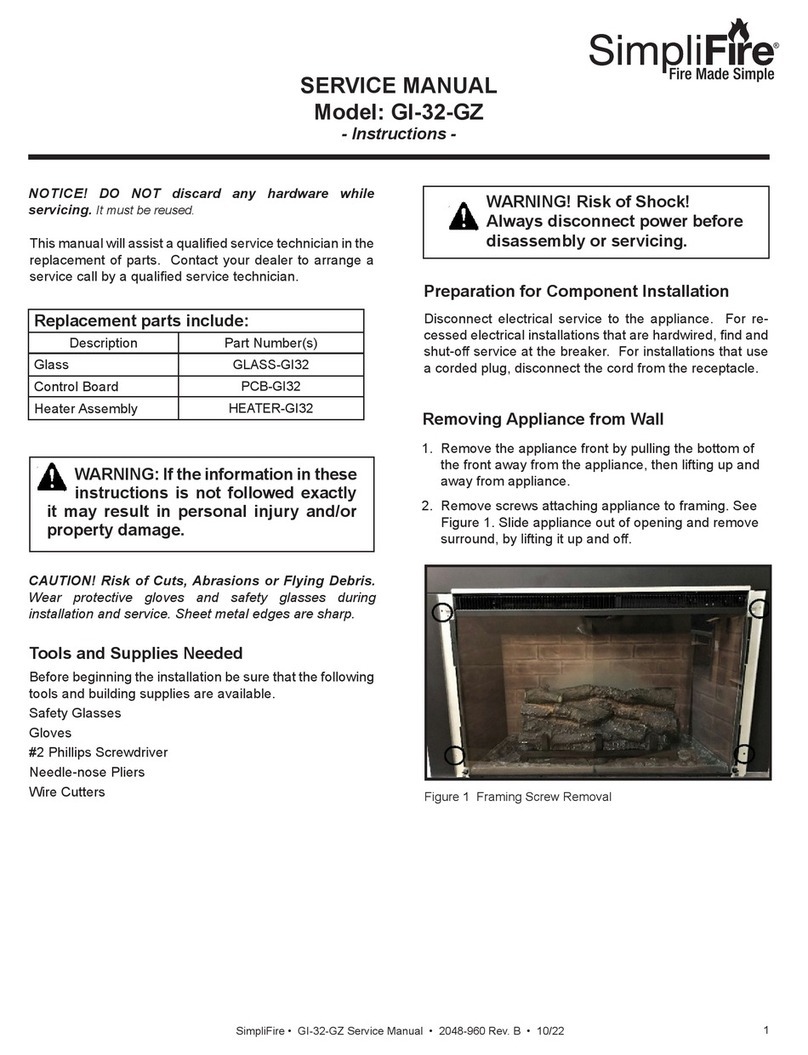
SimpliFire • SF-BI30-E, SF-BI36-E Service Manual • 2040-910 • 8/13
SERVICE MANUAL
Model: SF-BI30-E, SF-BI36-E
- Instructions -
Thismanualwillassist aqualified servicetechnician inthe
replacement of parts. Contact your dealer to arrange a
service call by a qualified service technician.
CAUTION! Risk of Cuts, Abrasions or Flying Debris.
Wear protective gloves and safety glasses during
installation and service. Sheet metal edges are sharp.
Leave this manual with party responsible for use
and operation.
WARNING: If theinformation inthese
instructions is notfollowed exactly it may
result in personal injury and/or property
damage.
NOTICE! DO NOT discard this manual. Important service
and maintenance instructions included.
Tools and Supplies Needed
Before beginning the installation be sure that the following
tools and building supplies are available.
Pliers
Phillips screwdriver
Electric drill and bits (1/4 in.)
Safety glasses
Flat blade screwdriver
Replacement Instructions
WARNING! Risk of Shock! Always disconnect power
before disassembly or servicing.
Front Replacement
1. If necessary, place a drop cloth or other material on
the hearth or flooring to prevent scratching. Grasp
front with two hands. Pull straight back to disengage
front from appliance.
2. Install replacement front by aligning the tabs on its
back side with the spring clips on the face of the ap-
pliance. Press evenly with two hands to fully engage
the front to the appliance.
Glass Front Replacement
1. If necessary, place a drop cloth or other material
on the hearth or flooring to prevent scratching. Grasp
front with two hands. Pull straight back to disengage
front from appliance.
2. Locate C-channel that retains top edge of glass
panel. While supporting the glass, remove the screw
located in the C-channel at the top two corners of the
glass panel. See Figure 1.
3. Pivot glass away from appliance and lift out of bottom
retainer channel.
4. Install replacement glass into bottom retainer chan
nel.
5. Install C-channel on top edge of replacement glass.
6. Align C-channel with screw holes in appliance. See
Figure 1
7. While supporting glass, install both screws through
top C-channel retainer into appliance
8. Install front by aligning the tabs on its back side with
the spring clips on the face of the appliance. Press
evenly with two hands to fully engage the front to the
appliance.
Replacement parts includes:
• Glass
• Log/Grate Assembly
• Flame Screen
• Refractory
• LED Lighting
• Blower/Heater Module
• Faux Flame Rod/Motor
NOTICE! DO NOT discard any hardware while
servicing. It must be reused.
SimpliFire • SF-BI30-E, SF-BI36-E Service Manual • 2040-910 • 8/132
15. Align C-channel with screw holes in appliance.
16. While supporting glass, install both screws through
top C-channel retainer into appliance.
17. Install front by aligning the tabs on its back side with
the spring clips on the face of the appliance. Press
evenly with two hands to fully engage the front to the
appliance.
12. Install rubber plugs into holes in each end of grate.
See Figure 2.
13. Install glass into bottom retainer channel.
14. Install C-channel on top edge of glass panel. See
Figure 1.
3. Pivot glass away from appliance and lift out of bottom
retainer channel.
4. Locate rubber plugs in each end of the grate.
Remove plugs with a small flat screwdriver. Save for
later use. See Figure 2.
5. Remove Phillips screw from each end of grate. Lift
grate from faux ember bed. Take care to retain
screws with grate. See Figure 2.
6. Grasp log ember bed and lift up and out of opening.
Rotate ember bed to expose electrical wiring.
7. Disconnect lighting LED power source pin connector
from back side of ember bed. See Figure 3.
8. Connect lighting LED power source pin connector to
back side of replacement ember bed. See Figure 3.
9. Rotate log ember bed and align with floor of opening.
Engage back side of ember bed into the opening.
Pivot the front of the ember bed into position flat on
the floor of the opening. Take care not to pinch wiring
under log ember bed.
10. Align the grate, with the retained screws, with the
steel brackets under the ember bed. Ensure that
wiring is not pinched between log ember bed and
steel bracket.
11. Install and tighten the screw in each end of the grate.
See Figure 2.
Log/Grate Replacement
1. If necessary, place a drop cloth or other material on
the hearth or flooring to prevent scratching. Grasp
front with two hands. Pull straight back to disengage
front from appliance.
2. Locate C-channel that retains top edge of glass
panel. While supporting the glass, remove the screw
located in the C-channel at the top two corners of the
glass panel. See Figure 1.
Flame Screen Replacement
1. If necessary, place a drop cloth or other material on
the hearth or flooring to prevent scratching. Grasp
front with two hands. Pull straight back to disengage
front from appliance.
2. Locate C-channel that retains top edge of glass
panel. While supporting the glass, remove the screw
located in the C-channel at the top two corners of the
glass panel. See Figure 1.
3. Pivot glass away from appliance and lift out of bottom
retainer channel.
4. Remove four thumb screws and metal angle bracket.
from upper rear of appliance cavity. See Figure 7.
5. Remove four screws from upper face of appliance.
Take care to support the Blower/Heater Module while
the screws are removed. See Figure 8.
6. Remove the Blower/Heater Module by lifting back
edge slightly then pulling it straight back from the
appliance opening. This will reduce the likelihood of
damaging the brick panels.
7. Locate the five electrical connectors on the right
side of the appliance cavity. Disconnect each of the
five connectors. See Figure 9.
8. Locate rubber plugs in each end of the grate.
Remove plugs with a small flat screwdriver. Save for
later use. See Figure 2.
9. Remove Phillips screw from each end of grate. Lift
grate from faux ember bed. Take care to retain
screws with grate. See Figure 2.
10. Grasp log ember bed and lift up and out of opening.
11. If necessary, unplug LED wire harness from back
side of ember bed. See Figure 3.
12. Fold sheet metal tabs on each side of opening on
front edge of refractory panels. See Figure 10.
13. Use hand to carefully pry along front edge of
refractory panel to disengage it from the appliance.
Pull both refractory panels. See Figure 10.
14. Remove the one screw that retains the brick panel
in the rear appliance cavity. Remove the brick panel
from the cavity. See Figure 12.
15. Remove the flame screen panel by removing six
screws that attach it to the appliance chassis. See
Figure 13.
16. Install the replacement flame screen panel and
attach with six screws. See Figure 13.
17. Install the brick panel into the rear of the cavity.
Ensure that it is orientated so that the notch is
located in the lower right of the cavity. See Figure
12.
3
SimpliFire • SF-BI30-E, SF-BI36-E Service Manual • 2040-910 • 8/13
21. While supporting the Blower/Heater Module, install
the four screws across the upper face of the
appliance. See Figure 8.
22. Install the four thumb screws and metal angle
bracket in the upper rear of the appliance cavity.
See Figure 7.
23. If necessary, plug LED wire connection into back
side of ember bed. See Figure 3.
24. Rotate log ember bed and align with floor of opening.
Engage back side of ember bed into the opening.
Pivot the front of the ember bed into position flat on
the floor of the opening. Take care not to pinch
wiring under log ember bed.
25. Align the grate, with the retained screws, with the
steel brackets under the ember bed. Ensure that
wiring is not pinched between log ember bed and
steel bracket.
26. Install and tighten the screw in each end of the grate.
See Figure 2.
27. Install rubber plugs into holes in each end of grate.
See Figure 2.
28. Install glass into bottom retainer channel.
29. Install C-channel on top edge of glass panel.
30. Align C-channel with screw holes in appliance.
See Figure 1.
31. While supporting glass, install both screws through
top C-channel retainer into appliance
32. Install front by aligning the tabs on its back side with
the spring clips on the face of the appliance. Press
evenly with two hands to fully engage the front to the
appliance.
Flame Screen Replacement (continued)
18. Install side refractory panels. Align tabs on back
edge of the panel with the slots in the rear appliance
cavity. Once the tabs are engaged, carefully
install the front edge of the appliance cavity. Take
care to apply even pressure to prevent damage to
the replacement panels. See Figure 10 & 11.
19. Reconnect the five connectors from the Blower/
Heater module to the appliance. See Figure 9.
20. Carefully align the Blower/Heater module horizontally
with the opening of the appliance. Install it straight
into the opening so that the back edge interlocks
with the back wall of the appliance.
Refractory Replacement
1. If necessary, place a drop cloth or other material on
the hearth or flooring to prevent scratching. Grasp
front with two hands. Pull straight back to disengage
front from appliance.
2. Locate C-channel that retains top edge of glass
panel. While supporting the glass, remove the screw
located in the C-channel at the top two corners of the
glass panel. See Figure 1.
3. Pivot glass away from appliance and lift out of bottom
retainer channel.
4. Remove four thumb screws and metal angle bracket
from upper rear of appliance cavity. See Figure 7.
5. Remove four screws from upper face of appliance.
Take care to support the Blower/Heater Module while
the screws are removed. See Figure 8.
6. Remove the Blower/Heater Module by lifting back
edge slightly then pulling it straight back from the
appliance opening. This will reduce the likelihood of
damaging the brick panels.
7. Locate the five electrical connections on the right
side of the appliance cavity. Disconnect each of the
five connectors. See Figure 9.
8. Locate rubber plugs in each end of the grate.
Remove plugs with a small flat screwdriver. Save for
later use. See Figure 2.
9. Remove Phillips screw from each end of grate. Lift
from faux ember bed. Take care to retain screws
with grate. See Figure 2.
10. Grasp log ember bed and lift up and out of opening.
11. Fold sheet metal tabs on each side of opening on
front edge of refractory panels. See Figure 6.10.
12. Use hand to carefully pry along front edge of
refractory panel to disengage it from the appliance.
Remove both refractory panels. See Figure 10.
13. Remove the one screw that retains the brick panel
in the rear appliance cavity. Remove the brick panel
from the cavity. See Figure 12.
14. Install the brick panel into the rear of the cavity.
Ensure that it is located so that the notch is in the
lower right of the cavity. See Figure 12.
15. Install replacement refractory panels. Align tabs
on back edge of the panel with the slots in the rear
appliance cavity. Once the tabs are engaged,
carefully install the front edge of the appliance cavity.
Take care to apply even pressure to prevent damage
to the replacement panels. See Figure 10 & 11.
16. Reconnect the five connectors from the Blower/
Heater module to the appliance. See Figure 9.
SimpliFire • SF-BI30-E, SF-BI36-E Service Manual • 2040-910 • 8/134
17. Carefully align the Blower/Heater module horizontally
with the opening of the appliance. Install it straight
into the opening so that the back edge interlocks
with the back wall of the appliance.
18. While supporting the Blower/Heater Module, install
the four screws across the upper face of the
appliance. See Figure 8.
19. Install the four thumb screws and metal angle
bracket in the upper rear of the appliance cavity.
See Figure 7.
20. Rotate log ember bed and align with floor of opening.
Engage back side of ember bed into the opening.
Pivot the front of the ember bed into position flat on
the floor of the opening. Take care not to pinch
wiring under log ember bed.
21. Align the grate, with the retained screws, with the
steel brackets under the ember bed. Ensure that
wiring is not pinched between log ember bed and
steel bracket.
22. Install and tighten the screw in each end of the
grate. See Figure 2.
23. Install rubber plugs into holes in each end of grate.
See Figure 2.
24. Install glass into bottom retainer channel.
25. Install C-channel on top edge of glass panel.
26. Align C-channel with screw holes in appliance.
See Figure 1.
27. While supporting glass, install both screws through
top C-channel retainer into appliance
28. Install front by aligning the tabs on its back side with
the spring clips on the face of the appliance. Press
evenly with two hands to fully engage the front to the
appliance.
Lighting LED Replacement
Note: Kit includes all three LED light strip assembly.
1. If necessary, place a drop cloth or other material on
the hearth or flooring to prevent scratching. Grasp
front with two hands. Pull straight back to disengage
front from appliance.
2. Locate C-channel that retains top edge of glass
panel. While supporting the glass, remove the screw
located in the C-channel at the top two corners of the
glass panel. See Figure 1.
3. Pivot glass away from appliance and lift out of bottom
retainer channel.
4. Remove four thumb screws and metal angle bracket
from upper rear of appliance cavity. See Figure 7.
5. Remove four screws from upper face of appliance.
Take care to support the Blower/Heater Module while
the screws are removed. See Figure 8.
6. Remove the Blower/Heater Module by lifting back
edge slightly then pulling it straight back from the
appliance opening. This will reduce the likelihood of
damaging the brick panels.
7. Locate the five electrical connections on the right
side of the appliance cavity. Disconnect each of the
five connectors. See Figure 9.
8. Locate rubber plugs in each end of the grate.
Remove plugs with a small flat screwdriver. Save for
later use. See Figure 2.
9. Remove Phillips screw from each end of grate. Lift
from faux ember bed. Take care to retain screws
with grate. See Figure 2.
10. Grasp log ember bed and lift up and out of opening.
11. Fold sheet metal tabs on each side of opening on
front edge of refractory panels. See Figure 10.
12. Use hand to carefully pry along front edge of
refractory panel to disengage it from the appliance.
Remove both refractory panels. See Figure 10.
13. Remove the one screw that retains the brick panel
in the rear appliance cavity. Remove the brick panel
from the cavity. See Figure 12.
14. Remove metal bracket in front of rear LED strip.
Remove four screws to remove metal parts. See
Figure 4.
15. Locate Lighting LED circuit input power source
connectors in rear of opening. Unplug all three
connectors from the three circuit boards. See Figure
6. If expoxy will not allow separation of the two
connectors, slide the pair of connectors off the pins
of the LED circuit board.
16. Using a pliers, compress each barbed clip along the
circuit board while lifting the board evenly to
disengage it from the clip. See Figure 5.
5
SimpliFire • SF-BI30-E, SF-BI36-E Service Manual • 2040-910 • 8/13
Lighting LED Replacement (continued)
17. Remove all three lighting LED circuit boards.
18. Install replacement lighting LED circuit boards into
the appliance. Fully engage each barbed clip. See
Figure 5.
19. Connect all three lighting LED power source
connectors to the three LED circuit boards. See
Figure 6.
20. Install metal brackets by attaching with four screws.
See Figure 4.
21. Install the brick panel into the rear of the cavity.
Ensure that it is located so that the notch is in the
lower right of the cavity. See Figure 12.
22. Install replacement refractory panels. Align tabs
on back edge of the panel with the slots in the rear
appliance cavity. Once the tabs are engaged,
carefully install the front edge of the appliance cavity.
Take care to apply even pressure to prevent damage
to the replacement panels. See Figure 10 & 11.
23. Reconnect the five connectors from the Blower/
Heater module to the appliance. See Figure 9.
24. Carefully align the Blower/Heater module horizontally
with the opening of the appliance. Install it straight
into the opening so that the back edge interlocks
with the back wall of the appliance.
25. While supporting the Blower/Heater Module, install
the four screws across the upper face of the
appliance. See Figure 8.
26. Install the four thumb screws and metal angle
bracket in the upper rear of the appliance cavity.
See Figure 7.
27. Rotate log ember bed and align with floor of opening.
Engage back side of ember bed into the opening.
Pivot the front of the ember bed into position flat on
the floor of the opening. Take care not to pinch
wiring under log ember bed.
28. Align the grate, with the retained screws, with the
steel brackets under the ember bed. Ensure that
wiring is not pinched between log ember bed and
steel bracket.
29. Install and tighten the screw in each end of the
grate. See Figure 2.
30. Install rubber plugs into holes in each end of grate.
See Figure 2.
31. Install glass into bottom retainer channel.
32. Install C-channel on top edge of glass panel.
33. Align C-channel with screw holes in appliance.
See Figure 1.
34. While supporting glass, install both screws through
top C-channel retainer into appliance.
Blower/Heating Module Replacement
1. If necessary, place a drop cloth or other material on
the hearth or flooring to prevent scratching. Grasp
front with two hands. Pull straight back to disengage
front from appliance.
2. Locate C-channel that retains top edge of glass
panel. While supporting the glass, remove the screw
located in the C-channel at the top two corners of the
glass panel. See Figure 1.
3. Pivot glass away from appliance and lift out of bottom
retainer channel.
4. Remove four thumb screws and metal angle bracket
from upper rear of appliance cavity. See Figure 7.
5. Remove four screws from upper face of appliance.
Take care to support the Blower/Heater Module while
the screws are removed. See Figure 8.
6. Remove the Blower/Heater Module by lifting back
edge slightly then pulling it straight back from the
appliance opening. This will reduce the likelihood of
damaging the brick panels.
7. Locate the five electrical connectors on the right
side of the appliance cavity. Disconnect each of the
five connectors. See Figure 9.
8. Reconnect the five connectors from the replacement
Blower/Heater module to the appliance. See Figure
9.
9. Carefully align the Blower/Heater module horizontally
with the opening of the appliance. Install it straight
into the opening so that the back edge interlocks with
the back wall of the appliance.
10. While supporting the Blower/Heater Module, install
the four screws across the upper face of the
appliance. See Figure 8.
11. Install the four thumb screws and angle metal
bracket in the upper rear of the appliance cavity.
See Figure 7.
12. Install glass into bottom retainer channel.
13. Install C-channel on top edge of glass panel.
14. Align C-channel with screw holes in appliance.
15. While supporting glass, install both screws through
top C-channel retainer into appliance. See Figure
1.
16. Install front by aligning the tabs on its back side with
the spring clips on the face of the appliance. Press
evenly with two hands to fully engage the front to the
appliance.
35. Install front by aligning the tabs on its back side with
the spring clips on the face of the appliance. Press
evenly with two hands to fully engage the front to the
appliance.
SimpliFire • SF-BI30-E, SF-BI36-E Service Manual • 2040-910 • 8/136
Faux Flame Motor/Rod Kit
1. If necessary, place a drop cloth or other material on
the hearth or flooring to prevent scratching. Grasp
front with two hands. Pull straight back to disengage
front from appliance.
2. Locate C-channel that retains top edge of glass
panel. While supporting the glass, remove the screw
located in the C-channel at the top two corners of the
glass panel. See Figure 1
3. Pivot glass away from appliance and lift out of bottom
retainer channel.
4. Remove four thumb screws and metal angle bracket
from upper rear of appliance cavity. See Figure 7.
5. Remove four screws from upper face of appliance.
Take care to support the Blower/Heater Module while
the screws are removed. See Figure 8.
6. Remove the Blower/Heater Module by lifting back
edge slightly and pulling it straight back from the
appliance opening. This will reduce the likelihood of
damaging the brick panels.
7. Locate the five electrical connectors on the right
side of the appliance cavity. Disconnect each of the
five connectors. See Figure 9.
8. Locate rubber plugs in each end of the grate.
Remove plugs with a small flat screwdriver. Save for
later use. See Figure 2.
9. Remove Phillips screw from each end of grate. Lift
grate from faux ember bed. Take care to retain
screws with grate. See Figure 2.
10. Grasp log ember bed and lift up and out of opening.
11. Fold sheet metal tabs on each side of opening on
front edge of refractory panels. See Figure 10.
12. Use hand to carefully pry along front edge of
refractory panel to disengage it from the appliance.
Pull both refractory panels. See Figure 10.
13. Remove the one screw that retains the brick panel
in the rear appliance cavity. Remove the brick panel
from the cavity. See Figure 12.
14. Remove the flame screen panel by removing six
screws that attach it to the appliance chassis.
See Figure 13.
15. Disengage faux flame rod from motor located in right
rear of cavity. Use hand shift the reflector rod to the
left until the rubber coupler on the right end
disengages from the motor shaft. See Figure 14.
16. Remove metal bracket in right side of cavity to allow
access to the faux flame motor and wiring
connections. Remove two screws to remove panel.
See Figure 15.
17. Remove three screws that attach motor mount
bracket to the appliance chassis. See Figure 16.
18. Remove the motor and bracket from the chassis until
the electrical connector is visible. See Figure 17.
19. Disconnect the electrical connector to the motor. See
Figure 17.
20. Install the replacement motor on the bracket.
21. Reconnect the electrical connector between the
motor and the appliance. See Figure 17.
22. Install the motor mount bracket to the chassis with
three screws. See Figure 16.
23. Install the replacement reflector rod. Install the left
end of the rod into the bushing in the left rear of the
cavity. Align the rubber coupler with the motor shaft.
Shift the rod to the right until the rubber coupler fully
engages the motor shift. See Figure 14.
24. Reinstall metal bracket in front of faux motor. Install
two screws to fasten the panel. See Figure 15.
25. Install the flame screen panel and attach with six
screws. See Figure 13.
26. Install the brick panel into the rear of the cavity by
attaching with one screw. See Figure 12.
27. Install refractory panels. Align tabs on back edge
of the panel with the slots in the rear appliance
cavity. Once the tabs are engaged, carefully
install the front edge of the appliance cavity. Take
care to apply even pressure to prevent damage to
the replacement panels. Fold sheet metal tabs on
each side of front edge of opening to secure front
edge of refractory. See Figure 10 & 11.
28. Reconnect the five connectors from the Blower/
Heater module to the appliance. See Figure 9.
29. Carefully align the Blower/Heater module horizontally
with the opening of the appliance. Install it straight
into the opening so that the back edge interlocks
with the back wall of the appliance.
30. While supporting the Blower/Heater Module, install
the four screws across the upper face of the
appliance. See Figure 8.
31. Install the four thumb screws and metal angle
bracket in the upper rear of the appliance cavity.
See Figure 7.
32. Rotate log ember bed and align with floor of opening.
Engage back side of ember bed into the opening.
Pivot the front of the ember bed into potion flat on
the floor of the opening. Take care not to pinch
wiring under log ember bed.
33. Align the grate, with the retained screws, with the
steel brackets under the ember bed. Ensure that
wiring is not pinched between log ember bed and
steel bracket.
7
SimpliFire • SF-BI30-E, SF-BI36-E Service Manual • 2040-910 • 8/13
Faux Flame Motor/Rod Kit (continued)
34. Install and tighten the screw in each end of the grate.
See Figure 2.
35. Install rubber plugs into holes in each end of grate.
See Figure 2.
36. Install glass into bottom retainer channel.
37. Install C-channel on top edge of glass panel.
38. Align C-channel with screw holes in appliance.
See Figure 1.
39. While supporting glass, install both screws through
top C-channel retainer into appliance.
40. Install front by aligning the tabs on its back side with
the spring clips on the face of the appliance. Press
evenly with two hands to fully engage the front to the
appliance.
Figure 1 Top Glass Retainer Screw Location
Figure 2 Grate and Log Screw Location
Figure 4 Removal and installation of LED access panel
Figure 3 Light LED Connection on Bottom of Log Ember Bed
Figure 5 Barbed Clip Access during LED Circuit Board
Replacement
Mounting Bracket Replacement
1. Install the mountng brackets (4) by aligning them
with the pre-drilled holes located on the side of the
appliance. Use two screws (ST4 x 8) per bracket to
secure to the appliance. See Figure 18 and 19.
SimpliFire • SF-BI30-E, SF-BI36-E Service Manual • 2040-910 • 8/138
Figure 6 Light LED Circuit Power Source Connectors
Figure 7 Four Thumb Screws located in Upper Rear of
Appliance Cavity
Figure 8 Four Screws that attach Blower/Heater Module to
Upper Face of Appliance
Figure 9 Five Electrical Connections required for Heater/
Blower Module Removal and Installation
Figure 10 Removal of Front Edge of Refractory from
Appliance Cavity
1
1
3
3
4
4
Front Edge
Retainer Tabs
5
5
2
2
Figure 11 Alignment of Tabs in Rear Edge of Refractory with
Slots in Appliance
9
SimpliFire • SF-BI30-E, SF-BI36-E Service Manual • 2040-910 • 8/13
Figure 12 Location of one screw that retain Brick Panel to
Rear Wall of Appliance
Figure 13 Location of six Screw Fasteners that attach
Flame Screen to Chassis
Note: Orientate so notch
is isolated on lower right
corner.
Figure 14 Removal and Installation of Reflector Rod Coupler
to Motor Shaft
Figure 15 Removal and installation of faux flame access
panel.
Figure 16 Location of three Screws that attach Motor Mount
Bracket to Appliance
Figure 17 Electrical Connection required for replacement for
the Faux Flame Motor.
SimpliFire • SF-BI30-E, SF-BI36-E Service Manual • 2040-910 • 8/1310
Figure 18 Bracket Locations
BRACKET LOCATION BRACKET LOCATION
Figure 19 Pre-Drilled Bracket Holes
PRE-DRILLED HOLES
SimpliFire, a brand of Hearth & Home Technologies
7571 215th Street West, Lakeville, MN 55044
www.hearthnhome.com
Please contact your SimpliFire dealer or customer/technical support
(877-320-0730) with any questions or concerns.
For the location of your nearest SimpliFire dealer,
please visit www.hearthnhome.com.

Other manuals for SF-BI30-E

3

This manual suits for next models

1

Other SimpliFire Indoor Fireplace manuals

SimpliFire SF-SCT43-BK User manual

SimpliFire

SimpliFire SF-SCT43-BK User manual

SimpliFire SF-WM58-BK User manual

SimpliFire

SimpliFire SF-WM58-BK User manual

SimpliFire SF-WM58-WH User manual

SimpliFire

SimpliFire SF-WM58-WH User manual

SimpliFire SF-ALL60-BK User manual

SimpliFire

SimpliFire SF-ALL60-BK User manual

SimpliFire SF-WM36-WH User manual

SimpliFire

SimpliFire SF-WM36-WH User manual

SimpliFire ASHLEYC23-ESP User manual

SimpliFire

SimpliFire ASHLEYC23-ESP User manual

SimpliFire SF-INS25 User manual

SimpliFire

SimpliFire SF-INS25 User manual

SimpliFire SF-ALL48-BK User manual

SimpliFire

SimpliFire SF-ALL48-BK User manual

SimpliFire SF-BI30-EB User manual

SimpliFire

SimpliFire SF-BI30-EB User manual

SimpliFire SF-BI30-EB User manual

SimpliFire

SimpliFire SF-BI30-EB User manual

SimpliFire SF-INS25 User manual

SimpliFire

SimpliFire SF-INS25 User manual

SimpliFire SF-WM38-BK User manual

SimpliFire

SimpliFire SF-WM38-BK User manual

SimpliFire MONARCH26-WA User manual

SimpliFire

SimpliFire MONARCH26-WA User manual

SimpliFire SF-WM58-WH User manual

SimpliFire

SimpliFire SF-WM58-WH User manual

SimpliFire SF-SCT43-BK User manual

SimpliFire

SimpliFire SF-SCT43-BK User manual

SimpliFire SF-WM36-WH User manual

SimpliFire

SimpliFire SF-WM36-WH User manual

SimpliFire SF-BI30-E User manual

SimpliFire

SimpliFire SF-BI30-E User manual

SimpliFire SF-PP23 User manual

SimpliFire

SimpliFire SF-PP23 User manual

SimpliFire SF-SC43-BK User manual

SimpliFire

SimpliFire SF-SC43-BK User manual

SimpliFire Inception SF-INC36 User manual

SimpliFire

SimpliFire Inception SF-INC36 User manual

SimpliFire SF-ALLP50-BK User manual

SimpliFire

SimpliFire SF-ALLP50-BK User manual

SimpliFire Allusion Series User manual

SimpliFire

SimpliFire Allusion Series User manual

SimpliFire Inception SF-INC36 Safety guide

SimpliFire

SimpliFire Inception SF-INC36 Safety guide

SimpliFire SF-INS30-BK User manual

SimpliFire

SimpliFire SF-INS30-BK User manual

Popular Indoor Fireplace manuals by other brands

Barton 95029 Owner's manual and safety instructions

Barton

Barton 95029 Owner's manual and safety instructions

Superior UVFCE Series installation instructions

Superior

Superior UVFCE Series installation instructions

SINED CAMINETTO-STROMBOLI-190 user manual

SINED

SINED CAMINETTO-STROMBOLI-190 user manual

Bellfires Smart Bell 75/55 MF Installation and maintenance manual

Bellfires

Bellfires Smart Bell 75/55 MF Installation and maintenance manual

Bellfires ROOM DIVIDER MEDIUM 3 CF user manual

Bellfires

Bellfires ROOM DIVIDER MEDIUM 3 CF user manual

Rofer & Rodi Hogar FOGOMAR Assembly and use manual

Rofer & Rodi

Rofer & Rodi Hogar FOGOMAR Assembly and use manual

Heatilator Wood Burning Fireplace EL42 Series owner's manual

Heatilator

Heatilator Wood Burning Fireplace EL42 Series owner's manual

Empire Comfort Systems LSU24RR-2 Installation instructions and owner's manual

Empire Comfort Systems

Empire Comfort Systems LSU24RR-2 Installation instructions and owner's manual

Vermont Castings Winter Warm Small Insert Homeowner's installation and operating manual

Vermont Castings

Vermont Castings Winter Warm Small Insert Homeowner's installation and operating manual

FUTURE FIRES PanoramicFX1 operating instructions

FUTURE FIRES

FUTURE FIRES PanoramicFX1 operating instructions

Quadra-Fire Edge60 owner's manual

Quadra-Fire

Quadra-Fire Edge60 owner's manual

Chesney's Alchemy GFL850URN User and installation instructions

Chesney's

Chesney's Alchemy GFL850URN User and installation instructions

Outland Technology FMPPC2-2 owner's manual

Outland Technology

Outland Technology FMPPC2-2 owner's manual

Napoleon GD15-N instructions

Napoleon

Napoleon GD15-N instructions

ambiance Illusion 47 Installation and operation manual

ambiance

ambiance Illusion 47 Installation and operation manual

Flamerite Fires Essence Corello Instructions for use

Flamerite Fires

Flamerite Fires Essence Corello Instructions for use

Superior Fireplaces VCM3026ZTP Assembly, installation and operation instructions

Superior Fireplaces

Superior Fireplaces VCM3026ZTP Assembly, installation and operation instructions

SEI FA1137759 Assembly

SEI

SEI FA1137759 Assembly

manuals.online logo
manuals.online logoBrands
  • About & Mission
  • Contact us
  • Privacy Policy
  • Terms and Conditions

Copyright 2025 Manuals.Online. All Rights Reserved.