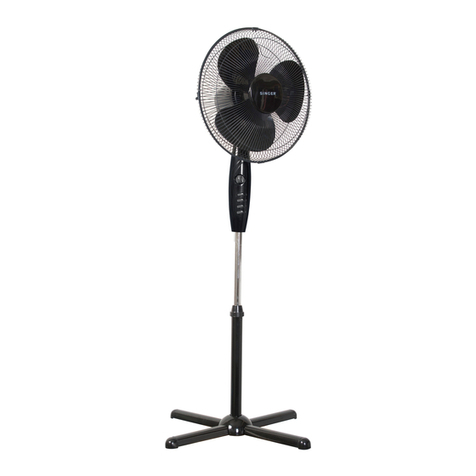
Singer PF 250R 3 IN 1 User manual

PF 250R 3 IN 1
Portable Rechargeable Fan
Φορητός Επαναφορτιζόμενος Ανεμιστήρας
Преносим акумулаторен вентилатор
GB
INSTRUCTION MANUAL
GR
ΒΙΒΛΙΟ ΟΔΗΓΙΩΝ
BG
ИНСТРУКЦИИ ЗА ЕКСПЛОАТАЦИЯ

2
ENGLISH
PLEASE READ THESE INSTRUCTIONS CAREFULLY
BEFORE USE AND KEEP THEM FOR FUTURE
REFERENCE.
Thank you for purchasing the stand fan of Singer. Each unit has
been manufactured to ensure safety and reliability. Before first
use, please read these instructions carefully and retain them for
future reference.
IMPORTANT SAFETY INSTRUCTIONS
1. Use the appliance only for its designated purpose.
2. Do not immerse the appliance or the base in water or any
other liquid.
3. Always disconnect the fan from the main supply when not
in use and before cleaning.
4. Never pull off the cable to disconnect it from the socket.
Instead, unplug by pulling the plug from the socket.
5. Turn off the power and pull out the plug when you go out
for long time.
6. Never attempt to put your finger and other objects into the
louver or the rear grill when the fan works.
7. Keep the cord, the base and the appliance away from hot
surfaces.
8. Check if the voltage indicated on the base of the appliance
corresponds to the local mains voltage before you connect
the appliance.
9. Keep the appliance and packaging materials away from
persons (including children) with reduced physical or
sensory capabilities, or lack of experience and knowledge.
10. Close supervision is necessary when the appliance is
used by or near children.
11. Do not attempt to dismantle any part of the desk fan. This
should only be done at a SINGER Service Center.

3
ENGLISH
12. Do not use the appliance if the cord, the plug, the base or
the appliance itself is damaged.
13. If the cord or any other part is damaged, you must contact
any SINGER Service Center or SINGER Client Service.
14. The appliance is intended for household use only.
15. This appliance is not intended for use by persons
(including children) with reduced physical, sensory or
mental capabilities, or lack of experience and knowledge,
unless they have been given supervision or instruction
concerning use of the appliance by a person responsible
for their safety.
16. Children should be supervised to ensure that they do not
play with the appliance.
17. Never put any object to block the air inlet/outlet.
18. Please use this product at 0~40℃, do not put the fan in
the bathroom, wet and very hot place to avoid damage to
the product.
19. Please keep the fan away from soft objects such as
curtains and door curtains, so as not to get involved in
the fan.
20. When the fan is not used for a long time, please remove the
power plug, so as not to shorten the product life and cause
accidents or dangers in the standby state for a long time.
21. The product should be kept clean and maintained
regularly.
22. Do not put the fingers and other body parts into the fan to
avoid injury and damage the product.
23. Do not put wet towels on the product casually to avoid
leakage and electric shock.
24. Do not touch the operation button when remove the
protective cover, to avoid accidents in product operation.

4
ENGLISH
SERVICE & REPAIR
1. For service or repair under warranty, please contact the authorized service
company that is mentioned on the guarantee card and accompanies the
product.
2. Do not operate any product with a damaged cord or plug. If the supply
cord is damaged, return the appliance to a SINGER service center for
examination, repair or adjustment. Do not attempt to dismantle any part of
the appliance. This should only be done at an authorized SINGER service
center.
3. The partial or total non-respect of the safety instructions in the present
instruction manual will automatically release Singer of any type of
responsibility in case of malfunction of the machine or injuries to persons
or animals.
4. In case of manipulation, repairing or any modification of the machine
made by unqualified persons or in case of improper use, the guarantee
will be automatically cancelled.
Note: Above specifications are subject to change without notice.
ADVANTAGES OF THE APPLIANCE
• This Rechargeable air circulating fan is designed for office and home
use.
• Adjustable wind speed from 1 to 8 gear. (Natural wind at 9 gear).
• The height of the fan can be adjusted by telescopic rod.
• It can be used as desktop fan and floor fan.
• It can be folded and stored.

5
ENGLISH
BASIC INTRODUCTION
Fixed back net
Adjustable
telescopic rod
Locking device
Rotating base
Portable
Handle
Remote
controler
Display screen
Switch
Speed
Rotating
Timer
Roatating Speed
Remote controler
(For first use, pull out the battery insulation)
Nature Wind
Adapter
Timer
Detachable front net

6
ENGLISH
PRODUCT SIZE(MM)
1. While it is folded,
pull up the fan.
2. Open the fan following
the arrow direction.
3. Open the fan, adjust
the angle to vertical,
then lock the handle in
clockwise.
Do not inclined.

7
ENGLISH
4. 180° up and down
adjustable angle.
7. Pull down the tube
to original positon
and fold the fan.
5. Height adjustable.Pay
attention to pull the rod
up or down gently.
8. Remove the screw
above the fan net with
a screwdriver.
Hold the fan net with
both hands and anti-
clockwise rotating to
open.
6. Please rotate the
handle device anti-
clockwise to unlock.
9. Take out the detachable
net to clean the dust.
Use wet cloth to wipe
the machine body
slightly.
Forbidden wash by
water.
Storage step 1
Storage
step 2

8
ENGLISH
10. Aim at “ ” position
to assemble the
fan net.
11.Hold the fan net and
clockwise rotating to
“ ” tighten. Install the
screw with screwdriver.
12.The arrow indicates
where is the DC
charging connector.
Aim at Aim at
INSTRUCTION FOR USE
1. Connect the fan to the adaptor (12.6V/1A) to charging connector (at the
bottom of the base).
2. When the indicator light flashes, that means remind of power shortage,
please charge it on time. (Please turn off the fan when charging or cannot
charge in.) The indicator light will stop flashes after fulling charging.
3. Keep the fan upright. Adjust the telescopic rod to the appropriate height or
angle, controlled the fan by the button of the base or remote control.
FUNCTION INTRODUCTION
1. Switch
Press the switch button. The fan run in first speed, press again, the fan
turns off.
(Note: the remote control cannot control the fan on/off. )
h
Charging Natural Wind
Rotating Timer
Speed/Timer

9
ENGLISH
2. Speed adjustment
After the fan is turned on, press the wind speed button or remote control.
Speed from 1-8 gear. Maximum speed is 8 gear.
3. Natural wind
a. Fan base operation: When the fan is running at 8 gear, press the wind
speed again, the fan enters 9 gear natural wind mode, the indicator
will light up. When press the wind speed button again, the fan will return
to 1 gear, the indicator light will turn off.
b. Remote control operation: When the fan is in any gear, press the natural
wind button , the fan enters 9 gear natural wind mode, the indicator
will light up. Press the natural wind button again, the fan returns to the
original gear, the indicator light turn off.
4. Rotating
When the fan is running, press the rotation button or remote control ,
the fan rotation indicator will turn on, the rotation function open, rotation
angle about 90°. Press the rotation button again, this function and indicator
will turn off.
5. Timer
When the fan is running, press the timer button or remote control , the
fan can shut down automatically according to the set time within 1~8 hours.
When the shut down time is set, the timing shutdown indicator hwill on,
the fan enters the timed shut down state. Each press adds an hour, when it
is adjusted to 8h, then press again, the timing function will be turn off. The
indicator will turn off.

10
ENGLISH
CLEANING AND MAINTENANCE
1. Before cleaning, maintaining or moving the product, must be turn off the
product and remove the power plug.
2. The fan must be completely stopped before it can be cleaned to avoid
injury.
3. Do not immerse the power cord or main engine in water to clean or rinse
under the tap. The internal parts of the fan should not touch water.
4. Do not use detergents, wire brushes, gasoline, alcohol, vinegar or other
corrosive liquid cleaning products to avoid damage to the product.
5. Clean the fan surface with a slightly wet cloth.
6. After cleaning, the product must be completely dried before it can be
connected to the power supply.
7. If you do not use it for a long time, please store the product back in the
packing box and place it in a dry, cool and safe place.
SPECIFICATIONS
* Power Input: DC12.6V, 1A
* Rated Power: 15W
* Adapter data: Input: AC100-240V, 50/60Hz; Output: DC12.6V, 1A
* Product size (mm):
• 280x280x137 (folded)
• 280x280x535 (desktop fan)
• 280x280x940 (floor fan)
* Product weight: 2,2kgs (fan + adapter + remote control)
* Battery Capacity: Lithium-Ion battery 18650: 2600mAh/each battery X 3
* Charging Time: ≈4 hours
* Working Time: 3-10 hours
* Timer: 1-8 hours
DANGER! Caution, risk of injury! Always pull the mains
plug out before commencing any work on the product.

11
ENGLISH
TECHNICAL FEATURES
Maximum fan flow rate (F): 17.60m3/min
Fan power input (P): 11,90W
Service value (SV): 1.48 (m3/min)/W
Standby power consumption (PSB): 0.19W
Fan sound power level (LWA): 51.57dB(A)
Maximum air velocity (c) : 3.73 meters/sec
Seasonal electricity consumption (Q): 4,02 kWh/a
Disposal of old Electrical & Electronic Equipment (Applicable in
the European Union and other European countries with separate
collection systems).
This symbol on the product or on its packaging indicates that this
product shall not be treated as household waste. Instead it shall
be handed over to the applicable collection point for the recycling
of electrical and electronic equipment. By ensuring this product is disposed
of correctly, you will help prevent potential negative consequences for
the environment and human health, which could otherwise be caused by
inappropriate waste handling of this product. The recycling of materials will
help to conserve natural resources. For more detailed information about
recycling of this product, please contact your local city office, your household
waste disposal service or the shop where you purchased the product.
DECLARATION OF CONFORMITY
Herewith, G. E. DIMITRIOU S.A. states that this product, complies with the
requirements of below European directives:
EMC Directive: 2014 / 30 / EU
LVD - Low Voltage Directive: 2014/ 35 / EU
ROHS Directive: 2011 / 65 / EU

12
ΕΛΛΗΝΙΚΑ
ΠΑΡΑΚΑΛΟΥΜΕ ΔΙΑΒΑΣΤΕ ΤΙΣ ΟΔΗΓΙΕΣ ΧΡΗΣΕΩΣ
ΠΡΟΣΕΚΤΙΚΑ ΠΡΙΝ ΤΗΝ ΧΡΗΣΗ ΚΑΙ ΚΡΑΤΗΣΤΕ ΤΕΣ
ΓΙΑ ΜΕΛΛΟΝΤΙΚΗ ΑΝΑΦΟΡΑ
Ευχαριστούμε για την αγορά του ανεμιστήρα της Singer. Κάθε
προϊόν έχει κατασκευαστεί για να διασφαλίσει την ασφάλεια
και αξιοπιστία. Πριν την πρώτη χρήση, παρακαλούμε να δια-
βάσετε αυτές τις οδηγίες προσεκτικά και να τις κρατήσετε
για μελλοντική χρήση.
ΣΗΜΑΝΤΙΚΕΣ ΟΔΗΓΙΕΣ ΑΣΦΑΛΕΙΑΣ
1. Χρησιμοποιήστε τη συσκευή μόνο για τη χρήση που προο-
ρίζεται.
2. Μη βυθίζετε τη συσκευή ήτη βάση της σε νερό ήοποιοδή-
ποτε άλλο υγρό.
3. Πάντοτε να αποσυνδέετε τον ανεμιστήρα από το ρεύμα
όταν δεν είναι σε λειτουργία ήπριν τον καθαρισμό.
4. Ποτέ μην τραβάτε το καλώδιο για να αποσυνδέσετε από
την πρίζα. Αντίθετα, πιάστε το φις και τραβήξτε το για να
αποσυνδέσετε.
5. Κλείστε τη συσκευή και βγάλτε την από την πρίζα εάν πρό-
κειται να λείψετε για μεγάλο χρονικό διάστημα.
6. Ποτέ μην επιχειρήσετε να βάλετε το δάχτυλό σας ήκά-
ποιο άλλο αντικείμενο μέσα στο κάλυμμα της φτερωτής ή
να ακουμπήσετε τη φτερωτή όταν οανεμιστήρας είναι σε
λειτουργία.
7. Κρατήστε το καλώδιο, τη βάση και τη συσκευή μακριά από
ζεστές επιφάνειες.
8. Ελέγξτε αν ητάση που αναφέρεται στη βάση της συσκευ-
ής ανταποκρίνεται στην τοπική τάση πριν τη συνδέσετε.
9. Κρατήστε τη συσκευή και μέρη της συσκευασίας μακριά
από παιδιά, ηλικιωμένους ήάτομα μειωμένης νοημοσύνης.
10. Χρειάζεται στενή παρακολούθηση όταν ησυσκευή χρησι-

13
ΕΛΛΗΝΙΚΑ
μοποιείται από ήκοντά σε παιδιά.
11. Μην επιχειρήσετε να αποσυναρμολογήσετε οποιοδήποτε
εξάρτημα του ανεμιστήρα. Αυτό μπορεί να γίνει μόνο από
ένα Εξουσιοδοτημένο Κατάστημα Σέρβις της SINGER.
12. Μη χρησιμοποιείτε τη συσκευή αν το καλώδιο, το φις, η
βάση ήηίδια ησυσκευή έχουν υποστεί βλάβη.
13. Αν το καλώδιο ήκάποιο άλλο μέρος της συσκευής έχει
υποστεί βλάβη, θα πρέπει να απευθυνθείτε σε ένα Εξου-
σιοδοτημένο Κατάστημα Σέρβις της SINGER ήνα επι-
κοινωνήσετε με το Κέντρο Εξυπηρέτησης Πελατών της
SINGER.
14. Ησυσκευή προορίζεται μόνο για οικιακή χρήση.
15. Αυτή ησυσκευή δεν προορίζεται για χρήση από παιδιά
και άτομα με μειωμένες σωματικές, αισθητηριακές ή/και
πνευματικές δυνατότητες ήέλλειψη εμπειρίας και γνώ-
σεων, εφόσον δεν υπάρχει εποπτεία ήδεν έχουν δοθεί
οδηγίες σχετικά με την χρήση της συσκευής με ασφαλή
τρόπο και κατανοούν τους κινδύνους που ενέχονται.
16. Τα παιδιά θα πρέπει να επιβλέπονται προκειμένου να δια-
σφαλιστεί ότι δεν παίζουν με τη συσκευή.
17. Ποτέ μην τοποθετείτε κανένα αντικείμενο για να μπλοκά-
ρετε την είσοδο/έξοδο αέρα.
18. Παρακαλώ χρησιμοποιήστε αυτό το προϊόν σε 0 ~ 40 ℃,
μην τοποθετείτε τον ανεμιστήρα στο μπάνιο, σε υγρό και
πολύ ζεστό μέρος για να αποφύγετε ζημιές στο προϊόν.
19. Φυλάξτε τον ανεμιστήρα μακριά από μαλακά αντικείμε-
να, όπως κουρτίνες και κουρτίνες πόρτας, ώστε να μην
εμπλακoύν στον ανεμιστήρα.
20. Όταν οανεμιστήρας δεν χρησιμοποιείται για μεγάλο χρο-
νικό διάστημα, αφαιρέστε το φις τροφοδοσίας, ώστε να
μην μειωθεί ηδιάρκεια ζωής του προϊόντος και να προ-

14
ΕΛΛΗΝΙΚΑ
κληθούν ατυχήματα ήκίνδυνοι στην κατάσταση αναμο-
νής για μεγάλο χρονικό διάστημα.
21. Το προϊόν πρέπει να διατηρείται καθαρό και να συντηρεί-
ται τακτικά.
22. Μην βάζετε τα δάχτυλα και άλλα μέρη του σώματος στον
ανεμιστήρα για να αποφύγετε τραυματισμό και ζημιά στο
προϊόν.
23. Μην τοποθετείτε βρεγμένες πετσέτες στο προϊόν για την
αποφυγή διαρροών και ηλεκτροπληξίας.
24. Μην αγγίζετε το κουμπί λειτουργίας όταν αφαιρείτε το
προστατευτικό κάλυμμα, για να αποφύγετε ατυχήματα
κατά τη λειτουργία του προϊόντος.
ΣΥΝΤΗΡΗΣΗ & ΕΠΙΣΚΕΥΗ
1. Για συντήρηση ήεπισκευή εντός εγγύησης, παρακαλούμε επικοι-
νωνήστε με τα στοιχεία της εταιρίας service που αναφέρονται στο
φύλλο εγγύησης που συνοδεύει το προϊόν.
2. Μην λειτουργείτε τη συσκευή με φθαρμένο καλώδιο ήπρίζα, εάν το
προϊόν δυσλειτουργεί ήέχει πέσει ήέχει υποστεί βλάβη με οποιον-
δήποτε τρόπο. Θα πρέπει να απευθυνθείτε σε ένα Εξουσιοδοτημένο
Κατάστημα Σέρβις της SINGER ήνα επικοινωνήσετε με το Κέντρο
Εξυπηρέτησης Πελατών της SINGER. Μην επιχειρήσετε να αποσυ-
ναρμολογήσετε οποιοδήποτε εξάρτημα του ανεμιστήρα. Αυτό μπο-
ρεί να γίνει μόνο από ένα Εξουσιοδοτημένο Κατάστημα Σέρβις της
SINGER.
3. Ημη τήρηση αυτών των κανονισμών και υποδείξεων που περιγρά-
φονται στο παρόν εγχειρίδιο απαλλάσσει τη Singer από κάθε ευθύνη
σε περίπτωση κακής λειτουργίας ήπρόκλησης βλάβης σε άτομα,
ζώα, κλπ.
4. Ηκακή χρήση ήπαρέμβαση από το χρήστη που δεν επιτρέπονται,
ακυρώνουν αυτομάτως την εγγύηση του προϊόντος.
Σημείωση: Οι παραπάνω προδιαγραφές ενδέχεται να αλλάξουν χωρίς
κάποια προηγούμενη ειδοποίηση.

15
ΕΛΛΗΝΙΚΑ
ΠΛΕΟΝΕΚΤΗΜΑΤΑ ΤΗΣ ΣΥΣΚΕΥΗΣ
• Οεπαναφορτιζόμενος ανεμιστήρας αέρα έχει σχεδιαστεί για χρήση
στο γραφείο και στο σπίτι.
• Ρυθμιζόμενη ταχύτητα αέρα από 1 έως 8. (Φυσική ταχύτητα ροής
αέρα στην 9 ταχύτητα).
• Το ύψος του ανεμιστήρα μπορεί να ρυθμιστεί με τηλεσκοπική ράβδο.
• Μπορεί να χρησιμοποιηθεί ως ανεμιστήρας επιτραπέζιος και ανεμι-
στήρας δαπέδου.
• Μπορεί να διπλωθεί και να αποθηκευτεί.
ΒΑΣΙΚΗ ΕΙΣΑΓΩΓΗ
Σταθερό πίσω
πλέγμα
Ρυθμιζόμενη
τηλεσκοπική
ράβδος
Κλείδωμα
συσκευής
Περιστρεφόμενη
βάση
Οθόνη
Διακόπτης
λειτουργίας
Ταχύτητα
Περιστροφή
Χρονο-
διακόπτης
Αποσπώμενο
μπροστινό πλέγμα

16
ΕΛΛΗΝΙΚΑ
Φορητή
λαβή
Τηλεχειριστήριο
Περιστροφή Ταχύτητα
Τηλεχειριστήριο
Στην πρώτη χρήση, τραβήξτε την μόνωση της
μπαταρίας
Φυσική ροή
αέρα
Φορτιστής
Χρονοδιακόπτης
ΔΙΑΣΤΑΣΗ ΠΡΟΙΟΝΤΟΣ (ΜΜ)

17
ΕΛΛΗΝΙΚΑ
ΛΕΙΤΟΥΡΓΙΕΣ
1.Ενώ είναι διπλωμέ-
νο, τραβήξτε τον
ανεμιστήρα.
4. 180 ° πάνω και
κάτω ρυθμιζόμενη
γωνία.
2. Ανοίξτε τον ανεμι-
στήρα ακολουθώντας
την κατεύθυνση του
βέλους.
5. Ύψος ρυθμιζόμε-
νο. Με προσοχή να
τραβήξετε τη ράβδο
πάνω ήκάτω απαλά.
3. Ανοίξτε τον ανεμι-
στήρα, ρυθμίστε την
γωνία κατακόρυφα
και μετά κλειδώστε τη
λαβή δεξιόστροφα.
6. Περιστρέψτε τη λαβή
αριστερόστροφα για
να ξεκλειδώσετε.
Μην τον γέρνετε
Βήμα αποθήκευσης Ι

18
ΕΛΛΗΝΙΚΑ
Βήμα
αποθή-
κευσης
2
10. Στοχεύστε στη
“ ” θέση για να
συναρμολογήσε-
τε το πλέγμα του
ανεμιστήρα.
11. Κρατήστε το πλέγμα
του ανεμιστήρα
και δεξιόστροφα
περιστρέφεται προς
“ ” για να σφίξτε.
Εγκαταστήστε την
βίδα με κατσαβίδι.
12. Το βέλος δείχνει τον
σύνδεσμο φόρτισης
DC.
Στοχεύστε Στοχεύστε
7. Τραβήξτε προς τα
κάτω το σωλήνα
στην αρχική του
θέση και διπλώστε
τον ανεμιστήρα.
8. Αφαιρέστε τη βίδα
πάνω από το πλέγμα
του ανεμιστήρα με
ένα κατσαβίδι.
Κρατήστε το πλέγμα
του ανεμιστήρα και με
τα δύο χέρια και με
αριστερόστροφη περι-
στροφή για άνοιγμα.
9. Βγάλτε το αποσπώ-
μενο πλέγμα για να
καθαρίσετε τη σκόνη.
Χρησιμοποιείστε υγρό
πανί για να σκουπίσετε
ελαφρώς το σώμα του
μηχανήματος.
Απαγορεύεται το πλύ-
σιμο με νερό.

19
ΕΛΛΗΝΙΚΑ
ΟΔΗΓΙΕΣ ΧΡΗΣΗΣ
1. Συνδέστε τον ανεμιστήρα στον φορτιστή (12.6V / 1A) στην υποδοχή
φόρτισης (στο κάτω μέρος της βάσης).
2. Όταν ηενδεικτική λυχνία αναβοσβήνει, αυτό σημαίνει υπενθύ-
μιση έλλειψης ισχύος, παρακαλώ φορτίστε εγκαίρως. Απενεργοποι-
ήστε τον ανεμιστήρα κατά τη φόρτιση καθώς δεν μπορεί να φορτι-
στεί. Ηενδεικτική λυχνία θα σταματήσει να αναβοσβήνει μετά
την ολοκλήρωση της φόρτισης.
3. Κρατήστε τον ανεμιστήρα σε όρθια θέση. Ρυθμίστε τη τηλεσκοπική
ράβδο στο κατάλληλο ύψος ήγωνία, ελέγξτε τον ανεμιστήρα με το
κουμπί της βάσης ήτου τηλεχειριστηρίου.
ΕΙΣΑΓΩΓΗ ΛΕΙΤΟΥΡΓΙΑΣ
1.Διακόπτης λειτουργίας
Πατήστε το κουμπί διακόπτη. Οανεμιστήρας λειτουργεί με την πρώ-
τη ταχύτητα, πατήστε ξανά, οανεμιστήρας σβήνει.
Σημείωση: το τηλεχειριστήριο δεν μπορεί να ελέγξει την ενεργοποίηση
/ απενεργοποίηση του ανεμιστήρα.
2.Ρύθμιση ταχύτητας
Αφού οανεμιστήρας είναι ενεργοποιημένος, πατήστε το κουμπί ταχύ-
τητας αέρα ήτο τηλεχειριστήριο.
Ηταχύτητα ορίζεται από το 1-8. Ημέγιστη ταχύτητα είναι 8.
3. Φυσική ροή αέρα
α. Λειτουργία βάσης ανεμιστήρα: Όταν οανεμιστήρας λειτουργεί
στην ταχύτητα 8, πατήστε την ταχύτητα ροής αέρα και πάλι, ο
h
Φόρτιση Φυσική ροή
αέρα
Περιστροφή Χρονοδιακόπτης
Ταχύτητα/Χρονοδιακόπτης

20
ΕΛΛΗΝΙΚΑ
ανεμιστήρας μπαίνει στην ταχύτητα 9 φυσικής ροής αέρα, ηένδειξη
θα ανάψει. Όταν πατήσετε ξανά το κουμπί ταχύτητας αέρα, ο
ανεμιστήρας θα επιστρέψει σε 1 ταχύτητα, ηενδεικτική λυχνία
θα σβήσει.
β. Λειτουργία τηλεχειριστηρίου: Όταν οανεμιστήρας βρίσκεται σε
οποιαδήποτε ταχύτητα, πατήστε το κουμπί φυσικής ροής του αέρα ,
οανεμιστήρας μπαίνει στην λειτουργία 9 φυσικής ροής αέρα, ηένδειξη
θα ανάψει. Πατήστε ξανά το κουμπί φυσικής ροής αέρα, οανεμι-
στήρας επιστρέφει στην αρχική ταχύτητα, ηενδεικτική λυχνία σβήνει.
4. Περιστροφή
Όταν οανεμιστήρας λειτουργεί, πατήστε το κουμπί περιστροφής ήτο
τηλεχειριστήριο , ηένδειξη περιστροφής του ανεμιστήρα θα
ανάψει, ηλειτουργία περιστροφής ξεκινά, ηγωνία περιστροφής είναι
περίπου 90 °. Πατήστε ξανά το κουμπί περιστροφής, ηλειτουργία και η
ένδειξη θα σβήσουν.
5. Χρονοδιακόπτης
Όταν οανεμιστήρας λειτουργεί, πατήστε το κουμπί χρονοδιακόπτη ή
το τηλεχειριστήριο , οανεμιστήρας μπορεί να απενεργοποιηθεί αυ-
τόματα σύμφωνα με τον καθορισμένο χρόνο εντός 1 ~ 8 ωρών. Όταν
οχρόνος απενεργοποίησης έχει ρυθμιστεί, ηένδειξη τερματισμού του
χρόνου hθα ανάψει, οανεμιστήρας μπαίνει στον τερματισμό της χρο-
νικής κατάστασης. Κάθε πάτημα προσθέτει μια ώρα, όταν ρυθμίζεται
στις 8 ώρες, τότε πατήστε ξανά, ηλειτουργία του χρόνου θα απενερ-
γοποιηθεί. Ηένδειξη θα σβήσει.
ΚΑΘΑΡΙΣΜΟΣ ΚΑΙ ΣΥΝΤΗΡΗΣΗ
1. Πριν από τον καθαρισμό, τη συντήρηση ήτη μετακίνηση του προϊ-
όντος, πρέπει να απενεργοποιήσετε το προϊόν και να αφαιρέστε το
ΚΙΝΔΥΝΟΣ! ΠΡΟΣΟΧΗ! Πάντα να αφαιρείτε το καλώδιο
τροφοδοσίας πριν ξεκινήσετε όποιαδήποτε εργασία στη
συσκευή.
Table of contents
Languages:
Other Singer Fan manuals