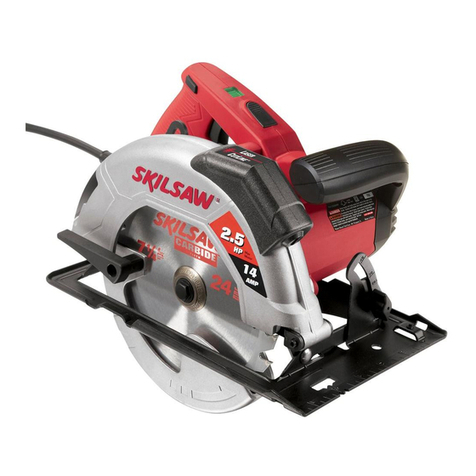
Skil 5385 User manual

iMPORTANT: iMPORTANT: IMPORTANTE:
Read BeforeUsing Lireavantusage Leer antes deusar
Operating/Safetyinstructions
Consignesdefonctionnernent/s6curit6
instruccionesdefuncionamientoy seguridad
5380
5385
5480
5485
®
Call ToJJFreefor
Consumerinformation
&Service Locations
Pourobtenirdesinformations
et lesadressesde noscentres
deserviceapr_s-vente,
appeiezce num_rogratuit
Liamegratispara
obtenerinformaci6n
parael consumidory
ubicaciones deservicio
i
ForEnglishVersion Version fran_aise Versi6n enespafiol
Seepage2 Voirpage15 Ver la p_gina28

General Power Tooi Safety Warnings
Read all safety warnings and instructions. Failure to follow the warnings
and instructions may result in electric shock, fire and/or serious injury.
SAVE ALL WARNINGS AND INSTRUCTIONS FOR FUTURE REFERENCE
The term "power tool" in the warnings refers to your mains-operated (corded) power tool or
battery-operated (cordless) power tool.
Work area safety
Keep work area clean and well lit. Cluttered
or dark areas invite accidents.
Do not operate power tools in explosive
atmospheres, such as in the presence of
flammable liquids, gases or dust. Power
tools create sparks which may ignite the dust
or fumes.
Keep children and bystanders away while
operating a power tool. Distractions can
cause you to lose control.
Electrical safety
Power tool plugs must match the outlet.
Never modify the plug in any way. Do not
use any adapter plugs with earthed
(grounded) power tools. Unmodified plugs
and matching outlets will reduce risk of electric
shock.
Avoid body contact with earthedor grounded
surfaces such as pipes, radiators, ranges
and refrigerators. There is an increased risk
of electric shock if your body is earthed or
grounded.
Do not expose power tools to rain or wet
conditions. Water entering a power tool will
increase the risk of electric shock.
Do not abuse the cord. Never use the cord
for carrying, pulling or unplugging the power
tool. Keep cord away from heat, oil, sharp
edges or moving parts. Damaged or entangled
cords increase the risk of electric shock.
When operating apower tool outdoors,
use an extension cord suitable for outdoor
use. Use of a cord suitable for outdoor use
reduces the risk of electric shock.
if operating the power tool in damp locations
is unavoidable, use a Ground Fault Circuit
interrupter (GFCl) protected supply. Use of
an GFCI reduce the risk of electric shock.
Personal safety
Stay alert, watch what you are doing and
use common sense when operating a
power tool. Do not use a power tool while
you are tired or under the influenceof drugs,
alcohol or medication. A moment of inattention
while operating power tools may result in
serious personal injury.
Use personal protective equipment. Always
wear eye protection. Protective equipment
such as dust mask, non-skid safetyshoes, hard
hat, or hearing protection used for appropriate
conditions will reduce personal injuries.
Prevent unintentional starting. Ensure the
switch is in the off-position before
connecting to power source and /or battery
pack, picking up or carrying the tool.
Carrying power tools with your finger on the
switch or energizing power tools that have the
switch on invites accidents.
Remove any adjusting key or wrench before
turning the power tool on. A wrench or a
key left attached to a rotating part of the
power tool may result in personal injury.
Do not overreach. Keep proper footing and
balance at all times. This enables better
control of the power tool in unexpected
situations.
Dress properly. Do not wear loose clothing
or jewelry. Keep your hair, clothing and
gloves away from moving parts. Loose
clothes, jewelry or long hair can be caught in
moving parts.
if devices are provided for the connection
of dust extraction and collection facilities,
ensure these are connected and properly
used. Use of dust collection can reduce dust-
related hazards.
Power tool use and care
Do not force the power tool. Use the
correct power tool for your application. The
correct power tool will do the job better and
safer atthe rate forwhich it was designed.
Do not use the power tool ifthe switch does
not turn it on and off. Any power tool that
cannot be controlled with the switch is
dangerous and must be repaired.
-2-


Disconnect the plug from the power source
and/or the battery pack from the power tool
before making any adjustments, changing
accessories, or storing power tools. Such
preventive safety measures reduce the risk of
starting the power tool accidentally.
Store idle power tools out of the reach of
children and do not allow persons
unfamiliar with the power tool or these
instructions to operate the power tool.
Power tools are dangerous in the hands of
untrained users.
Maintainpowertools. Check for misalignment
or binding of moving parts, breakage of
parts and any other condition that may
affect the powertool's operation. Ifdamaged,
have the power tool repaired before use.
Many accidents are caused by poorly
maintained power tools.
Keep cutting tools sharp and clean. Properly
maintained cutting tools with sharp cutting
edges are less likely to bind and are easier to
control.
Use the power tool, accessories and tool
bits etc. in accordance with these instructions,
taking into account the working conditions
and the work to be performed. Use of the
power tool for operations different from those
intended could result in a hazardous situation.
Service
Have your power tool serviced by a qualified
repair person using only identical
replacement parts. This will ensure that the
safety of the power tool is maintained.
Safety Rules for circular Saws
_Read all safety warnings and all instructions.
Cutting procedures
Keep hands and body away
__ from and to the side of the
blade. Contact with blade will result in
serious injury.
To reduce the risk of injury,
check guarding system, it
must cover the blade instantly! Hold saw
with both hands. Support and clamp work.
Wear eye protection,
Do not reach underneath the workpiece.
The guard cannot protect you from the blade
below the workpiece.
Adjust the cutting depth to the thickness of
the workpiece, Less than a full tooth of the
blade teeth should be visible below the
workpiece.
Never hold piece being cut in your hands
or across your leg. Secure the wotkpiece to
stable platform. It is important to support the
work properly to minimize body exposure,
blade binding, or loss of control.
Hold power tool by insulated gripping
surfaces when performing an operation
where the cutting tool may contact hidden
wiring or it own cord. Contact with a "live"wire
will also make exposed metal parts of the tool
"live" and shock the operator.
When ripping always use a rip fence or
straight edge guide. This improves the
accuracy of cut and reduces the chance for
blade binding.
Always use blades with correct size and
shape (diamond versus round) of arbor
holes. Bladesthat do not match the mounting
hardware of the saw will run eccentrically,
causing loss of control.
Never use damaged or incorrect blade
washers or bolt. The blade washers and bolt
were specially designed for your saw, for
optimum performance and safety of operation.
inspect the condition and quality of the
wood and remove all nails from lumber
before cutting. Wet lumber, green lumber or
pressure treated lumber require special
attention during cutting operation to prevent
kickback.
Hold the saw firmly to prevent loss of
control. Figures in this manual illustrate
typical hand support of the saw.
Depending upon use, the switch may not
last the life of the saw. if the switch should
fail in the "OFF" position, the saw may not
start, if it should fail while the saw is
running, the saw may not shut off. If either
occurs, unplug the saw immediately and do
not use until repaired.
-3-

This circular saw should not be mounted to
a table and converted to a table saw,
Circular saws are not designed or intended to
be used astable saws.
Kickback and related warnings
Causes and operator prevention of
kickback:
Kickback is a sudden reaction to a pinched,
bound or misaligned saw blade, causing an
uncontrolled saw to lift up and out of the
workpiece toward the operator.
When the blade is pinched or bound tightly by
the kerr closing down, the blade stalls and the
motor reaction drives the unit rapidly back
toward the operator•
If the blade becomes twisted or misaligned in
the cut, the teeth at the back edge of the blade
can dig into the top surface of the wood
causing the blade to climb out of the kerr and
jump back toward the operator•
Kickback is the result of tool misuse and/or
incorrect operating procedures or conditions
and can be avoided by taking proper
precautions as given below:
Maintain a firm grip with both hands on the
saw and position your arms to resist
kickback forces. Position your body to
either side of the blade, but not in line with
the blade. Kickback could cause the saw to
jump backwards, but kickback forces can be
controlled by the operator, if proper
precautions are taken.
When blade is binding, or when interrupting
a cut for any reason, release the trigger and
hold the saw motionless in the material
until the blade comes to a complete stop.
Never attempt to remove the saw from the
work or pull the saw backward while the
blade is in motion or kickback may occur.
Investigate and take corrective action to
eliminate the cause of blade binding.
When restarting a saw in a workpiece,
center the saw blade in the kerr and check
that saw teeth are not engaged into the
material. If saw blade is binding, it may walk
up or kickback from the workpiece as the saw
is restarted.
Support large panels to minimize the risk of
blade pinching and kickback. Large panels
tend to sag under their own weight• Supports
must be placed under the panel on both sides,
near the line of cut and near the edge of the
panel•
Do not use dull or damaged blades.
Unsharpened or improperly set blades
produce narrow kerfcausing excessive friction,
blade binding and kickback.
Blade depth and bevel adjusting locking
levers must be tight and secure before
making cut. If blade adjustment shifts while
cutting, it may cause binding and kickback.
Use extra caution when making a "Plunge
Cut" into existing walls or other blind
areas. The protruding blade may cut objects
that can cause kickback•
The blade washers and the bolt on your
saw have been designed to work as a
clutch to reduce the intensity of a kickback.
Understand the operation and settings of
the VARI-TORQUE CLUTCH. The proper
setting of the clutch, combined with firm
handling of the saw will allow you to control
kickback.
•.. ._,_-_.,, ,...
-.. .,, _#10#040 #
VARI-TORQUE
CLUTCH
Never place your hand behind the saw
blade. Kickback could cause the saw to jump
backwards over your hand.
Do not use the saw with an excessive
depth of cut setting. Too much blade
exposure increases the likelihood of the blade
twisting in the kerr and increases the surface
area of the blade available for pinching that
leads to kickback.
Lower guard function
Check lower guard for proper closing
before each use, Do not operate saw if
lower guard does not move freely and
close instantly, Never clamp or tie the
lower guard into the open position. If saw is
accidentally dropped, lower guard may be
bent. Raise the lower guard only with the lower
guard lift lever and make sure it moves freely
-4-

anddoesnottouchthebladeoranyotherpart,
inallanglesanddepthsofcut.
Checktheoperation of the lower guard
spring, if the guard and the spring are not
operating properly, they must be serviced
before use. Lower guard may operate
sluggishly due to damaged parts, gummy
deposits, or a buildup of debris.
Lower guard should be retracted manually
only for special cuts such as "Plunge Cuts"
and "Compound Cuts". Raise lower guard
by lower guard lift lever and as soon as
blade enters the material, lower guard must
be released. For all other sawing, the lower
guard should operate automatically.
Always observe that the lower guard is
covering the blade before placing saw
down on bench or floor. An unprotected,
coasting blade will cause the saw to walk
backwards, cutting whatever is in its path. Be
aware of the time it takes for the blade to stop
after switch is released.
Do not run the tool while carrying it at your
side. Lower guard may be opened by a
contact with your clothing. Accidental
contact with the spinning saw blade could
result in serious personal injury.
Periodically remove the blade, clean the
upper, lower guards and the hub area with
kerosene and wipe it dry, or blow it clean
with compressed air, Preventive maintenance
and properly operating guard will reduce the
probability of an accident.
Additional Safety Warnings
GFCI and personal protection devices like
electrician's rubber gloves and footwear will
further enhance your personal safety.
Do not use AC only rated tools with a DO
power supply. While the tool may appear to
work, the electrical components of the AC
rated tool are likely to fail and create a hazard
to the operator.
Keep handles dry, clean and free from oil
and grease. Slippery hands cannot safely
control the power tool.
Use clamps or another practical way to
secure and support the workpiece to a
stable platform. Holding the work by hand or
against your body leaves it unstable and may
lead to loss ofcontrol.
Develop aperiodic maintenance schedule
for your tool. When cleaning a tool be
careful not to disassemble any portion of
the tool since internal wires may be
misplaced or pinched or safety guard return
springs may be improperly mounted.
Certain cleaning agents such as gasoline,
carbon tetrachloride, ammonia, etc. may
damage plastic parts.
Risk of injury to user. The power cord must only
be serviced by a Skil Factory Service Center or
Authorized Skil Service Station.
Some dust created by power
sanding, sawing, grinding,
drilling, and other construction activities
contains chemicals known to cause cancer,
birth defects or other reproductive harm.
Some examples of these chemicals are:
• Lead from lead-based paints,
• Crystalline silica from bricks and cement and
other masonry products, and
• Arsenic and chromium from chemically-
treated lumber.
Your risk from these exposures varies,
depending on how often you do this type of
work. To reduce your exposure to these
chemicals: work in a well ventilated area, and
work with approved safety equipment, such as
those dust masks that are specially designed
to filter out microscopic particles.
-5-

IMPORTANT:Someofthefollowingsymbolsmaybeusedonyourtool.Pleasestudythem
andlearntheirmeaning.Properinterpretationofthesesymbolswillallowyoutooperatethe
toolbetterandsafer.
Symbol Name Designation/Explanation
V Volts Voltage(potential)
A Amperes Current
Hz Hertz Frequency(cyclespersecond)
W Watt Power
kg Kilograms Weight
min Minutes Time
s Seconds Time
O Diameter Sizeofdrillbits,grindingwheels,etc.
no Noloadspeed Rotationalspeed,atnoload
.../min RevolutionsorreciprocationperminuteRevolutions,strokes,surfacespeed,
orbitsetc.perminute
Zerospeed,zerotorque...
Speed,torqueorpositionsettings.
Highernumbermeansgreaterspeed
Infinitelyvariableselectorwithoff Speedisincreasingfrom0setting
Arrow Actioninthedirectionofarrow
Alternatingcurrent Typeoracharacteristicofcurrent
Directcurrent Typeoracharacteristicofcurrent
Alternatingordirectcurrent Typeoracharacteristicofcurrent
ClassIIconstruction DesignatesDoubleInsulated
Constructiontools.
Groundingterminal
Alertsusertowarningmessages
DesignatesLi-ionbatteryrecycling
program
0Off position
1,2, 3.... Selector settings
I, II, III,
"X.,
[]
(_ Earthing terminal
Warning symbol
O Li-ion RBRC seal
This symbol designates
that this tool is listed by
Underwriters Laboratories.
_[ his symbol designates
that this tool is listed by
the Canadian Standards
Association.
This symbol designates that
C_ this t°°l islisted bythe E'_
® Canadian Standards
Association, to United States
US and Canadian Standards. This symbol
designates
This symbol designates that that
this tool is listed by this tool
C US Underwriters Laboratories, to complies
United States and Canadian to NOM
Standards. Mexican
o_u This symbol designates that this tool is listed bythe Intertek Testing
s Services, to United States and Canadian Standards.
"6-
Standards.

Functional Description and Specifications
_isconnect the plug from the power source before making any
assembly, adjustments or changing accessories. Such preventive safety
measures reduce the risk of starting the tool accidentally.
Circular Saws
SAFETYSWITCH ------POWERiNDiCATORLIGHT
(Models5480&5485only)
UPPER HANDLE
LOWER CALIBRATED
GUARD LIFT BEVEL
LEVER QUADRANT
l I
I
BLADEWRENCH &
STORAGEAREA
LOWER GUARD
FOOT
BEVEL
ADJUSTMENT
WiNG NUT
Model number
Maximum Capacities
Blade
Blade arbor hole
Depth of cut at 90°
Depth of cut at 45°
5380 5385 5480 5485
7-1/4" 7-1/4" 7-1/4" 7-1/4"
Round Round Round Round
2-7/16" 2-7/16" 2-7/16" 2-7/16"
1-15/16" 1-15/16" 1-15/16" 1-15/16"
NOTE: For tool specifications refer to the
nameplate on your tool.
-7-

ATTACHINGTHE BLADE
_ Disconnect the plug from
the power source before
making any assembly, adjustments or
changing accessories. Such preventive
safety measures reduce the risk of starting
the tool accidentally.
1. Turn BLADE STUD with wrench provided
counter-clockwise and remove BLADE STUD
and OUTER WASHER (Fig. 2). If the shaft
moves while attempting to loosen the blade
stud, strike the wrench counter-clockwise to jar
BLADE STUD loose.
2. Retract the lower guard all the way up into
the upper guard. While retracting the lower
guard, check operation and condition of the
LOWER GUARD SPRING.
3. Make sure the saw teeth and arrow on the
blade point in the same direction as the arrow
on the lower guard.
4. Slide blade through slot in the foot and
mount it against the INNER WASHER on the
shaft. Be sure the large diameter of the INNER
and OUTER washers lay flush against the
blade.
5. Reinstall OUTER WASHER and tighten
BLADE STUD finger tight. To lock shaft hold
the sawsecurely by the upper guard with blade
teeth imbedded in scrap wood and TIGHTEN
BLADE STUD 1/8 TURN (45°) WITH THE
WRENCH PROVIDED.
Do not use wrenches with longer handles,
since it may lead to over tightening of the blade
stud. VARI-TORQUE CLUTCH
This clutching action is provided by the friction
of the OUTER WASHER against the BLADE
and permits the blade shaft to turn when the
blade encounters excessive resistance. When
the BLADE STUD is properly tightened (as
described in No. 5 of Attaching The Blade), the
blade will slip when it encounters excessive
resistance, thus reducing saw's tendency to
KICKBACK.
One setting may not be sufficient for cutting all
materials. If excessive blade slippage occurs,
tighten the blade stud a fraction of a turn more
(less than 1/8 turn). OVERTIGHTENING THE
BLADE STUD NULLIFIES THE EFFECTIVE-
NESS OF THE CLUTCH.
OUTERWASHER
LargeDiameter--
FacesBlade
UPPER
GUARD
-8-
BLADESHAFT
INNERWASHER
--Large Diameter
FacesBlade

Operating instructions
DEPTH ADJUSTMENT
Disconnect plug from power source. Loosen
the depth adjustment lever located between
the guard and handle of saw. Hold the foot
down with one hand and raise or lower saw by
the handle. Tighten lever at the depth setting
desired. Check desired depth (Fig. 3).
DEPTHSCALE
CalibratedForStandard
LumberSizes
DEPTH
--ADJUSTMENT
LEVER
--BLADE WRENCH &
STORAGEAREA !
Not more than one tooth length of the blade
should extend below the material to be cut, for
minimum splintering (Fig. 4).
ONETOOTHLENGTHSHOULD
PENETRATEWOOD FOB
MINIMUMSPLiNTERiNG |
SAFETY SWITCH
The safety switch is designed to prevent
accidental starts. To operate safety switch,
press the release button with your thumb on
either side of handle to disengage the lock,
then pull the trigger (Fig. 5). When the trigger
is released the button will engage the safety
switch automatically, and the trigger will no
longer operate. (See Switch & General Cuts
on page 9.)
90° CUTTING ANGLE CHECK
Disconnect plug from power source. Set foot to
maximum depth of cut setting. Loosen bevel
adjustment wing nut, set to 0° on quadrant,
retighten wing nut and check for 90° angle
between the blade and bottom plane of foot with
a square (Fig. 6). If adjustment is necessary, tilt
foot to 45°, tighten bevel adjustment wing nut
and bend "TAB" with an adjustable wrench or
pliers (Fig. 7).
_(Y <'/.._L _q_-_---.'_ _ |ADJUSTMENT
v/-"__ // !F _\\ \\ BLADE WiNGNUT TAB
BEVEL ADJUSTMENT
Disconnect plug from power source. The foot
can be adjusted up to 45° by loosening the
bevel adjustment wing nut at the front of the
saw. Align to desired angle on calibrated
quadrant. Then tighten bevel adjustment wing
nut (Fig. 8). Because of the increased amount
of blade engagement in the work and
decreased stability of the foot, blade binding
may occur. Keep the saw steady and the foot
firmly on the workpiece.
-g-
BEVEL
ADJUSTMENT
WING NUT
QUADRANT

LiNE GUIDE
For a straight 90° cut, use right side of notch
in the foot. For 45°bevel cuts, use the left side
(Fig. 9). The cutting guide notch will give an
approximate line of cut. Make sample cuts in
scrap lumber to verify actual line of cut. This
will be helpful because of the number of
different blade types and thicknesses
available. To ensure minimum splintering on
the good side of the material to be cut, face
the good side down.
POWER iNDiCATOR LIGHT
(Models 5480 &5485 only)
When you plug your tool into the power
source, the power indicator light will go "ON"
indicating the tool is receiving power (Fig. 1).
SWITCH
When starting the tool,
hold it with both hands.
The torque from the motor can cause the tool
to twist.
To turn tool "ON", squeeze the trigger switch.
To turn the tool "OFF", release the trigger
switch, which is spring loaded and will return
to the off position automatically.
Your saw should be running at full speed
BEFORE starting the cut, and turned off only
AFTER completing the cut. To increase switch
life, do not turn switch on and off while cutting.
GENERAL CUTS
Always hold the saw handle with one hand
and the auxiliary handle or housing with the
other.
_ Always be sure either hand
does not interfere with the
free movement of the lower guard.
Maintain a firm grip and operate the switch
with a decisive action. Never force the saw.
Use light and continuous pressure.
_ After completing a cut and
the trigger has been
released, be aware of the necessary time it
takes for the blade to come to a complete
stop during coast down, Do not allow the
saw to brush against your leg or side,
since the lower guard is retractable, it
could catch on your clothing and expose
the blade, Be aware of the necessary blade
exposures that exist in both the upper and
lower guard areas.
When cutting is interrupted, to resume cutting:
squeeze the trigger and allow the blade to
reach full speed, re-enter the cut slowly and
resume cutting.
When cutting across the grain, the fibers of
the wood have a tendency to tear and lift.
Advancing the saw slowly minimizes this
effect. For a finished cut, a cross cut blade or
miter blade is recommended.
CUTTING MASONRY/METAL
This tool is not designed for use with metal or
masonry cut-off wheels.
Do not use abrasive wheels
with circular saws. Abrasive
dust may cause lower guard to fail.
-10-

PLUNGE CUTS
Disconnect the plug from the power source
before making adjustments. Set depth adjust-
ment according to material to be cut. Tilt saw
forward with cutting guide notch lined up with
the line you've drawn. Raise the lower guard,
using lift lever and hold the saw by the front and
rear handles (Fig. 10).
With the blade just clearing the material to be
cut, start the motor. Gradually lower the back
end of saw using the front end of the foot asthe
hingepoint.
As blade starts cutting the
-- material, release the lower
guard immediately. When the foot rests fiat on
the surfacebeing cut, proceed cutting in forward
direction to end ofcut.
_ Allow blade to come to a
-- complete stop before lifting
the saw from cut. Also, never pull the saw
backward since blade will climb out of the
material and KICKBACK will occur. Turn saw
around and finish the cut in the normal manner,
sawing forward. Ifcorners ofyour pocketcut are
not completely cut through, use a jigsaw or
hand sawto finish the corners.
LOWER
GUARDLiFT
LEVER /
FOOT
CUTTING LARGE SHEETS
Large sheets and long boards sag or bend,
depending on support. If you attempt to cut
without leveling and properly supporting the
piece,the blade will tend to bind,causing KICK-
BACK andextra load on the motor (Fig.11).
Support the panel or board close to the cut, as
shown in (Fig. 12). Be sure to set the depth of
the cut so that you cut through the sheet or
|
WRONG
board only and not the table or work bench.The
two-by-fours used to raise and support the work
should be positioned so that the broadest sides
support the work and rest on the table or bench.
Do not support the work with the narrow sides
as this is an unsteady arrangement. Ifthe sheet
or board to be cut is too largefor atable or work
bench, use the supporting two-by-fours on the
floorand secure.
-11-

RiP CUTS
The combination blade provided with your saw
is for both cross cuts and rip cuts. Ripping is
cutting lengthwise with the grain of the wood.
Rip cuts are easy to do with a rip fence (Fig.
13). Rip Fence is available as an accessory (not
included). To attach fence, insert fence through
slots in foot to desired width as shown and
secure with the wing nut (not included).
RiP BOARD GUIDE
When rip cutting large sheets, the rip fence
may not allow the desired width of cut. Clamp
or nail a straight piece of 1" (25 mm) lumber to
the sheet as a guide (Fig. 14). Use the right
side of the foot against the board guide.
|
RIPBOARD
GUIDE
RIPFENCE DESIRED DESIREDLINE
WIDTHOFCUT OFCUT
Service
_reventive maintenance
performed by unauthorized
personnel may result in misplacing of
internal wires and components which
could cause serious hazard, We
recommend that all tool service be performed
by a Skil Factory Service Center or
Authorized Skil Service Station.
TOOL LUBRiCATiON
Your Skil tool has been properly lubricated
and is ready to use. It is recommended that
tools with gears be regreased with a special
gear lubricant at every brush change.
CARBON BRUSHES
The brushes and commutator in your tool
have been engineered for many hours of
dependable service. To maintain peak
efficiency of the motor, we recommend every
two to six months the brushes be examined.
Only genuine Skil replacement brushes
specially designed for your tool should be
used.
BEARINGS
After about 300-400 hours of operation, or at
every second brush change, the bearings
should be replaced at Skil Factory Service
Center or Authorized Skil Service Station.
Bearings which become noisy (due to heavy
load or very abrasive material cutting) should
be replaced at once to avoid overheating or
motor failure.
Cleaning
To avoid accidents always
disconnect the tool from
the power supply before cleaning or
performing any maintenance. The tool may
be cleaned most effectively with compressed
dry air. Always wear safety goggles when
cleaning tools with compressed air.
Ventilation openings and switch levers must
be kept clean and free of foreign matter. Do
not attempt to clean by inserting pointed
objects through openings.
_ Certain cleaning agents
and solvents damage
plastic parts. Some of these are: gasoline,
carbon tetrachloride, chlorinated cleaning
solvents, ammonia and household detergents
that contain ammonia.
CARE OF BLADES
Blades become dull even from cutting regular
lumber. If you find yourself forcing the saw
forward to cut instead of just guiding it through
-12-

the cut, chances are the blade is dull or coated
with wood pitch.
When cleaning gum and wood pitch from
blade, unplug the saw and remove the blade.
Remember, blades are designed to cut, so
handle carefully. Wipe the blade with kerosene
or similar solvent to remove the gum and pitch.
Unless you are experienced in sharpening
blades, we recommend you do not try.
lf an extension cord is
necessary, a cord with
adequate size conductors that is capable
of carrying the current necessary for your
tool must be used. This will prevent
excessive voltage drop, loss of power or
overheating. Grounded tools must use 3-wire
extension cords that have 3-prong plugs and
receptacles.
NOTE: The smaller the gauge number, the
heavier the cord.
RECOMMENDED SmZES OF EXTENSmON CORDS
120 VOLT ALTERNATNNG CURRENT TOOLS
Tool's Cord Size in A.W.G. Wire Sizes in mm 2
Ampere
Rating
3-6
6-8
8-10
10-12
12-16
Cord Length in Feet
25 50 100 150
18 16 16 14
18 16 14 12
18 16 14 12
16 16 14 12
14 12
Cord Length in Meters
15 30 60 120
0.75 .075 1.5 2.5
0.75 1.0 2.5 4.0
0.75 1.0 2.5 4.0
1.0 2.5 4.0 --
* Blade
* Wrench
** Rip Fence
** Carrying case
(*= standard equipment)
(**= optional accessories)
-13-

Trouble Shooting
PROBLEM
REMEDY
PROBLEM
REMEDY
PROBLEM
REMEDY
PROBLEM
REMEDY
PROBLEM
REMEDY
PROBLEM
REMEDY
Read instruction manual first! Remove plug from the power source before
making adjustments or assembling the blade.
TROUBLE: SAW WILL NOT START
1. Power cord is not plugged in.
2. Power source fuse or circuit breaker tripped.
3. Cord damaged.
4. Burned out switch.
5. Trigger does not turn tool on.
1. Plug saw in.
2. Replace fuse or reset tripped circuit breaker.
3. Inspect cord for damage. If damaged, have cord replaced by an Authorized Skil
Service Center or Service Station.
4. Have switch replaced by an Authorized Skil Service Center or Service Station.
5. Disengage Safety Switch as described on page 9
TROUBLE: BLADE DOES NOT COME UP TO SPEED
1. Extension cord too light or too long.
2. Low house voltage.
1. Replace with adequate cord.
2. Contact your electric company.
TROUBLE: EXCESSIVE VIBRATION
1. Blade out of balance.
2. Workpiece not clamped or supported properly.
1. Discard Blade and use different blade.
2. Clamp or support workpiece as shown on pages 9 and 11.
TROUBLE: CANNOT MAKE SQUARE CUT WHEN CROSSCUTTING
1. Foot not adjusted properly.
1. See "Operating Instructions" section, "Bevel Adjustment" (page 9), "Line Guide"
(page t 0, "Cutting Large Sheets (page t t) and "Rip Cuts" (page t2).
TROUBLE: CUT BINDS, BURNS, STALLS MOTOR WHEN RIPPING
1. Dull blade with improper tooth set.
2. Warped board.
3. Blade binds.
4. Improper workpiece support.
1. Discard blade and use a different blade.
2. Make sure concave or hollow side is facing "DOWN" feed slowly, see (page 11).
3. Assemble blade and tighten Vari-Torque clutch per "Assembly Instructions", see
(page 8)
4. Clamp or support workpiece as shown on pages 9 and 11.
TROUBLE: BLADE SLIPPING
1. Tool does not cut workpiece.
1. Assemble blade and tighten Vari-Torque clutch per "Assembly Instructions", see
(page 8)
-14-

AvertissementsgCnCrauxconcernantias cufit6 desoutils 61ectroportatifs
_VeuiJJezJiretous Jesavertissements et routes Jes consignes de s_curit_. Si I'on
__ n'observe pasces avertissements et ces consignes de sCcurit_, il existe un risque de
choc_lectrique,d'incendie et/oude blessurescorporellesgraves.
CONSERVEZTOUSLESAVERTISSEMENTSETTOUTESLESCONSIGNES
DES[_CURIT[_POURR[_FERENCEFUTURE.
Danslesavertissements,le terme <<outil_lectroportatif >>se rapportebvotre outil branch_sur le secteur(avecfil) ou
_.votre outil aliment_ par piles (sansfil).
S_curit_dulieudetravail
iVlaintenez le lien de travail propre et bien _ciair_.
Los risques d'accident sont plus _lev_s quand on
travailledartsunendroit encombr_ ousombre.
N'utilisez pus d'outils _lectroportatifs duns des
atmospheres explosives, comme par exemple en
presence de gaz, de poussi_res ou de liquides
inflammables. Los outils _lectroportatifs produisent
des 6tincelles qui risquent d'enflammer les poussi_res
oulesvapeurs.
Eloignez les enfants el les visiteursquand vousvous
servez d'un outil _lectroportatif. Vous risquez une
pertedecontrClesi onvous distrait.
S_curit6_Jectrique
Los fiches des outils _lectroportatifs doivent
correspondre _ la prise. II nefaut absolument jamais
modifier la fiche. N'utilisez pus d'adaptateur deprise
avec des outils _lectropertatifs munis d'une fiche de
terre. Le risque de choc _lectrique est moindre si on
utilise une fiche non modifi_e sur une prise qui lui
correspond.
Eviteztont contact du corpsavec des surfaces reli_es
la torte lois que tuyaux, radiateurs, gazini_res ou
r_frig_rateurs. Le risque de choc _]ectfiqueaugmente
sivotre corps est reli_& laterre.
N'exposez pus los outils_lectroportatifs _ la pluie ou
I'humidit_. Side I'eau p_n_tre darts un outil
_lectroportatif, le risquedechoc _lectriqueaugmente.
Ne maltraitezpas lecordon. Nevous en servez
jamais pourtransporter I'outi! _lectroportatif, pour le
liter ou pourle d_brancher. Eioignez le cordon de la
chaleur, des hullos, des ar_tes coupantes ou des
pi_ces mobiles. Les cordons abfm_s ou emm_l_s
augmententlesfisquesdechoc _]ectfique.
Si vous utiiisez un outil _lectroportatif _ I'ext_rieur,
employez une rallonge tongue pour I'ext_rieur. Ces
rallonges sont faites pour I'ext_rieur et r_duisent le
risquedechoc _lectrique.
S'il est absolument n_cessaire d'utiliser I'outil
_lectroportatif duns un endroit humide, utiiisez une
aiimentation protegeepar un disjoncteur de fuite de
terre (GFCI). L'utilisation d'un disjoncteur GFCIr_duit
lesrisques dechoc _lectrique.
S_curit_personnelle
Restez conceutr_, faites attention _ ceque vous
faites, el servez-vousdevotre ben sons Iorsque vous
utiiisez un outil _lectroportatif. N'employez pus
d'outiis _lectroportatifs quand vous _tes fatigu_ ou
sous I'emprise de drogues, d'alcool ou de
m_dicaments. Quand on utilise des outils
_lectroportatifs, il suffit d'un moment d'inattention pour
causerdes blessurescorporelles graves.
Utilisez des _quipements de s_curit_ personnelle.
Portez toujours une protection oculaire. Le port
d'_quipements de s_curit_ tels que des masques
antipoussieres, des chaussures de s_curit_
antid_rapantes, des casques de chantier et des
protecteurs d'oreilles dans des conditions appropri_es
r_duirale risquede blessure corporelle.
Evitez losd_marrages intempestifs.Assurez-vous que
I'interrupteur est duns la positionarr_t (Off) avant de
brancher I'outil duns une prise de courant et/ou un
bloc-piles, de le ramasser ou de le transporter. Le
transport d'un outil _lectroportatif avec le doigt sur la
g&chette ou le branchement de cet outil quand
Hnterrupteur est en position de marche (ON) est une
invite aux accidents.
Enievez routes los cl_s de r_giage avant de mettre
I'outil _lectreportatif en marche. Si on laisse unecl_
sur une piece toumante de I'outil _lectroportatif, il y a
risquedeblessure corporelle.
Hevous penchezpus. Conserveztoujours une bonne
assise et un ben _quilibre. Ceci vous permettra de
mieux maftriser I'outil _lectroportatif darts dessituations
inattendues,
Habillez-vousde mani_re appropri_e. Ne portezpus
de vetements amples ou de bijoux. Attachez les
cheveux longs. N'approchez pus les cheveux, les
v_tements ou los gantsdes pi_ces en mouvement.
Losv_tements amples, les bijoux ou les cheveuxlongs
risquentd'etre happ_spar lespi_cesenmouvement.
Si I'outil est muni de dispositifs permettant le
raccordement d'un syst_me d'aspiration el de
coiiecte des poussi_res, assurez-vous que ces
dispositifs sont raccord_s et utilis_s correctement.
L'utilisation d'un d@oussi_reur peut r_duire los
dangers associ_s_.I'accumulation depoussi_re,
-15-

Utilisationet entretiendesoutils
_lectroportatifs
Ne forcezpussnr J'outJJ_lectroportatif. UtiJisezJ'ontlJ
_Jectroportatif qui convient _Jat_che _effectuer.
L'outil qui convient _ ]a t_chefait un mei]]eur travail et
est plussOr_.lavitessepour lequel il a_t_ con(_u.
Ne vons servez pus de I'ontil _lectroportatif si son
interrnpteurne parvientpas_le mettre en marche ou
I'arreter. Tout outil _lectroportatif qui ne peut pas
etre command_ par son interrupteur est dangereux et
dolt etre r@ar_.
IDebranchezla fichede la priseon enlevezle bloc-pile
de I'ontil eiectroportatif avant tont r_giage,
changementd'accessoires on avant de ranger J'ontiJ
_lectroportatif. De telles mesures de s_curit_
preventive r6duisentle risquede d_marrageintempestif
deI'outil _lectroportatif.
Rangez los ontiiselectroportatifs dontyeas ne vous
servezpashorsde porteedes enfants et ne permettez
pus _ des personnesqni ne connaissentpus J'ontiJ
_lectroportatif on qui ignorentcos consignesde s'en
servir. Les outils _lectroportatifs sont dangereuxduns
lesmains d'utilisateursinexp_riment_s.
Entretenezlesontiis eiectroportatifs. Verifiez que les
pieces mobiles sont alignees correctement et ne
coincent pus. V_rifiezqu'iJn'ya pus de pieces
cass_es on d'autre circonstance qui risquent
d'affecter le fonctionnementde rontil eiectroportatif.
Si I'ontil est abim_, faites-Je r@arer avant de
I'ntiliser. De nombreux accidents sont caus6s par des
outils 61ectroportatifsmal entretenus.
Maintenez los ontils conpantsaff_tes et propres. Les
outils coupants entretenus correctement et dot_s de
bords tranchants aff0t6s sont moins susceptibles de
coinceretsont plusfaciles_ maftriser.
Utilisez I'ontil electroportatif, los accessoires el los
embonts d'outil, etc. conformement_cosinstrnctions,
en tenant compte des conditions de travail et des
travanx_reaiiser. L'emploi d'outils _lectroportatifs
pour des t_ches diff_rentes de cellespour lesquellesils
ont6tOpr_vuspeut r_sulterenunesituationdangereuse.
Entretien
Faites r@arer votreontil eiectroportatif parnn agent
de service qualifie n'ntilisant qne des pieces de
rechange identiques. Ceci assure que la s_curit_ de
I'outil _lectroportatif est pr_serv_e.
Consignesdesecurit poursciescirculaires
Venillezlire routeslosconsignesdes_curit6 et instructions.
Proceduresdecoupe
_Gardez los mains et le corps
__ distancede la lame et sur le c_te
de ceiie-ci. Un contactavec la lame canserait nne
blessnregrave.
Ponr reduire le risqne de
__ biessure, inspectez le
systeme de protection. II dolt convrir la lame
instantanement !Tenez la scie des denx mains.
Snpportez I'ouvrageet attachez-le par des brides de
fixation.Protegez-vouslosyenx.
N'introdnisez pus la main sons la piece _ travailler.
Legarde ne peut pas vous prot_ger de la lame sous la
piece_.travailler.
Ajnstez la profondenr de coupe en fonction de
I'@aisseur de la piece _travailier. II dolt seulement
_tre possible de voir moins d'une dent complNe des
dents dela lame au-dessousdela piece_travailler.
Betenez jamais la piece_couperduns yesmains on
sur yes jumbos. Fixez la piece _travailier snr nne
plateforme stable. II importe de supporter I'ouvrage
ad_quatementafin de minimiser I'exposition corporelle,
legrippage delame oula pertede contr01e.
Tenez I'ontil electroportatif par los surfaces isolees
de prehensionquand vouseffectnez nne operationan
conrs de laquelle I'outil de coupe peat venir en
contactavec desills dissimnles on sonproprecordon.
Lecontact avecunfil sous tension rendra_galementles
parties m_talliques expos_esde I'outil sous tension et
causeradeschocs _ I'op_rateur.
En refendant,utilisez tonjonrsun gnide de refente on
nne regie. Ceci am_liore I'exactitude de la coupe et
r_duit lespossibilit_s degrippagede la lame.
Utilisez tonjonrs des lames avec trons d'arbre de la
dimension et de la forme appropri_es (en diamant
par rapport_rondos).Los lamesqui ne se marient pus
avec le systeme de montage de la scie ne tourneront
pus rond. IIen r_sulteraunepertedecontr6le.
N'utiiisez jamais des rondeiies on bonlon de lame
abimes on incorrects.Les rondelles et le boulon de
lame ont etecon(_ussp_cialement pour votre scie, pour
une performance optimale et pour un fonctionnement
des plussQrs.
Inspectez la conditionet la qualite du bois et si vons
tronvezdes cions,retirez-lesavantde conper.Lebois
mouill_, le bois vert ou le bois trait_ par pression
n_cessitent uneattention sp_ciale durant la coupe pour
pr_venir le rebond.
-16-

Tenez la sciefermement pour prevenir une porte de
contr_le. Lesfigures de ce manuelillustrent le support
manueltypique dela scie.
Suivant I'usage,I'interrupteurpoutne pas dureraussi
Iongtemps que la scie. Si I'interrupteur fait defaut en
position d'arr_t, la scie pout ne pus se mettre en
marche. S'il devient defectueux pendant que la scie
esten marche, la scie poutne pass'arr_ter. DansFun
ou I'autre cas, d_branchezla scie imm_diatement et ne
I'utilisezpasavant qu'ellenesoit r@ar_e.
Cettescie circulaire ne dolt pus _tre montee sur une
table et convertie en scie de table. Los scies
circulaires ne sont pas congues ni destinies _ _tre
utilisOescomme sciesdetable.
Avertissementsrelatifsauxrebondset
probl_mesassoci_s
Causeset prevention,parroperateur, durebond :
Lerebondest une r_actionsoudaine _ une lame descie
pincOe,grippOeou real alignOe,amenant ainsi la scie
non contrOl_e _ lever et ressortir de I'ouvrage en
direction deI'op_rateur.
Lorsque la lameest pinc_eou grippOefermement par le
trait de scie qui se referme, la lame bloqueet la r_action
du moteur ram_ne rapidement I'outil en direction de
I'opOrateur.
Si la lame devient tordue ou real align_edans la coupe,
lesdents du bord arri_re de la lame peuvents'enfoncer
dans la surface supOrieuredu bois, amenant ainsi la
lame _ sortir du trait de scie et _ revenir vers
I'opOrateur.
Le rebond est le r_sultat d'une utilisation erronOede
I'outil et/ou de m_thodes ou de conditions de
fonctionnement incorrectes, et on peut I'_viter en
prenantles precautionsappropri_es,comme indiqu_ cl-
apr_s •
IVlaintenezune priseferme avec los deuxmainssurla
scieet positionnezvosbras de maniere _ resisteraux
forces de rebond. Positionnezvotre corpsd'un cSte
ou de rautre de la lame, mais pasduns iatrajectoire
de la lame. Le rebondpeut faire que la lame saute en
arri_re, mais I'op_rateur peut contrOler les forces de
rebondenprenantles precautionsappropriOes.
Lorsque la lame grippe ou Iorsqu'une coupe est
interrompuepourquelque motif que ce soit, rel_chez
la g_chette et tenez la scie sans bouger duns
I'ouvrage jusqu'_ ce que la lame s'arr_te
completement. Netentez jamais de rotifer la scie de
I'ouvrageou detirer la scievers I'arriere pendantque
la lame est en mouvement, ce qui pourrait provoquer
unrebond. Recherchezlacausedu grippagede lameet
prenezlesmesuresn_cessairespour lecorriger.
Lorsque veus remettez une scie en marche daas un
ouvrage,centrez la lame de scieduns le trait de scie
et assurez-vousque los dents de scie ne sont pus
engageesduns I'ouvrage. Si la lame de scie grippe, elle
pout remonter ou rebond depuis I'ouvrage Iorsque la
scie est remiseen marche.
Supportez los gros panneauxpourminimiser le risque
de pincement de lame et de rebond. Los gros
panneaux ont tendance &s'affaisser sous leur propre
poids. Des supports doivent _tre placOs sous le
panneau des deux cOt_s, pros de la ligne de coupe et
prosdu bord du panneau.
N'utilisez pus une lame emoussee ou abimee. Los
lames non affOt_es ou r_gl_es de faugh inappropri_e
produisent un trait de scie _troit, ce qui cause une
friction excessive,un grippagede lameet un rebond.
Los leviers de blocage de reglage de biseau el de
profondeur de lame doivent [}tre serres et fermes
avant de pratiquer la coupe. Un d@lacement du
r_glage de lame durant la coupe peut causer un
grippage etun rebond.
Redoubler de prudenceen pratiquantune ,, coupe en
guichet ,, duns des tours existants ou autres parties
aveugles. Lalame faisant saillie peut couper des objets
qui peuventcauser un rebond.
Los rondelles de lame et le boulon survotre scie ont
ere census de maniere _ travailler ¢omme un
embrayage pour reduire rintensite des rebonds.
Comprenez le fonctionnement et los reglages de
I'EMBRAYAGE A COUPLE VARIABLE. Le rOglage
appropri_ de I'embrayage, combin_ au maniement
ferme dela scie,vous permettra decontrOlerle rebond.
[I_801V0
EMBRAYAOE
VARI-TORQUE
Ne placez jamais votre main derriere la lame de la
scie. Le rebondpourrait faire sauter la scie vers I'arri_re
par-dessusvotre main.
N'utilisez pus la scie avec un reglage excessif de
profondeurde coupe. Une exposition excessivede la
lame accroft la possibilit_ detorsion de la lame dans le
trait de scie. Elle accroft _galement la surface de lame
pouvantetre pinc_e,ce qui entratneraitun rebond.
Fonctiondugardeinf_rieur
Verifiez le garde inferieur pour vous assurer qu'il
ferme adequatement avant chaque usage. N'utilisez
-17-

pas la scie si le garde inf_rieur ne bouge pas
librementet ne ferme pas instantan_meut.Ne pincez
ou ne fixez jamais Is garde inf_rieur en position
ouverte. Si la scie tombe par m_garde, le garde
inf6rieur peut _tre pii_. Levez le garde inf6rieur
uniquement _ I'aide de la levier de levagedu garde
inf_rieur,et assurez-vous qu'il bouge librementet ne
vient pas encontact avecla lame ouaucuneautrepiece,
sous tousles angleset profondeurs decoupe.
V_rifiez le fonctionnement du ressortdu rappel du
garde inf_rieur. Si le garde et le ressort ne
fonctionnent pas ad_quatement, ils doivent _tre
r_par_s avant usage. Le garde inf_rieur peut
fonctionner paresseusement en raison de pi_ces
ab;m_es, de d_pOtsgommeux ou d'une accumulation
de d_bris.
Le garde inf_rieur dolt _tre r_tract6 manuellement
uniquement pour des coupessp_cialesrelies que los
,, coupes en guichet ,, el les ,, coupes combin_es ,,.
Levez le garde inf_rieur _I'aide du levier de levage
dugarde inf_rieur.Le garde inf_rieurdolt _tre rel_ch_
d_s que la lame p_n_tre dans I'ouvrage. Pour toutes
les autres operationsde sciage, le garde inf6rieur dolt
fonctionner automatiquement.
Assurez-voustoujours quele garde inf_rieuroeuvre la
lame avant de d_poser la scie sur I'_tabli ou le
plancher. Une lame non protegee, qui continue b.
marcher par inertie, fera reculer la scie, coupant ainsi
tout ce qui est sur son chemin. Sachez le temps qull
faut pour que la lame s'arr_te apr_s rel&chement de
I1nterrupteur.
Ne faites pas fonctionner I'outil quand vousle portez
survotre hanche. Le garde inf_rieurpouts'ouvrir au
contact avec yes v_tements. Un contact accidentel
avecla lame descie en rotation pourrait provoquer des
blessuresgraves.
Aintervaiiesp_riodiques,d_posez la lame, nettoyez
los gardes sup_rieur et inf_rieur el la r_gion du
moyeu _ I'aide de k_ros_neet essuyez pour s_cher,
ou nettoyez en soufflant de I'air comprim_. Une
maintenance preventive et une utilisation correcte du
garde r_duiront la probabilit_ d'un accident.
Avertissements suppi6mentairesconcernantla s curit6
L'emploi d'un GFCI et de dispositifs de protection
personnelletels que gantsetchaussuresd'_lectricienen
caoutchoucam_liorent votre s_curit_ personnelle.
N'utiiisez pas un outil con_uuniquement pour le CA.
sur une aiimentation en C.C. M_me si I'outil semble
fonctionner, lescomposants_lectriquesd'un outil pr_vu
pour le C.A. tomberont probablement en panne et
risquent decrier un dangerpour rutilisateur.
Maintenez lospoign_ess_chesel exemptes d'huile el
de graisse. On ne pas maitriser un outil _lectroportatif
entoute s_curit_ quand onales mains glissantes.
Utilisez des brides ou d'autres moyens pratiques de
brider ou de supporter la piece sur une plate-forme
stable. Tenir la piece _ la main ou contre le corps est
instableet risquede r_sulteren unepertedecontr61e.
Cr_ez un agenda d'entretien p_riodique pour votre
outil. Quandvousnettoyezunoutil, faites attention de
n'en d_monter aucune piece car il est toujours
possible de real remonter ou de pincer los fils
internes ou de fomenter incorrectemeniles ressorts
de rappeldes capotsdeprotection. Certainsagentsde
nettoyage tels que I'essence, le t_trachlorure de
carbone, I'ammoniaque, etc. risquent d'ab;mer les
plastiques.
Risque de blessure pour I'utilisateur. Le cordon
d'alimentation _lectrique nedoit _tre r_par_que par un
Centre de service usine de Skil ou par une Station
serviceagr_e deSkil.
Les travaux _la machine
__ tel que pon_age, sciage,
moulage, portage et autres travaux du b_timent
peuventcrier des poussi_res contenant des produits
chimiquesqui sent des causesreconnuesde cancer,
de malformation cong_nitaleou d'autres probl_mes
reproductifs. Cos produits chimiques sent, par
exemple :
* Leplomb provenantdes peinturesbbasede plomb,
* Les cristaux de silices provenant des briques et du
ciment etd'autresproduits de magonnerie,et
* L'arsenic et le chrome provenant des bois trait_s
chimiquement.
Le niveaude risque dO_ cette exposition varie avec la
fr_quence de ces types de travaux. Pour r_duire
I'exposition _ ces produits chimiques, il faut travailler
dans un lieu bien ventil_ et porter un _quipement de
s_curit_ appropri_ tel que certains masques _poussi_re
con(_us sp_cialement pour filtrer les particules
microscopiques.
-18-

IMPORTANT: Certainsdes symboles suivants peuventetre utilis_s
leur signification. Une interpretation appropri@ de ces symboles
efficaceetplus sQre.
sur votre outil. Veuillez les_tudier et apprendre
vous permettra d'utiliser I'outil de fagon plus
Symbole Nora D_signation/Explication
V Volts Tension(potentielle)
A Amperes Courant
Hz Hertz Fr_quence(cyclespar seconde)
W Watt Puissance
kg Kilogrammes Poids
rain Minutes Temps
s Secondes Temps
0 Diam@e Tailledes meches de perceuse,meules,
etc.
no Vitesse_.vide Vitessede rotation, _.vide
.../min Tours ou mouvementalternatif par Tours, coups,vitesseen surface,orbites,
minute etc., par minute
0 Positiond'arret Vitessez_ro, couple z_ro ...
1,2, 3.... R6glagesdu s61ecteur R6glagesdevitesse, decouple oude
I, II,III.... position. Unnombre plus 61ev_signifie
unevitesse plusgrande
S@cteur variable _.I'infini avecarret Lavitesseaugmente depuis le r_glage0
Fleche Action dans la direction de lafleche
Courantalternatif Type oucaract_ristique du courant
---== Courantcontinu Type oucaract_ristique du courant
Courantalternatif Type oucaract_ristique du courant
ou continu
[] Construction classe II D_signedes outils construits avecdouble
isolation
1_ Bornedeterre Bornede raise_.la terre
,/_ Symbole d'avertissement Alerte I'utilisateur aux messages
d'avertissement.
SceauLidon RBRC D_signele programme de recyclagedes piles
Lidon.
Cesymbole signifie que cet
outil est approuv6 par
Underwriters Laboratories. C_ Cesymbole signifie quecet outil _
est approuv_ par I'Association ,,
® canadiennedenormalisation
US selon lesnormes des Etats-Unis Cesymbole
et du Canada. signifie que
Cesymbole signifie quecet outil cet outil se
est approuv6 par Underwriters conforme aux
C[IS Laboratories selon les normes normes
des Etats-Unis et du Canada. mexicaines
NOM.
t_Ce symbole signifie quecet
outil est approuv_ par
I'Association canadienne
de normalisation.
c@u Cesymbole signifie quecet out[Iest approuv_ par Intertek Testing
s Servicesselonles normes des Etats-Uniset du Canada
-lg-

Descriptionfonctionnelle etspecifications
_ _branchez la fiche de la prise de conrant avant d'effectner qnelqne assemblage
on r_glage qne ce soit on de changer les accessoires. Ces mesures de s6curit_
preventive r_duisent le risque d'une miseen marche accidentelle de I'outil.
Scies circulaires
|
INTERRUPTEURDE
SURETE I
GARDE__
SUPERiEUR
----_TEIVIOiN DEMISESOUSTENSION
modeles 5480et 5485 seulement)
POIGNEE
AUXILIAIRE
LEVER DE
LEVAGEDU
GARDE
INFERIEUR
I
CLEETCASEDE
REMISAGE
GARDE
INFERIEUR
SEIViELLE
SECTEUR
GRADUEDE
BiSEAU
l
ECROUA
OREiLLESDE
REGLAGEDU
BISEAU
Nnm_ro de module 5380 5385 5480 5485
Capacit_s maximales
Lame 184 mm 184mm 184mm 184 mm
Moyeu delame rond rond rond rond
Profondeurdecoupe _.90° 81,9 mm 81,9 mm 81,9 mm 81,9 mm
Profondeurdecoupe _.45° 49,2 mm 49,2 mm 49,2 mm 49,2 mm
REIVIARQUE: Poursp6cifications de I'outil, reportez-vous _.la plaque
signal_tique devotre outil.
-20-
This manual suits for next models
3
Table of contents
Languages:
Other Skil Saw manuals

Skil
Skil 9250 User manual

Skil
Skil 1053 User manual

Skil
Skil 5580 Operating and s Quick guide

Skil
Skil 5750 Assembly instructions

Skil
Skil TS6307-00 User manual

Skil
Skil 9205 Assembly instructions

Skil
Skil 4920 User manual

Skil
Skil 3335-01 Operating and s Quick guide

Skil
Skil SHD77M User manual

Skil
Skil PWRCORE 20 RS5884-00 User manual