Skoda AMUNDSEN+ User manual

SIMPLY CLEVER
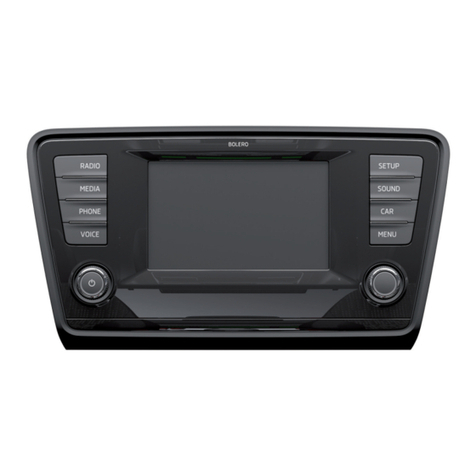
Infotainment Navigation Amundsen
Owner's Manual

Structure of this Owner's Manual (explanations)
This Owner's Manual has been systematically designed to make it easy for you
to search for and obtain the information you require.
Chapters, table of contents and subject index
The text of the Owner's Manual is divided into relatively short sections which
are combined into easy-to-read chapters. The chapter you are reading at any
particular moment is always shown at the bottom right of the page.
The Table of contents arranged according to chapter and the detailed Subject
index at the end of the Owner's Manual help you to rapidly find the information
you are looking for.
Direction indications
All direction indications such as “left”, “right”, “front”, “rear” relate to the direction
of travel of the vehicle.
Units of measurement
All values are expressed in metric units.
Explanation of symbols
Denotes a reference to a section with important information and safety
advice in a chapter.
Denotes the continuation of a section on the next page.
® Denotes a registered trademark.
Examples of the information listed in the Owner's Manual
Press the button → → Press Sound.
This information means that first the button on the device and then the
function key on the device screen is to be operate and then the menu is to
be confirmed by pressing the function key Sound
The “→” symbol indicates the next step.
Example of the menu, the available menus, menu items or functions.
■xyz - the first menu level
■xyz - the second menu level
■xyz - the third menu level
■xyz - the first menu level
Notes
WARNING
The most important notes are marked with the heading WARNING. These
WARNING notes draw your attention to a serious risk of accident or injury.
CAUTION
A Caution note draws your attention to the possibility of damage to your vehicle
(e.g. damage to gearbox), or points out general risks of an accident.
For the sake of the environment
An Environmental note draws your attention to environmental protection as-
pects. This is where you will, for example, find tips aimed at reducing your fuel
consumption.
Note
A normal Note draws your attention to important information about the opera-
tion of your vehicle.
5E0012720FE

Preface
You have chosen a ŠKODA vehicle, which is fitted with the Infotainment Navigation Amundsen
(hereafter called the unit) – we thank you for your confidence in us.
The new operating concept allows you to configure vehicle settings and to operate some electronic
systems centrally from the unit.
In addition to this Owner's Manual, please also carefully read the Vehicle Manual, as operation in ac-
cordance with these instructions is a prerequisite for proper use of the vehicle.
If you have any questions about your unit, please contact a ŠKODA Partner.
Your ŠKODA AUTO a.s. (hereinafter referred to as ŠKODA)
5E0012720FE

Table of Contents
Abbreviations
Familiarization with the unit
Introductory information 4
Important notes 4
Equipment overview 5
Unit operation 7
In the unit screen 7
operation via the MAXI DOT display 8
Voice control 13
Device settings 16
Setup menu 16
Audio
Radio 21
Operation 21
Radio settings 24
Media 26
Operation 26
Signal sources 27
Phone
Communication 33
Telephones and two-way radio systems 33
Connect to the mobile phone 36
Telephone functions 39
Navigation
Description of the navigation system 43
Preface to navigation 43
Navigation settings 44
Map operation 46
Extra window 47
Navigation 50
New destination entry 50
Entry of saved destinations 52
POI 53
POI categories 55
Route guidance 56
Traffic reports 58
Destination management 60
Vehicle
Vehicle systems 62
Vehicle settings 62
Index
2Table of Contents

Abbreviations
Abbreviation Definition
A2DP - a software profile for data transfer via Bluetooth ®, de-
signed for a one-way transfer of audio data
ACC Adaptive cruise control
AF The function ensures that the best receivable frequency of
the selected station is automatically and precisely set.
AM Identification of the radio-frequency range
TCS Traction control for the drive wheels
AVRCP A software profile for data transfer via Bluetooth®, which
supports multimedia functions
AV Audio / visual source signal - typical for DVD player or TV tu-
ner
BT Bluetooth® - wireless communication for reception and
transmission of voice and data information
DAB Digital radio reception
DRM - technical methods to monitor or restrict the use of digital
media content
ESC Electronic Stability Control
FM Identification of the radio-frequency range
HFP
- a software profile for data transfer via Bluetooth ®, which
allows for communication between a mobile phone and the
in-vehicle hands-free equipment
GPS Satellite system for position determination
GSM Global System for Mobile communication, the most popular
standard for mobile phones
ID3 tag An additional feature of a music file that allows for the dis-
play of artist, title, album name etc.
KESSY Key-less unlocking, starting and locking
NTSC Coding standard of the audiovisual signal in North and Cen-
tral America and some countries in South East Asia
PAL Coding standard of the audiovisual signal in most European
countries
Abbreviation Definition
PI Station identification by a single RDS code, for example,
when setting a different radio station
RDS System for the transmission of additional information for FM
radio reception
TMC Service for transmitting traffic information to the driver
TP Program identifier for the transmission of traffic information
vCard
File format .vcf for contact data exchange, especially elec-
tronic business cards, can include first and last names, ad-
dresses, phone numbers, URLs, logos, photos and audio clips
VIN Vehicle identification number
WMA compressed audio format
3
Abbreviations

Familiarization with the unit
Introductory information
Important notes
Introduction
This chapter contains information on the following subjects:
Declaration of conformity 4
Component protection 4
These operating instructions describe all possible equipment variants without
identifying them as special equipment, model variants or market-dependent
equipment.
Consequently, this vehicle does not need to contain all of the equipment com-
ponents described in these operating instructions.
The level of equipment of your vehicle refers to your purchase contract of the
vehicle. More information is available from the ŠKODA Partner1) where you
bought the vehicle.
Please note that these instructions are meant only as a supplement to the in-
formation in the Owner's Manual of your vehicle. Therefore, they can be used
only in conjunction with the latest manual for this vehicle. For a detailed de-
scription of some functions listed in these instructions, see the Vehicle Manual
for your vehicle.
The illustrations can differ in minor details from your unit; they are only inten-
ded for general information.
WARNING
■Concentrate fully at all times on your driving! As the driver you are fully
responsible for the operation of your vehicle.
■Only use the unit in a way that leaves you in full control of your vehicle in
every traffic situation – there is the risk of an accident.
WARNING (Continued)
■Adjust the volume to ensure that acoustic signals from outside, e.g. sirens
from vehicles which have the right of way, such as police, ambulance and
fire brigade vehicles, can be heard at all time.
■High volumes can cause hearing damage!
Declaration of conformity
Read and observe on page 4 first.
ŠKODA AUTO a.s. hereby declares that the ŠKODA Infotainment systems meet
the basic requirements and additional provisions of Directive 1999/5/EC with
reference to radio equipment and telecommunications devices.
ŠKODA AUTO a.s. hereby declares that the “connection and the use of this
communication device is granted by the Nigerian Communications Commis-
sion.”
Component protection
Read and observe on page 4 first.
Some electronic control units are factory-equipped with component protec-
tion.
The component protection was developed as a protection mechanism for:
›impairment of factory- or garage-fitted control units after installation in an-
other vehicle (for example, after a theft);
›impairment of components operated outside of the vehicle;
›the possibility of a legitimate installation or change of control units for re-
pairs at a ŠKODA1) specialist garage.
When component protection is enabled, the following message appears on the
unit's display Component theft protection: the infotainment system is not
fully available at present. Please switch on the ignition.
Please contact a ŠKODA Service Partner if component protection does not de-
activate when the ignition is switched on.
1) Terms used » manual, chapter Preface.
4Familiarization with the unit

Equipment overview
Introduction
This chapter contains information on the following subjects:
Description of the device 5
touch screen 5
Switching the unit on/off 5
Unit menus 6
Adjusting volume 6
First and foremost, pay attention to the safety instructions » page 4, Impor-
tant notes.
Description of the device
Fig. 1 Description of the device
Description of the device
- Switch unit on/off, adjust volume
Menu button for calls and confirmations
1
2
- Menu Radio » page 21
- Menu Media » page 26
- Menu Telephone » page 33
- Voice control » page 13
- Navigation menu » page 43
- List of traffic reports » page 59
- Vehicle systems settings » page 62
- Displays the unit menus » page 6
Touch screen » page 7
touch screen
The unit is equipped with a so-called touch screen 11 » Fig. 1 on page 5which
can only be operated by the touch of a finger.
CAUTION
■The screen can be operated by a slight touch of a finger. Do not apply pres-
sure to the screen - risk of damage!
■Do not use any objects to operate the screen - risk of damage!
■Do not use solvents such as benzene or turpentine for cleaning, since they
may damage the screen surface.
Note
■Use a soft cloth and, if necessary, methylated spirits, to remove fingerprints
from the screen. When doing so, ensure that you do not cause damage to oth-
er parts of the interior.
■It is not possible to operate the screen with your fingernails or while wearing
gloves.
■Do not affix anything to the area of the unit below the screen. This could af-
fect the operation of the sensors for the zoom function.
■You can use a touchscreen protector film that does not affect the touch-
screen's functionality to protect it.
■The brightness of the screen is adjusted automatically depending on the
brightness of the interior lighting. The automatic setting can be adjusted man-
ually » page 18.
Switching the unit on/off
›Press the knob to switch the unit on or off.
3
4
5
6
7
8
9
10
11
5
Introductory information

When the unit is switched on, the audio source last active and the most re-
cently selected menu before the unit was switched off will be restored.
If Telephone mode was active before you switched off the unit and the igni-
tion and Bluetooth® function is not switched on, the screen displays the mes-
sage » page 34. Switch on the ignition or the Bluetooth® func-
tion» page 19.
If the vehicle key is pulled out of the ignition lock while the unit is switched on,
the unit will switch off automatically. After switching on the ignition, the unit
is turned on automatically.
The unit will not be switched on automatically when the ignition is switched
on if the unit was switched off using the knob.
The unit will switch off automatically after the engine is switched off and the
door is opened if your vehicle is fitted with the KESSY system. The unit will
switch off if you open the driver's door before switching off the engine.
When the ignition is switched off, the unit switches itself off automatically af-
ter approximately half an hour (prevents the vehicle battery being drained).
Unit menus
Fig. 2
Unit menus
Call up the main menu
›Press the button.
Function keys in the MENU main menu
- Menu Radio » page 21
- Menu Media » page 26
- Tone settings » page 17
- Unit settings » page 16
- Vehicle systems settings » page 62
- Navigation menu » page 43
- Menu Telephone » page 33
Adjusting volume
Increase the volume
›Turn the knob to the right.
Reduce the volume
›Turn the knob to the left.
Muting
›Set the volume to 0 using the knob.
Note
■The change in volume is displayed on the screen of the unit.
■The following symbol appears in the display when the sound is muted: .
■High volumes can cause sound resonance in the vehicle.
■The car speakers may be damaged if the volume is set too loud or is distor-
ted.
■The loudspeakers in the vehicle are designed for a power output of the de-
vice of 4x20 W.
■When equipped with a sound system, the speakers are adapted for a total
power output from the amplifier of 570 W.
6Familiarization with the unit

Unit operation
In the unit screen
Introduction
This chapter contains information on the following subjects:
Operation 7
Input screen with keyboard 8
Input screen with numeric keyboard 8
First and foremost, pay attention to the safety instructions » page 4, Impor-
tant notes.
This chapter covers the operation of the unit and working with the
touchscreen and with various types of input keyboard.
Operation
Fig. 3
Screen display
Explanation of graphic
Currently selected menu
- Return to the higher-level menu
Function with “checkbox”
Scroll bar - Shows the position in the menu; touch the scroll bar to navi-
gate the menu
Menu item with “pop-up window”
Screen areas which confirm a function or a menu are called “function keys”.
White or green function keys are active.
Greyed out function keys are not active.
A
B
C
D
E
Proximity sensors
At the bottom of the device there are proximity sensors. When your hand ap-
proaches the screen, the device changes from display mode to operating mode
and the available function keys are highlighted.
Status line
In the main menu of some operating modes, the upper screen area contains a
status line displaying time details and the external temperature, as well as in-
formation on the operating mode currently selected.
Function keys in the main menu
In the main menu of some operating modes, the lower screen area contains
function keys with symbols for functions or menus.
Selecting menu/menu item
›Drag your finger over the screen in the required direction
›Turn the menu knob 2 » Fig. 1 on page 5
If you make the selection by turning the menu knob 2, the currently selected
menu is highlighted in green.
Confirming menu/menu item
›Touch the function key with your finger
›Press the menu knob 2
Returning to higher-level menu
Context-dependent
›By pressing
›By pressing the relevant button next to the screen
›By touching the screen outside the pop-up window with your finger
Switching function on/off with “checkbox”
Press the relevant function key
› or - Function is switched on
› or - Function is switched off
Set value
›by touching the function keys with the symbols / , / , - / +
›Touch or move your finger over the scale
Note
For some menus or menu items, the current setting is displayed, e.g. Dis-
tance: ... km or distance: ... mi.
7
Unit operation

Input screen with keyboard
Fig. 4
Input screen
The input screen with keypad is used to input entries or find entries in the unit
memory (e.g. phone contacts, addresses, etc.).
Description of the function keys
- Return to the higher-level menu
- Display the menu with the contacts found, information on the number of
relevant contacts
- Delete characters in the input line
- Change from upper case to lower case and vice versa
- Menu display with keys in the selected language, including diacrit-
ics » page 18
- Switch to numbers and special characters
- Switch to special characters
- Switch to letters
- Space
- Confirmation of text entered into the input line
Pressing the keyboard function key on the input screen places the character
required in text line A.
Only those letters or symbols reasonably used in an entry will be available dur-
ing input. Do not forget to enter a space in terms made up of more than one
word, such as Lorem Ipsum. The entries can be entered without special charac-
ters (diacritics).
The system begins searching for the most relevant terms as soon as letters
are entered, so it is not necessary to enter the entire name.
In addition to the text line A, the number of matching entries is shown in the
function key B.
The numbers 1-99 indicate the number of matching entries found. If even more
entries were found, ** is indicated instead of a number. If less than 6 entries
were found, a list of the found entries opens automatically.
Input screen with numeric keyboard
Fig. 5 Input screen with numeric keypad
The input screen with keypad is used for number input in particular.
- Input screen in the Telephone menu » page 39.
- Input screen in the Navigation menu » page 50
operation via the MAXI DOT display
Introduction
This chapter contains information on the following subjects:
Operate with the control lever buttons 9
Operating the audio using the buttons / dials on the multifunction steering
wheel 9
operation via the buttons / dials on the multifunction steering wheel -
Telephone 11
Operation with the buttons and wheels on the multifunction steering
wheel - Navigation 12
First and foremost, pay attention to the safety instructions » page 4, Impor-
tant notes.
8Familiarization with the unit

Some of the device's features are also displayed in the MAXI DOT display1). De-
pending on the equipment, these features can be operated as follows.
■With the buttons on the operating lever » page 9
■With the buttons and wheels on the multifunction steering
wheel » page 9
Note
If the ignition and the side lights are switched on, the buttons and dials on the
multifunction steering wheel will also be illuminated.
Operate with the control lever buttons
Fig. 6
Buttons on the control lever
The separate menus and menu items displayed in the MAXI DOT display can be
operated with the buttons on the control lever.
Press and hold - open main menu
Press briefly - select individual menu items or menus
Press briefly - select menu item or menu
A
A
B
Operating the audio using the buttons / dials on the multifunction steering wheel
Fig. 7 Multifunction steering wheel: control buttons and wheels
Each item in the Audio menu displayed in the MAXI DOT display can be operat-
ed with the buttons/wheels on the multifunction steering wheel.
The information shown on the MAXI DOT display (depending on the menu
selected)
■Radio
■current frequency band of the radio station;
■currently playing station of receivable radio stations in the given frequency
band if less than 5 are receivable;
■if more than 5 stations can be received, a list of receivable radio stations is
displayed with an option to choose one of them;
■TP traffic announcements.
■Media
■Name
1) The display in the MAXI DOT is described in the » Manual, chapter Information system
9
Unit operation

Buttons and wheels of the Audio menu
Button/
wheel » Fig. 7 Action Operation
Radio Media
1Press briefly Change source (change frequency bands and connected sources)
1Press and hold button Switch between the Radio and Media menus and open the last context status (e.g. the last radio station
or track to be played)
2Press briefly Switch off/on tonea) Start/stop playback
2Turn upwards Increase the volumeb)
2Turn downwards Decrease volumeb)
3Press briefly
Go to the next saved radio station in the station
list
or go to the station stored in the preset listc)
Stop traffic report
Skip to next trackd)
3Press and hold button Stop traffic report Fast forwardd)
4Press briefly
Go to the previous stored radio station in the sta-
tion list
or go to the station stored in the preset list
Stop traffic report
Go to the previous track when pressed within 5 s
from the change of track,
and to the beginning of the track when pressed 5 s
after track changed)
4Press and hold button Stop traffic report Fast rewind
5Press briefly Stop traffic report No function
5Turn upwards Display list of available stations
Scroll upwards Switch to previous trackd)
5Turn downwards Display list of available stations
Scroll downwards Skip to next trackd)
6Press briefly Call up the main menu
a) The sound is turned on again by pressing or turning wheel 2. Playback of the navigation announcements is not turned off.
b) The volume of the audible messages played by the system in the unit voice mode dialogues is modified.
c) Context-dependent selection.
d) Does not apply for AUX.
Note
Vehicles with the CANTON® sound system equipment are fitted with a loud-
speaker set including a mid-range speaker and bass speaker.
10 Familiarization with the unit

operation via the buttons / dials on the multifunction steering wheel - Telephone
Fig. 8 Multifunction steering wheel: control buttons and wheels
Items in the MAXI DOT display telephone menu can be operated with the but-
tons / dials on the multifunction steering wheel.
Buttons and wheels of the telephone menu
Button/wheel » Fig. 8 Action Operation
1Press briefly MUTE
1Turn upwards Increase the volume
1Turn downwards Reduce the volume
2Press briefly Accept call, end call, entry in the main menu of the telephone, call list, call the dialled contact
2Press and hold button Reject call, redial last call
3Turn up/down Call list, previous menu item
3Press briefly Confirm selected menu item
4Press briefly Return to a previous level on menu
4Press and hold button Return to Main Menu
Telephone call function in the MAXI DOT display
Depending on the context, you can select the following functions:
Incoming call
■ Answer - Answer a call
■ Reject - Reject a call
■ Ignore - Ignore a call
Outgoing call
■ Stop - End a call
Current call
■ Hang up - End a call
■ Mic. off - Microphone off
■ Mic. on - Microphone on
Symbols in the MAXI DOT display
Symbol Meaning
Charge status of the telephone batterya)
Signal strengtha)
11
Unit operation

Symbol Meaning
A phone is connected to the unit
Missed calls (if there are several missed calls, the number
of calls is shown next to the symbol)
a) This function is only supported by some mobile phones.
Call list
In the MAXI DOT display, only the call list can be displayed and used.
If the call list includes no entries, the following message appears in the MAXI
DOT display No entries available.
The following symbols are displayed next to each entry in the call list.
Symbol Meaning
Incoming call
Outgoing call
Missed call
Operation with the buttons and wheels on the multifunction steering wheel - Navigation
Fig. 9 Multifunction steering wheel: control buttons and wheels
Each item in the Navigationmenu displayed in the MAXI DOT display can be
operated with the buttons/wheels on the multifunction steering wheel.
Navigation is in progress
Graphical navigation instructions and other route and destination information
are displayed.
Navigation is not in progress
A compass/vehicle icon is shown to display the current vehicle position in rela-
tion to the compass.
Turn dial 2 » Fig. 9 on the multifunction steering wheel to display the Last
destinations menu.
The menu shows the Home address menu item and a list of recent destina-
tions.
When you select one of the menu items, the destination name and the follow-
ing items are displayed:
■OK - Start navigation
■Cancel - Return to the Navigation menu – the compass/vehicle symbol will
be displayed
If the home address is not defined when the menu item Home address is se-
lected, the following message appears: Please enter the home address on the
infotainment system.
Buttons and wheels for the Navigation menu
Button/
wheel » Fig. 9 Action Operation
1Press Interrupt current navigation announcement
1Turn upwards Increase volume of navigation announcements
1Turn downwards Reduce volume of navigation announcements
2Press briefly Repeat or clarify the last navigation announcement or confirm a menu item in the list of recent destina-
tions
12 Familiarization with the unit

Button/
wheel » Fig. 9 Action Operation
2Turn upwards Show the option to stop navigation or display the list of recent destinations
2Turn downwards
3Press briefly Return to a previous level on menu
3Press and hold button Return to Main Menu
Voice control
Introduction
This chapter contains information on the following subjects:
Function requirements 13
Switching on/off 14
Help for voice control 14
Operation 14
Non-recognition of a voice command 15
Option to correct a voice command input 15
Stop/restore voice command input 15
Not in the voice commands included in the help section 15
First and foremost, pay attention to the safety instructions » page 4, Impor-
tant notes.
Some equipment functions can be operated using voice commands. This accel-
erates the use of the device and increases comfort while driving.
Voice control can be used in the Radio, Media, Phone and Navigation menus.
The voice control system can be operated either by the driver or by the front
passenger.
WARNING
■Please pay attention to the traffic first and foremost. As the driver you
are fully responsible for road safety. Only use the system in a way that
leaves you in full control of your vehicle in every traffic situation – there is
the risk of an accident.
■Do not use the voice control system under stress or in an emergency.
Your voice commands may not be recognized in such situations. In such cir-
cumstances it may not be possible to establish a telephone connection or
the connection may take too much time to complete. The emergency num-
ber should be dialled manually.
Function requirements
Read and observe on page 13 first.
Function requirements for voice control.
The ignition is switched on.
The unit is switched on.
No phone call is in progress.
The parking aid is not active.
Requirements for optimum voice command recognition.
›Only give voice commands when the symbol. appears.
›Speak with a normal tone of voice without intonation and excessive pauses.
›Avoid a bad pronunciation.
›Close doors, windows and the sliding roof, to prevent external disturbance
affecting recognition of the voice commands.
›You are recommended to speak louder at higher speeds, so that the sound of
your voice is not drowned out by the increased ambient noise.
›Limit additional noise in the vehicle, e.g. passengers talking at the same time,
when you are using voice control.
13
Unit operation

CAUTION
For some languages voice control is not available. The device will notify the
user of this via a text message which is displayed after setting the device lan-
guage screen» page 16 .
Note
■No navigation announcements or traffic announcements are played while
you are using voice control.
■Some voice commands must be spelled out, depending on the language of
communication selected, such as Card “S D” One source selection.
Switching on/off
Fig. 10 Multifunction steering wheel
Read and observe on page 13 first.
Switching on voice control
›Briefly press the button on the device.
›Briefly press the symbol button 1 on the multifunction steering wheel.
Activation of voice control is indicated by an acoustic signal and the unit
screen will display a collection of basic voice commands for the current menu.
The menu display and the acoustic signal can be enabled or disa-
bled » page 19 .
Switching off voice control
›Press the button on the device for a long time, or press it twice.
›Press the symbol button twice or press and hold on the multifunction
steering wheel.
›Touch the screen with your finger (any part of the screen with the exception
of the function key with the symbol ).
›Pressing a button on the unit (except for a short press on the button ).
›Say the Cancel voice dialogue voice command.
Help for voice control
Read and observe on page 13 first.
Start introduction
When you give the voice command Start tutorial, the unit plays one of the sev-
en parts of the voice control tutorial.
Individual parts of the introduction can be requested separately by the voice
command Introduction part ... and numbers 1 through 7.
Help
When you give the voice command Help, the device displays a menu contain-
ing possible voice commands. In some cases repeating the Helpvoice com-
mand will bring up another part of the help section with a menu of additional
voice commands.
The help section does not contain all possible commands.
Operation
Read and observe on page 13 first.
The voice control system can usually be operated applying the “say what you
see” method.
Announce the descriptions of the green highlighted function keys. For exam-
ple, the function key Dial no. can be accessed through the voice command
“Call number.”
Voice control settings » page 19.
Icons in the voice control menu
A voice output is played
A voice command is awaited
a voice command entry is stopped » page 15
A voice command is recognized
As long as the system is playing a voice output, it is not necessary to await the
end of the message playback. The message can be ended by briefly pressing
the button or the symbol key on the multifunction steering wheel. In
this way the voice output is aborted and a new voice command is expected.
14 Familiarization with the unit

Non-recognition of a voice command
Read and observe on page 13 first.
If a voice command is not recognised, the system answers with Pardon? and
you can give a new command.
If the system does not recognise the second voice command, the help mes-
sage is provided again and you can give a new command.
If the system does not recognise the third voice command, the system plays
the Voice control cancelled message and the dialogue is ended.
Option to correct a voice command input
Read and observe on page 13 first.
A voice command can be corrected, modified or re-entered by briefly pressing
the button on the unit or the symbol key on the multifunction steering
wheel. However this is only possible if the symbol appears.
You do not have to wait until the voice command is recognized by the system.
Stop/restore voice command input
Read and observe on page 13 first.
In some menus, the procedure for entering voice commands can be stopped by
turning the knob 2» Fig. 1 on page 5.
The symbol displayed on the unit screen or in the information display then
changes from up .
Restore input
›by pressing the function key with the symbol ;
›by briefly pressing the button on the multifunction steering wheel.
›by pressing the symbol key on the multifunction steering wheel.
Not in the voice commands included in the help section
Read and observe on page 13 first.
Voice commands to select menus, folders and directories in individual menus.
Function Voice command
Returning to the higher-level
menu Back
Scroll through the menu /
list / directory
next page
previous page
first page
last page
Voice commands for navigation parameters
Function Voice command
Switch navigation announce-
ments on/off
Switch on navigation prompts
Switch off navigation prompts
Switch navigation guidance
assisted by TMC traffic mes-
sages on or off
Switch on dynamic route
Switch on dynamic navigation
Switch off dynamic route
Switch off dynamic navigation
Switch traffic sign display in
the unit screen on/
off » page 47
Switch on traffic signs on the map
Switch off traffic signs on the map
Show or hide lane guidance
in the unit screen » page 58
Switch on lane recommendations
Switch off track recommendations
Show or hide favourites icons
in the map
Show favourites
Switch off favorites
15
Unit operation

Voice commands for querying route information
Function Voice command
Information concerning dis-
tance to the destination distance to destination
Information concerning time
of arrival at destination arrival time
Information concerning driv-
ing time to the destination Driving time
Voice commands for the symbols in the settings menu for the map display
Symbol Voice command
Map “2 D”
Map “3 D”
Destination map
Overview map
Voice commands for the symbols to operate the map display
Symbol Voice command
Orientation zoom
Position map
Autozoom
Scale ... > Meter | Kilometre | Yards | Miles
e.g. Scale five kilometres
The destination address must be defined by saying the town and street name
and then the house number step-by-step in accordance with the system an-
nouncements. The navigation data must contain the house number.
The house number and a further address supplement in the form of a number
can be said where necessary. The system will then offer the number combina-
tion it has found if the house number and the further address supplement,
where appropriate, exists in the street entered.
Device settings
Setup menu
Introduction
This chapter contains information on the following subjects:
Main menu 16
Sound settings 17
Screen settings 18
Time and date settings 18
Keyboard settings 18
Additional keypad language settings 18
Unit settings 19
Voice control settings 19
Restore factory settings 19
Bluetooth® settings 19
First and foremost, pay attention to the safety instructions » page 4, Impor-
tant notes.
This chapter covers the basic settings for the unit.
Additional settings are described in the individual menus
■Radio » page 24
■Media » page 27
■Telephone » page 35
■Navigation » page 44
■Vehicle system settings » page 62
Main menu
Fig. 11
Unit settings: Main menu
16 Familiarization with the unit

The basic parameters for the unit can be set from the Main menu.
Call up the main menu
›Press → the function key with the symbol .
Menus in the main menu for unit setup
■Sound - Sound settings » page 17
■Screen - Screen settings » page 18
■Time and date - Time and date settings » page 18
■Language - Set the device language1)
■Keypad: - Keypad display for text entry » page 18
■More keypad languages - Enables you to enter characters other than those
available for the selected language » page 18
■Units - Unit settings » page 19
■Voice control - Voice control settings » page 19
■Remove SD card 1 safely - Safe removal of the SD card from slot 1
■Remove SD card 2 safely - Safe removal of the SD card from slot 2
■Remove USB device safely - Safe removal of USB device
■Factory settings - Reset to factory settings » page 19
■Bluetooth - Settings for the Bluetooth® function » page 19
■System information - Displays system information
■Device part number: ... - Part number of the unit
■Hardware: ... - Hardware used
■Software: ... - Software version
■Navigation database: ... - Version of the navigation data
■Media Codec: … ... - Media codec version
■Update software - manual software upgrade
■Copyright - Information on licences and copyrights are only available in Eng-
lish
Sound settings
Fig. 12 Sound settings / Balance - fader settings
›Press the button → → Press Sound.
■Volume - Volume settings
■Traffic report - Volume settings for the traffic program alerts (TP)
■Nav. announcement - Volume settings for the navigation announcements.
■Voice control - Volume settings for voice control
■Maximum switch-on volume - Maximum volume setting after switching on
■Volume adjustment - Speed-dependent volume increase
■iPod volume - Sets the volume for the connected iPod (on the MEDIA input)
■Quiet - Low volume
■Medium - Medium volume
■Loud - High volume
■AUX volume - Volume settings for the device connected through AUX
■Quiet - Low volume
■Medium - Medium volume
■Loud - High volume
■Bluetooth audio - Volume settings for the connected Bluetooth® device
■Quiet - Low volume
■Medium - Medium volume
■Loud - High volume
■Audio lowering: - Setting the reduction of the volume when the park dis-
tance control is active
■Off - Switched off
■Weak - Slight reduction
1) The correct display of country-specific characters (e.g. ID3 tag information) cannot always be guaran-
teed.
17
Device settings

■Medium - Average reduction
■Strong - strong reduction
■Bass - Mid - Treble - Sets the bass, mid and treble
■Balance - Fader - Sets the balance between left and right, front and rear
■Confirmation tone - Switch on/off confirmation tone when a function key is
pressed
■No navigation sound during call - Switch on/off navigation announcements
during a telephone call (using a phone connected to the hands-free system)
■Subwoofer - Subwoofer volume settings
■CANTON advanced setup - Setup of the Canton® sound system
■Select equaliser sound - Equaliser settings
■Music - Music
■Language - Language
■Sound focus: - Set the sound perception for different zones in the vehicle
interior
■Off - Settings apply to the whole vehicle
■Front - Optimised setting for the front seat occupants
■Driver - Optimised setting for the driver
■CANTON surround - Virtual Canton® surround system (active during media
playback)
Screen settings
›Press the button → → Screen.
■Switch off screen (in 10 seconds) - Activate/deactivate energy-saving mode
for the display1)
■Brightness: - Adjusts the brightness of the screen
■Brightest - brightest level
■Brighter - brighter level
■Medium - medium level
■Darker - darker level
■Darkest - darkest level
■Confirmation tone - Switch on/off confirmation tone when a function key is
pressed
■Show clock in standby mode - Time and date displayed on the screen when
the ignition is switched on and the unit is switched off
Time and date settings
›Press the button → → Time and date.
■Clock time source: - Type of time settings
■Manual - Manual setting
■GPS - Take the values from the GPS signal received
■Time: - Time settings
■Summer (DST) - Switches the summertime setting on/off
■Time zone: - Select the time zone
■Time format: - Set the time format
■12h
■24h
■Date: - Date settings
■Date format: - Set the date format
■DD.MM.YYYY - Day - Month - Year
■YYYY-MM-DD - Year - Month - Day
■MM-DD-YYYY - Month - Day - Year
Keyboard settings
›Press the button → → Keypad:.
■ABC - keys arranged alphabetically
■QWERTY - Arrangement of the keys as per the QWERTY system (in accord-
ance with computer keyboard arrangement)
Additional keypad language settings
›Press the button → → More keypad languages.
In this menu, the keyboard character layout for the chosen language can be
selected, and with this the option for fast entry of the characters used in the
selected language.
It is then possible to swap between the languages in the input screen showing
a keyboard by pressing » page 8 .
1) If after 10 seconds, the screen is not activated by approaching, touching the screen or operating the
menu button 2 » Fig. 1 on page 5, the screen turns black. You can switch the screen back on again by
approaching it with your hand, touching it, or using menu knob 2.
18 Familiarization with the unit
Other manuals for AMUNDSEN+
9
Table of contents
Other Skoda Car Video System manuals

Skoda
Skoda Infotainment Radio Bolero User manual

Skoda
Skoda Citigo User manual

Skoda
Skoda Infotainment Radio Swing User manual

Skoda
Skoda 5L0 063 521 A User manual

Skoda
Skoda Infotainment Radio Swing User manual

Skoda
Skoda Infotainment Radio Bolero User manual

Skoda
Skoda Infotainment Radio Blues User manual

Skoda
Skoda Infotainment Radio Bolero User manual