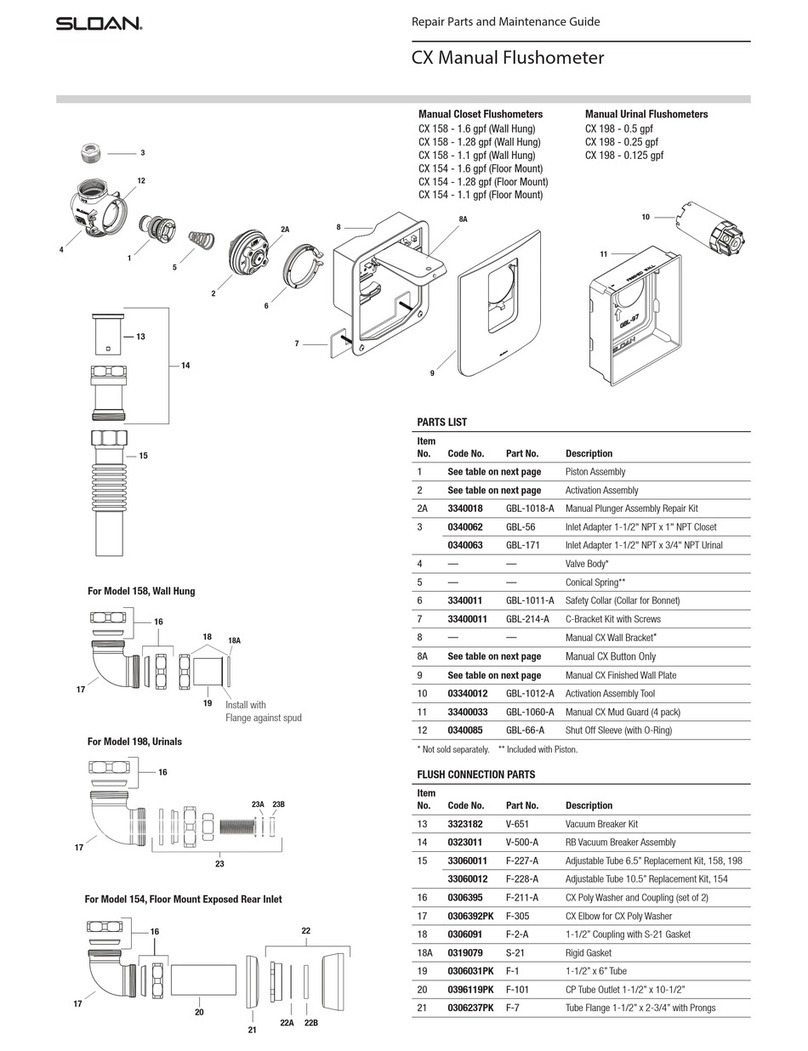
Repair Parts and Maintenance Guide
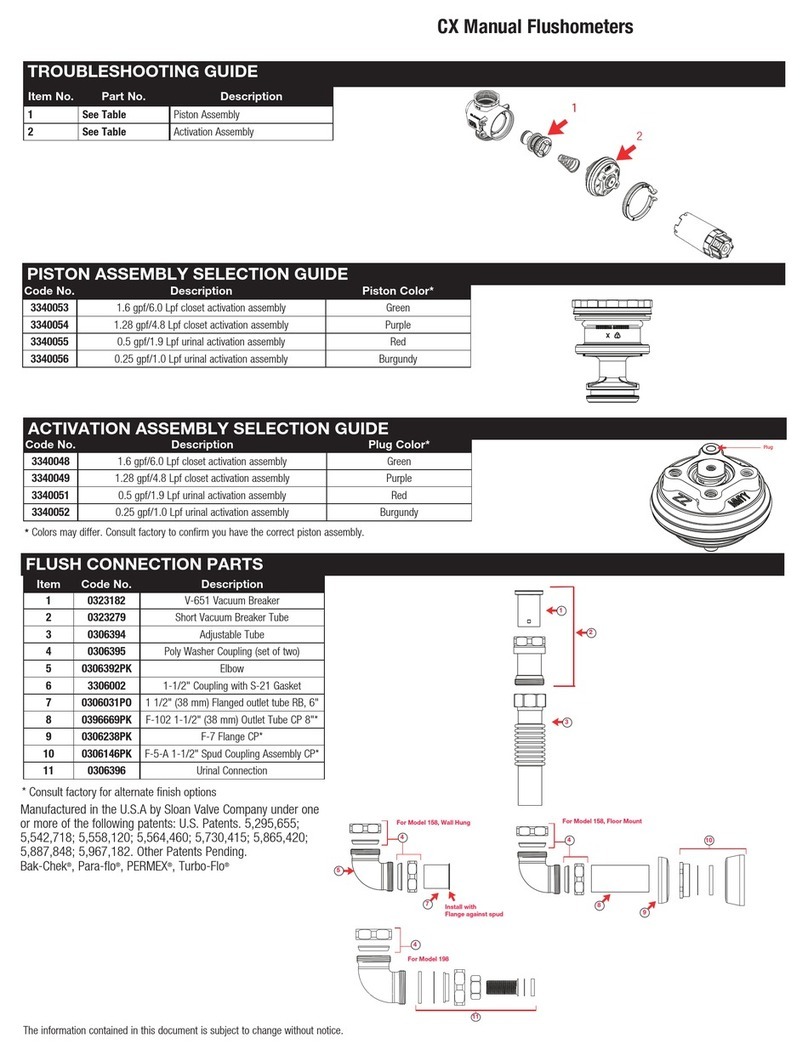
TROUBLESHOOTING GUIDE
1. Flushometer Does Not Function (No Water/Flush).
A. Ensure water supply to Valve is turned on.
B. Shut Off Sleeve is in closed position. Turn counter-clockwise to open water flow. Note: there is approximately 1/8-turn (45°) of free spinning as the
Activation Assembly engages the Shut Off Sleeve between opening and closing the Valve.
C. Plunger screw is not adjusted properly. Adjust screw using depth guide tool.
2. Volume Of Water Is Not Sufficient To Evacuate The Bowl.
A. Plunger screw is not adjusted properly (short button engagement of plunger). Adjust screw using depth guide tool.
B. Insufficient flow pressure. Readjust Activation Assembly by turning counter-clockwise to increase flow pressure.
C. Water supply pressure is inadequate (low). Increase the water supply pressure. Contact the fixture manufacturer for minimum water supply requirements
of the fixture.
D. Wrong model installed; i.e., 0.5 gpf/1.9 Lpf urinal installed on a 1.6 gpf/6.0 Lpf closet fixture. Replace with proper model.
E. Check lip seal for wear. Replace Piston if lip seal is worn or twisted.
3. Too Much Water To Fixture.
A. Excessive flow pressure. Readjust Activation Assembly by turning clockwise to decrease flow pressure.
B. Long Flush. Worn Piston; replace with new proper gpf/Lpf Piston.
C. Wrong model installed; i.e., 1.6 gpf/6.0 Lpf model installed on 0.5 gpf/1.9 Lpf or 0.25 gpf/1.0 Lpf urinal fixture. Replace with proper model per guide.
4. Valve Does Not Shut Off.
A. Plunger screw is not adjusted properly (constant contact on plunger). Adjust screw using depth guide tool.
B. Supply line water pressure has dropped and is not sufficient to close the Valve. Close Activation Assembly until pressure is restored.
C. Piston Filter Screen is clogged, Piston is damaged, or large debris stuck behind Piston. Turn off water at Shut Off Sleeve, release pressure, remove
Safety Collar and Activation Assembly. Remove Piston and check inside Valve for large debris. Do not attempt to remove Piston filter screen.
Replace Piston if damaged or cleaning does not correct the problem.
5. Leaking at Plunger.
A. Seal worn. Replace Activation Assembly.
6. Chirping Noise Is Heard At Start Or End Of Flush.
A. Caused by air purging from the system inside the Valve Assembly. Noise will subside with several flushes or within a day.
7. Valve Leaks Through Aspirator When Activated.
A. Debris between the umbrella Valve and the Retainer. Blow air on the Aspirator. If this does not correct the problem, remove Retainer with 5 mm Allen Key
(not included) and wash it under clean running water. Replace Aspirator if cleaning does not correct the problem.
B. Loose Retainer. Hand tighten Retainer with 5 mm Allen key (not included). Do not overtighten. Replace Aspirator if this does not correct the problem.
CARE AND CLEANING
DO NOT USE abrasive or chemical cleaners (including chlorine bleach) to clean Flushometers that may dull the luster and attack the chrome
or special decorative finishes. Use ONLY mild soap and water, then wipe dry with a clean cloth or towel. If using a cleaner in a spray bottle, DO
NOT spray directly onto the Flushometer, instead spray cleaner into a clean cloth and then wipe down the Flushometer.
While cleaning bathroom tile, protect the Flushometer from any splattering of cleaner. Acids and abrasive cleaning fluids will discolor or remove
chrome plating.
When assistance is required, please contact Sloan Technical Support at 1.888.SLOAN.14 (1.888.756.2614).
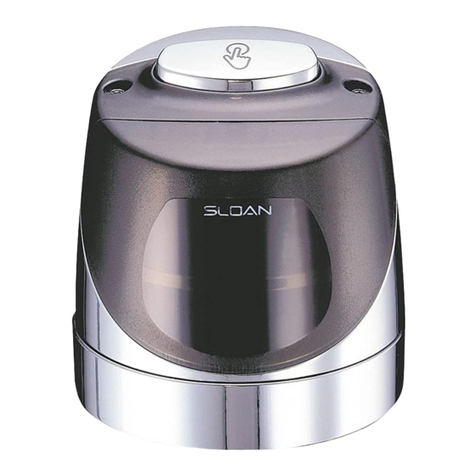
TruFlush Manual Flushometer NOT AVAILABLE IN
USA OR CANADA
