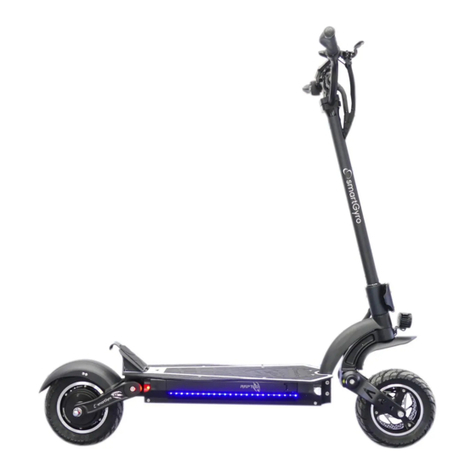
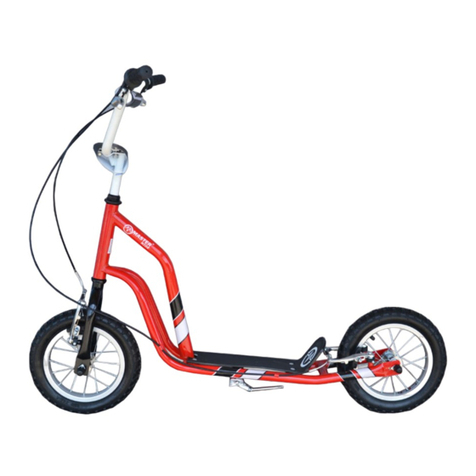
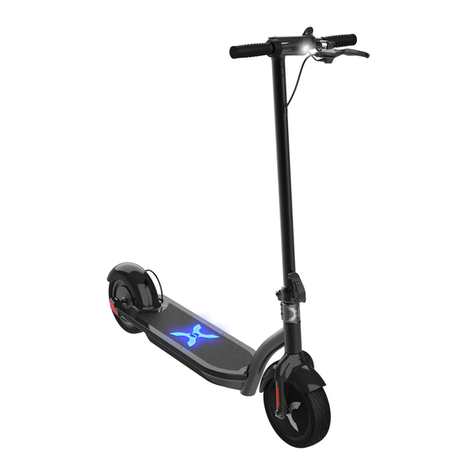
SmartGyro CROSSOVER DUAL MAX LR User manual

Vídeos
tutoriales
Ficha Técnica
y Manual completo
potente, cómodo, funcional...
disfruta de tu ciudad
Guía rápida
crossover max

Importante:
¡Importante!. Lee atentamente y guarda para futuras referencias.
1. Con el fin de ser más respetuosos con el medio ambiente, solo se
ha incluido esta guía rápida para una primera toma de contacto
con el producto, te recomendamos visitar nuestra web
www.smartgyro.es y descargar y leer las instrucciones completas.
2. Este patinete y todos sus componentes cumplen con todas las
normativas de seguridad europeas, pero te recomendamos usar
protecciones y hacer una conducción responsable.
3. Cada ciudad tiene sus propias normativas de circulación, consúl-
talas antes de su uso. No olvides conducir sobre superficies planas,
limpias, secas y con suficiente distancia respecto a otros usuarios
de la vía.
GARANTÍA.
- Este producto cuenta con tres años de garantía, consulta las con-
diciones completas en nuestra web www.smartgyro.es
1. Antes del primer uso, carga la batería al máximo de su capaci-
dad. Solo hay que fijarse en el led indicador del transformador:
Rojo=cargando //// Verde ó Azul = carga completa
2. Enciende tu Smartgyro presionando el botón de encendido
situado en el panel de control durante unos segundos
3. Selecciona una velocidad entre las 4 disponibles con una sola
pulsación del botón de encendido
4. Por seguridad, tienes que iniciar la marcha con el pie y después
presionar el acelerador (A)
5. El dispositivo tiene la función de arranque CERO; coloca un pie
sobre la base del patín y el otro pie en el suelo hasta que accio-
nes muy suavemente el acelerador y el patín comience a fun-
cionar.
Utilización:
ES
1

Esquema de la unidad: ES
2
- La velocidad de crucero es una función extra que puede configurarse
para mayor comodidad del usuario y que implica que al soltar el acelera-
dor, el patín no reducirá su velocidad. Utilícelo en largas rectas sin obstá-
culos y siempre con precaución. La velocidad de crucero se activa o
desactiva desde la aplicación de Smartgyro.
- El nivel de emisión sonora con ponderación A es inferior a 70 dB(A).
Acelerador
A
BFreno
C
DFaro
E
Reflector
F
Mástil
GPalanca de plegado
HPuerto de carga
I
JSuspensión delantera
K
L
Intermitentes
M
Luz RGB de cortesía
N
O
Luz de freno
Suspensión trasera Guardabarros
Gancho colgar
Display
V
N
D
E
H
I
G
F
C
A
B
J
K
L
O
M
Botón de encendido:
A
B
C
D
E
F
Botón encendido/apagado (pulsa 3 seg)
Botón para encender/apagar luces
Timbre
S: Cambia marcha (Peatón, ECO, Sport, Race)
Modo: para cambiar de KMH a MPH
Intermitente derecho y/o izquierdo
A
A
D
C
E
F

1. Inserta el conjunto del manillar en el tubo grande plegable y atorni-
lla firmemente los 4 tornillos.
2. Despliega el tubo, fija el cierre y gira el conector de plegado. Doble
cierre.
1. Gira el conector de plegado en sentido contrario a las agujas del
reloj hasta que la hebilla del conector de plegado ya no sujete el
conector.
2. Abre la llave pequeña.
3. Dobla el manillar y lleva el tubo hacia atrás.
Como desplegar tu patín Smartgyro:
ES
3
Como plegar tu patín Smartgyro:

Display:
ES
4
Cinco luces LED en la pantalla indican la capacidad de la batería:
- Cuando se encienden 5 leds la capacidad está ntre 100% y 90%.
- Cuando la batería se agota, las cinco luces LED se apagan (se mantiene
una encendida en color rojo de advertencia) y el patinete se desliza hasta
detenerse naturalmente debido a la inercia. Es necesario realizar la carga
urgentemente. Se recomienda no descargar la batería al 100% y cargarla
antes de su uso.
Indicador de modo de velocidad:
Modo peatón (caminar)
Modo Económico
Modo Sport
Modo Race
Luces: después de encender el patinete, pulsa el botón interruptor de las
luces para hacer clic en el interruptor multifunción. Los símbolos de las
luces se mostrarán en el display cuando todas las luces del vehículo están
encendidas.
En modo peatón ( ): el símbolo del peatón se mostrará en el display
cuando la velocidad del vehículo sea igual o inferior a 6Km/h.
- Velocidad máxima: muestra la velocidad más alta de todo el recorrido.
- Velocidad actual: el display muestra la velocidad actual durante el viaje
- Kilometraje único: muestra el kilometraje real durante el viaje y vuelve
automáticamente a cero después de apagar la fuente de alimentación.
Las fotografías de los productos publicadas son ilustrativas (imágenes no
contractuales). Es posible que alguna imagen pueda actualizarse a una
versión superior sin previo aviso
Batería y Cargador:

Aplicación Smartgyro:
ES
5
1 Descarga la APP de Smartgyro.
Descarga la APP de Smartgyro. Para ello selecciona tu sistema
operativo (Android o Apple) y a continuación selecciona el
modelo de patinete Smartgyro que ha comprado:
En la APP podrá encender y apagar luces, activar o desactivar la
velocidad de crucero y ver velocidad, kilómetros realizados,
batería, etc.
Cada smartGyro está equipado con una batería de litio y con su
cargador, además cuenta con su propio número de serie. No
reemplaces la batería ni su cargador, podría ser peligroso.
Batería de Litio
Por favor, cargua completamente la batería antes de usar su
smartGyro Crossover Dual MAX LR por primera vez. Carga la
batería cuando su nivel esté a la mitad de la barra de energía
para evitar que influya en tu conducción.
Cargador
La función de protección de sobrecarga del cargador detendrá
automáticamente el proceso de carga cuando la batería esté
llena al 100%.
Instrucciones para su carga:
1. El vehículo debe estar apagado durante la carga.
2. Conecta el enchufe del cargador a la red.
3. Importante: enchufa el cargador a una toma de corriente de
100V-240V.
4. Luz roja: en proceso de carga. Luz verde o azul: proceso de
carga completado. Por favor, guarde siempre el cargador en un
ambiente seco y ventilado.
Batería y Cargador:

ES
Mantenimiento
• Instrucciones para la limpieza de tu Smartgyro.
Si quieres mantener tu patinete como nuevo, te recomendamos
limpiarlo después de cada uso con un paño suave y húmedo (sin
líquidos abrasivos). Después déjalo en un lugar donde pueda
ventilarse evitando la corrosión de las piezas metálicas. Cuando
limpies el patinete, asegúrate de que esté apagado, desenchufa-
do de la corriente y con la tapa de carga cerrada. No puedes
limpiar el patinete con una manguera de auga a presión o sumer-
girlo en agua puesto que podrías dañarlo seriamente.
• Ajuste de los frenos
Los frenos delantero y trasero (de disco) de tu Smartgyro Crosso-
ver Dual MAX LR tienen dos puntos de ajustes: o a través del tensor
de las manetas de freno del manillar o a través del cable/pinza del
freno. En ambos casos para poder tensarlos, debes girar la rosca
en el sentido de las agujas del reloj, y para destensarlos, en el
sentido contrario. Si lo tensas desde la pinza tienes que aflojarlo
con una llave allen, tensar el cable y volver a apretarlo.
• Ajuste de las suspensiones
Las suspensiones no necesitan ningún tipo de ajuste.
•Reemplazar componentes como pastillas de freno, ruedas, etc.
Para ello le recomendamos entrar en nuestra web smartgyro.es, ir
a cualquier de nuestras tiendas y talleres oficiales o entrar en
nuestro canal de youtube para ver tutoriales @smartGyroOficial.
• Lubricación de piezas importantes:
Agrega una pequeña cantidad de grasa o lubricante específico
para mantener siempre lubricado los amortiguadores delantero y
trasero y todas las zonas necesarias del patinete de forma perió-
dica cada poco tiempo para alargar la vida de tu patinete y que
esté siempre a punto.
RECUERDE:
• Evita los obstáculos y anticipa la trayectoria y velocidad respetan-
do el código de circulación y a los más vulnerables
• En cualquier caso cuida de ti mismo y de los demás. 6

Si tiene cualquier problema con el funcionamiento, uso o montaje del producto puede
IMPORTANTE
- Respeta las normas que afectan al uso de su patín, en especial las de
circulación, es tu responsabilidad. Especial atención en lugares oscuros.
- Atención: no uses el producto cerca del agua., ni tampoco lo uses si está
dañado.
- El vehículo está diseñado para usarse por un usuario. y no ha sido diseñado
para hacer acrobacias.
- Edad mínima recomendada del usuario de 14 años. Peso máximo del
usuario: 120 kg. Altura mínima y máxima del usuario: 120–200 cm (3’11”–6’6”)
- Lleva ropa y calzado adecuado de protección (casco, rodilleras, coderas, etc.
Es obligatorio llevar zapatos).
- Atención! Cualquier componente del vehículo está sujeto a estrés y fatiga. Si
la esperanza de vida de un componente se ha superado, este puede
romperse pudiendo producir daños y/o heridas en el usuario. Si aparecen
grietas, roturas o decoloración en las áreas de más estrés, indican que el
componente ha superado su vida útil y debe ser reemplazado
- Atención! Mantener cualquier plástico fuera del alcance de los niños para
evitar asfixia.
- Mantener el manual de usuario cerca para futuras consultas. Tómate
tiempo para leer las indicaciones básicas para evitar accidentes que
puedan realizarse en los primeros meses.
- Evita zonas con mucho tráfico y cruza por el paso de peatones andando.
- Notifica tu presencia cuando te acerques a un peatón o ciclista que no te
está viendo o escuchando.
- Precaución: los frenos pueden estar calientes después de su uso. MUY
IMPORTANTE: no tocar el freno de disco.
- Eliminar cualquier arista cortante.
- Utiliza el dispositivo de parking (pata lateral) cuando no uses el vehículo.
- Cualquier carga en el manillar puede afectar a la estabilidad del vehículo.
IMPORTANTE:
- Toda manipulación o modificación del patín o alguna de sus partes tanto de software como
de hardware implicará la perdida de garantía
- La manipulación para modificar las prestaciones del patín está expresamente prohibida por
la ley y puede tener consecuencias legales para el usuario.
- Haz una comprobación general de la fijación de la estructura, comprueba la presión de las
ruedas y rellénalas en caso necesario y mira cada cierto tiempo la fijación de las tuercas.
Debido al movimiento y a continuos baches, estas tienden a aflojarse.
IMPORTANTE
- Respeta las normas que afectan al uso de su patín, en especial las de
circulación, es tu responsabilidad. Especial atención en lugares oscuros.
- Atención: no uses el producto cerca del agua., ni tampoco lo uses si está
dañado.
- El vehículo está diseñado para usarse por un usuario. y no ha sido diseñado
para hacer acrobacias.
- Edad mínima recomendada del usuario de 16 años. Peso máximo del
usuario: 120 kg. Altura mínima y máxima del usuario: 120–200 cm (3’11”–6’6”)
- Lleva ropa y calzado adecuado de protección (casco, rodilleras, coderas, etc.
Es obligatorio llevar zapatos).
- Atención! Cualquier componente del vehículo está sujeto a estrés y fatiga. Si
la esperanza de vida de un componente se ha superado, este puede
romperse pudiendo producir daños y/o heridas en el usuario. Si aparecen
grietas, roturas o decoloración en las áreas de más estrés, indican que el
componente ha superado su vida útil y debe ser reemplazado
- Atención! Mantener cualquier plástico fuera del alcance de los niños para
evitar asfixia.
- Mantener el manual de usuario cerca para futuras consultas. Tómate
tiempo para leer las indicaciones básicas para evitar accidentes que
puedan realizarse en los primeros meses.
- Evita zonas con mucho tráfico y cruza por el paso de peatones andando.
- Notifica tu presencia cuando te acerques a un peatón o ciclista que no te
está viendo o escuchando.
- Precaución: los frenos pueden estar calientes después de su uso. MUY
IMPORTANTE: no tocar el freno de disco.
- Eliminar cualquier arista cortante.
- Utiliza el dispositivo de parking (pata lateral) cuando no uses el vehículo.
- Cualquier carga en el manillar puede afectar a la estabilidad del vehículo.
7

Important:
Important!. Please read carefully and save for future reference.
1. In order to be more environmentally friendly, only this quick guide
has been included for a first contact with the product, we recom-
mend that you visit our website www.smartgyro.es and download
and read the complete instructions before daily use.
2. This scooter and all its components comply with all European
safety regulations, but we recommend that you wear protective
equipment and ride responsibly.
3. Each city has its own traffic regulations, we recommend that you
consult them before use.
WARRANTY.
This product has a two-year warranty, please consult the complete
conditions on our website www.smartgyro.es.
1. Before the first use, charge the battery to its maximum capacity.
Just look at the LED indicator on the transformer:
Red=charging //// Green=full charge.
2. Turn on your Smartgyro by pressing the power button located on
the control panel for a few seconds.
3. Select one of the 4 available speeds with a single press of the
power button.
4. For safety reasons, you have to initiate the ride with your foot
and then press the accelerator (A).
5. The device has a ZERO start function; place one foot on the base
of the skate and the other foot on the ground until you very
gently operate the accelerator and the skate starts running.
Use:
EN
8

Scooter Schematics:
EN
- The cruising speed is an extra function that can be configured for the
user's comfort and that means that when the accelerator is released,
the skate will not reduce its speed. Use it on long straight lines without
obstacles and always with caution. The cruising speed is activated or
deactivated from the Smartgyro application.
- The sound emission level is less than 70 dB(A).
9
Accelerator
A
BBrake
C
DHeadlight
E
Reflector
F
Mast
GFolding Lever
HPort of Charge
I
JFront suspension
K
L
Signal lights
M
RGB light
N
O
Brake light
Rear suspension Mudguard
Hook Hang
Display
V
N
D
E
H
I
G
F
C
A
B
J
K
L
O
M
Power on/off button:
A
B
C
D
E
F
Power ON/OFF button: Long press 3
Light button: short click to switch on/off
Horn: whistle and warning
S button : short click to change the gear
M button: switch from KM/H to MPH
Turning signal button:switch the right turning
A
A
D
C
E
F

EN
10
How to unfold your Smartgyro scooter
1. Insert the handlebar assembly into the large collapsible tube and
screw the 4 screws tightly.
2. Unfold the tube, fix the closure and twist the folding connector.
Double closure.
1. Turn the crimp connector counter-clockwise until the crimp con-
nector buckle no longer holds the connector.
2. Open the small key.
3. Bend the handlebars and bring the tube back.
How to fold your Smartgyro scooter:

EN
11
Display:
Five LED lights on the screen indicate the battery capacity:
- When 5 leds light up, the capacity is between 100% and 90%.
- When the battery runs out, all five LED lights turn off (one warning red stays
on) and the scooter coasts to a stop naturally due to inertia. It is necessary
to carry out the charge urgently. It is recommended not to discharge the
battery 100% and charge it before use.
Speed mode indicator:
Pedestrian mode (walk)
Economy mode
sport mode
race mode
Lights: After turning on the scooter, press the light switch button to click the
multi-function switch. The light symbols will be shown on the display when
all vehicle lights are on.
In pedestrian mode ( ): the pedestrian symbol will be shown on the display
when the vehicle speed is equal to or less than 6Km/h.
- Maximum speed: shows the highest speed of the entire journey.
- Current speed: the display shows the current speed during the trip
- Single mileage: shows the actual mileage during the trip and automatica-
lly returns to zero after turning off the power supply.
The photographs of the published products are illustrative (non-contractual
images). It is possible that some image may be updated to a higher version
without prior notice
Battery and Charger:

EN
Each smartGyro is equipped with a lithium battery and charger
and has its own serial number. Do not replace the battery or its
charger, it could be dangerous.
Lithium Battery
Please fully charge the battery before using your smartGyro
Crossover Dual MAX LR
Charge the battery when its level is at half of the power bar to
avoid influencing your driving.
Charger
The charger's overcharge protection function will automatically
stop the charging process when the battery is 100% full.
Charging instructions:
1. The vehicle must be turned off during charging
2. Connect the charger plug to the mains.
3. Important: plug the charger into a 100V-240V outlet.
4. Red light: charging in progress. Green light: charging process
completed. Please always store the charger in a dry and ventila-
ted environment.
Battery and Charger:
Smartgyro app:
1 Download the Smartgyro APP.
Download the Smartgyro APP. To do this, select your operating
system (Android or Apple) and then select the Smartgyro scooter
model you have purchased: Smartgyro Crossover Dual MAX LR.
In the APP you can turn lights on and off, activate or deactivate
cruising speed and see speed, kilometers traveled, battery, etc.
12

13
EN
Maintenance
• Instructions for cleaning your Smartgyro.
If you want to keep your scooter looking like new, we recommend
cleaning it after each use with a soft, damp cloth (no abrasive
liquids). Then leave it in a place where it can be ventilated avoiding
the corrosion of metal parts. When you clean the scooter, make
sure it is turned off, unplugged from power and with the charging
lid closed. You cannot clean the scooter with a pressurized water
hose or submerge it in water since you could seriously damage it.
• Brake adjustment
The front and rear (disc) brakes of your Smartgyro Crossover Dual
MAX LR have two adjustment points: either through the handlebar
brake lever tensioner or through the brake cable/caliper. In both
cases, to be able to tighten them, you must turn the thread cloc-
kwise, and to loosen them, in the opposite direction. If you tighten it
from the caliper you have to loosen it with an allen key, tighten the
cable and tighten it again.
• Suspension adjustment
The suspensions do not need any kind of adjustment.
•Replace components such as brake pads, wheels, etc.
For this we recommend you enter our website smartgyro.es, go to
any of our official stores and workshops or enter our YouTube
channel to see tutorials @smartGyroOficial.
• Lubrication of important parts:
Add a small amount of grease or specific lubricant to always keep
the front and rear shock absorbers lubricated and all the neces-
sary areas of the scooter periodically from time to time to extend
the life of your scooter and that it is always ready.
REMEMBER:
• Avoid obstacles and anticipate the trajectory and speed respec-
ting the traffic code and the most vulnerable
• In any case take care of yourself and others.

14
If you have any problem with the operation, use or assembly of the product, you can
IMPORTANT
- Respect the rules that affect the use of your skate, especially those of
circulation, it is your responsibility. Pay special attention in dark places.
- Attention: do not use the product near water, nor use it if it is damaged.
- The vehicle is designed to be used by one user. and it has not been designed
to do stunts.
- Minimum recommended user age of 16 years. Maximum user weight: 120 kg.
Minimum and maximum height of the user: 120–200 cm (3’11”–6’6”)
- Wear appropriate protective clothing and footwear (helmet, knee pads,
elbow pads, etc. It is mandatory to wear shoes).
- Attention! Any vehicle component is subject to stress and fatigue. If the life
expectancy of a component has been exceeded, it may break, causing
damage and/or injury to the user. If cracks, breaks, or discoloration appear in
the most stressed areas, it indicates that the component has exceeded its
useful life and should be replaced.
- Attention! Keep any plastic out of the reach of children to avoid suffocation.
- Keep the user manual nearby for future reference. Take time to read the
basic indications to avoid accidents that can take place in the first months.
- Avoid areas with a lot of traffic and cross the pedestrian crossing on foot.
- Notify your presence when you approach a pedestrian or cyclist who is not
seeing or hearing you.
- Caution: the brakes may be hot after use. VERY IMPORTANT: do not touch the
disc brake.
- Eliminate any sharp edges.
- Use the parking device (side leg) when you are not using the vehicle.
- Any load on the handlebars can affect the stability of the vehicle.
IMPORTANT:
- Any manipulation or modification of the skate or any of its parts, both software and hardwa-
re, will imply the loss of warranty
- Manipulation to modify the performance of the skate is expressly prohibited by law and may
have legal consequences for the user.
- Make a general check of the fastening of the structure, check the pressure of the wheels and
fill them in if necessary and check from time to time the fastening of the nuts. Due to move-
ment and continuous bumps, they tend to loosen.

Wichtig:
Wichtig!. Bitte sorgfältig lesen und zum späteren Nachschlagen
aufbewahren.
1 Um die Umwelt zu schonen, haben wir diese Kurzanleitung nur für
den ersten Kontakt mit dem Produkt beigefügt; wir empfehlen Ihnen,
unsere Website www.smartgyro.es zu besuchen und die vollständi-
ge Anleitung vor dem täglichen Gebrauch herunterzuladen und zu
lesen.
2. Dieser Scooter und alle seine Komponenten entsprechen allen
europäischen Sicherheitsvorschriften, aber wir empfehlen Ihnen,
Schutzausrüstung zu tragen und verantwortungsvoll zu fahren.
3. Jede Stadt hat ihre eigenen Verkehrsregeln, wir empfehlen Ihnen,
diese vor der Benutzung zu konsultieren.
GARANTIE.: Dieses Produkt hat eine zweijährige Garantie, bitte über-
prüfen Sie die vollständigen Bedingungen auf unserer Website
www.smartgyro.es
1. laden Sie den Akku vor der ersten Benutzung auf seine maximale
Kapazität auf. Achten Sie einfach auf die LED-Anzeige am Trans-
formator:
Rot=Ladung //// Grün=Vollladung.
2. Schalten Sie Ihren Smartgyro ein, indem Sie die Einschalttaste
auf dem Bedienfeld einige Sekunden lang drücken.
3. eine der 4 verfügbaren Geschwindigkeiten mit einem einzigen
Druck auf die Einschalttaste wählen.
4. Aus Sicherheitsgründen müssen Sie Ihren Smartgyro mit dem
Fuß starten und dann das Gaspedal (A) betätigen.
5. Das Gerät verfügt über eine NULL-Start-Funktion; stellen Sie einen
Fuß auf die Basis des Skateboards und den anderen Fuß auf den
Boden, bis Sie ganz leicht auf das Gaspedal drücken und das
Skateboard beginnt zu fahren.
Verwenden Sie:
DE
15

Überblick über die Einheit:
DE
16
- Die Reisegeschwindigkeit ist eine zusätzliche Funktion, die für den Komfort
des Benutzers konfiguriert werden kann und bedeutet, dass der Skate seine
Geschwindigkeit nicht verringert, wenn das Gaspedal losgelassen wird.
Verwenden Sie es auf langen geraden Linien ohne Hindernisse und immer mit
Vorsicht. Die Reisegeschwindigkeit wird über die Smartgyro-Anwendung
aktiviert oder deaktiviert.
- Der A-bewertete Schallemissionspegel ist kleiner als 70 dB(A).
Gaspedal
A
BBremse
C
DLeuchtturm
E
Reflektor
F
Mast
GKlapphebel
HVerladehafen
I
JVorderradaufhängung
K
L
Scheuklappen
M
RGB-Licht
N
O
Bremslicht
Hinterradaufhängung Kotflügel
Haken hängen
Display
V
N
D
E
H
I
G
F
C
A
B
J
K
L
O
M
Ein-/Aus-Taste:
A
B
C
D
E
F
Ein-/Aus-Taste (3 Sek. drücken)
Taste zum Ein-/Ausschalten des Lichts
Türklingel
S: Gang wechseln (Fußgänger, ECO, Sport, Rennen)
Modus: zum Wechsel von KMH zu MPH
Blinker rechts und/oder links
A
A
D
C
E
F

DE
17
So entfalten Sie Ihren Smartgyro Scooter
1. Setzen Sie die Lenkerbaugruppe in das große Faltrohr ein und
schrauben Sie die 4 Schrauben fest.
2. Falten Sie den Schlauch auf, befestigen Sie den Verschluss und
drehen Sie den Faltverbinder. Doppelter Verschluss.
1. Drehen Sie den Crimpstecker gegen den Uhrzeigersinn, bis die
Schnalle des Crimpsteckers den Stecker nicht mehr hält.
2. Öffnen Sie den kleinen Schlüssel.
3. Biegen Sie den Lenker und bringen Sie das Rohr zurück.
So falten Sie Ihren Smartgyro-Skate:

DE
18
Display:
Fünf LED-Leuchten auf dem Bildschirm zeigen die Akkukapazität an:
- Wenn 5 LEDs aufleuchten, liegt die Kapazität zwischen 100 % und 90 %.
- Wenn die Batterie leer ist, erlöschen alle fünf LED-Leuchten (eine rote
Warnleuchte bleibt an) und der Roller kommt aufgrund der Trägheit auf
natürliche Weise zum Stehen. Die Ladung muss dringend durchgeführt
werden. Es wird empfohlen, den Akku nicht zu 100 % zu entladen und ihn vor
der Verwendung aufzuladen.
Geschwindigkeitsmodusanzeige:
Fußgängermodus (Gehen)
Sparmodus
Sportmodus
Rennmodus
Lichter: Drücken Sie nach dem Einschalten des Rollers die Lichtschaltertaste,
um den Multifunktionsschalter zu betätigen. Die Lichtsymbole werden auf
dem Display angezeigt, wenn alle Fahrzeuglichter eingeschaltet sind.
Im Fußgängermodus ( ): Das Fußgängersymbol wird auf dem Display
angezeigt, wenn die Fahrzeuggeschwindigkeit 6 km/h oder weniger beträgt.
- Höchstgeschwindigkeit: Zeigt die höchste Geschwindigkeit der gesamten
Fahrt an.
- Aktuelle Geschwindigkeit: Das Display zeigt die aktuelle Geschwindigkeit
während der Fahrt an
- Einzelkilometerstand: Zeigt den tatsächlichen Kilometerstand während der
Fahrt an und setzt sich nach dem Ausschalten der Stromversorgung auto-
matisch auf Null zurück.
Die Fotos der veröffentlichten Produkte dienen der Veranschaulichung
(nicht vertragsgemäße Abbildungen). Es ist möglich, dass einige Bilder ohne
vorherige Ankündigung auf eine höhere Version aktualisiert werden
Akku und Ladegerät:

Jeder smartGyro ist mit einem Lithium-Akku und einem Ladegerät
ausgestattet und hat eine eigene Seriennummer. Tauschen Sie
weder den Akku noch das Ladegerät aus, da dies gefährlich sein
könnte.
Lithium-Batterie
Bitte laden Sie den Akku vollständig auf, bevor Sie Ihren smartGyro
Crossover Dual pro benutzen.
Laden Sie die Batterie auf, wenn der Batteriestand die Hälfte des
Energiebalkens erreicht hat, um zu verhindern, dass Ihr Fahrverhal-
ten dadurch beeinträchtigt wird.
Ladegerät
Die Überladeschutzfunktion des Ladegeräts stoppt den Ladevor-
gang automatisch, wenn der Akku zu 100 % voll ist.
Anweisungen zum Aufladen:
1. Das Fahrzeug muss während des Ladevorgangs ausgeschaltet
sein
2. Schließen Sie den Stecker des Ladegeräts an das Stromnetz an.
3. wichtig: Schließen Sie das Ladegerät an eine 100V-240V-Steckdo-
se an.
4. Rotes Licht: Der Ladevorgang läuft. Grünes Licht: Ladevorgang
abgeschlossen. Bitte lagern Sie das Ladegerät immer in einer troc-
kenen und belüfteten Umgebung.
DE
19
Akku und Ladegerät:
Smartgyro-App:
1 Laden Sie die Smartgyro-APP herunter.
Laden Sie die Smartgyro-APP herunter. Wählen Sie dazu Ihr
Betriebssystem (Android oder Apple) und dann das von Ihnen
erworbene Scootermodell Smartgyro aus: Smartgyro Crossover
Dual MAX LR.
In der APP können Sie das Licht ein- und ausschalten, die Reise-
geschwindigkeit aktivieren oder deaktivieren und Geschwindi-
Table of contents
Languages:
Other SmartGyro Scooter manuals

SmartGyro
SmartGyro Baggio 8 User manual
SmartGyro
SmartGyro K2 User manual

SmartGyro
SmartGyro XL1 Street User manual
SmartGyro
SmartGyro Ziro User manual
SmartGyro
SmartGyro e-Xplorer User manual

SmartGyro
SmartGyro Speedway 2.0 User manual
SmartGyro
SmartGyro Speed Way User manual
SmartGyro
SmartGyro ziro pro User manual
SmartGyro
SmartGyro Xtreme Seat User manual

SmartGyro
SmartGyro RockWay User manual
