manuals.online logo
Brands
  1. Home
  2. •
  3. Brands
  4. •
  5. SMC Networks
  6. •
  7. Controllers
  8. •
  9. SMC Networks IRV10 User manual

SMC Networks IRV10 User manual

This manual suits for next models

2

Other SMC Networks Controllers manuals

SMC Networks ITV1000 series User manual

SMC Networks

SMC Networks ITV1000 series User manual

SMC Networks ITV1000-IO Series User manual

SMC Networks

SMC Networks ITV1000-IO Series User manual

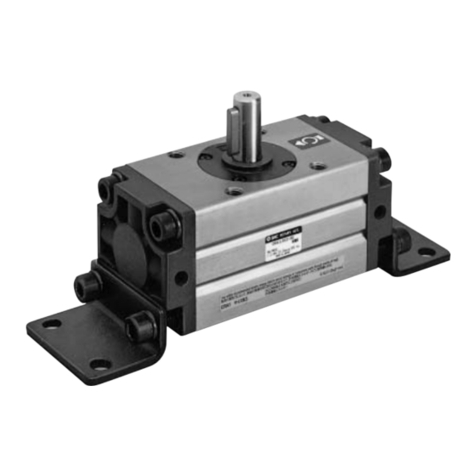
SMC Networks CRB10 User manual

SMC Networks

SMC Networks CRB10 User manual

SMC Networks LEFS Series User manual

SMC Networks

SMC Networks LEFS Series User manual

SMC Networks AS-FS A Series User manual

SMC Networks

SMC Networks AS-FS A Series User manual

SMC Networks ITVX Series User manual

SMC Networks

SMC Networks ITVX Series User manual

SMC Networks LECP6 Series Manual

SMC Networks

SMC Networks LECP6 Series Manual

SMC Networks LEY series User manual

SMC Networks

SMC Networks LEY series User manual

SMC Networks PSE303-LBC User manual

SMC Networks

SMC Networks PSE303-LBC User manual

SMC Networks IZN10 Series User manual

SMC Networks

SMC Networks IZN10 Series User manual

SMC Networks LEYG User manual

SMC Networks

SMC Networks LEYG User manual

SMC Networks D-B53 Series User manual

SMC Networks

SMC Networks D-B53 Series User manual

SMC Networks ZL3 Series User manual

SMC Networks

SMC Networks ZL3 Series User manual

SMC Networks LEKFS G Series User manual

SMC Networks

SMC Networks LEKFS G Series User manual

SMC Networks EX260-SPR1/3 User manual

SMC Networks

SMC Networks EX260-SPR1/3 User manual

SMC Networks EX600-SPR*A Installation manual

SMC Networks

SMC Networks EX600-SPR*A Installation manual

SMC Networks Sentry 5000-32-IT User manual

SMC Networks

SMC Networks Sentry 5000-32-IT User manual

SMC Networks CRQ2 Series User manual

SMC Networks

SMC Networks CRQ2 Series User manual

SMC Networks CRJ Series User manual

SMC Networks

SMC Networks CRJ Series User manual

SMC Networks JXCL1 Series User manual

SMC Networks

SMC Networks JXCL1 Series User manual

SMC Networks AS 0 2F Series User manual

SMC Networks

SMC Networks AS 0 2F Series User manual

SMC Networks LEH Series User manual

SMC Networks

SMC Networks LEH Series User manual

SMC Networks 4011 Series User manual

SMC Networks

SMC Networks 4011 Series User manual

SMC Networks MY3 Series User manual

SMC Networks

SMC Networks MY3 Series User manual

Popular Controllers manuals by other brands

Sunricher SR-ZV9003T3-RGBW-US Installation

Sunricher

Sunricher SR-ZV9003T3-RGBW-US Installation

Ksenia intro Installation and configuration manual

Ksenia

Ksenia intro Installation and configuration manual

Inovance CAN200 Series manual

Inovance

Inovance CAN200 Series manual

Gauzy LC6 FLEX Controller Installation and operation guide

Gauzy

Gauzy LC6 FLEX Controller Installation and operation guide

Viking SLP-1 Technical practice

Viking

Viking SLP-1 Technical practice

CKD KBX-30E-U Series instruction manual

CKD

CKD KBX-30E-U Series instruction manual

Sharp Energy Sun Flux User manual & installation guide

Sharp Energy

Sharp Energy Sun Flux User manual & installation guide

Yamaha RCX40 user manual

Yamaha

Yamaha RCX40 user manual

AB Quality PowerFlex 400 Frames D-H Service bulletin

AB Quality

AB Quality PowerFlex 400 Frames D-H Service bulletin

Yamaha MJC8 owner's manual

Yamaha

Yamaha MJC8 owner's manual

AL-KO ATC operating instructions

AL-KO

AL-KO ATC operating instructions

Savant SmartControl 2 Deployment guide

Savant

Savant SmartControl 2 Deployment guide

GameSir T3S user manual

GameSir

GameSir T3S user manual

Kostal inveor operating manual

Kostal

Kostal inveor operating manual

Emerson Yarway 20-55 Operating and safety instructions

Emerson

Emerson Yarway 20-55 Operating and safety instructions

CoCo ACM-LV24 Quick installation guide

CoCo

CoCo ACM-LV24 Quick installation guide

Brooks SLA5810/20 Installation and operation manual

Brooks

Brooks SLA5810/20 Installation and operation manual

SIGMA TEK SR 011 Technical manual

SIGMA TEK

SIGMA TEK SR 011 Technical manual

manuals.online logo
manuals.online logoBrands
  • About & Mission
  • Contact us
  • Privacy Policy
  • Terms and Conditions

Copyright 2025 Manuals.Online. All Rights Reserved.

No.DIK-45700-OM002-A
PRODUCT NAME
Vacuum regulator
MODEL/ Series
IRV10
IRV10A
IRV20
IRV20A
- 1 -
Table of Contents
Safety Instructions 2~3
Introduction 4
1.Specifications 4
2.Construction and Operating Principle 5
3.How to Order 6~7
4.Specific Product Precautions 8~13
5.Warranty 14
- 2 -
Safety Instructions
These safety instructions are intended to prevent hazardous situations and/or equipment damage.
These instructions indicate the level of potential hazard with the labels of “Caution,” “Warning” or “Danger.”
They are all important notes for safety and must be followed in addition to International Standards
(ISO/IEC)*1) , and other safety regulations.
*1) ISO 4414: Pneumatic fluid power -- General rules relating to systems.
ISO 4413: Hydraulic fluid power -- General rules relating to systems.
IEC 60204-1: Safety of machinery -- Electrical equipment of machines .(Part 1: General requirements)
ISO 10218: Manipulating industrial robots -Safety.
etc.
Caution
Caution indicates a hazard with a low level of risk which, if not avoided, could result
in minor or moderate injury.
Warning
Warning indicates a hazard with a medium level of risk which, if not avoided, could
result in death or serious injury.
Danger Danger indicates a hazard with a high level of risk which, if not avoided, will result
in death or serious injury.
Warning
1. The compatibility of the product is the responsibility of the person who designs the equipment or
decides its specifications.
Since the product specified here is used under various operating conditions, its compatibility with specific
equipment must be decided by the person who designs the equipment or decides its specifications based on
necessary analysis and test results.
The expected performance and safety assurance of the equipment will be the responsibility of the person who
has determined its compatibility with the product.
This person should also continuously review all specifications of the product referring to its latest catalog
information, with a view to giving due consideration to any possibility of equipment failure when configuring the
equipment.
2. Only personnel with appropriate training should operate machinery and equipment.
The product specified here may become unsafe if handled incorrectly.
The assembly, operation and maintenance of machines or equipment including our products must be
performed by an operator who is appropriately trained and experienced.
3. Do not service or attempt to remove product and machinery/equipment until safety is confirmed.
1.The inspection and maintenance of machinery/equipment should only be performed after measures to
prevent falling or runaway of the driven objects have been confirmed.
2.When the product is to be removed, confirm that the safety measures as mentioned above are implemented
and the power from any appropriate source is cut, and read and understand the specific product precautions
of all relevant products carefully.
3. Before machinery/equipment is restarted, take measures to prevent unexpected operation and malfunction.
4. Contact SMC beforehand and take special consideration of safety measures if the product is to
be used in any of the following conditions.
1. Conditions and environments outside of the given specifications, or use outdoors or in a place exposed to
direct sunlight.
2. Installation on equipment in conjunction with atomic energy, railways, air navigation, space, shipping,
vehicles, military, medical treatment, combustion and recreation, or equipment in contact with food and
beverages, emergency stop circuits, clutch and brake circuits in press applications, safety equipment or
other applications unsuitable for the standard specifications described in the product catalog.
3. An application which could have negative effects on people, property, or animals requiring special safety
analysis.
4.Use in an interlock circuit, which requires the provision of double interlock for possible failure by using a
mechanical protective function, and periodical checks to confirm proper operation.
- 3 -
Safety Instructions
Caution
The product is provided for use in manufacturing industries.
The product herein described is basically provided for peaceful use in manufacturing industries.
If considering using the product in other industries, consult SMC beforehand and exchange
specifications or a contract if necessary.
If anything is unclear, contact your nearest sales branch.
Limited warranty and Disclaimer/Compliance Requirements
The product used is subject to the following “Limited warranty and Disclaimer” and “Compliance
Requirements”.
Read and accept them before using the product.
Limited warranty and Disclaimer
1.The warranty period of the product is 1 year in service or 1.5 years after the product is delivered,
whichever is first.2)
Also, the product may have specified durability, running distance or replacement parts. Please
consult your nearest sales branch.
2. For any failure or damage reported within the warranty period which is clearly our responsibility,
a replacement product or necessary parts will be provided.
This limited warranty applies only to our product independently, and not to any other damage
incurred due to the failure of the product.
3. Prior to using SMC products, please read and understand the warranty terms and disclaimers
noted in the specified catalog for the particular products.
2) Vacuum pads are excluded from this 1 year warranty.
A vacuum pad is a consumable part, so it is warranted for a year after it is delivered.
Also, even within the warranty period, the wear of a product due to the use of the vacuum
pad or failure due to the deterioration of rubber material are not covered by the limited
warranty.
Compliance Requirements
1. The use of SMC products with production equipment for the manufacture of weapons of mass
destruction(WMD) or any other weapon is strictly prohibited.
2. The exports of SMC products or technology from one country to another are governed by the
relevant security laws and regulation of the countries involved in the transaction. Prior to the
shipment of a SMC product to another country, assure that all local rules governing that export
are known and followed.
Caution
SMC products are not intended for use as instruments for legal metrology.
Measurement instruments that SMC manufactures or sells have not been qualified by type approval
tests relevant to the metrology (measurement) laws of each country.
Therefore, SMC products cannot be used for business or certification ordained by the metrology
(measurement) laws of each country.
- 4 -
Introduction
IRV10,10A,20,20A vacuum regulator is an apparatus to adjust vacuum pressure (negative
pressure) Arbitrarily by connecting vacuum pump to the port on the VAC. side.
1.Specifications
Model
※
IRV10
※
IRV20
Fluid Air
Set pressure range
Note1)
-100 to -1.3kPa
Withstand pressure
Note2)
100 kPa(Except with pressure gauge)
Knob resolution 0.13kPa or less
Atmospheric intake consumption
Note3)
0.6L/min(ANR) or less
Ambient and fluid temperature 5 to 60℃
VAC side tubing O.D φ6、φ8
φ1/4”、φ5/16”
φ6、φ8、φ10
φ1/4”、φ5/16”、φ3/8”
SET side tubing O.D
Weight
(No accessories)
Standard connections 135g(IRV10-C08) 250g(IRV20-C10)
Single sided connections 125g(IRV10A-C08) 250g(IRV20A-C10)
(Note1)This varies with pressure on vacuum pump side.
(Note2)For vacuum regulators with a pressure gauge, the pressure gauge will be damaged if
positive pressure is supplied. In the event that positive pressure is applied, the vacuum
regulator will not be damaged, however, the main valve will open and positive pressure will
enter the vacuum pump. This may cause malfunction of the vacuum pump. The vacuum
regulator cannot positive pressure.
(Note3)Taking air from atmosphere all the time.
- 5 -
2.Construction and Operating Principle
①
By turning handle ②
clockwise, force of set spring ③
pushes down diaphragm ④
and main valve so
that VAC. Pressure side and SET. Pressure side are connected, which increases vacuum on
SET. Pressure side (become closer to absolute vacuum).
⑥
Vacuum pressure on SET. Pressure side passes air pass, goes to vacuum chamber and acts
③
on the top of diaphragm . This pressure opposes compression force of set ②
spring and
becomes SET. Pressure.
When vacuum SET. Pressure becomes higher than the set value (closer to absolute vacuum),
② ⑥
balance of set spring and SET. Pressure in vacuum chamber is lost. Because of this,
③ ④
diaphragm is pushed up so that main valve c ⑤
loses and atmosphere suction valve opens.
Atmosphere flows in SET. Pressure and becomes SET. Pressure when compression force of set
②
Spring balances with SET. Pressure.
When vacuum of SET. Pressure becomes lower than the set value (closer to atmospheric
p② ⑥ ③
ressure), balance of set spring and SET. Pressure in vacuum chamber is lost, and diaphragm is
⑤ ④
pushed down. Atmosphere suction valve closes and main valve opens, and air is sucked to VAC.
Pressure side. It becomes SET. Pressure when compression force o ②
f set spring
balances with SET. Pressure.
Block Diagram
②SET SPRING
① HANDLE
⑥ VACUUM CHAMBER
③ DIAPHRAGM
⑤ SUCTION VALVE
④ MAIN VALVE
Diaphragm
m2
Setting spring
N/m springCompb.
1
(B)
m/N
Suction valve
mkPa
(S)
Displacement
m
+
-
Displacement
m
Vacuum
pressure
kPa
Force
N
VAC
Force
N
- 6 -
3.How to Order
【Standard connections】
I R V 20 - ※ C08 ※ ※
Accessories2
【Accessory is included in the same container】
Nil No accessory(Note1)
GN With gauge nut assembly (Note2)
G With pressure gauge(Note3)
ZN (Note3)
With
digital
pressure
switch
NPN open collector 1 outputs
ZP PNP open collector 1 outputs
ZA NPN open collector 2 outputs +Copy function
ZB PNP open collector 2 outputs +Copy function
One-touch fitting
Nil Straight
L Elbow
Connection port size
symbol
Port size IRV10
IRV20
C06
mm
φ6 ● ●
C08 φ8 ● ●
C10 φ10 - ●
N07
inch
φ1/4”
● ●
N09 φ5/16”
● ●
N11 φ3/8”
- ●
Accessories1
【Accessory is included in the same container】
Nil No accessory
B With Bracket
L With Bottom Bracket
Body size
10
The maximum flowing
quantity 140l/min(ANR)
20
The maximum flowing
quantity 240l/min(ANR)
(Note1) Two plug nut assemblies are mounted on the gauge
port.
There is no R1/8 port.
(Note2) One plug nut assembly, one gauge nut assembly
(Rc1/8) and two clips are included in the same
container.
(Note3)Pressure gauge assembly or digital pressure switch
assembly, one plug nut assembly and two clips are
included in the same container.
- 7 -
【Single sided connections】
I R V 20 A - ※ C08 ※ ※
Body size
10
The maximum flowing
quantity 140l/min(ANR)
20
The maximum flowing
quantity 240l/min(ANR)
Accessories2
【Accessory is included in the same container】
Nil No accessory(Note1)
GN With gauge nut assembly (Note2)
G With pressure gauge(Note3)
ZN (Note3)
With
digital
pressure
switch
NPN open collector 1 outputs
ZP PNP open collector 1 outputs
ZA NPN open collector 2 outputs +Copy function
ZB PNP open collector 2 outputs +Copy function
One-touch fitting
Nil Straight
L Elbow
Connection port size
symbol
Port size IRV10A
IRV20A
C06
mm
φ6 ● ●
C08 φ8 ● ●
C10 φ10 - ●
N07
inch
φ1/4”
● ●
N09 φ5/16”
● ●
N11 φ3/8”
- ●
Accessories1
【Accessory is included in the same container】
Nil No accessory
B With Bracket
L With Bottom Bracket
(Note1) One plug nut assembly is mounted on the gauge
port.
There is no R1/8 port.
(Note2) One gauge nut assembly (Rc1/8) and one clip are
included in the same container.
(Note3)Pressure gauge assembly or digital pressure switch
assembly, one clip are included in the same
container.
Single sided connections
- 8 -
4.Specific Product Precautions
Warning Handling
(1)If a possible danger of system is expected when vacuum pressure is
Decreased by service interruption and/or vacuum pump trouble, provide
the system with a safety circuit to avoid such a danger.
(2)If a possible danger of system is expected when vacuum regulator
fails, provide the system with a safety circuit to avoid such a danger.
(3)Keep the specified tightening torque for mounting
Excessive torque can damage the mounting screws and product body.
And insufficient torque can cause the threaded parts to loosen.
Cross recessed round head screw for mounting the bottom bracket
Square nut
Bottom bracket
Applicable torque
IRV10(A):M3
0.32±0.03N・m
IRV20(A):M4
0.76±0.05N・m
- 9 -
Caution Handling
(1) Reduce the set pressure to zero(atmospheric pressure) for removing the plug
when additionally mount the pressure gauge and pressure switch.
1.For customers purchasing regulator with a pressure gauge or pressure switch
1-1 Accessories
・Pressure gauge (GZ43,GZ33)or pressure switch (ZSE30A)------------1 piece
・Gauge nut (with O-ring)-----------------------------------------------------------1 piece
Note) The gauge nut is mounted on the pressure gauge or pressure switch.
・ Plug nut (with O-ring)------------------------------------------------------------1 piece
・ Clip-----------------------------------------------------------------------------------1 piece
Note) For the summarized piping specification, only 1 clip is provided ,and no plug
nut is provided.
Pressure gauge Pressure switch
Gauge nut Plug nut Clip
1-2 Mounting of pressure gauge or pressure switch
1) Confirm the VAC side and SET side of the product, and insert the pressure
gauge or pressure switch completely (until flush with the product surface)into the
preferred hexagon gauge port.
Insert the clip to the left side of the product completely as shown in the figure.
2) After insertion, check to ensure the pressure gauge does not come off.
This is the end of the mounting procedure for the summarized
piping specification.
1) 2)
Pressure gauge
Clip