EN 6
speedtimerhasexpireditreturnstothethirdspeedbydefault.
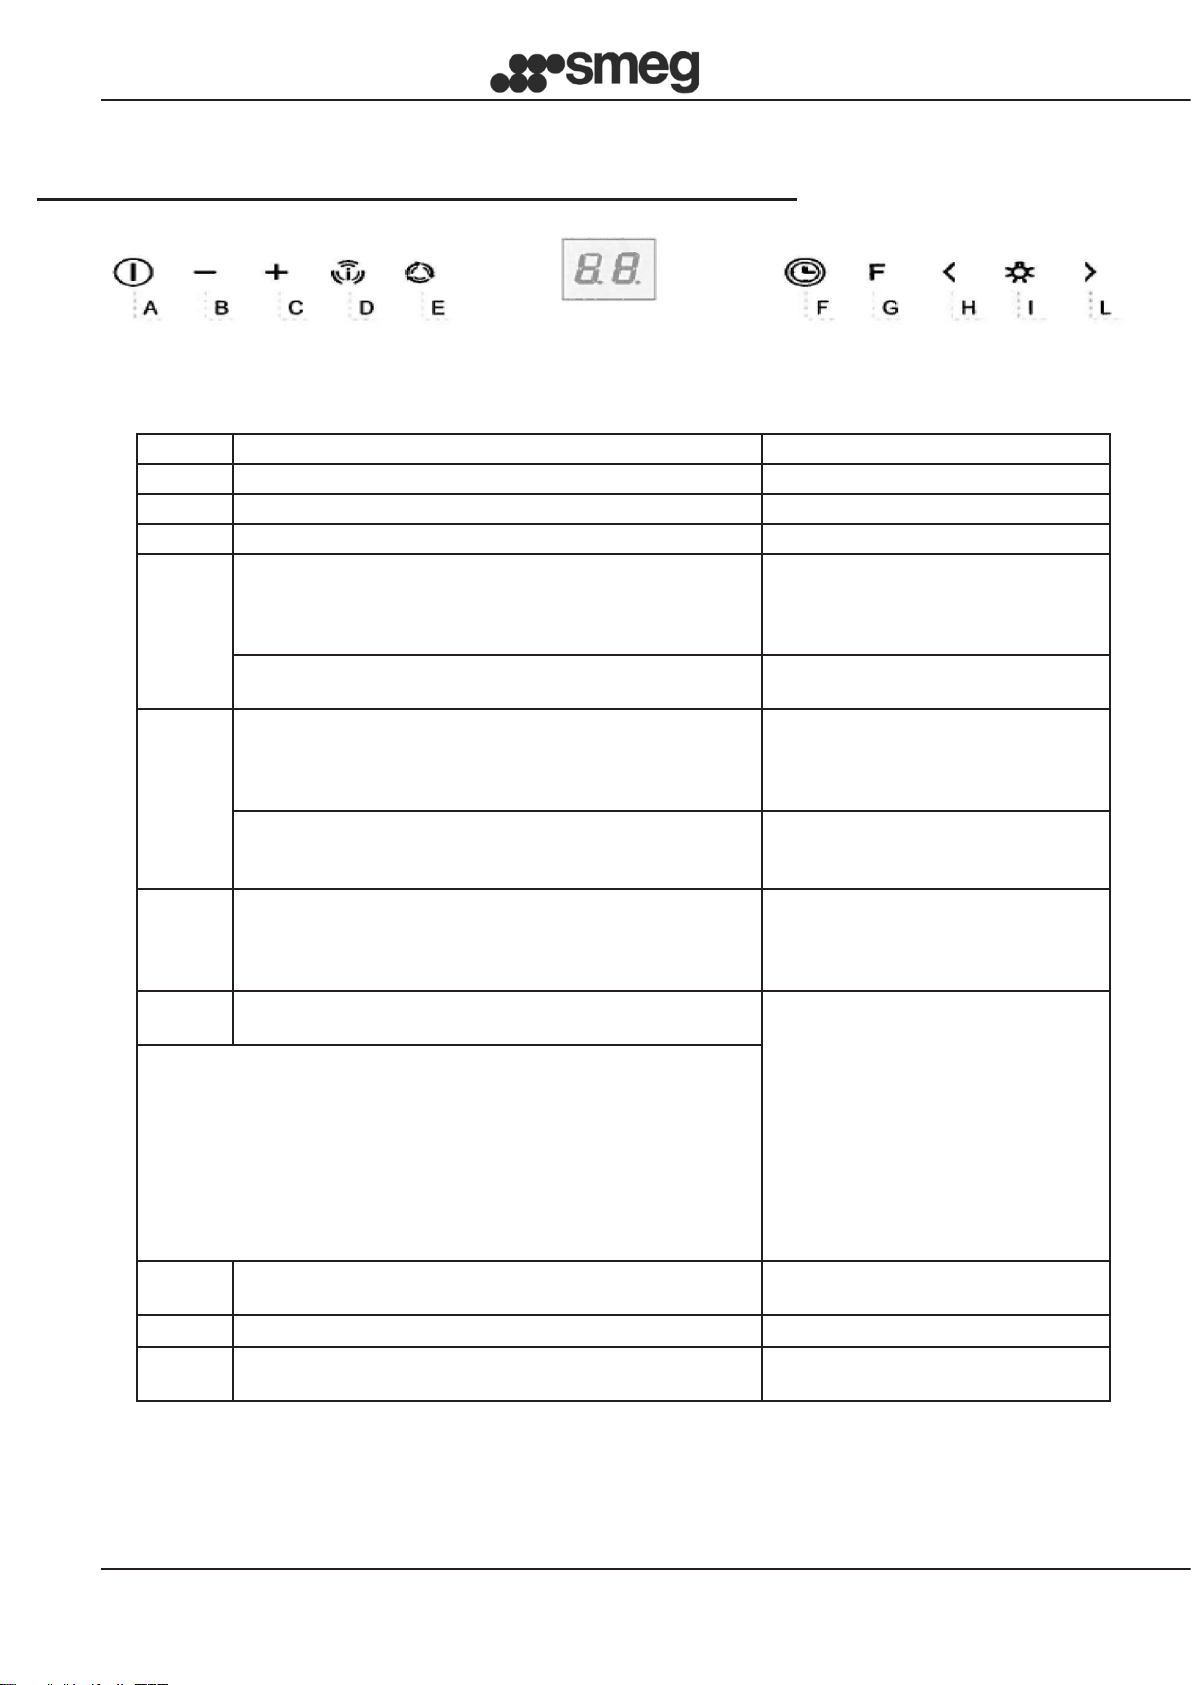
Control panel
2-DIGIT10-KEYCAPACITIVEPUSHBUTTONBOARD:
Key Function Display
ATurns the suction motor on / off. Displays the set speed
BDecreases the operation speed. Displays the set speed
CIncreases the operation speed. Displays the set speed
DActivates the Intensive speed from any speed even with the
motor off, this speed is timed. At the end, the system returns
to the speed previously set. Suitable for dealing with the
maximum emissions of cooking fumes.
Displays alternately HI
Hold the button down for about 5 seconds, when all loads are
off (Motor + Light), to switch the keyboard lock On / Off.
"- -" Keyboard lock On.
E24 H function
Activates the motor at the rst speed and allows extraction for
10 minutes every hour.
It displays 24 and the point at the bottom
right ashes once a second, while the
motor is in operation. Press the key to
disable it.
Holding the button down for about 5 seconds when all loads
are off (Motor + Light), holding key "B" down during the
animation, the Active Carbon Filters Alarm switches On / Off.
Displays a rotary animation for 5
seconds. "EF" ashes twice in activation.
"EF" ashes once in deactivation.
FDelay function
Enables the automatic shutdown delay of 30'. Suitable for
removing residual odours. Can be activated from any position.
You disable it by pressing the key or turning the motor off.
Displays the operating speed and the
point on the lower right ashes.
GWith the lter alarm in progress, pressing the key for about 3
seconds resets the alarm.
After the procedure, the signal
previously displayed turns off:
FF signals the need to wash the metallic
grease lters. The alarm comes on after
100 hours of actual operation of the
Hood.
EF signals the need to replace the active
carbon lters and the metallic grease
lters must also be washed. The alarm
comes on after 200 hours of actual
operation of the Hood.
HDecreases the light intensity at each press of the Key in a cyclic
manner.
1Turns the lighting system on and off at maximum intensity.
LIncreases the light intensity at each press of the Key in a cyclic
manner.