manuals.online logo
Brands
  1. Home
  2. •
  3. Brands
  4. •
  5. socorex
  6. •
  7. Laboratory Equipment
  8. •
  9. socorex ACURA 841 User manual

socorex ACURA 841 User manual

1
ACURA
TM
841
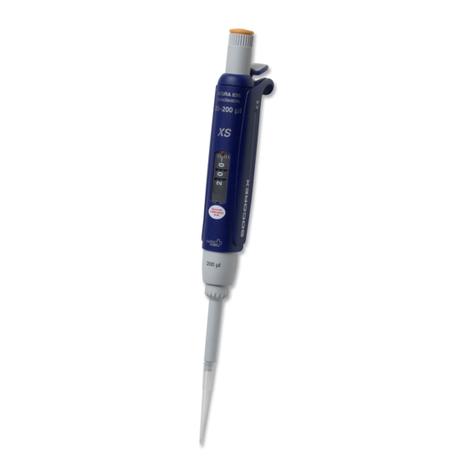
POSITIVE DISPLACEMENT MICROPIPETTE
DIREKTVERDRÄNGUNGS-MIKROPIPETTE
MICROPIPETTE A DEPLACEMENT POSITIF
OPERATING INSTRUCTIONS
BETRIEBSANWEISUNG
MODE D'EMPLOI
BESCHREIBUNG
Die Acura
®
841 Direktverdrängungs-Mikropipette
zeichnet sich durch Einfachheit und Präzision aus.
Sie bietet umfangreiche Anwendungen an:
• Verteilung viskoser Flüssigkeiten
• Dosierung flüchtiger Medien
• Chemische und kosmetische Anwendungen
• Gebrauch mit Öl und Reinigungsmittel
Die Mikropipette verfügt über 5 vorkalibrierte Volu-
men. Die Flüssigkeitsprobe wird in eine Glaskapil-
lare aufgezogen, da kein Luftpolster vorhanden ist
bleibt die Genauigkeit auch bei wechselnder Visko-
sität unverändert. Die Kapillare wird praktisch rest-
los entleert und kann bei Flüssigkeitswechsel
weiter verwendet werden.
Fünf Pipetten decken den gesamten Volumen be-
reich von 1 bis 200 µl ab.
Jede Pipette wird mit einem Kontrollzertifikat gelie-
fert.
DOSIEREN
Einfaches Einstellen und klares Ablesen des ge-
wünschten Volumens auf dem Kolben tragen zur
sicheren Handhabung bei.
Einstellen des Volumens (Abb. 1)
Zylinder C von der verriegelten Position Wauf die
Schiebestellung I drehen, dann verschieben, bis
der gewählte Skalen-Teilstrich (z.B. 50 µl) am Ring
D anliegt. Zurück auf Position Wzur Verriegelung
(Abb. 2).
DESCRIPTION
The Acura
®
841 is a positive displacement micropi-
pette line intended for accurate, precise and easy
pipetting.
It has a wide range of applications such as:
• Viscous liquid distribution
• Dosing of volatile liquid
• Chemical and cosmetic applications
• Use of oils and detergents
Ajustable micropipette with 5 preset volumes. The
plunger draws the sample into the recision glass capil-
lary without any dead volume. No air interface means
that volume dispensed will always be the same re-
gardless of viscosity. The plunger is designed to deliv-
er the sample without any noticeable residue, which
allows the capillary to be reused with other fluids.
Five pipettes cover the full range of usual sample
volumes from 1 to 200 µl.
Each pipette is supplied with a control quality cer-
tificate.
DOSING INSTRUCTION
Volume selection is a matter of seconds. Simple
mechanical device gives high precision, eliminate
risks of errors. At all times the selected volume
clearly appears on the barrel.
Volume setting (Fig. 1)
Barrel C will slide after rotating from locked posi-
tion Wto selector position I. Place selected gradua-
tion mark (for example 50 µl) flush with end of ring
D. Then lock into position W.
DESCRIPTION
Votre nouvelle pipette Acura
®
841 à déplacement
positif est un instrument à la fois simple et précis.
Sa plage d’application comprend:
• Distribution liquide visqueux
• Dosage liquide volatile
• Domaine cosmétique et chimie
• Utilisation d’huiles et détergents
Micropipette réglable à 5 volumes pré-étalonnés.
Le piston aspire l’échantillon dans un tube capillai-
re par contact direct: l’absence de coussin d’air ga-
rantit un volume constant, quelle que soit la
viscosité du liquide. La forme étudiée du piston
permet la décharge de l’échantillon sans résidus
gênants et la réutilisation du capillaire pour
d’autres fluides.
Cinq pipettes couvrent la gamme complète des me-
sures utiles de 1 à 200 µl.
Chaque pipette est pourvue d’un certificat de con-
trôle de qualité.
OPERATION DE PIPETAGE
Le changement d’une capacité à une autre est ins-
tantané. Une mécanique simple, d’emploi facile,
assure une grande précision et élimine tout risque
d’erreur. La capacité est affichée sur le cylindre.
Réglage du volume (Fig. 1)
Faire coulisser le cylindre C après l’avoir amené par ro-
tation de la position verrouillée Wà la position de ré-
glage I. Placer le trait de graduation choisi (p.ex. 50 µl)
à fleur de la bague D; verrouiller en retournant sur W.
SAFETY PRECAUTIONS
• Read operating instructions carefully; keep
available for future reference.
• Observe manufacturer’s instructions and
guidelines for operation and maintenance.
• Refer to and follow regulations about handling
of potentially hazardous reagents.
• Before use, check instrument for good working
conditions.
• Do not use harsh chemicals (such as acetone)
to clean instrument.
• This product should be used only for its
intended purpose.
• Mind possible hand-fatigue during serial
pipetting and its medical consequences (such
as repetitive strain injuries RSI).
SICHERHEITSANWEISUNGEN
• Vor Gebrauch Betriebsanweisung sorgfältig lesen
und zum späteren Nachschlagen aufbewahren.
• Hinweise des Herstellers sowie Instruktionen
betreffend Bedienung und Wartung befolgen.
• Sicherheitsvorschriften zur Handhabung
gefährlicher Lösungen beachten.
• Vor jedem Gebrauch kontrollieren, ob das
Instrument in perfektem Arbeitszustand ist.
• Nicht mit aggressiven Lösungsmitteln (z.B.
Azeton) reinigen.
• Produkt nur für dafür vorgesehene Zwecke
einsetzen.
• Mögliche Überanstrengung der Hand während
längerer Pipettierarbeit und deren medizini-
sche Konsequenzen (wie z.B. Sehnenscheiden-
entzündung) vermeiden.
CONSIGNES DE SECURITE
• Avant utilisation, lire avec soin le mode
d’emploi, le conserver et s’y référer au besoin.
• Respecter les consignes du fabricant ainsi que
les directives d’utilisation et d’entretien.
• Connaître et se confromer aux règles de sécu-
rité sur l’emploi de réactifs dangereux.
• Contrôler avant chaque usage le parfait état de
fonctionnement de l’instrument.
• Ne pas employer de solutions agressives (p.ex.
acétone) pour le nettoyage du corps de la pipette.
• L’instrument ne doit pas être utilisé à d’autres
fins que celles définies ci-dessous.
• Attention à une possible fatigue de la main
lors de pipetages répétitifs afin d’éviter
d’éventuelles conséquences médicales (syn-
drome du tunnel carpien).
2
Dispensing
1. Depress plunger fully and immerse capillary into
solution. Release slowly.
2. Wipe carefully external of glass capillary without
touching the opening.
3. Place capillary against wall of receiving vessel
and smoothly depress plunger until it stops.
Note: For volumes of 1µl and 5 µl, it is mandatory
to eliminate any forming drop at end of capillary to
insure good precision.
4. After work is completed, discard capillary or
rinse in distilled water or saline solution by oper-
ating plunger rapidely a few times.
Dosiervorgang
1. Kolbenstange ganz herunterdrücken und Kapil-
lare in die Lösung tauchen. Langsam loslassen.
2. Kapillare aussen abwischen, ohne Berühren der
Öffnung.
3. Kapillare an der Gefässwand anlegen und Kol-
benstrange ganz herunterdrücken.
Notiz: Um eine einwandfreie Genauigkeit zu ge-
währleisten, muss auf Volumen 1µl und 5 µl jegli-
che Tropfenbildung an der Spitze der Kapillare
zwingend beseitigt werden.
4. Nach der Serie, Kapillare auswechseln oder
durch Betätigen des Kolbens in destilliertem
Wasser oder physiologischer Lösung spülen.
Distribution
1. Presser le piston à fond et immerger le capillaire
dans le liquide à pipetter.
Relâcher doucement.
2. Essuyer l’extérieur du capillaire sans toucher
l’orifice.
3. Placer le capillaire contre la paroi du récipient et
presser doucement le piston jusqu’à la butée.
Note: Pour les volumes de 1µl et 5 µl, il est impéra-
tif d’éliminer toute goutte (ménisque) qui pourrait
se former à l’extrémité du capillaire afin de garantir
une bonne précision.
4. Après la série, changer le capillaire ou rincer par
quelques mouvements du piston dans de l’eau
distillée ou de l’eau physiologique.
MAINTENANCE
The instrument is designed to sustain long-term
operation with minimal maintenance and service
requirements.
Defective parts must be replaced, or instrument re-
turned to dealer for repair. Order original spare
parts from authorised dealers only.
The colour appearing on the finger rest of the pi-
pette is to be found on the matching capillaries and
spare plungers. Only assemble components with
similar colour.
Replacing and installing glass capillary (Fig. 2)
Loosen collet A and remove used capillary. Set pi-
pette on maximum volume and insert new capil-
lary with colour mark first.
Do not try ro remove a brocken capillary over
the plunger, this would damage it. Remove
plunger rod and broken glass over the rod. Loosen
collet A to remove any part of glass left in the collet
A.
Plunger replacement
To remove a worn plunger, loosen the collet A and
carefully remove the glass capillary. Use the allen
wrench to loosen the screw #3. Remove the worn
plunger.
Turn pipette upside down and insert a new plunger
until it stops. Tighten screw #3 and reinstall capil-
lary according to above
WARTUNG
Die Modelle benötigen in der Regel keine Wartung.
Eine stetige Pflege und Reinigung tragen zur opti-
malen Funktion und Langlebigkeit des Instruments
bei.
Defekte Teile nur durch Originalteile vom Hersteller
ersetzen. Instrument zur Reparatur an den Fach-
handel einsenden.
Der Farb-Code auf der Fingerstütze, den Kapillaren
und Ersatzkolben garantiert, dass die ver-
schiedenen Komponente zusammenpassen.
Auswechseln und Einfügung der Kapillare
(Abb. 2)
Überwurfmutter A lockern und gebrauchte Kapil-
lare herausziehen. Pipette auf Maximalvolumen
einstellen und neue Kapillare einsetzten -Farb-
Code gegen die Pipette.
Ziehen Sie eine zerbrochene Kapillare nie
über den Kolben hinaus; dies würde ihn beschä-
digen. In diesem Fall die Kolbenstange lösen und
die Glasreste rückwärts entnehmen.
Überwurfmutter A lockern um übrigbleibende
Glasteile zu entfernen.
Auswechseln des Kolbens
Zum Auswechseln eines gebrauchten Kolbens,
Überwurmutter A lockern und Kapillare herauszie-
hen. Mit dem Inbuschlüssel Kolbenbefestigungs-
schraube #3 lösen und abgenutzter Kolben ent-
fernen.
Pipette mit Überwurfmutter nach oben halten und
neuer Kolben bis zum Anschlag einführen.
Schraube #3 wieder anziehen und neue Kapillare
wie obenerwähnt einsetzten.
ENTRETIEN
L’instrument ne nécessite pratiquement aucun en-
tretien. Le soin apporté lors de son utilisation et
son maintien en état de propreté contribuent à son
bon fonctionnement et sa longévité.
Toute pièce défectueuse doit être remplacée ou
l’instrument retourné pour réparation. N’utiliser
que des pièces de rechange d’origine commandées
auprès d’un distributeur agréé.
La couleur apparaissant sur l’appuie-doigts de la
pipette se retrouve sur les capillaires et sur l’embal-
lage des pistons de rechange. N’assembler que les
composantes de mêmes couleurs.
Changement et mise en place du tube capillaire
(Fig. 2)
Dévisser d’un demi-tour l’écrou molleté A et retirer
le capillaire. Régler la pipette sur le volume maxi-
mum et introduire le nouveau capillaire sur le pis-
ton - bande colorée vers la pipette.
N’essayer pas de retirer un capillaire cassé
par-dessus le piston: cela l’abîmerait. Enlever le
piston et retirer le capillaire par la tige. Dévisser
aussi l’écrou molleté A pour enlever le tronçon de
verre qui s’y trouverait.
Changement du piston
Pour dégager un piston usé, Dévisser l’écrou mol-
leté A et retirer le capillaire en verre. Utiliser la clé
imbus fournie pour desserrer la vis de fixation #3
du piston. Le piston libre peut être retiré.
Tourner la pipette pointe en haut et introduire jus-
qu’en butée un piston neuf, serrer la vis #3 et repla-
cer le capillaire comme indiqué ci-dessus.
Fig. 1
Fig. 2
3
CALIBRATION
Each positive displacement Acura
®
841 micropi-
pette has been factory calibrated and controlled.
The QC certificate accompanying the instrument in-
cludes control data and lot number. Calibration is
carried out gravimetrically with bidistilled water at
constant temperature (± 0.5°C) comprised between
20 and 25 °C according to ISO 8655.
In-lab calibration (Fig. 2)
Loosen collet A. Line up calibration mark B of capil-
lary with the flat end of the plunger as shown in Fig.2.
Tighten collet A. The instrument is ready for opera-
tion. When plunger rod is fully depressed, the plung-
er tip will slightly protrude from galss capillary.
Note: Control with garvimetry method the desired
precision for volumes < 50 µl
WARRANTY
Your positive displacement Acura
®
841 micropipette
is guaranteed against any material or manufacturing
defects for the period of time specified in its QC certif-
icate. Damages due to non-respect of manufacturer's
instructions, safety precautions, glass breakage, as
well as material colour alteration are excluded from
the warranty. Repair and replacement of parts do not
extend warranty time.
Should regular maintenance not eliminate a detect-
ed defect, return the instrument to the dealer from
whom it was purchased after obtaining return au-
thorization.
Decontaminate instrument prior to returning
it.
KALIBRIERUNG
Jede Direktverdrängungs-Mikropipette Acura
®
841
wurde in der Fabrik kalibriert und geprüft. Das mit
der Pipette gelieferte Kontrollzertifikat enthält alle
Daten sowie seine Lotnummer. Die Kontrolle der
Leistungsdaten erfolgt mit destilliertem Wasser,
bei einer konstanten (± 0.5°C) Raumtemperatur
zwischen 20 und 25 °C, gemäss ISO 8655.
In-Lab Kalibration (Abb. 2)
Überwurfmutter A leicht lockern. Ringmarke B der Ka-
pillare wird mit dem flachen Kolbenende in Deckung
gebracht (Abb. 2). Überwurfmutter festdrehen. Die Pi-
pette ist einsatzbereit. Bei durchgedrückter Kolben-
stange ragt der Kolben leicht aus der Kapillare hervor.
Notiz: An Hand der gravimetrischen Prüfungsme-
thode gewünschte Präzision für Volumen < 50 µl
kontrollieren
GARANTIE
Die Direktverdrängungs-Mikropipette Acura
®
841
wird gegen jeden Fabrikations- und Materialfehler für
die im Kontrollzertifikat erwähnte Zeitdauer garan-
tiert. Schäden infolge von Missachtung der Betriebs-
und Sicherheitsanweisungen bei nicht sachgemässer
Temperatur, Glassbruch sowie Farbabweichungen
der Materialien sind von der Garantie ausgeschlos-
sen. Reparaturen und Ersatzteilaustausch verlängern
die Garantiezeit nicht.
Falls Störungen vorliegen, die nach genannten Hin-
weisen nicht zu beseitigen sind, senden Sie das Instru-
ment an Ihren Fachhändler zurück (Rücksenderecht
anfordern).
Instrument vor Rücksendung desinfizieren.
CALIBRATION
Chaque micropipette Acura
®
841 à déplacement
positif est contrôlée et livrée avec un certificat de
contrôle de qualité portant le numéro de lot de
l’instrument. Les mesures sont effectuées avec de
l’eau distillée à une température ambiante constan-
te (+/- 0.5°C) entre 20 et 25 °C selon la norme ISO
8655.
Calibration en laboratoire (fig. 2)
Dévisser légèrement l’écrou molleté A. Aligner la
marque circulaire B du capillaire sur l’extrémité
plate du piston, selon encadré fig.2. Serrer l’écrou
molleté. La pipette est prête à l’emploi. A fond de
course, le piston dépasse légèrement le verre.
Note: Contrôler par vérification gravimétrique se-
lon précision désirée pour les volumes < 50 µl
GARANTIE
Votre micropipette Acura
®
841 est garantie contre
tout défaut de matière ou de fonctionnement, pour la
période figurant sur le certificat de contrôle indivi-
duel. Le bris de pièces de verre, les dommages dus au
non respect des instructions du fabricant, altération
des couleurs du produit ou des consignes de sécurité
invalident cette garantie. La durée de la garantie n’est
pas prolongée par les réparations ou le changement
des pièces.
Si l'instrument présente un défaut qui n'a pas pu être
éliminé par l'entretien courant, le retourner pour ré-
paration après obtention de l'accord du revendeur.
Décontaminer l'instrument avant de le re-
tourner.
Spare plungers with capillaries - Color code Volume range
Steel (plunger alone) 1 – 5 µL 5 / pk 342.005
White 5 – 25 µL 5 / pk 342.025
Green 10 – 50 µL 5 / pk 342.050
Blue 60 – 100 µL 5 / pk 342.100
Red 100 – 200 µL 5 / pk 342.200
Work station for two pipettes 841 1 / pk 320.333
Spare glass capillaries - Color code Volume range Packing Socorex Cat. No.
White 1 – 5 µL 200 / pk 341.005
2 x white 5 – 25 µL 200 / pk 341.025
Green 10 – 50 µL 200 / pk 341.050
Blue 60 – 100 µL 200 / pk 341.100
Red 100 – 200 µL 100 / pk 341.200
ACCESSORIES ZUBEHÖR ACCESSOIRES
I841 P –A511
SOCOREX ISBA S.A. – CH. CHAMP-COLOMB 7 – CH-1024 ECUBLENS/LAUSANNE – SWITZERLAND
[email protected] – www.socorex.com – TEL. +41 21 651 6000 – FAX +41 21 651 6001
SPARE PARTS
1. Push button
2. Cap
3. Allen screw
4. Cap
6. Plunger stop
7. O-ring
8. Washer
9. Spring
10. Plunger rod
11. Slotted sleeve
12. Tempered screw
14. Click stop, ball
15. Click stop, spring
16. Graduated barrel assembly
18. Pipette retainer and collet
20. Screw
21. Circlip
22. Handpiece
ERSATZTEILE
1. Druckknopf
2. Kappe
3. Inbusschraube
4. Kappe
6. Kolbenanschlag
7. O-Ring
8. Schiebe
9. Feder
10. Kolbenstange
11. Hülse mit Einrastungen
12. Schraube
14. Stopp-Kugel
15. Stopp-Feder
16. Graduirtes Zylinderaggregat
18. Halterungshals
20. Schraube
21. Circlip
22. Handstück
LISTE DE PIECES
1. Bouton poussoir
2. Calotte
3. Vis imbus
4. Calotte
6. Butée mobile
7. O-ring
8. Rondelle
9. Ressort
10. Tige piston
11. Chemise
12. Vis
14. Bille d’arrêt
15. Ressort d’arrêt
16. S.-ens. cylindre gradué
18. Collier de retenue
20. Vis
21. Circlip
22. Poignée
Volumes
(μL)
Inaccuracy (E%) Imprecision (CV%) Socorex Cat.
No.
Color code
Min. vol. Mid. vol. Max. vol. Min. vol. Mid. vol. Max. vol.
1-2-3-4-5 µl < ± 3.0%* < ± 2.3% < ± 2.0% < ± 2.5% < ± 2.0% < ± 1.2% 841.005 White
5-10-15-20-25 µl < ± 1.5% < ± 1.2% < ± 0.8% < ± 1.0% < ± 0.9% < ± 0.6% 841.025 2 x white
10-20-30-40-50 µl < ± 1.2% < ± 1.0% < ± 0.7% < ± 0.8% < ± 0.7% < ± 0.4% 841.050 Green
60-75-80-90-100 µl < ± 0.7% < ± 0.7% < ± 0.7% < ± 0.6% < ± 0.5% < ± 0.3% 841.100 Blue
100-120-150-175-200 µl < ± 0.7% < ± 0.7% < ± 0.7% < ± 0.3% < ± 0.3% < ± 0.3% 841.200 red
PERFORMANCE DATA AND ORDERING TECHNISCHE DATEN UND DONNEESTECHNIQUES ET
INFORMATION BESTELLINFORMATIONEN CATALOGUE
* Remove liquid meniscus from capillary end after aspiration, otherwise inaccuracy may be as high as 12%.
Performance values obtained with bi-dest. water at constant temperature (± 0.5) comprised between 20 and 25°C in accordance with ISO 8655.

Other socorex Laboratory Equipment manuals

socorex CALIBRA 852 Series User manual

socorex

socorex CALIBRA 852 Series User manual

socorex Calibra 832 User manual

socorex

socorex Calibra 832 User manual

socorex ACURA 815 User manual

socorex

socorex ACURA 815 User manual

socorex ACURA 826 XS User manual

socorex

socorex ACURA 826 XS User manual

socorex Acura Electro 926 User manual

socorex

socorex Acura Electro 926 User manual

socorex Acura electro 925 User manual

socorex

socorex Acura electro 925 User manual

socorex ACURA self-refill 865 User manual

socorex

socorex ACURA self-refill 865 User manual

socorex PROFILLER electro 447 User manual

socorex

socorex PROFILLER electro 447 User manual

socorex DOSYS 162 User manual

socorex

socorex DOSYS 162 User manual

socorex acura 865 User manual

socorex

socorex acura 865 User manual

socorex CALIBRA 822 User manual

socorex

socorex CALIBRA 822 User manual

Popular Laboratory Equipment manuals by other brands

Thermo Scientific Orion 960 Addendum

Thermo Scientific

Thermo Scientific Orion 960 Addendum

CBM SST 1700B instruction manual

CBM

CBM SST 1700B instruction manual

Yamato DF410 instruction manual

Yamato

Yamato DF410 instruction manual

ThermoFisher Scientific QuantStudio 3 Directions for installation, use and maintenance

ThermoFisher Scientific

ThermoFisher Scientific QuantStudio 3 Directions for installation, use and maintenance

Malvern Zetasizer Nano Series user manual

Malvern

Malvern Zetasizer Nano Series user manual

Hampton Research Seed Bead HR2-320 user guide

Hampton Research

Hampton Research Seed Bead HR2-320 user guide

RWD DSC-400 user manual

RWD

RWD DSC-400 user manual

Air Techniques Peri-Pro operating instructions

Air Techniques

Air Techniques Peri-Pro operating instructions

Malvern Nano Series Quick Start & Self Installation Guide

Malvern

Malvern Nano Series Quick Start & Self Installation Guide

Himedia COLONY COUNTER LA660 quick start guide

Himedia

Himedia COLONY COUNTER LA660 quick start guide

Bertin Technologies Coriolis m user manual

Bertin Technologies

Bertin Technologies Coriolis m user manual

Hitachi PRIMAIDE instruction manual

Hitachi

Hitachi PRIMAIDE instruction manual

Ocean Optics Stage-RTL-T Installation and operation manual

Ocean Optics

Ocean Optics Stage-RTL-T Installation and operation manual

Levitronix PuraLev 200SU user manual

Levitronix

Levitronix PuraLev 200SU user manual

DrBrowns AC178-INTL Instructions for use

DrBrowns

DrBrowns AC178-INTL Instructions for use

Pfeiffer Vacuum PRISMAPRO QMG 250 Translation of the original

Pfeiffer Vacuum

Pfeiffer Vacuum PRISMAPRO QMG 250 Translation of the original

Radleys Reactor-Ready instructions

Radleys

Radleys Reactor-Ready instructions

Leica CM1950 Instructions for use

Leica

Leica CM1950 Instructions for use

manuals.online logo
manuals.online logoBrands
  • About & Mission
  • Contact us
  • Privacy Policy
  • Terms and Conditions

Copyright 2025 Manuals.Online. All Rights Reserved.