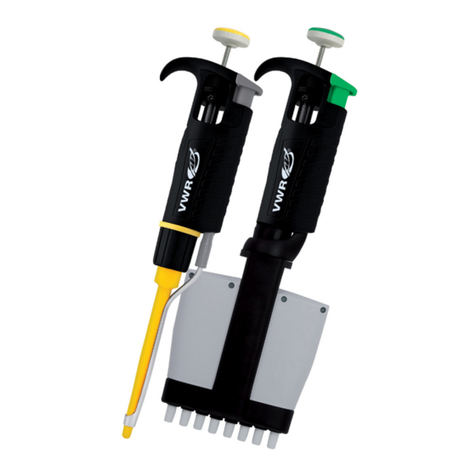
socorex CALIBRA 852 Series User manual

1
CALIBRA®852
DIGITAL MULTICHANNEL PIPETTE
DIGITAL MEHRKANALPIPETTE
PIPETTE DIGITALE MULTICANAUX
OPERATING INSTRUCTIONS
BETRIEBSANWEISUNG
MODE D'EMPLOI
DESCRIPTION
Adjustable volume multichannel micropipette for use
with detachable polypropylene tips, for an easy and con-
tinuous work with standard microplates.
The sample is drawn into the polypropylene tip without
any contact with the plunger assembly. The integrated tip
ejector is located on the handpiece allowing the automat-
ic release of the tips.
Simultaneous delivery of 8 or 12 samples from 1 µl to
200 µl by means of three pipette sizes, autoclavable at
121ºC fully assembled.
Each instrument is individually quality controlled and
comes along with its calibration certificate.
HOLDING THE MULTICHANNEL
MICROPIPETTE (Fig. 2)
The ergonomic shape of the Calibra®greatly reduces op-
erator fatigue. Place fingerrest on the phalanx of forefin-
ger with ejector knob turned towards yourself. Ease of
access of both push button and ejector knob allows natu-
ral and comfortable thumb movement.
The multichannel casing revolves on the handpiece and
allows the selection of the best working position.
VOLUME SETTING (Fig. 1)
Two cylindrical cams fitted with pre-calibrated steps ro-
tate on their axis. The large cam shows the figures on the
left hand side of the window, the small one on its right
hand side.
Setting the volume as described below and illustrated in
Fig. 1 is fast, easy and glove friendly.
1. Push plunger button with thumb and pointer to the
first stop and lock it by a clockwise quarter of a turn.
2a. Turn setting wheel clockwise or counter-clockwise un-
til the expected key volumes appear at the left of the
window.
2b. If required, pull out setting wheel (position clicks-in)
and repeat point 2a for the fine tuning.
3. Push setting wheel back to the initial position and un-
lock plunger button.
BESCHREIBUNG
Einstellbare Mehrkanalmikroliterpipette für ein schnelles
und müheloses Arbeiten mit normalisierten Mikrotitra-
tionsplatten.
Durch Bestätigung des Druckknopfes wird die Flüssigkeit
in die Polypropylen-Spitzen, ohne Berührung mit dem
Messteil aufgenommen. Der integrierte handlich gelege-
ne Spitzenabwurf erlaubt einen automatischen Abwurf
der gebrauchten Spitzen.
Drei Instrument-Grössen geben Volumen von 1 µl bis
200 µl gleichzeitig über 8 oder 12 Kanäle ab. Bei 121ºC
komplett zusammengesetzt autoklavierbar.
Jedes Instrument wird individuell qualitätsgeprüft und
mit einem Kalibrierungsprotokoll geliefert.
ARBEITSHALTUNG
DER MEHRKANALMIKROPIPETTE (Abb. 2)
Der anwenderfreundlichen Form der Calibra®wurde be-
sondere Aufmerksamkeit geschenkt. Man arbeitet ent-
spannt mit der Fingerstütze auf dem dritten Glied des
Zeigefingers, Abwurfknopf gegen sich gerichtet.
Das Mehrkanalgehäuse dreht sich auf dem Handstück
und ist nach Belieben einstellbar.
VOLUMEN EINSTELLEN (Abb. 1)
Das zu pipettierende Volumen wird über zwei Stufenleh-
ren eingestellt: die Zahlen der grossen Lehre erscheinen
im Fenster links und die der kleinen rechts.
Das Volumen lässt sich leicht und rasch wie folgt einstel-
len (siehe auch Abb. 1):
1. Druckknopf bis zum ersten Anschlag herunterdrükken
und durch eine Vierteldrehung nach rechts in dieser
Position verriegeln.
2a. Einstellrad vor- oder rückwärts drehen, bis das ge-
wünschte Hauptvolumen links im Fenster erscheint.
2b. Falls nötig, Einstellrad hochziehen (die richtige Positi-
on wird durch Einrasten gekennzeichnet) Vorgang
wiederholen, um Zweitvolumen einzustellen.
3. Einstellrad in Ruhestellung zurückdrücken und Druck-
knopf entriegeln.
DESCRIPTION
Micropipette multicanaux àvolume réglable permettant
de travailler facilement et rapidement avec des plaques
de microtitration normalisées.
Seul l'embout en polypropylène détachable entre en
contact avec le liquide àpipetter. Le bouton éjecteur
d'embouts intégréplacésur le manchon permet la libé-
ration automatique des embouts.
Trois grandeurs distribuent des échantillons allant de 1 µl
à200 µl, simultanément dans chacun des 8 ou 12 canaux.
La micropipette est stérilisable àl'autoclave à121ºC, sans
démontage.
Chaque instrument est contrôléindividuellement et reçoit
un certificat d'étalonnage.
PRISE EN MAIN
DE LA PIPETTE MULTICANAUX (Fig. 2)
La forme ergonomique de la Calibra®permet un travail de
longue durée sans fatigue. Placer le bouton éjecteur face
àl'utilisateur, puis poser l'appuie-doigt sur la phalange de
l'index. Actionner les boutons poussoir et éjecteur par
simple pression du pouce.
Le boîtier multicanaux tourne sur son axe et permet de
choisir la position la mieux adaptée au travail du moment.
RÉGLAGE DU VOLUME (Fig. 1)
Deux cames cylindriques munies de butées fixes prééta-
lonnées pivotent sur leur axe: la grande porte les chiffres
situés àgauche dans la fenêtre, la petiteceux situés sur la
droite.
L'ajustement du volume tel que décrit ci-dessous et illus-
trédans la Fig. 1 est rapide et aisé, même pour une main
gantée.
1. Presser le bouton-poussoir jusqu'àla première butée
et le verrouiller par un quart de tour àdroite.
2a. Tourner la molette de réglage dans un sens ou dans
l'autre jusqu'àl'affichage du volume principal.
2b. Si nécessaire, tirer la molette de réglage vers le haut
(la position est marquée par un crantage), puis procé-
der de même pour le réglage fin.
3. Repousser la molette dans sa position originale et dé-
verrouiller le bouton-poussoir.
Fig. 1. Volume setting Abb. 1. Volumen einstellen Fig. 1. Réglage du volume

2
TIPS AND FILTERS
Disposable tips with or without filter were carefully de-
signed to provide the best pipette and tip combination for
all types of applications. See p. 4 for ordering information.
Tips are supplied on 96 piece racks, with the 9 mm spac-
ing fitting the instrument channels.
Place the instrument on a row of tips, press firmly to en-
sure a solid fit of the tips on each channel to avoid leak-
age.
Rinsing every new tip once or more with the pipetting so-
lution (fill –empty –expulse) will improve precision.
Regular tips are autoclavable at 121ºC. Filter tips are sup-
plied in sterile and autoclavable versions.
TIGHTNESS
To work correctly, the air chamber of each barrel has to be
tight. Leaks can be detected by observing the tip: a droplet
forming at the extremity signals a leak in the channel con-
cerned.
Following spots have to be watched for leakage:
1. Matching of the tips on nozzles
2. O-rings providing tightness to the plungers
3. Damaged nozzles
Leakage will usually be eliminated by changing the tip. If
the problem remains, change the suspicious O-ring. The
wear of the O-ring is very slow under normal use, some-
what faster under frequent autoclaving. Sterilization
therefore requires higher frequency tightness control.
Damaged nozzles should be changed.
SPITZEN UND FILTER
Die verschiedenen Spitzen mit oder ohne Filter ergeben
für jede Anwendung die bestmögliche Kombination von
Pipette und Spitze. Siehe Bestellinformationen Seite 4.
Spitzen werden in 96-er Racks, mit 9 mm Standard-
Abstand geliefert.
Instrument auf Spitzenreihe stecken und darauf achten,
dass die Spitzen fest auf den Konen sitzen, um Undichte
zu vermeiden.
Die Reproduzierbarkeit verbessert sich, wenn jede Spitze
vor Gebrauch mit dem Pipettiergut ein- oder mehrmals
durchgespült wird (Auffüllen –Entleeren –Ausblasen).
Die Standardspitzen sind bei 121ºC autoklavierbar. Die Fil-
terspitzen sind autoklavierbar oder werden steril geliefert.
ABDICHTUNG
Damit die Mehrkanalpipette optimal funktioniert, muss
der Luftpolster jedes Zylinders dicht abgeschlossen sein.
Undichtigkeit lässt sich an einem leichten Rinnen der
Flüssigkeit an der Spitze feststellen.
Folgende Stellen können undicht sein:
1. Verbindung zwischen Spitze und Konen
2. O-Ringe welche die Kolben abdichten
3. Beschädigte Konen sind auszuwechseln
Um einem eventuellen Flüssigkeitsverlust abzuhelfen, ist
zuerst die Spitze zu wechseln. Wenn auch diese rinnt,
muss der verdächtige O-Ring ersetzt werden. Die Abnut-
zung des O-Rings ist normalerweise gering, jedoch
manchmal höher bei zahlreichem Autoklavieren. Deshalb
wird eine häufigere Kontrolle der Dichtung verlangt. Be-
schädigte Konen sollten ausgewechselt werden.
EMBOUTS ET FILTRES
Afin d'exploiter au maximum les possibilités de l'instru-
ment, les embouts avec ou sans filtre ont étédéfinis avec
le plus grand soin et permettent de choisir la combinaison
pipette/embout optimale pour chaque application. Voir
p. 4 pour commande.
Les embouts sont livrés directement sur rack de 96 pièces,
respectant l'écartement de 9 mm entre les canaux de la pi-
pette.
Placer l'instrument sur une rangée d'embouts, appuyer
fortement de façon àce que les embouts soient fixés soli-
dement sur chaque canal et de ce fait soient étanches.
La reproductibilitéest améliorée en rinçant au minimum
une fois chaque nouvel embout avec le liquide àdoser
(remplir –vider –expulser).
Les embouts standards peuvent être autoclavés à121ºC.
Les embouts àfiltre sont disponibles en versions stérile
ou autoclavable.
ÉTANCHÉITÉ
Pour que la pipette multicanaux fonctionne bien, chaque
cylindre doit être étanche. Un défaut d'étanchéitése ma-
nifeste par la formation d'une gouttelette àl'extrémitédu
canal concerné.
Les points àsurveiller sont:
1. Jonction cônes porte-embout et embouts
2. O-rings assurant l'étanchéitédes pistons
3. Cônes porte-embout abîmés.
Pour remédier àune éventuelle fuite, on changera d'em-
bout. Si le problème persiste, changer le O-ring. L'usure
des O-rings est habituellement très faible. Une dégrada-
tion peut être plus importante lors de stérilisations répé-
tées. C'est pourquoi l'autoclavage s'accompagne d'un
contrôle plus fréquent de l'étanchéité. Des cônes porte-
embouts endommagés doivent être remplacés.
PIPETTING OPERATION (Fig. 3)
Forward pipetting mode:
Phase 1 Depress plunger button to the intermediate
stop ending calibrated stroke before immers-
ing tips into appropriate reagent container.
Phase 2 Immerse 8 or 12 tips vertically 5 mm into liquid
simultaneously and smoothly release plunger
button. Withdraw tips from liquid vertically af-
ter 2-3 seconds, sliding them along reservoir
wall.
Phase 3 Place tips against wall of microtiterplate, slow-
ly depress plunger button to first stop and let
liquid out. Depress button to second stop: the
excess air volume produced by depressing the
plunger beyond the calibrated stroke blows out
possible fluid particles which may cling to the
tips. Remove the multichannel pipette from the
wells of the microplate, with plunger knob in its
lowest position. Release knob slowly.
Tip To eject used tips, press ejector knob E, as
ejection shown in above illustration.
Apply new tips for every liquid; change tips if
droplets are retained after blow out.
Reverse pipetting mode also possible with the Calibra®
multichannel pipette.
OPÉRATION DE PIPETTAGE (Fig. 3)
Pipettage en mode direct:
Phase 1 Enfoncer le bouton-poussoir jusqu'àla premiè-
re butée (course étalonnée) avant de plonger
les embouts dans le liquide àprélever.
Phase 2 Immerger simultanément les 8 ou 12 embouts
verticalement de 5 mm dans le liquide et relâ-
cher doucement le bouton. Attendre 2 à3 sec.
puis retirer la pipette verticalement en glissant
les embouts sur la paroi du réservoir.
Phase 3 Placer les embouts contre la paroi des alvéoles
de la plaque de microtitration et enfoncer le
bouton-poussoir jusqu'àla première butée.
Laisser s'écouler le liquide puis enfoncer com-
plètement le bouton: l'excédent d'air ainsi ex-
pulsé(surcourse) permet de chasser tout
résidu de liquide se trouvant encore dans les
embouts. Retirer la pipette multicanaux contre
les alvéoles de la plaque de microtitration. Gar-
der le bouton enfoncéjusqu'àla fin de l'opéra-
tion. Relâcher le bouton.
Ejecter Pour éjecter les embouts usagés, presser le
l'embout bouton éjecteur E (selon illustration).
Utiliser des embouts propres pour chaque li-
quide; changer les embouts en cas de rétention
de gouttelettes.
La pipette multicanaux Calibra®est aussi utilisable en
mode de pipettage inverse.
PIPETTIERVORGANG (Abb. 3)
Normal Pipettiervorgang:
Phase 1 Betätigungsknopf bis zum ersten Anschlag
(Ende des kalibrierten Arbeitshubes) drücken,
bevor die Spitzen zum Ansaugen in die Flüssig-
keit eingetaucht werden.
Phase 2 8 oder 12 Spitzen simultan ca. 5 mm tief eintau-
chen und Knopf langsam freigeben. Zwei bis
drei Sek. warten, dann Mikropipette heraus-
nehmen und gefüllte Spitzen vertikal an Reser-
voirwand abstreifen.
Phase 3 Spitzen an Wand der Mikrotitrationsplatte plat-
zieren und Betätigungsknopf langsam bis zum
ersten Anschlag drücken. Die Flüssigkeit wird
ausgestossen, danach Betätigungsknopf bis
zum zweiten Anschlag durchdrücken. Die
durch den Überhub beförderte Luftmenge
bläst nun die letzten Rückstände aus der Spitze.
Mit durchgedrücktem Knopf die Spitzen von
der Mikrotitrationsplatte entfernen; Kolben
sorgfältig zurückgleiten lassen.
Spitzen Abwerfen der gebrauchten Spitzen erfolgt
abwurf durch Betätigen des Abwurfknopfes E (wie ab-
gebildet).
Für jede Flüssigkeit neue Spitzen aufsetzen; bei
Bildung von Rückständen, Spitzen auswech-
seln.
Die Calibra®Mehrkanalpipette ist auch mit Reverspipetti-
er-Vorgang möglich.

3
CALIBRATION
Each Calibra®has been calibrated permanently at the fac-
tory and individually controlled. The Q.C. certificate ac-
companying the instrument includes control data, serial
number and operator identification. Calibration is carried
out at a constant temperature (+/–0.5ºC) comprised be-
tween 20 and 25ºC with Aqua bidest, according to DIN
12650, part 6.
Under normal conditions, a Solid Calibration®pipette
does not need to be recalibrated. After replacing a part,
which could influence the measure, the calibration should
be checked, preferably by gravimetry according to the
above mentioned norm. Ten measurements should be
performed after checking the seal tightness of each chan-
nel of the instrument.
In-lab calibration (Fig. 4): Whenever required, for in-
stance when pipetting viscous or non-aqueous liquids,
calibration adjustments can be performed by laboratory
personnel. Reach calibration screw c) located inside
plunger button by removing comfort pad a). By means of
M3 allen key b), delicately turn calibration screw clock-
wise to decrease volume, and vice versa, using values in-
dicated below. Check resulting volume after each fine
tuning. Cover push-button with comfort pad again.
KALIBRIERUNG
Jede Calibra®wird im Werk permanent kalibriert und ein-
zeln computergeprüft. Der Kontrollstreifen trägt nebst
den Messdaten auch die Kontrollnummer der Pipette und
die Identität des Prüfers. Zur Kalibrierung wird gemäss
DIN 12650 Teil 6 destilliertes Wasser bei einer konstanten
(+/–0,5ºC) Raumtemperatur von 20–25ºC verwendet.
Unter normalen Bedingungen erfordert eine Solid Cali-
bration®Pipette kein Nachkalibrieren. In gewissen Fällen,
z.B. Einbau eines Ersatzteiles, welches das Pipettiervolu-
men beeinflussen kann, muss jedoch die Kalibrierung ge-
prüft werden. Diese kann durch Gravimetrie, gemäss
oben erwähnter Norm kontrolliert werden. Bei der gravi-
metrischen Prüfung berücksichtige man die Dichtheit je-
des Kanals des Instruments. Es sollten mindestens
10 Messungen pro Volumen durchgeführt werden.
In-lab Kalibrierung (Abb. 4): Bei viskosen oder nicht
wässrigen Flüssigkeiten kann eine Nachkalibrierung er-
forderlich sein. Die Kalibrierschraube c) wird durch Entfer-
nen des Polsters a) erreichbar. Mit Hilfe eines
Imbusschlüssels (M3) b) kann die Kalibrierschraube ver-
stellt werden, wobei sorgfältiges Drehen im Uhrzeiger-
sinn das Volumen reduziert und umgekehrt, gemäss
untenstehenden Daten. Das Volumen muss nach jeder
Anpassung nachkontrolliert werden. Den Druckknopf mit
dem Polster wieder verschliessen.
CALIBRATION
Chaque Calibra®est étalonnée de manière permanente à
l'usine et contrôlée individuellement. Outre les valeurs de
contrôle, le certificat de calibration inclut le numéro de sé-
rie de l'instrument ainsi que la référence de l'opérateur.
Les mesures sont effectuées avec de l'eau distillée àune
température ambiante constante (+/–0,5ºC) comprise en-
tre 20 et 25ºC selon la norme DIN 12650 section 6.
Dans des conditions normales, une pipette Solid Calibra-
tion®ne nécessite aucun réétalonnage. Au cas oùl'on
changerait une pièce pouvant influencer la mesure, il y a
lieu toutefois de procéder au contrôle de l'étalonnage. Le
volume sera mesuréde préférence par gravimétrie selon
la norme ci-dessus mentionnée. Il est recommandéde
procéder à10 mesures, en s'assurant de l'étanchéitéde
chaque canal de l'instrument.
Calibration in-lab (Fig. 4): un réétalonnage peut être re-
quis lorsqu'un liquide visqueux ou non aqueux est pipeté.
On accède àla vis de calibration c) logée sous le bouton-
poussoir en enlevant le coussinet de rembourrage a). Au
moyen de la cléimbus M3 b),diminuer le volume en tour-
nant délicatement la vis de calibration dans le sens des
aiguilles d'une montre, et inversement, en utilisant les va-
leurs ci-dessous. Contrôler les résultats obtenus après
chaque ajustement. Replacer le coussinet sur le bouton à
la fin de l'opération.
MAINTENANCE
After a longer period of work, it may become necessary to
change an O-ring (droplet forming at the tip) or to clean
the plungers (plungers dragging).
Changing the O-rings: to have access to the O-rings No. 2
and 9 (lower assembly), remove the two lock pins No. 62
and pull barrel assembly out of casing. Free ejector head
No. 3 from claws of ejector shafts No. 12, remove circlips
No. 63 and pull plungers out of barrels. Remove barrel
holder No. 10 held in place by upper circlip No. 65. Barrels
and O-rings are now free for inspection.
Slightly grease O-rings before re-assembling unit.
Cleaning the plungers: clean the plungers with a mild de-
tergent, rinse, add some grease and wipe with a clean
cloth.
Clean, grease and check instrument once a year or more
depending upon frequency of use.
STERILIZATION
The unit has been designed for repeated sterilization in
the autoclave at 121oC (20 minutes), fully assembled. Be-
fore autoclaving, set pipette to the largest possible vol-
ume. Place instrument horizontally in the autoclave
avoiding any direct contact with metal.
Allow instrument to dry and cool down before use. Tight-
en lower assembly nut if loose. If plunger movement is
not smooth, open the pipette and slightly lubricate plung-
er with silicone grease supplied with the instrument.
Check tightness and performance after first autoclaving
cycle then regularly but at least after 50 autoclaving cy-
cles.
A slight change of material colours may appear after long
term repeated autoclaving.
WARRANTY
Your Calibra®multichannel pipette is guaranteed against
any factory or material defects for the period of time spec-
ified in its Q.C. certificate. Damages due to non-respect of
manufacturer’s instructions, autoclaving at improper tem-
peratures as well as any colour alteration of materials are
excluded from the warranty.
Should regular maintenance not eliminate a detected de-
fect, return the instrument to the dealer from whom it was
purchased, after obtaining return authorisation.
Decontaminate instrument prior to returning it.
WARTUNG
Nach längerem Gebrauch kann die Notwendigkeit auftre-
ten, die O-Ringe auszuwechseln (Tropfenbildung an der
Spitze) oder die Kolben zu reinigen (gehemmter Kolben-
hub).
Auswechseln der O-Ringe (lower assembly): nach Entfer-
nen der beiden Bolzen Nr. 62, lässt sich die Zylinderbatte-
rie aus dem Gehäuse herausziehen. Spitzenabwurf Nr. 3
von den Klauen der Betätigungsarme Nr. 12 befreien.
Circlips Nr. 63 entfernen und die Kolben herausziehen.
Führungsstück Nr. 10 wird nach Entfernen der oberen
Circlips Nr. 65 abgehoben. Die Zylinder und O-Ringe lie-
gen frei.
Kolbenreinigung: die Kolben mit einer milden Lösung rei-
nigen, leicht einfetten und mit einem sauberen Tuch ab-
wischen.
Instrument mindestens einmal pro Jahr, je nach Ge-
brauch, reinigen, einfetten und überprüfen.
STERILISATION
Dieses Modell wurde speziell für wiederholbares Sterili-
sieren entwickelt. Es kann im Autoklav bei 121oC (20 Mi-
nuten) komplett zusammengesetzt sterilisiert werden. Vor
dem Autoklavieren, Pipette auf Maximal-Volumen einstel-
len und horizontal in den Autoklav legen. Den direkten
Kontakt mit Metall vermeiden.
Vor dem Gebrauch ist nachzuprüfen, dass die Pipette
komplett trocken und abgekühlt ist. Zylinderaggregat-
Schraube, falls lose, wieder anziehen. Wenn der Kolben-
hub nicht sanft läuft, die Pipette öffnen und mit etwas
Silikonfett, das mit dem Instrument mitgeliefert wird, den
Kolben einfetten. Abdichtung und Leistungsdaten nach
erster Autoklavierung nachkontrollieren; dann regelmäs-
sig aber mindestens nach 50 Autoklavierungszyklen.
Eine minimale Veränderung der Materialfarbe kann nach
wiederholtem Autoklavieren auftreten.
GARANTIE
Ihre Calibra®Mehrkanalpipette ist gegen jeden Fabrika-
tions- und Materialfehler für die im Kontrollzertifikat an-
gegebene Zeit garantiert. Beschädigungen durch Mis-
sachtung der Angaben in der Betriebsanweisung, Auto-
klavieren bei nichtsachgemässer Temperatur sowie Farb-
abweichungen der Materialien sind von der Garantie
ausgeschlossen.
Falls das Instrument einen Fehler aufweist, welcher sich
trotz regelmäßiger Wartung nicht beheben lässt ist die-
ses, nach Vereinbarung, an den zuständigen Fachhandel
zu retournieren.
Das Instrument vor der Rücksendung desinfizieren.
ENTRETIEN
Après un usage prolongé, il peut être nécessaire de rem-
placer un O-ring (formation d'une gouttelette àl'extrémité
de l'embout) ou de nettoyer les pistons (course du piston
freinée).
Changement des O-rings: pour accéder aux O-rings Nos 2
et 9 (lower assembly), enlever les deux verrous No62 et
extraire la batterie de cylindre du boîtier. Dégager l'éjec-
teur No3 des griffes des poussoirs No12 et enlever les cir-
clips No63 afin de retirer les pistons. Libérer ensuite le
guide No10 en enlevant les circlips supérieurs No65; les
cylindres et O-rings sont maintenant ànu.
Graisser légèrement les O-rings avant montage.
Nettoyage des pistons: essuyer les pistons avec un chif-
fon imprégnéd'un solvant doux, rincer, graisser très légè-
rement et essuyer avec un chiffon propre.
Nettoyer, graisser et contrôler l’instrument une fois par an
ou plus, en fonction de la fréquence d’utilisation.
STÉRILISATION
La pipette est conçue pour être stérilisée sans démontage,
de manière répétitive àl'autoclave à121oC (20 minutes).
Avant l'autoclavage, sélectionner sur la pipette le volume
maximum. Placer l'instrument àplat dans l'autoclave en
évitant tout contact direct avec des pièces métalliques.
Avant l'utilisation, contrôler que la pipette soit sèche et
complètement refroidie. Vérifier sil'écrou de la partie bas-
se est bien serré. Au besoin le resserrer. Sile mouvement
des pistons n'est pas régulier et uniforme, démonter la pi-
pette et lubrifier légèrement les pistons avec la graisse si-
licone fournie. Contrôler l’étanchéitéet les performances
après le premier autoclavage, puis régulièrement mais au
minimum après 50 cycles d’autoclave.
A la longue, suite àl'autoclavage, un léger changement
de couleur des matériaux peut apparaître.
GARANTIE
Votre pipette multicanaux Calibra®est garantie contre
tout défaut de matériel ou de construction pour la période
figurant sur son certificat de contrôle. Les dégâts dus au
non-respect des recommandations du fabricant, àune
température d’autoclavage inappropriée ainsi que l’alté-
ration des couleurs sont exclus de cette garantie.
Si l’instrument présente un défaut qui n’a pas pu être éli-
minépar l’entretien courant, le retourner pour réparation
après obtention de l’accord du revendeur.
Décontaminer l’instrument avant de le retourner.
CALIBRATION SCALE KALIBRIERUNGSSKALA ECHELLE DE CALIBRATION
Each graduation Model 10 µl 100 µl 200 µl
Jede Graduierung
Chaque graduation +/–vol 0.018 µl 0.16 µl 0.32 µl

© SOCOREX ISBA S.A. –CH. CHAMP-COLOMB 7 –P.O. BOX –CH-1024 ECUBLENS/LAUSANNE –SWITZERLAND
TEL. 41-(0)21651 6000 –FAX 41-(0)21 651 6001 –E-MAIL: socorex@socorex.com –INTERNET: www.socorex.com
I 852 P-F 1100
Volume
Range Description
Volume
Increment Cat. No.
Socorex
Qualitips
Cat. No.
Without filter
Cat. No.
With filter
Accuracy*
(mean error %)
Precision*
(CV %)
1 µl < 3,5% 1 µl < 3,0%
1 - 10 µl 8 Channel 0.05 µl 852.08.010 Ultra-micro 309.0010R / B 309.0010FR 10 µl < 1,5% 10 µl < 1,0%
10 - 100 µl 8 Channel 0.5 µl 852.08.100 Natural 308.0200R 308.0100FR / FS 10 µl < 1,0% 10 µl < 1,0%
20 - 200 µl 8 Channel 1 µl 852.08.200 Natural 308.0200B 308.0300FR / AFR 100 µl < 0,7% 100 µl < 0,4%
10 - 100 µl 12 Channel 0.5 µl 852.12.100 Natural 308.0200R 308.0100FR / FS 20 µl < 0,9% 20 µl < 0,6%
20 - 200 µl 12 Channel 1 µl 852.12.200 Natural 308.0200B 308.0300FR / AFR 200 µl < 0,7% 200 µl < 0,3%
A=Autoclavable, R=Rack, B=Bag, L=Long, F=Filter, S=Single wrapped
Description Capacity Size Cat. No. Description Capacity Size Cat. No. Description Cat. No.
Single well reservoir
Large reservoir with lid 70 ml
175 ml 10/Pack
10/Pack
330.01
330.01 L
8 channel reservoir sterile
12 channel reservoir sterile 40 ml
40 ml 10/Pack, single wrapped
10/Pack, single wrapped
330.08.9
330.12.9
Work station holding 4
multichannel pipettes 320.335
PERFORMANCE DATA AND
ORDERING INFORMATION TECHNISCHE DATEN UND
BESTELLINFORMATION DONNÉES TECHNIQUES ET
CATALOGUE
* Above values are actual Socorex Q.C. limits achievable in daily routine with high quality tips. (Aqua bidest., temp. 20-25oC (0.5oC) per DIN 12650, part 6)
UPPER ASSEMBLY
DESCRIPTION BESCHREIBUNG DESCRIPTION
2. Circlip 2. Circlip 2. Circlip
16. Pad 16. Polster 16. Rembourrage
18. Lock pin 18. Stift 18. Goupille
22. Small cam 22. Kleine Lehre 22. Petite came
25. Large cam 25. Grosse Lehre 25. Grande came
27. Ejector bar 27. Abwerfstange 27. Tige d'éjecteur
29. Overshoot spring 29. Überhubfeder 29. Ressort de surcourse
53. Bracket 53. Klammer 53. Attache
54. Circlip 54. Circlip 54. Circlip
55. Overshoot stop 55. Überhubanschlag 55. Butée de surcourse
56. Catch 56. Sperrklinke 56. Cranteur
57. Guide 57. Führungshülse 57. Guide butée
58. Plunger assembly 58. Kolbenaggregat 58. Assemblage piston
60. Plunger stop 60. Kolbenanschlag 60. Butée mobile
61. Rack, large cam 61. Zahnring, grosse Lehre 61. Crémaillère, grande came
62. Rack, small cam 62. Zahnring, kleine Lehre 62. Crémaillère, petite came
63. Ratchet 63. Klinke 63. Cliquet
64. Spacer 64. Distanzhülse 64. Entretoise
65. Spring plate 65. Feder-Lamelle 65. Lamelle ressort
66. Handpiece 66. Handgriff 66. Poignée
67. Window 67. Scheibe 67. Vitre
68. Colour plate 68. Farbplakette 68. Plaquette de couleur
69. Ejector button 69. Abwurfknopf 69. Bouton éjecteur
70. Setting wheel 70. Einstellrad 70. Molette de réglage
75. Calibration screw 75. Kalibrierschraube 75. Vis d'étalonnage
76. Push button 76. Druckknopf 76. Bouton-poussoir
LOWER ASSEMBLY
2. O-ring (852-100 and 200) 2. O-Ring (852-100 und 200) 2. O-ring (852-100 et 200)
3. Ejector head 3. Spitzenabwurf 3. Ejecteur
4. Small bar 4. Steg 4. Barrette
5. Plunger assembly 5. Kolbenaggregat 5. Ensemble piston
6. Barrels 6. Zylinder 6. Cylindres
8. Bottom plate 8. Bodenplatte 8. Fond
9. O-ring (only 852-200) 9. O-Ring (nur 852-200) 9. O-ring (seulement 852-200)
10. Barrel holder 10. Führung 10. Guide
11. Spring 11. Feder 11. Ressort
12. Ejector shaft 12. Abwurfbetätigungsarm 12. Poussoir
28. Casing 28. Gehäuse 28. Boîtier
29. Connector 29. Verbindung 29. Raccord
33. Ejector ring 33. Drücker 33. Poussoir d'éjecteur
57. Guide bar 57. Führungsstange 57. Guide
58. Spring 58. Feder 58. Ressort
59. Guide 59. Konus 59. Guide conique
60. Lock ring 60. Ring 60. Douille
61. O-ring 61. O-Ring 61. O-ring
62. Lock pin 62. Bolzen 62. Verrou
63. Circlip 63. Circlip 63. Circlip
64. Spacer 64. Distanzbolzen 64. Entretoise
65. Circlip 65. Circlip 65. Circlip

852 Calibra Digital Multi-Channel Micropipette
artistically crafted byParts Listlinda teti steve smith
10/26/2001
ITEM # DESCRIPTION 4 POS. 8 POS. 12 POS. 4 POS. 8 POS. 12 POS.
COMPLETE UNIT 851182 851183 851184 851186 851187 851188
**** UPPER ASSEMBLY ****
1 SETTING WHEEL I052476 I052476 I052476 I052476 I052476 I052476
2 CIRCLIP I053075 I053075 I053075 I053075 I053075 I053075
3 PAD I053076 I053076 I053076 I053076 I053076 I053076
4 SCREW I053077 I053077 I053077 I053077 I053077 I053077
5 SPACER I053078 I053078 I053078 I053078 I053078 I053078
6CALIBRATION SCREW (A series only)I053079 I053079 I053079 I053079 I053079 I053079
7 RATCHET I053080 I053080 I053080 I053080 I053080 I053080
8 BRACKET I053081 I053081 I053081 I053081 I053081 I053081
9PLUNGER STOP (A series only)
12 PLUNGER ROD I052477 I052477 I052477 I052477 I052477 I052477
14 GUIDE I053090 I053090 I053090 I053090 I053090 I053090
15 OVERSHOOT STOP I053091 I053091 I053091 I053091 I053091 I053091
16 PAD I053092 I053092 I053092 I053092 I053092 I053092
17 PUSH BUTTON (A series only)
18 LOCK PIN I053094 I053094 I053094 I053094 I053094 I053094
19 EJECTOR BUTTON I050032 I050032 I050032 I050032 I050032 I050032
20 HAND PIECE I053098 I053098 I053098 I053099 I053099 I053099
21 CLIP I052398 I052398 I052398 I052398 I052398 I052398
22 SMALL CAM I053103 I053103 I053103 I053104 I053104 I053104
23 RACK, SMALL CAM I053106 I053106 I053106 I053107 I053107 I053107
24 RACK, LARGE CAM I053107 I053107 I053107 I053106 I053106 I053106
25 LARGE CAM I053111 I053111 I053111 I053112 I053112 I053112
27 EJECTOR BAR I053114 I053114 I053114 I053114 I053114 I053114
28 CATCH I053115 I053115 I053115 I053115 I053115 I053115
29 OVERSHOOT SPRING I052478 I052478 I052478 I052478 I052478 I052478
30 CIRCLIP I053117 I053117 I053117 I053117 I053117 I053117
70 PLUNGER STOP (B series only)
71 PUSH BUTTON (B series only)I052405 I052405 I052405 I052405 I052405 I052405
72 SCREW, PUSH BUTTON (B series only)I052406 I052406 I052406 I052406 I052406 I052406
73 CALIBRATION LOCKING SCREW (B series only)I052407 I052407 I052407 I052407 I052407 I052407
74 CALIBRATION SCREW (B series only)I052408 I052408 I052408 I052408 I052408 I052408
75 CALIBRATION SCREW (C series only)I054738 I054738 I054738 I054738 I054738 I054738
76 PUSH BUTTON (C series only)I054752 I054752 I054752 I054752 I054752 I054752
77 PLUNGER STOP (C series only)I054753 I054753 I054753 I054753 I054753 I054753
77A PLUNGER STOP/PUSH BUTTON ASS'Y I052404 I052404 I052404 I052404 I052404 I052404
(INCL. PARTS 75 - 77) FOR SERIES A,B,C
Wheaton Science Products Non-Autoclavable Calibra 852
10 - 100 UL 20 - 200 UL.
NOT AVAILABLE SEPARATELY - USE # 77A
NOT AVAILABLE SEPARATELY - USE # 77A
NOT AVAILABLE SEPARATELY - USE # 77A

852 Calibra Digital Multi-Channel Micropipette
artistically crafted byParts Listlinda teti steve smith
10/26/2001
ITEM # DESCRIPTION 4 POS. 8 POS. 12 POS. 4 POS. 8 POS. 12 POS.
COMPLETE UNIT 851182 851183 851184 851186 851187 851188
****LOWER ASSEMBLY****
1 PLUNGER ASSEMBLY I052479 I052481 I052483 I052480 I052482 I052484
2 O-RING, PLUNGER I052485 I052485 I052485 I052486 I052486 I052486
3 EJECTOR HEAD I052487 I052488 I052489 I052487 I052488 I052489
6BARRELS (200 UL INCLUDES #9)I052493 I052493 I052493 851245 851245 851245
8 BOTTOM PLATE I052494 I052495 I052496 I052494 I052495 I052496
9 O-RING, BARREL N/A N/A N/A I051248 I051248 I051248
10 BARREL HOLDER I052497 I052499 I052505 I052498 I052500 I052506
11 SPRING I053043 I053043 I053043 I053043 I053043 I053043
12 EJECTOR SHAFT (2 PCS)I052507 I052507 I052507 I052507 I052507 I052507
28 CASING I052508 I052515 I052516 I052508 I052515 I052516
29 CONNECTOR (locking ring)I052517 I052517 I052517 I052517 I052517 I052517
33 EJECTOR RING I052518 I052518 I052518 I052518 I052518 I052518
57 GUIDE BAR I052519 I052519 I052519 I052519 I052519 I052519
58 SPRING I052521 I052521 I052521 I052521 I052521 I052521
59 GUIDE I052523 I052523 I052523 I052523 I052523 I052523
60 LOCK RING I052542 I052542 I052542 I052542 I052542 I052542
61 O-RING I052543 I052543 I052543 I052543 I052543 I052543
62 LOCK PIN I052544 I052544 I052544 I052544 I052544 I052544
63 CIRCLIP I052545 I052545 I052545 I052545 I052545 I052545
64 SPACER I052546 I052546 I052546 I052546 I052546 I052546
65 CIRCLIP I052547 I052547 I052547 I052547 I052547 I052547
20 - 200 UL.
Wheaton Science Products Non-Autoclavable Calibra 852
10 - 100 UL

852 Calibra Digital Multi-Channel Micropipette
artistically crafted byParts Listlinda teti steve smith
10/26/2001
ITEM # DESCRIPTION 8 POS. 12 POS. 8 POS. 12 POS. 8 POS. 12 POS.
COMPLETE UNIT W851180-2 N/A 851183-2 851184-2 851187-2 851188-2
**** UPPER ASSEMBLY ****
2 CIRCLIP I053075 N/A I053075 I053075 I053075 I053075
16 PAD I053076 N/A I053076 I053076 I053076 I053076
18 LOCK PIN I053094 N/A I053094 I053094 I053094 I053094
22 SMALL CAM I053102 N/A I053103 I053103 I053104 I053104
25 LARGE CAM I053111 N/A I053111 I053111 I053112 I053112
27 EJECTOR BAR I053114 N/A I053114 I053114 I053114 I053114
29 OVERSHOOT SPRING I055414 N/A I055414 I055414 I055414 I055414
53 BRACKET I055338 N/A I055338 I055338 I055338 I055338
54 CIRCLIP I054711 N/A I054711 I054711 I054711 I054711
55 OVERSHOOT STOP I054712 N/A I054712 I054712 I054712 I054712
56 CATCH I054713 N/A I054713 I054713 I054713 I054713
57 GUIDE I054714 N/A I054714 I054714 I054714 I054714
58 PLUNGER ASSEMBLY I055339 N/A I055339 I055339 I055339 I055339
60 PLUNGER STOP I054722 N/A I054722 I054722 I054722 I054722
61 RACK, 10 POSITIONS (2 pcs) I054723 N/A I054723 I054723 I054723 I054723
62 RACK, 20 POSITIONS (2 pcs) I054724 N/A I054724 I054724 I054724 I054724
63 RATCHET I054725 N/A I054725 I054725 I054725 I054725
64 SPACER I054726 N/A I054726 I054726 I054726 I054726
65 SPRING PLATE I054727 N/A I054727 I054727 I054727 I054727
66 HANDPIECE, DARK GRAY-SERIAL # < 09071001 I054728 N/A I054728 I054728 I054728 I054728
66 HANDPIECE, LIGHT GRAY-SERIAL # > 09071001 WI055761 N/A WI055761 WI055761 WI055761 WI055761
67 WINDOW I054729 N/A I054729 I054729 I054729 I054729
68 COLOR PLATE I054731 N/A I054733 I054733 I053734 I054734
69 EJECTOR BUTTON, DRK GRY-SER. # < 0971001 N/A N/A I054736 I054736 I054736 I054736
69 EJECTOR BUTTON, SERIAL # > 0971001 WI055762 N/A WI055763 WI055763 WI055763 WI055763
70 SETTING WHEEL I055341 N/A I055341 I055341 I055341 I055341
75 CALIBRATION SCREW I054738 N/A I054738 I054738 I054738 I054738
76 PUSH BUTTON I054739 N/A I054739 I054739 I054739 I054739
20 - 200 UL.10 - 100 ul1 - 10 ul
Wheaton Science Products Autoclavable Calibra Multi-Channel 852

852 Calibra Digital Multi-Channel Micropipette
artistically crafted byParts Listlinda teti steve smith
10/26/2001
ITEM # DESCRIPTION 8 POS. 12 Pos. 8 POS. 12 POS. 8 POS. 12 POS.
COMPLETE UNIT W851180-2 N/A 851183-2 851184-2 851187-2 851188-2
****LOWER ASSEMBLY****
2 O-RING, PLUNGER N/A N/A I052485 I052485 I052485 I052485
3 EJECTOR HEAD, DRK GRY-SER. # < 09071001 N/A N/A I052555 I052556 I053555 I052556
3 EJECTOR HEAD, LGHT GRY-SER. # > 09071001 WI055764 N/A WI055764 WI055765 WI055764 WI055765
3 HST N/A N/A I052491 I052492 I052491 I052492
4 SMALL BAR I055324 N/A I055324 I055325 I052324 I055325
5 PLUNGER ASSY.(1 PLUNGER,1 SPRING) WI055768 N/A I055326 I055326 I055327 I055327
6 BARREL (10UL INC PTFE SLEEVE & TUBE) WI055769 N/A WI055775 WI055775 WI055776 WI055776
8 BOTTOM PLATE, DRK GRY-SER. # < 09071001 N/A N/A I052558 I052559 I052558 I052559
8 BOTTOM PLATE, LGHT GRY-SER. # > 09071001 WI055766 N/A WI055766 WI055767 WI055766 WI055767
9 O-RING, BARREL(incl w/#6) N/A N/A N/A N/A I055330 I055330
10 BARREL HOLDER I052499 N/A I052499 I052505 I052500 I052506
11 SPRING I053043 N/A I053043 I053043 I053043 I053043
12 EJECT SHFT (2PCS) DRK GRY-SER# < 09071001 N/A N/A I052563 I052563 I052563 I052563
12 EJECT SHFT (2PCS) LGHT GRY-SER# >09071001 WI055770 N/A WI055770 WI055770 WI055770 WI055770
28 CASING ASSY. (INCL #28,29,60,61)
DARK GRAY-SERIAL # < 09071001 N/A N/A I055331 I055332 I055331 I055332
LIGHT GRAY-SERIAL # > 09071001 WI055771 N/A WI055771 WI055772 WI055771 WI055772
29 CONNECTOR, DRK GRY-SER # < 09071001 N/A N/A I052579 I052579 I052579 I052579
29 CONNECTOR, LGHT GRY-SER # > 09071001 WI055773 N/A WI055773 WI055773 WI055773 WI055773
33 EJECTOR RING I055333 N/A I055333 I055333 I055333 I055333
57 GUIDE BAR I055334 N/A I055334 I055334 I055334 I055334
58 SPRING I055335 N/A I055335 I055335 I055335 I055335
59 GUIDE I055336 N/A I055336 I055336 I055336 I055336
60 LOCK RING I052590 N/A I052590 I052590 I052590 I052590
61 O-RING I052543 N/A I052543 I052543 I052543 I052543
62 LOCK PIN, DRK GRY-SER # < 09071001 N/A N/A I052591 I052591 I052591 I052591
62 LOCK PIN, LGHT GRY-SER # > 09071001 WI055774 N/A WI055774 WI055774 WI055774 WI055774
63 CIRCLIP I050475 N/A I050475 I050475 I050475 I050475
64 SPACER I052592 N/A I052592 I052592 I052592 I052592
65 CIRCLIP I050475 N/A I050475 I050475 I050475 I050475
20 - 200 UL.10 - 100 UL1 - 10 ul
Wheaton Science Products Autoclavable Calibra Multi-Channel 852

852 Calibra Digital Multi-Channel Micropipette
artistically crafted byParts Listlinda teti steve smith
10/26/2001
Upper assembly Lower assembly
Autoclavable

852 Calibra Digital Multi-Channel Micropipette
artistically crafted byParts Listlinda teti steve smith
10/26/2001
Lower assembly
Upper assemblies
A series
5 digit serial numbers B series
Serial No > 0131000 C series
Serial No > 0841000
Non-Autoclavable
This manual suits for next models
5
Other socorex Laboratory Equipment manuals

socorex
socorex Acura Electro 926 User manual

socorex
socorex Acura electro 925 User manual

socorex
socorex Calibra 832 User manual

socorex
socorex ACURA self-refill 865 User manual
socorex
socorex ACURA 826 XS User manual

socorex
socorex PROFILLER electro 447 User manual

socorex
socorex ACURA 841 User manual

socorex
socorex acura 865 User manual

socorex
socorex ACURA 815 User manual
socorex
socorex DOSYS 162 User manual

