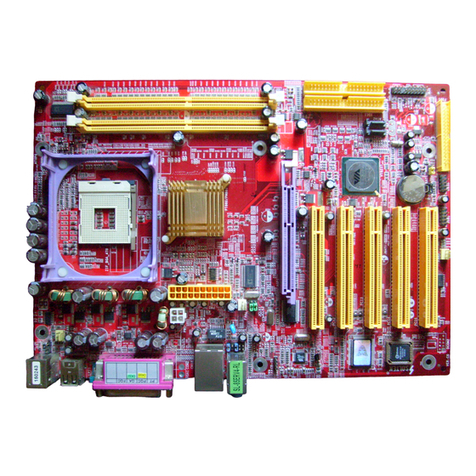
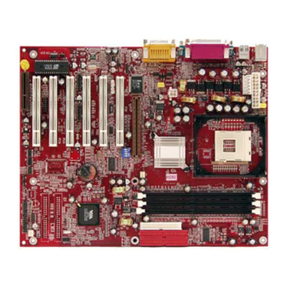
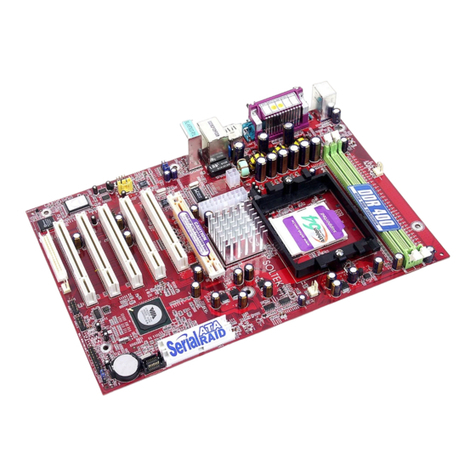
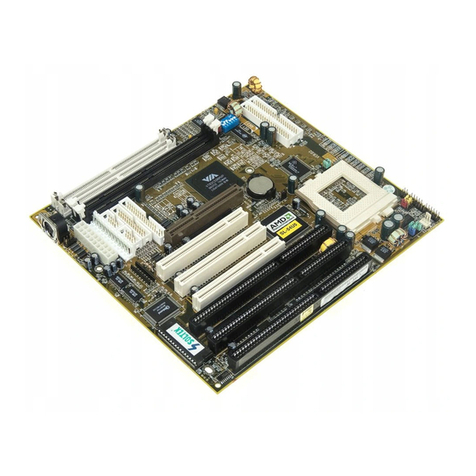
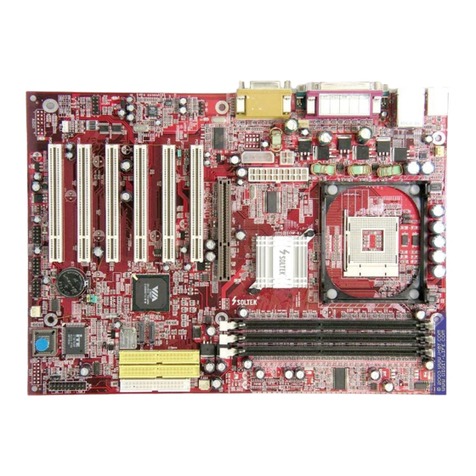
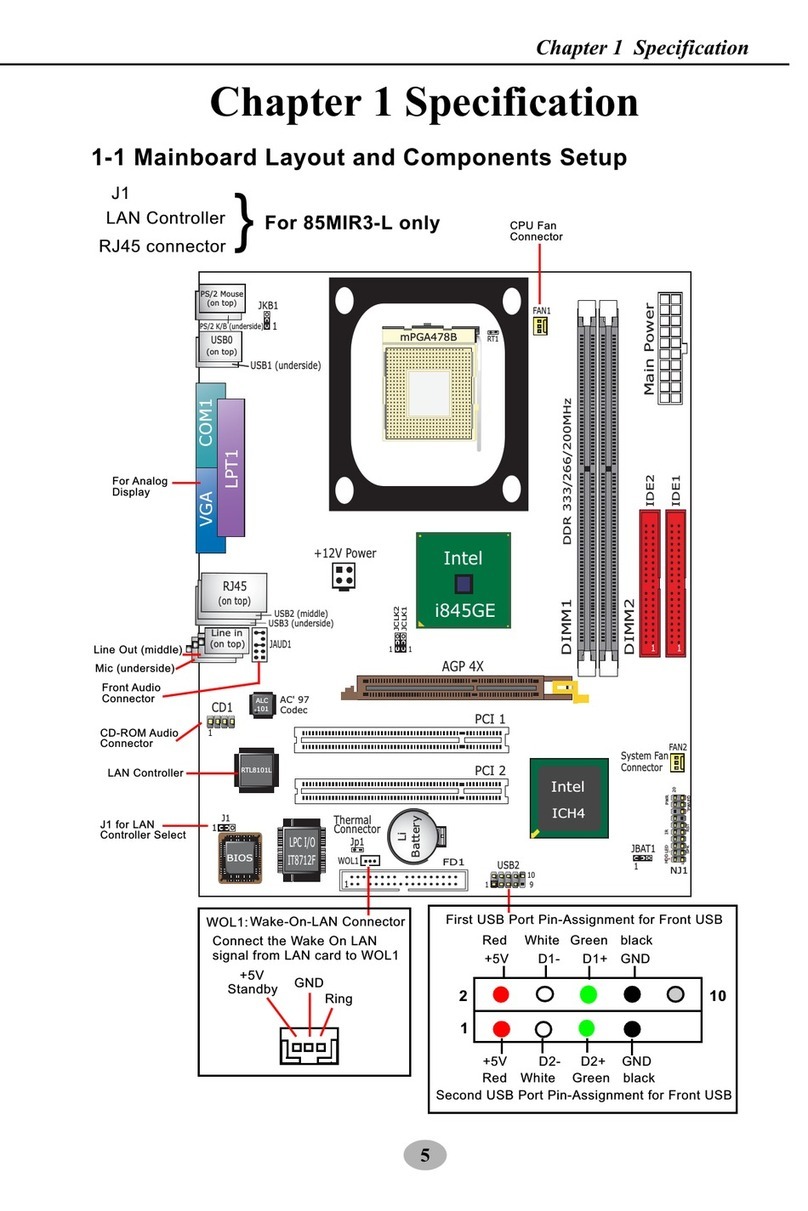
SOLTEK 85DR2-DC User manual

85DR2-DC / 85DR2-DCL
4
CONTENT
Item Checkup.............................................................. 7
Chapter 1 Specification .................................................. 8
1-1 Mainboard Layout ............................................................ 9
1-2 Mainboard Specifications ............................................... 10
1-2.1 CPU Socket ...................................................................... 10
1-2.2 Sysem Chipset Architecture.............................................. 10
1-2.3 Memory ............................................................................. 10
1-2.4 AMI BIOS .......................................................................... 10
1-2.5 Multi-I/O Function ..............................................................11
1-2.6 Expansion Slots .................................................................11
1-2.7 Accelerated Graphics port (AGP) Interface .......................11
1-2.8 FORM FACTOR.................................................................11
1-2.9 LAN on board (For 85DR2-DCL only) ............................... 12
1-2.10 AC’97 Audio Codec on board......................................... 12
1-2.11 Hardware Monitor on board ............................................ 12
1-2.12 6-channel Audio-out Support (optional) .......................... 12
1-2.13 Advanced System Power Management .......................... 12
1-3 Mainboard Specification Table ....................................... 13
1-4 Chipset System Block Diagram...................................... 14
Chapter 2 Hardware Setup ........................................... 16
2-1 Pentium 4 CPU and Installation ..................................... 17
2-1.1 To Identify a Pentium 4 CPU ............................................. 17
2-1.2 Pentium 4 CPU Installation with Socket 478 .................... 18
2-2 Pentium 4 CPU Fan Installation: .................................... 19
2-3 Memory Installation ........................................................ 20
2-3.1 To Install DIMM Module .................................................... 20
2-3.2 To Remove a DIMM: ......................................................... 20
2-3.3 Indicator LED: DIMM Powered On LED ........................... 21

5
Content
2-4 Install AGP4X with LED & Jumper Safeguard................ 22
2-5 IDE Connector Installation ............................................. 23
2-6 FDC (Floppy Drive Connector) Installation .................... 24
2-7 ATX V 2.03 Power Supply Installation ............................ 25
2-8 Jumper Settings ............................................................. 26
2-8.1 How to tackle the Jumpers: .............................................. 27
2-8.2 JFSB1: CPU Clock Select ................................................ 27
2-8.3 JFSB2: DDR DIMM Turbo Mode(Optional)....................... 28
2-8.4 JBAT1 : Clear CMOS ........................................................ 29
2-8.5 JP3: AGP 4X Safeguard ................................................... 29
2-8.6 JKB1: KB / Mouse Power On / Wake Up .......................... 30
2-8.7 LAN Controller Select (85DR2-DCL only) ......................... 30
2-9 Other Connectors Configuration .................................... 31
2-9.1 On Board Fan Connectors ................................................ 31
2-9.2 Wake On LAN .................................................................. 32
2-9.3 CD-ROM Audio Connector ............................................... 32
2-9.4 Thermal Resistor and Connector ...................................... 33
2-9.5 Front Panel Audio Connector........................................... 34
2-9.6 LAN Connector (85DR2-DCL Only) .................................. 34
2-9.7 Complex Header ............................................................... 35
2-9.8 USB Ports and USB Pin-headers ..................................... 37
2-9.9 Chassis Panel Connector ................................................. 38
2-9.10 PS/2 Mouse and PS/2 Keyboard .................................... 38
2-9.11 6-channel Sound Output Connector (Optional) ............... 39
Chapter 3 Software Setup ............................................ 40
3-1 To Open up the Support CD ........................................... 41
3-2 To Install “Intel Chipset Software Installation Utility” ..... 42
3-3 To Install “Intel Application Accelerator” ......................... 43
3-4 To Install AC’97 Audio Driver .......................................... 45

85DR2-DC / 85DR2-DCL
6
3-4.1 Install AC’97 6-channel Audio Driver ................................ 45
3-4.2 To verify 6-channel Audio .................................................. 46
3-5 To Install Hardware Monitor Utility.................................. 49
3-5.1 Installation........................................................................ 49
3-5.2 Verification ....................................................................... 50
3-6 To Install LAN Drivers (for 85DR2-DCL only) ................. 51
3-6.1 RTL8100B LAN driver on Windows ME / 2000 / XP ......... 51
3-6.2 RTL8100B LAN driver on Windows 9X............................. 51
3-7 To Install USB 2.0 Driver for Windows 2000/XP ............ 53
Chapter 4 AMI BIOS Setup ...........................................54
4-1 About BIOS Setup .......................................................... 55
4-2 To Run BIOS Setup ........................................................ 55
4-3 About CMOS .................................................................. 55
4-4 The POST ( Power On Self Test ) .................................. 55
4-5 To Update BIOS ............................................................. 56
4-6 BIOS SETUP --- CMOS Setup Utility ............................. 58
4-6.1 CMOS Setup Utility ........................................................... 58
4-6.2 Standard CMOS Setup ..................................................... 59
4-6.3 Advanced BIOS Features ................................................. 62
4-6.4 Advanced Chipset Features.............................................. 66
4-6.5 Power Management Features .......................................... 69
4-6.6 PNP / PCI Configurations ................................................. 71
4-6.7 Integrated Peripherals ...................................................... 73
4-6.8 Hardware Monitor Status .................................................. 76
4-6.9 Frequency/Voltage Control ............................................... 78
4-6.10 Set Supervisor Password ............................................... 80
4-6.11 Load Optimized Defaults ................................................ 82
4-6.12 Save & Exit Setup ........................................................... 82
4-6.13 Exit Without Saving......................................................... 82

7
Content
Item Checkup
• Mainboard
• Multi-lingual Quick Installation Guide
• User Manual (Mainboard)
• Support CD
• Bundled Bonus Pack CD
• Bundled Bonus Pack Manual
• Cable :
ATA66/100 IDE Cable
FDD Cable
USB Cable (Optional)
APPENDICES ................................................................. 84
Appendix-1 Identify Mainboard Model Number .................... 85
Appendix-2 Technical Terms ................................................ 86

8
85DR2-DC / 85DR2-DCL
Chapter 1 Specification
The topics contained in this chapter are:
1-1 Mainboard Layout
1-2 Mainboard Specifications**
1-3 Maniboard Specification Table
1-4 Chipset System Block Diagram
Introduction
This series features an integration of the powerful processor Intel
Pentium 4 and the single-chip North Bridge Intel 845E. The Intel P4
processor is a rapid execution engine providing 800/533/400MHz sys-
tem bus, while North Bridge Intel 845E is a high performance integrated
chipset providing DDR 266 SDRAM memory interface, Hub interface,
and AGP interface.
Integrated with i845E, South Bridge Intel ICH4 supports the LPC Su-
per I/O, upstream Hub interface, PCI interface, IDE interface, USB 2.
0interface, AC’97 2.2 (6-channel) Audio interface and the interrupt
control. This chapter is to introduce to users every advanced function
of this high performance integration.
** If any difference is found between the manual description and
the Mainboard you are using, please look up the ERRATA/UPDATE
Slip enclosed inside for the correction or updated information, or
else contact the Mainboard Dealer or visit our Web Site for the lat-
est manual update.

9
Chapter 1 Specification
PCI 1
PCI 2
PCI 3
PCI 4
PCI 5
W83627HF
LPC I/O
BIOS
USB3
1
USB2
1
Fan3
Audio1
1
14
RTL
IDE1
IDE2
ICH4
Intel
RTL
ALC650
Codec
AC'97
Li
Battery
AGP 4X
LPT1
COM1
COM2
Mic
Game/MIDI Port
Line
Out
Line
In
Fan1
PS/2 K/B (underside)
PS/2 Mouse
i845E
Intel
USB1 (underside)
RJ45
USB0 (middle)
DIMM1
DIMM2 DDR 266MHz
mPGA478
1
RT1
FD1
1
Fan2
1
JKB1
+12V Power
WOL1
1
CD_IN1
1
JP9
1
JBAT1
1
JP3
1
JFSB1
ATX
LED2
LED1
Jp11
CN9
(on top)
(on top)
POWER
8100B
NJ1
HDD IR PWR
1
20
SPK RST +-
+-
PWLED
LED
1
JFSB2
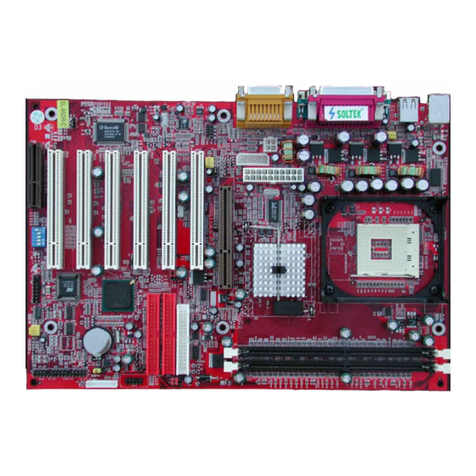
1-1 Mainboard Layout
RJ45
LAN Controller}
Optional 6-channel
Audio-Out Connector
Jp9
for 85DR2-DCL only
(Optional)

10
85DR2-DC / 85DR2-DCL
1-2.1 CPU Socket
CPU Socket 478B on board, supporting Intel®Pentium 4 processor
(including Intel Hyper Threading CPUs and Prescott CPUs) in the 478-pin
package for:
-- 800/533/400MHz System Bus -- 512KB L2 Advanced Transfer Cache
-- Hyper-pipelined technology -- Advanced dynamic execution;
-- Rapid Execution Engine -- Streaming SIMD Extensions 2
-- 128 Bit Enhanced Floating Point Unit -- Execution Trace Cache
1-2.2 Sysem Chipset Architecture
1-2 Mainboard Specifications
North Bridge Intel 845E:
• A high performance integrated chipset providing processor interface
(including Hyper Threading Technology), DDR 266 DRAM memory
interface, Hub interface, AGP interface.
• Showing Hyper-Threading Logo when booting with a Hyper-Threading
CPU installed.
South Bridge Intel ICH4:
• Supporting the LPC Super I/O, upstream Hub interface, PCI interface,
IDE interface, USB 2.0 interface, AC’97 2.2 (6-channel) Audio interface
and the interrupt control.
1-2.3 Memory
2 x DDR DIMM 184-pin slot on board for DDR 266 SDRAMs, supported by
2.5V default voltage (optional DIMM Voltage Adjustment):
• Directly supporting unregistered, non-ECC DDR 266 SDRAM up to 2GB
capacity
• Supporting installation of mixed volumes yet same type of DDR SDRAM
modules
1-2.4 AMI BIOS
Flash Memory for easy upgrade, supporting Year 2000 compliant, and
supporting various hardware configuration during booting system (See
Chapter 4 BIOS Setup):
• Standard CMOS Features(Times, Date, Hard Disk Type etc.)
• Advanced BIOS Features (Virus Protection, Boot Sequence etc.)
• Advanced Chipset Features (AT Clock, DRAM Timing etc.)
• Power Management Features ( Sleep Timer, Suspend Timer etc.)
• PNP/PCI Configurations (IRQ Settings, Latency Timers etc.)
• Integrated Peripherals ( Onboard IO, IRQ, DMA Assign. etc.)
• Hardware Monitor Status (CPU/System Temp., Fan speed etc.)
• Frequency/Voltage (CPU clock, Voltage of CPU, DIMM, AGP etc.)
11
Chapter 1 Specification
1-2.5 Multi-I/O Function
• PCI EIDE Controller, supporting:
-- 2x UATA100/66/33 IDE connectors supporting up to 4 IDE devices
• Dedicated IR Functions:
-- Third serial port dedicated to IR function either through the two
complete serial ports or the third dedicated port Infrared-IrDA (HPSIR)
and ASK (Amplitude Shift Keyed) IR
• Multi-mode Parallel Data Transfer:
-- Standard mode, high speed mode ECP and enhanced mode EPP
• Floppy Disk Connector:
-- One FDD connector supporting 2 floppy drives with drive swap support
• Universal Serial Bus Transfer Mode:
-- USB V2.0 compliant; 480Mb/s USB Bus, supporting Windows 2000/XP or later
operating system
-- USB drivers provided in Support CD for installation
-- 2 built-in USB connectors and 2 USB Headers which require 2 optional
USB cables to provide 4 more optional USB ports
• PS/2 Keyboard and PS/2 Mouse
• UARTs (Universal Asynchronous Receiver / Transmitter):
-- Two complete serial ports (COM1 & COM2) on board
1-2.6 Expansion Slots
• 5 PCI bus Master slots
• 1 AGP 4X slot
• 2 DDR DIMM slots
1-2.7 Accelerated Graphics port (AGP) Interface
AGP Controller embedded on board, supporting:
• 1.5V(4X) power mode only
• 4x AD and SBA signaling, AGP pipelined split-transaction longburst
transfers up to 1GB/sec.
• AGP 4X only, AGP V2.0 compliant
1-2.8 FORM FACTOR
• ATX Form Factor, ATX Power Supply, version 2.03 compliant, supported
by one Main Power Connector, one +12V Power Connector.
• Mainboard size: 305mm x 192mm

12
85DR2-DC / 85DR2-DCL
1-2.10 AC’97 Audio Codec on board
AC’97 Audio Codec 2.2 compliant on board
• Supporting 6-channel display of PCM audio output
• 6 channel audio consists of Front Left, Front Right, Back Left, Back Right
Center and Subwoofer for complete surround sound effect
• AC’97 Audio Codec Driver enclosed in Support CD for user’s installation.
1-2.12 6-channel Audio-out Support (optional)
• This series is designed with an optional 6-channel Audio-out connector
“Audio1”. If this option is chosen, a 6-channel Audio-out card will be
enclosed in the Mainboard package to provide 3 additional audio-out
ports for the 6-channel sound.
1-2.9 LAN on board (For 85DR2-DCL only)
PCI local bus single-chip Fast Ethernet Controller RTL8100B on board:
• Supporting 10/100Mb data transfer
• Supporting Wake On LAN function through the on-board RJ45 LAN Con-
nector
• LAN Driver enclosed in Support CD for user’s installation.
1-2.11 Hardware Monitor on board
• Soltek Hardware Monitor supported by W83627HF, providing monitoring
and alarm for flexible desktop management of hardware voltage, tem-
peratures and fan speeds.
• Utility Software Winbond HWDoctor for displaying system status is en-
closed in Support CD for user’s installation.
1-2.13 Advanced System Power Management
• ACPI 1.0B compliant (Advanced Configuration and Power Interface),
including ACPI suspend mode support (See Power Management of BIOS
Setup)
• APM V1.2 compliant (Legacy Power Management)
• Keyboard / Mouse Power On / Wake Up
• Supporting Wake-on-LAN
• Real Time Clock (RTC) with date alarm, month alarm, and century field

13
Chapter 1 Specification
1-3 Mainboard Specification Table
85DR2-DC/85DR2-DCL Specifications and Features
85DR2-DC
No
LAN Controller
on board
Optional
Features
Models
Socket 478B for P4 CPU
(Hyper Threading CPU and Prescott CPU included)
CPU
85DR2-DCL
Yes
Other Feature
I/O Connectors
PCI Slots
Audio
AGP Interface
I/O Chip
Memory
BIOS
South Bridge
North Bridge
IDE Interface
Intel 845E, supporting 533/400MHz FSB
Intel ICH4
AMI BIOS
Supporting DDR 266 DRAM, up to 2GB in 2 DDR
DIMM slots
W83627HF, with Hardware Monitor
AGP 4X mode only
AC’97 Audio 2.2 compliant, 2/6 channel audio
2 UATA 66/100 IDE ports
5 PCI Master slots on board
6 USB V2.0, 1 FDD port, 2 COM ports, 1 LPT,
1 IrDA, 1 PS/2 K/B, 1 PS/2 Mouse
Keyboard/Mouse Power On / Wake Up

14
85DR2-DC / 85DR2-DCL
Pentium 4 + Intel 845E + Intel ICH4 Diagram
1-4 Chipset System Block Diagram
System Bus 533/400MHz
System
Memory
DDR memory
Interface
DDR 266
SDRAM
Intel 845E
North Bridge
AGP Slot AGP 4X
Bi-directional
16-bit Data
Bus, 266MHz
ICH4
South
Bridge
PCI Bus
AC’97 2.2
ATA 100/66/33
4 IDE
Devices
USB Bus V2.0
USB
Ports
5 PCI Slots
Audio Codec
(6-channel)
RTL8100B RJ45
(Optional)
IR
FDD
Mouse/Keyboard
Serial Ports
Printer Port
Game/MIDI
H/Monitor
BIOS
LPC I/O
W83627HF
Intel Pentium 4 CPU
(Hyper Threading and
Prescott CPU Included)

15
Chapter 2 Hardware Setup
Memo

16
85DR2-DC / 85DR2-DCL
Chapter 2 Hardware Setup
To Get Things Ready for Hardware Setup !!!
1. We recommend to install your CPU before any other componentes. For
detailed installation instructions of processor, you can also refer to the
pamphlet enclosed in your CPU package.
2. Installing a cooling fan with a good heatsink is a must for proper heat
dissipation for your CPU. Get ready an appropriate fan with heatsink for
proper installation. Improper fan and installation will damage your CPU.
3. In case CPU Vcore, CPU clock or Frequency Ratio is adjustable onboard,
please follow the instructions described in the User manual for proper
setup. Incorrect setting will cause damage to your CPU.
The following topics are included in this chapter:
2-1 Pentium 4 CPU and Installation
2-2 Pentium 4 CPU Fan Installation
2-3 Memory Installation
2-4 AGP 4X (Accelerated Graphics Port) Installation
2-5 HDD Installation
2-6 FDD Installation
2-7 ATX Power Supply Installation
2-8 Jumper and Switch Settings
2-9 Other Connectors Configuration

17
Chapter 2 Hardware Setup
2-1 Pentium 4 CPU and Installation
1) CPU Working Frequency
On the heatsink side of a Pentium 4 CPU, there printed a line of figures to
identify its specifications. The line consists of 4 parts:
1. CPU Working Frequency: this part depicts the working frequency of
the CPU. The Intel P4 processor with three differeent System Bus
mode provides a variety of speeds ranging from 2A Ghz to 3.2Ghz.
400MHz System Bus: 2.60, 2.50, 2.40, 2.20, 2A GHz
533MHz System Bus: 3.06, 2.80, 2.66, 2.53, 2.40, 2.26 GHz
800MHz System Bus: 3.20, 3, 2.80C, 2.60C, 2.40C GHz
2. CPU L2 Cache: this part depicts the L2 Cache size. For example,
512 stands for 512 KB L2 Cache; 256 stands for 256 KB L2 Cache
3. System Bus: this part depicts the System Bus (Front Side Bus) is
provided by CPU clock x 4. For example,
800MHz = 200MHz(CPU clock) x 4; 533MHz = 133MHz x 4
400MHz = 100MHz x 4
Note: System Bus vs CPU Clock
P4 CPU is a quad-pumped CPU. The system bus is provided by the CPU
clock x 4. Therefore, users can figure out the P4 CPU clock by the System
Bus divided by 4.
(Hyper-Threading & Prescott CPU included)
Intel
PENTIUM 4
2.80 GHz / 512 / 800
2) CPU L2 Cache
3) System Bus
Pentium 4 with Hyper Threading Technology :
(1) P4 processors at 2.40C, 2.60C, 2.80C, 3, 3.20GHz with an advanced
800MHz system bus
(2) P4 processor at 3.06Ghz with 533MHz system bus
2-1.1 To Identify a Pentium 4 CPU

18
85DR2-DC / 85DR2-DCL
2-1.2 Pentium 4 CPU Installation with Socket 478
mPGA478B
Intel Pentium 4
mPGA478B
Pin 1
This series is built with CPU Socket
478B (478-pin) supporting the Intel
Pentium 4 CPU:
• Follow the steps described in this
section to install the 478-pin Pentium
4 CPU into the on board Socket 478.
• After installation of Pentium 4 CPU,
you must also install the specific Pen-
tium 4 CPU fan designed in tandem
with this CPU. This CPU Fan instal-
lation is described in next section.
• This series supports Hyper-thread-
ing dual-in-one CPU, the function of
which can be enabled by Windows
XP. (See illustration on the right.)
1. First pull sideways the lever of
Socket 478, and then turn it up
900so as to raise the upper layer
of the socket from the lower
platform.
3. Make sure that all CPU pins have
completely entered the socket
and then lower down the lever to
lock up CPU to socket.
2. Configure Pin 1 of CPU to Pin 1
of the Socket, just as the way
shown in the diagram on the right.
Adjust the position of CPU until
you can feel all CPU pins get into
the socket with ease.
mPGA478B
Intel Pentium4
Pin 1
( If Hyper-threading CPU is
installed successfully with O/S
Win XP, the O/S will enable the
dual-in-one CPU function.)

19
Chapter 2 Hardware Setup
2-2 Pentium 4 CPU Fan Installation:
Connect Fan Connector to CPU FAN connector
Press down 4 Spring Locks to lock fan to fanbase
CPU Fan Connector Pentium 4 Fanbase
The above pictures are taken from sample mainboard as installation illustr-
ation. The layout in the illustration may be different from your mainboard.

20
85DR2-DC / 85DR2-DCL
2-3.2 To Remove a DIMM:
• Press down the holding latches on both sides of the DIMM slot and the
module will be released from it.
2-3 Memory Installation
2-3.1 To Install DIMM Module
• This series only supports up to 2GB unbuffered DDR 266/200MHz
SDRAM, with 2 DDR DIMM slots on board. Do not insert other type of
memory module into these slots.
• DDR DIMM slot has 184-pins and one notch. Insert a DDR SDRAM
vertically into the 184-pin slot with the notch-to-rib matching. Press the
module down in a gradual way until it surely reaches the bottom and
clicks straight up the two latches on the left and right of the slot. If any
one of the latches has not turned up completely, you should unplug the
module and press it down the slot a bit more firmly.
How to tackle the memory modules:
• Make sure to unplug your power supply before adding or removing
memory module. Failure to do so may cause severe damage to both your
mainboard and the memory module.
• Pay attention to the orientation of the DIMM slots. Forcing a DIMM into a
slot improperly will damage the memory module and the slot itself.
• Make sure you have the right type of memory module for your mainboard.
184-Pin DIMM Notch Key Definitions
DRAM Key Position Voltage Key Position
(2.5V Voltage Key)DDR Notch DDR Rib
Module Latch

21
Chapter 2 Hardware Setup
PCI 1
PCI 2
PCI 3
PCI 4
PCI 5
W83627HF
LPC I/O
BIOS
USB3
1
USB2
1
Fan3
Audio1
1
14
RTL
IDE1
IDE2
ICH4
Intel
RTL
ALC650
Codec
AC'97
Li
Battery
AGP 4X
LPT1
COM1
COM2
Mic
Game/MIDI Port
Line
Out
Line
In
Fan1
PS/2 K/B (underside)
PS/2 Mouse
i845E
Intel
USB1 (underside)
RJ45
USB0 (middle)
DIMM1
DIMM2 DDR 266MHz
mPGA478
1
RT1
FD1
1
Fan2
1
JKB1
+12V Power
WOL1
1
CD_IN1
1
JP9
1
JBAT1
1
JP3
1
JFSB1
ATX
LED2
LED1
Jp11
CN9
(on top)
(on top)
POWER
8100B
NJ1
HDD IR PWR
1
20
SPK RST +
-
+
-
PWLED
LED
1
JFSB2
DDR DIMM Slots
(184-pin)
Indicator LED2:
DIMM Powered On LED
2-3.3 Indicator LED: DIMM Powered On LED
An indicator LED2 is designed on board. Whenever system is started or
enters S1(Power on Suspend)mode, the LED2 will light up. This indicator
is to warn users that, whenever LED2 is lighting up, no memory module
should be removed from or added into it, or the DATA stored to RAM will
get lost. For further setting about S1 mode, please set it in the “Power
Management Features” of BIOS.

22
85DR2-DC / 85DR2-DCL
PCI 1
PCI 2
PCI 3
PCI 4
PCI 5
W83627HF
LPC I/O
BIOS
USB3
1
USB2
1
Fan3
Audio1
1
14
RTL
IDE1
IDE2
ICH4
Intel
RTL
ALC650
Codec
AC'97
Li
Battery
AGP 4X
LPT1
COM1
COM2
Mic
Game/MIDI Port
Line
Out
Line
In
Fan1
PS/2 K/B (underside)
PS/2 Mouse
i845E
Intel
USB1 (underside)
RJ45
USB0 (middle)
DIMM1
DIMM2 DDR 266MHz
mPGA478
1
RT1
FD1
1
Fan2
1
JKB1
+12V Power
WOL1
1
CD_IN1
1
JP9
1
JBAT1
1
JP3
1
JFSB1
ATX
LED2
LED1
Jp11
CN9
(on top)
(on top)
POWER
8100B
NJ1
HDD IR PWR
1
20
SPK RST +
-
+
-
PWLED
LED
1
JFSB2
LED1
AGP Warning Indicator
2-4 Install AGP4X with LED & Jumper Safeguard
3. LED1 is a Warning LED. Whenever JP3 is set 1-2 closed for an AGP 4X
card installation, and yet the AGP slot is left empty, or the card is not a
correct one, LED1 will light up until a proper installation is done.
1. The AGP slot on board supports only AGP 4X card configuration. Users
should install an 1.5V AGP 4X card.
2. A safe installation of AGP 4X card is to set Jp3 to 1-2 closed, resulting in
allowing only 1.5V AGP 4X card to boot system. In this case, if users
cannot boot with an AGP card inserted in the slot, it indicates that the
AGP card is not a correct one. The card should be replaced with a 1.5V
AGP 4X card.
AGP Accelerator
Warning:
• If a 3.3V AGP 2X card is
mistakenlyinserted for booting the
system, the high voltage will burn
the 1.5V circuit on board. Never
use a 3.3V or an unknown AGP
card on this mainboard
(default)
AGP4X Safeguard
1-2 closed
Safeguard Enabled
1.5V AGP 4X Card to boot system only
1
2-3 closed
Safeguard Disabled
Onboard VGA or AGP 4X Card to boot
system (Warning: 3.3V AGP card will
cause 1.5V circuit burn.)
Jp3:
1

23
Chapter 2 Hardware Setup
PCI 1
PCI 2
PCI 3
PCI 4
PCI 5
W83627HF
LPC I/O
BIOS
USB3
1
USB2
1
Fan3
Audio1
1
14
RTL
IDE1
IDE2
ICH4
Intel
RTL
ALC650
Codec
AC'97
Li
Battery
AGP 4X
LPT1
COM1
COM2
Mic
Game/MIDI Port
Line
Out
Line
In
Fan1
PS/2 K/B (underside)
PS/2 Mouse
i845E
Intel
USB1 (underside)
RJ45
USB0 (middle)
DIMM1
DIMM2 DDR 266MHz
mPGA478
1
RT1
FD1
1
Fan2
1
JKB1
+12V Power
WOL1
1
CD_IN1
1
JP9
1
JBAT1
1
JP3
1
JFSB1
ATX
LED2
LED1
Jp11
CN9
(on top)
(on top)
POWER
8100B
NJ1
HDD IR PWR
1
20
SPK RST +
-
+
-
PWLED
LED
1
JFSB2
To install HDD or CD-ROM Drive, you may connect the connector of IDE
cable to the primary (IDE1) or secondary (IDE2) connector on board, and
then connect the gray connector to your slave device and the black
connector to your master device. If you install two hard disks, you must
configure the second drive to Slave mode by setting its jumpers correctly.
Please refer to your hard disk documentation for the jumper settings.
2-5 IDE Connector Installation
Pin 1 (to Red Line)
IDE2
IDE1
Hard Disk Drive
Connector:
Orient the red line on the
IDE ribbon cable to
Pin1.
Gray connector
Blue connector
Black connector
Red line
(To Mainboard)
(To Slave device)
(To Master Device)
IDE Flat Cable
80-conductor
cable
This manual suits for next models
1
Table of contents
Other SOLTEK Motherboard manuals

SOLTEK
SOLTEK SL-85DRV3 User manual

SOLTEK
SOLTEK SL-67B-W User manual

SOLTEK
SOLTEK 85ERV2 User manual

SOLTEK
SOLTEK 85DRV4-C User manual

SOLTEK
SOLTEK SL-54A2 User manual

SOLTEK
SOLTEK SL-85DRS User manual

SOLTEK
SOLTEK SL-53A2 Use and care manual

SOLTEK
SOLTEK SL-65ME-T User manual

SOLTEK
SOLTEK SL-85DR-C User manual

SOLTEK
SOLTEK SL-B8E-FG User manual

SOLTEK
SOLTEK SL-K890-754G User manual

SOLTEK
SOLTEK SL-65MIV-C User manual

SOLTEK
SOLTEK K8AV2-R User manual

SOLTEK
SOLTEK SL-55B5 User manual

SOLTEK
SOLTEK SL-85DR User manual

SOLTEK
SOLTEK NV400-64 User manual

SOLTEK
SOLTEK 86SP2 User manual

SOLTEK
SOLTEK SL-65EB User manual

SOLTEK
SOLTEK SL-B5A-FG User manual

SOLTEK
SOLTEK 85DRV5 User manual