SONY.
4-172-946-12(2)
Battery
Charger
Chargeurde Batterie
EP.it!JJlEP.H
Operating Instructions
Mode d'emploi
fil!liJ!.PJl4!
UTHitJM/ON
m
rl)lnfoUTHIU~
mUTHIUM/ON m
(i)tnfoU1HIU~
0
raJinfoUTH/U~
m
Ci)WoUTHI~
m
LITHIUM
ION
Q
,..,
"'"
BC-TRN
0
2010SonyCo
r
~~
t
ion
Primedin.lapan
http
:/twww.
sony.nev
Printed on
70%
or
more
recycled paper
using
VOC
(Volatile Organic
Compound)-free
vege
t
able
oil
based
ink
.
1
~
11111111111
1
1111111111
4172946120
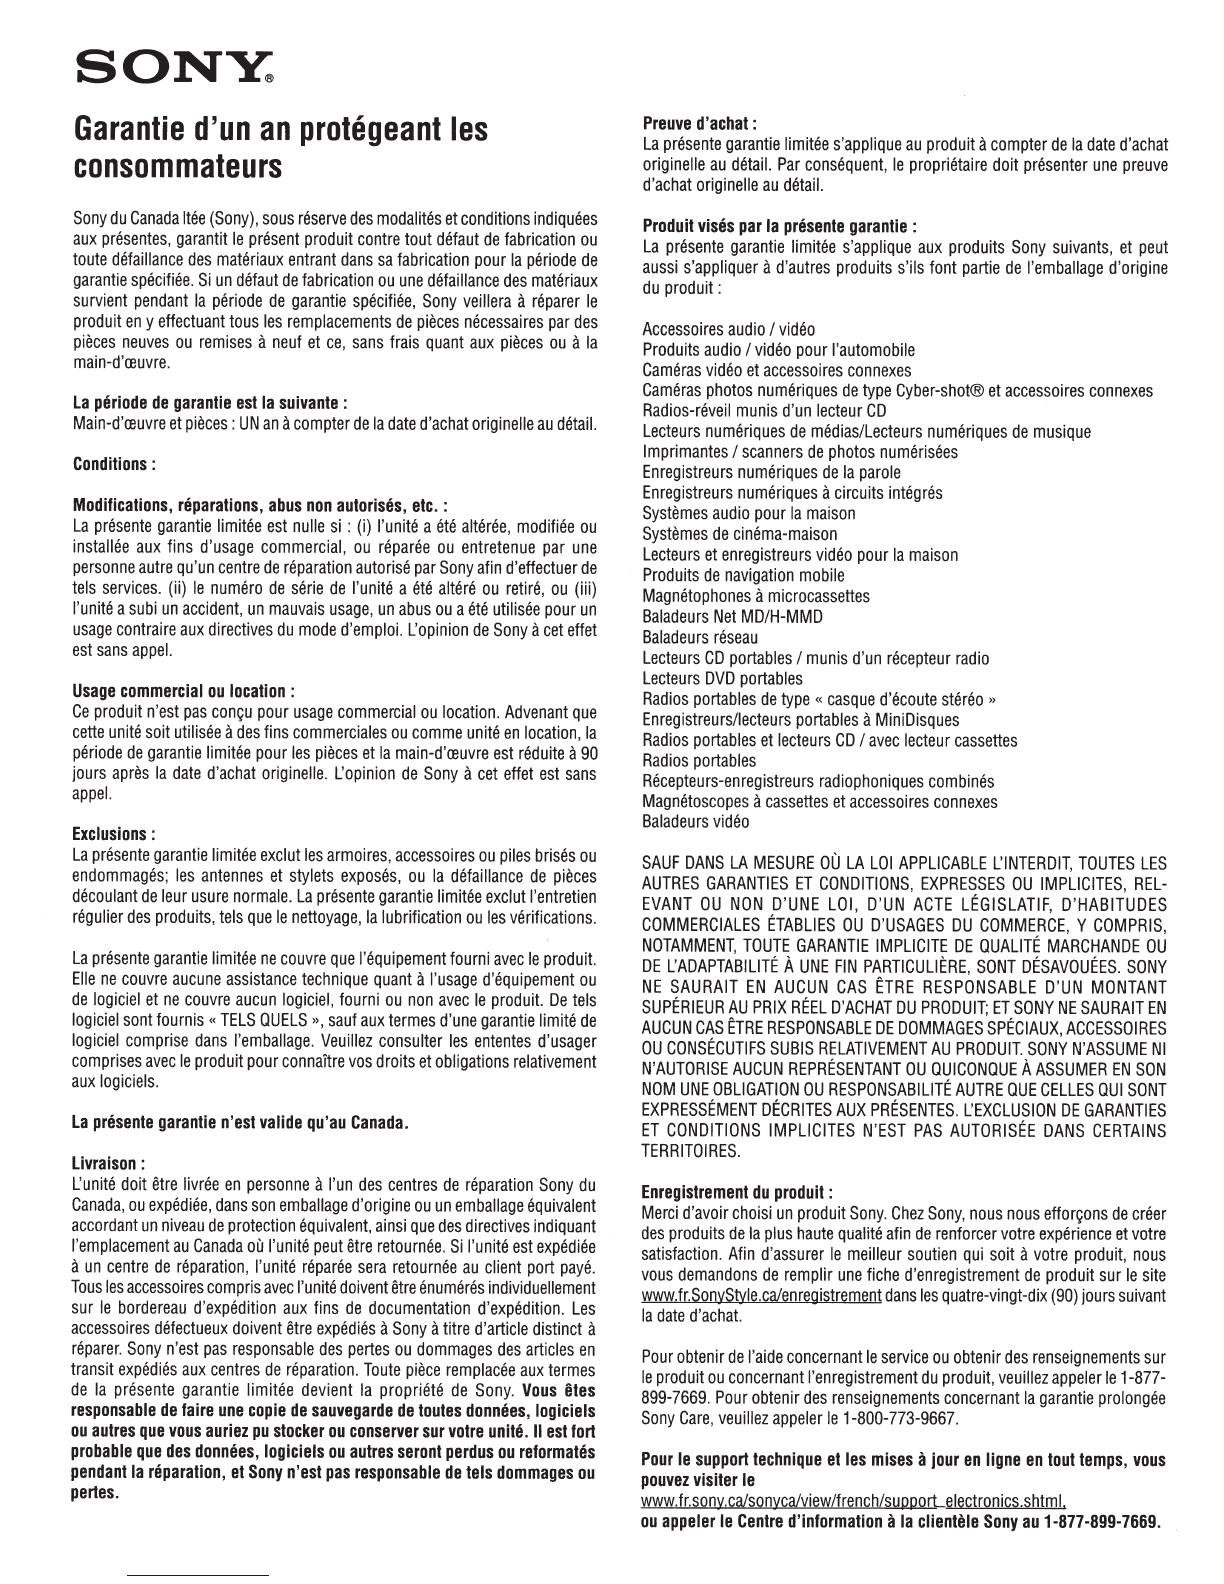
• The BC-TRN battery chargercan
on
ly
be
used to charge
"JnfoLI
THIUM
Hbattery packs (type
G/
type
T/type
Rl[)'pe
D)
and
lilhium ion type battery packs (type Nftype G/type D)
• Designed for use with compatible Sony baltery packs.
" This
un
it cannot be used to charge a
nkkd
cadmium
type
or
nickel
metal hydride type battery pack.
•
~InfoUT
HI
UM"
is a
trademark
of
Sony Corporation.
•
I.e
chargeur
de
ba
tt
er
ie
BC
-
TRN
ne
pe
ut etre utilist
que
pour
charger
les batteries rechargeables M lnfoLITHJUM
~(type
G/type
T/type
R/type
D)
et les batteries rechargtables au lithium-ion (type
N/type
G/typeD)
.
•
r1
est
con~Y
u
pour
l
es
batteries rechargeables Sony compatibl
ts
.
• Cet appareil ne peut pas
Ctre
utilise
pour
charger une batlerie
rechargeable nickel-cadmium
ou
nickcl-hydrure metallique.
•
~
Jnf
oLJTHIUM
~
est
une marque
com
merciale
de
Sony
Corpo
ration.
~
1
~
2
~
JD,
~~
CHARGE
Battery
pack
lamp
'
Battery•mark
Charger'Ym
Power
plug
2
~
~~
l!l
~
I '
.,jiiiiJ~
mrrnw
Thank you for purchasing the Sony Battery charge
r.
Befort
opera
ting this Battery charger, please read this manual
thoro
u
gh
ly
andretainitforfuturcreference.
Owner's Record
Ihe
model
and serial n
um
bers are located on the bottom. Record the
serial
number
in
the space provided below. Ref
er
to these
numbers
whenever you ca
ll
up
on
yo
ur
Sony dealer regardi
ng
thi
s product.
Model No.
BC
·TRN Serial No.
__
___
_
To
reduce
fi
re or
shod
ha:r.ard,
do
no
t expose the unit to rain
or
moisture.
To
avoid electrical shock.do n
ot
open t
he
cabinet.
Do
not
expose
the
baueries to excessive heat such as sunshi
ne
, fire or the
li
ke.
Refer servicing to quali
fi
ed
personnel only.
NOTICE
FOR
THE
CUSTOMERS
IN
THE
U
.S.
A. AND CANADA
IMPORTANTSAFETY
INSTRUCTIONS
SAVE
THESE
INSTRUCTIONS.
DANGER-
TO
REDUCE
THE
RISK
OF
FIRE
OR
ELECTRIC
SHOCK,
CAREFULLY
FOLLOW
THESE
INSTRUCTIONS.
-This
power unit
is
intended to be
cor
rectly orientated
in
a vertical
or
floor
moun
t position.
-For
connection to a su
pp
ly
not
in the
U.S
.A., use an
attachment
plug
adapter
of
the
proper
configurati
on
for the
power
out
le
t.
NOTICE
FOR
THE
CUSTOMERS
IN
THE
U.S.A.
CAUTION
You
arc cautioned that any changes
or
modifications
not
expressly
approved in this manual could void
your
authority to
operate
th
is
equipment.
NOTE
This equipme
nt
has been tested
and
found
to comply with the lim
it
s for a
Class Bdigital device, pursu
an
t to Part 15
of
the FCC Rules.
lhese
limits
are designed to provide reasonable protection against harmful
interference in a residential instaUation. This equ
ipm
en
t generates, uses,
and
c
an
r
ad
iate radio frequency energy and,
if
not
installed
and
used
in
accordancewiththeinstructions,maycauseharmfulinterferencetoradio
comm
unications.
However, there is
no
guarantee
tha
t interference will
not
occur in a
particular installation. If this
equipment
does
cause
ha
rm
ful
inttrfe
rence
to radio
or
televisi
on
reception, which c
an
be
dete
rmined
by
turning
the
equipment o
ff
an
d
on
, the
user
is encouraged to try to correct
the
interference by
one
or
more
of
the following measures:
-Reorient
or relocate the receiving antenna.
-Increase
the
separation be
tw
een the
equipment
and receiver.
-Con
nect the equipment into
an
outlet
on
a circuit differem from
tha
t to
which
thE'
receiver
is
connected
.
-Consult
the dealer
or
an experienced
radioffV
technician
fo
r help.
Notes
on
Use
This
untt
does
not
have
dust-proof
,
splash-pr
oof
or
wa
ter-proof
sp«ifications.
Warrantyfor Recorded Content
Contents
of
the recording cannot
be
com
pensated
if
recording
or
playback
is
not
made
due to a malf
unction
of this
un
it.
Where
not
to
placethis unit
Do not place this unit
in
any
of
the following l
ow
tions,
whether
it
is
in
use or in storage.
Doing
so may lead to a ma
lf
unction.
• In direct sunl
ig
ht such
as
on
dashboards
or
near
heating apparatus, as
this unit
ma
y become d
eformed
or
ma
lfunction
•
Where
there is excessive
vi
bration
•
Where
there is strong electromagnetism
or
radiant rays
•wh
er
et
h
ereisexcessivesand
In
locations such as the seashore
and
other
sandy
areas
or
where
dust
clouds occur, protect th
is
unit from sand a
nd
dust.
Th
ere is a risk
of
malfunction.
Precautions
on
Use
• C
onn
ect this unit to
an
available wall
ou
tlet
(waJI
socket). Even when
the CHARGE l
amp
of
this
un
it is off, the power
is
no
t disco
nn
ected.
If
any trouble occurs while this unit
is
in use, unplug it from the
waD
outlet (wa
ll
socket) to
di
sconnec
t the power.
•
Do
not use this unit in a narrow space
such
as between a wall
and
f
urni
ture.
• Attach the battery packfirmly to this unit when charging the batt
ery
pack.
• The battery ter
mina
l may
be
damaged
if
the
banery
pack is not attached
correctly.
• To protect
the
ba
ttery pack, remove it from th
is
unit when charging
is
comp
leted.
•
Do
not
dro
p
or
apply mechanical shock
to
this unit.
•
Kee
p this unit away from
TV
s
or
AM rece
iv
er
s.
Noise from this unit
ma
y enter a
TV
or
radio
if placed nearby.
• Unplug this unit from the wall outlet (w
al
l socket) after use.
• Be sure t
hat
nothing metallic comes
into
contact with the metal parts
of
this
un
it.
If
it does, a sh
ort
may
occur
and
this unit may
be
damaged.
• Do
no
t
co
nn
ect this
un
it to a voltage adaptor
(t
ravel converter) for
overseas travel.This m
ay
result in overheating
or
another
malfunction.
• The battery pack and this unit can beco
me
warm
duri
ng
or
immed
iately after rec
ha
rging.
Maintenance
•
If
this unit gets dirty, wipe it u
si
ng a soft
dry
doth
.
• [f this unit gets very dirty, wipe it using a cloth with a little neutral
solvent added, and then wipe it d r
y.
•
Do
no
t use thinners,
benz
ine, alcohol, etc., as th
t.'Y
will
da
mage the
surfaceof
th
isunit
.
• When you use a chemical cleaning cloth, refer
to
its inst
ruc
tion
manuaL
• Using a volatile
so
l
ve
nt such as
an
insect
ic
ide
or
keeping this unit
in contact with a
rubber
or vinyl
prod
u
ct
f
or
a long
time
may
cause
deterioration
or
damage to this uni
t.
To
Charge
the
Battery
Pack
The
batt
ery
pack is charged
by
attaching
it
to this unit.
1
Attach
the
battery
pack
.
Before
attaching
When you use a battery pack type G, before attaching the battery pack
to this unit, operate
the
following
pr
oce
du
re.
• If you u
sc
a battery pack type N,
type
T, type R or
typeD,
you
do
not
needthefollowingprocedure.
Lift the switc
hin
g lever
up
(Sec
ill
u
st
rati
on
li,l
-1
).
~~~~;
i:hc~i~;:!t(~;f
1
/~;;a!~
0
~h
fa
~~~~
marked
0
on
the
illustration
How
to
atta
ch
the
battery
pack
Align the battery •
mark
in the direction
of
the ch
ar
ger •
mark
and
insert
ir
in the
dir
ection
of
the
arro
w (Sec
ill
ustrati
on
liJ
-1)
(The battery pad illus
tra
ted is type N.)
After inserting it as far
as
it will
go
,
pre~
lightly in the
dir
t.x:tion
of
the
arr
ow
until it clicks into place (See illustration
liJ-2
).
2
Pull
the
power
plug
up,
and
then
connect
tt
to
a
wall
outlet
{wall
socket).
lhe
CHARGE lamp (orange) lights
up
and charging begins.
When
the CHARGE lampgoes out, normal charging
is
completed
(
Nonnal
charge
).
For a
full
charge, which allows you to use the battery pack longer
than
usual, leave the battery pack in place
fo
r approximately
another
one
hour
(Full
charge
).
Alwa
ys
connect
the
power plug
wi
th the prongs at the top (See
illustration ti)).
Do
not
connect the power plug with the
pro
ngs at the
bottom
(See
i
ll
ustration
I!]
).
To
remove
the
battery
pack
Lift the battery
pad
up
and
remove
it.
Charging
time
The
fo
ll
owing table shows the charging
time
for a battery pack that is
complet
el
y discharged
Batt
ery
NP·BG1/ NP-FT1 /
NP·BN1
NP-801/
NP·FR1
pack
NP-FG1 NP-FD1
Full
charging
145 195 140 205
time
Normal
charging
(85) (135)
{80)
(145)
time
• Approxtmate
number
of
mm
utes to fully charge
an
empty
ba
ttery pack
(F
u
ll
c
ha
rging time).
•
Numbers
in
parentheses
in
dicate the
timt
to
chargt
n
orma
lly (Normal
charging time).
• For
more
about the battery life, see the instruction manual
of
your
digital still camera.
•
Ihe
charging t
im
e may differ depen
ding
on
the condition
of
the
ba
ttery
pack or the ambient temperature
• The times shown are for charging
an
empty
battery pack whi
ch
has
been
run
down
with a digital still camera, using this unit
at
an
am
bient
temperature of 25
°C
(77 "F).
Chilrging
temperature
The t
empera
tur
e range for charg
in
g is 0
oc
to40
oc
(32
"F
to 104 "
F)
.
Fo
r
maximum
battery efficiency, the reco
mmen
ded te
mp
era
tur
e
range when charging is IO"C to 30 "C (SO"F to 86 "F).
To
use
the
battery
pack
quickly
You
wn
remove
the
battery pack from this unit and use it even
if
charging
is
no
t complet
ed
. However, the charging
ti
me a
ff
ec
ts
the
time
that the
batter y pack can
be
used.
Notes
•
If
the CHARGE l
amp
does
not
li
ght up, check
if
t
he
battery pack
is
firml
yattachedtothisun
it.
• When a fully c
har
ged
ba
tt
ery
pack
is
installed, the CHARGE lamp
lightsuponcea
ndth
engoesou
t.
• A battery pack that has
not
been used for a long
tim<·
may take longer
than
usual to charge.
Troubleshooting
When the CHARGE lamp blinks, check through t
he
following chart.
TheCHARGE
lamp
blinks
in
two
ways.
Blinks slowly:
Tu
rns on and offrepeatedly every 1
.5
seconds
Bli
n
ks
quickly: Turns
on
and off repeatedly every 0.15 seconds
The acti
on
to be taken depe
nd
s on the way
the
CHARGE lamp blinks.
When
th
e CHARGE
lamp
keeps
blinking
slowly
Charging
is
pausing. This unit is in the sta
nd
by state.
If
the
room
temperature
is
ou
t
of
the appropriate temperature range,
chargingstops automatica
ll
y.
When
the
room
temperature returns to the appropriate range, the
CHARGE lamp lights
up
an
d c
har
ging restarts.
We
reco
mm
en
d charging the battery
pa
ck
at
IO"C to 30 "C
(SO
"F to
86"F).
When
the
CHARGE
lamp
keeps
blinking
quickl
y
Check through the
foll
ow_i
ng chart.
The
CHARGE
lamp
lights
up
and
doe$
not
blink a9ll'ln:
lft
he CHARGEiampgoesout
becau
se
th
echargingtime
has
pas!ied,
there
is
no problem.
The
CHARGE
lamp
lights
up
and
doesnotblinkil9illln:
lfth
eCHARGElampgoesout
bec
ausethechargingtime
ha
s
p;~ssed.
th
ep
robl
e
miswithth~
batterypackfirstinstaUed.
Specifications
lnputrating
Output
rating
Operating
temperature
Storage temperature
Dimensions
Mass
In
cl
uded items
100
V-
240 V
AC
50160 Hz
II
15VA
6W
Ba
ttery charge terminal:
4.2 V DC
0.7
A
O"Cto40
"
C{32
°
Fto
104"F)
-20
•c to +60 "C (- 4
"F
to +140
°F)
Approx. 47
;.:
42
x
72
mm
(w
lh
/d)
(17/Sx
lll/16x27
/
8inches)
Approx.
71
g(2.5oz)
Baltery Charger (BC
-TRN
)
(I)
Set
of
printed documentation
Design
and
specificationsare s
ub
ject to change without notice.