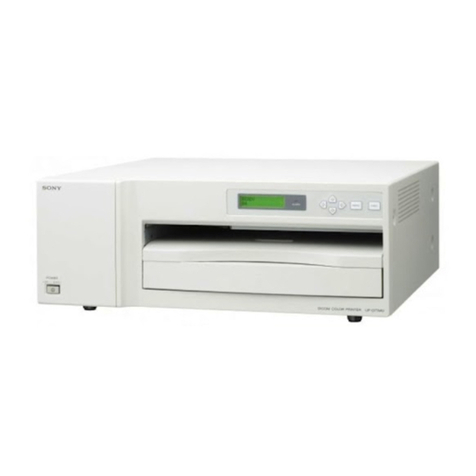
Sony UP-27MD User manual

Color Video
Printer
Instructions for Use
Before operating the unit, please read this manual thoroughly
and retain it for future reference.
UP-27MD
5-029-577-11 (1)
2021-09
© 2021 Sony Corporation

2
Table of Contents
Introduction
System Features ......................................... 11
Part Names and Functions .......................... 11
Front ..............................................................11
Rear .............................................................. 13
Information display ...................................... 13
Preparation
Connections ................................................ 15
Connecting video equipment ...................... 15
Connecting a video monitor ........................16
Connecting a foot switch .............................16
Color Printing Pack ..................................... 17
Compatible ink ribbon and paper ............... 17
Loading the Ink Ribbon ...............................18
Loading the Paper ..................................... 20
Selecting the Input Signal ...........................22
Setting the Message Display Language ......24
Operation
Making Full-Size Image Printouts ...............25
Making printouts with a user registered
settings .......................................................27
Making multiple copies of identical
printouts .....................................................27
Queuing another image while printing ..... 29
Making Variations of Printouts .................. 30
Selecting a memory page .......................... 30
Making a Printout of Reduced Images – Multi
Print ............................................................ 31
Making Printouts with a Caption ................36
Entering text ............................................... 36
Zoom and Print Part of an Image ................38
Deleting Images Stored in Memory ............43
Setting the function of the STOP/CLEAR
button ........................................................ 43
Deleting images stored in memory ........... 44
Hiding the Screen Display on the Video
Monitor ...................................................... 46
Locking Controls .........................................47
Adjustment
Menu Configuration ................................... 48
Items That Can be Set on Menus ................. 51
Basic Menu Operations ...............................52
Adjusting the Color and Sharpness ............ 55
Compensating for source image brightness,
etc. ............................................................. 55
Matching the video monitor and printout
color ........................................................... 56
Adjusting the printout sharpness .............. 58
When a black frame or lines show up on
printouts .................................................... 59
Printing to match paper size ...................... 60
Adjusting the color balance ........................61
Specifying colors for adjustment ............... 64
Setting the HD signal aspect ratio ............. 69
Configuring Various Settings ..................... 69
Registering a user settings ......................... 69
Returning user settings to factory
defaults ..................................................... 70
Displaying the ink ribbon or printer setting
information ................................................ 71
Disabling message display .......................... 71
Selecting controls using the device connected
to the REMOTE connector .......................... 71
Setting the communication speed with a
printer .........................................................73
Setting the operation and alarm sounds ....73
Adjusting the printer window display .........73
Setting the tray light ....................................73
Printing the setting value list ......................73
Setting the cleaning message display
function ......................................................74
Miscellaneous
Maintaining Printer Functionality ............... 75
When not used for a long time ...................75
Printer location ............................................75
Transportation .............................................75
On condensation .........................................76
LCD image display .......................................76
Use with electrosurgical knives and similar
devices .......................................................76
Cleaning the cabinet ....................................76
Cleaning the thermal head ..........................76
Automatic paper feed roller cleaning .........77
Manual paper feed roller cleaning ..............77
Specifications ............................................. 78
Troubleshooting ......................................... 82
Error/Warning Messages ........................... 84
Error messages ........................................... 84
Warning and other messages .................... 85
Clearing a paper jam .................................. 86
License ....................................................... 88

3
Indications for Use/Intended Use
The Sony UP-27MD printer is a color printer with
digital video interface. It is designed to be
connected with medical imaging systems such as
ultrasound, cardiac catheterization laboratory,
endoscopy and other compatible medical
imaging systems and produce hard copy prints of
still images captured by these systems for
referrals.
Notes
• Output images from this equipment cannot be
used for diagnostic use.
• This equipment is for medical professionals.
• This equipment is intended for use in medical
environments, such as clinics, examination
rooms, and operating rooms.
To reduce the risk of fire or electric shock, do not
expose this equipment to rain or moisture.
To avoid electrical shock, do not open the
cabinet. Refer servicing to qualified personnel
only.
No modification of this equipment is allowed.
Warning
To avoid the risk of electric shock, this
equipment must only be connected to a supply
mains with protective earth.
Warning
To disconnect the main power, unplug the power
plug.
When installing the unit, incorporate a readily
accessible disconnect device in the fixed wiring, or
connect the power plug to an easily accessible
socket-outlet near the unit.
Do not position the ME equipment where it is
difficult to unplug the power plug.
If a fault should occur during operation of the unit,
operate the disconnect device to switch the power
supply off, or disconnect the power plug.
Warning
Symbols on the product
Consult the instructions for use
Follow the directions in the instructions
for use for parts of the unit on which this
symbol appears.
This symbol indicates the manufacturer,
and appears next to the manufacturer’s
name and address.
This symbol indicates the Importer, and
appears next to the Importer’s name and
registered office address.
This symbol indicates the European
Community representative, and appears
next to the European Community
representative’s name and address.
This symbol indicates the medical device
in the European Community.
This symbol indicates the date of
manufacture.
This symbol indicates the serial number.
This symbol indicates the Unique Device
Identifier (UDI), and appears next to the
bar code representation of the Unique
Device Identification.
This symbol indicates the equipotential
terminal which brings the various parts
of a system to the same potential.
Storage and transport temperature
This symbol indicates the acceptable
temperature range for storage and
transport environments.
Storage and transport humidity
This symbol indicates the acceptable
humidity range for storage and transport
environments.
Storage and transport pressure
This symbol indicates the acceptable
atmospheric pressure range for storage
and transport environments.
For accessories
This symbol indicates the batch code.
This symbol indicates “Do not reuse”.

4
For customers in the U.S.A.
This equipment has been tested and found to
comply with the limits for a Class A digital device,
pursuant to part 15 of the FCC Rules. These limits
are designed to provide reasonable protection
against harmful interference when the equipment
is operated in a commercial environment. This
equipment generates, uses and can radiate radio
frequency energy and, if not installed and used in
accordance with the instruction manual, may
cause harmful interference to radio
communications. Operation of this equipment in a
residential area is likely to cause harmful
interference in which case the user will be
required to correct the interference at his own
expense.
You are cautioned that any changes or
modifications not expressly approved in this
manual could void your authority to operate this
equipment.
All interface cables used to connect peripherals
must be shielded in order to comply with the
limits for a digital device pursuant to Subpart B of
part 15 of FCC Rules.
If you have any questions about this product, you
may call;
Sony Customer Information Service Center 1-800-
222-7669 or http://www.sony.com/
For customers in the U.S.A.
Caution
Federal law (United States of America) restricts
this device to sale by or on the order of a licensed
healthcare practitioner.
For customers in Canada
This unit has been certified according to Standard
CAN/CSA-C22.2 No. 60601-1.
Important safeguards and notices for use
in the medical environments
1. All devices connected to the unit must be
certified or compliant according to IEC 60601-1,
IEC 60950-1, and IEC 60065 standards and
other IEC/ISO standards applicable to the
devices.
2. Furthermore, the system as a whole must
comply with IEC 60601-1 standards. All
peripheral devices connected to the signal
input/output sections of the unit constitute the
medical-use system, and therefore, the user is
responsible for ensuring that the system as a
whole complies with IEC 60601-1 standards. If
in doubt, consult qualified Sony service
personnel.
3. Connecting the unit to other devices may
increase the leakage current.
4. For all peripheral devices connected to the unit
that operate on commercial power supplies
and do not comply with IEC 60601-1 standards,
incorporate an isolation transformer that
complies with IEC 60601-1 standards and
connect to the commercial power supply via
the transformer.
5. The unit generates, uses, and may radiate radio
frequency energy. If it is not installed and used
in accordance with the instruction manual, it
may cause interference on other devices. If the
unit causes interference (which can be
determined by disconnecting the power cord
from the unit), try the following.
– Relocate the unit with respect to the affected
devices.
– Connect the unit and the affected devices to
different branch circuits.
For more information, consult qualified Sony
service personnel.
(Applicable standard: IEC 60601-1-2)
Supplier’s Declaration of Conformity
Trade Name : SONY
Model : UP-27MD
Responsible party : Sony Electronics Inc.
Address : 16535 Via Esprillo,
San Diego, CA 92127 U.S.A.
Telephone Number: 858-942-2230

5
Important EMC notices for use in medical environments
• The UP-27MD needs special precautions regarding EMC and needs to be installed and put into service
according to the EMC information provided in the instructions for use.
• The UP-27MD is intended for use in a professional healthcare facility environment.
• Portable and mobile RF communications equipment, such as cellular phones, can affect the UP-27MD.
Warning
• Portable RF communications equipment should be used no closer than 30 cm (12 inches) to any part of
the UP-27MD. Otherwise, degradation of the performance of this equipment could result.
• If the UP-27MD will be used adjacent to or stacked with other equipment, normal operation of the
UP-27MD under such configurations should be verified via observation.
• The use of accessories and cables other than those specified, with the exception of replacement parts
sold by Sony Corporation, may result in increased emissions or decreased immunity of the UP-27MD.
Guidance and manufacturer’s declaration – electromagnetic emissions
The UP-27MD is intended for use in the electromagnetic environment specified below. The customer or
the user of the UP-27MD should assure that it is used in such an environment.
Emission test Compliance Electromagnetic environment – guidance
RF emissions
CISPR 11 Group 1
The UP-27MD uses RF energy only for its internal
function. Therefore, its RF emissions are very low
and are not likely to cause any interference in
nearby electronic equipment.
RF emissions
CISPR 11
CISPR 32
Class B
The UP-27MD is suitable for use in all
establishments, including domestic
establishments and those directly connected to the
public low-voltage power supply network that
supplies buildings used for domestic purposes.
Harmonic emissions
IEC 61000-3-2
Class A
Voltage fluctuations/
flicker emissions
IEC 61000-3-3
Complies

6
Guidance and manufacturer’s declaration – electromagnetic immunity
The UP-27MD is intended for use in the electromagnetic environment specified below. The customer or
the user of the UP-27MD should assure that it is used in such an environment.
Immunity test IEC 60601
test level Compliance level Electromagnetic environment – guidance
Electrostatic
discharge (ESD)
IEC 61000-4-2
±8 kV contact
±15 kV air
±8 kV contact
±15 kV air
Floors should be wood, concrete or ceramic tile.
If floors are covered with synthetic material, a
relative humidity of at least 30% is
recommended.
Electrical fast
transient/burst
IEC 61000-4-4
±2 kV for power
supply lines
±1 kV for input/
output lines
±2 kV for power
supply lines
±1 kV for input/
output lines
Mains power quality should be that of a typical
commercial or hospital environment.
Surge
IEC 61000-4-5
±1 kV line(s) to
line(s)
±2 kV line(s) to
earth
±1 kV differential
mode
±2 kV common
mode
Mains power quality should be that of a typical
commercial or hospital environment.
Voltage dips,
short
interruptions and
voltage
variations on
power supply
input lines
IEC 61000-4-11
0%
U
T
(100% dip in
U
T)
for 0.5/1 cycles a
70%
U
T
(30% dip in
U
T)
for 25/30 cycles a
(for 0.5 sec)
0%
U
T
(100% dip in
U
T)
for 250/300
cycles a
(for 5 sec)
0%
U
T
(100% dip in
U
T)
for 0.5/1 cycles a
70%
U
T
(30% dip in
U
T)
for 25/30 cycles a
(for 0.5 sec)
0%
U
T
(100% dip in
U
T)
for 250/300
cycles a
(for 5 sec)
Mains power quality should be that of a typical
commercial or hospital environment. If the user
of the UP-27MD requires continued operation
during power mains interruptions, it is
recommended that the UP-27MD be powered
from an uninterruptible power supply or a
battery.
Power frequency
(50/60 Hz)
magnetic field
IEC 61000-4-8
30 A/m 30 A/m Power frequency magnetic fields should be at
levels characteristic of a typical location in a
typical commercial or hospital environment.
NOTE:
U
Tis the a.c. mains voltage prior to application of the test level.
a For example, 10/12 means 10 cycles at 50 Hz or 12 cycles at 60 Hz.

7
Guidance and manufacturer’s declaration – electromagnetic immunity
The UP-27MD is intended for use in the electromagnetic environment specified below. The customer or
the user of the UP-27MD should assure that it is used in such an environment.
Immunity test IEC 60601
test level
Compliance
level Electromagnetic environment – guidance
Portable and mobile RF communications
equipment should be used no closer to any part
of the UP-27MD, including cables, than the
recommended separation distance calculated
from the equation appliance to the frequency of
the transmitter.
Recommended separation distance
Conducted RF
IEC 61000-4-6
3 Vrms
150 kHz to
80 MHz
outside ISM
bands c
3 Vrms
d
= 1.2 √
P
6 Vrms
150 kHz to
80 MHz
in ISM bands c
6 Vrms
Radiated RF
IEC 61000-4-3
3 V/m
80 MHz to
2.7 GHz
3 V/m
d
= 2.0 √
P
80 MHz to 2.7 GHz
Where
P
is the maximum output power rating of
the transmitter in watts (W) according to the
transmitter manufacturer and
d
is the
recommended separation distance in meters (m).
Field strengths from fixed RF transmitters, as
determined by an electromagnetic site survey, a
should be less than the compliance level in each
frequency range. b
Interference may occur in the vicinity of
equipment marked with following symbol:
NOTE 1: At 80 MHz, the higher frequency range applies.
NOTE 2: These guidelines may not apply in all situations. Electromagnetic propagation is affected by
absorption and reflection from structures, objects and people.

8
a Field strengths from fixed transmitters, such as base stations for radio (cellular/cordless) telephones
and land mobile radios, amateur radio, AM and FM radio broadcast and TV broadcast cannot be
predicted theoretically with accuracy. To assess the electromagnetic environment due to fixed RF
transmitters, an electromagnetic site survey should be considered. If the measured field strength in
the location in which the UP-27MD is used exceeds the applicable RF compliance level above, the
UP-27MD should be observed to verify normal operation. If abnormal performance is observed,
additional measures may be necessary, such as reorienting or relocating the UP-27MD.
b Over the frequency range 150 kHz to 80 MHz, field strengths should be less than 3 V/m.
c The ISM (industrial, scientific and medical) bands between 150 kHz and 80 MHz are 6.765 MHz to
6.795 MHz; 13.553 MHz to 13.567 MHz; 26.957 MHz to 27.283 MHz; and 40.66 MHz to 40.70 MHz.
Recommended separation distances between portable and mobile RF communications equipment
and the UP-27MD
The UP-27MD is intended for use in an electromagnetic environment in which radiated RF disturbances
are controlled. The customer or the user of the UP-27MD can help prevent electromagnetic interference
by maintaining a minimum distance between portable and mobile RF communications equipment
(transmitters) and the UP-27MD as recommended below, according to the maximum output power of
the communications equipment.
Rated maximum output power of
transmitter
W
Separation distance according to frequency of transmitter
m
150 kHz to 80 MHz
d
= 1.2 √
P
80 MHz to 2.7 GHz
d
= 2.0 √
P
0.01 0.12 0.20
0.1 0.38 0.63
11.2 2.0
10 3.8 6.3
100 12 20
For transmitters rated a maximum output power not listed above, the recommended separation
distance
d
in meters (m) can be estimated using the equation applicable to the frequency of the
transmitter, where
P
is the maximum output power rating of the transmitter in watts (W) according to
the transmitter manufacturer.
NOTE 1: At 80 MHz, the separation distance for the higher frequency range applies.
NOTE 2: These guidelines may not apply in all situations. Electromagnetic propagation is affected by
absorption and reflection from structures, objects and people.

9
Caution
When you dispose of the unit or accessories, you
must obey the laws in the relative area or country
and the regulations in the relative hospital
regarding environmental pollution.
Warning on power connections
Use a proper power cord for your local power
supply.
1. Use the approved Power Cord (3-core mains
lead) / Appliance Connector / Plug with
earthing-contacts that conforms to the safety
regulations of each country if applicable.
2. Use the Power Cord (3-core mains lead) /
Appliance Connector / Plug conforming to the
proper ratings (Voltage, Ampere).
If you have questions on the use of the above
Power Cord / Appliance Connector / Plug, please
consult a qualified service personnel.
Guidance and manufacturer’s declaration – electromagnetic immunity
The UP-27MD is intended for use in an electromagnetic environment in which radiated RF disturbances
are controlled. Portable RF communications equipment should be used no closer than 30 cm (12 inches)
to any part of the UP-27MD. Otherwise, degradation of the performance of this equipment could result.
Immunity test Band aService aModulation IEC 60601
test level
Compliance
level
Proximity fields
from RF wireless
communications
equipment
IEC 61000-4-3
380 – 390 MHz TETRA 400
Pulse
modulation
18 Hz
27 V/m 27 V/m
430 – 470 MHz GMRS 460
FRS 460
FM
±5 kHz
deviation
1 kHz sine
28 V/m 28 V/m
704 – 787 MHz LTE Band 13, 17
Pulse
modulation
217 Hz
9 V/m 9 V/m
800 – 960 MHz
GSM 800/900
TETRA 800
iDEN 820
CDMA 850
LTE Band 5
Pulse
modulation
18 Hz
28 V/m 28 V/m
1,700 –
1,990 MHz
GSM 1800
CDMA 1900
GSM 1900
DECT
LTE Band 1, 3, 4,
25
UMTS
Pulse
modulation
217 Hz
28 V/m 28 V/m
2,400 –
2,570 MHz
Bluetooth
WLAN
802.11 b/g/n
RFID 2450
LTE Band 7
Pulse
modulation
217 Hz
28 V/m 28 V/m
5,100 –
5,800 MHz WLAN 802.11 a/n
Pulse
modulation
217 Hz
9 V/m 9 V/m
NOTE: These guidelines may not apply in all situations. Electromagnetic propagation is affected by
absorption and reflection from structures, objects and people.
a For some services, only the uplink frequencies are included.

10
Warning on power connections for
medical use
Customers in the U.S.A. and Canada should use
the following type of power cord.
Customers in other countries or regions should
use the power cord prescribed by their country or
region.
* Note: Grounding reliability can only be achieved
when the equipment is connected to an
equivalent receptacle marked “Hospital Only” or
“Hospital Grade”.
Caution
Do not use the device in a MR (Magnetic
Resonance) environment.
It may cause a malfunction, fire, and unwanted
movement.
U.S.A. and Canada
Plug type HOSPITAL GRADE*
Cord type Min. Type SJT
Min. 18 AWG
Minimum rating for plug
and appliance couplers
10 A / 125 V
Safety approval UL Listed and CSA
For the customers in the U.S.A.
SONY LIMITED WARRANTY - Please visit
http://www.sony.com/psa/warranty for
important information and complete terms and
conditions of Sony’s limited warranty applicable
to this product.
For the customers in Canada
SONY LIMITED WARRANTY - Please visit
http://www.sonybiz.ca/pro/lang/en/ca/
article/resources-warranty for important
information and complete terms and conditions
of Sony’s limited warranty applicable to this
product.
For the customers in Europe
Sony Professional Solutions Europe - Standard
Warranty and Exceptions on Standard Warranty.
Please visit https://pro.sony/support-services/
primesupport/support-professional-solutions-
europe-standard-product-warranty for
important information and complete terms and
conditions.
For the customers in Korea
SONY LIMITED WARRANTY - Please visit
http://bpeng.sony.co.kr/handler/BPAS-Startfor
important information and complete terms and
conditions of Sony’s limited warranty applicable
to this product.

11
Introduction
System Features
The UP-27MD is a color video printer that captures
images from an imaging output device such as
video equipment and prints the images at A6 size
with simple operations. It prints images by
pressing a thermal head, heated according to the
input image data, against a dedicated ink ribbon
coated with sublimation ink, transferring the ink
onto special thermal printing paper.
The UP-27MD has the following features:
• High picture quality and high print resolution
The printer allows you to print out high
resolution images in full color in high resolution
print mode (approximately 423 dpi).
• Menu settings to meet your preferences
You can create a variety of prints including
reduced images and images with captions. See
“Making Variations of Printouts” (page 30) for
details on operations.
Ordinary print operations can be performed
using the buttons on the printer. Depending on
the operation you want perform, you can use
the window display on the printer or a
connected monitor display to configure printer
settings and perform various adjustments as
necessary.
• SDI (SD/HD/3G) signal input/output support
SD, 1080i, and 1080p signal formats are
supported. Signal formats are automatically
detected via settings.
• High-definition display window
A high-definition display window on the front
panel makes it easy to check the printer status
and use the menu.
Part Names and
Functions
Front
PRINT indicator
Lights while printing is in progress.
ALARM indicator
Lights when an error such as a paper jam
occurs.
Printer window display
Displays the normal printer status.
When operating menus, the printer window
also indicates the line on which the menu
cursor is positioned.
If errors occur, messages are displayed.
The contrast and brightness of the printer
window display can be adjusted. For details,
see “Adjusting the printer window display”
(page 73).
MENU button
Switches between the menu and normal
screen display.
DISPLAY button (see pages 26, 46)
When the normal screen is displayed:
Pressing this button shows/hides the screen
display (printer setting information and
pointers displayed on the video monitor).
When this button is pressed, the [Information
Display] screen is displayed for a few seconds,
allowing you to set whether or not to show
the screen display. [Information Display] in
the [Output Setup] tab of the [User Setup]
menu also changes in conjunction with each
press of this button.

12
When the menu screen is displayed: The
screen display is hidden when this button is
pressed and held.
Directional buttons (, , , )
Use these buttons to select menu items and
change settings.
STOP/CLEAR button (page 43)
When printing is in progress: This button
functions as the STOP button. Press this
button during continuous printing operations
to stop printing after the current item finishes
printing.
When printing is not in progress: This button
functions as the CLEAR button. Press this
button to delete images captured in memory.
The images deleted when the button is
pressed depend on the [Clear Button] setting
in the [Function Setup] tab of the [User Setup]
menu. If the button is pressed while the
setting is [Off], an error tone will sound.
MULTI PICTURE button (page 31)
Repeatedly press this button during normal
screen display to select the layout (full-size
image, two reduced images, or four reduced
images) in which images are captured to
memory. Each press of this button displays
the current image type for several seconds.
[Multi Picture] in the [Print Setup] tab of the
[User Setup] menu also changes in
conjunction with each press of this button.
PRINT QTY button (page 27)
Repeatedly press this button to set the print
quantity. You can select up to nine copies, and
the current selection is displayed for a few
seconds when the button is pressed. [Print
Quantity] in the [Print Setup] tab of the [User
Setup] menu also changes in conjunction with
each press of this button.
CAPTURE button
Capture images to memory for printing.
PRINT button
Print the images that are captured to memory.
POWER switch
Use this switch to turn the printer on or off.
Tray light
Illuminates the output tray. Settings can be
changed. For details, see “Setting the tray
light” (page 73).
Paper feed tray (page 20)
Load paper in this tray. Printouts stack in the
tray above.
(eject) icon
Press here to eject the paper feed tray.
EXEC button
Use to confirm a menu setting.
MEMORY PAGE button (see pages 29,
30, 45)
Select the appropriate memory page.
SOURCE/MEMORY button
Press this button to select the source for
images that are output to the monitor. Each
time you press this button, images are
switched between the memory and input
signal (source) images.
Inside the ribbon door panel
POWER switch
Use this switch to turn the printer on or off.
This switch turns the printer on or off even
while the ribbon door panel is open.
Ribbon tray (page 18)
Load the ink ribbon in this tray.
Dial (page 86)
Use this dial to clear paper manually when an
internal paper jam occurs.

13
Rear
3G-SDI (HD/SD) (SDI video signal) input
connector (page 15)
Connects to video equipment with SDI signal
output connectors.
Both SD and HD signals are supported.
For details, see “Supported signal formats”
(page 23).
Caution
Do not come into contact with this terminal
and patients at the same time.
Doing so may result in a generation of voltage
that can be harmful to patients if the unit is
malfunctioning.
Always disconnect the power cord before
connecting and disconnecting connectors.
3G-SDI (HD/SD) (SDI video signal)
output connector (page 16)
Connects to video equipment with SDI signal
input connectors.
Both SD and HD signals are supported.
For details, see “Supported signal formats”
(page 23).
Caution
Do not come into contact with this terminal
and patients at the same time.
Doing so may result in a generation of voltage
that can be harmful to patients if the unit is
malfunctioning.
Always disconnect the power cord before
connecting and disconnecting connectors.
REMOTE connector (stereo mini jack)
(page 16)
Connects to an FS-24 Foot Switch (not
supplied).
RS-232C connector (page 16)
Connects to a computer for controlling the
printer.
Caution
Do not come into contact with this terminal
and patients at the same time.
Doing so may result in a generation of voltage
that can be harmful to patients if the unit is
malfunctioning.
Always disconnect the power cord before
connecting and disconnecting connectors.
AC IN connector (page 15)
Connects to the power cord.
Equipotential connector
Brings the all devices connected to the printer
to the same potential.
Information display
Once the POWER switch is turned on and
operations are possible, the following screen is
displayed.
Monitor display
When the printer is connected to a video monitor
the following information is displayed on the
monitor display.
For detailed information on the menu, see “Menu
Configuration” (page 48).
This manual mainly uses screen displays for
explanations.
1AM 2ı 504
Printer Error : 56
Check Paper: Load
Printer Information
Please Wait
Printing Memory
Printer Information
Press any button
1/1
Page A Printing

14
Printer window display
Image capture position
The current position of the pointer is indicated
with an asterisk (*).
Monitor display: The captured image is
displayed at the position of the blue pointer.
Printer window display: The captured image
is displayed at the position where the asterisk
(*) is displayed.
Once an image is captured, the pointer moves
to the next position.
If [1] is set for the number of reduced images
in [Multi Picture] on the [Print Setup] tab of the
[User Setup] menu, the pointer will not be
displayed.
Message display
Error messages and notifications are
displayed here. Urgent messages are
displayed at the top of the screen (monitor
display). Messages are also displayed on the
printer window display.
English or Japanese can be selected for the
message display language. For setting
instructions, see “Setting the Message Display
Language” (page 24).
Ink ribbon type and remaining ink ribbon
display
The ink ribbon type is displayed as follows:
[S]: UPC-21S (S size)
[L]: UPC-21L (L size)
[C]: Cleaning ribbon
[?]: There is no ribbon in the printer or an
unidentified ribbon is in the printer (monitor
display only)
Captions
Displays whether or not to the printer is set to
add a caption to the print.
Monitor display:
[On]: Adds a caption.
[Off]: Does not add a caption.
Printer window display: “-----” is displayed
when the printer is set to add a caption.
Reduced image setting
Monitor display: Displays the number of
reduced image screens.
Printer window display: Displays the type of
reduced image screens.
Output image
Shows whether the image output on the
video monitor is an input image (source) or
memory image.
[S]: Source image
[M]: Memory image
Memory page display
Displays the currently selected memory page.
Print quantity display
Displays the number of copies to be printed.
Captured image (printer window display
only)
Displayed filled in when there is a captured
image present.
Control lock (printer window display only)
(page 47)
Displayed when the printer button controls
are locked.
User setting (printer window display only)
(page 27)
Displays the currently selected user settings.
Input signal format display (printer window
display only)
Displays the current input signal format.
For details on the printer window display and
input signal, see “Input signal format and
output signal relation” (page 80).
1HM
1080p 80
User01
Full-size image Two reduced images
Four reduced images

15
Preparation
Connections
To enable printing, video equipment acting as an
input signal source must be connected along with
a video monitor to display images or menus.
The connection diagrams illustrate how to
connect the input signal source to the printer, how
to connect devices to receive signals output from
the printer, and how to connect a foot switch.
Connect the video equipment which will be used
in actual printing, using the following diagram as
a guide.
Notes
• Turn off the power of each device before
attempting to make any connections.
• Connect the power cord last.
Warning
Using this unit for medical purposes
The connectors on this unit are not isolated.
Do not connect any device other than one which
conforms to IEC 60601-1 standards.
When an information technology device or AV
device that uses an alternating current is
connected, current leakage may result in an
electric shock to the patient or operator.
If use of such a device is unavoidable, isolate its
power supply by connecting an isolation
transformer, or by connecting an isolator between
the connecting cables.
After implementing these measures, confirm that
the reduced risk now conforms to IEC 60601-1
standards.
Connecting video equipment
Note
The printer cannot accommodate 4K video signal
or 3D video signal input.
To video output connector
Video equipment
75 coaxial cable with BNC
connector
5C-FB or equivalent
Power cord
To AC power source
To AC IN
To 3G-SDI (HD/SD) input

16
Connecting a video monitor
Connect a video monitor as follows to view
captured images and to check those to be printed.
Connecting a foot switch
The printer can be controlled remotely by
connecting the FS-24 Foot Switch (not supplied),
or a computer.
To video input connector
Video monitor
75 coaxial cable with BNC
connector
5C-FB or equivalent
Power cord
To AC power source
To AC IN
To 3G-SDI (HD/SD) output
Computer a)
To RS-232C
To AC power source
RS-232C cable
Power cord
To REMOTE
To AC IN
a) When controlling the printer from a computer, set the
appropriate baud rate. See “Setting the
communication speed with a printer” (page 73).
FS-24 Foot Switch
(not supplied)

17
Color Printing Pack
Compatible ink ribbon and paper
Do not re-use
Doing so may result in malfunction and
negatively affect printing results.
Color Printing Pack UPC-21S
Contains color ink ribbons and paper for
240 sheets worth of high-speed, high-sensitivity
printing, including:
Three ink ribbons for 80 sheets worth of printing
each
Three reams of paper (90 × 100 mm) with
80 sheets each
Color Printing Pack UPC-21L
Contains color ink ribbons and paper for
200 sheets worth of high-speed, high-sensitivity
printing, including:
Four ink ribbons for 50 sheets worth of printing
each
Four reams of paper (100 × 144 mm) with
50 sheets each
Notes
• When the paper runs out, replace both the
paper and the ink ribbon.
• Use the ink ribbon and the paper in the carton as
a set.
• Since, like other color dyes, the dyes used in this
ink ribbon may discolor over time, the product
will neither be replaced nor be warranted
against any color change.
• Do not replace the ink ribbon and paper roll
when they are only partially used. Doing so can
cause problems. The number of printouts
indicated above is not guaranteed.
Storing paper
• Avoid storing paper in a location subject to high
temperatures and humidity, excessive dust, or
direct sunlight.
• Remove the partially used paper and ink ribbon
from the printer, reseal them in their original
bags, and store them in a cool, dark location.
Before unsealing and reusing the stored paper
and ink ribbon, allow them to return to room
temperature to prevent condensation.
Notes for preserving your printouts
• Keep printouts in a dark and cool place.
• Avoid using tape on printouts, leaving an eraser
on printouts, or putting the printout on objects
which contain plastic (desk mat, etc.)
• Be sure not to spill alcohol or other volatile
organic solvents onto the printouts.

18
Loading the Ink
Ribbon
Note
When using the printer for the first time, the
thermal head may be set to its transport position.
Be sure to turn on the printer and release the
thermal head from its transport position before
removing the ribbon tray. Do not open the ribbon
door panel if “Please Wait” appears on the printer
window display.
1
Open the ribbon door panel.
2
Pull the ribbon tray straight out of the printer.
3
Load the ink ribbon.
Align the two pegs on each side of the ink
ribbon with the slots on the ribbon tray.
Notes
• Make sure to load the ink ribbon with the
front and back oriented correctly.
• Before loading the ink ribbon, make sure to
position the start mark as shown in the
illustration and remove any slack by turning
the gear in the direction of the arrow.
Slide the ink ribbon straight into the
ribbon tray until completely inserted.
Correct Incorrect
Gear
Start mark

19
Note
Do not touch the white tabs on the sides of
the ribbon tray. Doing so may result in
improper loading of the ink ribbon.
4
Slide the ribbon tray straight into the printer
until completely inserted.
5
Close the ribbon door panel.
To remove the ribbon tray
To remove the ribbon tray when replacing the ink
ribbon, for example, pull the tray straight out.
If the ink ribbon tears during use
Cellophane tape, etc., can be used to repair a torn
ink ribbon so that the remainder of the ribbon can
be used. Wind the ink ribbon until the cellophane
tape is no longer visible by turning the black (or
gray) gear at the winding end in the direction of
the arrow. (Make sure the ink ribbon does not
sag.)
Tab
Cellophane tape

20
Loading the Paper
Follow the steps below to load paper into the
paper feed tray and to insert the tray into the
printer.
When using the printer for the first time, begin
with step2.
Notes
• Be careful not to touch the print side of the
paper.
• Use only the recommended paper for this
printer. Other types of paper may cause printer
malfunctions, such as paper jams. For details
about ink ribbons and paper, see “Compatible
ink ribbon and paper” (page 17).
• When the message “Change Ribbon” appears
on the printer window display, the ink ribbon is
used up. Replace the ribbon and load the printer
with new paper.
• Be careful when inserting and removing the
paper feed tray, because it may cause the printer
to shift position and fall.
• When the paper runs out, do not just add more
paper. When the paper runs out, replace both
the paper and the ink ribbon. Replenishing the
paper midway may cause a paper jam.
1
Press the mark on the paper feed tray to
eject the tray.
2
Open the lid of the paper feed tray, and load
the paper and protective sheet together with
the print side facing up.
When using printing pack UPC-21L:
Open the paper feed tray.
If the paper feed tray partition is raised,
lower it.
Neatly stack and load the paper in the
paper feed tray, aligning the mark on
the protective sheet with the mark
inside the tray.
When using printing pack UPC-21S
Open the paper feed tray.
If the paper feed tray partition is lowered,
raise it.
Table of contents
Other Sony Printer manuals

Sony
Sony DPP-FP97 User manual

Sony
Sony UP-890CE User manual

Sony
Sony SNAPLAB UP-CR20L Assembly instructions

Sony
Sony FVP-1E User manual

Sony
Sony UPX-C100 User manual

Sony
Sony FilmStation UP-DF550 User manual

Sony
Sony UP-890CE User manual

Sony
Sony DPP--SV77 User manual

Sony
Sony SNAPLAB UP-CR20L User manual

Sony
Sony DMP-1000 User manual

Sony
Sony UPA-WU10 User manual

Sony
Sony UP55MD User manual

Sony
Sony UP-TX1 Series Installation and operation manual

Sony
Sony UP-970AD User manual

Sony
Sony DPP-SV55 User manual

Sony
Sony UP-5500 User manual

Sony
Sony DPP-FP95 User manual

Sony
Sony SpectaProof UP-D9500 User manual

Sony
Sony UP25MD User manual

Sony
Sony UPA-PC110 User manual