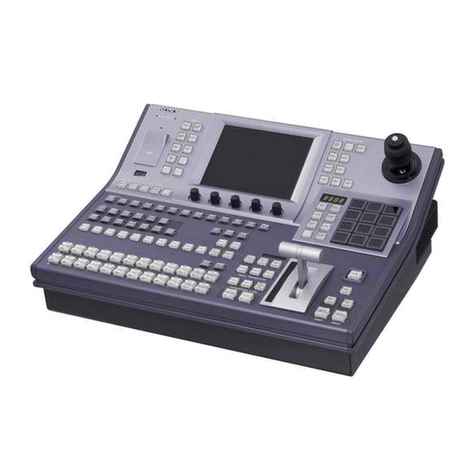
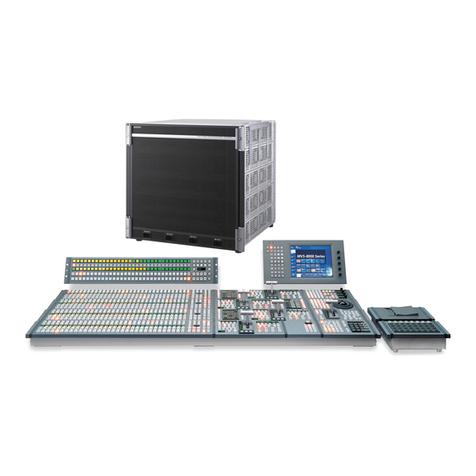
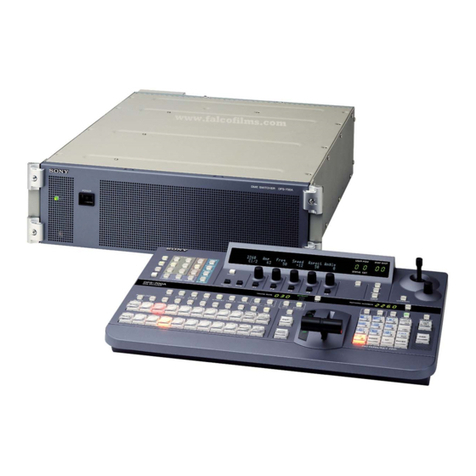
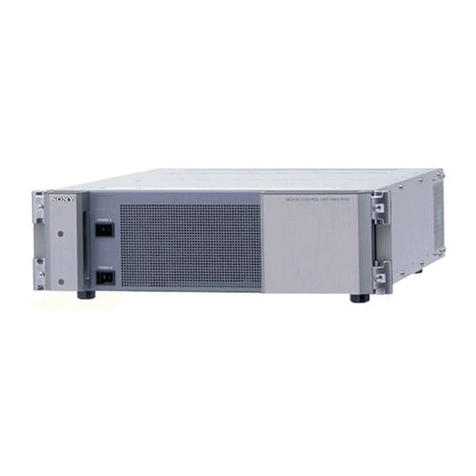
Sony MCS-8M User manual

Multi Format
Compact Switcher
4-296-436-12 (1)
© 2011 Sony Corporation
Operating Instructions (Volume II Advanced Settings)
Before operating the unit, please read this manual thoroughly and retain it for future reference.
MCS-8M
Software Version 1.03 or later

Table of Contents
II-2
Chapter 1 Overview
Introduction....................................................................... II-5
System Configuration Examples ................................................II-5
Chapter 2 Video Switching
Overview ............................................................................ II-7
Setting the Transition Type .......................................... II-8
General Transition Settings ([Misc] menu)............... II-8
AUX Mixing........................................................................ II-9
Setting Wipes.................................................................. II-10
Basic Operations for Wipe .......................................................II-10
Selecting the Pattern and Direction for Wipes .........................II-10
Making Detailed Adjustments to Wipe Patterns ......................II-10
Adding the Edge to the Wipe Pattern .......................................II-12
Setting DME Wipes........................................................ II-12
Basic Operations for DME Wipe .............................................II-12
Selecting the Pattern and Direction for DME Wipes ...............II-12
Making Detailed Adjustments to DME Wipe Patterns ............II-13
Adding an Edge to a DME Wipe Pattern .................................II-14
Adjusting the Background Color of a DME Wipe ...................II-14
Details on [Effect] Menu .............................................. II-15
[Effect] Menu ...........................................................................II-15
[Wipe Modify] Menu ...............................................................II-16
[DME Wipe Modify] Menu......................................................II-18
Setting Keys.................................................................... II-19
Basic Operations for Keys........................................................II-19
Setting Key Transitions ............................................................II-20
Selecting the Pattern and Direction for Key Wipes..................II-20
Making Detailed Adjustments to Key Wipe Patterns...............II-20
Setting Key DME Wipes ..........................................................II-20
Making Detailed Adjustments to Key DME Wipe Patterns.....II-21
Selecting Key Types.................................................................II-21
Making Detailed Adjustments to the Luminance Key .............II-21
Making Detailed Adjustments to the Linear Key.....................II-21
Making Detailed Adjustments to the Chroma Key ..................II-21
Setting the Key Fill and Key Source ........................................II-21
Setting a Mask for a Key ..........................................................II-22
Adding an Edge to a Key..........................................................II-22
Adjusting the Size and Position of the Key..............................II-22
Details on [Key] Menu .................................................. II-23
[Key] Menu ..............................................................................II-23
[Resizer] Menu .........................................................................II-26
[Auto Chromakey] Menu .........................................................II-27
[Manual Chromakey] Menu .....................................................II-28
[Key Wipe Modify] Menu........................................................II-29
[Key DME Wipe Modify] Menu ..............................................II-30
Chapter 3 Audio Mixing
Overview .......................................................................... II-31
Details on [Audio Channel] Menu ............................. II-31
Chapter 4 Input Image Freezing and Frame
Memory
Overview .......................................................................... II-34
Freezing Input Images.................................................. II-34
Selecting Frame Memory for Use as Frame Memory
Video (FM) ..................................................................... II-35
Saving Images to Frame Memory ............................. II-35
Importing and Exporting Images............................... II-36
Importing Images......................................................................II-36
Export Frame Memory .............................................................II-36
Chapter 5 Importing and Exporting Files
Importing and Exporting Configuration Data ........ II-38
Exporting Configuration Data ..................................................II-38
Importing Configuration Data ..................................................II-39
Importing and Exporting Snapshots........................ II-39
Exporting Snapshots.................................................................II-39
Importing Snapshots.................................................................II-40
Formatting a USB Flash Drive ................................... II-40
Chapter 6 3D System
Overview .......................................................................... II-41
Making the Necessary Settings................................. II-42
Setting the Signal Format and Video Size................................II-42
Turning 3D Mode On ...............................................................II-42
Confirming 3D Video Output...................................................II-43
Chapter 7 Controlling External Devices
Enabling/Disabling Operation from External
Devices .......................................................................... II-44
Connecting with External Devices............................ II-44
Setting GPI Inputs ....................................................................II-44
Setting GPI Outputs/Tallies......................................................II-44
Details on [GPI/Tally] Menu ........................................ II-45
Table of Contents
(this manual)

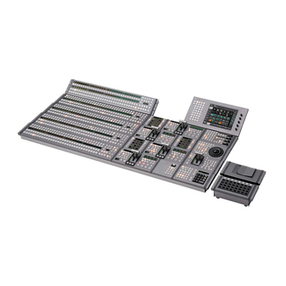
Table of Contents II-3
Chapter 8 Setup ([Setup] Menu)
Overview .......................................................................... II-48
System Setup (System)................................................ II-48
Details on [System] Menu ........................................................II-49
Audio Setup (Audio) ..................................................... II-50
Details on [Audio] Menu..........................................................II-50
Video Input Setup (Video (Input)).............................. II-52
Details on [Video (Input)] Menu ..............................................II-52
Assigning Video Input Signals to the Cross Point
Buttons (Video (XPT)) ................................................ II-53
Using the Shift Button Function...............................................II-53
Details on [Video (XPT)] Menu...............................................II-53
Video Output Setup (Video (Output)) ....................... II-54
Details on [Video (Output)] Menu ...........................................II-54
Setup of Other Video Related Items
(Video (Misc)) ............................................................... II-55
Details on [Video (Misc)] Menu ..............................................II-55
Displaying Various Information (Information) ....... II-55
Installing Application Software and Firmware
(Install) ........................................................................... II-55
Appendix
Message List................................................................... II-56
Errors ........................................................................................II-56
Warnings...................................................................................II-57
Information ...............................................................................II-58
Index ................................................................................ II-59
Table of Contents
(Volume IBasic Operation)
Chapter 1 Overview
Introduction
Names and Functions of Parts
Chapter 2 Preparations
Connecting Devices
Configuring System Settings
Configuring Video Signal Settings
Configuring Audio Signal Settings
Configuring Multi Viewer Settings
Chapter 3 Basic Operations
Switching Video
Composing Images with Keys
Composing Images Using
Picture-in-Picture (PinP)
Mixing Audio
Snapshots
Saving and Selecting Settings
Appendix
Effect Pattern List
Troubleshooting
Maintenance
Specifications
Index

II-4 About This Manual
About This Manual
This manual describes how to make adjustments and
settings to enable you to use the advanced features of this
unit.
For the basic operating procedures of the unit, see to “Operating
Instructions (Volume I Basic Operation).”
How to View This Manual
About setting values
The setting values shown in bold are the factory default
settings.
Examples:
About references
References to the Operating Instructions (Volume I Basic
Operation) are indicated by the cmark as follows.
Example 1:
Channel faders (cBasic Operation: “Names and
Functions of Parts”)
Example 2:
For details, see “Effect Pattern List” (cBasic
Operation).
To find information on a specific topic
See “Index” (page II-59) at the end of this manual.
The index indicates whether the information can be found
in “Volume I Basic Operation” or “Volume II Advanced
Settings” and the corresponding page numbers.
Knob Parameter Meaning Setting range
V3 Format Signal format 108059, 108050,
720p59, 720p50,
480i59, 576i50,
Test1, Test2, Test3
V4 Aspect Aspect ratio 16:9, 4:3

II-5
Introduction
Chapter 1 Overview
Chapter
Overview
Introduction
The unit allows you to adjust and set video effects, transitions, and audio in detail to
perform more sophisticated switching. You can also perform 3D video switching,
and use the frame memory function to write one screen of the input video to memory
so that you can use it as input material.
System Configuration Examples
Example 1: When SD system
Presenter computer
Presenter
microphone
Projector
VIDEO
DVI-D
Host microphone
DVI-I
SDI
VIDEO
SDI
PA, etc.
Multi Viewer display
Headphones
PGM monitoring display
Recording equipment
with SDI input
Camera with SDI output
Recording equipment
with SDI output
CD/DVD
player
SDI
USB flash drive
(CG material)
PGM
SDI
MIC/LINE
MIC/LINE
LINE
Camera with VIDEO output
DVI⇔HDMI
conversion cable

II-6 Introduction
Chapter 1 Overview
Example 2: When 3D system
For details on configurations for 3D systems, see “Chapter 6: 3D System” (page II-41).
Presenter
microphone
DVI-D
Host microphone
HD SDI
(L)
HD SDI
(PGM L, PGM R)
PA, etc.
Multi Viewer display
Headphones
Recording equipment
with HD SDI input
Right camera
CD/DVD
player
HD SDI (L+R)
PGM
Left camera
HD SDI
(L)
Right camera Left camera
HD SDI (R)
PGM monitoring display
HD SDI (R)
MIC/LINE MIC/LINE
LINE
DVI⇔HDMI
conversion cable

II-7
Overview
Chapter
Chapter 2 Video Switching
s
Video Switching
Overview
This unit includes three video composition blocks: M/E (Mix/Effect), Aux1, and Aux2. You can also apply transitions
between the buses of each block.
In the M/E block, you can add a variety of video effects while switching the video, as well as use keys to compose video.
Although you cannot add wipe and key effects in the Aux blocks, video can be switched via mixing in these blocks. (See
“AUX Mixing” (page II-9))
Transition, effect, and key adjustments and settings are
performed in the following menus.
Video input Video output
Preview
Program
Aux1 Preview
Aux1 Program
Aux2 Preview
Aux2 Program
Aux1 PGM Bus
Aux1 PST Bus
Aux2 PGM Bus
Aux2 PST Bus
Key Source Bus
Key Fill Bus
PST Bus
PGM Bus
Aux1
Aux2
M/E
(Mix/Effect)
Menu Description Reference
page
Misc Set general transition settings
(e.g., transition rates, color
backgrounds).
II-8
Effect Set the transition type. II-8
Set the wipe. II-10
Set the DME wipe. II-12
Key Set the key. II-19

II-8 Setting the Transition Type / General Transition Settings ([Misc] menu)
Chapter 2 Video Switching
Setting the Transition
Type
You can specify the transition type that is used when you
perform effect transitions.
You can select any of the following transition types.
Wipe: Use a wipe to switch from the current output image
to a new image.
NAM (Non-Additive Mix): Compare the current image
and new image signals, and gives priority to the signal
with the highest luminance level in the output.
For the first half of the transition, the current image is
maintained at 100% and NAM is gradually performed
for the new image. At the halfway point, NAM is
performed for both images which are maintained at
100%. In the second half, the new image is maintained
at 100% and NAM is performed while the current
image is gradually reduced.
DME (Digital Multi Effects): Use DME effects to
switch the image currently being output in a manner
that appears as if it is being wiped (DME wipe).
Settings menu: [Effect] menu > [Effect Transition]
(page II-15)
General Transition Settings ([Misc] menu)
You can set the transition rate and the color background (ColBg) with the items in the [Misc] menu.
Press the MISC button in the menu control block to display the [Misc] menu.
Menu item Description Knob Parameter Meaning Setting range
Transition
Rate (1/2)
You can set the time (transition rate) it takes to switch
videos when a transition is executed with the AUTO
TRANS button, KEY TRANS button, or FTB button for
each transition.
Tips
• The transition rate for effect transition can also be set
under [Effect Transition] in the [Effect] menu.
(See page II-15)
• Key transition rates can be set under [Key Transition] in
the [Key] menu. (See page II-23)
V2 Effect Transition rate for
effect transition
1 to 999
frames (30)
V3 Key Transition rate for
key transition
1 to 999
frames (30)
V4 FTB Transition rate for
FTB
1 to 999
frames (30)
Transition
Rate (2/2)
V3 Aux1 Transition rate for
Aux1
1 to 999
frames (30)
V4 Aux2 Transition rate for
Aux2
1 to 999
frames (30)
Color
BKGD
A color signal can be generated within the unit and used
as a single-color background. Color signals can be
assigned to the cross point buttons (PGM button and
PST/KEY button) and then used.
V2 Lum Luminance 0.00 to 100.00
V3 Sat Saturation 0.00 to 100.00
V4 Hue Hue 359.99 to 0.00
Port
Enable
Enable or disable the GPI and RS-232C ports which are
used for operation from external devices.
For details on controls for external devices, see “Chapter 7: Controlling
External Devices” (page II-44).
V3 GPI Enables/disables
GPI port
Enbl (enable),
Disbl (disable)
V4 RS232C Enables/disables
RS-232C port (for
future expansion)
Enbl (enable),
Disbl (disable)

II-9
AUX Mixing
Chapter 2 Video Switching
AUX Mixing
You can switch video via mixing (AUX Mixing) in the Aux blocks of this unit.
In addition, you can select the M/E program output as the input signal in the Aux blocks, allowing you to switch the video
composed in the M/E block with another video via mixing in the Aux blocks and simulate the flexible video composition
of a 2M/E switcher.
You can also use the output from the Aux blocks as the main video output. As illustrated above, you can adjust effects and
keys in the M/E block while outputting the main output from an Aux block, and switch to that video when ready.
As an example, this section describes the procedure for
using Aux1 as the main video output.
Preliminary settings
1
Select the Aux1 program as the main video output
(program video output).
Settings menu: [Setup] menu > [Video (Output)]
menu (page II-54)
2
Set Aux1 as the reference signal for the on-air tally.
Settings menu: [Setup] menu > [GPI/Tally] menu >
[On Air Source] (page II-47)
Mixing operation
1
Press the AUX 1 bus delegation button.
2
Select the input material of the PGM bus in the PGM
cross-point buttons.
3
Select the M/E program output in the PST/KEY
cross-point buttons.
4
Execute the transition using the fader lever, CUT
button, or AUTO TRANS button.
Aux1 and Aux2 settings are not stored in snapshots.
Tip
Sports News
Sports News
AUX output
CAM1 Program video
Mix transition
VTR (PinP)
Mix transition
CAM2
Key
M/E
Video composed in M/E block
CAM1
Tip

II-10 Setting Wipes
Chapter 2 Video Switching
Setting Wipes
A wipe is a transition effect that switches to the next video
by applying an effect that removes the program output
video in a manner that appears as it is being wiped off with
the video to be output next.
With this unit, you can make the following settings.
•Selecting the Pattern and Direction for Wipes (page
II-10)
•Making Detailed Adjustments to Wipe Patterns (page
II-10)
•Adding the Edge to the Wipe Pattern (page II-12)
This section describes wipe effects and basic operations
for wipes.
Wipe settings are made in the [Effect] menu.
For details on the menu item, see “Details on [Effect] Menu” (page II-15).
The [Effect] menu does not appear in 3D mode.
Basic Operations for Wipe
Selecting the Pattern and Direction
for Wipes
A wipe can be set to proceed in either the normal wipe
direction (normal) or reverse wipe direction (reverse). You
can also specify normal and reverse to be switched each
time a transition finishes (normal/reverse).
Selecting the wipe pattern
You can select the wipe pattern using one of the following
three methods.
• Select from the patterns assigned to the numeric buttons
(direct selection).
For details, see “Selecting Effects with the Numeric Keypad (Direct
Selection)” (cBasic Operation)
• Enter the pattern number with the numeric buttons.
For details, see “Specifying effects by pattern number” (cBasic
Operation).
• Specify the pattern number in the [Effect] menu.
Specifying the pattern number in the
[Effect] menu
Settings menu: [Wipe Adjust] (page II-15)
For details on the wipe pattern numbers, see “Effect Pattern List” (cBasic
Operation).
Making Detailed Adjustments to
Wipe Patterns
You can set the position of a wipe pattern and apply
various variations and modifiers in the [Wipe Modify]
menu.
To display the [Wipe Modify] menu
Display the [Effect] menu, turn the V1 knob to select
[Wipe Adjust], and press this knob.
Tip
Select the video for program output.
r
Select the next video for output.
r
Press the EFF transition type selection button.
r
Set the transition type to [Wipe].
r
Select the pattern and direction for the wipe.
r
Make detailed adjustments to the wipe pattern if necessary.
r
Execute the transition.
Normal Reverse

II-11
Setting Wipes
Chapter 2 Video Switching
Setting the wipe position
The wipe position can be set in the [Wipe Modify] menu
or with the X-Y pointer in the menu control block.
Settings menu: [Wipe Modify] menu > [Positioner]
(page II-16), [Positioner Adjust] (page II-16)
To set the position with the X-Y pointer
Press the POS button in the menu control block so that it
lights up and then adjust the position by controlling the
X-Y pointer. If the F1 button is lit orange, press the F1
button to light it green.
Setting the rotation method of a wipe
pattern
You can select from the following three rotation methods
for wipe patterns.
Angle
Performs the wipe with the pattern inclined at a fixed
angle.
Speed
Rotates the pattern at a fixed speed during the transition.
Magnitude
Rotates the pattern at only the set angle for one transition.
Settings menu: [Wipe Modify] menu > [Rotation]
(page II-17), [Rotation Adjust] (page II-17)
Setting the aspect ratio of a wipe pattern
You can freely change the aspect ratio of a wipe pattern.
Settings menu: [Wipe Modify] menu > [Aspect]
(page II-17)
Replicating a wipe pattern
The same pattern can be placed up to 63 times either
horizontally or vertically, or in both directions.
Furthermore, you can select from the following four
methods for placing the patterns.
1: All of the patterns are oriented the same way
2: Even numbered rows are moved in the horizontal
direction
3: Even numbered columns and even numbered rows are
reversed
4: Even numbered columns and even numbered rows are
reversed and even numbered rows are moved in the
horizontal direction
Settings menu: [Wipe Modify] menu > [Multi]
(page II-17), [Multi Adjust] (page II-17)
Positioner Off Positioner On
Angle Off Angle On
Aspect Adjustment Off Aspect Adjustment On
Multi Function Off Multi Function On
1234

II-12 Setting DME Wipes
Chapter 2 Video Switching
Adding the Edge to the Wipe Pattern
You can add a border around the pattern (border), defocus
the edge around the pattern (soft), and defocus an added
edge of border (soft border).
The edge color can also be adjusted.
Border: You can adjust the width of the border.
Soft Edge: You can adjust the defocus condition for the
edge.
Soft Border: You can adjust the width of the border and
the defocus condition for the edge of the border.
Settings menu: [Wipe Edge] (page II-15), [Wipe Edge
Color] (page II-15)
Setting DME Wipes
DME wipes are effects that use DME (digital multi effects)
to switch the image currently being output in a manner that
appears as if it is being wiped.
With this unit, you can make the following settings.
•Selecting the Pattern and Direction for DME Wipes
(page II-12)
•Making Detailed Adjustments to DME Wipe Patterns
(page II-13)
•Adding an Edge to a DME Wipe Pattern (page II-14)
•Adjusting the Background Color of a DME Wipe (page
II-14)
This section describes DME wipe effects and basic
operations for DME wipes.
DME wipe settings are made in the [Effect] menu.
For details on the menu item, see “Details on [Effect] Menu” (page II-15).
Basic Operations for DME Wipe
Selecting the Pattern and Direction
for DME Wipes
For details on the pattern and direction for DME wipes, see “Selecting the
Pattern and Direction for Wipes” (page II-10).
Settings menu: [DME Wipe Adjust] (page II-15)
Border Soft BorderSoft Edge
Select the video for program output.
r
Select the next video for output.
r
Press the EFF transition type selection button.
r
Set the transition type to [DME].
r
Select the pattern and direction for the DME wipe.
r
Make detailed adjustments to the DME wipe pattern if
necessary.
r
Execute the transition.

II-13
Setting DME Wipes
Chapter 2 Video Switching
Making Detailed Adjustments to
DME Wipe Patterns
You can adjust the position of a DME wipe pattern, adjust
the size of the sub-screen for during PinP, perform
cropping to cut the edge of the image, and make other
settings in the [DME Wipe Modify] menu.
To display the [DME Wipe Modify] menu
Display the [Effect] menu, turn the V1 knob to select
[DME Wipe Adjust], and press this knob.
Setting the DME wipe position
The wipe position can be set in the [DME Wipe Modify]
menu or with the X-Y pointer in the menu control block.
Settings menu: [DME Wipe Modify] menu >
[Positioner] (page II-18), [Positioner Adjust]
(page II-18)
To set the position with the X-Y pointer
Press the POS button in the menu control block so that it
lights up, and then adjust the position by controlling the
X-Y pointer.
Adjusting the size of the sub-screen used
for Frame In/Out and PinP
You can adjust the size of the sub-screen that appears when
you use the Frame In/Out and PinP DME wipe patterns.
Settings menu: [DME Wipe Modify] menu > [Size]
(page II-18)
Cutting (cropping) the edge of an image
You can crop portions of the image that are unnecessary.
The crop function is not available in the following cases.
• When the mosaic or defocus effect pattern is selected
• When the KEY next transition selection button is
selected
Settings menu: [DME Wipe Modify] menu > [Crop H]
(page II-18), [Crop V] (page II-18)
The cropping process when the transition is executed is as
follows.
Cut: Cropping is maintained during transition
execution and then removed at the point in time
that the transition ends.
Last 5%: Cropping is maintained as is until the
transition progresses to 95% and then removed
during the remaining 5%.
Linear: Cropping is linearly removed from the start of
the transition in accordance with the progression
of the transition.
Note
0100 (%)
y
t
(%)
100
Cut
0100 (%)95
y
t
(%)
100
95
Last 5%
0100 (%)
Linear
y
t
(%)
100
t: Transition execution time
y: Amount of change of transition and crop
Transition
Crop
Transition
Crop
Transition
Crop

II-14 Setting DME Wipes
Chapter 2 Video Switching
Adding an Edge to a DME Wipe
Pattern
With a DME wipe, you can add a border around the pattern
(border) and defocus the edge of an added border (soft
border).
The edge color and background color can also be adjusted.
For details on how to add an edge, see “Adding the Edge to the Wipe
Pattern” (page II-12).
Settings menu: [DME Wipe Edge], [DME Wipe Edge
Color] (page II-16)
Adjusting the Background Color of a
DME Wipe
You can adjust the background color of a DME wipe.
Settings menu: [DME Wipe Bkgd Color] (page II-16)
• The background color of the DME wipe can only be used
for Flip Tumble DME wipe patterns.
• The background color of the DME wipe is shared with
the edge color of the wipe pattern.
Tips

II-15
Details on [Effect] Menu
Chapter 2 Video Switching
Details on [Effect] Menu
[Effect] Menu
Press the EFF button in the menu control block to display the [Effect] menu.
Menu item Description Knob Parameter Meaning Setting range Reference
page
Effect
Transition
Set the transition rate and transition type
that is used when you perform effect
transitions.
V3 Rate Transition rate
when executed
with the AUTO
TRANS button
1 to 999 frames
(30)
II-8
V 4 Ty p e Tr a n s i t i on t y p e Wipe, NAM, DME
Wipe
Adjust
Set the wipe direction and wipe pattern.
You can also press the V1 knob to display
the [Wipe Modify] menu (page II-16).
V1 Modify Press the knob
to display the
[Wipe Modify]
menu
–II-10
V3 Direct Wipe direction Norm (normal),
N/R (normal/
reverse), Rev
(reverse)
II-12
V4 PtnNum Wipe pattern
number
1to 24
Wipe Edge Add a border around the pattern (border),
defocus the edge around the pattern
(soft), and defocus an added border (soft
border).
V2 Type Wipe edge type Off, Border, Soft
(soft edge),
S-Brdr (soft
border)
II-12
V3 Width Adjusts border
width
0.00 to 100.00
V4 Soft Defocus
condition for
edge
0.00 to 100.00
Wipe Edge
Color
Adjust the color of the wipe edge. V2 Lum Luminance 0.00 to 100.00 II-12
V3 Sat Saturation 0.00 to 100.00
V4 Hue Hue 359.99 to 0.00
DME Wipe
Adjust
Set the DME wipe direction and DME
wipe pattern.
You can also press the V1 knob to display
the [DME Wipe Modify] menu (page
II-18).
Tip
When the KEY next transition selection
button is selected, 1101 to 1102 (Flip
Tumble), 1251 (PinP), 1701 (Mosaic),
and 1702 (Defocus) cannot be selected.
V1 Modify Press the knob
to display the
[DME Wipe
Modify] menu
–II-12
V3 Direct DME wipe
direction
Norm (normal),
N/R (normal/
reverse), Rev
(reverse)
V4 PtnNum DME wipe
pattern number
1001 to 1008
(Slide), 1021 to
1031 (Squeeze),
1041 to 1044
(Door), 1201 to
1208/1221 to
1224 (Frame In/
Out), 1101 to
1102 (Flip
Tumble), 1251
(PinP), 1701
(Mosaic), 1702
(Defocus)

II-16 Details on [Effect] Menu
Chapter 2 Video Switching
[Wipe Modify] Menu
Display the [Wipe Modify] menu by pressing the V1 knob while [Wipe Adjust] is selected.
DME Wipe
Edge
Add a border around the DME pattern
(border), and defocus the edge of an
added border (soft border).
V2 Type DME wipe edge
type
Off, Border,
S-Brdr (soft
border)
II-14
V3 Width Adjusts border
width
0.00 to 100.00
(2.00)
V4 Soft Defocus
condition for
edge
0.00 to 100.00
DME Wipe
Edge Color
Adjust the color of a DME wipe edge. V2 Lum Luminance 0.00 to 100.00
(14.63)
II-14
V3 Sat Saturation 0.00 to 100.00
(50.09)
V4 Hue Hue 359.99 to 0.00
(349.83)
DME Wipe
Bkgd Color
Adjust the background color for the DME
wipe.
V2 Lum Background
color luminance
0.00 to 100.00 II-14
V3 Sat Background
color saturation
0.00 to 100.00
V4 Hue Background
color hue
359.99 to 0.00
Menu item Description Knob Parameter Meaning Setting range Reference
page
Menu item Description Knob Parameter Meaning Setting range Reference
page
Positioner Turn the positioner for adjusting the wipe
position on/off.
If you also select [On] with the V3 knob,
the pattern will move from the location to
which the pattern was moved with the
positioner to the center of the screen as a
result of the transition.
Tip
The patterns for which the positioner can
be used are as follows.
17, 18, 21, 22, 23, and 24
V3 AutoCT Turns auto
center function
on/off
Off, On II-11
V4 Pos Turns positioner
on/off
Off, On
Positioner
Adjust
Adjust the wipe position.
If you want to reset the setting value to
“0.00,” press the V4 knob.
V2 Pos H Adjusts position
in horizontal
direction
–200.00 to
+200.00 (0.00) (A
negative value
moves the pattern
left, and a positive
value moves it
right)
II-11
V3 Pos V Adjusts position
in vertical
direction
–200.00 to
+200.00 (0.00) (A
negative value
moves the pattern
down, and a
positive value
moves it up)
V4 Center Resets setting
value to “0”
–

II-17
Details on [Effect] Menu
Chapter 2 Video Switching
Rotation Set the rotation method of a wipe pattern. V4 Rotate Rotation type Off, Angle,
Speed, Mag
(magnitude)
II-11
Rotation
Adjust
Set the parameters depending on the
rotation type selected in [Rotation].
• When [Angle] is selected: Set [Angle].
• When [Speed] is selected: Set [Speed].
• When [Mag] is selected: Set [Angle]
and [Mag].
About setting values
Angle: –100.00 corresponds to the state
in which the pattern is rotated once
counterclockwise, and +100.00 to
the state in which the pattern is
rotated once clockwise. 0.00
corresponds to a non-rotation state.
Mag: –200.00 rotates the pattern twice
counterclockwise, and +200.00
rotates the pattern twice clockwise.
0.00 does not rotate the pattern.
Speed: –100.00 is the speed of one
counterclockwise rotation per
second, and +100.00 is the speed of
one clockwise rotation per second.
0.00 corresponds to a stationary
state.
V2 Angle • Pattern
inclination
angle ([Angle])
• Pattern
inclination
angle when
transition
starts ([Mag])
–100.00 to
+100.00 (0.00)
II-11
V3 Mag Amount of
rotation during
transition
–200.00 to
+200.00 (0.00)
V4 Speed Pattern rotation
speed
–100.00 to
+100.00 (0.00)
Aspect Change the aspect ratio of a wipe
pattern. Setting the aspect ratio to a
negative value stretches the pattern
vertically to make it longer in the vertical
direction, and setting the aspect ratio to a
positive value stretches the pattern
horizontally to make it longer in the
horizontal direction.
V3 Aspect Turns aspect
adjustment on/
off
Off, On II-11
V4 Ratio Adjusts aspect
ratio
–100.00 to
+100.00 (0.00)
Multi Turn the multi function for replicating wipe
patterns on/off.
V4 Multi Turns multi
function on/off
Off, On II-11
Multi
Adjust
The same pattern can be placed up to 63
times either horizontally or vertically, or in
both directions.
V2 H Mult Number of
patterns to place
in horizontal
direction
1to 63 II-11
V3 V Mult Number of
patterns to place
in vertical
direction
1to 63
V4 InvTyp Pattern
placement
method
1to 4
Menu item Description Knob Parameter Meaning Setting range Reference
page

II-18 Details on [Effect] Menu
Chapter 2 Video Switching
[DME Wipe Modify] Menu
Display the [DME Wipe Modify] menu by pressing the V1 knob while [DME Wipe Adjust] is selected.
The crop function is not available in the following cases.
• When the 1701 (Mosaic) or 1702 (Defocus) effect pattern is selected
• When the KEY next transition selection button is selected
Menu item Description Knob Parameter Meaning Setting range Reference
page
Positioner Turn the positioner for adjusting the
DME wipe position on/off.
Tip
The patterns for which the positioner
can be used are as follows.
1031, 1201 to 1208, 1221 to 1224, and
1251
V4 Pos Turns positioner
on/off
Off, On II-13
Positioner
Adjust
Adjust the DME wipe position.
If you want to reset the setting value to
“0.00,” press the V4 knob.
V2 Pos H Adjusts position
in horizontal
direction
–200.00 to +200.00
(0.00) (A negative
value moves the
pattern left, and a
positive value moves
it right)
II-13
V3 Pos V Adjusts position
in vertical
direction
–200.00 to +200.00
(0.00) (A negative
value moves the
pattern down, and a
positive value moves
it up)
V4 Center Resets setting
value to “0”
–
Size You can adjust the size of the
sub-screen when you use the 1201 to
1208 (Frame In/Out), 1221 to 1224
(Frame In/Out), and 1251 (PinP) DME
wipe patterns.
Notes on setting values
Param: Set the enlarge/reduce ratio
as a percentage. The 100.00
setting is equal to the size of the
input image.
V3 Size Turns size
adjustment on/off
Off, On II-13
V4 Param Adjusts size 0.00 to 200.00
(100.00)
Crop H Turn the crop function on/off, and set
the left and right positions used when
cropping unnecessary portions of an
image.
V2 Crop Turns crop on/off Off, On II-13
V3 Left Position for
cutting left
portion of image
–100.00 to +100.00
V4 Right Position for
cutting right
portion of image
–100.00 to +100.00
Crop V Set the action performed when a
transition is executed, and set the top
and bottom positions used when
cropping unnecessary portions of an
image.
V2 Trans Action when
transition
executed
Cut, Last5%, Linear II-13
V3 Top Position for
cutting top
portion of image
–100.00 to +100.00
V4 Bottom Position for
cutting bottom
portion of image
–100.00 to +100.00
Tip

II-19
Setting Keys
Chapter 2 Video Switching
Setting Keys
A key is a function for cutting out the background image
and then inserting an image or text in that portion. The
signal for cutting out the background is called a key
source, the signal for filling the cutout portion is called a
key fill, and the block for processing a key is called a
keyer.
This section describes how to make detailed adjustments
for keys.
With this unit, you can make the following settings for
keys.
•Basic Operations for Keys (page II-19)
•Setting Key Transitions (page II-20)
•Selecting the Pattern and Direction for Key Wipes (page
II-20)
•Making Detailed Adjustments to Key Wipe Patterns
(page II-20)
•Setting Key DME Wipes (page II-20)
•Making Detailed Adjustments to Key DME Wipe
Patterns (page II-21)
•Selecting Key Types (page II-21)
•Making Detailed Adjustments to the Luminance Key
(page II-21)
•Making Detailed Adjustments to the Linear Key (page
II-21)
•Making Detailed Adjustments to the Chroma Key (page
II-21)
•Setting the Key Fill and Key Source (page II-21)
•Setting a Mask for a Key (page II-22)
•Adding an Edge to a Key (page II-22)
•Adjusting the Size and Position of the Key (page II-22)
For the basic operating procedures of the luminance key and chroma key, see
“Composing Images with Keys” (cBasic Operation).
Make the key and the key transition settings in the [Key]
menu.
For details on the [Key] menu item, see “Details on [Key] Menu” (page
II-23).
In 3D mode, the [Key] menu is not displayed.
Basic Operations for Keys
Use the following procedure to perform basic operations
for keys.
Depending on where you want to perform the key
transition, perform one of the following two variations for
basic key operations.
• Effect transition (select KEY next transition button)
(page II-19)
• Key transition (page II-20)
Effect transition
Material selection
Transition configuration j
Key configuration j
Tip
Material selection
r
Transition configuration
r
Key configuration
r
Transition execution
Press the KEY bus delegation button.
r
Select the video for program output.
r
Select the key material (i.e., the image to be
superimposed on the program video output).
1) Use the [Effect] menu.
Press the KEY next transition selection button to light it.
r
Press the MIX button or EFF button.
r
Set the transition type for the effect transition.1)
r
Select the pattern and direction for the wipe or DME wipe
if necessary.1)
Select the key type.
r
Make detailed adjustments to the key if necessary.

II-20 Setting Keys
Chapter 2 Video Switching
Transition execution j
Key transition
Material selection
Transition configuration j
Key configuration j
Transition execution j
Setting Key Transitions
Set the key transition rate and key transition type for when
a key transition is performed.
You can select any of the following transition types.
Cut: Quickly insert (cut in) or remove (cut out) the key.
Mix: Gradually insert (fade in) or remove (fade out) the
key.
Wipe: Use the wipe to cut out the background and then
embed a key.
DME (Digital Multi Effects): Use a DME effect and
apply the same effect as the DME wipe to the key (key
DME wipe).
Settings menu: [Key Transition] (page II-23)
Selecting the Pattern and Direction
for Key Wipes
You can cut out the background from a wipe pattern
selected for a key transition and then embed a key.
Settings menu: [Key Wipe Modify] (page II-24)
For details on the wipe directions, see “Selecting the Pattern and Direction
for Wipes” (page II-10).
For details on the wipe pattern numbers, see “Effect Pattern List” (cBasic
Operation).
Making Detailed Adjustments to Key
Wipe Patterns
You can set the position of a wipe pattern, and apply
various variations and modifiers in [Key Wipe].
To display the [Key Wipe] menu
Display the [Key] menu, turn the V1 knob to select [Key
Wipe], and press this knob.
The setting items in the [Key Wipe Modify] menu are the same as those of
[Wipe Modify] in the [Effect] menu. For details on the setting items, see the
corresponding sections of “Making Detailed Adjustments to Wipe Patterns”
(page II-10).
Setting Key DME Wipes
For a key, you can make the same settings as with DME
wipe.
Settings menu: [Key DME Wipe] (page II-24)
For details on the DME wipe directions, see “Selecting the Pattern and
Direction for Wipes” (page II-10).
For details on the wipe pattern numbers, see “Effect Pattern List” (cBasic
Operation).
Execute the transition using the fader lever, CUT button,
or AUTO TRANS button.
Press the KEY bus delegation button.
r
Select the video for program output.
r
Select the key material (i.e., the image to be
superimposed on the program video output).
1) Use the [Key] menu.
Set the transition type for the key transition.1)
r
Select the pattern and direction for the key wipe or key
DME wipe if necessary.1)
Select the key type.
r
Make detailed adjustments to the key if necessary.
Execute the transition using the KEY TRANS button.
Other manuals for MCS-8M
1
Table of contents
Other Sony Switch manuals

Sony
Sony DVS-7200 User manual

Sony
Sony PVS-R102 User manual

Sony
Sony MLS-X1 User manual

Sony
Sony DMX-SW1 - Bravia Input Link User manual

Sony
Sony BRS-200 User manual

Sony
Sony DVS-7250 Mounting instructions

Sony
Sony MFS-2000-C User manual

Sony
Sony XVS-G1 User manual

Sony
Sony PC-3000 User manual

Sony
Sony BKPF-R70 User manual

Sony
Sony DVS-7000 User manual

Sony
Sony CCP-8000 Series User manual

Sony
Sony BKPF-R70 User manual

Sony
Sony MVS -8000X User manual

Sony
Sony MVS-8000 User manual

Sony
Sony DCU-8000 User manual

Sony
Sony MK7807V1 Manual

Sony
Sony DVS-7150 User manual

Sony
Sony XVS-9000 User manual

Sony
Sony XA-C30 - 2 Output Selector User manual