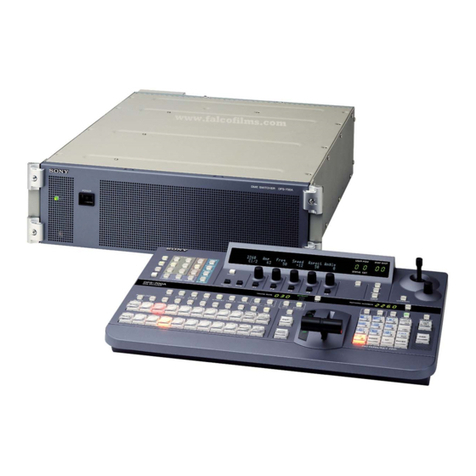
Sony BKPF-R70 User manual

ROUTING SWITCHER CONTROLLER
BKPF-R70
INSTALLATION MANUAL
1st Edition
Serial No. 10001 and Higher

!WARNING
This manual is intended for qualified service personnel only.
To reduce the risk of electric shock, fire or injury, do not perform any servicing other than that
contained in the operating instructions unless you are qualified to do so. Refer all servicing to
qualified service personnel.
!WARNUNG
Die Anleitung ist nur für qualifiziertes Fachpersonal bestimmt.
Alle Wartungsarbeiten dürfen nur von qualifiziertem Fachpersonal ausgeführt werden. Um die
Gefahr eines elektrischen Schlages, Feuergefahr und Verletzungen zu vermeiden, sind bei
Wartungsarbeiten strikt die Angaben in der Anleitung zu befolgen. Andere als die angegeben
Wartungsarbeiten dürfen nur von Personen ausgeführt werden, die eine spezielle Befähigung
dazu besitzen.
!AVERTISSEMENT
Ce manual est destiné uniquement aux personnes compétentes en charge de l’entretien. Afin
de réduire les risques de décharge électrique, d’incendie ou de blessure n’effectuer que les
réparations indiquées dans le mode d’emploi à moins d’être qualifié pour en effectuer d’autres.
Pour toute réparation faire appel à une personne compétente uniquement.

1 (E)
BKPF-R70
Table of Contents
Manual Structure
Purpose of this manual ........................................................................................ 3 (E)
Contents ............................................................................................................... 3 (E)
Related manuals................................................................................................... 4 (E)
1. Installation
1-1. Installing the Board ...............................................................................1-1 (E)
1-2. System Configuration............................................................................1-3 (E)
1-3. Components...........................................................................................1-4 (E)
1-4. Location and Function of the Connectors .............................................1-4 (E)
1-5. Connecting Connectors and Cables ......................................................1-5 (E)
1-6. Signal Input/Output ...............................................................................1-6 (E)
1-7. Location and Function of Switches/ LEDs ...........................................1-7 (E)
1-8. Connection ..........................................................................................1-11 (E)
1-9. The Cautions Relative to Power Supply .............................................1-12 (E)
1-10. Setup....................................................................................................1-12 (E)
1-11. ISR (Interactive Status Reporting) ......................................................1-14 (E)


3 (E)
BKPF-R70
Purpose of this manual This manual is the installation manual of Routing Switcher Controller BKPF-R70.
This manual is intended for use by trained system and service engineers, and
describes the information for installing.
Contents This manual is organized by following sections.
Section 1 Installation
1-1. Installing the Board
This section explains the board installation into the Digital Video Interface Unit
PFV-D20/D50/D100A/D200A/D300, with taking PFV-D300 as an example.
1-2. System Configuration
This section explains the connection between BKPF-R70 and switchers, remote
control units, monitors, and a personal computer.
1-3. Components
This section explains the items composed BKPF-R70.
1-4. Location and Function of the Connectors
This section explains the location and function of connectors at the rear panel.
1-5. Connecting Connectors and Cables
This section explains the type of connectors at the rear panel and the matching
connectors and cables.
1-6. Signal Input/Output
This section explains the connector pin assignments at the rear panel.
1-7. Location and Function of Switches/ LEDs
This section explains the name and function of the switches and LEDs on the
CPU-256 board and factory setting.
1-8. Connection
This section explains the precautions when connecting the BKPF-R70 to the
system.
1-9. The Cautions of Power-ON
This section explains the precautions in power on when the backup BKPF-R70 is
installed in another PFV which installs the main BKPF-R70.
Manual Structure
4 (E) BKPF-R70
1-10. Setup
This section explains the connection (between BKPF-R70 and a control terminal)
and the sample screen when sets the devices connecting to the S-BUS line.
1-11. ISR (Interactive Status Reporting)
This section explains the overview of the ISR system.
Related manuals The following manuals are prepared for BKPF-R70.
• Operation Manual (Supplied with BKPF-R70)
This manual describes the notes on operating, and the locations and functions of
parts and controls of BKPF-R70.
• Maintenance Manual (Optional manual)
This manual describes the information for periodic maintenance and detailed
service.
For obtaining the maintenance manual, please contact to your local Sony’s sales/
service office.

1-1 (E)
BKPF-R70
1-1. Installing the Board
This section describes how to install the board into the
PFV-D300. If the board is installed into other PFV, refer to
the manual supplied with the PFV. The board can be
installed in any slot of the PFV-D300.
n
Turn off the power of the PFV-D300 and unplug the power
plug from the outlet before installing or removing the
board.
Main board installation
1. Loosen the four screws (with stoppers) and remove the
front panel.
2. Remove the six screws and remove the board retainers.
Fig1-01E
Section 1
Installation
3. Insert the main board along the board guide rails.
Fig1-02E
PSW 3x6
PSW 3x6Board retainers
Board guide rail
Component side
Main board

1-2 (E) BKPF-R70
Connector panel installation
Insert the connector panel to the slot in which the main
board has been installed.
1. Remove the two screws at the slot which the main
board has been installed and remove the blank panel.
n
Keep the removed blank panel.
fig1-04E
2. Insert the connector panel.
3. Secure the connector panel with the two screws
securing the blank panel.
fig1-05E
n
Do not open the slot for air-cooled effect of the
PFV-D300. Install the blank panel to a dead slot.
4. Turn the board levers in the direction of the arrows 1
after inserting the main board to the end of the slot by
hand.
Fig1-03E
5. Stick the slot label supplied with the optional board
onto the board lever.
6. Install the board retainers.
7. Install the front panel.
n
When removing the main board, turn the board levers in
the direction of the arrows 2, and pull out the board
toward you.
1Install
2Remove
12
1
2
12
Board
lever
1
2
Board
lever
B 3x6
Blank panel
B 3x6
Connector panel
1-1. Installing the Board

1-3 (E)
BKPF-R70
1-2. System Configuration
fig1-06E
.Terminal Emulator Software
.Data Backup Software (BZR-10)
REMOTE 3
Routing Switcher Controller
BKPF-R70
(A)
ABC
Routing Switcher Controller
BKPF-R70
(B)
ABC
REMOTE 1
REMOTE 1
REMOTE 1
BKS-R3210
BKS-R3209
BKS-R3209
DVS-V6464B
BKPF-300
(PFV-D300)
BKDS-7700
BKS-R3281
BKS-R3281
BKS-R3281
DVS-7000
RS-422A
<Routing Switcher> <Remote Control Unit> <Display>
Digital Video Interface Unit (PFV-xxx)
: S-BUS
: RS-232C
: RS-422A
: T bridge (B)
: 75 Zterminator
(A) and (B) of the BKPF-R70 mean
the main (A)/backup (B) switch setting
on the board.
Primary
station
Secondary
station
Personal computer
*
1-2. System Configuration

1-4 (E) BKPF-R70
1-3. Components
The BKPF-R70 is composed of the following items.
.Main board (CPU-256 board) (1)
.Connector panel (CN-1515 board) (1)
.Operation Manual (1)
.Installation Manual (1)
.Slot number label (1)
.Data Backup Software (BZR-10) (1)
1-4. Location and Function of the Connectors
fig1-08E
11
11
1REMOTE 1 connectors (BNC type)
These connectors are used for S-BUS control.
The devices of the secondary station can be
connected to the A, B, or C connectors.
For the fast-response communication, connect the
devices as follows.
Connector A: Routing switchers
Connector B and C: Remote control units
22
22
2REMOTE 2 connector (D-sub 9-pin type)
This connector is used for RS-422A control.
The control command input from this connector is
converted to S-BUS (REMOTE 1) in the
BKPF-R70.
33
33
3REMOTE 3 connector (D-sub 9-pin type)
This connector is used for RS-232C control.
44
44
4MAIN-BACKUP connector (D-sub 25-pin type)
This connector is used to connect between the main
board and backup board.
If connects the backup board to the main board and
installs two boards in a PFV, the PFV has a dual
controller.
1-3. Components
1-4. Location and Function of the Connectors
MAIN-BACKUP
BKPF-R70
REMOTE 3
RS232C A
REMOTE 2
C B A
REMOTE 1
CONTROLLER
1
2
3
4

1-5 (E)
BKPF-R70
1-5. Connecting Connectors and Cables
If any cable is connected to the connectors on the connector panel when installing or servicing, use the
connector or cable listed below or equivalent.
BKPF-R70 Connector Panel Matching Connector/Cable
Panel Indication Connector Connector SONY Part No.
REMOTE 1 BNC (75Z) BNC (75Z) 1-569-370-12
BELDEN8281 _
REMOTE 2 D-sub 9-pin, female D-sub 9-pin, male 1-560-651-00 (connector)
1-561-749-00 (shell)
RCC-5G/10G/30G*1_
REMOTE 3 D-sub 9-pin, male D-sub 9-pin, female _
RS-232C cross cable*2_
MAIN-BACKUP D-sub 25-pin, female D-sub 25-pin, male _
Straight cable for all pins 1-559-558-11
connection (25P-25P)*2
*1; Each length of these cables is 5 m, 10 m, and 30 m.
*2; These cables are commercially available.
1-5. Connecting Connectors and Cables

1-6 (E) BKPF-R70
1-6. Signal Input/Output
Input and output signals of connectors on the connector
panel are shown below.
fig1-09E
Pin No. I/O Signal
1_FG
2 OUT TXD (_)
3 IN RXD (+)
4 IN/OUT TX GND
5_NC
6 IN/OUT RX GND
7 OUT TXD (+)
8 IN RXD (_)
9_NC
fig1-10E
Pin No. I/O Signal
1_NC
2 IN RXD
3 OUT TXD
4 OUT DTR
5 IN/OUT GND
6 IN DSR
7 OUT RTS
8 IN CTS
9_NC
fig1-11E
Pin No. I/O Signal
1 IN/OUT +5 V
2 IN/OUT +5 V
3 IN/OUT GND
4 IN/OUT GND
5 IN/OUT TERM TX
6 IN/OUT TERM RX
7 IN/OUT TERM RTS
8 IN/OUT TERM CTSA
9 IN/OUT TERM DSRA
10 IN/OUT 422 TXD1
11 IN/OUT 422 RTS1
12 IN/OUT 422 RXD1 (+)
13 IN/OUT 422 RXD1 (_)
14 IN GND
15 IN GND
16 IN GND
17 IN GND
18 IN/OUT BACKUP TX
19 IN/OUT BACKUP RX
20 IN/OUT ACTIVE
21 IN/OUT BACKUP IN
22 IN/OUT BACKUP OUT
23 IN/OUT TALLY COM
24 IN/OUT TALLY 2
25 IN GND
13
25
1
14
MAIN-BACKUP (D-sub 25-pin female)
<External View>
5
96
1
REMOTE 2 (D-sub 9-pin, female)
<External View>
1
69
5
REMOTE 3 (D-sub 9-pin, male)
<External View>
1-6. Signal Input/Output

1-7 (E)
BKPF-R70
1-7. Location and Function of Switches/ LEDs
fig1-12E
11
11
1Indicators
Ref. No. Indicator Color Status
D6 SBUS-A Green Rx : Lights when the necessary data is received from the connector A of
REMOTE 1 (S-BUS data link) or while CPU (A) for S-BUS remote is down
loading a program normally.
D5 Tx : Lights when the data is transmitted to the connector A of REMOTE 1.
D8 SBUS-B Green Rx : Lights when the necessary data is received from the connector B or C of
REMOTE 1 (S-BUS data link) or while CPU (B) for S-BUS remote is down
loading a program normally.
D7 Tx : Lights when the data is transmitted to the connector B or C of REMOTE 1.
D18 A Green The switch S8 is set to A side (MAIN).
D11 422 Green Rx : Lights when the necessary data is received from REMOTE 2 (RS-422A).
D10 Tx : Lights when the data is transmitted to REMOTE 2.
D1 ACTIVE Green Lights while this board is operating.
D13 PRIMARY Green Lights when this board is set to the primary station on the S-BUS data link.
(S2-2 is set to ON.)
D2 RUN Green Lights while the CPU is operating normally.
D12 ERROR Red Lights when an error is detected in a periodic self-diagnostics.
This indicator goes out automatically when the board recovers from an error.
The error is indicated on the 7-segment LED (IC27) by a double-digit error
code.
7
S4
Component side (A side)
S3
S5
IC27
S1
Rx Tx
6
5
4
3
S2
2
1
8
9
CPU-256 board
D6
D8
D11
D1
D13
D2
D12
D10 D18
D5
D7
S8
COR2
1-7. Location and Function of Switches/ LEDs

1-8 (E) BKPF-R70
22
22
2S2: Mode selection switch
Used to set the various settings of the board.
The factory setting is as follows. ( indicates the switch lever position.)
S2-1: SYNC/ASYNC selection
Used to test whether the reference video signal is input or not. The result is reported to the ISR
system. Whichever S2-1 is set, the BKPF-R70 keeps the normal operation.
ON (ASYNC): Not perform the test. (Factory setting)
OFF (SYMC): Performs the test.
S2-2: S-P selection
Sets this board in a primary station on the S-BUS data link.
The PRIMARY indicator (D13) lights.
ON (P): Operating as the primary station (Factory setting)
OFF (S): Operating as the secondary station
S2-3: REMOTE 3 mode selection
Selects the mode of the BKPF-R70 when the BKPF-R70 is connected to a personal computer.
If selects ON, the BKPF-R70 is set to the ISR mode.
If selects OFF, the BKPF-R70 is set to the setting terminal mode or data backup mode.
ON (ISR): ISR mode
OFF (TERM): Setting terminal mode or data backup mode (Factory setting)
.To enter the setting terminal mode
Press x key with pressing Ctrl key. (Ctrl_x)
To exit the mode, press Ctrl_x again.
.To enter the data backup mode
Start the BZR-10 software.
S2-4: REMOTE 3 baud rate selection
Used to select the baud rate of REMOTE 3 (RS-232C). If selects ON (9.6), the response is slow
while the terminal display appears.
ON (9.6): 9600 bps
OFF (38.4):38400 bps (Factory setting)
33
33
3S1: Reset switch
Used to reset the hardware of CPU-256 board. When this switch is pressed, the board performs the
same operation as during the power-on sequence.
44
44
4IC27: Error No. indicator
Indicates the error code defined in S-BUS protocol when an error is detected in the self-diagnostics.
The error code does not go out even though this board recovers from the error.
To clear the error code, reset this board.
7-segment Description
00 Normal operation.
27 The cable of REMOTE 1 has breaks.
60 S2-1 is set to OFF (SYNC). Set S2-1 to ON (ASYNC).
ON
1234
1-7. Location and Function of Switches/ LEDs

1-9 (E)
BKPF-R70
55
55
5S3: Station ID setting switch
Used to set the station ID for S-BUS remote. The station ID of this board designed specially for the
primary station is fixed even if changes the lever position.
The factory setting is as follows. ( indicates the switch lever position.)
fig1-15E
66
66
6S4: Selection switch
Used to the various settings of the board.
The factory setting is as follows. ( indicates the switch lever position.)
fig1-15E
S4-1: Precedence processing selection
Used to select the priority; a command from the S-BUS remote is processed prior to a command from
RS-422A remote or a command from RS-422A is processed prior to a command from the S-BUS
remote.
OPEN (Upper) : S-BUS is prior to RS-422A. (Factory setting)
CLOSE (Lower) : RS-422A is prior to S-BUS.
S4-2: Table data size selection
Used to select the size of the table data output from the primary station.
This switch is set to CLOSE (Lower) in normal operation.
n
After turning on the power, the initialization time changes according to this switch setting.
(OPEN: approx. 80 seconds, CLOSE: approx. 20 seconds)
OPEN (Upper) : 32 byte
CLOSE (Lower) : 128 byte (Factory setting)
S4-3: Soft matrix selection
If selects OPEN, the 64 x 64 matrix switcher made by the software is available. This function is used
to display the assigned signal name and the crosspoint tally.
OPEN (Upper) : Enable
CLOSE (Lower) : Disable (Factory setting)
S4-4: REMOTE 1 baud rate selection
Used to select the baud rate of the S-BUS data link connecting to REMOTE 1. If selects OPEN (1250
kpbs), set the baud rate of the other devices on the same S-BUS data link to 1250 kbps.
If selects OPEN (1250 kbps), it is necessary to attach a 75Zterminator at both ends of the cable.
Therefore, the cable break cannot be detected, but the response speed is faster than 312 kbps.
OPEN (Upper) : 1250 kbps
CLOSE (Lower) : 312 kbps (Factory setting)
S4-5 to S4-7: Not used
Factory setting : All CLOSE (Lower)
12345678
OPEN
12345678
OPEN
1-7. Location and Function of Switches/ LEDs

1-10 (E) BKPF-R70
S4-8: Debug mode selection
If selects OPEN, the board stops the operation.
OPEN (Upper) : Debug mode
CLOSE (Lower) : Normal operation (Factory setting)
77
77
7S5: Test switch
n
If the circuit test is executed, the setting data of this board is initialized. Copy the setting data to
BZR-10 for backup. For the details of the copying procedure and circuit test, refer to the optional
maintenance manual of BKPF-R70.
S5 Setting Description
0 Normal operation (Factory setting)
8 Circuit test (Simple test for operation)
1 to 7, 9, A to F Factory use only
88
88
8S8: Board switch
Used to set this board as the main board or as the backup board.
A side : Sets this board as the main board and the indicator (D18) lights.
After two seconds from turning on the power, this board starts operating.
B side : Sets this board as the backup board.
After three seconds from turning on the power, this board starts operating.
99
99
9COR2: S-BUS Remote connection selection
Set COR2 to SBON if installs this board to a device which has the S-BUS remote connectors, such as
PFV-D300.
If installs two BKPF-R70 to PFV-D300 for the main board and backup board, set COR2 on the both
boards to SBON. If the PFV-D300 is connected to the S-BUS line, the REMOTE 1 (S-BUS) connec-
tor A of this board is connected to the S-BUS line without a cable and bridge.
fig1-16E
1-7. Location and Function of Switches/ LEDs
When selects SBON
SBON
When selects SBOFF
(Factory setting)
SBON

1-11 (E)
BKPF-R70
1-8. Connection
To connect the devices to the S-BUS line, see the system configuration of Section 1-2 and following
precautions.
Precautions for connection
.The cable length of one S-BUS line is a maximum of 500 m (when a BELDEN 8281 or the equivalent
is used).
.The T bridge attached to the last machine of the S-BUS line is always terminated with a 75Ztermina-
tor.
.The devices of the secondary station can be connected to the A, B, or C connectors of REMOTE 1.
For the fast-response communication, connect the devices as follows:
Connector A: Routing switchers
Connector B and C: Remote control units
.Set the switch on the CPU-256 board as follows:
For the main board : Set S8 to A side.
For the backup board : Set S8 to B side.
.Turn off the power before the cable is connected to the MAIN-BACKUP connector.
.Use the specified cable for the MAIN-BACKUP connector.
The connector has a pin for the power supply connection. If the specified cable is not used, an IC link
on the CN-1515 board will short out.
n
If the IC link shorts out, be sure to replace it with the specified IC link described in the Maintenace
Manual.
.Prepare the T bridge and a coaxial cable and use them as follows for the dual-controller by using the
main BKPF-R70 and the backup BKPF-R70.
1-8. Connection
REMOTE1
(BNC connector, male)
BKPF-R70
(Rear panel)
BELDEN 8281 cable
(shorter than 50 cm)
T bridge (B)
<Main BKPF-R70>
<Secondary device>
<Backup BKPF-R70>

1-12 (E) BKPF-R70
1-9. The Cautions Relative to Power Supply
1-10. Setup
1-9. The Cautions Relative to Power Supply
When each of two BKPF-R70 is used in different PFV unit, note the following.
The caution of Power-ON
.Turn on the power of the PFV in which a main BKPF-R70 (S8 is set to A side on CPU-256 board) is
installed before the PFV in which a backup BKPF-R70 is installed.
(The board supplied power earlier operates as the main.)
The caution during operation
.Do not turn off the power of the PFV in which BKPF-R70 is installed.
Especially, do not turn off the power of the PFV in which the backup BKPF-R70 is installed.
(If the PFV in which the backup BKPF-R70 is installed is turned off the power, the operation of the
main BKPF-R70 stops for about three seconds.)
1-10. Setup
If connecting a control terminal to this board, the devices connecting to the S-BUS line can be set from
the control terminal. This section describes the connection between this board and a control terminal, and
the sample screen.
For the setup procedure, refer to the installation manual of ROUTING SWITCHER SYSTEM.
(For obtaining the installation manual of ROUTING SWITCHER SYSTEM, please contact to your local
Sony’s sales/service office.)
Connection
1. Connect a control terminal to the RS-232C connector (D-sub 9-pin) with an RS-232C cross cable.
2. Set S2-3 on the CPU-256 board to OFF.
3. Start the control terminal.
When turning on the power (System Status Screen)
SONY Digital Routing System BKPF-R70 V1.00
ITEM
ROM CHECK SUM D836
RAM READ AND WRITE OK
REFERENCE SIGNAL OK
S-BUS LINK TERMINATE OK
REAL TIME CLOCK OK
STARTED

1-13 (E)
BKPF-R70
1-10. Setup
4. Set the control terminal to the same settings as this board.
n
This board’s setting is as follows:
Setting Item Setting
Speed 9600 bps / 38.4 kbps
Start Bit 1
Data Bits 8
Parity Bit None
Stop Bit 1
5. Press x key with pressing Ctrl key from the control terminal. (Ctrl_x)
To return to System Status Screen, press Ctrl_x key.
When starting the setting (Menu Screen)
SONY ROUTING SYSTEM SETUP MENU BKPF-R70 V1.00 STATION NUMBER 1
MODIFICATION COMMAND
A: DISPLAY CONTROL AREA B: SET SOURCE/DEST TYPE
C: SET DESTINATION NAME D: SET SOURCE NAME
E: SET LEVEL TABLE F: SET ACTIVE UNIT NUMBER
G: UPDATE BACKUP CONTROLLER H: SET GLOBAL PHANTOM
J: NAME STYLE (Type +Num) K: RESET TO DEFAULT TABLE
L: SET PHYSICAL ASSIGNMENT M:SET INHIBIT TABLE
N: SET DESCRIPTION NAME GROUP O: SET TIE LINES
P: CHANGE PASSWORD Q: CHANGE CROSSPOINT
R: CALL SECONDARY STATION
MAINTENANCE COMMAND
——————————————— T: SET CLOCK
U: SELECT CONTROL MODE V: SELECT WARNING DISPLAY (ON)
W:SYSTEM STATUS LOG X: DISPLAY S-BUS COMMUNICATION
Y: DISPLAY TABLE DATA Z: SET UNIT DETECTABLE
Ctrl _X: QUIT SETUP MENU
For the remainder of the setup procedure and the setting data backup (BZR-10 supplied with BKPF-R70
is used), refer to the installation manual of ROUTING SWITCHER SYSTEM.

1-14 (E) BKPF-R70
1-11. ISR (Interactive Status Reporting)
This board has its own ISR interface function. The following messages are sent to the ISR system,
permitting the operating status of the BKPF-R70 to be monitored without BKPF-500 ISR Interface Board.
The ISR function is controlled by Sony application program software. For the program software, usage,
installation, and operation of a personal computer in which this program software can be used, consult
with your local Sony’s sales/service office.
n
BKPF-500 is necessary to monitor the operating status of the power supply units of the interface unit
(PFV series) and the boards except BKPF-R70.
Connection
1. Connect a personal computer to the RS-232C connector (REMOTE 3, D-sub 9-pin) with an
RS-232C cross cable.
2. Install the ISR application program software to the personal computer.
3. Set the personal computer as follows:
Setting Item Setting
Speed 9600 bps
Start Bit 1
Data Bits 7
Parity Bit ODD
Stop Bit 1
4. Set S2-3 on the CPU-256 board to ON.
Status message
Message Description
BACKUP CPU DOWN The backup CPU is shut down.
S-BUS LINK DISCONNECTED The S-BUS remote cable has opens.
1-11. ISR (Interactive Status Reporting)
Other manuals for BKPF-R70
1
Table of contents
Other Sony Switch manuals

Sony
Sony MVS-6000-C User manual

Sony
Sony MVS-8000X SystemMVS-7000X System User manual

Sony
Sony BRS-200 Quick start guide

Sony
Sony MCS-8M User manual

Sony
Sony MLS-X1 User manual

Sony
Sony DVS-7000A User manual

Sony
Sony DCU-8000 User manual

Sony
Sony PC-3000 User manual

Sony
Sony SB-V60S User manual

Sony
Sony DFS-700 User manual
Popular Switch manuals by other brands

Intellinet
Intellinet 503907 user manual

Cisco
Cisco Nexus 3500 Hardware installation guide

HP
HP 279720-B21 - ProLiant BL p-Class F-GbE... overview

Eaton
Eaton LSR-S TKG Series Instruction leaflet

Idem
Idem PSA operating instructions

Blade Network Technologies
Blade Network Technologies BLADEOS RackSwitch G8124 Application guide