7
Names of Parts
Overview
dOUTPUTS
1 to 16 connectors (BNC-type)1): MVS-6520
1 to 32 connectors (BNC-type)1): MVS-6530
These connectors output serial digital signals. You can
assign them as program output, preview output, AUX
output, and so on.
Make output assignments on the MVS-6500 system
control panel.
For details about output signals and settings, refer to the
User’s Guide.
eTALLY/GPI IN (tally/ general purpose interface
input) 1 to 18 and TALLY/GPI OUT (tally/ general
purpose interface output) 1 to 48 connectors (D-sub
25-pin)
Output tally data created with the control panel of the
MVS-6500 system (open collector).
These connectors can also be used as GPI output ports.
You can also input trigger signals as GPI inputs.
Input and output settings are made on the control panel of
the MVS-6500 system.
fSERIAL TALLY connector (D-sub 9-pin,
RS-422A)
Output tally data created with the control panel of the
MVS-6500 system.
gREMOTE 1 to 4 connectors (D-sub 9-pin, RS-
422A)
Connect devices supporting Sony 9-pin VTR, VDCP
(Video Disk Communications Protocol), or P-Bus
(Peripheral II Protocol) protocols.
hUTIL (FM) (utility (frame memory data))
connector (RJ-45 compliant)
Intended for future expansion.
iFM (frame memory) DEVICE connector (USB 2.0
compliant)
This connector is for attaching an external HDD for frame
memory.2)
jS-BUS connector (BNC-type)1)
Connect this connector with a BNC cable to an S-Bus data
link via a T bridge.
Connecting devices such as IXS series routing switchers
and MKS-8080/8082 AUX bus remote panels via an S-Bus
data link enables the following kinds of control.
• Returning to the S-Bus, tally data created by this unit on
the basis of data received from other devices
• Switching the cross-points of a routing switcher from the
control panel
• Switching the cross-points of a switcher from the remote
panel
• Displaying on the control panel source names set on a
routing switcher
kUTIL (SCU) (utility (SCU)) connector (RJ-45
compliant)
Intended for future expansion.
lREMOTE S1 and S2 connectors (D-sub 9-pin, RS-
422A compliant)
These connectors are used to operate the MVS-6500
system from external devices or editing control systems
such as the BVE-9100.
Define the types of the connected devices on the control
panel.
mMVS (multi format video switcher) connector
(RJ-45 compliant)
Connect to an ICP-6520/6530 control panel.
For details about connecting a DCU and MVE-8000A/
9000 multi format DME processor, refer to the User’s
Guide.
nUTIL (SW) (utility (SW)) connector (RJ-45
compliant)
Intended for future expansion.
oREF INPUT (reference video input) connectors
(BNC-type)1)
If you wish to synchronize this unit to an external reference
signal, input the reference signal. For an HDTV system,
input an HD tri-level sync signal, black burst signal, or
analog sync signal. For an SDTV system, input a black
burst signal or analog sync signal.
The two connectors have a loop-through configuration.
Signal input to one connector can be output from the other
connector. If you will not be using the loop-through
output, be sure to terminate the unused connector with the
supplied 75 ohm terminator.
1) Attach the cable connected to the BNC-type connectors to the rack or other
support so there is no load on the connector. There is a risk of damage to
the BNC-type connectors and cable.
2) For information about devices that can be connected, contact your Sony
representative.
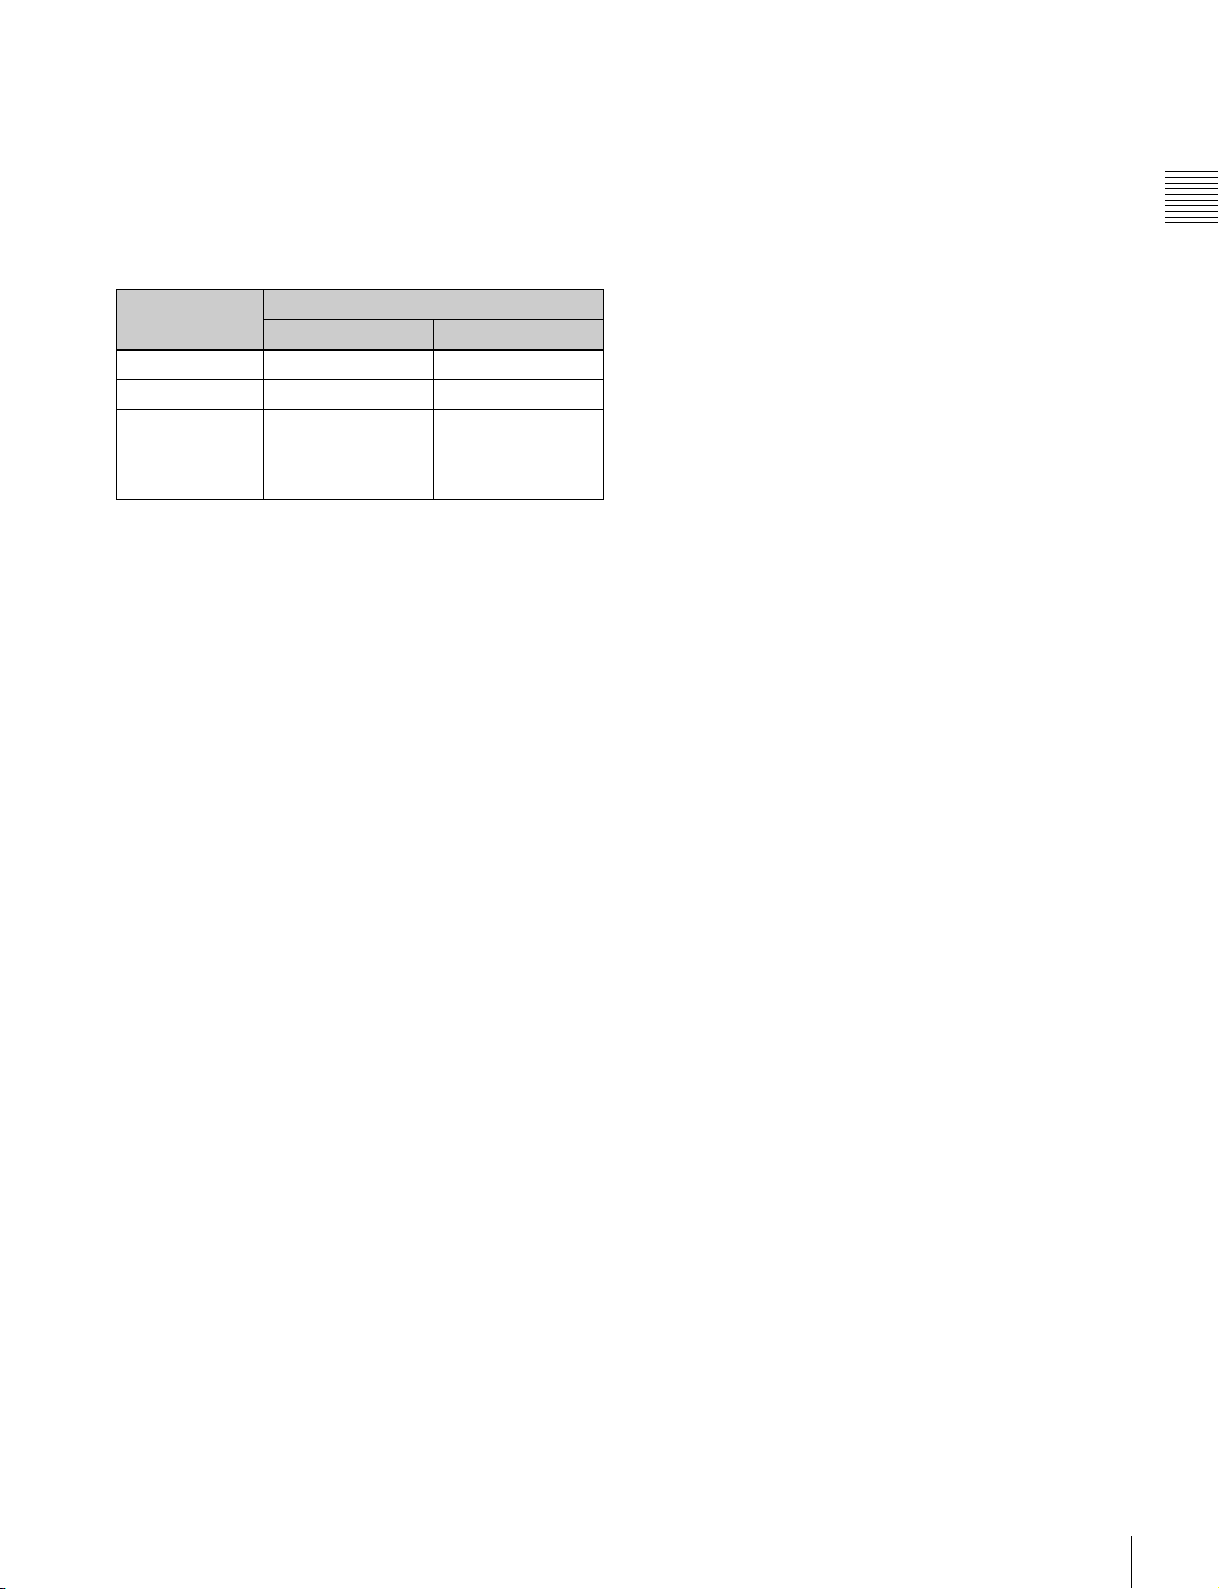
Types of output
signal
Configurable connectors
MVS-6520 MVS-6530
Re-Entry Source OUTPUTS 1 to 16 OUTPUTS 1 to 24
Aux Bus OUTPUTS 1 to 16 OUTPUTS 1 to 24
Output/MV/FC/
DME
OUTPUTS 1 to 16
(FC: 15, 16
combination only)
OUTPUTS 1 to 32
(FC: 15, 16 and 31,
32 combinations
only)