manuals.online logo
Brands
  1. Home
  2. •
  3. Brands
  4. •
  5. Sony
  6. •
  7. Turntable
  8. •
  9. Sony PS-X600 User manual

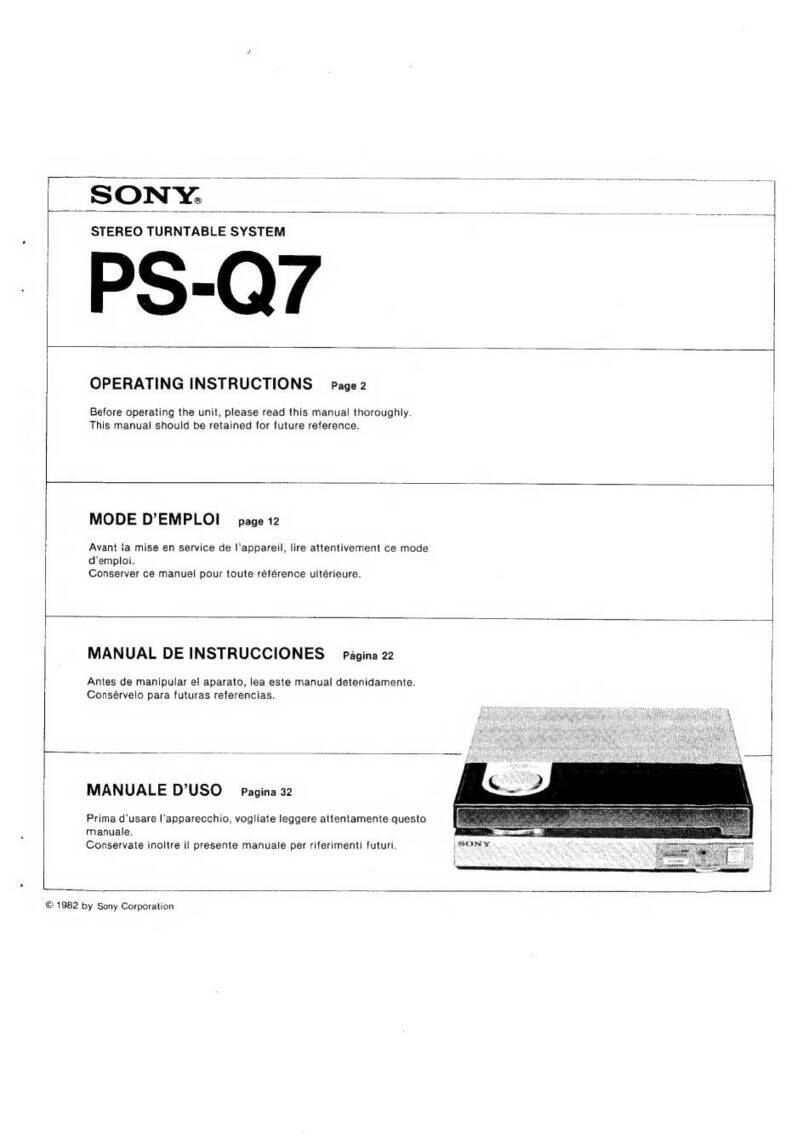
Sony PS-X600 User manual

r
Ys
STEREO
TURNTABLE
SYSTEM
OPERATING
INSTRUCTIONS
Page
2
Before
operating
the
unit,
please
read
this
manual
thoroughly.
This
manual
should
be
retained
for
future
reference.
MODE
D’EMPLOI
page
13
Avant
toute
opération,
lire
attentivement
ce
mode
d’emploi.
Conserver
ce
manuel
pour
toute
référence
ultérieure.
BEDIENUNGSANLEITUNG
-
seite
24
Vor
Inbetriebnahme
lesen
Sie
bitte
diese
Bedienungsanieitung
aufmerksam
durch.
Bewahren
Sie
diese
Anleitung
zum
spateren
Nachschiagen
gut
auf.
MANUAL
DE
INSTRUCCIONES
pagina
35
Antes
de
manipular
el
aparato,
lea
este
manual
detenidamente.
Consérvelo
para
futuras
referencias.
WARNING
To
prevent
fire
or
shock
hazard,
do
not
expose
the
unit
to
rain
or
moisture.
To
avoid
electrical
shock,
do
not
open
the
cabinet.
Refer
servicing
to
qualified
personnel
only.
TABLE
OF
CONTENTS
PALO
S
sic
ecd
Fai
cadeue
devas
iopican
tla
belde
aus
eavabeineectessectiese
ces
ues
eee
eueiewinnvenst
ses
2
Operating
VONAGE
vetted
eee
iaatenaeeietar
isi
iec
hae
ema
neninss
3
PROCAULOINS
icasistecbixnagiuduocicastsatdainceesitesuse
ys
wate
ceedewsa
du
Saneecntacnee
es
ekaienes
owe
3
Location:and
function
Of
CONTIONS
owcsisccicicsccccccncsconscsactan
cad
cctodetasceieses
4
TURNTADIS
ASSEMDIY
oisivessavesccees
ce
vacdezavcicepededeveedeeda
cadet
sieseeaemaeanreevenses
5
Cartridge
installation
TONGA
AGIUSTINGN
Ureicsuicorsssders
ses
ticccticssiancosintnawanantsdaanteias
sgedtavecoueetene
6
PRECOPG
DIAV
IG
earesacsenaascschavseceg
osc
wedswasecoa
risen
casein
tae
aneaiancaNeseeaasuencadices
7
To
begin
record
play
at
a
particular
point
To
move
to
a
different
part
of
a
record
while
the
record
is
playing
To
stop
during
play
To
lift
up
the
stylus
during
play
To
repeat
play
TonearMm
Arop-pOint
AGjUSTMENL......
ee
seeeeeeeeeseeeeenesseeeeeetssseeeeeeeeees
8
How
the
auto
record
Size
SElECTION
WOFKS
.........cceeeeseseeereeceeeneneneeeees
9
Instantaneous
Start
Of
play
(CUCING)
«0...
eeeeeeeeeeeeseeesttereeseetetseeteees
9
Synchronized
play
of
the
turntable
and
the
cassette
deck.............
10
DVT
ULTRA
CS
aasalccis
a
cesta
ceincnicecaa
tout
Sede
Seseees
tee
eeunascaueiea
dia
ees
case
eaete
dean
11
SDECITICATIONS
siacvaancneiceansdevesueatnvuiieececccaciacoctatsavs
car
macucinenetbucanacoricdanese
11
TROUDI
SC
CHECKS
nGiretre
aki
carcanat
nckctdsblaeannawea
cosas
oscdenuela
ceubineeashes
12
FEATURES
Biotracer
electronic
tonearm
The
horizontal
and
vertical
movement
of
the
tonearm
is
monitored
by
the
Biotracer’s
own
sensors,
and
this
information
is
transmitted
to
the
tonearm
by
the
tonearm’s
own
linear
motors
to
Suppress
resonance
at
low
frequencies
and
to
obtain
the
maximum
signal-to-
noise
ratio.
With
the
microprocessor
incorporated,
the
tonearm
movement,
up/down
or
forward/backward,
is
accurate
and
smooth.
Auto
record
size
selection
Record
size
is
automatically
set
by
a
photo
sensor
system.
If
no
record
is
on
the
turntable,
the
tonearm
will
not
descend
but
will
automatically
return
to
the
arm
rest.
Electronic
stylus
force
and
anti-skating
adjustment
As
the
stylus
force
is
electronically
controlled
by
a
knob
it
can
be
easily
adjusted
during
record
play.
The
proper
anti-skating
force
is
automatically
set
when
the
stylus
force
is
set.
;
Synchronized
operation
with
the
Sony
cassette
decks
When
the
tonearm
lowers
to
the
lead-in
groove
of
a
record,
the
cassette
deck
stand-by
mode
is
released
and
the
record
mode
assumed.
When
play
finishes,
the
cassette
deck
is
automatically
set
first
in
the
record
muting
mode,
then
in
the
pause
mode.
This
synchroniz-
ed
operation
is
possible
with
Sony
cassette
decks
equipped
with
a
four-pin
remote
control
jack
which
is
connected
with
a
Sony
RM-65
synchro
remote
control
unit.
Muting
system
The
muting
system
activates
when
the
tonearm
is
lifted
and
deac-
tivates
after
the
tonearm
lowers
onto
a
record.
There
is
no
need
to
turn
down
the
amplifier
volume
every
time
a
stylus
is
placed
on
a
record
or
when
a
Cartridge
is
changed.
Quartz
lock
and
magnedisc
servo
system
The
turntable
maintains
an
accurate
and
drift-free
speed
by
refer-
ring
to
a
frequency
generated
by
a
very
stable
quartz
oscillator,
and
with
aid
of
a
speed
monitoring
system
which
utilizes
a
magnetic
pick-up
head
and
a
pulse
signal
derived
from
a
magnetic
coating
at
the
edge
of
the
platter.
Linear
BSL
motor
Direct
drive
system
with
Sony’s
unique
BSL
(Brushless
and
slotless)
motor
which
has
a
high
signal-to-noise
ratio
to
virtually
eliminate
wow
and
flutter.
Its
high
torque
assures
quick
start
to
331/3
rpm
after
only
a
half
revolution.
OPERATING
VOLTAGE
Before
connecting
the
unit
to
the
power
source,
check
that
the
operating
voltage
of
your
unit
is
the
same
as
the
local
power
line
voltage.
The
model
for
European
countries
(Type
1)
operates
on
220
V
ac.
The
model
for
the
United
Kingdom
(Type
2)
operates
on
240
V
ac.
The
model
for
other
countries
(Type
3)
operates
on
either
110-120
or
220-240
V
ac.
The
voltage
selector
is
located
on
the
rear
panel.
If
the
selector
must
be
reset,
disconnect
the
ac
power
cord
and
slide
the
selector
to
the
desired
voltage.
For
the
Customers
in
the
United
Kingdom
important
The
wires
in
the
mains
lead
are
coloured
in
accordance
with
the
following
code:
Blue:
Neutral
Brown:
Live
As
the
colours
of
the
wires
in
the
mains
lead
of
this
apparatus
may
not
correspond
with
the
coloured
markings
identifying
the
ter-
minals
in
your
plug
proceed
as
follows:
The
wire
which
is
coloured
blue
must
be
connected
to
the
terminal
which
is
marked
with
the
letter
N
or
coloured
black.
The
wire
which
is
coloured
brown
must
be
connected
to
the
ter-
minal
which
is
marked
with
the
letter
L
or
coloured
red.
PRECAUTIONS
On
safety
@
Before
operating
the
unit,
be
sure
that
the
operating
voltage
of
your
unit
is
identical
with
that
of
your
local
power
supply.
@
Should
any
solid
object
or
liquid
fall
into
the
cabinet,
unplug
the
unit
and
have
it
checked
by
qualified
personnel
before
operating
it
any
further.
@
Unplug
the
unit
from
the
wall
outlet
if
it
is
not
to
be
used
for
an
extended
period
of
time.
To
disconnect
the
cord,
pull
it
out
by
the
plug.
Never
pull
the
cord
itself.
On
instailation
@
Piace
the
turntable
on
a
level
surface.
@
Avoid
placing
the
unit
near
electrical
appliances
(Such
as
a
televi-
_
sion,
hair
dryer,
or
fluorescent
lamp)
which
may
cause
hum
or
noise.
@
Place
the
turntable
where
it
will
not
be
subject
to
any
vibration,
such
as
from
speakers,
slamming
of
doors,
etc.
@Keep
the
unit
away
from
direct
sunlight,
extremes
of
temperature,
and
excessive
dust
and
moisture.
@
Allow
at
least
10
cm
(4
inches)
clearance
behind
the
unit
so
that
the
cover
can
be
opened.
380
mm
(approx.
15
in)
(approx.
165/s
in)
@
The
turntable
has
resilient
feet
that
isolate
the
mechanism
from
external
shock
and
vibration.
If
the
unit
has
not
been
placed
ona
level
surface,
turn
the
feet
to
level
the
unit.
ny
On
repacking
Do
not
throw
away
the
carton
and
packing
materials.
It
is
an
ideal
container
in
which
to
transport
the
unit.
When
shipping
the
unit
to
another
location,
repack
it
as
illustrated
on
the
carton
box
observ-
ing
the
following
points.
@
Secure
the
tonearm
to
the
arm
rest.
@
Fix
the
transit
screws
in
the
original
positions.
LOCATION
AND
FUNCTION
OF
CONTROLS
45-rpm
Adaptor
POWER
Switch
Oo
Quartz
Lock
Indicator
[LOCKED]
@
SPEED
Selector
Button
@
REPEAT
Button
and
Indicator
@
Up/Down
Button
[Z/
7
]
5]
Arm
Direction
Buttons
[<p>
]
@
@
synchro
Remote
Control
Jack
Holes
for
Auto
Record
Size
Selection
and
Lamp
{iy
counterweight
and
Adjustment
Knob
Arm
Rest
Tonearm
Drop-point
Adjustment
Opening
ZERO
BALANCE
Switch
and
Indicator
;
Cartridge
Shell
STYLUS
FORCE/ANTI
SKATING
Control
(7)
START/STOP
Button
@
POWER
Switch
Press
to
turn
on
the
turntable.
To
turn
the
turntable
off,
press
it
again.
@
Quartz
Lock
Indicator
[LOCKED]
The
indicator
illuminates
when
the
turntable
rotation
is
locked
with
the
nominal
speed
by
the
quartz
lock
control
system.
©
SPEED
Selector
Button
Selects
the
record
speed.
When
the
POWER
switch
is
turned
on,
the
speed
is
always
33/3
rpm
unless
the
button
is
pressed
to
select
45
rpm.
©
REPEAT
Button
and
Indicator
Press
this
button
to
repeat
play.
The
indicator
illuminates
and
repeat
play
continues
until
this
button
is
pressed
to
stop
it.
If
the
START/STOP
button
is
pressed
during
repeat
play,
the
tonearm
returns
to
the
arm
rest
and
the
turntable
stops
rotating.
©
Up/Down
Button
[V/V]
Press
this
button
to
lift
or
lower
the
tonearm
during
play.
©
Arm
Direction
Buttons
[<]
[>]
To
move
the
tonearm
inward,
press
the
<]
button,
and
to
move
out-
ward,
the
>
button.
The
tonearm
is
raised
and
continues
to
move
while
the
button
is
pressed.
The
tonearm
will
stop
when
the
button
is
released.
For
fine
adjustment
of
the
tonearm
drop-point
over
a
record,
press
and
immediately
release
the
appropriate
button.
@
STARTI/STOP
Button
Press
this
button
for
record
play.
To
stop
during
play,
press
this
button
again.
©
STYLUS
FORCE/ANTI
SKATING
Control
Stylus
force
and
anti-skating
force
are
both
electronically
set
by
this
knob.
The
stylus
force
can
be
changed
during
record
play
if
so
desired.
©
ZERO
BALANCE
Switch
and
Indicator
Press
the
switch
before
adjusting
the
tonaerm
balance.
@®
Counterweight
and
Adjustment
Knob
For
tonearm
balance
adjustment,
turn
the
knob
to
move
the
counterweight.
®
Synchro
Remote
Control
Jack
Synchronized
recording
from
disc
to
tape
is
possible
on
specified
Sony
cassette
decks
by
using
the
synchro
remote
control
unit
RM-65.
TURNTABLE
ASSEMBLY
Dust
cover
removal
The
numbers
in
the
illustration
refer
to
the
sequence
of
the
assembly.
Place
the
rubber
mat
on
the
platter,
matching
>
ae
the
projection
on
the
back
of
the
rubber
mat
|
to
the
holes
on
the
platter.
Rubber
Mat
Open
the
dust
cover
fully
and
slide
it
upward.
Align
the
holes
in
the
rubber
mat
and
the
holes
in
the
turntable
so
that
a
beam
from
the
lamp
goes
through.
Platter
Magnetic
coating
for
servo
system
is
applied
on
the
inside
rim
of
the
platter.
Do
not
touch
the
coating.
A
Plug
the
cartridge
shell
into
the
tonearm.
Holes
Guide
pin
Cartridge
shell
Secure
the
tonearm
to
the
arm
rest.
§
Match
the
guide
pin
with
the
slot
and
turn
the
locking
collar
until
the
shell
is
firmly
locked.
Magnetic
pick-up
head
Do
not
touch.
os
es
When
using
a
cartridge
weighing
between
7
and
12
g,
insert
the
supplied
extra
weight
fully
to
the
end.
Remove
the
transit
screws.
Save
these
screws,
|
since
they
will
be
required
when
repacking.
gm=
CARTRIDGE
INSTALLATION
ssessnennsnsccannceecns
sme
1
blue
I
green
(RE,
G)
(LE,
G)
3
Place
the
cartridge
shell
exactly
over
the
diagram
and
adjust
the
position
of
the
cartridge.
Parallel!
green
biue
red(R)
white(L)
red
white
;
Attach
the
cartridge
loosely
with
Cartridge
pins
Wires
the
supplied
mounting
screws.
4
Tighten
the
screws
down.
You
can
check
if
the
cartridge
is
correctly
installed
by
using
the
alignment
gauge
on
the
back
of
the
rubber
mat.
See
“‘Overhang
check”
on
page
8.
TONEARM
ADJUSTMENT
The
turntable
must
be
on
a
level
surface
while
the
tonearm
is
being
adjusted.
Be
careful
not
to
damage
the
stylus
tip
while
making
adjustments.
to
an
ac
outlet.
Unlock
the
arm
rest.
ZERO
POWER
BALANCE
;
Press
Press
Turn
the
counterweight
adjustment
knob
as
required
Panes
balance
until
the
tonearm
is
in
a
balanced
position.
adjustment
*
1
Counterweight
~~’
2)
Remove
the.
ee
stylus
cover.
Correct
balance
Move
the
weight
forward.
Move
the
weight
backward.
Stylus
force
(anti
skating).
adjustment
*
2
Turn
the
control
so
that
the
stylus
force
Secure
the
tonearm
value
is
aligned
with
the
guide
line.
to
the
arm
rest.
BA
CE
Guide
line
STYLUS
FORCE
ANTI
SKATING
Press
to
release.
stylus
force
is
too
light,
the
stylus
will
skip
grooves.
When
it
is
too
heavy,
the
stylus
tip
and
the
record
will
wear
excessively.
Note
that
if
you
play
a
record
at
a
temperature
below
10°C
(50°F),
or
if
the
record
to
be
played
is
bag-
*
4
Tonearm
balance
adjustment
It
is
critically
important
for
good
sound
reproduction
that
the
stylus
traces
the
record
groove
accurately
and
with
the
proper
stylus
force.
To
do
this,
the
tonearm
must
first
be
balanced
so
that
the
proper
stylus
force
can
be
applied.
ly
warped,
the
stylus
force
should
be
increased
by
20%.
*
2
Stylus
force
Anti-skating
While
the
record
is
being
played,
friction
between
the
record
groove
and
the
Stylus
force
is
the
vertical
force
applied
to
the
stylus
tip
so
that
it
can
ac-
curately
trace
a
record
groove.
The
stylus
force
is
applied
after
the
tonearm
is
balanced.
Since
the
proper
stylus
force
differs
depending
on
which
cartridge
is
install-
ed,
be
sure
to
apply
the
stylus
force
recommended
for
your
cartridge.
If
the
stylus
produces
a
force
that
tends
to
drive
the
tonearm
toward
the
center
df
the
record.
The
anti-skating
control
cancels
this
force.
RECORD
PLAYING—Auto
play
Connection
to
an
amolifier
Input
selector
to
PHONO
Amplifier
When
making
connections,
turn
down
the
amplifier
volume.
It
is
not
necessary
to
turn
down
the
volume
at
the
start
of
record
play,
however,
because
a
muting
system
activates
when
the
stylus
is
lowered
to
a
record.
Amplifier
to
a
ground
‘terminal
BOA
FeAaa
to
phono
inputs
Red
plug
to
R
White
plug
to
L
to
an ac
outlet
an
LP
a
Transparent
records
cannot
be
played
with
this
automatic
playing
procedure.
See
page
9.
Remove
the
stylus
cover.
For
a
45-rpm
record,
press
this
button.
|
START/STOP
|
Play
will
begin.
Press
When
the
tonearm
reaches
the
end
of
the
record,
it
will
automatically
return
to
the
arm
rest
and
the
turntable
will
stop.
TO
BEGIN
RECORD
PLAY
AT
A
PARTICULAR
POINT
@
Press
the
POWER
switch
(ON)
and
select
the
correct
record
speed.
@
Bring
the
tonearm
to
the
point
over
the
record
at
which
you
want
play
to
begin.
|
Instead
of
handling
the
tonearm,
use
the
<J
>
buttons.
Keep
the
<J
button
pressed
until
the
tonearm
reaches
the
desired
point.
Then,
to
adjust
the
stylus
drop
point
precisely,
press
and
im-
mediately
release
the
<j
or
[>
button
as
necessary.
©
Press
the
START/STOP
button.
The
tonearm
will
lower
to
the
record
and
play
will
begin.
TO
MOVE
TO
A
DIFFERENT
PART
OF
A
RECORD
WHILE
THE
RECORD
IS
PLAYING
Keep
the
appropriate
<]
or
[>
button
pressed
until
the
tonearm
reaches
the
desired
position.
For
fine
movement,
press
and
im-
mediately
release
the
button.
To
lower
the
tonearm
onto
the
record,
press
the
VY
/
V
button.
TO
STOP
DURING
PLAY
Press
the
START/STOP
button.
The
tonearm
will
return
to
the
arm
rest
and
the
turntable
will
stop
rotating.
TO
LIFT
UP
THE
STYLUS
DURING
PLAY
To
lift
the
stylus
from
a
record
for
a
moment
and
then
start
playing
from
the
same
point,
press
the
Y/V_
button.
To
lower
the
tonearm
onto
the
record,
press
the
button
again.
TO
REPEAT
PLAY
Press
the
REPEAT
button
either
before
or
after
starting
play.
The
tonearm
continues
repeat
play
unless
the
button
is
pressed
again
to
turn
off
the
repeat
function.
To
stop
during
repeat
play,
press
the
START/STOP
button.
TONEARM
DROP-POINT
ADJUSTMENT
The
tonearm’s
drop-point
during
auto
play
has
been
adjusted
at
the
factory.
If
this
needs
to
be
readjusted,
proceed
as
follows.
@
Be
sure
that
the
turntable
is
turned
off
and
the
tonearm
is
secured
to
the
arm
rest.
@
Remove
the
rubber
cap
over
the
tonearm
drop-point
adjustment
opening
located
at
the
right
side
of
the
arm
base.
©
Insert
the
supplied
adjustment
key
into
the
opening
-To
move
the
drop-point
inward...
turn
the
screw
in
direction
A.
To
move
the
drop-point
outward
...
turn
the
screw
in
direction
B.
@
Be
sure
not
to
turn
the
screw
in
direction
B
so
far
that
the
stylus
tip
cannot
make
contact
with
the
record.
@
Start
auto
play
and
check
that
the
stylus
lowers
on
the
correct
drop-point.
:
@
If
the
drop-point
is
correct
for
30
cm
(12
inch)
records,
it
will
also
be
correct
for
17
cm
(7
inch)
records.
|
OVERHANG
CHECK*
Check
that
the
cartridge
is
correctly
installed,
using
the
alignment
gauge
on
the
underside
of
the
rubber
mat.
If
the
installation
is
in-
correct,
the
tonearm
drop-point
during
auto
play
will
be
incorrect.
@
Place
the
rubber
mat
upside
down,
and
turn
on
the
power.
@
Bring
the
tonearm
over
the
point
where
the
two
fine
lines
cross
and
carefully
lower
the
stylus
to
this
point
by
pressing
the
V/V
button.
|
=
©
Check
to
see
that
the
head
shell
is
parallel
to
the
lines
marked
on
the
rubber
mat,
as
shown
in
the
illustration.
If
it
is
not,
loosen
the
cartridge
mounting
screws
and
slide
the
cartridge
to
the
required
position.
Tighten
the
screws
and
recheck
the
balance
and
stylus
force.
Correct
overhang
;
*
Overhang
While
record
grooves
are
cut
by
a
head
which
tracks
a
record's
radius
in
a
line,
a
tonearm,
because
it
is
pivoted,
traces
an
arc
on
a
record.
To
compen-
sate
for
this
difference
in
movement,
the
head
shell
is
angled
and
the
car-
tridge
is
installed
with
a
16.5
mm
overhang.
(See
the
illustration.)
The
cor-
rect
overhang
is
obtained
by
installing
the
cartridge
with
a
37.5
mm
space
between
the
stylus
tip
and
the
end
of
the
cartridge
shell
and
by
checking
the
installation
with
the
alignment
gauge.
HOW
THE
AUTO
RECORD
SIZE
SELECTION
WORKS
By
pressing
the
START/STOP
button,
the
Rubber
mat
tonearm
goes
automatically
into
the
lead-in
groove
of
whether
30
cm
or
17
cm.
A
beam
from
the
lamp
is
transmitted
through
the
holes
provided
on
the
rubber
mat
and
the
_
platter
to
the
photo
detector
which
actives
the
auto
record
size
selection.
Outer
holes
for
R—
Lamp
a
30cm
record
Cae
‘When
a
30
cm
record
is
to
be
played,
Photo
detector
,
Oo
both
inner
and
outer
holes
are
covered
so no
beam
is
transmitted
to
the
photo
detector.
Inner
holes
for
30
cm
and
17
cm
records
Platter
the
inner
holes
are
covered
so
a
beam
is
transmit-
ted
through
the
outer
holes
to
the
photo
detector.
a
beam
is
transmitted
through
both
the
inner
and
outer
holes
to
the
photo
detector.
Even
if
the
START/STOP
button
is
pressed
mistakenly,
the
tonearm
does
not
lower
but
return
to
the
arm
rest.
the
tonearm
lowers
to
the
same
point
if
a
17
cm
record
were
on
the
platter,
since
only
the
inner
holes
are
covered.
To
play
a
25
cm
record,
lower
the
tonearm
to
the
lead-in
groove
by
pressing
the
Y/V
button
then
press
the
START/STOP
button.
a
beam
passes
through
both
the
inner
and
outer
holes
to
the
detector
so
the
tonearm
does
not
lower
on
a
record.
To
play
a
transparent
record,
lower
the
tonearm
to
the
lead-in
groove
by
press-
ing
the
Y/V
button
and
press
the
START/STOP
button.
if
the
record
is
badly
warped,
a
beam
may
pass
through
the
holes
to
the
detector
and
cause
malfunction
of
the
auto
record
size
selection.
INSTANTANEOUS
START
OF
PLAY
(CUEING)
Owing
to
the
powerful
starting
torque
of
the
turntable,
instantaneous
start
on
a
record
is
possible.
For
this
operation
the
amplifier
volume
should
be
set
to
a
normal
listening
level.
@
Press
the
POWER
switch
(ON)
and
select
the
correct
record
speed.
@
Lower
the
tonearm
at
the
lead-in
groove
of
the
desired
music
by
pressing
the
V/V
button.
_
©
Rotate
the
turntable
slowly
by
hand
and
at
the
starting
groove
of
the
music,
it
begins
to
be
heard.
Reset
the
stylus
at
the
point
just
before
the
starting
of
the
music
by
rotating
the
turntable
by
hand
in
the
op-
posite
direction
a
little.
The
starting
point
is
now
found.
@
From
the
point
indicated
in
the
illustra-
tion
below,
rotate
the
turntable
by
hand
slowly
in
the
opposite
direction
up
to
the
center
position.
(The
rotation
corresponds
to
the
turntable
starting
torque.)
@
Press
the
START/STOP
button.
The
music
starts
to
play
instantaneously.
SYNCHRONIZED
PLAY
OF
THE
TURNTABLE
AND
THE
CASSETTE
DECK
—With
an
RM-65
synchro
remote
control
unit
connected
Record
recording
starts
only
when
the
START/STOP
button
is
pressed.
When
the
tonearm
lowers
to
the
record,
the
tape
deck
goes
into
the
the
record
mode
and,
when
the
tonearm
is
lifted
up,
the
deck
goes
into
the
auto
record
muting
mode
for
four
seconds,
Cassette
deck
which
can
be
used
with
your
turntable
for
this
special
synchronized
operation
are
those
Sony
models
which
are
equipped
with
a
4-pin
remote
control
jack.
:
An
RM-65
synchro
remote
control
unit
(optional)
is
required
em
nOailie;
pause
i10ce:
to
connect
the
turntable
and
the
cassette
deck.
Connection
and
preparation
|
Set
the
input
selector
to
PHONO.
@
Turn
on
the
power
of
each
component.
eee
ite
ee
Ree
ae
ee
ere
ace
MRE
f
oro
clansn
antenna
nmin
yoked
heen
Corrects
emslretsbeisncetnrstwsasatovieitan
eas
‘
ON
Adjust
the
recording
tS
——e
Place
a
record,
select
the
|
the
cassette
deck
in
record
stand-by
mode
by
pressing
the
record
and
correct
record
speed
and
a
the
arm
rest.
|
forward
buttons
together
with
the
pause
button.
to
the
recording
inputs
to
the
ground
terminal
vid
Transparent
records
eee,
:
ae
cannot
be
used
since
a
*
ee
record
size
|
Be
sure
to
connect
selection
does
not
-
|
:
|
the
ground
wire.
|
work
Anatheny:
b—N41
tS
to
the
remote
control
jac
|
st
en
\
|
Synchro
remote
control
L
gunit
RM-65
Sere
ene
eC
to
the
synchro
remote
oe
control
input
Set
the
SYNCHRO
switch
to
ON.
RECORDING
Desired
action
Turntable
operation
Synchronized
operation
of
the
cassette
deck
To
record
form
the
beginning
of
a
Press
the
START/STOP
button.
When
the
tonearm
lowers
to
the
record,
the
record...
pause
mode
is
released
and
recording
begins.
To
lift
up
the
tonearm
to
move
to
a
dif-|
Press
the
V
/
V
button.
When
the
tonearm
is
lifted
up,
auto
record
ferent
point
on
a
record...
muting
activates
for
four
seconds,
then
the
pause
mode
is
assumed.
To
record
from
a
point
some
way
into
Bring
the
tonearm
over
the
desired
point
When
the
tonearm
lowers
to
the
record,
the
the
record...
and
press
the
START/STOP
button.
pause
mode
is
released
and
recording
begins.
To
stop
recording
during
record
play...
|
Press
the
START/STOP
button.
When
the
tonearm
is
lifted
up,
auto
record
muting
activates
for
four.seconds,
then
the
pause
mode
is
assumed.
When
record
play
ends...
The
tonearm
returns
automatically
to
the
|
When
the
tonearm
is
lifted
up,
auto
record
arm
rest.
muting
activates
for
four
seconds,
then
the
pause
mode
is
assumed.
Y
10
MAINTENANCE
Stylus
|
Before
playing
a
record,
clean
the
stylus
with
a
soft
brush.
Brush
the
stylus
from
back
to
front.
Never
attempt
to
clean
the
stylus
with
your
finger
tip.
Ifa
fluid
stylus
cleaner
is
used,
make
sure
not
to
moisten
the
stylus
too
much.
Cabinet
Clean
the
cabinet
and
dust
cover
periodically
with
a
soft
dry
cloth.
If
the
stains
are
difficult
to
remove,
use
a
cloth
moistened
with
a
mild
detergent
solution.
Do
not
use
solvents
such
as
alcohol,
benzine
or
thinner,
since
they
will
damage
the
finish.
Rubber
mat
When
the
rubber
mat
becomes
dirty,
wipe
it
gently
with
a
soft
cloth
slightly
dampened
with
water.
Lubrication
The
turntable
requires
no
periodic
lubrication.
The
motor
shaft
is
lubricated
at
the
factory
for
the
life
of
the
turntable.
SPECIFICATIONS
Turntable
Platter
32
cm
(125/s
in.),
aluminum-alloy
diecast
Motor
Linear
BSL
(brushless
and
slotless)
motor
Direct
drive
Quartz
lock
control,
magnedisc
servo
control
system
Speed
331/3
rpm,
45
rpm
Starting
characteristics
Comes
to
nominal
speed
within
a
half
revolution
(83'/3
rpm)
0.015
(WRMS)*
0.025%
(WRMS)
+0.03%
(DIN)
Signal-to-noise
ratio
78
dB
(DIN-B)
Load
characteristics
0%
up
to
150
g
stylus
force
(at
lead-in
groove
of
a
record)
Within
+0.003%
.
Lead-in,
return,
reject,
repeat,
record
size
selection,
anti-skating
Drive
system
Control
system
Wow
and
flutter
Speed
deviation
Automatic
system
Tonearm
Type
Electronic
tonearm
Pivot-to-stylus
length
216.5
mm
(8°/s
in.)
Overall
arm
length
295
mm
(115/s
in.)
Overhang
16.5
mm
(22/32
in.)
Tracking
error
|
+3°,-1°
Stylus
force
adjustment
range
O-3g
Cartridge
shell
weight
5g
Cartridge
weight
range
(including
supplied
cartridge
shell)
7.5-12.5g
12
-
17g
(with
extra
weight)
General
Power
requirements
Type
1:
220
V
ac
Type
2:
240V
ac
Type
3:
110-120
or
220-240
V
ac
adjustable
50/60
Hz
Power
consumption
16W
Dimensions
Approx.
430
x
120
x
385
mm
(w/h/d)
(17
x
43/4
x
1547/4
in.)
including
projecting
parts
and
controls
Weight
Approx.
8.5
kg
(18
Ibs
12
oz),
net
Approx.
10
kg
(22
Ibs
1
02),
in
shipping
carton
Supplied
accessories
45-rpm
adaptor
(1)
Extra
weight
(1)
Cartridge
shell
(1)
Cartridge
mounting
screws
(1
set)
Tonearm
drop-point
adjustment
key
(1)
While
the
information
given
is
correct
at
the
time
of
printing,
small
production
changes
in
the
course
of
our
company’s
policy
of
im-
provement
through
research
and
design
might
not
necessarily
be
indicated
in
the
specifications.
We
ask
you
to
check
with
your
ap-
pointed
Sony
dealer
if
clarification
on
any
point
is
required.
Note
Appliance
conforms
with
EEC
Directive
76/889
regarding
inter-
ference
suppression.
*
This
new
measuring
method
concerns
only
the
turntable
assembly,
in-
cluding
the
platter.
It
excludes
wow
and
flutter
caused
by
the
tonearm,
the
cartridge,
or
the
record.
Measured
by
obtaining
signal
from
magnetic
pick-
up
head.
11
TROUBLE
CHECKS
The
following
trouble
checks
will
help
you
correct
most
common
problems
encountered
with
a
turntable
system.
Should
any
pro-
blem
persist
after
you
have
made
these
checks,
consult
your
CAUSES
—
Transparent
record
Warped
record
A
rubber
mat
other
than
the
one
supplied
being
used.
TROUBLES
The
tonearm
does
not
lower
on
the
record
but
returns
to
the
arm
rest.
The
tonearm
always
lowers
on
the
point
for
30cm
records.
Incorrect
placement
of
the
supplied
rubber
mat
The
turntable
does
not
rotate
by
pressing
the
START/STOP
button.
pushed
in.
——
The
STYLUS
FORCE/ANTI
SKATING
control
is
set
to
se
0
ha
By
pressing
the
START/
STOP
button,
the
turntable
rotates
but
the
tonearm
does
not
move
in.
Improper
tonearm
balance
or
tracking-force
Impaired
tone
quality
Dusty
stylus
Worn
stylus
A
record
with
shallow
return
grooves
being
played
by
a
cartridge
with
low
tracking
force
Auto
return
does
not
operate
at
the
end
of
play.
Loose
connection
of
phono
cord
No
audio
from
one
channel
Steady
low-pitched
nemmiag
sound
tridge
shell
to
the
tonearm.
Ground
wire
is
not
connected
to
the
amplifier.
Groove
skipping
;
tonearm
skating
;
tonearm
not
advan-
cing.
Turntable
not
level
Defective
record
The
turntable
subjects
to
ex-
ternal
vibration.
Loud
rumble
or
low-
frequency
howl
*
|
Improper
tracking-force
The
turntable
is
placed
too
near
the
speaker.
*
This
is
called
“acoustic
feedback”
and
is
caused
when
vibrations
from
the
speakers
are
transmitted
through
the
air
or
via
solid
objects
(such
as
the
shelves,
the
cabinet,
the
floor,
etc.)
to
the
turntable,
where
it
is
picked
up
by
the
stylus,
amplified
and
reproduced
through
the
speakers
once
again.
12
————
The
ZERO
BALANCE
switch
is
Loose
attachment
of
the
car-
nearest
Sony
service
facility.
Before
proceeding
with
these
trouble
checks,
first
refer
to
the
con-
nections
and
the
operating
procedures
on
page
7.
WHAT
TO
DO
=
Play
the
record
manually.
—————
Use
the
supplied
rubber
mat.
—
Align
the
holes
on
the
rubber
mat
with
the
holes
of
the
platter.
Press
the
switch
again
to
lease
it.
————
Set
the
control
according
to
the
stylus
force
of
the
cartridge
used.
————
Adjust
the
tonearm,
referring
to
page
6.
Clean
the
stylus
with
a
soft
brush
from
back
to
front.
The
stylus
life
is
approx.
400
hours.
Replace
with
a
new
stylus.
Apply
more
tracking-force.
——
Connect
the
cord
firmly.
Fix
the
shell
to
the
tonearm
firmly.
Connect
the
ground
wire
to
the
amplifier.
—————
Apply
proper
stylus
force.
(See
page
6.)
———
Place
the
turntable
on
a
level
surface.
Place
the
turntable
on
a
solid
surface
free
from
ex-
ternal
vibration.
—
Locate
the
turntable
as
far
away
from
the
speaker
as
possible.

Other Sony Turntable manuals

Sony PS-LX350H User manual

Sony

Sony PS-LX350H User manual

Sony NW-A45 User manual

Sony

Sony NW-A45 User manual

Sony Walkman WM-EX600 User manual

Sony

Sony Walkman WM-EX600 User manual

Sony PS-636 User manual

Sony

Sony PS-636 User manual

Sony PS-LX230 User manual

Sony

Sony PS-LX230 User manual

Sony PS-6750 Setup guide

Sony

Sony PS-6750 Setup guide

Sony XD-AX10 User manual

Sony

Sony XD-AX10 User manual

Sony PS-LX250H User manual

Sony

Sony PS-LX250H User manual

Sony DD-10EX User manual

Sony

Sony DD-10EX User manual

Sony D-F181 - Fm/am Portable Cd Player User manual

Sony

Sony D-F181 - Fm/am Portable Cd Player User manual

Sony PS-LX300H User manual

Sony

Sony PS-LX300H User manual

Sony Betacam SX DNW-A22 User manual

Sony

Sony Betacam SX DNW-A22 User manual

Sony HAP-Z1ES User manual

Sony

Sony HAP-Z1ES User manual

Sony PS-F9 User manual

Sony

Sony PS-F9 User manual

Sony NW-A45 User manual

Sony

Sony NW-A45 User manual

Sony NW-E99 - Network Walkman User manual

Sony

Sony NW-E99 - Network Walkman User manual

Sony PS-X500 User manual

Sony

Sony PS-X500 User manual

Sony PS-X50 Setup guide

Sony

Sony PS-X50 Setup guide

Sony PS-LX76 User manual

Sony

Sony PS-LX76 User manual

Sony PS-LX55 User manual

Sony

Sony PS-LX55 User manual

Sony PS-LX310BT User manual

Sony

Sony PS-LX310BT User manual

Sony MDX-F5800 User manual

Sony

Sony MDX-F5800 User manual

Sony PS-2250 User manual

Sony

Sony PS-2250 User manual

Sony PS-LX250H Parts list manual

Sony

Sony PS-LX250H Parts list manual

Popular Turntable manuals by other brands

Thales TTT-Slim manual

Thales

Thales TTT-Slim manual

Technics SL-1200MK2 operating instructions

Technics

Technics SL-1200MK2 operating instructions

Victrola VWRP3500 user manual

Victrola

Victrola VWRP3500 user manual

Pro-Ject Audio Systems RPM 5.1 Instructions for use

Pro-Ject Audio Systems

Pro-Ject Audio Systems RPM 5.1 Instructions for use

Ortofon 2MR Red quick start guide

Ortofon

Ortofon 2MR Red quick start guide

Panasonic Technics SL-1300 operating instructions

Panasonic

Panasonic Technics SL-1300 operating instructions

PRIXTON DETROIT manual

PRIXTON

PRIXTON DETROIT manual

LOTOO PAW GOLD quick start guide

LOTOO

LOTOO PAW GOLD quick start guide

Vinyl Engine Goldring-Lenco GL 75 instruction manual

Vinyl Engine

Vinyl Engine Goldring-Lenco GL 75 instruction manual

Technics SL-1200MK2 operating instructions

Technics

Technics SL-1200MK2 operating instructions

Crosley T100D instruction manual

Crosley

Crosley T100D instruction manual

Gemini XL-200 Operation manual

Gemini

Gemini XL-200 Operation manual

Kenwood KD-491F instruction manual

Kenwood

Kenwood KD-491F instruction manual

MUSIC HALL us-1 instruction manual

MUSIC HALL

MUSIC HALL us-1 instruction manual

THORENS TD 125 Service manual

THORENS

THORENS TD 125 Service manual

Innovative Technology ITVS-550 instruction manual

Innovative Technology

Innovative Technology ITVS-550 instruction manual

Numark TT-100 owner's manual

Numark

Numark TT-100 owner's manual

Fisher Studio Standard MT-6330 operating instructions

Fisher

Fisher Studio Standard MT-6330 operating instructions

manuals.online logo
manuals.online logoBrands
  • About & Mission
  • Contact us
  • Privacy Policy
  • Terms and Conditions

Copyright 2025 Manuals.Online. All Rights Reserved.