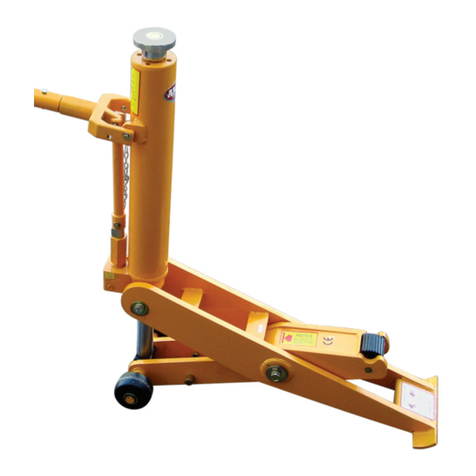
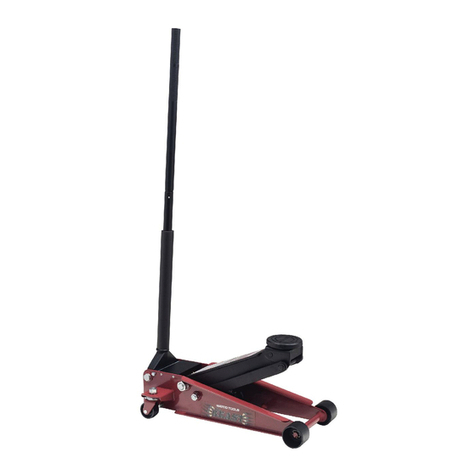
SPX OTC 1540 User manual

© 2004 SPX Corporation
Sheet No.
Issue Date: Rev. B, 6/07/04
Form No. 525814
Parts List &
Operating Instructions
for: 1540
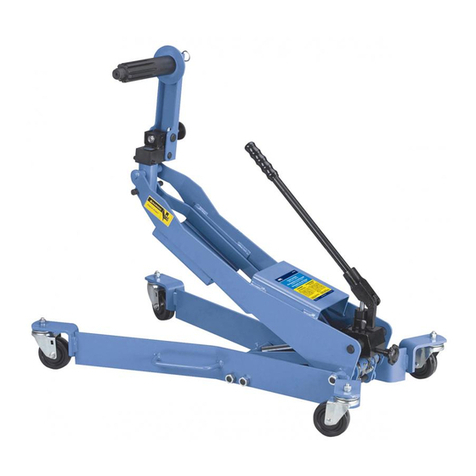
4-Ton Fork Lift Jack
Application: Servicing Fork Lift Machinery
SPX Corporation
655 Eisenhower Drive
Owatonna, MN 55060-0995 USA
Phone: (507) 455-7000
Tech. Serv.: (800) 533-6127
Fax: (800) 955-8329
Order Entry: (800) 533-6127
Fax: (800) 283-8665
International Sales: (507) 455-7223
Fax: (507) 455-7063
1 of 4
Specifications
Lifting Capacity: 8,818 lbs.
Lifting Range 13"
Min–Max Height 2.5"–16"
Package Size: 28 x 10 x 17"
Net Weight: 73 lbs.
123
4
321
2
6
7
5
26
9
8
10
11
10
5
9
16
17
18
15
1413 12
8
19
63
64
63
37
62
43
37
37 38 39 38
36
35
34
33
32
31
28
27
252423
22 2120
26
28
29
65
30
37
44
45
46
47
45
21
20
55
56
61
60
59
58 57
48
49
43
50
28
51
52
53 54
15
Added translations.

Parts List & Operating Instructions Form No. 525814, Sheet 1 of 4, Back
Item
No. Qty. Description
1 2 Screw
2 4 Lock Washer
3 2 Trunnion
4 1 Frame 1
5 2 Screw
6 2 Washer
7 1 Axle
8 2 Snap Ring
9 2 Washer
10 2 Wheel
11 1 Frame 2
12 2 Screw
13 2 Lock Washer
14 2 Nut
15 2 Spacer
16 1 Pin
17 1 Saddle
18 1 Pin
19 1 Piston Rod Pad
20 2 Screw
21 2 Seal Ring
22 1 Screw
23 1 Spring
24 1 Ball Seat
25 1 Ball
26 1 Valve Block
27 1 Filter
28 3 Ball
29 1 Spring
30 1 Screw
31 1 Seal Ring
32 1 Pump
33 1 O-ring
34 1 Back-up Ring
35 1 Wiper
36 1 Plunger
37 6 Retaining Ring
38 2 Link Rod
39 2 Pin
43 2 O-ring
44 1 Oil Tank
45 2 O-ring
46 1 Port Ring
47 1 Cylinder
48 1 Piston Rod
49 1 Piston
50 1 Valve Seat
51 1 O-ring
52 1 Release Rod
53 1 Release Knob
54 1 Pin
55 1 Chain Hook
56 1 Chain
57 1 Handle Base
58 1 Ring
59 1 Pin
60 1 Handle
61 1 Grip
62 1 Pin
63 2 O-ring
64 1 Back-up Ring
65 1 Seal Ring
Parts Description
Item
No. Qty. Description

© 2004 SPX Corporation
Sheet No.
Issue Date: Rev. B, 6/07/04
Handle Kit
No. 525820
37 2 Retaining Ring
55 1 Chain Hook
56 1 Chain
57 1 Handle Base
58 1 Ring
59 1 Pin
60 1 Handle
61 1 Grip
62 1 Pin
Hydraulic Unit
No. 525821
18 1 Pin
19 1 Piston Rod Pad
20 2 Screw
21 2 Seal Ring
22 1 Screw
23 1 Spring
24 1 Ball Seat
25 1 Ball
26 1 Valve Block
27 1 Filter
28 3 Ball
29 1 Spring
30 1 Screw
31 1 Seal Ring
32 1 Pump
33 1 O-ring
34 1 Back-up Ring
35 1 Wiper
36 1 Plunger
43 2 O-ring
44 1 Oil Tank
45 2 O-ring
46 1 Port Ring
47 1 Cylinder
48 1 Piston Rod
49 1 Piston
50 1 Valve Seat
51 1 O-ring
52 1 Release Rod
53 1 Release Knob
54 1 Pin
63 2 O-ring
64 1 Back-up Ring
65 1 Seal Ring
Release Knob Kit
No. 525818
28 1 Ball
51 1 O-ring
52 1 Release Rod
53 1 Release Knob
54 1 Pin
Saddle Kit
No. 525822
16 1 Pin
17 1 Saddle
Seal Kit
No. 525817
21 2 Seal Ring
23 1 Spring
24 1 Ball Seat
25 1 Ball
27 1 Filter
28 3 Ball
29 1 Spring
31 1 Seal Ring
33 1 O-ring
34 1 Back-up Ring
35 1 Wiper
43 2 O-ring
45 2 O-ring
46 1 Port Ring
51 1 O-ring
63 2 O-ring
64 1 Back-up Ring
65 1 Seal Ring
Wheel Kit
No. 525819
8 1 Snap Ring
9 1 Washer
10 1 Wheel
Item
No. Qty. Description Item
No. Qty. Description
Parts List & Operating Instructions Form No. 525814
2 of 4
Hydraulic Unit Rebuild Kit
No. 525826
18 1 Pin
19 1 Piston Rod Pad
20 2 Screw
21 2 Seal Ring
22 1 Screw
23 1 Spring
24 1 Ball Seat
25 1 Ball
27 1 Filter
28 1 Ball
29 1 Spring
30 1 Screw
43 2 O-ring
45 2 O-ring
46 1 Port Ring
47 1 Cylinder
48 1 Piston Rod
49 1 Piston
50 1 Valve Seat
63 2 O-ring
64 1 Back-up Ring
65 1 Seal Ring
Jack Stop Kit
No. 525824
12 1 Screw
13 1 Lock Washer
14 1 Nut
Pivot Pins Kit
No. 525823
1 2 Screw
2 4 Lock Washer
3 2 Trunnion
5 2 Screw
6 2 Washer
7 1 Axle
15 2 Spacer
Pump Station Kit
No. 525825
28 1 Ball
31 1 Seal Ring
32 1 Pump
33 1 O-ring
34 1 Back-up Ring
35 1 Wiper
36 1 Plunger
37 4 Retaining Ring
38 2 Link Rod
39 2 Pin
Replacement Kits
Item
No. Qty. Description

Safety Precautions
CAUTION: To prevent personal injury and damage to equipment,
•Read, understand, and follow all instructions, including the ANSI B30.1 safety code for jacks. Before
using the fork lift jack to lift a vehicle, refer to the vehicle service manual for recommended lifting
surfaces on the vehicle chassis.
•Wear protective eyewear that meets the requirements of ANSI Z87.1 and OSHA.
•Inspect the jack before each use; do not use the jack if it’s damaged, altered, or in poor condition.
•Use the jack for lifting purposes only.
•A load must never exceed the rated lifting capacity (4 ton) of the jack.
•Only use the jack on a hard, level surface.
•Do not tilt the vehicle more than 15°when using the
serrated pad. Tilting the vehicle too far may result in
the jack kicking out suddenly and dropping the load.
•Stay clear of lifted loads and the scissor mechanism
of the jack.
•Placesupportstandsundertheaxlesbeforeworking
on the vehicle. See Figure 1.
•Do not modify the jack or use adapters unless
approved or supplied by OTC.
•Lower the jack slowly and carefully while watching
the position of the jack saddle. Do not drive the fork lift truck off the jack, or move the fork lift when
it is supported by the jack.
•Useonly approvedhydraulic fluid(Mobile DTE#13 orequivalent). Theuse ofalcohol, hydraulicbrake
fluid, or automatic transmission fluid (ATF) could damage seals and result in jack failure.
This guide cannot cover every situation, so always do the job with safety first.
Figure 1
Bleeding Air from the Fork Lift Jack
Air can accumulate within a hydraulic system during shipment or after prolonged use. This entrapped air causes
the jack to respond slowly or feel “spongy.” To remove the air:
1. Open the release valve (large knob on top) by turning the knob two full turns counterclockwise (CCW).
2. Pump handle slowly 5–10 times.
3. Close release valve.
If jack does not lift correctly, repeat steps 1 through 3.
Parts List & Operating Instructions Form No. 525814, Sheet 2 of 4, Back

© 2004 SPX Corporation
Sheet No.
Issue Date: Rev. B, 6/07/04
Operating Instructions
To raise the jack,
1. Insert handle into handle base.
2. Turn release valve (turn the knob clockwise until resistance is felt); do not over tighten.
To lower the jack,
1. SLOWLY turn the release valve counterclockwise. IMPORTANT: When lowering a fork lift truck, keep the rate of
lowering under your control. Do not lower the fork lift until the area is free of personnel, tools, and equipment.
Stay clear of the rear wheels on the jack; the wheels will move backward when the jack is lowered.
Recommended Method to Raise a Vehicle
1. Lower the forks on the fork lift. Remove any load. Clear personnel
from the area.
2. Carefully select a lifting point on the fork lift. It must be strong enough
to resist the lifting force without damage to the fork lift.
3. Cradle a support point in the notch at the end of the lift arm. See
Figure 2-B. Use the serrated pad to raise a vehicle with a flat
underside. See Figure 2-A.
CAUTION: To prevent injury or equipment damage,
•Use only the serrated lifting pad or the notch in the end of the
lifting arm as the means of lifting. Do not use any other part of
the jack as a lifting contact point.
•Do not tilt the vehicle more than 15°when using the serrated
pad. Tilting the vehicle too far may result in the jack kicking out
suddenly and dropping the load.
•Do not use cribbing under the jack or on top of the lift pad. The
jack must remain in direct contact with the floor; the lift pad or
notch must be in direct contact with the fork lift.
4.
Position the lift pad at least 3" inward toward the center of the vehicle
from the beginning of the flat surface. See Figure 2-A.
Lifting from the Side
1. Position the jack closer to the rear wheels than the front wheels to
maintain balance. See Figure 3. If the fork lift seems heavier at one
end, lower the jack and move it closer to the heavy end.
CAUTION: When lifting narrow fork lift trucks (less than 40"
wide) from the sides, the height between the floor and the bottom
of the raised tire cannot be more than one fourth (1/4) the tire tread
width.(Treadwidth is measured from centerline to centerline ofthe
tire treads.) If this height is exceeded, the fork lift truck could tip
over or the jack could drop the load. See Figure 4.
Example: If tread width is 36", the bottom of the vehicle tire may
never be more than 9" off the floor.
Figure 2
Figure 3
AB
3" min. flat
tread width
ht
Figure 4
3 of 4
Parts List & Operating Instructions Form No. 525814

Preventive Maintenance
IMPORTANT: The greatest single cause of failure in hydraulic units is dirt. Keep the fork lift jack clean and well
lubricated to prevent foreign matter from entering the system. If the jack has been exposed to rain, snow, sand,
or grit, it must be cleaned before it is used.
1. Store the jack in a well-protected area where it will not be exposed to corrosive vapors, abrasive dust, or any other
harmful elements.
2. Regularly lubricate the stem of the pump plunger with heavy grade machine oil.
3. To check the oil level, place the fork lift jack on level ground, and completely retract the ram. Remove the plug from the
oil filler hole. The oil level should be within 1/4" of the filler plug hole. If necessary, add approved anti-wear hydraulic
jack oil (Mobile DTE #13 or equivalent), and install the filler plug again. IMPORTANT: The use of alcohol, hydraulic
brakefluid, detergent motor oil, or automatic transmission fluid (ATF) could damage the seals and resultin jack
failure.
4. Inspect the jack before each use. Take corrective action if any of the following problems are found:
a. Cracked or damaged housing d. Scored or damaged piston rod
b. Excessive wear, bending, or other damage e. Loose hardware
c. Leaking hydraulic fluid f. Modified or altered equipment
Lifting from the End
1. Position the jack at the center of the fork lift truck. See Figure 5.
2. Chock the wheels at the opposite end of the fork lift.
CAUTION: To prevent injury or equipment damage,
•Do not lift from the end of the fork lift if the contact surface is
sloped or rounded, such as in the counter weight areas.
•When lifting 3-wheeled trucks, never lift the 2-wheeled end.
Figure 5
Parts List & Operating Instructions Form No. 525814, Sheet 3 of 4, Back

© 2004 SPX Corporation
Sheet No.
Issue Date: Rev. B, 6/07/04
Parts List & Operating Instructions Form No. 525814
Troubleshooting Guide
Repair procedures must be performed in a dirt-free environment by qualified personnel who are familiar with this equipment.
Trouble Cause Solution
Erratic action 1. Air in system
1. Refer to section titled "Bleeding Air from the
Fork Lift Jack."
2. Oil viscosity too high
2. Change to a lower viscosity oil.
3. Internal leakage in cylinder
3. Replace worn packings. Look for
excessive contamination or wear.
4. Cylinder sticking or binding
4.
Look for dirt, gummy deposits, leaks,
misalignment, worn parts, defective packings.
Jack does not lift 1. Release valve is open
1. Close release valve.
2. Low/no oil in reservoir
2. Fill with oil and bleed system.
3. Air-locked system
3. Bleed system.
4. Load is above capacity of jack
4. Use correct equipment.
5. Delivery valve and/or bypass
5. Clean to remove dirt or foreign matter.
valve not working correctly
Replace oil.
6. Packing worn out or defective
6. Repair power unit.
Jack lifts only partially 1. Too much or not enough oil
1. Check oil level.
Jack advances slowly 1. Air in system
1. Refer to section titled “Bleeding Air from the
Fork Lift Jack.”
2. Pump not working correctly
2. Repair power unit.
3. Leaking seals
3. Repair power unit or seals.
Jack lifts load, but doesn’t hold 1. Cylinder packing is leaking
1. Repair power unit or seals.
2. Valve not working correctly (suction,
2. Inspect valves. Clean and repair seat
delivery, release, or bypass)
surfaces.
3. Air-locked system
3. Bleed system.
Jack leaks oil 1. Worn or damaged seals
1. Repair power unit or seals.
Jack will not retract 1. Release valve is closed
1. Open or clean release valve.
Jack retracts slowly 1. Cylinder damaged internally
1. Send jack to OTC authorized service center
for repair.
2. Link section is binding
2. Lubricate link section.
4 of 4

Table of contents
Other SPX Jack manuals
Popular Jack manuals by other brands
Larzep
Larzep A10210 instruction sheet

Atlas Equipment
Atlas Equipment RJ-6000 Installation & operation manual

Motomaster
Motomaster 009-1535-4 instruction manual
BGS technic
BGS technic 1975 instruction manual

LCI
LCI Power Tongue Jack installation manual
Matco Tools
Matco Tools MFJ354PA operating instructions
